Sunday, August 9, 2009

Margarita Cupcakes


In case you haven't figured it out by now, I just love making cupcakes. They are so much fun, and who doesn't love their own personal dessert? I love trying out new varieties, so I always sign up for dessert at potlucks.

My women's Bible Study group got together with our husbands for a cookout. And what kind of cupcake is better than a margarita cupcake to take to a church function, right?

These cupcakes are actually from the book Vegan Cupcakes Take Over the World, but I did not make them vegan. I used whole milk instead of soy, and butter instead of shortening in the frosting. This was fine until we went to see a movie before the party and were faced with leaving them in a 100 degree car. So I just put them in a cooler to keep the icing from running. It still melted a bit from the heat of my hand while piping, but not too badly. Just something to be aware of if you make these.

The cupcakes have a very subtle lime and tequila flavor; not to tart or sweet. It really does taste like a margarita!

Margarita Cupcakes
adapted from
VCTOTW
makes 24 cupcakes

  • 1/4 cup lime juice
  • 1/4 cup margarita mix
  • zest of 2 limes
  • 2 cups milk
  • 1/2 cup canola oil
  • 4 teaspoons tequila
  • 2 cups sugar
  • 1 teaspoon vanilla extract
  • 2 2/3 cup all purpose flour
  • 1/2 teaspoon baking soda
  • 1 teaspoon baking powder
  • 1 teaspoon salt
Preheat oven to 350F. Fill 2 12-cup muffin tins with liners, and spray with nonstick cooking spray.

In a large bowl, mix together lime juice, margarita mix, lime zest, soy milk, oil , tequila, vanilla and sugar.

In a small bowl, mix together flour, baking soda, baking powder and salt. Add to lime mixture and stir until just combined. Divide evenly into muffin tins.

Bake for 18-22 minutes, until a tester comes out clean and the cakes spring back when lightly pressed.
Cool completely on a wire rack before frosting.
Tequila Lime Frosting
  • 1/2 cup butter, softened (1 stick)
  • 2 Tablespoons milk
  • 3 Tablespoons lime juice
  • 3 Tablespoons margarita mix
  • 3 Tablespoons tequila
  • 4 cups confectioners sugar, sifted
  • sugar, for "rims"
Cream the butter, milk, lime juice, margarita mix, and tequila in a stand mixer fitted with the paddle attachment. Gradually add the sugar, scraping down the sides of the bowl every so often. Beat an additional 3-4 minutes.

Fill a pastry bag fitted with a #12 round tip. Pipe frosting onto cupcakes, and dip edges into green sugar to resemble salt on the rims of glasses.

Note: I think it would also be cute to tint the frosting green and use coarse sugar for rims.


Friday, August 7, 2009

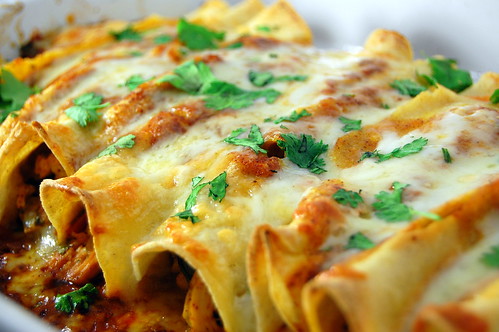
Chicken Enchiladas


aka the best enchiladas ever! Thank you so much to Laura, at Tide and Thyme, for introducing me to this recipe. Seriously - they were so so good I can't even tell you. So good in fact, that the leftovers are really calling my name, and I'm trying so hard to resist....

OK so on to the recipe. I followed her recipe pretty closely, with the exception of a few minor changes. I added diced fresh jalapenos with the onion at the beginning; consequently, I omitted the pickled jalapenos from the filling. I also added a big tomato (diced) in with the tomato sauce and water to cook down. Finally, I did a mixture of white cheddar and Monterrey jack instead of all cheddar (simply because I had some to use up). I was a little worried about the spiciness when I tasted the sauce by itself, but when mixed with the fillng and cheese it really mellows out.

Seriously, make these ASAP!
Pin It


Chicken Enchiladas with Red Chile Sauce
adapted from Tide and Thyme, orginally from America's Test Kitchen
  • 1 medium onion, chopped fine
  • 2 jalapenos, seeded and chopped fine
  • 1 teaspoon canola oil
  • 3 medim cloves garlic, minced
  • 3 Tablespoons chili powder
  • 2 teaspoons ground cumin
  • 3 teaspoons sugar
  • 1 15-oz can tomato sauce
  • 1 cup water
  • 1 large beefsteak tomato, seeded and chopped
  • 1 pound boneless, skinless chicken breasts (2 large breasts)
  • 1 cup extra sharp white cheddar, shredded
  • 1 cup monterey jack cheese, shredded
  • 1/2 cup minced fresh cilantro
  • 12 (6-inch) soft corn tortillas
  • cooking spray
  • salt and ground black pepper
Preheat oven to 425.

Combine the onion, jalapeno, 1/2 teaspoon salt, and oil in a large saucepan. cover and cook over medium-low heat, stirring often, until the onions and peppers have softened, 8-10 minutes. Stir in the garlic, chili powder, cumin, and sugar, and cook until fragrant, less than 30 seconds. Stir in the tomato sauce, water, and chopped tomato. Bring to a simmer, and cook until slightly thickened, 5 minutes.

Nestle the chicken into the sauce. Reduce heat to low, cover, and cook until chicken is cooked through (thickest part reaches 160 degrees), about 12-20 minutes. Transfer the chicken to a plate, and set aside to cool.

Strain the sauce through a strainer into a medium bowl, pressing the onion mixture to extract as much liquid as possible. Transfer the onions to a large bowl and set aside. Season sauce with additional salt and pepper to taste.

Shred the chicken into bite-sized pieces. Add to the onin mixture, and add 1/4 cup of the enchilada sauce, 1 cup cheese, and the cilantro. Toss to combine.

Stack the tortillas on a plate and cover with plastic wrap; Microwave on high until warm and pliable, 40-60 seconds. Spread the tortillas on a clean work surface, and spoon 1/3 cup of the chicken mixture evenly down the center of each. Tightly roll each tortilla and lay seam-side down in a greased 9x13 inch baking dish.

Lightly spray the tops of the enchiladas with cooking spray. Place in the oven, uncovered, for about 7 minutes, or until the tortillas start to brown slightly (skip this step if you don't like the crunch).

Reduce heat to 400. Remove enchiladas and pour sauce evenly on top. Top with the remaining cheese. Cover dish with foil, and bake an additional 20 minutes, or until heated through.

Remove foil and bake another 5 minutes, until cheese browns. Remove from oven and let stand 10 minutes before serving.

Serve with sour cream, guacamole, salsa, additional cilantro, etc.


Thursday, August 6, 2009

Make Life Sweeter: Cherry Garcia Ice Cream


August 1-7 is National Breastfeeding Week. This is very near and dear to my heart, as I have a 13 month old daughter whom I breastfed for just over a year. I won't lie, the first few weeks were incredibly difficult and painful, but once we made it over the hump, I wouldn't have traded it for anything in the world. I truly believe that breastfeeding your child is one of the best things you can do for them, and I feel very fortunate that I was able to keep it up for as long as I did. In fact, I have been very emotional over the past few weeks about it; I guess I wasn't quite ready to give it up.

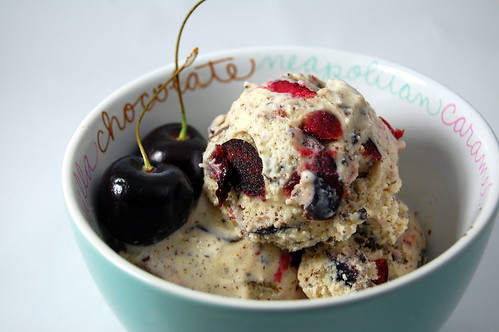
In any case, in honor of this week, I am participating in the Got Milk? event hosted by Linda of Make Life Sweeter. The rules are simple: make a sweet recipe that has milk as an ingredient. The hardest part for me was deciding what to make! When I made the swiss meringue buttercream over the weekend and had leftover egg yolks, I knew I would make ice cream. And then when I picked up a big bag of cherries at the grocery store, I quickly decided on Cherry Garcia ice cream. It is even more fitting since she absolutely loves ice cream and cherries (Not that she will get to eat any; she is allergic to eggs).

I didn't follow any particular recipe; I just made a basic vanilla ice cream and mixed in pitted and quartered cherries and shaved chocolate. The result was deliciously sweet! I have actually only had Ben and Jerry's once or twice, so I can't say how it compares, but this was definitely a winner!

Cherry Garcia Ice Cream
method from
Giada de laurentiis
  • 3/4 cup sugar, divided
  • 2 cups milk
  • 1 cup heavy cream
  • 4 egg yolks
  • 1 teaspoon vanilla extract
  • 1 1/2 cups pitted and quartered cherries
  • 1 oz unsweetened chocolate
  • 1 oz semi-sweet chocolate
Heat milk, cream, and 1/2 cup sugar in a medium saucepan over low heat until sugar has dissolved, stirring often.

Meanwhile, beat egg yolks with remaining sugar until they are pale yellow and fluffy. Add 1/2 cup milk mixture to the eggs and stir to combine. Pour egg mixture into saucepan, and cook, stirring constantly, 10-20 minutes, or until mixture has thickened and it coats the back of a spoon. Add vanilla extract.

Pour through a fine-mesh sieve into a medium bowl and chill completely. Follow the instructions on your ice cream maker to churn. When finished, fold in cherries and chocolate. Freeze until ready to serve.


Grilled Pork with Herbs and Red Wine Vinegar


I have already professed my love for grilled pork tenderloin... and the love affair continues after this meal. The meat was so flavorful and juicy. This would be a great meal to serve company; you can marinate the meat ahead of time and then just throw it on the grill when you're ready to eat. 20-30 minutes later, you have a perfectly grilled pork tenderloin!

This recipe was from Cook's Illustrated, another one of my favorites, but it was for pork cutlets. I just adapted the marinade to my liking and used it for a pork tenderloin instead, as we prefer that cut.

Grilled Pork Tenderloin with Herbs and Red Wine Vinegar
marinade adapted from Cook's Illustrated, Summer Grilling 2009

  • 1/3 cup red wine vinegar
  • 1/3 cup olive oil
  • 2 medium garlic cloves, minced
  • 2 teaspoons fresh thyme leaves
  • 2 teaspoons fresh rosemary leaves
  • 2 teaspoons fresh oregano leaves
  • 1 Tablespoon honey
  • 1 Tablespoon Dijon mustard
  • 3/4 teaspoon salt
  • 1/4 teaspoon ground pepper
  • 1 pork tenderloin, trimmed of fat and membrane removed
Combine the ingredients for the marinade in a large ziploc bag. Transfer the pork to the bag, massaging the marinade gently into the meat. Refrigerate at least 30 minutes, and up to several hours.

Prepare grill, and grill tenderloin until meat thermometer registers 140-45, turning once. Remove from grill and cover with a foil tent for 15 minutes. Slice and serve.


Wednesday, August 5, 2009

Summer Berry Salad


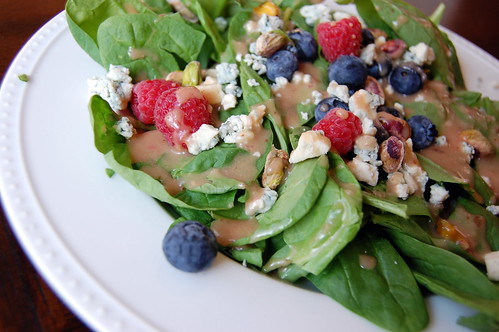
Joey had a meeting on Tuesday night, so I was on my own for dinner. Whenever this happens I either eat leftovers or make something that I know he won't care for. I took the opportunity to make a nice light salad using berries, blue cheese, and pistachios. I grilled some chicken to slice over the salad, mixed up a quick vinaigrette, and called it a day.

My mother-in-law always says I make good salads, but they are usually all just different variations on the same salad. They always have all the same components... so now I will share my secret (which I'm sure most of you already do; I'm really not very inventive)

1. Dark, leafy greens (spinach, arugula, spring mix, romaine, etc)
2. Sweet - fruit - either fresh or dried (pears, berries, figs, apples...)
3. crunch - any sort of nut - pistachios, toasted almonds, pine nuts, pecans, walnuts
4. cheese - feta and blue cheese are my favorites
5 . crunchy veggie - cucumber, bell pepper, carrots, onion
6. viniagrette that reiterates one of the flavors - I usually do a fruit based or cheese

So there you have it, how to make a perfect salad, every time. I also like to add a legume to the salad as well - either chickpeas, black beans, northern beans, etc. Honestly I don't see how you can mess up a salad - be creative, have fun, and enjoy!

Summer Berry Spinach Salad
  • 2 cups baby spinach, stems removed
  • 1/3 cup fresh raspberries
  • 1/4 cup fresh blueberries
  • 1/4 cup blue cheese
  • 1/4 cup pistachios, shelled
For the dressing (this makes more than you need for a single serving entree salad - enough for 2 big salads, or at least 4 small)
  • 1/2 shallot, chopped
  • 2 Tablespoons seedless raspberry preserves
  • 1/4 cup raspberry vinegar
  • 1/3 cup extra virgin olive oil
  • salt and pepper
  • 1 Tablespoon dijon mustard
Process ingredients in food processor or blender until smooth

Assemble ingredients and drizzle with dressing. Top with grilled chicken, salmon, or pork if desired.


Tuesday, August 4, 2009

Blueberry Shortcakes with Lemon Thyme Biscuits


In the June 2009 issue of Bon Appetit magazine, there was an article full of recipes utilizing fresh summer berries. I found myself ripping out every single recipe! They all looked so delicious, but the WC Ingredient Challenge gave me a great opportunity to try one out. Every other week, a new ingredient is announced, and the challenge is to cook a dish that highlights it. This week's challenge was blueberries, and I knew I'd have no trouble coming up with something wonderful.

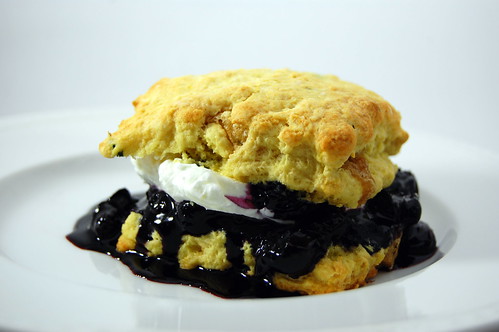
I absolutely LOVE using herbs in dessert. I guess it just goes back to my love affair with the sweet and savory combo. This recipe uses the classic combination of lemon and thyme to create a slightly sweet yet savory biscuit as the base for the shortcake. You then cook fresh blueberries with sugar, and top with freshly whipped cream.

This was absolutely divine! The bluberries were oozing and sweet, and the biscuit was fresh and savory. The only change I would make would be to add another half a teaspoon or so of fresh thyme, as I didn't feel like it was very pronounced. Or maybe the blueberry was just more overpowering. In any case, I plan on eating a biscuit toasted with butter for breakfast!

Blueberry Shortcakes with Lemon Thyme Biscuits
adapted from Bon Apetit, June 2009

Berries
  • 4 cups blueberries (2 pints) rinsed and drained
  • 2/3 cup confectioners sugar
  • 2 Tablespoonswater
Biscuits
  • 3/4 cup chilled buttermilk
  • 1 Tablespoon lemon zest (I just did the zest of 1 medium lemon)
  • 1 1/2 teaspoons chopped fresh thyme
  • 2-1/4 cups all-purpose flour
  • 1/2 cup packed brown sugar
  • 1 1/2 teaspoons baking powder
  • 1 teaspoon baking soda
  • 1/4 teaspoon salt
  • 6 Tablespoons (3/4 stick) chilled unsalted butter, cut into cubes
For the berries, combine the blueberries, sugar, and water in a medium saucepan. Stir over medium heat until berries are softened and syrup coats the spoon, about 8 minutes. Transfer to a medium glass bowl, and allow to come to room temperature before serving.
For the biscuits, preheat oven to 425 and position rack to the center of the oven. Line a large rimmed baking sheet with parchment paper or a baking mat.

Mix the buttermilk, lemon, and thyme in a small bowl. Whisk next 5 ingredients in a large bowl to blend. Add butter and rub in with fingertips or using a pastry cutter, until the dough is the consisentcy of coarse meal. Add the buttermilk mixture, and stir with a fork until just blended.

Transfer dough to a lightly floured surface. Knead gently just until dough comes together, 4 or 5 turns. The shortcakes will be tough if they are handled too much. Pat dough out to a 3/4 inch thick circle. Using either a round or square 3-4 inch cookie cutter dipped in flour, cut out dough. Gently gather leftover dough and repeat (I got 7 square biscuits). Transfer to the baking sheet, and sprinkle with raw sugar.

Bake 12-15 minutes, or until a toothpick inserted in the middle comes out clean. Transfer to a rack and cool slightly.

Using a serrated knife, carefully cut biscuits horizontally in half. Spoon blueberries over bottom half, top with whipped cream, and cover with top half.


Monday, August 3, 2009

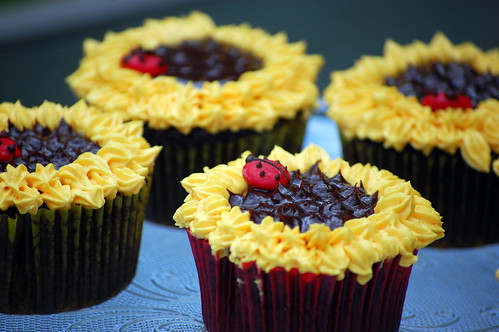
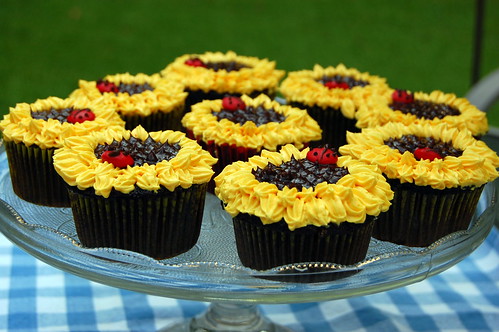
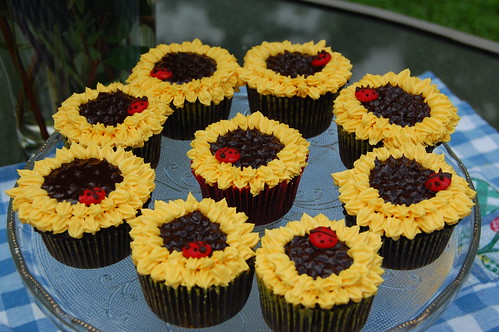
Sunflower Cupcakes


This past weekend marked a very special occasion. My brother (Paul) and older sister (Kalli) flew into Atlanta for the weekend from Arizona and Oregon (respectively). It was a very special visit for a few reasons. 1. They haven't been home in over 2 years and 2. they haven't met either Caroline or my niece, Georgia. So needless to say, I have been very excited about the visit. And I wasn't the only one. My stepmother threw a party in honor of the occasion on Sunday night. We had a great time eating ribs and chicken fingers, letting the girls play in the kiddie pool, and just enjoying the great company.

Linda asked me to make some cupcakes, and I decided on these sunflower cupcakes. They turned out even better than I expected, as I combined a few methods and adapted them to my liking. My biggest challenge was that I couldn't decide what to use as the center. One method used an oreo, while some used cocoa puff cereal, and Martha Stewart used chocolate covered sunflower seeds. I experimented a bit, I and finally decided to simply pipe chocolate icing in dots to make the center. The ladybug was a great finishing touch, and Georgia couldn't wait to eat a "ladybug cake."


Just as a quick note, the buttercream was insanely buttery when made according to the recipe, so I added about 1/2 to 1 cup of confectioner's sugar to sweeten it up. I have made this change in the recipe below. Oh and a special thanks to my mother-in-law for helping me pipe at midnight Saturday night!

These are a simple chocolate cupcake with Swiss meringue buttercream.

Sunflower Cupcakes

inspired by Martha Stewart and Hello Cupcake
cupcake adapted from Hershey's

Swiss Meringue frosting adapted from Martha Stewart

For the cupcakes:

  • 2 cups sugar
  • 1-3/4 cups all-purpose flour
  • 3/4 cup unsweetened Cocoa powder
  • 1-1/2 teaspoons baking powder
  • 1-1/2 teaspoons baking soda
  • 1 teaspoon salt
  • 2 eggs
  • 1 cup milk
  • 1/2 cup vegetable oil
  • 2 teaspoons vanilla extract
  • 1 cup hot, strong brewed coffee
Preheat oven to 350. Line muffin tins with cupcake liners, and spray with nonstick cooking spray.

Sift together flour, sugar, cocoa powder, baking powder, baking soda, and salt in the bowl of stand mixer. In another bowl, whisk together eggs, milk, vegetable oil, and vanilla extract. Add to mixer, and beat on medium speed for 2 minutes. Stir in hot coffee, and pour into muffin tins, filling about 2/3 to the top.

Bake 17-20 minutes, or until a toothpick inserted into the center comes out clean. Allow to cool completely before frosting.

For the buttercream
makes about 5 cups

  • 5 large egg whites
  • 1 cup plus 2 tablespoons sugar
  • Pinch of salt
  • 1 pound (4 sticks) unsalted butter, cut into tablespoons, room temperature
  • 1 1/2 teaspoons pure vanilla extract
  • 1/2-1 cup sifted confectioners sugar
Combine egg whites, sugar, and salt in the heatproof bowl of a standing mixer set over a pan of simmering water. Whisk constantly by hand until mixture is warm to the touch and sugar has dissolved (the mixture should feel completely smooth when rubbed between your fingertips).

Attach the bowl to the mixer fitted with the whisk attachment. Starting on low and gradually increasing to medium-high speed, whisk until stiff (but not dry) peaks form. Continue mixing until the mixture is fluffy and glossy, and completely cool (test by touching the bottom of the bowl), about 10 minutes.


With mixer on medium-low speed, add the butter a few tablespoons at a time, mixing well after each addition. Once all butter has been added, whisk in vanilla. Switch to the paddle attachment, and continue beating on low speed until all air bubbles are eliminated, about 2 minutes. Taste, and add confectioners sugar, a few tablespoons at a time, until desiered taste is reached. Scrape down sides of bowl with a flexible spatula, and continue beating until the frosting is completely smooth.

Keep buttercream at room temperature if using the same day, or transfer to an airtight container and refrigerate up to 3 days or freeze up to 1 month. Before using, bring to room temperature and beat with paddle attachment on low speed until smooth again, about 5 minutes.


For the sunflowers
  • 12 chocolate cupcakes
  • 1 cup chocolate frosting (I used canned to save time)
  • 1/2 recipe Swiss meringue buttercream, tinted yellow
  • 12 red m&m's
Using a #5 round tip, pipe a small mound of chocolate onto the center of the cupcake. Pipe small dots over the mound. Don't worry if its not a perfect circle, the petals will cover the edge of the center.

Using a #18 star tip, pipe petals around the outside edge of the cupcake. Starting between 2 petals, pipe a second row around the cupcake. If necessary, pipe a few more petals to cover inperfections of the center.

For the ladybugs, use a #3 round tip to pipe chocolate frosting to resemble the shell. Carefully place the ladybugs on the flower.

I also tinted some buttercream green, and just piped it onto extra cupcakes. I didn't get any pictures of them, but they looked cute with the flowers.


BLOG DESIGN BY: SHERBET BLOSSOM DESIGNS