Tuesday, September 30, 2014

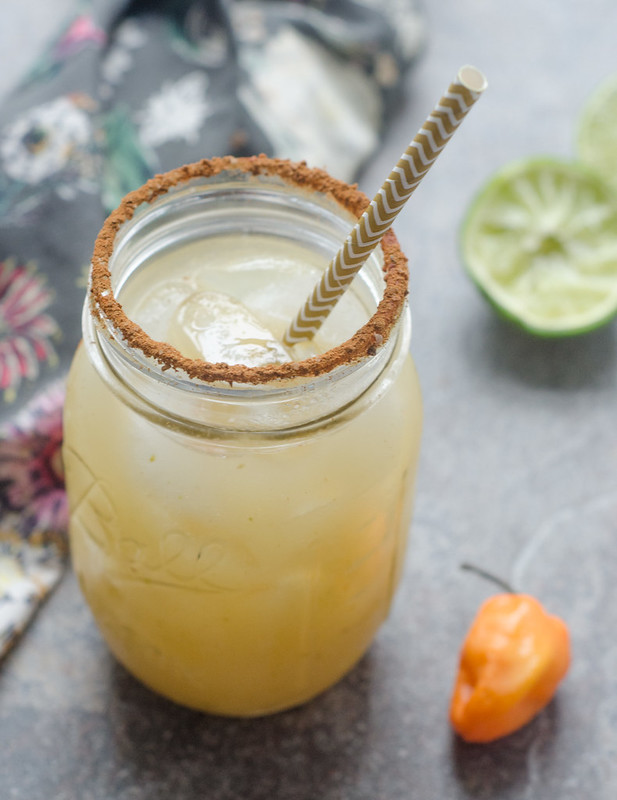
Apple-Habanero Margaritas

Apple-Habanero Margaritas

In case you can't tell from my archives, I've pretty much made it my mission to make as many seasonal margaritas as I can throughout the year.  A good margarita is definitely my drink of choice, and I absolutely love all the seasonal variations and spins.  Strawberry-Rhubarb in the spring, blood orange and grapefruit in the winter, watermelon, cherry, and cucumber in the summer, and cranberry and pomegranate in the fall.  And now I'm adding apple-habanero to my fall line-up as well.

This margarita is brought to you by the incomparable Rick Bayless; therefore it is completely fabulous. Although it takes a bit of prep-work, it's totally worth it.  In order to get the most concentrated, pure apple flavor, you roast apples with some sugar before pureeing them along with a habanero.  And to give the drink even more apple oomph, you use apple brandy in place of the traditional orange liqueur.  The habanero doesn't over power the drink, but rather balances the sweetness of the apples and tequila with a hint of spice.  You can make this as spicy or mild as you like, but it's recommended that you don't use more than half the habanero… lest you may need a chaser of milk, and I really don't see that ending well!

The final touch of these margaritas is the peppery cinnamon salt rim, which is simply ground cinnamon, salt, and pepper.  I absolutely loved this addition, so don't skip it!

I see these margaritas being a big hit for any fall parties or tailgates, and I for one can't wait to spread the apple-habanero margarita gospel this fall!

Apple-Habanero Margaritas 

These margaritas were part of a special fall-themed Mexican dinner I cooked over the weekend, and I can't wait to share the rest of the dinner with you guys!  

Apple-Habanero Margaritas
barely adapted from Frontera, by Rick Bayless
makes 6 to 8 cocktails

  • 1 1/2 cups tequila
  • 1/3 cup fresh lime juice
  • 1/2 cup apple brandy (preferably Calvados)
  • 1 1/2 cups apple-habanero puree (recipe follows)
  • 1 lime wedge
  • Peppery Cinnamon Salt (recipe follows)
In a pitcher, combine the tequila, lime juice, apple brandy, and apple-habanero puree.  Stir well and refrigerate until well-chilled, about 2 hours.

Use the lime and peppery cinnamon salt to rim your glasses, fill them with ice, then divide the margaritas among the glasses.  Serve immediately.


Apple-Habanero Puree

  • 2-3 large apples, peeled, cored, and sliced into 8 wedges (preferable Granny Smith, or another tart apple)
  • 2 Tbs sugar
  • 1 habanero chile
  • 1/4 cup simple syrup
Preheat the oven to 400 degrees.  Line a baking sheet with foil, then toss the apples with the sugar.  Arrange the apples plus the habanero in a single layer on the baking sheet, and cook for 15 minutes.  Flip the apple pieces and chile, then roast another 10-15 minutes, or until the apples are lightly browning and completely soft.  

In a food processor or blender, combine the apples, syrup, and 1/2 cup of water.  Blend until completely smooth.  Chop the hanbanero, and add about 1/4 of it to the mixture (seeds and all).  Process to blend thoroughly, taste, and add more of the chile as you see fit.  

If the puree is the same consistency as apple sauce, add more water, a tablespoon at a time, to achieve a slightly thinner consistency.  

Strain the mixture into a glass bowl or jar, and refrigerate until ready to use.

Peppery Cinnamon Salt

To make the peppery cinnamon salt, mix 3 parts kosher salt with 2 parts ground cinnamon, and 1 part freshly cracked black pepper.  Store covered in a small bowl.


Sunday, September 28, 2014

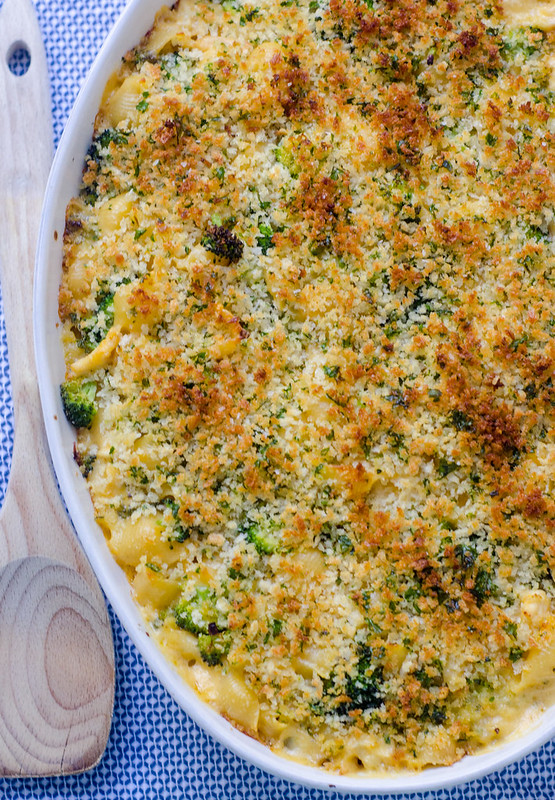
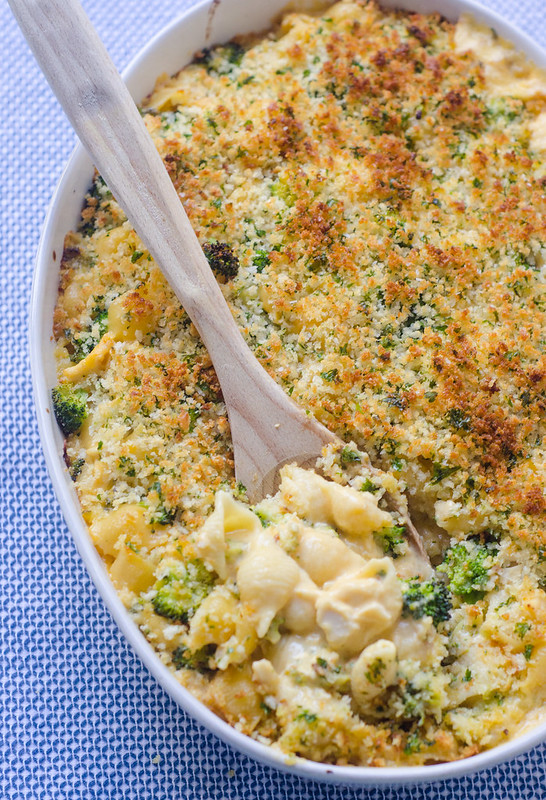
Cheesy Baked Shells with Broccoli and Chicken

Cheesy Baked Shells with Broccoli and Chicken 


Remember this absolutely amazing incredible mac and cheese recipe?  If you haven't made it yet, you really are missing out.  Because it really and truly is the best mac and cheese of all time.  I realize that's a lofty claim, but I have eaten a LOT of mac and cheese in my day, so I feel pretty confident in my assertion.

So anyway, I took that macaroni and cheese, and I added some broccoli and chicken to it.  To make it a full meal, of course.  Look, I can make an entire meal out of a big bowl of mac and cheese, but in the name of adult responsibility, I felt like a vegetable and a protein were needed.  So cheesy baked shells with broccoli and chicken were born!

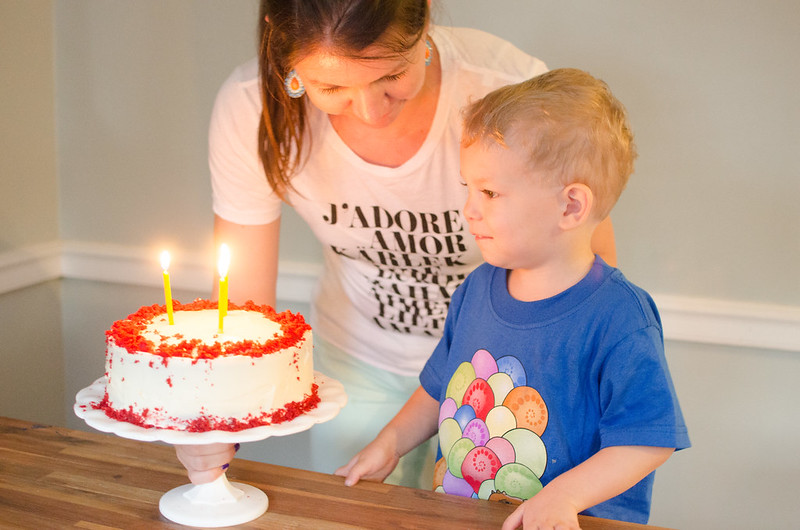
It's become a standing tradition to for me to make a big dinner for the kids' birthdays.  Smith turned three last week (obvious comment about time moving too quickly), and I'm going to be brutally honest here for a minute.  That kid has challenged me more than I thought possible.  At fifteen months, the poor guy was only a baby himself when Henry and Tucker came along and rocked our world, and he definitely didn't know exactly how to handle the upheaval.  We went though many tough phases with him:  sitting on the babies, pushing them over, throwing toys at them, stealing their milk and food, you name it.  Not to mention the normal day-to-day toddler meltdowns and challenges.

DSC_8965 

But in the past six months or so, there's been a shift.  He's gone from pushing the babies down, to helping them back up when they fall.  He no longer steals their milk, but is waiting at the bottom of the stairs with it every morning when they wake up.  He teaches them all the animal and dinosaur sounds.  He's there to give them hugs and kisses when they have their own epic tantrums.  And he's the referee between their toddler skirmishes now.  This guy was just meant to be a big brother.

So we celebrated my big boy's birthday with this cheesy baked pasta dish.  It's the best dinner I could think of for my little guy, and it was a hit with the whole family.  We're looking forward to another fun-filled year with this sweet boy!
DSC_8972

Cheesy Baked Shells with Broccoli and Chicken
adapted from this macaroni and cheese (which is from Cook's Illustrated)
serves 8 to 10
  • 1 recipe Panko Topping (follows)
  • salt
  • 4 cups chopped broccoli florets
  • 1 pound medium pasta shapes, such as shells
  • 6 Tbs unsalted butter
  • 2 medium garlic cloves, minced
  • 1 tsp dry mustard
  • 1/4 tsp cayenne pepper
  • 6 Tbs all-purpose flour
  • 2 1/4 cups low-sodium chicken or vegetable broth
  • 3 1/2 cups milk (low-fat is fine)
  • 1 pound colby jack cheese, shredded (about 4 cups)
  • 8 oz extra-sharp cheddar, shredded (about 2 cups)
  • 2 cups diced cooked chicken
  • ground black pepper
Preheat the oven to 400 degrees.

In a large microwave-safe bowl, toss the broccoli with a splash of water.  Cover with plastic wrap.  Cook 3-4 minutes, stirring after every minute, until the broccoli is bright green, and just tender.  Set aside.

Bring water to a boil in a large dutch oven set over high heat.  Add 1 tablespoon of salt and the pasta, and cook, stirring occasionally, until the pasta is just beginning to soften, about 5 minutes.  Drain the pasta and leave in the colander.

Wipe the pot dry, and add the butter, and set it over medium heat until melted.  Stir in the garlic, mustard, and cayenne, and cook until fragrant, about 30 seconds.  Stir in the flour, and cook, stirring constantly, until golden, about 1 minute.  Slowly whisk in the chicken broth and milk, and bring to a simmer.  Whisking often, cook until large bubbles form on the surface and the sauce is slightly thickened, about 15 minutes.  Remove from heat and stir in the cheeses until completely melted.  Season with salt and pepper to taste.

Stir the drained pasta, broccoli, and diced chicken into the cheese sauce, breaking up any clumps, until well combined.  Pour into a lightly greased 9x13 inch baking dish and sprinkle with crumb topping.

Bake uncovered, until the sauce is bubbling and the crumbs are crisp, 25-35 minutes. 


To store and serve later:  Wrap the dish tightly with foil, and refrigerate for up to 2 days.  To serve, bake in a 400 degree oven until the filling is hot throughout, about 40-45 minutes.  Remove the foil and continue to cook until the crumbs are crisp, 15-20 minutes.


Panko Topping

  • 1 cup panko bread crumbs
  • 2 Tbs unsalted butter, melted
  • 2 Tbs minced fresh parsley
  • salt and pepper
In a small bowl, combine the panko with the melted butter and parsley.  Season to taste with salt and pepper.


Tuesday, September 23, 2014

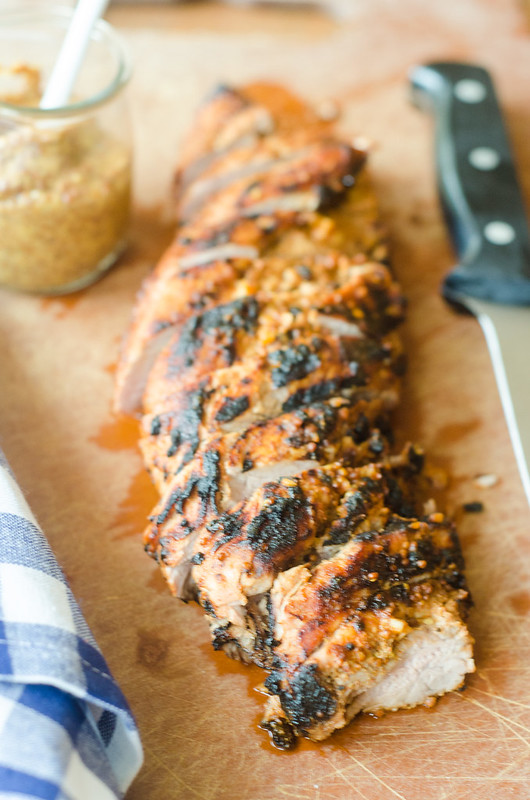
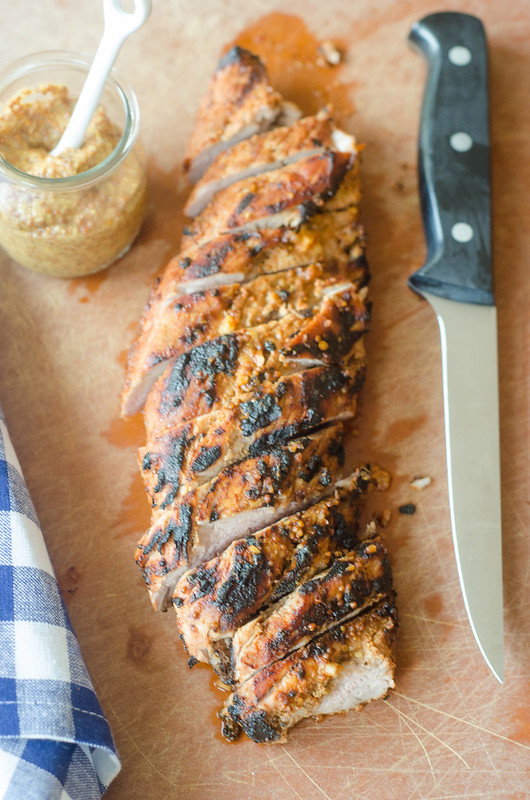
Garlic & Mustard-Grilled Pork Tenderloin

Garlic and Mustard-Grilled Pork Tnderloin 


I've though long and hard about this, because clearly it's a life-or-death decision.  And I've come to the conclusion that pork tenderloin is my favorite cut of meat to grill.  It's lean, easy to prep, quick to cook, healthy, and has so much flavor.  You can pretty much go any direction or cuisine you want, making it incredibly versatile.

This version is marinated in a mustard and garlic mixture, then grilled and glazed with more of that delicious mixture.  Joey immediately proclaimed it to be the best pork tenderloin I've made to date, and I immediately added it to next week's menu.

Seriously, this is the easiest prep ever, and it's an absolutely amazing dinner.  You can pretty much serve it with any side you want - I went with a salad and stuffed zucchini (recipe coming soon!).  But any grilled or roasted veggies would be awesome, as well as grits, polenta, rice, etc.

I know that as we move into fall, many of you stow away your grills.  But I beg of you:  keep them out!  enjoy them until the first snow falls!  And make this pork tenderloin!

DSC_8890 

Garlic and Mustard-Grilled Pork Tenderloin
adapted from Bobby Flay:  Grilling for Life
serves 6

  • 1/4 cup whole-grain mustard
  • 2 Tbs Dijon mustard
  • 5 cloves garlic, minced
  • 2 Tbs white wine vinegar
  • 1 Tbs low-sodium soy sauce
  • 1 Tbs honey
  • 1 Tbs chopped fresh thyme leaves
  • 2 tsp smoked paprika
  • pinch of red pepper flakes
  • 1/4 tsp kosher salt
  • 1/4 tsp freshly ground black pepper
  • 2 pork tenderloins, trimmed 
Whisk together all the ingredients (mustard through black pepper).  Reserve 1/4 cup of the marinade, then pour the remaining marinade into a gallon-sized ziploc bag.  Transfer the pork tenderloins to the bag, seal, and press to coat the meat with the marinade.

Refrigerate for at least 30 minutes, and up to 4 hours.

Prepare the grill over medium-high heat.

Grill the meat, turning every 5 minutes, and brushing with the reserving marinade every time you turn it.  Cook until it reaches an internal temperature of 135-140 degrees.  

Remove from heat and cover loosely with foil.  Allow to sit for 10 minutes.  Slice and serve.


Sunday, September 21, 2014

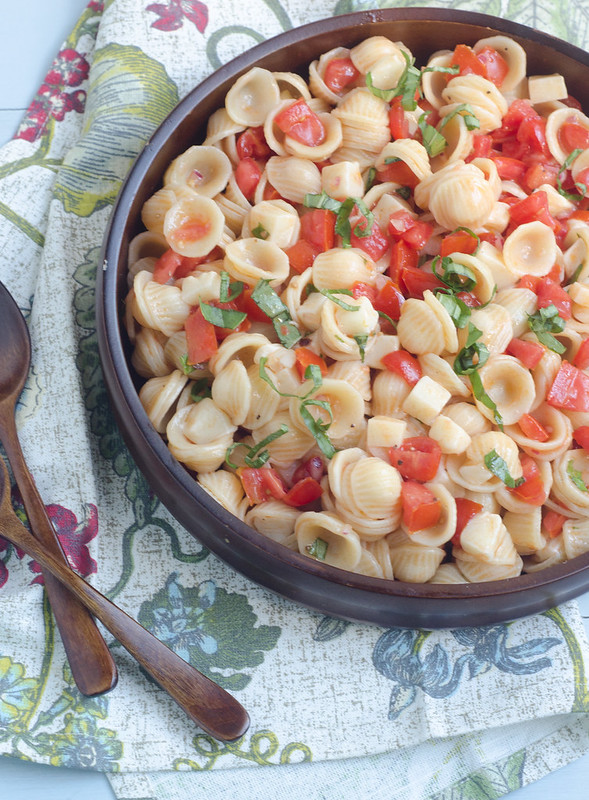
Summer Caprese Pasta

Summer Caprese Pasta 

I know, I know.  Today's the first day of fall.  But here in the south, it's still "summer-like," so I'm still cooking summer dishes.  Sorry not sorry.  I just can't get on the pumpkin-apple-butternut squash-fall foods bandwagon quite yet.  Give me until the end of September, and I promise I'll join all of you fall lovers in October.  Deal?

And I couldn't possibly let summer end without sharing this super easy and delicious pasta recipe with you.  Caprese pasta is nothing new or revolutionary, but oftentimes there are some drawbacks:  the tomatoes release too much water and create a bland and watery sauce... the mozzarella gets kind of gummy… the basil is too strong, or not strong enough… The problem with seemingly simple dishes is that even a small misstep makes a big negative impact on the final dish.  When there are so few ingredients and components, it doesn't take much to muck it up.

But have no fear!  This pasta recipe is pretty much foolproof.  Good tomatoes are still available in most areas, so snatch some up and make this caprese pasta, stat!  Bonus:  the leftovers are awesome served as a chilled pasta salad.  I packed this in Caroline's lunch with great success, and the boys enjoyed the leftovers for their lunches as well.

I'm not quite ready for fall, so indulge me and join me in my end-of-summer denial?

Summer Caprese Pasta 

Summer Pasta Caprese
barely adapted from Pasta Revolution
serves 4 to 6

  • 1/4 cup extra virgin olive oil
  • 2 tsp lemon juice, plus more as needed
  • 1 tsp lemon zest
  • 1 small shallot, minced
  • 1 clove garlic, minced
  • pinch of red pepper flakes
  • pinch of sugar
  • kosher salt and freshly ground black pepper
  • 1 1/2 lbs vine-ripened tomatoes; cored, seeded, and chopped into 1/2-inch pieces
  • 12 oz fresh mozzarella, cut into 1/2-inch pieces and patted dry with paper towels
  • 1 lb small or medium pasta shapes (I used orecchiete)
  • 1/4 cup chopped fresh basil
Whisk the oil, lemon juice, shallot, garlic, lemon zest, red pepper flakes, a pinch of sugar, 1/2 tsp salt, and 1/4 tsp pepper together in a large serving bowl.  Add the tomatoes and toss gently to combine.  Marinate the tomatoes in the dressing for at least 10 minutes, but no more than 45 minutes.  

Meanwhile, place the mozzarella in the freezer and freeze until slightly firm, about 10 minutes.

Meanwhile, bring a large saucepan of salted water to a boil.  Stir in the pasta and cook until al dente, about 10 minutes.  

Drain the pasta and add to the bowl with the marinated tomatoes.  Add the mozzarella and basil, and toss gently to combine.  Allow to sit for 5 minutes, then taste and season with salt, pepper, and/or additional lemon juice as needed.  Serve immediately.


Friday, September 12, 2014

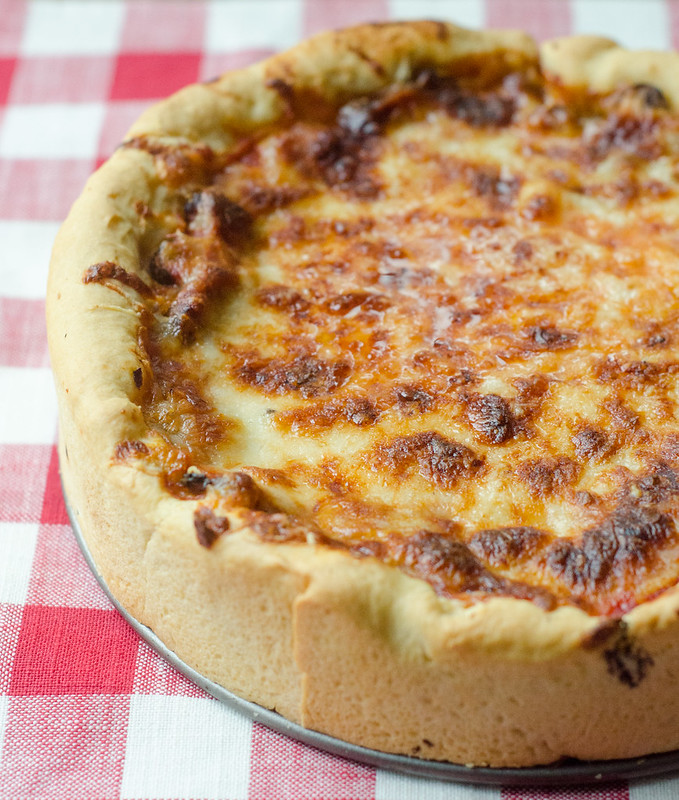
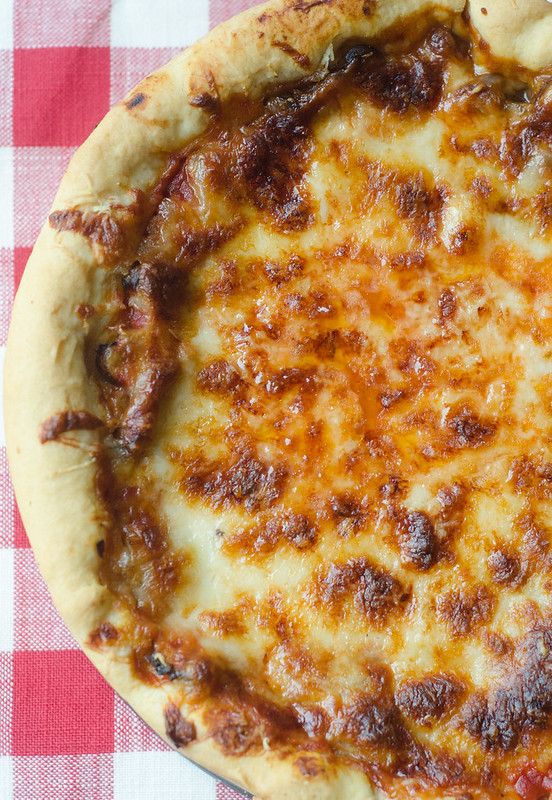
Deep Dish Mushroom and Onion Pizza

Deep Dish Mushroom and Onion Pizza 

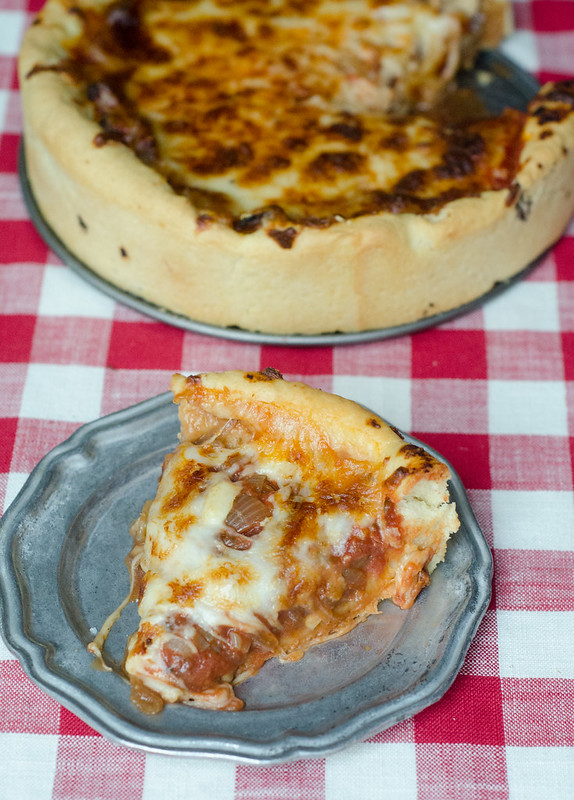
Pizza Friday!  And this is a good one.  The cover of the September Cooking Light had me drooling from the minute I saw it.  The Deep Dish Mushroom & Onion Pizza looked so amazingly cheesy and delicious, and it went on my weekly menu immediately.  Unsurprisingly, we all loved it.  How could you not?

Deep Dish Mushroom and Onion Pizza 
This is a great base recipe as well.  I can think of innumerable variations, but off the top of my head, the addition of spicy sausage is pretty high up there, as are bell peppers.  Play around, mix up the toppings (filling?) to your liking, and enjoy!  We have homemade pizza quite often, but this was a nice change from the usual style.  I hope you all have a wonderful weekend!

Deep Dish Mushroom and Onion Pizza 

Deep Dish Mushroom and Onion Pizza
adapted from Cooking Light, September 2014
serves 6 (at 1 slice each)

  • 1 1/4 tsp instant yeast
  • 1/2 tsp sugar
  • 3/4 cup warm water (about 110 degrees F)
  • 4 Tbs olive oil, divided
  • 9 oz all-purpose flour, divided (about 2 cups)
  • 1/4 cup semolina flour
  • 3/4 tsp kosher salt, divided
  • cooking spray
  • 1 1/2 cups thinly sliced onion
  • 2 cloves garlic, minced
  • 1/2 tsp dried oregano
  • pinch red pepper flakes
  • 1/4 tsp ground black pepper
  • 8 oz cremini mushrooms, sliced
  • 3/4 cup tomato sauce
  • 1 clove garlic, crushed
  • 1 oz Parmesan cheese, grated (about 1/4 cup)
  • 5 oz part-skim mozzarella cheese, shredded (1 1/4 cups)
Dissolve the yeast and sugar in 3/4 cup of the warm water in the bowl of a stand mixer. Let stand 5 minutes, then add 3 tablespoons of the oil.  Weigh out 7.9 oz of the flour (about 1 3/4 cups), and add to the stand mixer, along with the semolina flour and 1/2 teaspoon of salt.  Mix at medium-low speed with a dough hook until smooth, about 4 minutes.

Turn the dough out onto a lightly-floured surface and knead for about 5 minutes, until it's smooth and elastic.  As you're kneading, gradually add the remaining 1/4 cup of flour.

Lightly grease a large bowl with olive oil, then place the dough in the bowl, cover with a dish towel, and move to a warm, dry place.  Let rise until it's doubled in size, about 1 1/2 hours.

To make the toppings, heat a large skillet with 1 tablespoon of olive oil over medium-high heat.  Add the onion and cook 3 minutes.  Stir in the garlic, oregano, a pinch of salt, and pepper, and cook, stirring constantly, until the garlic is fragrant (about 30 seconds).  Add the mushrooms.  Cook about 5 to 6 minutes, or until the mushrooms release their moisture.  Set the pan aside.

In a medium saucepan, combine the tomato sauce, a pinch of red pepper flakes, 1/8 teaspoon of salt, and the crushed clove of garlic.  Bring to a vigorous simmer, reduce heat, and simmer for about 5 to 10 minutes.  Discard the garlic clove.

Preheat the oven to 425 degrees and place the oven rack in the lower-third of the oven.  

Coat the bottom and sides of a 10-inch springform pan with 1 tablespoon of oil. 

Punch down the dough and turn out onto a lightly-floured surface.  Gently press the dough into a 13-inch circle.  

Working carefully, lift the dough and place in the prepared pan.  Press the dough into the bottom and halfway up the sides of the pan.  

Scatter the mushroom mixture over the bottom of the pan, then spread the marinara mixture over the mushrooms in an even layer.  Top with the parmesan cheese and mozzarella.

Bake at 425 degrees for 25 to 30 minutes, or until the crust and cheese are browned.  Let stand 5 to 10 minutes before slicing into wedges and serving.


Wednesday, September 10, 2014

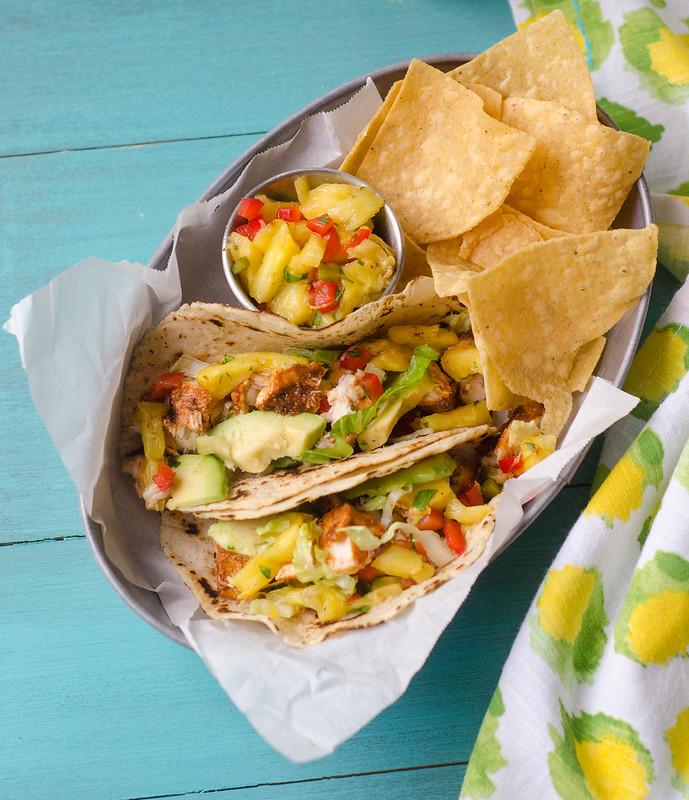
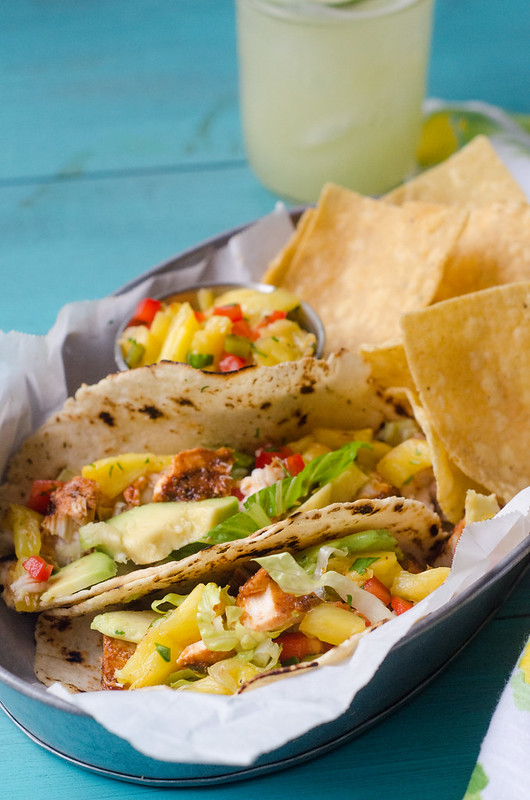
Grilled Fish Tacos with Grilled Pineapple Salsa

Grilled Fish Tacos with Grilled Pineapple Salsa

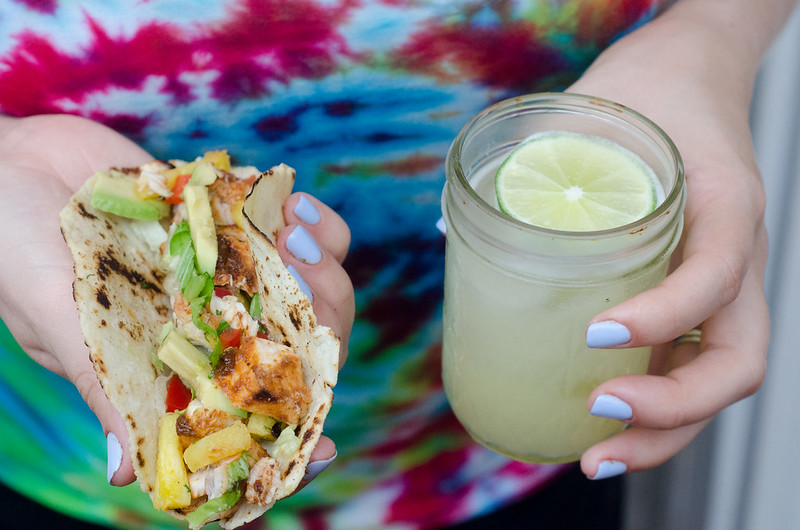
Grilled fish tacos have long-been one of my favorite Mexican dishes, but I've yet to make any at home that blew me away.  Until now, that is.  Cook's Illustrated touts these as "Really Good Fish Tacos," and I counter with "The Best Fish Tacos You'll Ever Make."  I don't make such claims often, so trust me on this.  They've got just the right amount of spice, a touch of sweetness from the pineapple, which is grilled, thus also giving you a touch of smokiness.  And then they are wrapped in a warm tortilla (which I highly recommend you make from scratch), topped with some fresh and crisp lettuce and creamy avocado.  This is good stuff here.

Grilled Fish Tacos with Grilled Pineapple Salsa 

The fish of choice is swordfish, but I think any firm white fish would be fine.  The spice paste is what makes the fish tacos really stand out in my opinion, so don't skip that step!

I'm also a big fan of fruit salsas, and now I'm an even bigger fan of grilled fruit salsa.  Perfection.

I know that for some, grilling season is winding down, but I beg of you.  Make these fish tacos this weekend.  Make a big pitcher of margaritas.  Have yourself a fish taco fiesta.

Grilled Fish Tacos with Grilled Pineapple Salsa 

Grilled Fish Tacos with Grilled Pineapple Salsa
barely adapted from Cook's Illustrated, Sept/Oct 2014
serves 6
  • 3 Tbs canola oil
  • 1 Tbs chile powder
  • 1 1/2 tsp chipotle chile powder (or 1 tsp chile powder + 1/2 tsp cayenne pepper)
  • 1 tsp dried oregano
  • 1 tsp dried coriander
  • 2 cloves garlic, minced
  • kosher salt
  • 2 Tbs tomato paste
  • 1/2 cup orange juice
  • 6 Tbs fresh lime juice (from about 2-3 limes)
  • 2 lbs skinless swordfish steaks, cut lengthwise into 1-inch-wide strips
  • 1 pineapple, peeled, quartered lengthwise, and cored
  • 1 jalapeƱo chile
  • 18 (6-inch) corn tortillas
  • 1 red bell pepper, stemmed, seeded, and cut into 1/4-inch pieces
  • 3 Tbs minced fresh cilantro, plus more for serving
  • 1/2 head iceberg or romaine lettuce, cored and thinly sliced
  • 1 avocado, halved, pitted, and thinly sliced
  • lime wedges
Heat 2 tablespoons of the oil over medium heat in an 8-inch skillet.  Add the chile powders and, cook, stirring constantly, until fragrant and some bubbles form, 2 to 3 minutes.  Stir in the oregano, coriander, garlic, and 1 teaspoon of salt, and continue to cook an additional 30 seconds.  Add the tomato paste, and use a spatula to mash it with the spice mixture until it's well-combined.  Stir in the orange juice and 2 tablespoons of the lime juice.  Cook, stirring constantly, until thoroughly mixed and slightly reduced, about 2 minutes.  Transfer the spice mixture to a large bowl and allow to cool for at least 15 minutes.

Add the swordfish to the bowl and stir gently with a rubber spatula to coat the fish with the spice mixture,  Cover and refrigerate for at least 30 minutes, or up to 2 hours.

Prepare grill by heating over high heat until hot, about 15 minutes.  Lower the heat to medium-high.

Brush the cooking grate with a well-oiled paper towel, then brush the pineapple and jalapeƱo with the remaining tablespoon of oil.

Place fish and the pineapple on the grill.  Grill everything for 3 to 5 minutes, or until it all begins to brown.  Use a thin spatula to flip it all over. Cook an additional 3 to 5 minutes, until the jalapeƱo and pineapple are well browned, and the fish registers 140 degrees.  Transfer the fish to a large platter and cover loosely with foil.  Add the corn tortillas to the grill and cook 30 to 45 seconds per side.  Transfer to a plate and cover loosely with a dish towel or foil.

Use a fork to flake the fish into bite-sized pieces.

Transfer the pineapple and jalapeƱo to a large cutting board.  Peel the jalapeƱo, remove the seeds and ribs, and finely chop.  Finely chop the jalapeƱo.  In a medium bowl, combine the pineapple, jalapeƱo, bell pepper, cilantro, and remaining 4 tablespoons of lime juice.  Season to taste with salt.  

To serve, top tortillas with fish, salsa, lettuce, avocado, and cilantro.  Serve.


Sunday, September 7, 2014

Root Beer Turkey Sloppy Joes

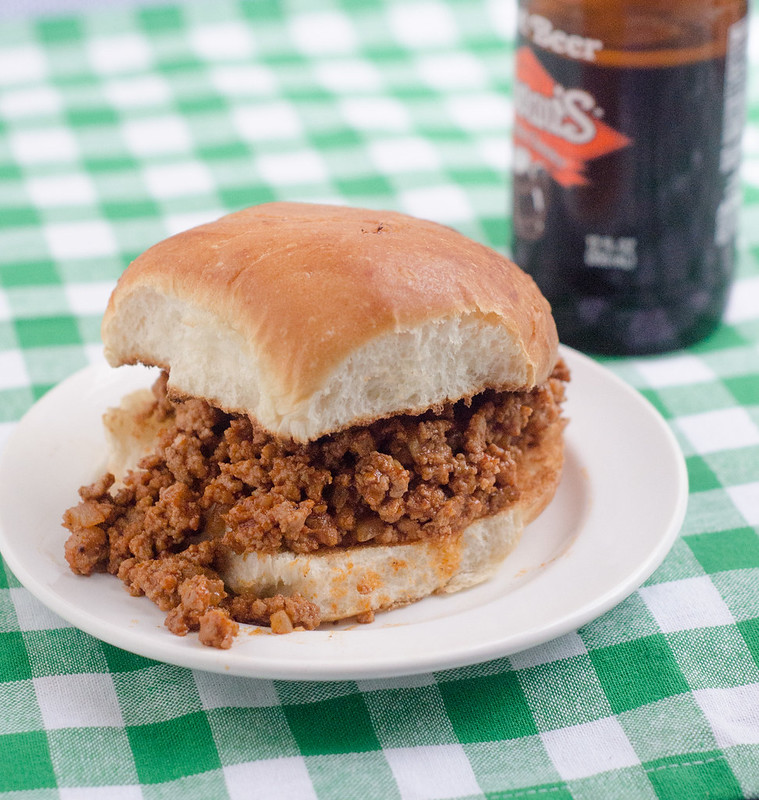
Root Beer Sloppy Joes 

Now that school's back in session and after school activities are in full-swing, our evenings just got really busy, really fast.  So I'm always on the lookout for dinners that are healthy, quick and easy, and appealing to the whole family.

I was a vegetarian growing up, so I didn't eat a lot of Sloppy Joes.  And to be honest, even once I ate meat again, they didn't really seem all that appealing.  But after having these… boy have I been missing out!  Ground turkey, a great blend of sweet and savory seasonings, tomato sauce, and finally, just enough root beer to lend a subtle caramel finish.  Good stuff, these sandwiches.

Even better, they fit the bill for my dinner trifecta:  healthy, fast, and kid-approved.  I served these with zucchini tots and fresh fruit, and it was a really great dinner.   The turkey mixture is also one of those great foods that tastes even better the next day, so I had some pretty great lunches over the course of the week as well.

Do you have any strategies for quick and easy weeknight meals?  This will be an upcoming topic for my "Feeding my Family" series, so I'd love to have some reader-advice to include!

Root Beer Sloppy Joes
adapted from Cooking Light, September 2014

  • 2 tsp canola oil
  • 3/4 cup chopped white onion
  • 1 lb ground turkey
  • 2 cloves garlic, minced
  • 1 tsp dry mustard powder
  • 1 tsp chili powder
  • 1 tsp tomato paste
  • 3/4 cup tomato sauce
  • 1 Tbs apple cider vinegar
  • 1/2 tsp hot sauce
  • 1/4 cup root beer
  • 1 Tbs Worcestershire sauce
  • kosher salt and freshly ground black pepper
  • 4 hamburger buns, toasted
Heat the canola oil in a large nonstick skillet over medium heat.  Add the onion, and cook 3 minutes, or until it's just beginning to soften.  Stir in the ground turkey, breaking up the meat as you stir and cook.  Cook 4 minutes, or until the meat is just beginning to brown.  

Add the garlic, mustard, chili powder, tomato paste, and 1/2 teaspoon of kosher salt.  Cook, stirring constantly, until the mixture is fragrant.  Stir in the tomato sauce, vinegar, hot sauce, root beer, and Worcestershire sauce.  Bring to a simmer and cook 5 to 7 minutes, or until the mixture is slightly thickened.  

Divide the mixture among the bottom halves of the buns, top with the top halves, and serve.


Thursday, September 4, 2014

Farmer's Market Roasted Vegetable Salad

Farmer's Market Roasted Vegetable Salad 

Do you go to the farmer's market over the weekend?  We love going on Saturday mornings.  The kids get to eat popsicles and crepes, and I get to peruse the stalls and pick out beautiful produce, fresh flowers, good meats, eggs, cheese… it's pretty much my favorite time of the week.  Oftentimes I have a plan of what to buy, and what I'm going to make with it.  But I'm also a pretty bad impulse shopper, and sometimes I just can't help myself.  Exhibit A:  Lima beans.  Or butter beans, if you're from the south.

Look, I know they have a bad reputation and some would put them in the "gross vegetable" category, but hear me out.  When they're fresh, and when they're cooked and seasoned properly, they are one of my favorite veggies.  They're creamy and buttery, and absolutely delicious.

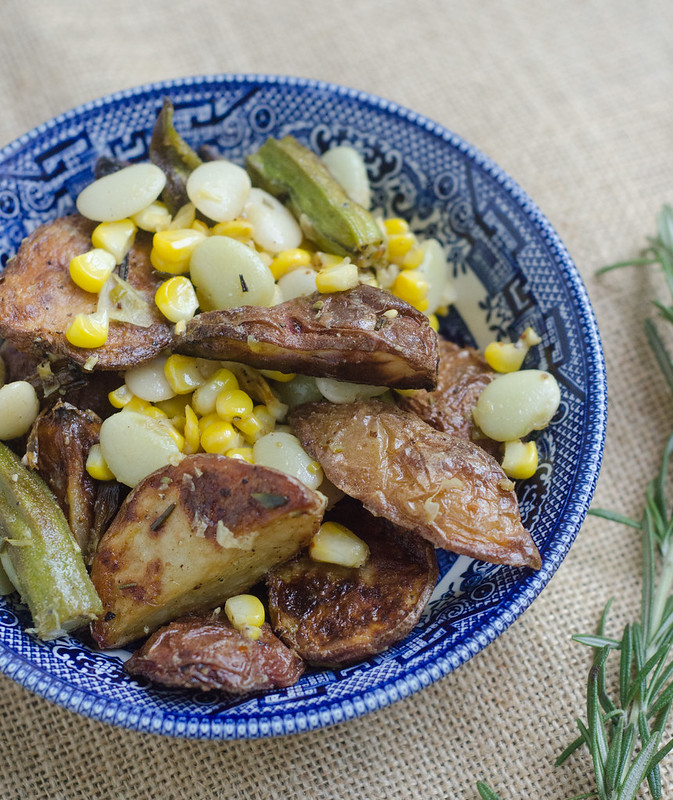
So back to the farmer's market and impulse purchases.  Between our weekly produce delivery, and our trips to the farmer's market, there's been no shortage of amazing food in our fridge this summer.  I took that gorgeous produce and made a wonderful salad with it.  Here's what's going on in there:  roasted potatoes, okra, corn, lima beans, and onions, dressed with a lemon-rosemary vinaigrette.  It's delicious hot and right out of the oven, it's great at room temperature, and it's wonderful served chilled over a bed of greens.  What I'm saying here, is that it's just a really great dish!

I served this with my Peach Chutney and Goat Cheese Burgers, and it was a wonderful meal.  And then I enjoyed the salad leftovers for lunch the next few days.

This is pretty infinitely adaptable as well:  add some squash or zucchini, maybe sprinkle some goat cheese or feta over the top, add some fresh tomatoes at the end, mix up the veggies… the sky's the limit here.

Farmer's Market Roasted Vegetable Salad
adapted from Food and Wine (via Elly Says Opa)

  • 2 lbs small potatoes, such as red-skinned, yukon gold, or fingerling
  • 2 large fresh rosemary sprigs, plus 1/2 tsp minced fresh rosemary
  • 1/4 cup olive oil
  • kosher salt
  • freshly cracked black pepper
  • 3/4 lb okra, tops and tips trimmed off
  • 2 ears corn
  • 2 cups fresh (rehydrated) lima beans, rinsed and picked through
  • juice of 1/2 lemon
  • 1 tsp Dijon mustard
  • 1 shallot, finely minced
Preheat the oven to 450 degrees Fahrenheit.  

Halve the potatoes lengthwise and toss with 2 tablespoons of oil, rosemary, 3/4 tsp salt, and 1/2 tsp pepper.  Arrange in a single layer on a rimmed baking sheet, and cook for 20 minutes, stirring once halfway through.  Add the okra to the pan, and stir to combine.  Arrange the corn on the edge of the pan, and cook an additional 20 to 30 minutes, or until the potatoes are well-browned and tender, and the okra is cooked through.  When cool enough to handle, cut the corn off the cobs.

Meanwhile, bring a medium saucepan of water to a boil.  Add 1 teaspoon of salt and the lima beans, and cook until the lima beans are fork-tender and soft, 15 to 20 minutes.  Drain and set aside.

In a large bowl, whisk together the remaining 2 tablespoons of olive oil, lemon juice, dijon, 1/2 tsp salt, 1/2 tsp pepper, remaining rosemary, and shallot.  Add the roasted vegetables and lima beans, and toss well to coat with the dressing.  Serve immediately, at room temperature, or chilled.


Tuesday, September 2, 2014

A Sweet Lunch Giveaway! (Closed)


Yesterday I posted all about school lunches, and I hope I provided some good inspiration for those of you with school-age kids.  More importantly, I promised a giveaway, and I'm here to deliver.

Sure, you can pack a pretty amazing lunch with nothing but a paper sack and some sandwich bags.  But why not step it up a notch, and use a pretty fabulous bento box?  And why not use a pretty sweet cookbook full of lunch recipes and inspiration?

As I mentioned yesterday, this lunchbox from Pottery Barn Kids is one of my favorite purchases of the year.  It's cute, environmentally friendly, easy to clean, and makes packing a lunch so easy and low maintenance. So would you like to win one?

And while I'm at it, I'm also giving away a copy of Weelicious Lunches.  This cookbook is full of recipes and ideas for lunches that go beyond a pb&j.  I use it all the time for inspiration for Caroline's lunches, as well as for ideas for the boys as well.  I'm a big fan of the Weelicious food blog, and the cookbook is a wonderful extension of it.  I find myself flipping through it at least weekly for new ideas and combinations.

To enter, just leave a comment telling me what your favorite lunch food was as a kid.  I was definitely a fan of the classic peanut butter and jelly!

The fine print:
This giveaway is sponsored by yours truly because I really love these items.  The winner can choose his or her favorite pattern for the lunchbox.  Open to US residents only.  Must leave a valid email address to win.  Giveaway is open until Friday, September 5th at midnight.  Winner will be chosen using a random number generator.  Good luck!


Monday, September 1, 2014

Feeding My Family: School Lunches

school lunches


It's September second.  While Caroline has been in school for three weeks now, I know many parts of the country don't start until this week.  And my boys start preschool this week (cue meltdown about time moving way too quickly).  So whether you are sending your kid off to their first day of school, or you've been back in the game for a few weeks now, the struggle of the school lunch is still the same.  Lunch from the school oftentimes leaves a lot to be desired, and it seems like packing a lunch is the best option.  But your kids get bored quickly with the same old pb and j or turkey and cheese.  Those get old, and fast.  Plus, with the way school is nowadays, lunch is one of the few "fun" times the kids have left.  So I want to pack something that I know Caroline will enjoy, and it has to keep her full and ready to face the rest of the school day.

I've been compiling lunch ideas for almost a full year now, and I'm ready to share.  I also have a few general rules and guidelines that I follow when I'm lacking inspiration or want to pack something fun and festive.  I've broken these lunches down into categories, but obviously some could fit under more than one.  And I don't always remember to snap a picture, so I'll also just be listing some other ideas that we've done in the past.  

So here are the general rules that I follow when packing Caroline's lunch:
  1. I only pack things that I know she'll eat.  Caroline is a very good eater, but she has her preferences just like any other kid.  She doesn't care for sharp cheddar cheese or raw onion, so I'm not going to pack that in her lunch and then be upset when she doesn't eat it.  If your child doesn't like turkey, don't pack a turkey sandwich.  If they don't like carrots, don't pack them.  Send foods that you know they will eat and enjoy.  They don't have someone standing there telling them what to eat, and you want them to get maximum nutrition and satiety from their lunch, so don't take risks here.  Save it for the dinner table.
  2. Be cognizant of allergies.  Last year, Caroline had a few classmates with nut allergies, so I avoided nut butters.  Sunflower butter is a great substitute, so we've used that a lot.  Some schools are totally nut free these days anyway, but in general it's not a bad idea to just save nut products for snacks and meals at home.  Note:  There are not allergies in Caroline's class this year, so I have been sending nut products in her lunches.
  3. Pack a good variety of foods.  I try to be sure to pack Caroline at least one source of protein, plus at least one veggie, at least one fruit, and some sort of carbohydrate or starch.  Last year she went through a phase where she only asked for "super healthy" foods, i.e. fruits and veggies, but she was coming home famished.  So I had to make a point to send in items with protein and good fats.
  4. Involve your child.  This goes back to #1, but ask them what they want in their lunch.  I usually pack at least one item that she asks for, then decide on the rest myself.  If you have a child that's more picky, rather than just asking what they want, ask "Which fruit would you like?"  Let's be honest, if I could eat anything I wanted for lunch, I'm sure it would involve Reese's pb cups and chips ;)  But letting them have a say in what healthy options you pack for them gives them a sense of control and responsibility - which is huge for young kids (and I'll touch on this again in my post about picky eaters!).
  5. Always pack a sweet treat!  It doesn't have to be a big cookie or brownie or whatever.  Just a small item for dessert to make their lunch feel special and fun.  Sometimes I just pack fruit, but lately I've been sending chocolate covered sunflower seeds, dried fruit, trail mix, or a small baked good.  We don't always have dessert at home, so it's a fun way for her to end her lunch.  I of course just assume that she saves it for last… but who knows ;)
  6. Keep a well-stocked pantry and fridge.  I always try and keep a good variety or fruits, veggies, dried fruits, snack foods, cheeses, meats, etc.  It makes it much easier to put together a healthy and filling lunch than when I'm scraping the bottom of the barrel.  
I'll share more tips along the way, but for now I'm going to share a bunch of lunches from the past year.  I've broken them down into a few categories, so next time you're feeling uninspired, just pick a category and go from there!

Keep it Simple with a Sandwich

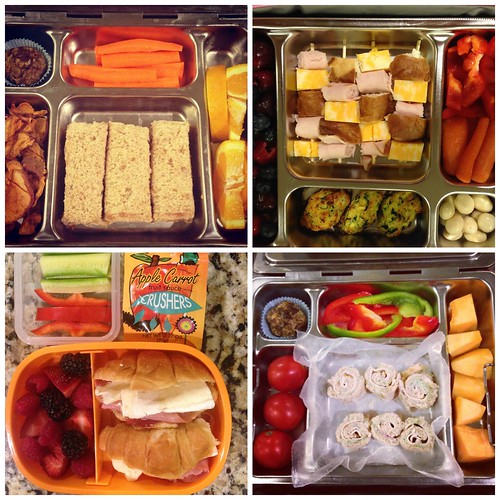
School Lunches - Sandwiches

You don't have to reinvent the wheel every day.  Sandwiches are a lunch staple, and they are always a safe bet.  But just because you're packing a sandwich, it doesn't make it boring.  There are lots of ways you can mix them up, from cutting them into fun shapes (cookie cutters are great for this!), skewering the ingredients (more on this later), going global, or making sandwich "sushi," the sky's the limit here.

Clockwise from top left:
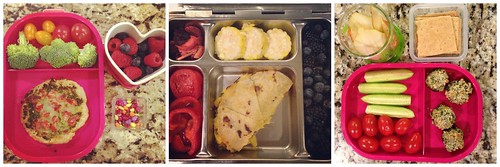
  • PB and J on wheat, cut into strips, orange slices, carrots, apple chips, and a granola truffle.
  • turkey, cheese, and pretzel bread skewers, bell peppers and carrots, zucchini tots, fresh berries, and yogurt-covered raisins
  • turkey and hummus "sushi," (flatten a piece of bread, spread with hummus, top with a few slices of turkey, then roll it up and slice with a sharp knife), cantaloupe, cherry tomatoes, bell pepper strips, and a granola truffle
  • mini croissant sandwiches with ham, brie, and raspberry jam, berries, bell peppers, cucumbers, and an applesauce pouch.
Other ideas:  tortillas with bananas and peanut butter, folded into a quesadilla and cut into wedges, bagel sandwiches, cream cheese and veggies on wheat bread, cream cheese + fruit on wheat bread, bean and cheese panini, apple butter + ham


Reinvent Leftovers.  

School Lunches - Leftovers

A lot of leftovers are perfectly suited to be eaten at room temperature, so I use dinner as inspiration for the next day's lunch.  

(L-R)
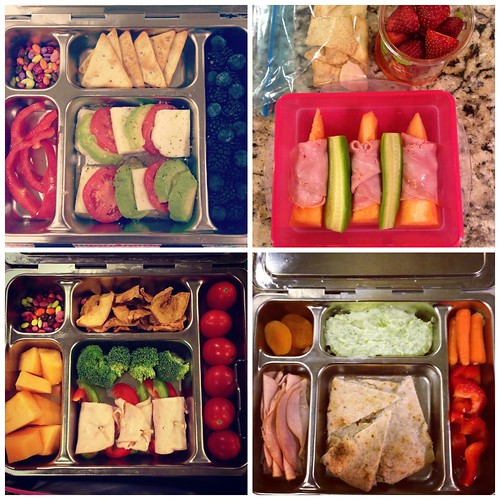
  • mini pizza with broccoli pesto, cheese, and tomatoes (I just tore off a small piece of pizza dough before I rolled out the big one for dinner, then used the same toppings for a baby pizza for Caroline the next day)
  • cheese and pineapple quesadilla, corn wheels (simply corn on the cut cut into smaller pieces).  This was inspired by our dinner of fish tacos with grilled pineapple salsa.  I don't typically send fish with Caroline, so I just used the pineapple salsa and some cheese to make a quesailla on a homemade corn tortilla.  I always grill a few extra ears of corn to use for lunches and salads, so this was a really easy lunch to put together.  
  • spinach-artichoke stuffed mushrooms.  These were leftover from our Frozen dinner party, and Caroline loved eating "troll" mushrooms the next day.  
Other ideas:  make a salad with leftover rice, quinoa, couscous, or pasta.  Many pastas can be eaten chilled or at room temperature.  One of our favorites is to make a quick pasta salad. I just save a bit of the pasta when I cook it at dinner, then toss with with a little salad dressing, some cheese, maybe some meat, and whatever veggies I have on hand.  Super easy, healthy, and quick.


Go Seasonal

School Lunches - Go Seasonal

This is kind of an overarching theme for all of my cooking and meals, but when you're lacking inspiration, it's a good place to start.  What's in season?  Look to the farmer's market, a CSA, or just see what's on sale at your grocery store.  Fill up your lunchbox with fresh, seasonal produce, and you'll have a happy, healthy kid.
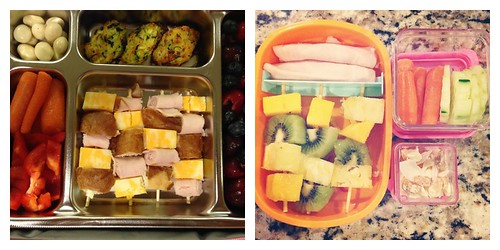
  • Avocado, Mozzarella, and Tomato Stacks.  I just layered everything, seasoned with some salt and pepper, and drizzled with a bit of olive oil.  Also featured:  fresh berries, bell peppers, pita chips, and chocolate-covered sunflower seeds.
  • Cantaloupe wrapped with ham (a play on proscuitto-wrapped cantaloupe), cucumber spears, strawberries, and crackers
  • butterbean hummus (any hummus or bean dip would work well here) with lots of goodies for dipping:  pita, turkey rolls, carrots, bell peppers, and some dried apricots for dessert
  • Turkey and bell pepper roll-ups, broccoli, cherry tomatoes, cantaloupe, apple chips, and sunflower seeds.
More ideas:  caprese skewers. grilled veggies… really just anything in season, supplemented with protein and healthy fats!


Skewer it!
School Lunches - Skewer It
It's a proven fact that food is more fun when eaten off a stick.  So when in doubt, just skewer it!  I use regular bamboo skewers from the grocery store, then snip off the sharp points and cut the sticks down to size using my kitchen shears.   Easy peasy.
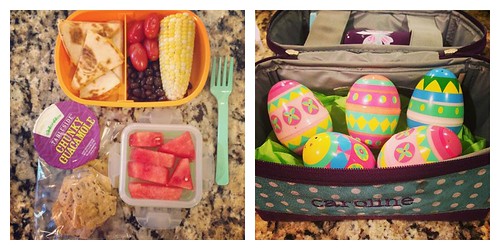
  • ham, turkey, and cheddar skewers, zucchini tots, peppers, carrorts, and yogurt-covered raisins
  • tropical fruit skewers (mango, pinapple, kiwi), turkey rolls, carrots, cucumbers, and a homemade trail mix with coconut cashews and roasted coconut chips
Other ideas:  caprese skewers, chicken satay, grilled veggie skewers, and really anything you'd normally eat on a sandwich or in a salad.  Just layer it on a skewer.


Be Festive and Celebrate Holidays!

School Lunches - Holidays

Like most kids, Caroline absolutely loves any and all holidays.  So I use that as inspiration for her lunches.  Pack festive foods, use cookie cutters to cut sandwiches, cheese, and fruit into fun shapes, or like I did above, you can even use Easter eggs for the lunch itself!  
  • Cinco de Mayo:  cheese quesadilla, black beans, tomatoes, watermelon, guacamole, and chips.  
  • Easter:  Easter eggs filled with fruit, crackers, cheese cubes, etc.
Other ideas:  Turkey and cranberry sandwich for Thanksgiving, snack-o-lantern fruit cups for Halloween, spinach wraps on St. Patrick's Day, an all-red and pink lunch for Valentine's Day, etc.


More Ideas:

Breakfast for lunch:  french toast skewers, yogurt + fruit and granola, or a biscuit + sausage and fruit
Deconstructed Pizza:  pepperoni, crackers, cheese, and bell pepper strips, with a small cup of marinara for dipping.  Caroline really loves this lunch
Antipasta:  salami or proscuitto, red bell peppers, marinated tomatoes, mozzarella, crackers, and grapes
Bento Box:  vegetrain sushi (like a California roll), edamame, sliced cucumbers, rice crackers, and fruit
Homemade Lunchables:  crackers, cheese slices, turkey or ham slices, and fruit

Feel free to share your own ideas in the comments, and I'll update this section!

So as you may have noticed in the pictures above, some of the lunches are packed in a stainless steel bento-style lunchbox.  In the past, I've packed Caroline's lunch in reusable containers with a few ziploc bags mixed in.  But washing all those containers became quite cumbersome.  We always manage to lose the lid or the cup, so I acquired quite a collection of mismatched containers. I'd been eyeing the bento style lunchbox from Pottery Barn Kids for over a year, and finally pulled the trigger last month.  And while it is pricey, I feel like it's already paid for itself.  

To be honest, I find it much easier to pack lunches using this.  I just fill the compartments!  No need to stress about having the right size container, or losing parts, etc.  Just simply fill it up.  And in Caroline's words, "it's so fun to open my lunchbox and see my whole lunch, right there!" Planet Box also has a similar lunch box, but I had points to use at Pottery Barn Kids, so the decision was an easy one.  Bonus points:  the PB Kids lunch box is now on sale!

Ahem.  And if you're considering buying one, then maybe wait a few days?  And maybe check back here tomorrow?  It will be worth your while, I promise.

And finally, when all else fails, look around the web for inspiration.  These are some of my favorite resources for getting new ideas:
Annie's Eat's instagram feed (#anniesschoolunches)

I hope this was helpful for some of you, and I hope you enjoyed getting a peak into Caroline's school lunches. What's your favorite thing to pack for your kids?


 
BLOG DESIGN BY: SHERBET BLOSSOM DESIGNS