Showing posts with label side dish. Show all posts

Monday, August 3, 2015

Summer Tomato and Black Eyed Pea Salad

Summer Tomato and Black Eyed Pea Salad 

I'd like to introduce you to one of my favorite dishes of all time.  This salad is pretty much on repeat for me all summer long.  Fresh black eyed peas are one of my favorite summer treats, and they really shine in this salad.  The creamy peas, fresh tomatoes, sweet corn, and tangy vinaigrette all come together in perfect summer vegetable harmony.  I make a big batch of it to go with dinner one night, then eat it in various ways throughout the week - as is, over greens for lunch, over chicken or fish, rolled up into a wrap with turkey and cheese, and my personal favorite, as a salsa with tortilla chips for a snack.  Most recently I used this salad in an absolutely killer dish, and I'll be sharing the details of that later this week!

This salad is not only versatile, but the flavor combinations are endless as well.   As written here, it is very simply and neutrally seasoned, but I sometimes like to use lime juice, cilantro, and add some jalapeños to the mix as well.  I've also been known to mix in a little crumbled bacon.  A huge variety of veggies work well here too -- green beans, okra, shredded zucchini, bell peppers… really anything you find at the farmer's market this time of year will work beautifully.  What grows together, goes together!

Summer Tomato and Black Eyed Pea Salad
barely adapted from Bon Appétit,Y'all, by Virginia Willis

  • 3 ears of corn, shucked
  • 2 cups fresh or frozen black eyed peas (or lady peas, or any other field pea)
  • 2 large tomatoes, cored, seeded and chopped
  • 1/2 sweet onion, preferably Vidalia, finely diced
  • 1 stalk of celery, finely diced
  • 1 clove garlic, minced
  • 1/2 cup basil, chopped
  • 3 Tbs fresh parsley, chopped
  • 2 Tbs apple cider vinegar
  • pinch of sugar
  • 1 tsp Dijon mustard
  • 1/4 cup canola oil
  • kosher salt and freshly ground black pepper
Bring a large pot of salted water to a boil.  Add the corn and cook until tender, 2 to 3 minutes.  Use tongs to remove from the pot, and drain them on a paper towel-lined plate.

Return the water to a boil and add the black eyed peas.  Simmer until they are tender but not mushy, 15 to 20 minutes (cooking time will depend on their freshness, so start checking by tasting around 12 to 15 minutes).

Meanwhile, use a sharp knife to cut the corn kernels off the cob.  Place them in a large bowl, and add the tomatoes, onion, celery, garlic, and basil.  

Once the peas are cooked, drain them in a colander and rinse well with cold water.  Drain them very well, shaking to remove as much water as possible, then add them to the bowl with the other vegetables as well.

To make the dressing, whisk together the oil, mustard, and sugar in a small bowl.  Whisking constantly, slowly stream in the oil.  Season with salt and pepper.

Gently stir the dressing into the salad, taste, and season with additional salt and pepper as needed. 


Wednesday, November 19, 2014

Apple-Sage Stuffing Cups

Apple-Sage Stuffing Cups

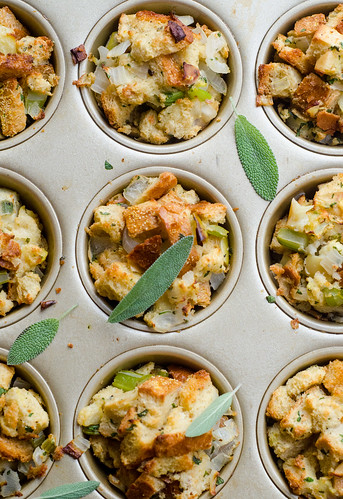
T-minus one week until Thanksgiving.  Are you hosting?  Are you ready?  Yesterday I talked about non-negotiables on the Thanksgiving table, and stuffing/dressing certainly qualifies as such.  People are very opinionated on their stuffing, and for good reason.  I am not necessarily a purist when it comes to dressing, but this classic southern style dressing tops my favorites list.  Last year I shared this biscuit, bacon, and oyster dressing.  It's a little off the wall, but amazingly delicious.  And this year I'm dialing it up with a kind-friendly, portable recipe:  apple-sage stuffing cups!

I realize that these are a bit on the precious and cute side, which is not really what I think of when I plan a Thanksgiving meal.  But they make up for the cutsey-ness with the flavor.  I absolutely love apples in my stuffing - both from a flavor and textural standpoint.  They are a nice texture in contrast to the soft bread, and a lovely burst of sweetness as well.  As such, the sage tempers the sweetness nicely, and when cooked in muffin tins, you get all the coveted crispy edges to yourself.  No fighting over with your brother!

As I made these, it occurred to me that these would be a great offering for a kids' classroom Thanksgiving feast.  They are already perfectly portioned, and kids always love things shaped like muffins - I know mine do anyway.  If you're still planning your Thanksgiving menu, or if you're attending a casual Friendsgiving this weekend, these apple-sage stuffing cups are a great option - easy, portable, and obviously delicious!

Apple-Sage Stuffing Cups

Apple-Sage Stuffing Cups
adapted from Cooking Light, November 2014
makes 12 muffins

  • 12 oz of a baguette or rustic white bread, cut into 1-inch cubes
  • 3 Tbs butter
  • 1 1/2 cups peeled and diced apple
  • 1 1/2 cups diced onion
  • 2/3 cup diced celery
  • 1 1/2 Tbs minced fresh sage
  • 1/2 tsp freshly ground black pepper
  • 1/2 tsp kosher salt
  • 1/4 cup minced fresh flat-leaf parsley
  • 1 3/4 cups reduced-sodium chicken broth
  • 2 large eggs, lightly beaten
Preheat the oven to 375 degrees.  Spray a muffin tin with cooking spray and set aside.

Arrange the bread cubes in a single layer on a baking sheet.  Bake 15 minutes, or until the bread is toasted, stirring halfway through.  Transfer the bread to a large bowl and set aside.

Melt the butter in a large skillet over medium heat.  Add the apple, onion, celery, sage, pepper, and salt.  Sauté 5 minutes, or until tender.   Add the apple-onion mixture to the bowl with the bread, and toss to combine.

combine the chicken broth, eggs, and parsley in a small bowl and whisk to combine.  Pour over the bread mixture and use a wooden spoon to gently combine.

Divide the bread mixture evenly among the 12 muffin cups, using a heaping 1/2-cup for each.  Bake 20-25 minutes, or until the tops are browned and crispy.  Use a spatula to gently pop out each muffin, and serve.


Tuesday, November 18, 2014

Bourbon Sweet Potato and Apple Casserole with a Pecan Crust

Bourbon Sweet Potato and Apple Casserole with a Pecan Crust
On my Thanksgiving table there are non-negotiables.  Turkey, duh.  Gravy, cranberry sauce, a legit green vegetable, mashed potatoes, and sweet potatoes.  I will forever and ever have a soft spot for sweet potatoes topped with marshmallows.

And while I'll never turn down those ubiquitous marshmallow sweet potatoes, I can't help but cringe a bit as well.  I mean, have you ever made a classic sweet potato casserole?  Do you know how much sugar is in there?  Cups.  CUPS of sugar, in a "vegetable" side dish.  No wonder they're so good!  You might as well just move that pyrex to the dessert table.

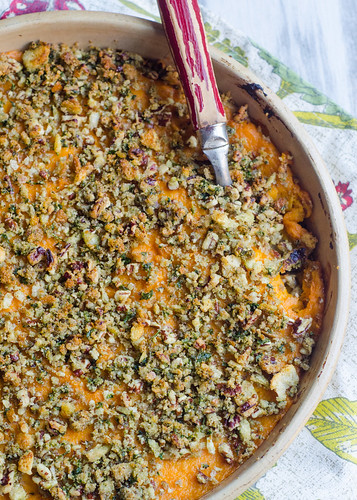
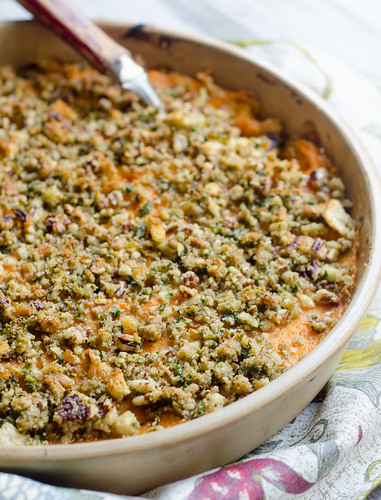
So for the past few years I've been making sweet potatoes that highlight the actual sweet potatoes, and qualify as a reasonable side dish, not a dessert disguised as a vegetable.  And this year, I finally found the ultimate sweet potato dish.  Mashed sweet potatoes.  Apples.  Bourbon.  And an herbed pecan crust.  Yeah, this is good stuff.

In lieu of actual spices to this dish, whole spices are simmered with cream and then strained out, leaving behind a whisper of scent and subtle flavors.  The bourbon lends a gentle smoky, sweet flavor.  And the apples contrast to the sweet potatoes both in texture and sweetness.  The tartness of the granny smiths works really well with the lightly spiced sweet potatoes.  The crispy bread crumb and pecan topping gives the dish much-needed texture and crunch, rounding out the whole thing perfectly.  This recipe highlights the actual sweet potatoes, rather than disguising them in mounds of sugar and marshmallows.  I think it's safe to say that I've finally found the perfect sweet potato dish.  No question.

Bourbon Sweet Potato and Apple Casserole with a Pecan Crust 

Bourbon Sweet Potato and Apple Casserole with a Pecan Crust
barely adapted from Fine Cooking, Holiday Dishes 2014
serves 8

  • 3 lbs sweet potatoes (about 3 large)
  • 4 Tbs unsalted butter
  • kosher salt and freshly ground black pepper
  • 4 oz toasted pecans
  • 4-5 slices rustic white bread (such as sourdough or country bread), torn into pieces
  • 2 Tbs fresh parsley leaves
  • 1 cup heavy cream
  • 1 inch fresh ginger, sliced as thinly as possible
  • 2 whole star anise
  • 1 cinnamon stick
  • 3 Tbs bourbon
  • 1 1/2 tsp vanilla extract
  • 3 large Granny Smith apples, peeled, cored, and thinly sliced
Preheat the oven to 400 degrees.  Prick the sweet potatoes all over with a fork and arrange on a baking sheet.  Bake for 55 to 60 minutes, or until they are completely tender when pierced with a fork.  Let them rest until they are cool enough to handle.*   Reduce the temperature to 375 degrees.

Discard the skins and put the flesh in a mixing bowl.  Use a fork or potato masher to mash the potatoes (they don't have to be perfectly smooth!).  Set the bowl aside.

To make the crumb topping, combine the pecans, bread, and parsley in a food processor.  Pulse until the nuts and bread are coarsely chopping.  Transfer to a small mixing bowl.  Melt 2 tablespoons of the butter and mix into the bowl, along with a generous pinch of kosher salt.  Set aside.

To infuse the cream, combine the heavy cream, ginger, star anise, and cinnamon stick in small saucepan.  Bring to a boil, watching carefully so it doesn't boil over.  Remove from heat immediately, cover, and let steep for 15 to 20 minutes.  Strain through a fine-mesh strainer into a liquid measuring cup, pressing down on the solids to extract as much liquid as possible.  Stir in 2 tablespoons of the bourbon, the vanilla extract, and 1/4 teaspoon of salt.  

While the cream-spice mixture is steeping, melt the remaining 2 tablespoons of butter in a 12-inch skillet over medium-high heat.  Add the apples, season with 1/4 teaspoon of salt, and toss well.  Increase the heat to high, and cook, stirring frequently, until the apples are softened and lightly browned, 5 to 6 minutes.  

Remove from heat and stir in the remaining tablespoon of bourbon.  Stir until it evaporates, which should only take a few seconds.  Stir in 1/3 cup of the infused cream.  

To assemble the casserole, lightly grease a shallow 3-quart baking dish (such as a 9x13 inch dish).  Stir in the remaining cream to the mashed sweet potatoes, and season generously with salt to taste.  

Arrange the apples across the bottom of the baking dish, then spread the sweet potatoes over the apples in an even layer.**  Sprinkle the pecan-crumb mixture over the sweet potatoes.

Bake at 375 degrees until the crumb topping is dark brown and the casserole is heated through, about 25 minutes.  Serve.

*This is a great thing to do ahead of time.  Bake your sweet potatoes off at least a day in advance, then when you are ready to assemble, you have them ready to go.

**At the point, the casserole and the crumb topping can be stored (seperately) in the refrigerator overnight.  When ready to bake, sprinkle the topping over the sweet potatoes and add a few extra minutes to the cooking time.


Monday, November 17, 2014

Crispy Green Bean Fries with Sriracha Dipping Sauce

Crispy Green Bean Fries with Sriracha Dipping Sauce

When you go to the grocery store, do you painstakingly measure and weigh each ingredient you're buying?  Or do you just kind of estimate and buy what looks about right?  Because if you're the latter, then you may have gotten yourself into trouble before.  Either you are short and don't have enough of what you need, or you grossly overbuy and then have a bunch of some random ingredient to use up.  Not that I know this from experience…

Anyhoo, should you find yourself with extra green beans after Thanksgiving, or if you're looking for a fun and unique side for your turkey leftovers sandwich, I have a recipe for you!

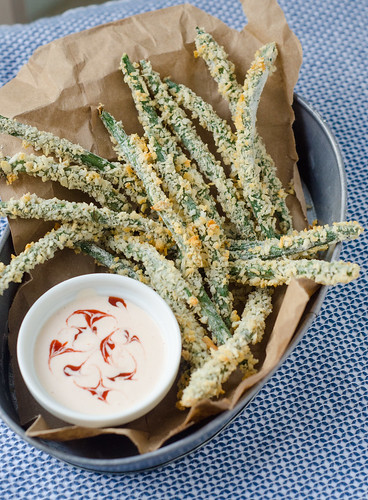
These crispy green bean fries use steamed green beans.  You coat them with some herbs, spices, and panko bread crumbs, and bake them to crispy perfection.  And then.  You serve them with a spicy Sriracha dipping sauce.  The bright freshness of the green beans pairs so nicely with the creamy, spicy sauce.  To be totally honest, I was a little skeptical of this recipe.  I mean, green bean french fries?  Really?  Just drop the act and give me real fries, please and thank you.  But Joey and I were both pleasantly surprised by these!  And that sauce.  It's really really great.  If you make these green beans to serve with a a turkey leftovers sandwich (and you should), then I highly recommend that you slather this sauce on your sandwich as well.  It's Thanksgiving leftovers perfection.

Crispy Green Bean Fries with Sriracha Dipping Sauce
adapted from Cooking Light, November 2014


  • 1/4 cup reduced fat mayonnaise or Greek yogurt
  • 2 Tbs buttermilk
  • 2 tsp Sriracha
  • 1 Tbs fresh lime juice
  • 2 1/2 cups panko bread crumbs
  • 1/3 cup all-purpose flour
  • 1 tsp garlic powder
  • 1/2 tsp cayenne
  • 1/4 tsp kosher salt, plus more as needed
  • 1/2 tsp dried oregano
  • 1 lb steamed green beans
  • 3 egg whites, lightly beaten
Preheat the oven to 375 degrees


Combine the mayonnaise, buttermilk, Sriracha, and lime juice in a small bowl.  Season lightly with salt and pepper, cover, and chill until ready to serve.

Spread the panko in an even layer on a baking sheet, and bake for 4 minutes, until light golden-brown.  Transfer to a shallow dish (like a pie plate) to cool.

In a gallon-sized ziploc bag, combine the flour, garlic powder, cayenne, salt, and oregano.  Add the green beans, close the bag, and shake to coat the green beans with the flour mixture.  

Add the egg whites to a shallow dish as well.

Working a few beans at a time, shake off the excess flour, dip in the egg whites, then roll in the panko.

Arrange in a single layer on a  rimmed baking sheet and sprinkle with salt.

Bake for 8 to 10 minutes, until they are crispy and golden-brown.  Serve immediately with the dipping sauce.


Thursday, October 16, 2014

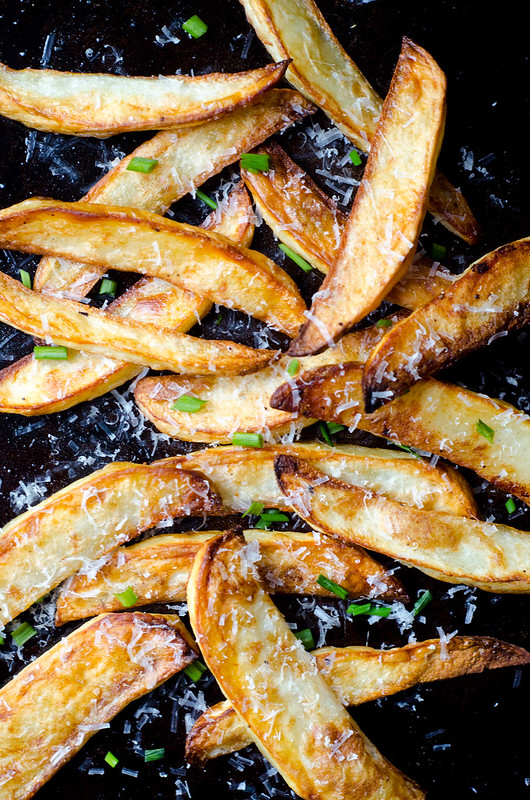
Parmesan-Truffle Oven Fries

Parmesan-Truffle Oven Fries

When it comes to eating French fries, I am admittedly kind of a snob.  I like them to be hand-cut, nice and crispy, and really salty… almost bordering on too salty.  When I come across fries that meet my trifecta, I am pretty much powerless against them.  Can't.  Stop. I don't order fries that often in restaurants, but I always make sure to test a few of Joey's.  Much to his annoyance.  Joey doesn't share food! (can't ever help myself from making a Friend's reference).

And this might put me in the "weirdo" category, but I don't like ketchup on my perfectly cooked and salty fries.  The ketchup dilutes the perfection of the fries and is totally unnecessary.  Sorry ketchup-fiends.  And don't even try putting a cup of mayo down for dipping.  Gag.

However, I will partake in fries that are alternatively seasoned.  Such as say… a parmesan-truffle fry, perhaps?  Yes and yes.

Parmesan-truffle fries have been popping up on the menus of trendy pubs and restaurants for the past several years, and I'm pretty much always going to order them if they're available.  I throw out my "fry trifecta" rule for these fries because…. parmesan.  and truffles.  They are decadent, earthy, salty, and cheesy.  Love at first bite.  Or whiff.  Because is there a smell that's more enticing than that of truffles?

So naturally I set out to make parmesan-truffle fries at home.  I prefer to make oven fries when I'm cooking at home, and to be able to make them slightly healthier was definitely a bonus.

The fries are cooked in a mixture of vegetable oil and truffle oil; so the truffles aren't overwhelming, just a nice background flavor.  A healthy sprinkle of parmesan cheese after cooking finishes them off, and there you have it.  Gourmet fries at home.

I made these alongside what is probably the most amazing Philly Cheesesteak sandwich ever (it had short ribs, omg.  Will be sharing soon).  And Joey asked me to marry him all over again.  Good thing too.  Because I need to keep stealing his French fries.

Parmesan-Truffle Oven Fries
adapted from Cook's Illustrated's Oven Fries

This method is how I always cook oven fries.  So whether you want the Parm-truffle variety (which you should) or you're going basic, this preparation is by far the best one I've ever come across.

  • 3 russet potoates (about 8-12 oz each)
  • 3 Tbs truffle oil*
  • 2 Tbs vegetable oil
  • kosher salt and freshly ground black pepper
  • freshly grated parmesan cheese, for serving
  • freshly snipped chives, for serving
Preheat the oven to 475 degrees and adjust the oven rack to the lowest position.

Peel the potatoes, halve them lengthwise, then cut each half into 4-6 even wedges.

Place the potato wedges in a large bowl filled with hot tap water.  Soak for 10 minutes, then drain and dry on a lint-free kitchen towel (or a double layer of paper towels).  Pat thoroughly with another towel to dry completely.  Toss with 1 tablespoon of the truffle oil.

Meanwhile, coat a large rimmed baking sheet with 2 tablespoons of truffle oil and 2 tablespoons of vegetable oil, using a pastry brush to cover the entire pan with the oil.  Sprinkle evenly with 3/4 teaspoon of salt and 1/4 teaspoon of pepper.

Arrange the potato wedges in a single layer on the baking sheet.  Sprinkle lightly with salt.  Cover tightly with foil and bake 5 minutes.

Remove the foil and continue to bake until the bottoms of the poatoes are spotty golden brown, an additional 15 to 20 minutes.

Using a spatula and a pair of tongs, flip the potatoes, keeping them in a single layer.  Return to the oven and bake until the fries are golden-brown and crisp, 5 to 15 minutes longer, rotating the pan as needed if the fries are browning unevenly.

Transfer the fries to another sheet of paper towels or a kitchen towel to drain the excess oil.  Sprinkle with more salt to taste and toss to combine.  Before serving, sprinkle generously with freshly grated parmesan cheese and freshly-snipped chives.

*In my experience, the intensity of truffle oils vary by brand, and by age.  So if your bottle of truffle oil isn't very strongly scented, I'd recommend using 4 Tablespoons of truffle oil and 1 Tablespoon of vegetable oil.  If your oil is very fresh and fragrant, stick to 3 tablespoons.


Thursday, September 4, 2014

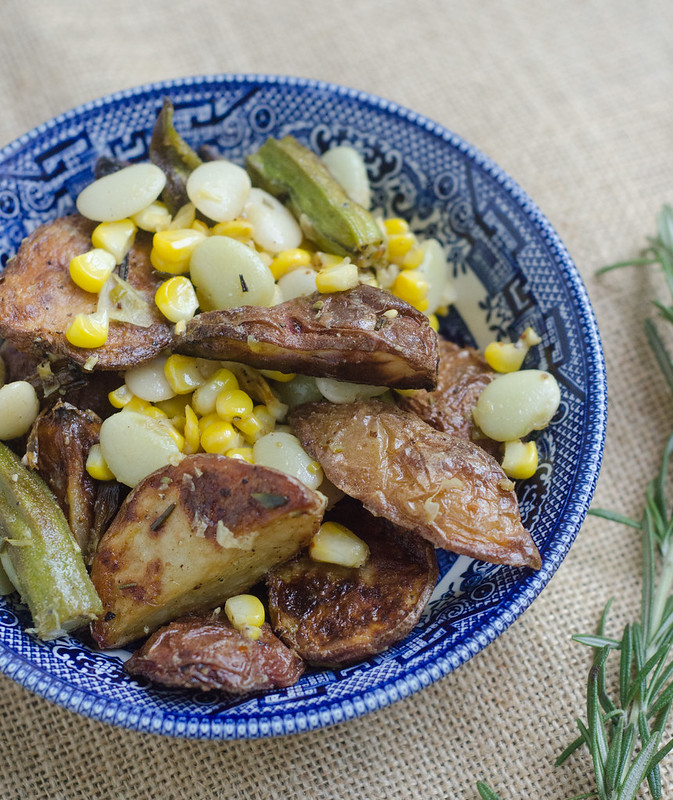
Farmer's Market Roasted Vegetable Salad

Farmer's Market Roasted Vegetable Salad 

Do you go to the farmer's market over the weekend?  We love going on Saturday mornings.  The kids get to eat popsicles and crepes, and I get to peruse the stalls and pick out beautiful produce, fresh flowers, good meats, eggs, cheese… it's pretty much my favorite time of the week.  Oftentimes I have a plan of what to buy, and what I'm going to make with it.  But I'm also a pretty bad impulse shopper, and sometimes I just can't help myself.  Exhibit A:  Lima beans.  Or butter beans, if you're from the south.

Look, I know they have a bad reputation and some would put them in the "gross vegetable" category, but hear me out.  When they're fresh, and when they're cooked and seasoned properly, they are one of my favorite veggies.  They're creamy and buttery, and absolutely delicious.

So back to the farmer's market and impulse purchases.  Between our weekly produce delivery, and our trips to the farmer's market, there's been no shortage of amazing food in our fridge this summer.  I took that gorgeous produce and made a wonderful salad with it.  Here's what's going on in there:  roasted potatoes, okra, corn, lima beans, and onions, dressed with a lemon-rosemary vinaigrette.  It's delicious hot and right out of the oven, it's great at room temperature, and it's wonderful served chilled over a bed of greens.  What I'm saying here, is that it's just a really great dish!

I served this with my Peach Chutney and Goat Cheese Burgers, and it was a wonderful meal.  And then I enjoyed the salad leftovers for lunch the next few days.

This is pretty infinitely adaptable as well:  add some squash or zucchini, maybe sprinkle some goat cheese or feta over the top, add some fresh tomatoes at the end, mix up the veggies… the sky's the limit here.

Farmer's Market Roasted Vegetable Salad
adapted from Food and Wine (via Elly Says Opa)

  • 2 lbs small potatoes, such as red-skinned, yukon gold, or fingerling
  • 2 large fresh rosemary sprigs, plus 1/2 tsp minced fresh rosemary
  • 1/4 cup olive oil
  • kosher salt
  • freshly cracked black pepper
  • 3/4 lb okra, tops and tips trimmed off
  • 2 ears corn
  • 2 cups fresh (rehydrated) lima beans, rinsed and picked through
  • juice of 1/2 lemon
  • 1 tsp Dijon mustard
  • 1 shallot, finely minced
Preheat the oven to 450 degrees Fahrenheit.  

Halve the potatoes lengthwise and toss with 2 tablespoons of oil, rosemary, 3/4 tsp salt, and 1/2 tsp pepper.  Arrange in a single layer on a rimmed baking sheet, and cook for 20 minutes, stirring once halfway through.  Add the okra to the pan, and stir to combine.  Arrange the corn on the edge of the pan, and cook an additional 20 to 30 minutes, or until the potatoes are well-browned and tender, and the okra is cooked through.  When cool enough to handle, cut the corn off the cobs.

Meanwhile, bring a medium saucepan of water to a boil.  Add 1 teaspoon of salt and the lima beans, and cook until the lima beans are fork-tender and soft, 15 to 20 minutes.  Drain and set aside.

In a large bowl, whisk together the remaining 2 tablespoons of olive oil, lemon juice, dijon, 1/2 tsp salt, 1/2 tsp pepper, remaining rosemary, and shallot.  Add the roasted vegetables and lima beans, and toss well to coat with the dressing.  Serve immediately, at room temperature, or chilled.


Thursday, March 27, 2014

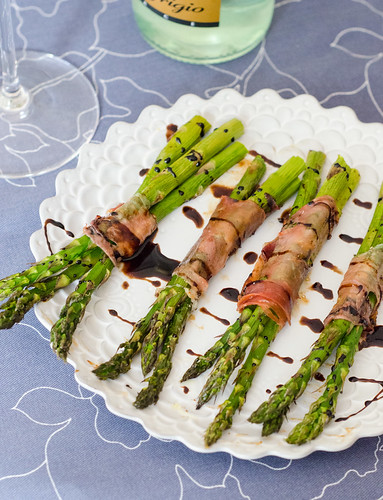
Prosciutto-Wrapped Asparagus Bundles


This is one of those embarrassingly easy recipes that I make dozens of times a year.  As soon as spring rolls around and asparagus comes into season, this becomes my go-to appetizer and pot luck contribution.  It's great straight out of the oven, at room temperature, and even chilled; so you really can't go wrong.

I love to drizzle these with a balsamic glaze, but it's certainly not necessary.  Just an extra little touch that makes them even more special.

Same deal with the Dijon mustard.  I brush each piece of prosciutto lightly with the mustard, and I think it imparts a nice little bit of spiciness, and it helps cut the rich saltiness of the prosciutto.  So while you could just simply wrap some asparagus with prosciutto and call it a day, the mustard and prosciutto are what elevate this dish to truly wonderful.

I hope everyone has a wonderful weekend - perhaps one that involves these little babies and a few glasses of wine?


Prosciutto-Wrapped Asparagus Bundles

  • 1 lb asparagus, woody ends trimmed
  • 4 oz thinly sliced prosciutto, halved horizontally
  • 1-2 Tbs Dijon mustard
  • extra virgin olive oil
  • kosher salt and freshly ground black pepper
  • balsamic glaze, for serving*
Preheat the oven to 400 degrees and lightly grease a rimmed baking sheet.

Brush each slice of prosciutto lightly with the Dijon mustard, and wrap tightly around 3-4 spears of asparagus.  Lay each bundle seam side-down on the baking sheet.

Drizzle lightly with oil, then sprinkle the asparagus VERY lightly with salt.  Season with freshly ground black pepper.

Bake 10-15 minutes, or until the asparagus is tender and cooked-through, and the asparagus is slightly browned and crispy.

Before serving, drizzle with balsamic glaze.

*To make a balsamic glaze, heat 1 cup of balsamic vinegar in a small saucepan over medium-high heat.  Bring to a boil and cook until it is thickened and reduced by half, 15-20 minutes.  Remove from heat and cool.


Monday, March 3, 2014

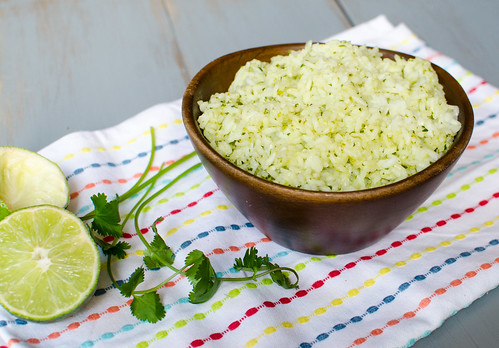
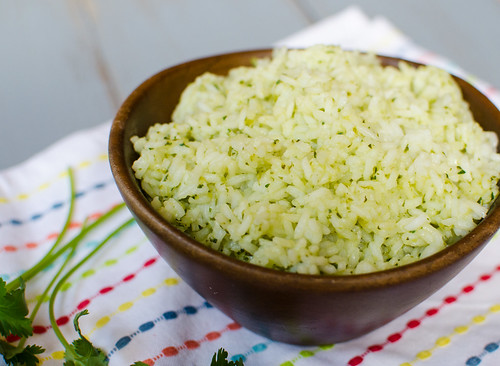
Cilantro-Lime Rice


If I see cilantro-lime in a recipe title, chances are I'm immediately saving it.  It's easily one of my favorite combos, and come on - it's Mexican food.

I've been making this cilantro-lime rice for a few years now, and it's one of my favorite side dishes.  For some reason, the traditional red Mexican-style rice feels heavy to me, and this just feels so light and fresh.  Oftentimes I even use quinoa instead of the rice, and I use brown rice sometimes too - it just depends on my mood and the rest of the meal.  Any grain will do here!

Also, if you're a fan of Chipotle, this is a pretty close approximation of the rice they serve! I have used this rice as the base for a burrito bowl many times, in fact.  It really is one of my favorite recipes.

On a semi-related note, I've started a Pinterest board for my very favorite recipes in the whole wide world.  These are recipes that I make over and over again, and are family favorites.  Some are from my blog, but many are from other blogs and sites, and I've just never posted them here.  But I want to share them with you, so if you're interested in what makes me happy, be sure to check it out :)


Cilantro-Lime Rice
adapted from Everyday Food (RIP) via Annie's Eats

  • 1 cup long grain white rice*
  • 2 cups water
  • kosher salt
  • 2/3 cup fresh cilantro, lightly packed
  • 1 tsp lime zest
  • juice of 1/2 lime
  • 1 Tbs canola oil
  • 1/2 jalapeño, seeds and ribs removed, coarsely chopped
  • 1 Tbs water
Combine the rice, water, and 1/2 tsp salt in a medium saucepan and bring to a boil.  Stir, cover, and reduce heat to medium-low.  Cook 15-20 minutes, or until the rice is tender and cooked through.  Remove from heat and set aside.

Meanwhile, in the bowl a food processor or a blender, combine the cilantro, lime zest and juice, canola oil, jalapeño, water, and 1/4 teaspoon of salt.  Puree until smooth.

Stir the cilantro-lime puree into the rice, taste and season with additional salt and pepper if needed, and serve.

*If you use another grain besides rice, be sure to read the package directions for water:grain ratio and cook times.


Monday, November 25, 2013

Biscuit, Bacon, and Oyster Stuffing


I know oyster stuffing can seem.... weird.  But it's a thing.  It's a quite popular thing in certain regions of the US, in fact.  I myself could never bring myself to make it or try it ... the thought of biting into an oyster hiding in my dressing kind of icked me out.  It's a textural issue for me.  But I had the idea to chop the oysters prior to mixing them into the dressing, so you get all the wonderful, briny flavor, but none of the unappetizing slimy texture.  Win and win!

I've previously sung the praises of this southern-style cornbread dressing, and really had zero interest in trying another dressing recipe... ever.  But when this biscuit and bacon dressing was recommended to me, I couldn't resist.  I mean, a stuffing recipe made totally out of biscuits?  With bacon?  Sold.

The oysters were a great addition - the briny flavor was a great counterpart to the salty bacon and rich biscuits.  This dressing is absolutely amazing, and I beg you not to be scared off by the addition of the oysters.  In fact, when I made this, I made no mention of the oysters, and Joey immediately proclaimed it to be the best stuffing he's ever had.  Oysters in your dressing.  Do it.


Biscuit, Bacon, and Oyster Dressing
adapted from Williams-Sonoma and Cook Like a Champion

  • 12 cream biscuits (1.5  times this recipe)
  • 1 lb bacon, diced
  • 1 large onion, minced
  • 5 celery stalks, diced; and their leaves minced
  • 1/4 cup minced fresh parsley
  • 2 Tbs minced fresh sage
  • 2 Tbs minced fresh thyme
  • 10-12 fresh oysters, shucked*
  • 3 1/2 cups chicken broth
  • kosher salt and freshly ground black pepper
  • 2 Tbs unsalted butter, cut into 1/2-inch pieces
Preheat the oven to 350 degrees.  Crumble the biscuits into 1-inch pieces, and spread evenly on a baking sheet.  Toast 20-25 minutes, or until the biscuits are lightly browned.  Remove from oven, set aside to cool, and increase the temperature to 375 degrees.

Meanwhile, in a large skillet, cook the bacon until browned and crispy, stirring often.  Use a slotted spoon to remove the bacon to a paper towel-lined plate.  Pour all but 3 tablespoons of the fat.

Add the onions to the skillet and cook until they begin to soften, 5 to 6 minutes.  Add the celery, celery leaves, parsley, sage, and thyme, and cook, stirring often, until the vegetables are softened and beginning to brown, another 5 to 7 minutes.  

Meanwhile, add the oysters to the food processor and pulse a few times to finely mince.  Set aside.

In a large mixing bowl, gently stir to combine the biscuit pieces, sautéed vegetables, and oysters.  Pour the chicken broth over the mixture and mix well.  Pour the mixture into a greased 9x13 inch baking dish.  Sprinkle the butter pieces over the top and cover the dish with foil.

Bake 30 minutes, then remove the foil and bake an additional 20-25 minutes, or until the top is golden-brown and crispy.  Allow to cool 10 minutes before serving.  

*If you don't want to shuck your own oysters, oysters can be purchased already shucked, in pint containers.  They are packed in their own liqueur, so just drain the liquid off before chopping.


Thursday, July 18, 2013

Cheesy Potato & Tomato Casserole


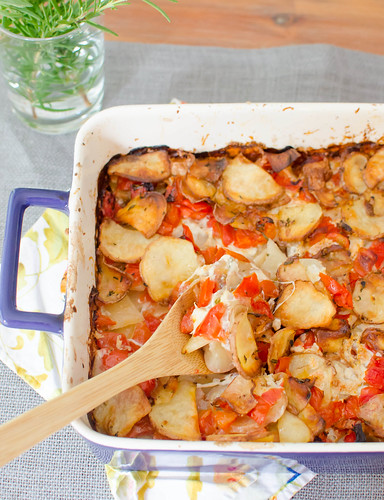
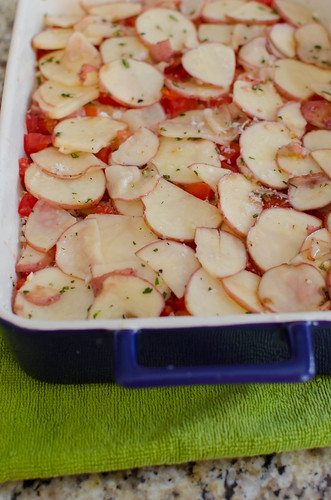
How do you define comfort food?  For me, cheese must be involved.  And a lot of it.  I also need some sort of carb - be it pasta, potatoes, whatever.  Anything else is just a bonus, but those are my main requirements.  So this potato bake is some major comfort food.  It has thinly sliced potatoes, seasoned with garlic, rosemary, and salt, and layered with chopped tomatoes, mozzarella, and parmesan cheese.  After baking, you are left with what I would consider a pretty awesome dish.   There is a blanket of perfectly crispy potatoes covering a bed of soft, creamy, cheesy potato goodness.  The rosemary and tomatoes give the dish a nice burst of freshness.  I couldn't decide if I liked the crispy top layer or the creamy interior.  Because if there is anything better than a crispy, salty potato, it would be a soft, creamy, cheesy potato.  

This is one of those dishes that I kept sneaking bite after bite as I cleaned the kitchen that night.  I had originally planned to save enough to serve with breakfast - how fabulous would this be topped with a poached egg?!  But alas, Joey and I couldn't keep our forks out of this, and um, we finished the whole thing.  Sorry not sorry.


Cheesy Potato & Tomato Casserole
serves 4-6 as a side.  Or 2-3 as a main dish, apparently.
  • 1/4 cup olive oil
  • 1 Tbs minced fresh rosemary leaves
  • 2 large cloves of garlic, minced
  • 1 tsp kosher salt
  • 1/2 tsp freshly ground black pepper
  • 2 lbs potatoes, scrubbed 
  • 6 oz mozzarella cheese, shredded
  • 1 oz parmesan cheese, shredded
  • 1 1/4 lbs plum tomatoes, cored, seeded, and chopped (about 5-6 medium)
Preheat the oven to 400 degrees Fahrenheit.  Brush 1 tablespoon of the oil over the bottom and sides of a 9x13 inch baking dish.  Set aside.

Combine the remaining 3 tablespoons of the oil with the rosemary, garlic, salt, and pepper.

Slice the potatoes as thinly as you can - preferably 1/8-inch.  Using a food processor with the slicing blade attachment works really well, as does a mandolin.  But a sharp knife works just fine.

Place the potatoes in a large bowl and toss with the oil mixture, coating them evenly.  

Line the bottom of the baking dish with one third of the potatoes, slightly overlapping the slices.  Sprinkle with half the mozzarella, half the parmesan, and half the tomatoes.  Repeat the layering of potatoes, cheese, and tomatoes one more time, then finish by topping with the remaining potatoes.  If there is any of the oil mixture pooled at the bottom of the bowl, drizzle it over the top.  Sprinkle very lightly with salt.  (At this point, the casserole can be covered and refrigerated overnight.  Bring to room temperature before baking).

Cover with foil and bake 40 minutes.  Remove the foil and bake an additional 20 minutes, or until the top layer of potatoes is golden-brown.  Allow to cool 5 to 10 minutes before serving.


Monday, March 25, 2013

Spring Vegetable Tortellini Salad


I definitely owe you guys an apology.  When I posted the menu and pictures from Smith's Baptism Lunch last year, I received a ton of requests for the spring veggie tortellini salad recipe.  I kind of just threw it together on the spot at the time, and since I was making a really big batch and didn't write down all the ingredients, I was afraid it wouldn't translate well to the blog.  So I meant to make it again before posting, and I never got around to it before the end of spring.  BUT here we are.  Less than a week before Easter.  In the height of spring..... if "the height of spring" means 35 degrees outside, that is.  But we can still live vicariously through our food.

This salad has some of my favorite things:  asparagus, pasta, cheese, and crispy prosciutto.  It's lightly dressed in a lemony-herb vinaigrette, and served with more herbs.  If you're still planning your Easter menu, I highly recommend this salad as a side dish.  And if you're not planning your Easter menu or don't celebrate the holiday, I highly recommend this anyway.  It makes a great lunch or light dinner.  Enjoy!


Spring Vegetable Tortellini Salad
a Pink Parsley Original

As written, this serves 2-3 people as a side dish, but it can easily be multiplied to serve a crowd.

  • 1 (9-oz) package refrigerated cheese tortellini
  • 1/2 lb asparagus, woody ends removed
  • 1/2 cup frozen peas
  • 2-3 slices prosciutto, chopped
  • 1 tsp lemon zest
  • juice of 1/2 lemon
  • 1 Tbs white balsamic vinegar (or white wine vinegar)
  • kosher salt and freshly ground black pepper
  • 1/4 cup chopped fresh herbs, divided (I used a mixture of chives, parsley, basil, and oregano.  I really love mint in this as well though)
  • just a smudge of honey
  • 3 Tbs extra virgin olive oil
Bring a large pot of salted water to a boil, and cook the tortellini according to the package directions.

Meanwhile, slice the asparagus into 2-inch pieces.  Add it to the tortellini for the last 1-2 minutes of cooking time.

Drain the pasta and asparagus and rinse under cold water to stop the cooking.  Drain again.  Toss with the frozen peas and set aside.

In a small skillet over medium heat, cook the prosciutto, stirring often, until crispy and lightly browned. Drain on a paper towel and set aside.

To make the dressing, combine the lemon zest and juice, vinegar, salt, pepper, 2 tablespoons of the fresh herbs, and the honey.  Whisking constantly, stream in the olive oil, and continue whisking to combine well.  

In a large bowl, toss the tortellini, asparagus, peas, dressing, and remaining 2 tablespoons of the fresh herbs. Allow to sit 15 minutes to let the flavors meld.  Sprinkle with the prosciutto and serve.

*This can be made the night before, but the vegetables may not retain their bright green color.  It will still taste great though!


Thursday, November 15, 2012

Southern-Style Cornbread Dressing


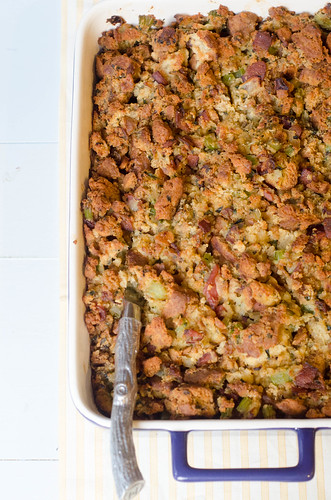
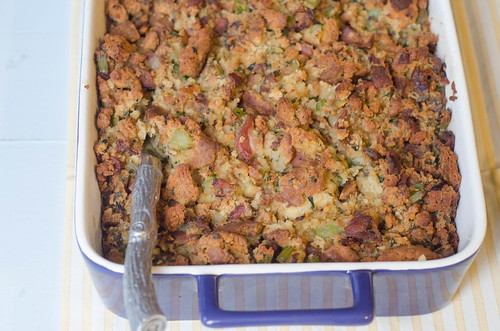
So do you call the ubiquitous Thanksgiving side stuffing or dressing?  If you call it stuffing, and you don't cook it inside your turkey... well, you're wrong.  Dressing is served alongside your turkey - which is how most of us eat it these days, what with the risks and worries about salmonella and all.  Anyway, it seems like most people from the south call it dressing, and northerners call it stuffing - why the discrepancy, I don't know... but whatever you call it, here's my very favorite version.

A few years ago, I hosted my first Thanksgiving dinner.  As usual, I had a hard time keeping with tradition, and I thought my family might revolt against me.  I served pumpkin soup.  And topped my sweet potatoes with sautéed apples.  And served roasted brussels sprouts and butternut squash.  And in what was perhaps my biggest error, I made dressing out of sourdough bread.  With bacon and apples.  I'll admit it - I liked it.  The dressing was really good.  But it wasn't traditional dressing that my family was used to.  Here in the south, we make dressing with cornbread and biscuits.  Making dressing out of sourdough bread, with fruit in it?  It was practically blasphemous.
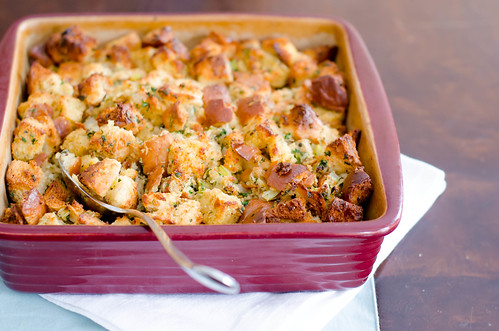
Last year when my mom asked me if I wanted to make the dressing for Thanksgiving, I was admittedly a little scared.  So I decided to try and K.I.S.S. (Office, anyone?) and go with a traditional southern version.  But since I can't resist testing the boundaries a little bit, I chose this recipe.  It's traditional in that it's cornbread, onions, celery, and herbs, but it mixes things up a bit by also using brioche bread in combination with the cornbread.  The result is absolutely heavenly.  The traditional taste is there thanks to the cornbread, but you also have these perfect little pillows of bread from the brioche.  With just enough chicken stock to hold it together - but not so much that it's mushy and soggy.  The celery and onions provide just the right amount of sweetness and texture, the herbs give it tons and tons of flavor, and the butter... well that just makes it perfect.  This dressing really is just about as good as it gets.


Southern-Style Cornbread Dressing
adapted from Sara Foster's Southern Kitchen

  • 1/2 lb (2 sticks) unsalted butter
  • 1 large onion, chopped
  • 6 celery stalks, chopped, with 1/4 cup leaves chopped and reserved
  • 1 loaf of challah, brioche, or other soft eggy bread, cut into 1-inch cubes (about 12 cups)
  • about 8 cups cubed cornbread (preferably day-old cornbread)
  • 2 Tbs minced fresh sage
  • 3 Tbs minced fresh parsley
  • 1 1/2 tsp sea salt
  • 1/2 tsp freshly ground black pepper
  • 2-2 1/2 cups low-sodium chicken broth
  • 4 large eggs, lightly beaten
Preheat the oven to 350 degrees and lightly grease a 9x13 inch baking dish.

Melt the butter in a large skillet over medium heat.  Add the onion and celery and cook, stirring occasionally, until the onion is soft and golden (about 5-6 minutes).

In a large bowl, toss the bread cubes (both brioche and cornbread) with the cooked celery and onion, reserved celery leaves, sage, parsley, salt, and pepper.

Pour the chicken broth and eggs over the mixture and mix well to combine and moisten the bread.  If the mixture seems really dry, add more broth as needed.

Transfer to the prepared baking dish and cook 45 minutes to 1 hour, or until the top is golden brown and the dressing is heated throughout.  If the top begins to brown too quickly, cover with foil and continue to bake.  Serve warm.

Note:  The dressing can be assembled and refrigerated overnight before baking.  Just add a little extra chicken broth.


Friday, August 24, 2012

Crispy Baked Zucchini Fries


My summer produce consumption has been way down this year when compared to previous years.  Blame it partly on us preparing to move, and trying to use up pantry staples... blame it on me sleeping in on Saturdays and skipping the farmer's market... or most likely, blame it on the debilitating morning sickness of the first trimester, when just the thought of vegetables made me gag.  I'm not totally out of the woods yet, but it's definitely gotten sooo much better.  So I've been trying to make up for lost time by eating as much produce as I possibly can until the end of summer.

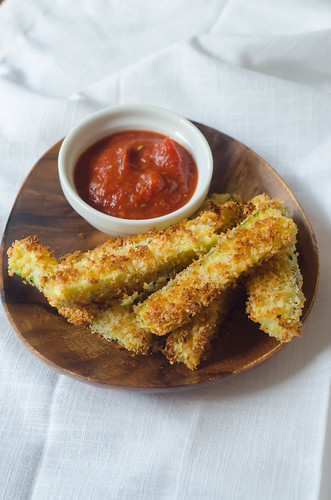
These zucchini fries were a perfect "gateway" veggie.  Yes, it's fresh zucchini - but it's coated in garlicky, crunchy, panko, baked up to crispy perfection, and then dipped in marinara.  It's hard to say no to that.  Feel free to use your preferred sauce for dipping - marinara, ranch dressing, bbq sauce, honey mustard... whatever floats your boat.

Some of you are furiously cooking as much zucchini as possible before it takes over your fridge, and some of you are force-feeding yourselves veggies (guilty).  Whatever the inspiration, these will be a hit.


Crispy Baked Zucchini Fries
adapted from Confections of a Foodie Bride

  • 1/4 cup  flour
  • 2 eggs
  • 2 cups Panko breadcrumbs
  • kosher Salt
  • Pepper
  • 1/2 tsp garlic powder
  • 1/4 tsp cayenne pepper
  • 1 lb zucchini, cut into 4-5-inch sticks (1-2 zucchinis, depending on their size)
Preheat the oven to 425 degrees and line a baking sheet with parchment paper, then spray with nonstick cooking spray or brush lightly with oil.

In a gallon-sized ziploc bag, add the flour and a big pinch of salt.  Add the zucchini and toss well to coat.

In a shallow dish or pie plate, whisk the eggs.

In a second shallow dish, combine the panko, garlic powder, cayenne, salt, and pepper.

Working a few zucchini sticks at a time, Remove from the flour, shaking off the excess, then roll in the egg, followed by the panko.  Arrange in a single layer on the baking sheet.

Sprinkle the zucchini lightly with salt and garlic powder, then bake 18-20 minutes, or until browned and crispy.  Serve immediately.

To reheat leftovers, cook in a 375 degree oven 5-7 minutes, or until heated through.


Tuesday, July 31, 2012

Summer Corn Pudding


Before I had Smith, I used to ask parents of multiple children if they secretly have a favorite.  I always kind of thought they were lying and just embarrassed to admit it when they all insisted that they didn't.  But now that I have two kids, I can honestly understand it.  Sure, sometimes I get more frustrated with one over the other, or have an easier time getting one to sleep, but they are both so fun and awesome in their own ways.  

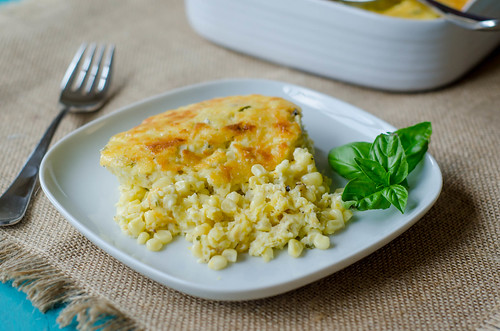
So if someone were to ask me if I could pick my favorite summer produce, I'm pretty sure I'd go back and forth for days between corn ... tomatoes ... peaches ... cherries ... okra ... berries ... too hard to choose!  So how's this:  Favorite summer produce prepared as a savory "pudding" with super sharp cheddar, basil, and ricotta?  Corn would win!

Corn casserole is a popular side dish pretty much year round, but this is so much better than that - it uses fresh corn, and you just can't beat that flavor.  It also doesn't use a can of creamed corn (ick) or prepared cornbread mix.  Everything here is super fresh - and the final dish is really fantastic.  I served this as a side to pan-seard steaks, and it says a lot when I'm more excited about the side dish than I was about the main course.  It also reheats very well, so paired with a salad, this made for some killer lunches the rest of the week.

So maybe I can't pick a favorite child.  And maybe I can't pick a favorite summer vegetable.  But I can pick a favorite side dish featuring corn!

Summer Corn Pudding
adapted from Barefoot Contessa Family Style, by Ina Garten
serves 8
  • 6 Tbs unsalted butter
  • 5 cups fresh corn kernels, cut off the cobs (6 to 8 ears)
  • 1 cup chopped yellow onion
  • 4 eggs
  • 1 1/2 cups milk
  • 1/2 cup half-and-half
  • 1/2 cup yellow cornmeal
  • 1 cup ricotta (part skim is fine)
  • 1/4 cup chopped fresh basil leaves
  • 1 Tbs sugar
  • 2 tsp kosher salt
  • 3/4 tsp black pepper
  • 1 cup (8 oz) grated extra-sharp cheddar cheese
Preheat the oven to 375 degrees.  Lightly grease an 8 to 10-cup baking dish.

Melt the butter in a large skillet over medium-high heat.  Saute the onion until just softened, about 4 minutes.  Add the corn and sauté an additional 4 minutes or so.  Remove from heat and cool slightly.

Meanwhile, whisk together the eggs, milk, and half and half in a large bowl.  Whisk in the cornmeal and then the ricotta, then stir in the basil, sugar, salt, and pepper.  Add the corn and onion mixture and 3/4 cup of the grated cheddar and mix to combine.  Pour into the prepared baking dish and sprinkle the top with the remaining 1/4 cup cheddar.

Bake the pudding 35 to 45 minutes, until a knife inserted into the center comes out clean and the top begins to brown.  Allow to cool about 10 minutes before serving.


Wednesday, July 18, 2012

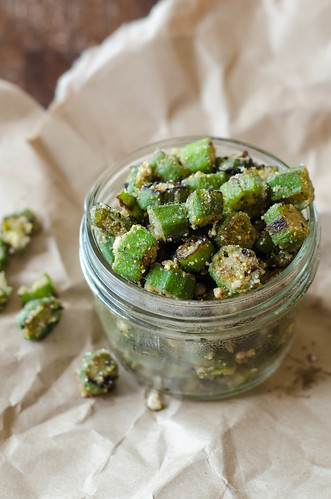
Cornmeal-Crusted Okra


There doesn't seem to be much of a middle ground when it comes to okra - people either love it or hate it.  I happen to love it - fried, grilled, toasted, in soups and stews, mixed into fritters, in a salad, pickled... any way, any time, I love it.  So when it's in season and abundant during the summer, I buy a basket from the farmer's market every weekend.  Usually it ends up being thrown on the grill or dry-roasted.  While fried okra is one of my favorite things ever, it is a bit labor-intensive, not to mention messy and yes, very unhealthy.

This cornmeal-crusted okra is a great alternative to fried okra.  It is somewhat healthier, makes little-to-no mess, is very low-maintenance, and comes together quite quickly.  It's still crispy like fried okra, yet the okra really shines here since it's not battered and deep-fried.  Joey loved it, and suggested that I start making it like this for snacks.  Smith couldn't get enough either!


I did something kind of crazy and unconventional with this okra, so check back tomorrow - it was definitely a successful experiment!  So okra:  love it or hate it?  

Cornmeal-Crusted Okra
barely adapted from Bon Appetit, Y'all, by Virginia Willis

  • 6 Tbs canola or peanut oil 
  • 2 lbs okra, sliced into 1/2-inch pieces, stems and tips discarded
  • kosher salt and freshly ground black pepper
  • 1/2 cup fine yellow cornmeal
In a large skillet (preferably nonstick), heat 3 tablespoons of the oil over medium-high heat.  Add the okra, stir to coat, and cover.  Reduce the heat to medium and cook, stirring frequently, until the okra is bright green, 10-12 minutes.  

Season generously with salt and pepper, then sprinkle the cornmeal over the okra.  Stir to coat, and drizzle the remaining 3 tablespoons of oil over the top.  Continue cooking, stirring frequently, until the okra is tender, browned, and crispy, 5-10 minutes.  Taste and season with more salt and pepper if necessary.  Serve immediately.


Wednesday, July 11, 2012

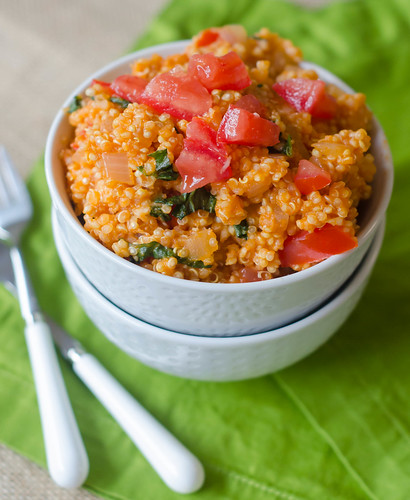
Tomato-Basil Quinoa


In the summer, my weekly meal plan could quite easily be:
Monday:  tomato-basil _________
Tuesday:  tomato-basil _________
Wednesday:  tomato-basil __________

You get the the picture.  It's just such a timeless and perfect combination that I could combine it with pretty much any protein, carb, or veggie and be pretty pleased with the results.  Since I've been all about quinoa lately, it only seemed natural to combine my two current obsessions into one kick-butt dish.

This tomato-basil quinoa was kind of thrown together using what we had in the pantry, and it turned out really well.  I had originally intended for it to be kind of like a salad, but it ended up being more reminiscent of a pasta dish.  It really reminded me of pasta with a simple marinara sauce.   I loved it and kept going back to to the pot for spoonfuls as we cleaned up the kitchen.  Caroline loved it, and Joey loved it too.  I even pureed some for Smith, and it was a hit with him as well!

If you're looking for a fresh and fast summer side dish, this is a great option.  It would be great with pretty much any grilled meat - steak, chicken, Italian sausage, fish, etc.  Or if you're looking to a healthier alternative to spaghetti, this is a great choice.  Customize it by mixing in some grilled veggies for a complete meal, stir in some cubes of mozzarella for a caprese-like dish... the possibilities are pretty much endless!

Tomato-Basil Quinoa
a Pink Parsley Original

  • 2 tsp olive oil
  • 1/2 yellow onion, diced
  • 2 cloves garlic, minced
  • kosher salt and freshly ground black pepper
  • 8 oz. can tomato sauce
  • 1 cup water
  • 1 cup quinoa, rinsed and drained
  • 2/3 cup shredded Parmesan cheese
  • 1-2 tomatoes, cored, seeded, and diced
  • 2 Tbs chopped fresh basil
Heat the olive oil in a medium saucepan over medium heat.  Add the onion and cook, stirring frequently, until softened, about 5 minutes.  Add the garlic and cook, stirring constantly, until fragrant, about one minute.  Season with salt and pepper.

Add the tomato sauce and water to the saucepan and stir in the quinoa.  Bring to a boil, stirring occasionally.  Reduce the heat, cover, and cook until the quinoa is tender but still chewy, and white spiral-like threads appear around each grain, about 15 minutes.

Remove from heat and allow to sit about 5 minutes.  Stir in the Parmesan cheese, tomatoes, and basil, and season with salt and pepper if necessary.  Serve.


Monday, July 2, 2012

Barbecue Pasta Salad


A few weeks ago, we spent a week on St. George Island, Florida with Joey's parents.  We had a wonderful vacation - plenty of time for playing in the waves, reading outside on the porch, walks on the beach, and of course plenty of ice cream was consumed nightly. :)


Whenever we go on vacation with Joey's family, I get to be in charge of the food, and I had a great time planning the week's meals.  This year I only cooked 3 nights, and the other nights we either went out or ate leftovers.  It was a good balance for us - I didn't end up in the kitchen for hours every evening, and we were still able to enjoy some local cuisine, but we still enjoyed home-cooked leisurely meals in our beach house.  What I cooked this year:

Spicy Grilled Shrimp Po' Boys, Cajun-Grilled Corn on the Cob, Watermelon Slices
Pimento Cheeseburgers, BBQ Pasta Salad, Watermelon, Toasted Okra
Grilled Chicken Fajitas, Beans and Rice, Chips, Salsa, and Guacamole
also on the menu but we didn't get around to it - Grouper with Garlic-Shrimp Sauce, Mashed Potatoes, Sautéed Zucchini


The BBQ pasta salad was one of my favorite dishes, and what's even better - I was able to eat the leftovers for lunch throughout the week.  It's a step up from your basic creamy pasta salad.  Barbecue sauce is added, as are some fun spices and flavors - cider vinegar, chili powder, garlic, hot sauce, scallions, and a little honey.  And since I like a lot of "stuff" in my pasta salad, I added chopped onion, fresh corn, grape tomatoes, and shredded cheddar cheese.  If you really want to get crazy you could sprinkle it with crumbled bacon before serving.  It's a fun twist on the traditional, and often boring, pasta salad.  And one that would definitely be well-received at a cookout this week!

BBQ Pasta Salad
adapted from Cook's Illustrated, Summer Grilling 2009
serves 8 to 10

  • 1 lb elbow macaroni, or other pasta shape
  • salt
  • 1/2 cup diced sweet onion
  • 4 scallions, sliced thin
  • 2 Tbs cider vinegar
  • 1 tsp hot sauce, plus more for serving
  • 1 tsp chili powder
  • 1/8 tsp garlic powder
  • pinch cayenne pepper
  • 2 tsp honey
  • 1 cup mayonnaise (light is fine), or any combination of mayo and Greek yogurt to make 1 cup
  • 2/3 cup BBQ Sauce
  • 3 ears of corn, cooked as desired (roasting or grilling is my method of choice), kernels cut off
  • 1 1/2 cups shredded sharp cheddar cheese
  • 2 cups quartered grape tomatoes
Bring a large pot of water to a boil.  Add 1 tablespoon of salt and the pasta and cook until almost tender, about 5-7 minutes.  Drain in a colander and rinse with cold water until cool, then drain briefly, so that the pasta is still moist.  Transfer to a large bowl.

Stir in the onion, scallions, vinegar, hot sauce, chili powder, garlic powered, cayenne, and honey.  Let sit until the flavors are absorbed, about 2 minutes.  Stir in the mayonnaise and barbecue sauce, and sit unitl the salad is no longer watery, about 5 minutes.  Gently stir in the corn, cheese, and tomatoes, season with salt and pepper as needed, and serve.  

Salad can be covered and refrigerated for up to 2 days.  If the salad becomes dry from sitting, stir in a few tablespoons of water or barbecue sauce just before serving.


Tuesday, April 10, 2012

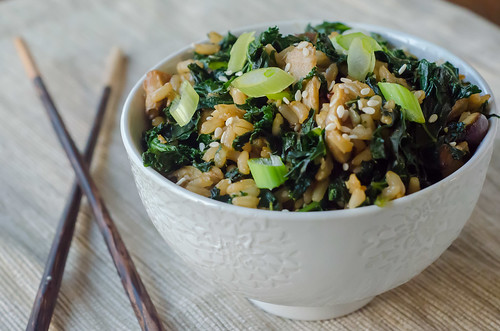
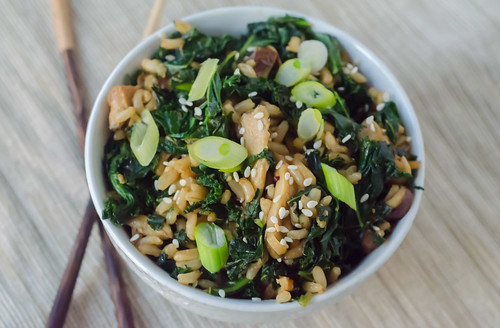
Kale and Shiitake Fried Brown Rice


Lately I've been really trying to make it a point to incorporate more greens into our diet.  I use chard (my favorite green) in my morning smoothies, eat spinach salads for lunch, and then try to have one dinner a week where the greens are a main component.  It's only been mildly successful because Joey isn't a fan of all greens, but I take my wins when I can.  

This fried rice was definitely a win.  Its fast and easy, it's very healthy, and it's tasty to boot.  The kale is sliced into thin little ribbons, then sautéed with the mushrooms.  You add the (already cooked) rice, a few simple seasonings, and you're done!  I think Joey doesn't care for kale on account of the bitterness, but it is masked a bit here by the soy sauce, garlic, and mushrooms.  This could be a light main course all on its own, but I served it alongside the teriyaki salmon

With dishes like this in my repertoire, getting more greens into our diet is becoming an easier task.  Now if I could just get Joey to eat beets, I'd be money.


Kale & Shiitake Fried Brown Rice
  • 3/4 lb kale, thick stems discarded
  • 8 oz. shiitake mushrooms, stems discarded, and caps thinly sliced
  • 2 Tbs sesame oil
  • kosher salt
  • 2 cloves garlic, finely minced
  • pinch of crushed red pepper flakes
  • 3 scallions, thinly sliced on diagonal, plus more for garnish
  • 2 cups cooked brown rice
  • 2 tsp soy sauce
  • sesame seeds, for serving
Roll a few kale leaves into a tight cigar, and thinly slice to form ribbons.  Run your knife through the kale a few times to chop it into smaller pieces.

In a large skillet, heat the oil until shimmering.  Add the kale and mushrooms, and cook, stirring often, until they are softened and tender, about 5 to 8 minutes.  Season with salt.  Add the garlic and red pepper flakes, and stirring constantly, cook until fragrant but not browned, about a minute.  Stir in the scallions and rice, and cook another 2 minutes, stirring often.  Add the soy sauce, cook another 30 seconds, and season to taste with salt, additional soy sauce, and/or red pepper flakes.

Divide among serving dishes and top each serving with more scallions and a sprinkle of sesame seeds.


Sunday, April 1, 2012

Goat Cheese Potato Gratin


Potatoes au gratin are one of those things that I can eat any time, any day.  I mean, seriously.  You smother potato slices in cream and cheese and then bake it.  Nothing bad about that.  I've made countless variations over the years, but the experimenting ends with this version.  I have two words for you:  Goat.  Cheese.  I should just stop right there because really - what else could I possibly say?

How about this is not only the absolute best potato gratin I've ever made, but also the most low-maintenance?  You simply slice the potatoes (a mandolin makes this job very easy and fast), then layer them with a mixture of milk, cream, goat cheese, garlic, and Parmesan.  Bake it, and you're ready to dig in.

The goat cheese was definitely noticeable, but not overly prominent.  I think it just gave the dish another depth of flavor and some extra creaminess.  After dinner, I found myself sneaking bite after bite of the leftovers.  It's definitely one of those dangerously addictive dishes.  I served this with asparagus and herb-grilled pork tenderloin (recipe coming soon!), and finished the meal with a strawberry-rhubarb crisp.  It was a wonderful spring dinner, but Joey pointed out that he would have been equally as happy if I'd just served the potatoes and called it a day.

I always think of potatoes au gratin as being a good dish for Easter, and this version would be especially great.  The goat cheese elevates it to "holiday meal" level, but it's still incredibly easy and low-maintenance.  Assemble it in the morning, then after church just pop it in the oven.  And prepare to swoon.


Goat Cheese Potato Gratin
adapted from Bon Appetit, via Epicurious

  • 2 lbs yukon gold potatoes, peeled
  • 1 cup milk (low fat is fine)
  • 1 cup heavy cream
  • 2 cloves garlic, minced
  • 1 heaping cup crumbled goat cheese
  • 1/2 cup freshly grated Parmesan cheese
  • 1 1/4 tsp kosher salt
  • 1/2 tsp ground black pepper
  • 1/8 tsp nutmeg
  • snipped fresh chives, for serving
Preheat the oven to 400 degrees.  Lightly grease an 11x7 inch baking dish.

Slice the potatoes very thinly.  I used my mandolin, and did half of them on the thinnest setting, and the other half on the next one up.  This gave the dish a little more texture.

In a medium bowl, whisk together the milk, crew, garlic, goat cheese, Parmesan cheese, salt, pepper, and nutmeg.

Layer 1/3 of the potatoes in the bottom of the baking dish. overlapping them slightly.  Pour 1/3 of the cream mixture over the potatoes, then repeat the layers two more times with the remaining potatoes and cream.

Bake, uncovered, for about 1 hour and 15 minutes, or until the top is browned and the potatoes are cooked through.  Allow to stand at least 15 minutes.  Sprinkle with chives and serve.


Tuesday, November 22, 2011

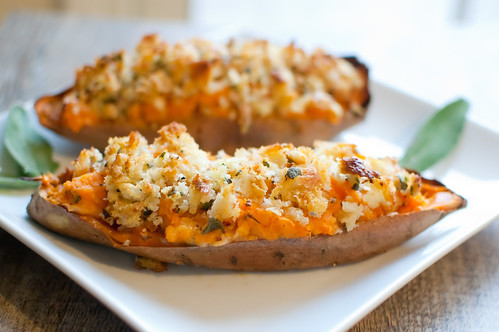
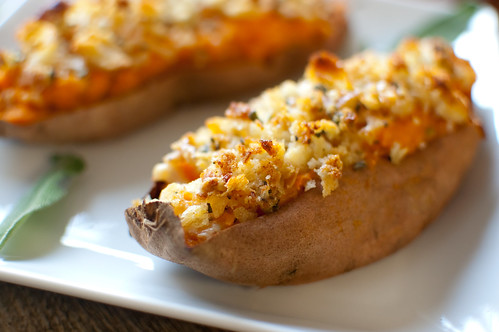
Twice-Baked Sweet Potatoes with Sage, Brown Butter, and Gruyere


As I mentioned in my post for Sweet Potato & Marshmallow Bars, I really love sweet potatoes, but I think that sweet potato dishes often fall into the sweet/dessert sector.  Not these.  These twice-baked sweet potatoes have just a hint of sweetness, but they are most definitely savory.  And that's definitely a good thing - sage, brown butter, and gruyere.  mmmmm.  I know you probably already have your Thanksgiving menu planned out, but if you are still looking for a side dish to replace sweet potato casserole, this would be a great choice.  Especially if you are planning dinner for just a few people - you don't have to make a huge casserole, and everyone gets their own individual portion.

These potatoes were kind of an experiment, but they were so delicious.  I made these for lunch one day thinking that I'd eat one half potato that day, and save the other one for the next day.  Well, I ended up eating both.  Oink oink! 

I loved the combination of the crunchy breadcrumb topping with the creamy potatoes, the savory sage and breadcrumbs mixed with the sweetness of the filling, and the richness from the Gruyere.  Everything is better with Gruyere, right?   

This is a great side dish to pretty much any meat, but it is great on it's own as well.  Served with a side salad, this would make a wonderful light fall or winter dinner.


Twice-Baked Sweet Potatoes with Sage, Brown Butter, and Gruyere
Pink Parsley Original, topping inspired by Martha Stewart
  • 2 sweet potatoes, scrubbed 
  • 4 Tbs unsalted butter
  • 1/2 cup fresh bread crumbs, still somewhat chunky
  • 4 tsp chopped fresh sage, divided
  • kosher salt and freshly ground black pepper
  • 1/4 cup + 2 Tbs grated Gruyere cheese
  • 2 tsp maple syrup
  • 2 Tbs sour cream or Greek yogurt
  • pinch cayenne pepper
Preheat the oven to 400 degrees.  Pierce the sweet potatoes a few times with a fork, and place on a baking sheet.  Cook 45 minutes to 1 hour, or until they are cooked through and tender to the touch.  Remove from the oven and allow to cool until they are cool enough to handle.

Cut each potato in half lengthwise, and carefully scoop out the filling and add to a medium bowl.  You don't want to scoop out all of it, since the skins are pretty thin, but aim to scoop out 90% or so. 

In a small skillet, melt the butter over medium heat, whisking constantly.  When it reaches a deep golden-brown color and has dark brown specks in it, remove from heat immediately.

In a small bowl, combine the breadcrumbs, 2 tablespoons of the butter, 2 teaspoons of the sage, 2 tablespoons of sage, and salt and pepper to taste. 

Using a fork, mash the sweet potato filling until it's smooth.  Add the remaining brown butter, sage, Gruyere, the maple syrup, cayenne, and Greek yogurt.  Mix well to combine.  Divide the filling among the potato skins.  Sprinkle the breadcrumb mixture over the potatoes.

Return to the oven and cook about 15 minutes, or until the filling is heated through and the breadcrumbs are turning light golden-brown.  Serve.


BLOG DESIGN BY: SHERBET BLOSSOM DESIGNS