Showing posts with label pasta. Show all posts

Monday, August 17, 2015

Macaroni and Cheese-Stuffed Zucchini Boats

Mac and Cheese Stuffed Zucchini Boats

Oh boy.  There's a lot to love about these babies.  Creamy, cheesy, mac and cheese baked inside tender, sweet zucchini?  Yeah, sign me right up.

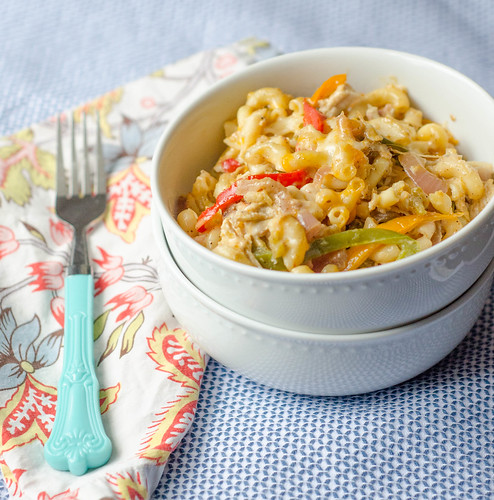
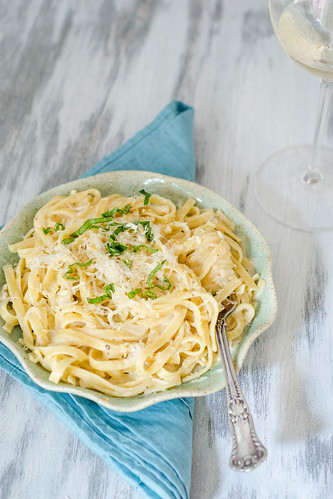
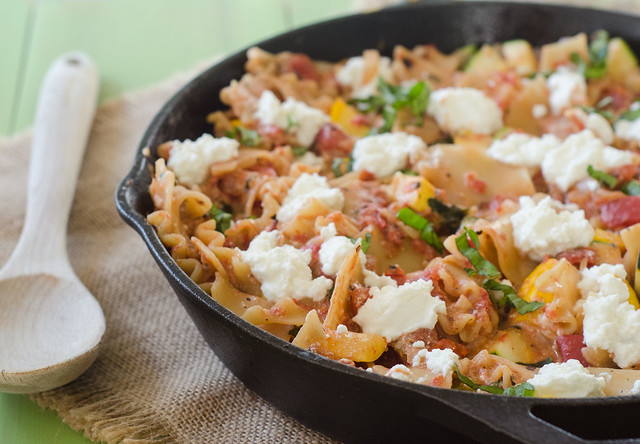
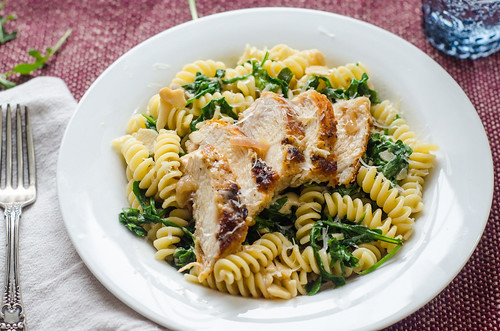
Just because there's half a zucchini in every serving, I'm not fooling myself (or you guys) into thinking this is healthy.  BUT.  It is built in portion control.  And there's a serving of veggies along with your carbs and cheese.  Thus, it's not the most indulgent calorie bomb in the world, but rather a nice treat that you don't have to feel super totally guilty about enjoying.  Really you can use any mac and cheese recipe you'd like; I'm just sharing what I did this time… but feel free to mix it up or add some extras!  Bacon would be great, as would tomatoes, shredded zucchini, chicken, or an infinite number of cheeses as well.

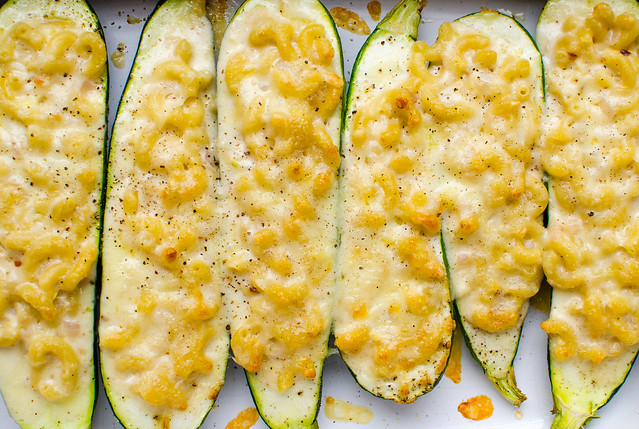
My kids are mac and cheese aficionados… er, addicts.  So I fully expected them to just scoop out the mac and cheese and leave the zucchini, but surprisingly, they ate up the zucchini as well!  I've made countless variations of stuffed zucchini - sausage and cheese, chili, enchiladas, etc.  The mac and cheese was a new one for me, but it's definitely going into my rotation.  Do you have zucchini coming out of your ears these days?  If so, stuff it with some mac and cheese!

Macaroni and Cheese-Stuffed Zucchini Boats
inspired by Melt, by Stephanie Stiavetti & Garrett McCord

  • 3-4 medium zucchini (about 3 lbs)
  • olive oil, for brushing
  • 5 oz elbow macaroni or other small pasta shape
  • 1 Tbs butter
  • 1 shallot, finely minced
  • 1 clove garlic
  • 1/4 tsp dry mustard powder
  • pinch cayenne pepper
  • 1 Tbs flour
  • 1 cup milk or half-and-half
  • kosher salt
  • freshly ground black pepper
  • 4 oz Swiss or Gruyere cheese, shredded
  • 3 oz sharp cheddar cheese, shredded
Preheat the oven to 400 degrees.

Halve each zucchini lengthwise, and use a large spoon of scrape out the seeds and filling, leaving a thin border on all sides.  Brush the inside lightly with olive oil and sprinkle with salt and pepper.  Arrange in a single layer, cut side-down, on a baking sheet or 9x13 inch baking dish.  Cook 5 to 7 minutes, and remove from the oven.

Decrease the oven temperature to 350 degrees.

Meanwhile, bring a large pot of salted water to a boil.  Add the pasta and cook until just al dente, about 8 to 9 minutes (or according to the package instructions).

In a medium saucepan, melt the butter over medium heat.  Add the garlic, shallot, mustard powder, and cayenne pepper and cook, stirring constantly, about 1 minute.  Add the flour and cook, again, stirring constantly, until the flour is golden-brown, 2 to 3 minutes.  Slowly pour in the milk, whisking constantly.  Bring to a simmer, reduce heat, and cook until the mixture is slightly thickened, about 4 minutes.  

Remove from heat and stir in the cheese, one handful at a time, until it's melted and the sauce is smooth.    Reserve about 1/4 cup of the shredded cheese for topping.  Season to taste with salt and pepper.  Stir in the cooked pasta.

Using a large spoon, fill each zucchini boat with the macaroni and cheese, and arrange the boats in a single layer in a 9x13 inch baking dish.  Sprinkle the reserved cheese over the top.  

Bake 25 to 30 minutes, or until the mac and cheese is bubbly and the zucchini is tender and cooked through.  Serve.


Monday, March 23, 2015

Asparagus Noodle Skillet Lasagna

Asparagus Noodle Skillet Lasagna

 Guys, I have such a fun post for you today!  Over the past few months, I've been loving zucchini noodles, and have been quite taken with my spiralizer.  I've even begun to branch out -- cucumber noodles are great in salads, sweet potato noodles make yummy curly fries… and beet noodles, anyone?

A few weeks ago I had planned to make skillet lasagna using zucchini noodles, but as I was buying groceries, I had the idea to use shaved asparagus instead.  It was a bit of a gamble, but it turned out to be one of the best meals I've cooked in a while!  The noodles were perfectly tender, without being mushy, and they imparted a wonderful mild and fresh flavor to the dish.  The texture was closer to that of fresh pasta than any veggie noodle I've had previously, and my kids absolutely devoured it.

I've been a bit hesitant to share recipes using the spiralizer here, since they do require a specialty kitchen tool.  But all you need for the asparagus noodles is a veggie peeler!  I was so excited by the success of this recipe, that I've been dreaming up other asparagus noodle ideas.  I never thought I'd be so excited about a vegetable, but with asparagus coming into season, get ready to see a lot of it around here!

Asparagus Noodle Skillet Lasagna


Asparagus Noodle Skillet Lasagna
heavily adapted from Inspiralized, by Ali Maffucci
serves 4

  • 1 lb asparagus
  • 2 tsp olive oil
  • 1 shallot, minced
  • 2 garlic cloves, minced
  • pinch of red pepper flakes
  • 1/4 tsp dried oregano
  • 1 (14.5 oz) can fire-roasted diced tomatoes
  • 4 oz tomato sauce
  • salt and pepper
  • 1/4 cup chopped fresh basil
  • 1/4 cup freshly grated parmesan cheese
  • 3/4 cup ricotta cheese
  • 1/3 cup shredded mozzarella cheese, divided
  • 1 egg, lightly beaten
  • 3 cups baby spinach
Preheat the oven to 375 degrees. 

To prepare the shaved asparagus, Lay each spear flat on the cutting board and hold by the woodsy end.  Moving from the base of the stalk to the tip, shave thin slices using a vegetable peeler.  It's okay if they are different thicknesses. 

Heat the oil in a 12-inch nonstick, oven safe skillet over medium heat.  Add the shallot and cook until it's just softened, 3 minutes.  Add the garlic, red pepper flakes, and oregano, and cook until fragrant, stirring constantly, about 1 minute.

Increase the heat to medium-high and stir in the tomatoes plus their juices and the tomato sauce.  Season generously with salt and pepper and bring to a boil.  Reduce the heat and simmer for 10 minutes.  Stir in the basil.

Meanwhile, make the filling.  In a medium bowl, combine the parmesan cheese, ricotta, 1/4 cup mozzarella, and the egg.  Season with salt and pepper and stir to combine.

Remove half the sauce from the pan, and set it aside in a small bowl.  Stir the spinach into the remaining sauce, and cook over low heat until it is wilted.  Spread the sauce evenly on the bottom of the skillet.  Pile the shaved asparagus over the sauce, then pour the remaining sauce over the asparagus. Drop large spoonfuls of the filling over the top, then sprinkle the remaining mozzarella cheese on top.

Cover with foil and bake 15 minutes.  Remove the foil and bake an additional 5 to 10 minutes, or until the noodles are soft and cheese is melted.  Serve.


Tuesday, February 24, 2015

Shrimp-Stuffed Shells

Shrimp-Stuffed Shells

Stuffed shells have long-been one of my favorite dinners, but I typically keep it pretty traditional, with a standard sausage-ricottoa-spinach filling.  However, I absolutely love seafood pastas, so the minute I saw this shrimp-stuffed shells recipe, I knew it would be a winner.  What I didn't expect though, was how MUCH of a winner it would be.  Caroline ate an obscene number of these, and Smith had almost as many.  Henry and Tucker have entered "the picky era" of their lives, and they even ate these shells with reckless abandon.  Which, as I'm sure you can imagine, means, sauce and shrimp flying all over the place and making a giant mess, as only two year olds know how.

Shrimp-Stuffed Shells 

The idea of shrimp in a baked pasta dish may seem kind of .. odd.. but the shrimp cook right in the shells, and there's no overcooked, rubbery seafood to be found.  The filling is cheesy and creamy, and the rich tomato sauce is a great contrast to that.  Of course, no baked pasta dish is complete without a blanket of mozzarella and parmesan, so of course we've got you covered there too.

As we hunker down for another winter storm, I am all about comfort food, and baked pasta definitely fits the bill.  And as a bonus, this is actually pretty light.  Four shells, which I found to be a very generous serving, is just under 500 calories, making this a really great healthy meal.

Shrimp-Stuffed Shells 

Shrimp-Stuffed Shells
adapted from Cooking Light, January 2012
serves 5 to 6

  • 20 uncooked jumbo pasta shells
  • 1  Tbs olive oil
  • 1/2 cup diced shallots
  • 2 Tbs minced garlic
  • 1/2 cup (4 oz) reduced fat cream cheese, softened to room temperature
  • 1/4 cup milk
  • pinch of red pepper flakes
  • 1/3 cup chopped fresh basil
  • 1 pound medium shrimp; peeled, deveined, and cut into thirds
  • 2 tsp cornstarch
  • cooking spray
  • 2-3 cups marinara sauce
  • 1/3 cup shredded mozzarella cheese
  • 2 Tbs freshly grated Parmesan cheese

Preheat oven to 400° F.  Lightly spray a 9x13 inch baking dish with cooking spray.

Bring a large pot of water to a boil and add 2 teaspoons  of kosher salt.  Cook pasta 7 to 9 minutes or until just al dente.  Drain and set aside.

Heat a medium skillet over medium heat. Add oil to pan; swirl to coat. Add shallots and cook 3 to 4 minutes, stirring occasionally. Add garlic and red pepper flakes; cook 1 minute, stirring constantly. Whisk in the cream cheese and milk and cook until cheese melts, stirring until smooth. Remove from heat. Stir in basil. Place shrimp in a bowl. Sprinkle with the corn starch and toss well to coat. Add cream cheese mixture to shrimp.  Mix well to combine.

Divide shrimp mixture evenly among pasta shells.  Spread 1 cup marinara over bottom of dish. Arrange the shells in a single layer in the prepared dish; top with remaining 1-2 cups marinara. Sprinkle shells evenly with the mozzarella and parmesan cheese. Cover  Bake at 400° for 20 minutes.  Remove the foil and bake an additional 5 to 10 minutes, or until the cheese is melted and the shrimp are cooked through.  Serve.


Sunday, January 4, 2015

Baked Pasta with Cauliflower in a Spicy Pink Sauce

Baked Pasta with Cauliflower in a Spicy Pink Sauce 

I know it's January, and that means resolutions, healthy eating, and no carbs.  Thus, I bring you a cheesy, creamy, baked pasta dish.  Sorry not sorry.  There is cauliflower in here though, so… it balances out, right?  In all seriousness, this is a decadent, hearty, filling, and comforting dinner.  One that will definitely stick to your ribs on a cold winter night.

This is a pretty basic baked pasta dish, with just a few add-ons that catapult it into the "super delicious" category.  First, the spicy pink sauce.  A simple marinara sauce is amped up with the addition of a little cream and some red pepper flakes.  The rich cream pairs nicely with the spiciness from the pepper.  Secondly, it uses fontina instead of mozzarella, which gives it a slightly creamier, more complex flavor. Finally, the addition of cauliflower not only adds a textural counterpoint to the soft and tender pasta, but it balances out some of the richness as well.  I served this as a vegetarian main course, but I think some spicy sausage would be great it here as well, or even just served alongside the pasta.

Despite having several components, this does come together pretty easily.  However, I see no reason why you couldn't assemble it ahead of time and bake it when you're ready for dinner.  Just add a few extra minutes to the baking time.

And then have a salad on the side.  Because you know, resolutions and all.

Baked Pasta with Cauliflower in a Spicy Pink Sauce 

Baked Rigatoni with Cauliflower in a Spicy Pink Sauce
barely adapted from Fine Cooking
serves 6 to 8


  • 3 Tbs olive oil
  • 2 (28-oz) cans whole tomatoes
  • 1 large yellow onion, halved and thinly sliced
  • 1 1/4 tsp kosher salt
  • 4 cloves garlic, minced
  • 1/2 cup heavy cream
  • 1/4 cup chopped fresh flat-leaf parsley
  • 1/2 tsp crushed red pepper flakes
  • 1 lb dried pasta, such as rigatoni or corkscrews
  • about 4 cups small cauliflower florets (from 1 large head)
  • 2 1/2 cups shredded Fontina cheese (about 10 oz)
  • 2 oz freshly grated Parmigiano- Reggiano (about 3/4 cup)


  • Position a rack in the center of the oven and heat the oven to 450°F . Grease a 9x13-inch baking dish with 1 Tbs. olive oil.

    Pour off 1 cup of juice from one of the cans of tomatoes and discard it. In a blender or food processor, purée both cans of tomatoes with their remaining juice and set aside.

    Heat the remaining 2 Tbs olive oil in a large skillet over medium-high heat. When the oil is shimmering, add the onions and 1/4 teaspoon of the salt and cook, stirring occasionally, until nicely browned, 5 to 10 minutes. Add the garlic and pepper flakes and cook until fragrant, about 1 minute.

    Add the puréed tomatoes and cream (be careful; it will splatter), plus the remaining 1 teaspoon of salt. Bring to a boil over medium-high heat, reduce to a gentle simmer, and cook for 15 minutes, stirring occasionally, so that the sauce thickens slightly. Taste for salt and pepper and remove from the heat and stir in the parsley.

    Meanwhile, bring a large stockpot pot or Dutch oven of water to a boil and add 1 tablespoon of salt. Add the pasta and cook  until it’s al dente, 8 to 10 minutes. During the last 2-3 minutes of cook time, add the cauliflower and cook with the pasta.  Drain well and return to the pot.  Stir in the tomato sauce and 1 1/2 cups of the Fontina cheese.  Mix well to combine.
    Transfer to the prepared baking dish and spread evenly. Top the pasta with the remaining 1 cup Fontina and then the Parmigiano-Reggiano.

    Bake uncovered until the cheese is golden brown, about 15 minutes. Cool for 10 minutes before serving.


    Sunday, September 28, 2014

    Cheesy Baked Shells with Broccoli and Chicken

    Cheesy Baked Shells with Broccoli and Chicken 


    Remember this absolutely amazing incredible mac and cheese recipe?  If you haven't made it yet, you really are missing out.  Because it really and truly is the best mac and cheese of all time.  I realize that's a lofty claim, but I have eaten a LOT of mac and cheese in my day, so I feel pretty confident in my assertion.

    So anyway, I took that macaroni and cheese, and I added some broccoli and chicken to it.  To make it a full meal, of course.  Look, I can make an entire meal out of a big bowl of mac and cheese, but in the name of adult responsibility, I felt like a vegetable and a protein were needed.  So cheesy baked shells with broccoli and chicken were born!

    It's become a standing tradition to for me to make a big dinner for the kids' birthdays.  Smith turned three last week (obvious comment about time moving too quickly), and I'm going to be brutally honest here for a minute.  That kid has challenged me more than I thought possible.  At fifteen months, the poor guy was only a baby himself when Henry and Tucker came along and rocked our world, and he definitely didn't know exactly how to handle the upheaval.  We went though many tough phases with him:  sitting on the babies, pushing them over, throwing toys at them, stealing their milk and food, you name it.  Not to mention the normal day-to-day toddler meltdowns and challenges.

    DSC_8965 

    But in the past six months or so, there's been a shift.  He's gone from pushing the babies down, to helping them back up when they fall.  He no longer steals their milk, but is waiting at the bottom of the stairs with it every morning when they wake up.  He teaches them all the animal and dinosaur sounds.  He's there to give them hugs and kisses when they have their own epic tantrums.  And he's the referee between their toddler skirmishes now.  This guy was just meant to be a big brother.

    So we celebrated my big boy's birthday with this cheesy baked pasta dish.  It's the best dinner I could think of for my little guy, and it was a hit with the whole family.  We're looking forward to another fun-filled year with this sweet boy!
    DSC_8972

    Cheesy Baked Shells with Broccoli and Chicken
    adapted from this macaroni and cheese (which is from Cook's Illustrated)
    serves 8 to 10
    • 1 recipe Panko Topping (follows)
    • salt
    • 4 cups chopped broccoli florets
    • 1 pound medium pasta shapes, such as shells
    • 6 Tbs unsalted butter
    • 2 medium garlic cloves, minced
    • 1 tsp dry mustard
    • 1/4 tsp cayenne pepper
    • 6 Tbs all-purpose flour
    • 2 1/4 cups low-sodium chicken or vegetable broth
    • 3 1/2 cups milk (low-fat is fine)
    • 1 pound colby jack cheese, shredded (about 4 cups)
    • 8 oz extra-sharp cheddar, shredded (about 2 cups)
    • 2 cups diced cooked chicken
    • ground black pepper
    Preheat the oven to 400 degrees.

    In a large microwave-safe bowl, toss the broccoli with a splash of water.  Cover with plastic wrap.  Cook 3-4 minutes, stirring after every minute, until the broccoli is bright green, and just tender.  Set aside.

    Bring water to a boil in a large dutch oven set over high heat.  Add 1 tablespoon of salt and the pasta, and cook, stirring occasionally, until the pasta is just beginning to soften, about 5 minutes.  Drain the pasta and leave in the colander.

    Wipe the pot dry, and add the butter, and set it over medium heat until melted.  Stir in the garlic, mustard, and cayenne, and cook until fragrant, about 30 seconds.  Stir in the flour, and cook, stirring constantly, until golden, about 1 minute.  Slowly whisk in the chicken broth and milk, and bring to a simmer.  Whisking often, cook until large bubbles form on the surface and the sauce is slightly thickened, about 15 minutes.  Remove from heat and stir in the cheeses until completely melted.  Season with salt and pepper to taste.

    Stir the drained pasta, broccoli, and diced chicken into the cheese sauce, breaking up any clumps, until well combined.  Pour into a lightly greased 9x13 inch baking dish and sprinkle with crumb topping.

    Bake uncovered, until the sauce is bubbling and the crumbs are crisp, 25-35 minutes. 


    To store and serve later:  Wrap the dish tightly with foil, and refrigerate for up to 2 days.  To serve, bake in a 400 degree oven until the filling is hot throughout, about 40-45 minutes.  Remove the foil and continue to cook until the crumbs are crisp, 15-20 minutes.


    Panko Topping

    • 1 cup panko bread crumbs
    • 2 Tbs unsalted butter, melted
    • 2 Tbs minced fresh parsley
    • salt and pepper
    In a small bowl, combine the panko with the melted butter and parsley.  Season to taste with salt and pepper.


    Sunday, September 21, 2014

    Summer Caprese Pasta

    Summer Caprese Pasta 

    I know, I know.  Today's the first day of fall.  But here in the south, it's still "summer-like," so I'm still cooking summer dishes.  Sorry not sorry.  I just can't get on the pumpkin-apple-butternut squash-fall foods bandwagon quite yet.  Give me until the end of September, and I promise I'll join all of you fall lovers in October.  Deal?

    And I couldn't possibly let summer end without sharing this super easy and delicious pasta recipe with you.  Caprese pasta is nothing new or revolutionary, but oftentimes there are some drawbacks:  the tomatoes release too much water and create a bland and watery sauce... the mozzarella gets kind of gummy… the basil is too strong, or not strong enough… The problem with seemingly simple dishes is that even a small misstep makes a big negative impact on the final dish.  When there are so few ingredients and components, it doesn't take much to muck it up.

    But have no fear!  This pasta recipe is pretty much foolproof.  Good tomatoes are still available in most areas, so snatch some up and make this caprese pasta, stat!  Bonus:  the leftovers are awesome served as a chilled pasta salad.  I packed this in Caroline's lunch with great success, and the boys enjoyed the leftovers for their lunches as well.

    I'm not quite ready for fall, so indulge me and join me in my end-of-summer denial?

    Summer Caprese Pasta 

    Summer Pasta Caprese
    barely adapted from Pasta Revolution
    serves 4 to 6

    • 1/4 cup extra virgin olive oil
    • 2 tsp lemon juice, plus more as needed
    • 1 tsp lemon zest
    • 1 small shallot, minced
    • 1 clove garlic, minced
    • pinch of red pepper flakes
    • pinch of sugar
    • kosher salt and freshly ground black pepper
    • 1 1/2 lbs vine-ripened tomatoes; cored, seeded, and chopped into 1/2-inch pieces
    • 12 oz fresh mozzarella, cut into 1/2-inch pieces and patted dry with paper towels
    • 1 lb small or medium pasta shapes (I used orecchiete)
    • 1/4 cup chopped fresh basil
    Whisk the oil, lemon juice, shallot, garlic, lemon zest, red pepper flakes, a pinch of sugar, 1/2 tsp salt, and 1/4 tsp pepper together in a large serving bowl.  Add the tomatoes and toss gently to combine.  Marinate the tomatoes in the dressing for at least 10 minutes, but no more than 45 minutes.  

    Meanwhile, place the mozzarella in the freezer and freeze until slightly firm, about 10 minutes.

    Meanwhile, bring a large saucepan of salted water to a boil.  Stir in the pasta and cook until al dente, about 10 minutes.  

    Drain the pasta and add to the bowl with the marinated tomatoes.  Add the mozzarella and basil, and toss gently to combine.  Allow to sit for 5 minutes, then taste and season with salt, pepper, and/or additional lemon juice as needed.  Serve immediately.


    Wednesday, July 23, 2014

    Spinach & Zucchini-Stuffed Lasagna Rolls

    Spinach and Zucchini-Stuffed Lasagna Rolls


    What do you get when you combine one of my favorite comfort foods with fresh summer produce?  Spinach and Zucchini Lasagna Rolls!  These tender pasta rolls are stuffed to the gills with a mixture of ricotta, parmesan, zucchini, onions, and spinach.  Then they're smothered in marinara sauce and cheese, baked, and devoured.  And my gosh, they are good!  And as far as eating a baked pasta dish with three cheeses, they are actually pretty light.  A modest amount of cheese goes a long way in lightening these up, and the addition of zucchini and spinach bulks up each serving.

    Spinach and Zucchini-Stuffed Lasagna Rolls

    I've been making a conscious effort to eat healthier this summer, and it's so refreshing to be able to enjoy a meal like this with no guilt.   It still has that satisfying comfort food feel, but thanks to a few steps to lighten it up, it's actually fairly healthy.  Definitely the best of both worlds.


    Spinach and Zucchini-Stuffed Lasagna Rolls


    Spinach and Zucchini-Stuffed Lasagna Rolls
    adapted from Skinny Taste
    makes 8 rolls
    • 8 lasagna noodles, cooked, drained, and patted dry
    • 2 tsp olive oil
    • 1/2 medium white onion, diced
    • 3 cloves garlic, minced
    • 16 oz zucchini (about 2 medium), grated and squeezed dry
    • 1 cup  part skim ricotta cheese 
    • 1/2 cup grated Parmesan cheese
    • 1 cup baby spinach, chopped
    • 2 Tbs chopped fresh basil, plus more for garnish
    • 1 large egg, lightly beaten
    • 3/4 tsp kosher salt
    • freshly cracked pepper
    • pinch of red pepper flakes
    • 1/2 tsp dried oregano
    • 2 cups Marinara sauce
    • 1/2 cup part skim mozzarella cheese, shredded
    • fresh basil for garnish (optional)

    Directions: 

    Preheat the oven to 350°F. Ladle about 1 cup sauce on the bottom of a 9 x 13-inch baking dish.

    Heat the oil in a large skillet over medium heat.  Add the onion, and cook until just softened, about 3 minutes.  Add the zucchini and sauté until it is softened and beginning to brown, 4 to 5 minutes.  Stir in the garlic, 1/4 teaspoon of salt, and 1/4 teaspoon of pepper, and cook until fragrant about one minute.

    In a medium bowl, combine the zucchini, spinach, ricotta cheese, Parmesan cheese, egg, red pepper flakes, oregano, 1/2 teaspoon of salt and pepper in a medium bowl.  


    Lay out the lasagna noodles on a clean work surface. Make sure noodles are dry. Take a scant 1/3 cup of ricotta mixture and spread evenly over the noodle. Carefully roll the noodle and transfer it seam-side down to the prepared baking dish.  Repeat with the remaining noodles and filling.

    Ladle the remaining sauce over the lasagna rolls and top each one with 1 tablespoon of mozzarella cheese. Cover the baking dish with foil, and bake for 30 minutes, then remove the foil and cook an additional 10 minutes.  Allow to cool slightly, sprinkle basil over the top, and serve.


    Sunday, July 6, 2014

    Summer Vegetable Skillet Lasagna

    Summer Vegetable Skillet Lasagna

    Two years ago, I posted a recipe for Skillet Lasagna, and it's still one of the most popular recipes on this here blog.  And for good reason:  it's super easy, fast, and amazingly delicious.  Since the first time I made it, I've been mulling over other variations, one of which being a skillet lasagna that features the beautiful produce of summer.  But lo and behold, good old America's Test Kitchen pulled through and provided me with just that!

    This skillet lasagna features tomatoes, zucchini, and squash.  It is just as low-maintenace as the original, if not more so.  It's also super delicious, and was a hit with everyone in my family - if that's not a ringing endorsement, I don't know what is!

    Everything cooks in one skillet, so this is really as easy as it gets.  Minimum work, maximum reward.  What more do you want?  Lazy summer days turn into lazy summer dinners here, and I couldn't be happier about it!

    Summer Vegetable Skillet Lasagna 

    Summer Vegetable Skillet Lasagna
    barely adapted from America's Test Kitchen's Best Summer Recipes
    serves 4 to 6

    • 2 Tbs extra virgin olive oil
    • 1 medium white onion, chopped fine
    • 4 cloves garlic, minced
    • 1/4 tsp crushed red pepper flakes
    • 1 (28-oz) can fire-roasted diced tomatoes, drained with juice reserved
    • kosher salt and freshly ground black pepper
    • 10 curly-edged lasagna noodles, broken into 2-inch lengths
    • 1 (8-10-oz) zucchini, cut into 1/2-inch pieces
    • 1 (8-10 oz) yellow summer squash, cut into 1/2-inch pieces
    • 1/4 cup shredded fresh basil
    • 8 oz (1 cup) ricotta cheese, divided

    Heat the oil over medium-high heat in a 12-inch nonstick skillet.  Add the onion and cook until softened, about 3 to 4 minutes.  Stir in the garlic and red pepper flakes and cook until fragrant, about 1 minute.

    Drain the can of tomatoes into a 2-cup liquid measuring cup.  Add enough water to the reserved tomato juice to equal 2 cups.

    Pour the tomato-water mixture over the onions, then stir in 1 teaspoon of salt and 1/2 teaspoon of pepper.  Scatter the noodles over the the top, then layer the tomatoes over the noodles.  Bring to a simmer, stir, and reduce heat to medium.

    Cover the pan and cook about 10 minutes, stirring occasionally.  Stir in the zucchini and squash, and cook for 8 more minutes, or until the noodles and squash are tender.

    Add the basil and 1/2 cup of the ricotta.  Stir until the sauce is creamy, season to taste with additional salt and pepper, remove from heat, and dollop the remaining 1/2 cup of ricotta over the top.  Allow to cool 5 to 10 minutes, and serve.


    Monday, May 19, 2014

    Baked Penne with Roasted Red Pepper Sauce and Goat Cheese


    Some flavors and ingredients just inherently go together, and in my humble opinion, roasted red peppers and goat cheese are one of them.  I've been making this pasta for the past two years, and I'm sorry to say that I'm only now sharing it with you.

    The sauce is a simple roasted red pepper sauce, with the addition of some cheese, shallots, herbs, and a little lemon.  A pinch of red pepper flakes give it just a hint of spice, and the luxurious and vibrant sauce coats the pasta beautifully.  A mixture of goat and ricotta cheeses dot the top of the baked pasta dish, and the creamy cheese with the bold sauce just work.  I always add a little shredded chicken for some extra protein, but this is great as a vegetarian meal as well.

    This baked pasta dish is super easy to prep, and is perfect for serving to guests.  Something about this dish seems just so "springtime" to me, so that's when I make it the most.  Therefore, I of course always serve it with simple roasted asparagus, and a light white wine.

    Roasted Red Peppers + Goat Cheese = True Love Forever.

    Baked Penne with Roasted Red Peppers and Goat Cheese
    adapted from Pasta Revolution
    serves 4

    • 8 oz (2 1/2 cups) dried penne pasta
    • kosher salt and black pepper
    • 4 oz (1/2 cup) ricotta cheese
    • 4 oz goat cheese, softened
    • 1 tsp lemon zest
    • 6 Tbs extra virgin olive oil
    • 3 cups roasted red peppers, patted dry and chopped coarse (3-4 peppers)
    • 2 oz Parmesan cheese, grated (1 cup)
    • 1/3 cup fresh parsley leaves
    • 1 shallot, chopped
    • 2 tsp minced fresh thyme
    • 1 Tbs fresh basil, plus more for serving
    • 2 cloves garlic, smashed
    • juice of 1/2 lemon
    • pinch of red pepper flakes
    • 2 cups shredded cooked chicken
    Heat the oven to 450 degrees and lightly grease an 8-inch square baking dish.

    Bring a large pot of water to a boil, season with 1 tablespoon of salt, and add the pasta.  Cook until it is just shy of al dente, 8 to 9 minutes.  Drain the pasta and return to the pot.

    Meanwhile, mix the ricotta, goat cheese, lemon zest, 1 tablespoon of oil, 1/4 teaspoon of salt, and 1/4 teaspoon of pepper in a medium bowl.  Set aside.

    In a food processor, combine the peppers, Parmesan, remaining 5 tablespoons of oil, parsley, shallot, thyme, garlic, basil, lemon juice, and roasted red paper flaws,  Season with 1/4 teaspoon of salt and 1/4 teaspoon of pepper.  Puree until smooth, about 30 seconds, scraping down the sides of the bowl if necessary.  Taste and season with additional salt and paper as needed.

    Add the sauce to the pot with the pasta, and stir in the chicken.  Mix well to combine.  Pour the mixture into the prepared baking dish, and drop dollops of the cheese mixture over the top.

    Bake until bubbly and browning, about 15 minutes.  Allow to cool 10 to 15 minutes, sprinkle additional basil over the top, and serve.


    Sunday, April 20, 2014

    Skillet-Baked Tex-Mex Macaroni


    Do you want to know how you can tell that something was REALLY good?  If you look at a picture of it two weeks later, when you are super full from a huge Easter lunch, and your mouth waters and your stomach growls.... you know it's good.

    This skillet tex-mex macaroni is not only amazingly delicious, but it's cooked in under 30 minutes, and only dirties one pot.  It makes a perfect weeknight dinner, and it has all your bases covered:  Mexican food, pasta, spice, cheesiness, and it's reasonably healthy.


    This skillet meal reminded me a bit of hamburger helper, but obviously it's better.  Joey and I really really loved this, and my mom asked for the recipe when she ate the leftovers for lunch during a visit.  

    I really just cannot say enough good things about this dish, so I'll leave you with this:  rearrange your weekly meal plan and squeeze this in.  And then come back and tell me "thank you."  


    Skillet-Baked Tex-Mex Macaroni
    adapted from Pasta Revolution
    serves 4
    • 1 Tbs canola oil
    • 1 cup finely chopped onion
    • 1 green bell pepper, stemmed, seeded, and chopped into small pieces
    • 1 jalapeño, seeds and ribs removed, minced
    • 3 cloves garlic, minced
    • 2 Tbs chili powder
    • pinch of cayenne pepper (optional)
    • 2 tsp cumin
    • 1/2 tsp paprika
    • kosher salt and freshly ground black pepper
    • 1 lb 90% lean ground beef
    • 2 cups water
    • 1 (15-oz) can tomato sauce (preferably from fire-roasted tomatoes, if you can find it)
    • 8 oz (about 2 cups) elbow macaroni or shells
    • 1 cup frozen corn
    • 1 (4.5 oz) can chopped green chiles, drained
    • 3 Tbs chopped fresh cilantro
    • 1 cup shredded cheddar cheese
    • 1 cup shredded Monterey Jack or Pepperjack cheese
    • avocado, sour cream, and/or hot sauce for serving
    Preheat the oven to 475 degrees.

    Heat the oil in a 12-inch nonstick skillet over medium heat.  Add the onion, bell pepper, and jalapeño and sauté until softened, 5 to 7 minutes.  

    Stir in the garlic, chili powder, cumin, cayenne, paprika, and 1/2 teaspoon of salt.  Cook until fragrant, about 30 seconds.  

    Add the beef, using a wooden spoon to break up any big pieces, and cook until it's no longer pink, 2 to 3 minutes.

    Stir in the water, tomato sauce, and pasta.  Increase heat, cover, and bring to a vigorous simmer.  Stirring frequently, cook until the pasta is tender, 10 to 12 minutes.

    Remove the skillet from heat and stir in the corn, green chiles, 2 tablespoons of the cilantro, and 1/2 cup of each of the cheeses.  Taste and season with salt and pepper as needed.  Sprinkle the remaining cheese over the top of the para, and bake until the cheese is melted, browned, and bubbly, 10 to 15 minutes.  

    Cool 10 minutes, sprinkle with the remaining tablespoon of cilantro, and serve.


    Sunday, March 23, 2014

    Vietnamese-Style Pork and Rice Noodle Salad


    Sometimes I just do not feel like making dinner.  Like on a day when I oversleep, and then I'm "that mom" at toddler sports class, with all three boys crying for no reason.  And then a certain 2 year-old pushes down his brother and almost breaks his nose.  And then everyone refuses to nap.  And it's raining.  Again.  You know, hypothetically, you may not want to make dinner after a day like that.


    Or maybe you do.  Because after lunch, the sun comes out, and it's a glorious day outside.  And your sweet husband brings home your favorite wine.  Then that sweet husband takes all the kids outside to play; you have a quiet house, a glass of wine, and all the time in the world to unwind and relax as you make said dinner.  Those are hypothetically the kinds of things that might turn your day around.

    And then when that dinner ends up being one of the best things you've made all year?  Day = made.

    This was pretty far outside my comfort zone, which was another reason that I was so tempted to order take-out on this hypothetical day.  And it does require quite a bit of chopping and mixing, so I understand that can be a deterrent (I'm really selling this salad, aren't I?).


    However, maybe I'm crazy, but when I'm not rushed to put dinner on the table or trying to multitask while I cook, I find chopping, slicing, and mixing to be quite therapeutic.  Crank up my favorite pandora station pour myself a glass of wine, and I find my happy place.

    And then I found my happy place again when we sat down to eat.  This salad.  Oh my, it's good.  Chewy rice noodles, crisp veggies, crunchy peanuts, bright and fresh herbs, perfectly cooked pork tenderloin, and a sweet-salty-spicy dressing.  It's good stuff.  Like I said, this was a bit outside my comfort zone, but when all was said and done, I'm so glad I took the chance on it.

    I wasn't so sure how this would be received by the kids, but they all really loved it - especially the pork.  I kept it simple and just sliced up some mango and pineapple to serve on the side, and it was a really wonderful and light meal.  Definitely the kind of meal to turn your day around.  Hypothetically.


    Vietnamese-Style Pork and Rice Noodle Salad
    adapted from America's Test Kitchen's Pasta Revolution
    serves 6

    Pork

    • 3 Tbs fish sauce
    • 3 Tbs brown sugar
    • 1 Tbs + 1 tsp vegetable oil
    • 1 1/2 lbs pork tenderloin, trimmed and sliced crosswise into 1/4-inch medallions
    Dressing
    • 2/3 cup fish sauce
    • 1/2 cup warm water
    • 1/3 cup lime juice (about 3-4 limes)
    • 1/4 cup granulated sugar
    • 2 Thai, serrano, or jalapeño chiles, ribs and seeds removed, finely minced
    • 2 cloves garlic, minced
    Salad
    • 4 medium carrots, peeled and shredded on the large holes of a cheese grater
    • 1 large cucumber, peeled, seeded, halved crosswise, and thinly sliced into half moons
    • 1/3 cup chopped unsalted roasted peanuts
    • 1 Thai, serrano, or jalapeño chile, ribs and seeds removed, thinly sliced
    • 6 oz dried rice noodles (rice vermicelli), broken into 6-inch pieces
    • 4-5 cups romaine lettuce, chopped
    • 1/2 cup fresh basil, chopped
    • 1/4 cup fresh cilantro, chopped
    • 1/4 cup fresh mint, chopped
    For the pork:  Combine the fish sauce, brown sugar, and oil together in a gallon-sized freezer bag, and agitate to dissolve the sugar.  Add the pork, shake to combine, refrigerate for at least 30 minutes, or up to 24 hours.

    For the dressing:  Combine all the ingredients in a mason jar or small bowl, then shake or whisk to combine.  Set aside.

    For the salad:  In a small bowl, toss the carrots, cucumbers, peanuts, and chile together with 1/4 cup of the dressing.  Set aside and allow to marinate while you prepare the rest of the salad.

    Bring a large pot of water to boil.  Remove from heat, add the noodles, and stirring occasionally, let them sit about 10 minutes.  Drain the noodles and transfer to a large bowl.  Layer the carrot-cucumber mixture, lettuce, basil, cilantro, and mint on top of the noodles, but do not toss.  Set aside.

    Meanwhile, adjust the oven rack 6 inches from the broiler and heat the broiler.  Line a sheet pan with aluminum foil and spray with cooking spray.  Arrange the slices of pork in a single layer on the baking sheet.

    Broil until the pork is golden on both sides with crispy, browned edges, about 10 minutes, flipping halfway through.

    Pour half the dressing over the noodle-veggie mixture and toss to combine.  Divide among serving bowls and top each portion with a few pieces of the pork.  Drizzle the remaining dressing over the individual servings and serve immediately.


    Sunday, February 23, 2014

    Garlicky Pasta with Tuscan Chicken


    Growing up, we lived across the street from my great-aunt.  I have many many memories and stories from their house, but in particular I remember going to her house after church for Sunday dinner.  I always loved going over there, seeing my cousins, and just enjoying time with our big family.  Now that I have a big family of my own, I romanticize about having big family dinners at our house after church.

    However, those notions are pretty quickly squelched... by the time we get home from church on Sundays, I'm starving, Smith has passed out, the twins are hungry and tired, and Caroline... well actually, she's usually just singing a Disney song in the backseat and is fine.  We're definitely on borrowed time, and hangry meltdowns are imminent for all of us.  My visions of big Sunday dinners in reality end up being grilled cheese sandwiches, leftovers, or eggs and toast.  Nailed it.


    A few weeks ago, however, I stayed home from church, and had the house all to myself for the morning.  After folding a bunch of laundry, leisurely drinking my coffee, and doing some cleaning, I decided to make a nice lunch for when everyone else got home.  While it's not the fried chicken, okra, tomato salad, biscuits, and butter beans that I grew up eating as Sunday dinner, it is still quite hearty, comforting, and delicious.

    Chicken is pan-fried, then served atop a bed of garlicky pasta that's coated in a white wine sauce,and lots of bright and peppery arugula.  It's a great combination of creamy, garlicky, fresh, and comforting.

    Now when I say this is garlicky, I mean there are 12 cloves of garlic here!  That's 3 cloves per person!  However, they are slowly sautéed, then cooked further in the sauce, so the flavor is more roasted and buttery vs strong and abrasive.  It's very well-balanced, so don't be scared!

    Not a fan of arugua?  Try spinach, kale, or swiss chard or even toss the pasta with some steamed broccoli, asparagus, or roasted brussels sprouts.  I think pretty much any green veggie would work here.

    While my daydreams of big family-style lunches after church are on the back burner for now, having a homey and comforting pasta dish like this isn't too shabby.


    Garlicky Pasta with Tuscan Chicken
    barely adapted from Pasta Revolution

    • 3 (6 to 8 oz) boneless, skinless, chicken breasts
    • kosher salt and freshly ground black pepper
    • 1/2 tsp garlic powder
    • 1 tsp lemon zest
    • 1/2 cup plus 1 Tbs flour
    • 3 Tbs olive oil
    • 12 cloves garlic, thinly sliced
    • 3 shallots, thinly sliced
    • pinch of red pepper flakes
    • 3/4 cup dry white wine
    • 3 cups low-sodium chicken broth
    • 12 oz dried pasta
    • 6 oz (6 cups) baby arugula
    • 1 1/2 oz  (3/4 cup) Parmesan cheese, grated, plus more for serving
    • 1 Tbs lemon juice
    Pat the chicken dry with paper towels and season both sides generously with salt and pepper.  In a shallow dish, combine 1/2 cup of the flour with the garlic powder and lemon zest.  Working one piece of chicken at a time, dip in the flour mixture, coating all sides, and shaking off the excess.

    Heat 2 tablespoons of the oil over medium-high heat in a 12-inch skillet.  Carefully arrange the chicken in a single layer, then allow to cook 6 to 8 minutes.  Use tongs to flip the chicken, reduce the heat to medium-low, and cook an additional 6 to 8 minutes, or until it registers 160 degrees.  Transfer the chicken to a plate and cover with aluminum foil to keep warm.

    Meanwhile, bring a large pot of water to a boil and season with 1 tablespoon of salt.  Add the pasta and cook, stirring often, until al dente, using the time recommendation from the box.  Reserve 1/2 cup of the cooking water, then drain the pasta.  Return the pasta to the pot, add the arugula, stir, then cover to keep warm and wilt the greens.

    As the pasta is cooking, add the remaining tablespoon of oil to the skillet, along with the garlic and shallots.  Cook over medium-low heat, stirring often, until softened and beginning to brown, about 3 minutes.  Stir in the pepper flakes and remaining tablespoon of flour, and cook 30 seconds.

    Whisk in the wine, then broth.  Increase the heat to medium-high, bring to a simmer, and cook until the sauce is thickened and measures 2 1/2 cups, about 15 minutes.  Reserve 1/2 cup of the sauce, then pour the rest into the pot with the pasta and arugula.  Stir in the Parmesan cheese, and lemon juice, then toss until the mixture is well-combined.  Add the reserved cooking water as needed to adjust the consistency, then season with salt and pepper.

    Slice the chicken thinly on the bias.  Divide the pasta among 4 serving bowls, then top with the sliced chicken.  Drizzle each serving with 2 tablespoons of the reserved sauce, then sprinkle with extra parmesan cheese.  Serve immediately.


    Sunday, February 2, 2014

    Mushroom-Miso Soup with Shrimp and Udon Noodles


    I didn't really make New Year's resolutions for 2014, but I did sit down and make a little list of a few goals I'd like to focus on throughout the year.

    ....Ok, so when I put it that way, I guess I did make resolutions.

    One of my non-resolution resolutions is to cook more foods outside my typical cuisines of Southern, Mexican, and Italian food.  I actually really love Asian food, and every time I make something that's Chinese or Japanese-inspired, I kick myself for not venturing to the far east more often.

    Speaking of the far east, did you know that I almost moved to Japan when I graduated college?  It's a long story, but one that definitely worked out for the best in the end.  ANYWAY, I visited there over Christmas break of my senior year, after taking Japanese lessons for almost a year.  I was so excited to immerse myself in the culture, see some famous sites, and of course, eat the food.

    Almost every meal began with miso soup, and I came to look forward to that small bowl of fragrant broth.  This soup is a heartier and more filling take on that soup.  In addition to the miso broth, there are tender udon noodles - which just so happened to be my favorite noodle in Japan!  There are also earthy mushrooms, tender and sweet shrimp, and bites of leafy green spinach.  It's a wonderful combination, and the first few bites transported me back all those years to Japan.  Caroline absolutely loved this soup - she slurped up all the noodles, ate the shrimp, spinach, and mushrooms out with a fork, and then drank the remaining broth.

    With meals as delicious as this one, it will definitely be easy to keep my non-resolution this year, and I can't wait to share more of my adventures with you along the way.


    Mushroom-Miso Soup with Shrimp and Udon
    barely adapted from The Six-Ingredient Solution
    serves 4 generously

    • 12 oz udon noodles
    • 4 oz (4 cups) baby spinach, roughly chopped
    • 10 oz shiitake mushrooms
    • 3 cups vegetable broth
    • 12 oz extra-large shrimp, peeled and deveined
    • 1/2 cup white miso
    • kosher salt and freshly ground black pepper
    Bring 4 quarts of water to a boil in a large pot.  Add the noodles and cook until al dente, about 4 to 5 minutes.  Drain and rinse with warm water to remove any excess starch.  Drain well, then portion the noodles into four individual serving bowls.  In each bowl, top the noodles with one cup of the baby spinach.  Set the bowls aside while you finish the soup.

    Stem and thinly slice the mushrooms.  Bring the broth, 2 cups of water, and the mushrooms to a boil in a large saucepan over medium-high heat.

    Reduce the heat to medium-low and simmer gently until the flavors meld and the mushrooms are tender, about 10 minutes.

    Meanwhile, remove the tails from the shrimp and cut each shrimp into 3 equal pieces, and season lightly with salt and pepper.

    In a small bowl, whisk together the miso and 1/2 cup of water until it's a smooth mixture.

    Remove the soup from heat and stir in the shrimp and miso mixture.  Cover and let sit until the shrimp are just pink, about 1 to 2 minutes.  Taste and season with salt and pepper as needed.  Ladle the soup into the prepared bowls and serve.


    Wednesday, January 15, 2014

    Pasta all'Amatriciana (Pasta with Spicy Tomato Sauce & Pancetta)


    Spaghetti is a regular in the rotation here, and while I love classic marinara and meat sauce, sometimes I'm in the mood to mix things up a little.  When that happens, this is a great option.  It's got all the components of a good, classic marinara sauce, but it's kicked up a few notches.  There's pancetta, garlic, a good pinch of red pepper flakes, and red wine.  Finished with a sprinkle of grated Parmesan or Pecorino cheese, this is a bold, brash pasta dish that is a perfect way to spice up the dreary winter days we've been having.  Yeah, it's good stuff.

    Do you know what else is good?  This meal will be on your table in less than 30 minutes.  Your weeknights just got a little less hectic.  In just a few more minutes than it takes to pop open a bottle of marinara sauce, you can have a big plate of spicy, cheesy pasta that's homemade.  Throw together a simple Caesar or garden salad, warm up a loaf of bread, open a bottle of red wine, and call it done.


    Pasta all'Amatriciana
    adapted from America's Test Kitchen, Pasta Revolution
    serves 4 to 6

    kid-freindly adaptation:  Adjust the red pepper flakes to your spice tolerance, but if your kids (or spouse) find it too spicy, stir a little cream or half-and-half into their serving to tame it a bit.  And if you like things really spicy, feel free to top your serving with extra red pepper flakes.  That's the beauty of making your own sauce - you make it exactly how you like it!

    • 1 Tbs olive oil
    • 4 oz pancetta, diced into small pieces (or bacon)
    • 1 medium onion, chopped fine (about 1 cup)
    • 1/2 tsp red pepper flakes
    • 2 cloves garlic, minced
    • 1/2 tsp kosher salt
    • 1/4 cup red wine
    • 1 (28-oz) can diced tomatoes
    • 1 lb pasta
    • 1 1/2 oz Pecorino Romano or Parmesan cheese, grated (about 3/4 cup), plus more for serving
    Heat the oil in a 12-inch skillet over  medium heat.  Add the pancetta, and cook until it's well-browned and crop, 6 to 8 minutes, stirring often.  Use a slotted spoon to transfer it to a paper towel-lined plate.  

    Pour off all but about 2 tablespoons of fat from the skillet (if you don't have 2 tablespoons of fat in the skillet, add more olive oil to reach that volume).  Add the onion and cook over medium heat until softened, about 5 minutes.  Stir in the pepper flakes, garlic, and salt, and cook until fragrant, about 30 seconds. 

    Pour the wine into the skillet, and scrape the bottom with a wooden spoon to scrape up any browned bits.  Cook until the wine has reduced to about half it's volume, 1-2 minutes.  Stir in the tomatoes, bring to a simmer, and cook until the sauce is slightly thickened, about 10 minutes.  Taste and season with additional salt if needed.

    Meanwhile, bring a large pot of salted water to a boil.  Add the pasta and cook, stirring often, until al dente, according to the package directions.  Reserve 1/2 cup of cooking water, then drain the pasta and return it to the pot.

    Add the sauce, pancetta, and grated cheese, and toss to combine.  Season to taste with salt, and add the reserved water as needed to adjust the consistency.  Divide among serving plates and garnish with additional cheese and/or red pepper flakes.


    Sunday, January 5, 2014

    Chicken Fajita Mac & Cheese


    Mexican food is what I call my "baseline craving."  Anytime, anywhere, I'm pretty much always down for Mexican.  On the other hand, Caroline's baseline craving is macaroni and cheese.  Whenever I ask her what she wants for dinner, that's her immediate request.  So one fateful day last month, I was craving Mexican food, and planned to make chicken fajitas for dinner.  That afternoon, she came home from school and requested mac and cheese.  It was cold and rainy that day, and comfort food definitely sounded good, but I wanted fajitas, darn it!  What's a mom to do?  Put your hands together, my friend.

    Fajita mac and cheese.  Oh yes.  Creamy, cheesy, noodles swimming with spicy chicken and sautéed onions and peppers?  This stuff is good.  I loved the combination of the sweet peppers and onions, the rich and creamy sauce, and the slightly spicy chicken.  And of course who can resist gobs of melted cheddar and pepperjack?  Not I.  Joey couldn't sing its praises enough, and while I cleaned the kitchen, I couldn't stop myself from grabbing bite after bite from the casserole dish.

    This was a wonderfully comforting take on Mexican food.  While I already have tons of recipes for macaroni and cheese in my arsenal, it never hurts to add another - because you never know when you'll have simultaneous cravings for Mexican food and mac and cheese.


    Chicken Fajita Mac and Cheese
    adapted from Annie's Eats

    • 12 oz pasta shapes
    • 1 tsp cumin
    • 1/2 tsp chili powder
    • 1/2 tsp kosher salt
    • 1/2 tsp paprika
    • 1/4 tsp ground black pepper
    • pinch of cayenne
    • 3 Tbs unsalted butter, divided
    • 2 chicken breast halves, trimmed of any visible fat
    • 1 medium red onion, halved pole-to pole and thinly sliced
    • 3 medium bell peppers (various colors), seeded and thinly sliced
    • 3 cloves garlic, minced
    • 1 (4 oz) can diced green chiles, drained
    • 3/4 cup sour cream (light is fine)
    • 8 oz pepper jack cheese, shredded
    • 6 oz sharp cheddar cheese, shredded
    Preheat the oven to 400 degrees and butter a 2 qt baking dish.

    Bring a large pot of salted water to a boil and cook the pasta according to the directions on the box, until just al dente.  Drain and set aside.

    Meanwhile, combine the cumin, chile powder, salt, paprika, black pepper, and cayenne in a small bowl.  Pat the chicken dry with a paper towel, then sprinkle the mixture on both sides of the chicken.

    Heat 1 tablespoon of the butter in a large skillet over medium-high heat.  Add the chicken, and cook about 7 minutes per side, or until it's cooked through.  Remove from the pan, allow to cool slightly, then shred or chop into bite-sized pieces.  Set aside.

    Melt the remaining 2 tablespoons of butter over medium heat in the now-empty skillet, and add the onions and pepper, and sauté until tender, about 5 minutes.  Add the garlic and green chiles and cook an additional minute.

    In a large bowl, mix together the pasta, chicken, sautéed vegetables, sour cream, and all but 1/2 cup of the cheeses.  Stir until well-combined, taste and season with additional salt and pepper if needed, then spread into the prepared baking dish.  Sprinkle the remaining 1/2 cup of cheese over the top, transfer to the oven, and bake 15 to 20 minutes, or until the cheese is melted and the sauce is bubbly.  Cool slightly before serving.


    Monday, October 21, 2013

    Brats with Beer & Mustard Sauce over Egg Noodles


    The majority of the time, I try and cook meals that are at least somewhat nutritionally sound.  Or at least have some small amount of nutritional value.  So let me be clear: this meal has basically zero nutritional value, and is not healthy.  At all.  But oh man.  It is good.  And how could it not be?  It's full of some of my favorite things:  sausage, beer, mustard, caramelized onions, and pasta.  I actually did use wheat egg noodles, out of nutrition-guilt, and I roasted a pan of brussels sprouts, apples, and carrots to serve on the side.  So I don't feel tooooo guilty.  And you shouldn't either.  Especially when you taste this outstanding dinner.  I definitely believe in splurges, and this is one you should definitely make.

    When we used to tailgate every weekend, beer brats were always a popular dish.  This pasta is a play on that.  The brats are first browned in a skillet.  You then caramelize onions, make a super simple sauce of beer and mustard, then finish cooking the brats in the sauce, infusing them with the beer and tangy mustard.  Served over egg noodles, this is major comfort food.  And even better:  it's one of the easiest and fastest meals ever.  Super comfort food.  Ready in under 30 minutes.  Beer.  Done and done.


    Brats with Beer and Mustard Sauce over Egg Noodles
    America's Test Kitchen's Pasta Revolution
    serves 4 to 6

    • 2 Tbs canola oil
    • 1 lb bratwurst
    • 2 medium onions, halved and sliced thin
    • salt and pepper
    • 1 (12-oz) bottle of a lager or other mild beer
    • 1/3 cup Dijon mustard
    • 12 oz egg noodles
    Heat 1 tablespoon of the oil in a 12-inch skillet over medium hat.  Add the sausage and cook until well-browned, about 5 minutes total, turning every minute or so.  Transfer to a plate and set aside.

    Add the remaining tablespoon of oil, the onions, and 1/4 teaspoon of salt to the now-empty skillet.  Cook, stirring frequently, until the onions are softened and lightly browned, about 12-15 minutes.  

    Whisk the beer and mustard into the skillet with the onions until smooth.

    Nestle the sausages into the sauce, along with any accumulated juices from the plate.  Bring to a simmer and cook until the sausages are cooked through, about 10 to 12 minutes.

    Transfer the sausages to a cutting board, and once they are cool enough to handle, slice them on the bias about 1/2-inch thick.  Return the sausage to the skillet and season the sauce to taste with salt and pepper.

    Meanwhile, bring a large pot of salted water to a boil, and cook the egg noodles until al dente, stirring often, about 10 minutes.  Reserve 1/2 cup of the cooking water, drain the noodles, and return them to the pot.  

    Add the sausage + onions and beer sauce to the pot with the noodles, and toss well to combine.  Add the reserved pasta water, a few tablespoons at a time, until you reach your desired consistency.  Taste and season with salt and pepper as needed.  Serve.


    Sunday, September 22, 2013

    Creamy Lemon One-Pot Pasta


    If you've spent any time at all on Pinterest in the last three months, you have no doubt seen Martha Stewart's One-Pot Wonder Pasta.  I'm pretty sure that every single one of my friends has pinned this recipe.  And for good reason - I made it about a month ago, and it was a huge hit with my whole family.  It was also one of the easiest dinners I've ever made, which is an added bonus.  I loved it so much in fact, that I began envisioning countless variations and iterations of the dish.

    I started with this creamy lemon version.  It is alfredo-esque, but lighter, and honestly, more flavorful.  This creamy white wine and lemon sauce hits on all the major notes - creamy, salty, tart, and just a little spicy.  I had originally planned to add shrimp and mushrooms to the final dish, but decided to keep it simple this time.  I just served it with some roasted broccoli on the side, and it was such an easy and delicious meal.

    I don't have much more to say about this one - it's so easy and tasty that I think it speaks for itself.  Start off the week with some comfort food!

    Creamy Lemon One-Pot Pasta
    inspired by Martha Stewart

    • 12 oz. dried pasta
    • 2 cups thinly sliced onion
    • 3 garlic cloves, minced
    • pinch of red pepper flakes
    • 2 sprigs of fresh basil
    • 2 Tbs olive oil
    • 1 1/2 tsp kosher salt
    • 1/2 tsp freshly ground black pepper
    • 3 1/2 cups water
    • 1 (12-oz) can evaporated milk
    • 1/2 cup white wine
    • 1 Tbs lemon zest
    • 1/4 cup heavy cream
    • 1/2 cup freshly shredded Parmesan cheese
    • 2 Tbs fresh lemon juice
    In a large straight-sided skillet, combine the pasta, onion, garlic, red pepper flakes, basil, olive oil, salt, black pepper, water, milk, wine, and lemon zest.  

    Bring to a boil over medium-high heat, using tongs to turn and stir the pasta often.  Boil until the noodles are al dente and most of the liquid has evaporated/been absorbed, 8-12 minutes.  

    Remove from heat, remove the sprigs of basil, and stir in the cream, parmesan cheese, and lemon juice.  Allow to sit for 5 minutes, stir again, and divide among bowls.  

    Serve with additional Parmesan cheese and basil, if desired.


    Sunday, August 4, 2013

    Pasta with Bacon, Toasted Corn, and Cherry Tomatoes


    I might be nearing the point of needing a corn intervention.  I've been obsessed with it all summer, and I don't have any plans of stopping.  We've been enjoying it in our dinners at least twice a week, whether it's straight-up corn on the cob or incorporating it into other dishes... like crab cakes, pizza, risotto... and now into this pasta dish.  I even have a dessert in the works. Things are getting mighty crazy up in here!

    So this pasta embodies everything I love about summer dinners.  It was super fast - allowing for maximum outside time both before and after dinner.  It didn't require many dishes to wash, or ingredients to buy.  You don't have to turn on the oven.  It has bacon (although let's be honest - that makes a good meal no matter what time of year it is).  And finally, it's full of peak-season produce.

    The bacon is quickly cooked, then corn is toasted in the rendered bacon fat.  Cherry tomatoes are thrown in for good measure, and the whole thing is finished with some Parmesan cheese, fresh basil, and a squirt of lemon juice.

    I was a little worried that it wouldn't really seem like a cohesive dish without a true sauce - I didn't want  pasta with just random ingredients thrown in.  But as the cherry tomatoes cook, some will burst, and that plus the pasta water and Parmesan cheese form a super flavorful sauce.  And these cute little corkscrews were perfect for trapping the corn kernels and bacon bits - maximum flavor in each bite!

    School is starting in the next few weeks, and I know that weeknights are super busy.  Making this a great dinner to put on the table for your family.  Because whether you're trying to make the most out of the last vestiges of summer, or gearing up for a busy fall, this pasta dish will meet all your criteria.

    Pasta with Bacon, Toasted Corn, and Cherry Tomatoes
    adapted from America's Test Kitchen, Pasta Revolution
    serves 4 to 6

    • 8 slices of bacon, chopped
    • 4 ears of corn, kernels cut from the cob
    • salt and pepper
    • 1 lb cherry or grape tomatoes, halved
    • 1 lb medium pasta shape
    • 2 oz. freshly grated Parmesan cheese (about 1 cup), plus extra for serving
    • juice of 1/2 lemon (about 1-2 Tbs)
    • 1/2 cup chopped fresh basil
    Cook the bacon in a large nonstick skillet over medium-high heat until crisp, about 5 minutes, stirring often.  Use a slotted spoon to transfer it to a paper towel-lined plate, and drain off all but 2 tablespoons of the fat from the skillet.  Add the corn, 1/4 teaspoon of salt and cook until the corn is toasted and spotty brown, 7-10 minutes.  Add the tomatoes and cook, stirring often, about 3 minutes, or until they are slightly softened and starting to burst.

    Meanwhile, bring a large pot of water to a boil.  Add 1 tablespoon of salt, then stir in the pasta.  Return to a boil and cook until al dente, stirring often (I usually cook it 1-2 minutes less than the recommended time on the box).

    Reserve 1/2 cup of the cooking water, drain the pasta, and return it to the saucepan.  Stir in the bacon, corn and tomato mixture, Parmesan, basil, and lemon juice.  Add the reserved pasta water a little at a time to adjust the consistency as needed.  Season with salt and pepper as needed.  Divide among serving bowls, and pass extra parmesan at the table.


    BLOG DESIGN BY: SHERBET BLOSSOM DESIGNS