Showing posts with label corn. Show all posts

Sunday, July 31, 2016

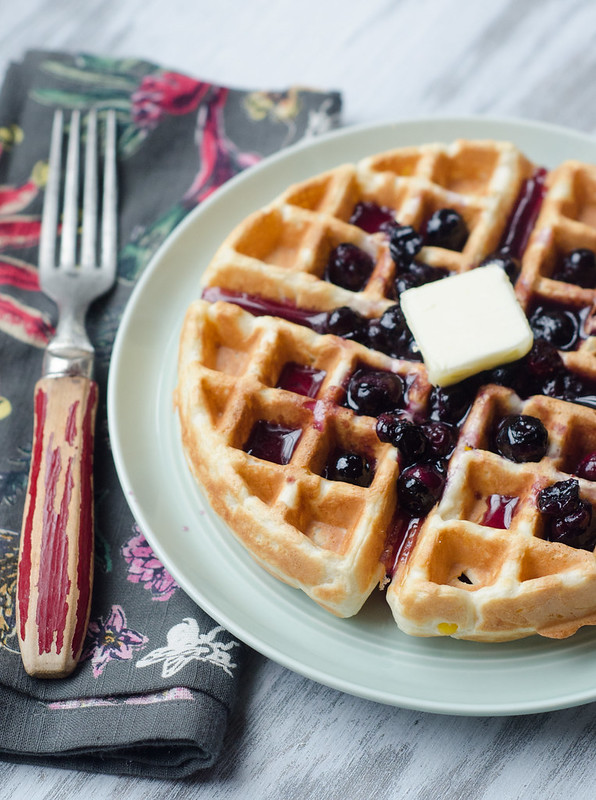
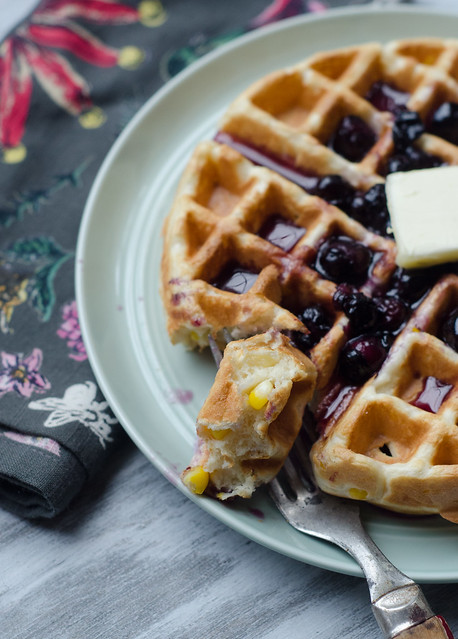
Sweet Corn Waffles with Blueberry-Maple Syrup


If there's one motto for our family, it might just be "waffles are always a good idea."  They are our lunch of choice on Sundays after church, and we have them fairly often for dinner as well.  Ironically, we rarely eat them for breakfast, but that's neither here nor there.  Anyway, if we are having waffles for dinner, I like to mix up the flavors, and experiment with different combinations.  One favorite of the summer has been zucchini waffles (recipe coming soon!), and these corn waffles with blueberry syrup were a hit as well.

My only issue with having waffles or pancakes for dinner is that oftentimes you're basically just having dessert for dinner… which, I mean, I'd be lying if I said I didn't like that.  But every now and then I do try and behave like a responsible parent and feed my children nutritious meals.  These waffles are definitely a little healthier since they have very little added sugar, and you're getting a serving of corn and blueberries in each waffle as well.

Until a few years ago, I probably would have turned up my nose at the combo of blueberries and corn, but now I embrace the motto of "if it grows together, it goes together," and I'm basically just like "gimme all the corn and blueberries now."  This chicken salad is amazing, blueberry cornbread is my favorite, and these waffles are the bomb.   I like serving these with a simple fruit salad on the side, along with either bacon or chicken sausage to round it all out.   We have Meatless Mondays, Taco Tuesdays, and Thirsty Thursdays… so shall we start a trend with Waffle Wednesdays?  Make it happen!


Sweet Corn Waffles with Blueberry-Maple Syrup
adapted from How to Cook Everything Fast, by Mark Bittman
serves 4-6, depending on the size of your waffle iron

  • 2 cups all-purpose flour (or 1 cup all-purpose flour + 1 cup whole wheat flour)
  • 1 Tbs baking powder 
  • 1/4 tsp kosher salt
  • 1 Tbs sugar
  • 2 eggs
  • 3 Tbs melted butter
  • 1 cup buttermilk
  • 1 cup fresh corn kernels
  • 1/2 cup fresh blueberries
  • 3/4 cup maple syrup
Preheat the oven to 200 degrees.

In a large bowl, whisk together the flour, baking powder, salt, and sugar.

In another bowl, combine the eggs, 2 tablespoons of butter, and buttermilk, whisking until well-mixed

Gently stir the wet ingredients into the dry ingredients using a wooden spoon, stirring until just combined.  The batter will still be thick and lumpy.  Fold in the corn kernels.

Follow the directions on your waffle iron to cook the waffles.  As they are finished, place them in the preheated oven to keep warm as you cook the rest.

Meanwhile, melt the remaining tablespoon of butter in a skillet set over medium heat.  Add the blueberries and cook, stirring often, until they begin to soften and give up their juice.  Add the maple syrup and cook until heated through.  Remove from heat and cover to keep warm.

Serve the waffles warm, with the blueberry syrup and more butter, if desired.


Sunday, September 13, 2015

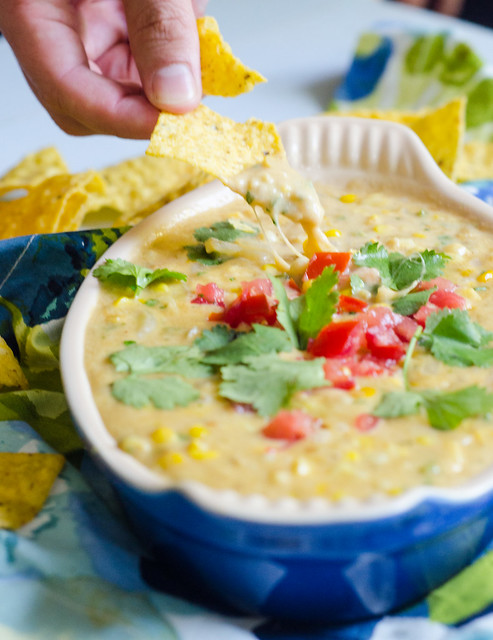
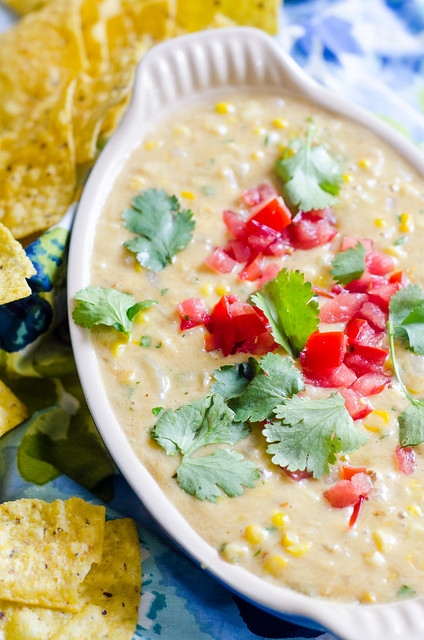
Sweet Corn Queso Dip

Sweet Corn Queso Dip 

Normally as we round the corner into the fall, I'm digging in my heels and refusing to acknowledge the end of summer.  I'm definitely not one of those people who turns into PUMPKIN EVERYTHING in mid august… or mid September even.  Up until September 23rd, I'm firmly still in summer-mode.  Thus, while bloggers everywhere are bringing you pumpkin and apples, I'm bringing you sweet corn queso dip.  I might not be a cool, up to the minute blogger, but I'm living in the now.  And the now is gorgeous weather, football, corn, and queso.  Queso is always in the now.

This queso is a little more than just corn mixed into queso.  You puree some of the kernels, then mix in whole kernels; thus creating a perfect corny bite.  While this is an ode to summer corn, it's also pretty much a perfect snack for watching football, cooking out, or just sitting outside and enjoying the perfect weather with a margarita.

I'm pretty much a sucker for any queso dip, but combining it with some of my favorite summer produce was revolutionary.  We all huddled around this scooping, dipping, and munching until the dish was scraped clean.  So whether you are a fall-lover or a stage five summer-clinger, this dip will definitely make you happy!  Long live queso!

Sweet Corn Queso Dip

Sweet Corn Queso Dip
adapted from Food and Wine, December 2013

While you can definitely use frozen corn for this, I'd highly recommend that you use fresh corn when it's in it's peak!  

  • 3 cups fresh corn kernels (4-5 ears).
  • reserved cobs from corn
  • 2 Tbs canola oil
  • 1 poblano chile, stemmed, seeded, and diced
  • 1/2 medium onion, diced
  • 2 cloves garlic, minced
  • kosher salt
  • 1 tsp chile powder
  • 8 oz Monterey Jack cheese, shredded
  • 2 Tbs minced fresh cilantro
  • cilantro, tomatoes, onions, jalapeño slices, etc for garnish
Cut the kernels from the cob.  Using the back of a spoon, scrape the spent cobs to "milk" them.  

In a blender, combine half the corn kernels, the corn milk, and 1/3 cup of water.  Puree until smooth.

In a medium skillet, heat the oil over medium heat.  Add the poblano and onion, and cook until softened, stirring often, about 5 minutes.  Stir in the remaining corn, a big pinch of salt, garlic, and chile powder.  Cook an additional 2 to 3 minutes.

Add the corn puree and stir to combine.  Bring to a simmer.  Cook until slightly thickened, about 2 minutes.

Reduce the heat to low and stir in the cheese, a little at a time, until it is melted and incorporated.  Remove from heat and stir in the cilantro, then season with additional salt if needed.  Garnish with diced tomatoes, more cilantro, jalaponeo slice, etc.  Serve immediately with tortilla chips.


Monday, August 3, 2015

Summer Tomato and Black Eyed Pea Salad

Summer Tomato and Black Eyed Pea Salad 

I'd like to introduce you to one of my favorite dishes of all time.  This salad is pretty much on repeat for me all summer long.  Fresh black eyed peas are one of my favorite summer treats, and they really shine in this salad.  The creamy peas, fresh tomatoes, sweet corn, and tangy vinaigrette all come together in perfect summer vegetable harmony.  I make a big batch of it to go with dinner one night, then eat it in various ways throughout the week - as is, over greens for lunch, over chicken or fish, rolled up into a wrap with turkey and cheese, and my personal favorite, as a salsa with tortilla chips for a snack.  Most recently I used this salad in an absolutely killer dish, and I'll be sharing the details of that later this week!

This salad is not only versatile, but the flavor combinations are endless as well.   As written here, it is very simply and neutrally seasoned, but I sometimes like to use lime juice, cilantro, and add some jalapeños to the mix as well.  I've also been known to mix in a little crumbled bacon.  A huge variety of veggies work well here too -- green beans, okra, shredded zucchini, bell peppers… really anything you find at the farmer's market this time of year will work beautifully.  What grows together, goes together!

Summer Tomato and Black Eyed Pea Salad
barely adapted from Bon Appétit,Y'all, by Virginia Willis

  • 3 ears of corn, shucked
  • 2 cups fresh or frozen black eyed peas (or lady peas, or any other field pea)
  • 2 large tomatoes, cored, seeded and chopped
  • 1/2 sweet onion, preferably Vidalia, finely diced
  • 1 stalk of celery, finely diced
  • 1 clove garlic, minced
  • 1/2 cup basil, chopped
  • 3 Tbs fresh parsley, chopped
  • 2 Tbs apple cider vinegar
  • pinch of sugar
  • 1 tsp Dijon mustard
  • 1/4 cup canola oil
  • kosher salt and freshly ground black pepper
Bring a large pot of salted water to a boil.  Add the corn and cook until tender, 2 to 3 minutes.  Use tongs to remove from the pot, and drain them on a paper towel-lined plate.

Return the water to a boil and add the black eyed peas.  Simmer until they are tender but not mushy, 15 to 20 minutes (cooking time will depend on their freshness, so start checking by tasting around 12 to 15 minutes).

Meanwhile, use a sharp knife to cut the corn kernels off the cob.  Place them in a large bowl, and add the tomatoes, onion, celery, garlic, and basil.  

Once the peas are cooked, drain them in a colander and rinse well with cold water.  Drain them very well, shaking to remove as much water as possible, then add them to the bowl with the other vegetables as well.

To make the dressing, whisk together the oil, mustard, and sugar in a small bowl.  Whisking constantly, slowly stream in the oil.  Season with salt and pepper.

Gently stir the dressing into the salad, taste, and season with additional salt and pepper as needed. 


Tuesday, July 21, 2015

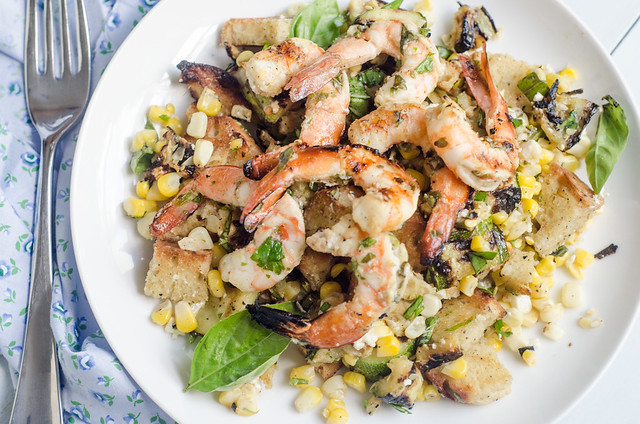
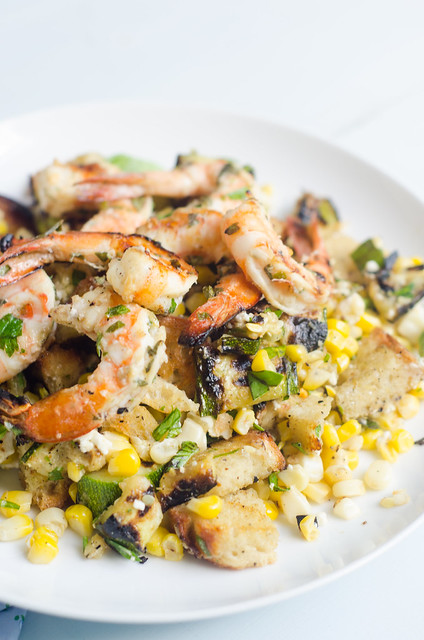
Grilled Shrimp and Summer Vegetable Panzanella

Grilled Shrimp and Summer Veggie Panzanella 

This summer has brought about a new family tradition.  On Friday evenings, we meet a few other neighborhood families at the pool, grill our dinner, and engage in general merriment with the kids.  It's something that I very much look forward to all week long.  Because I am who I am, I spend most of the week thinking about what we'll grill and eat, what cocktail I'll mix up, and what we'll eat for dessert.  Sometimes we go simple - burgers or hotdogs, chips, and watermelon.  Sometimes we go REALLY simple and order pizza.  And sometimes I get inspired and end up creating one of my favorite dinners of the summer.

Obviously I'm talking about this salad.  I planned to use my favorite recipe for grilled shrimp, and serve it alongside a simplified zucchini and corn salad, along with some grilled garlic bread.  In a moment of inspiration, I turned it into a grilled shrimp and bread salad.  I was so excited and enamored with the final dish that I made it again a few days later.

This was not only a big hit with Joey and me, but it was a huge hit with the kids as well .  They were especially obsessed with the grilled shrimp and bread, and couldn't get enough.

I have revamped and remixed my chopped summer veggie salad in several ways, spanning numerous cuisines and seasons, but this may be my favorite yet.  When I've made this, I just keep it to the veggies, shrimp, and bread, and leave out the grilled romaine.  I certainly think it would be a great addition though!  If you're looking for a side for this salad, I'd recommend that you keep it simple - a plate of sliced tomato with salt and pepper is perfection here!

Here's to summer grilling and dinner at the pool!


DSC_1430

Grilled Shrimp and Summer Veggie Panzanella

Herb-Grilled Shrimp
adapted from Ina Garten
  • 1 1/2 lbs large shrimp, peeled and deveined, but tails left on
  • 3 cloves garlic, minced
  • 1 medium yellow onion, minced
  • 1/4 cup minced fresh parsley
  • 1/4 cup minced fresh basil
  • 1 teaspoon dry mustard
  • 2 teaspoons Dijon mustard
  • 1 1/2 teaspoons kosher salt
  • 1/2 teaspoon fresh black pepper
  • pinch of red pepper flakes
  • 1/4 cup olive oil
  • 1 lemon, juiced
Combine all the ingredients and toss to coat the shrimp.  Allow to marinate at room temperature for 1 hour, or in the refrigerator for up to 24 hours.
Summer Vegetable and Grilled Bread Salad
  • 1/3 cup extra virgin olive oil, plus more for dressing
  • 3 cloves garlic, minced
  • kosher salt and freshly ground black pepper
  • 1/4 tsp red pepper flakes
  • zest of half a lemon
  • 2 ears corn, husk and silks removed
  • 3 medium zucchini, sliced lengthwise into 1/2-inch-thick planks
  • 6-8 slices baguette or other crusty bread (I used a roasted garlic loaf and it was really really good!)
  • 2 Tbs chopped fresh basil
  • 1/2 cup crumbled feta cheese (about 2 oz)
Prepare the grill to cook at medium-high heat.  Allow to preheat at least 15 to 20 minutes.

Meanwhile, whisk together the oil, garlic, 1/2 teaspoon of salt, 1/2 teaspoon of pepper, lemon zest, and red pepper flakes.

Brush the zucchini, bread slices, and corn with the oil mixture. Reserve the remaining oil mixture to use for the dressing.

Clean the cooking grate, then place the zucchini, corn, and bread slices on the grill.  

For the corn, grill, turning every 2 to 3 minutes, until the kernels are lightly charred all over, about 10 minutes total.

For the zucchini, grill it until it is well-browned and tender (but not mushy), about 4 to 5 minutes per side.

For the bread, grill it 1 to 2 minutes per side, or until it is lightly charred.

Meanwhile, prepare the dressing.  Add enough oil to the remaining oil-garlic-pepper mixture to reach a volume of 1/4 cup, then whisk in the lemon juice.  Taste and season with salt and pepper as needed.

Prepare grill. 

 Thread the shrimp on skewers.

Grill the shrimp for about 2 minutes, then flip skewers and grill until cooked through, an additional 1-2 minutes.  Remove from the grill and cover lightly with foil as you prepare the rest of the salad.

Once everything is off the grill, begin building the salad.    Cut the kernels off the corn and add them to a large bowl.  Cut the zucchini crosswise into 1/2 inch-thick slices, and add those as well.  Slice or tear the bread into bite-sized pieces.  Crumble the feta into the bowl, and top with the chopped basil.  Drizzle the dressing over the top, then toss well to combine.  

Divide among plates, then lightly sprinkle each serving with salt and freshly ground pepper.  Top each serving with several shrimp, and serve.


Sunday, January 25, 2015

Skillet Chicken Tamale Pie

Skillet Chicken Tamale Pie

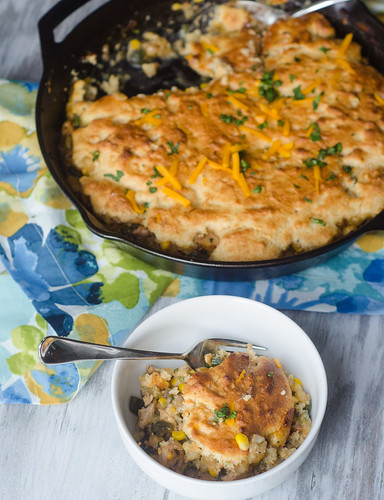
When I was growing up, one of my favorite dinners was tamale pie.  My mom made a vegetarian version, which still remains in my top 5 meals (sorry, I've been holding out -- I'll share it soon!).  In case you're unfamiliar with the concept of tamale pie, it's a baked casserole, the filling consisting of various vegetables, perhaps meat, Mexican spices, and topped with cornbread.  Yeah.  It's good.

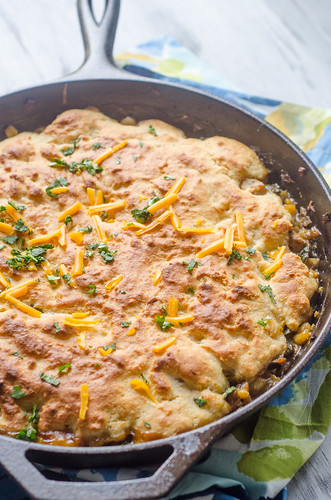
This version is pretty much a 180 from the tamale pie I had growing up, but I love it just as much.  The filling is chicken, poblano peppers, corn, hominy, and cheddar.  Topped with cornbread batter and baked, it is so comforting -- basically this is a Mexican-inspired chicken pot pie with cornbread instead of a pie crust on top.  As Ina would say, "How bad can that be?"

It's also a pretty light dinner, especially for something so filling and comforting.  It comes in at under 400 calories per serving, which makes this calorie-counting woman very happy.  Paired with a green salad, this made for a really wonderful dinner, and a few days worth of awesome lunches as well!

So I noticed that this is the third skillet dinner in a row that I've posted… hope you guys love them as much as we do!  Long live the skillet!


Skillet Chicken Tamale Pie 

Skillet Chicken Tamale Pie
adapted from America's Test Kitchen's Healthy Family Cookbook
serves 6

  • 1 lb boneless, skinless chicken thighs, trimmed of excess fat
  • kosher salt and freshly ground black pepper
  • 2 tsp canola oil
  • 1 onion, minced
  • 2 poblano peppers, stemmed, seeded, and chopped
  • 1 jalapeño, stemmed, seeded, and chopped (optional)
  • 3 cloves garlic, minced
  • 1 Tbs all purpose flour
  • 1 1/2 cups low-sodium chicken broth
  • 1 (15-oz) can hominy, drained and rinsed
  • 1 (7-oz) can mild chopped green chiles, drained
  • 1 cup frozen corn
  • 3/4 cup shredded extra sharp cheddar cheese
  • 1/4 cup minced fresh cilantro
Topping
  • 3/4 cup all-purpose flour
  • 3/4 cup cornmeal
  • 3 Tbs sugar
  • 3/4 tsp baking powder
  • 1/4 tsp baking soda
  • 1/2 tsp kosher salt
  • 3/4 cup buttermilk
  • 1 large egg
  • 1 Tbs unsalted butter, melted
  • 1/4 cup extra sharp cheddar cheese
Preheat the oven to 450 degrees.  

Pat the chicken dry and season liberally with salt and pepper.  Heat the oil in a 12-inch oven-safe skillet over medium-high heat.  Add the chicken and cook 6 to 8 minutes, flipping once, until it is golden-brown on both sides.  Transfer the chicken to a plate and leave the fat in the pan.

Add the onion, poblano, 1/2 teaspoon of salt, and 1/2 teaspoon of pepper to the pan and cook until it's softened and lightly browned, 5 to 7 minutes.  Stir in the garlic and flour and cook an additional minute.

Stir in the broth, hominy, chiles, and corn, and bring to as mimer.  Nestle the chicken in tot he mixture, cover, and reduce heat to medium-low.  Cook until the chicken is cooked through, about 10 minutes.

Remove the chicken from the skillet, and once it's cool enough to handle, shred it into bite-sized pieces.  Return the chicken to the skillet and stir to combine.  Stir in the cheddar and cilantro, taste, and season with additional salt and pepper if needed.  Remove from heat and cover to keep warm while you make the cornbread topping.

In a large bowl, whisk together the flour, cornmeal, sugar, baking powder, baking soda, and salt.  In a separate, smaller bowl, whisk together the buttermilk and egg.  Stir the buttermilk mixture into the flour mixture, just until no streaks of flour can be seen, then stir in the melted butter and cheddar cheese.  

Drop spoonfuls of the batter over the chicken filling, then smooth the top into an even layer, covering the filling completely.

Transfer the skillet to the oven and bake 15 to 20 minutes, or until the topping is golden and set.  Cool for 10 minutes before scooping into bowls and serving.


Thursday, September 4, 2014

Farmer's Market Roasted Vegetable Salad

Farmer's Market Roasted Vegetable Salad 

Do you go to the farmer's market over the weekend?  We love going on Saturday mornings.  The kids get to eat popsicles and crepes, and I get to peruse the stalls and pick out beautiful produce, fresh flowers, good meats, eggs, cheese… it's pretty much my favorite time of the week.  Oftentimes I have a plan of what to buy, and what I'm going to make with it.  But I'm also a pretty bad impulse shopper, and sometimes I just can't help myself.  Exhibit A:  Lima beans.  Or butter beans, if you're from the south.

Look, I know they have a bad reputation and some would put them in the "gross vegetable" category, but hear me out.  When they're fresh, and when they're cooked and seasoned properly, they are one of my favorite veggies.  They're creamy and buttery, and absolutely delicious.

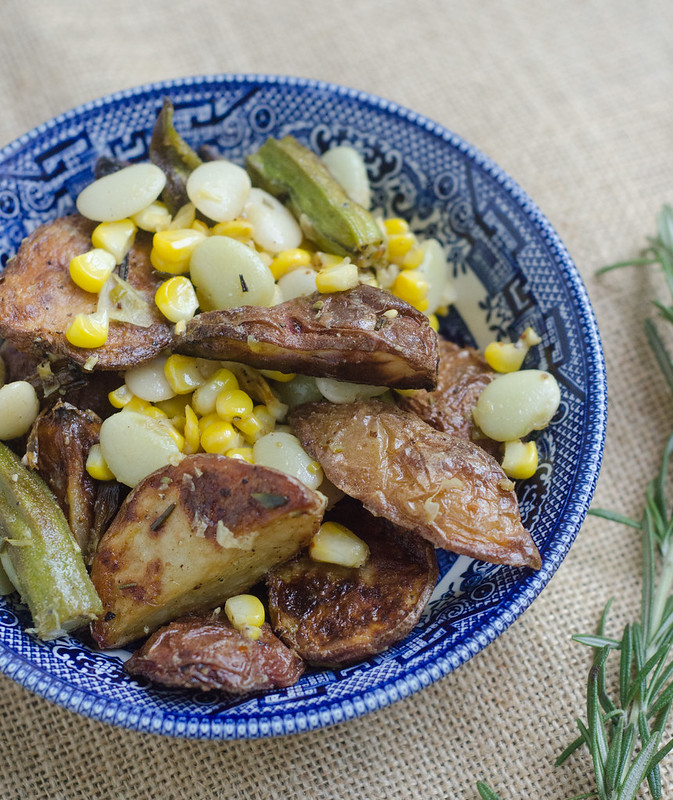
So back to the farmer's market and impulse purchases.  Between our weekly produce delivery, and our trips to the farmer's market, there's been no shortage of amazing food in our fridge this summer.  I took that gorgeous produce and made a wonderful salad with it.  Here's what's going on in there:  roasted potatoes, okra, corn, lima beans, and onions, dressed with a lemon-rosemary vinaigrette.  It's delicious hot and right out of the oven, it's great at room temperature, and it's wonderful served chilled over a bed of greens.  What I'm saying here, is that it's just a really great dish!

I served this with my Peach Chutney and Goat Cheese Burgers, and it was a wonderful meal.  And then I enjoyed the salad leftovers for lunch the next few days.

This is pretty infinitely adaptable as well:  add some squash or zucchini, maybe sprinkle some goat cheese or feta over the top, add some fresh tomatoes at the end, mix up the veggies… the sky's the limit here.

Farmer's Market Roasted Vegetable Salad
adapted from Food and Wine (via Elly Says Opa)

  • 2 lbs small potatoes, such as red-skinned, yukon gold, or fingerling
  • 2 large fresh rosemary sprigs, plus 1/2 tsp minced fresh rosemary
  • 1/4 cup olive oil
  • kosher salt
  • freshly cracked black pepper
  • 3/4 lb okra, tops and tips trimmed off
  • 2 ears corn
  • 2 cups fresh (rehydrated) lima beans, rinsed and picked through
  • juice of 1/2 lemon
  • 1 tsp Dijon mustard
  • 1 shallot, finely minced
Preheat the oven to 450 degrees Fahrenheit.  

Halve the potatoes lengthwise and toss with 2 tablespoons of oil, rosemary, 3/4 tsp salt, and 1/2 tsp pepper.  Arrange in a single layer on a rimmed baking sheet, and cook for 20 minutes, stirring once halfway through.  Add the okra to the pan, and stir to combine.  Arrange the corn on the edge of the pan, and cook an additional 20 to 30 minutes, or until the potatoes are well-browned and tender, and the okra is cooked through.  When cool enough to handle, cut the corn off the cobs.

Meanwhile, bring a medium saucepan of water to a boil.  Add 1 teaspoon of salt and the lima beans, and cook until the lima beans are fork-tender and soft, 15 to 20 minutes.  Drain and set aside.

In a large bowl, whisk together the remaining 2 tablespoons of olive oil, lemon juice, dijon, 1/2 tsp salt, 1/2 tsp pepper, remaining rosemary, and shallot.  Add the roasted vegetables and lima beans, and toss well to coat with the dressing.  Serve immediately, at room temperature, or chilled.


Sunday, August 3, 2014

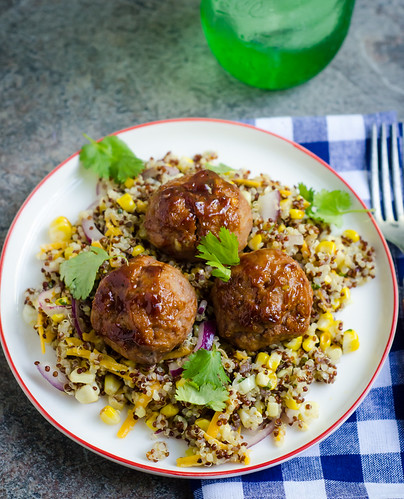
BBQ Turkey Meatballs over Cheddar-Corn Quinoa

BBQ Turkey Meatballs over Cheddar-Corn Quinoa


I've had meal-planning ADD lately.  I sit down to plan my menu, write it all out, make my grocery list, then decide I hate everything on it and start over.  I'm pretty certain that last week I created three separate menus before finally settling on the final version.  And I have to say, I'm glad I floundered the way I did, because last week's meals were pretty spectacular!  I must do my best work under pressure.  
Leading the way was this last-minute addition, and ironically, it was just kind of thrown together on a whim.  I didn't have it in me to drag all the kids to the grocery store that day, so I needed to figure something out based on what was in the fridge.

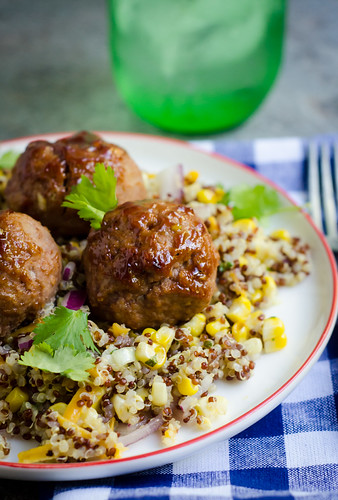
The meatballs are an adaptation of my BBQ chicken burgers, and they were a smash hit.  Everyone in my family just devoured these.  To keep this dinner on the light side, I threw together a grilled corn and cheddar quinoa salad, and the pairing of the meatballs with the quinoa was just fantastic (though I think the meatballs would be fabulous over cheesy grits as well).  These would be a great addition to a party spread or tailgate as well, just served as-is.  Or topped with melted cheese and turned into a bbq meatball sub.  Um, yes please.

This was a filling and satisfying summer meal, but it was nice and light as well.  The perfect balance between my desire for healthy dinners, and wanting to serve something hearty and filling for the kids.  It's a winner all-around.


BBQ Turkey Meatballs over Cheddar-Corn Quinoa

BBQ Turkey Meatballs over Cheddar-Corn Quinoa


BBQ Turkey Meatballs
  • 1 lb ground turkey
  • 1/4 cup panko bread crumbs
  • 1 scallion, minced
  • 1 Tbs minced fresh cilantro
  • 1/2 tsp paprika
  • 1/4 tsp garlic powder
  • 1 tsp dry mustard
  • 3/4 tsp kosher salt
  • pinch cayenne
  • 2 tsp brown sugar
  • 5 Tbs bbq sauce, divided
Preheat the oven to 400 degrees.  Line a baking sheet with foil or parchment paper, and spray lightly with cooking spray.

In a large bowl, combine the turkey, panko, scallion, cilantro, paprika, garlic, mustard, salt, cayenne, brown sugar,  and 2 tablespoons of the bbq sauce.  Lightly but thoroughly mix with your hands to incorporate all the ingredients.  Using an ice cream scoop or 1/4 cup measuring cup, form the mixture into balls, and arrange in a single layer on the prepared baking sheet.

Add the remaining 3 tablespoons of bbq sauce to a small bowl.

Bake the meatballs 11 to 12 minutes, then brush with the reserved bbq sauce.  Return to the oven and bake an additional 3 to 4 minutes, or until they are cooked through (160 in the center).  

Cheddar-Corn Quinoa
  • 1 cup quinoa, rinsed and drained
  • 1 1/2 cups chicken or vegetable broth
  • kosher salt and freshly ground black pepper
  • 2-3 ears of corn, grilled, roasted, or boiled, kernels cut from cobs
  • 1/2 medium red onion, sliced into thin rings and rinsed under cold water
  • 3 Tbs chopped fresh cilantro
  • 1 scallion, minced
  • 3/4 cup freshly shredded sharp cheddar cheese
  • 3 Tbs olive oil
  • 1/4 tsp crushed red pepper flakes
  • 2 cloves garlic, minced
  • 1 Tbs apple cider vinegar
Bring the quinoa, broth, and a big pinch of salt to a boil in medium saucepan.  Cover, reduce heat, and simmer about 15 minutes, or until the quinoa is cooked through.

Remove the quinoa from heat, and add to a medium mixing bowl.  Stir in the corn, onion, cilantro, scallion, and cheese.

In small bowl, whisk together the oil, pepper flakes, garlic, and vinegar.  Pour over the quinoa and gently mix to combine.  Taste and season with additional salt and pepper as needed.

Serve the meatballs over the quinoa.


Tuesday, June 17, 2014

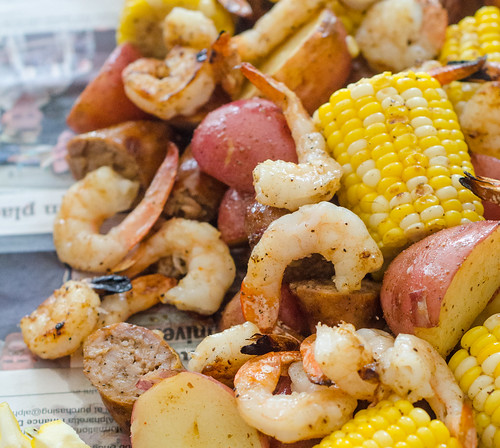
Low Country Grill


Part of what I love the most about this fine country of ours are all the different regional cuisines and specialties.  I'm sure you're all familiar with seafood boils in the summer, but depending on where you live, it may be called something else, and the seafood will definitely vary.  Here in the coastal south, we call it a "low country boil."  Louisiana and Texas have crawfish boils.  The northeast does clambakes.  And some just call it a shrimp boil.

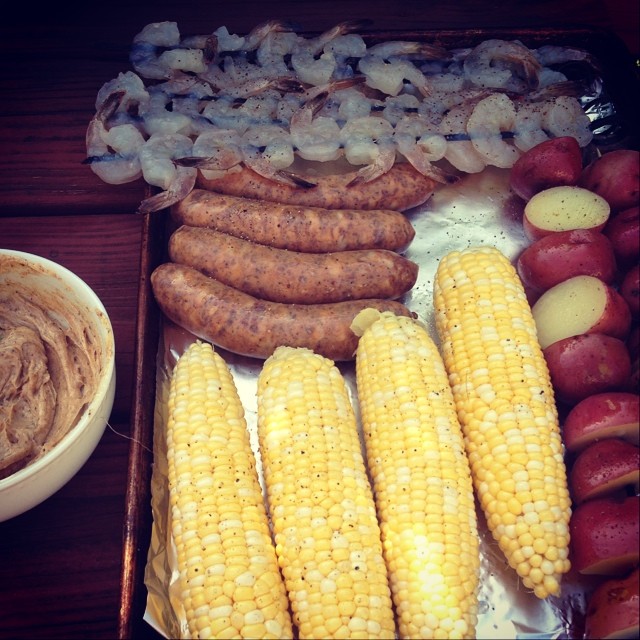
So everyone does it differently, but here's the way I like it.  Shrimp (only gulf shrimp will do), potatoes, corn, and spicy sausage.  Lots of old bay seasoning.  Butter.  And from the grill.  Low country boil purists will definitely call blasphemy on this, but in my opinion, serving this grilled blows the boil right out of the water (pun intended).  Oftentimes the boil can be bland, and the timing can be tricky as well. Sometimes the potatoes are undercooked.  Sometimes the shrimp is overcooked and rubbery.  But when you make it on the grill, you have total control over each component.


I've been making this for a few years now, and it's my favorite summer dinner.  We make this every year at the beach for our group of 20+, when we're entertaining at our house, when we want a fun weekend dinner… it's just a great summer meal.  I like to prep everything ahead of time, then just throw it on the grill when we're ready to eat.  As it all grills, I brush it with Old Bay butter, then toss it all with more of that delicious compound butter once it comes off the grill.  Dump it on a pile of newspaper, and dig in caveman-style.  The kids think it's hilarious to eat dinner without plates.

The side dishes for this are non-negotiable:  cheddar-garlic biscuits and fresh watermelon.  And cold beer for the adults, of course.

This is the ultimate summer meal, and one that I look forward to every year.  Grill your low-country boil.  You won't be sorry.


Low Country Grill
inspired by Everyday Food, June 2011
serves 4 to 6, and can easily be scaled up or down

  • 1 lb red new potatoes, halved or quartered, depending on size
  • 4 ears corn, husks and silks removed
  • 1 lb smoked sausage or Andouille sausage
  • 1 lb shrimp, peeled and deveined
  • canola oil
  • kosher salt and freshly ground black pepper
  • 8 Tbs unsalted butter, at room temperature
  • 1 Tbs Old Bay seasoning
  • 1 tsp hot sauce (or more, if you prefer more spice)
  • 1 tsp honey
  • lemon wedges, for serving
  • hot sauce, for serving
Prepare grill to medium-high heat.

Add the potatoes to a medium saucepan, cover with water, and season with a big pinch of salt.  Bring to a boil and cook until the potatoes are easily pierced with a fork, 8 to 12 minutes.  Drain and rinse, then when cool enough to handle, thread onto skewers.

Thread the shrimp onto skewers.  

Brush everything with canola oil, and season lightly with salt and pepper.

In a medium bowl, combine the butter, old bay, hot sauce, honey, and a pinch of salt.

Place everything on the grill, then cook 8 to 12 minutes, turning every few minutes and brushing with the butter.  The shrimp will take the least amount of time - cook them just until they are pink and opaque, 8 minutes at the very most, but likely closer to 5 to 6 minutes, depending on how tightly they are threaded onto the skewers and how big they are.  Reserve the remaining butter.

Remove from heat and cut each ear of corn into thirds.  Slice the sausage into bite-sized pieces.  Combine the sausage, corn, potatoes, and shrimp in a large bowl and toss with the remaining butter.  

To serve, dump everything onto a platter or newspaper.  Dig in.


Tuesday, June 10, 2014

Grilled Summer Vegetable Chopped Salad


Alternately titled, "My Summer Obsession."  Or "Grilled Romaine Salad with Chicken, Zucchini, Corn, and Feta, with a Spicy Lemon-Garlic Dressing."  Do you see why I went with "Grilled Summer Veggie Chopped Salad?"

But no matter what you call it, this salad IS my summer obsession, and with the veggies coming into their primes, I see no signs of that slowing down any time soon.  My nutrition and diet as of late haven't exactly been ideal, and this salad has been a great way to kind of "reset."  It's healthy and light, but it's really filling and really delicious, so I don't feel deprived or bitter about giving up french fries.  And isn't there something so great about chopped salads?  I don't know what it is, but I just love them.

A few weeks ago, my sweet friend Courtney and her sweet family stopped by our house on their way through Atlanta.  We of course wanted to cook together, and the original version of this salad was on the menu.  A seemingly simple grilled salad of corn, zucchini, and feta, this salad ended up being my favorite dish of the night.  We all raved over it, and I haven't stopped thinking about it since.

The following week, I was craving it again, but this time I bulked it up with the addition of grilled chicken and grilled romaine.  And then the next week, I made it again.  You can see where this is going.

If you've never had grilled romaine,  I know it sounds kind of weird, but just trust me.  Grilling the romaine hearts gives them a great char and a little smoky flavor, but since they're only on the grill for a few minutes, they don't get gross and mushy.  Like I said, you have to just trust me on this that grilled romaine is amazing.

This is an easy dinner, one that only dirties a few dishes, it's healthy, and it celebrates the produce of the season.  Will you pretty please make this for dinner tonight?


Grilled Summer Vegetable Chopped Salad
inspired by Cook's Country, June/July 2014
  • 1/3 cup extra virgin olive oil, plus more for dressing
  • 3 cloves garlic, minced
  • kosher salt and freshly ground black pepper
  • 1/4 tsp red pepper flakes
  • zest of half a lemon
  • 2 ears corn, husk and silks removed
  • 3 medium zucchini, sliced lengthwise into 1/2-inch-thick planks
  • 2 heads of romaine hearts, halved lengthwise
  • 1 lb boneless skinless chicken breasts, trimmed
  • juice of half a lemon
  • 2 Tbs chopped fresh basil
  • 1/2 cup crumbled feta cheese (about 2 oz)
Prepare the grill to cook at medium-high heat.  Allow to preheat at least 15 to 20 minutes.

Meanwhile, whisk together the oil, garlic, 1/2 teaspoon of salt, 1/2 teaspoon of pepper, lemon zest, and red pepper flakes.

Brush the zucchini, corn, and romaine with oil, then pour about 1 tablespoon of the oil mixture over the chicken breasts,  Brush them with the oil then discard the brush (In other words, don't dip it back into the mixture, because it will contaminate the oil since the chicken is raw!).  Reserve the remaining oil mixture to use for the dressing.

Clean the cooking grate, then place the chicken, zucchini, romaine, and corn on the grill.  This may need to be done in batches, depending on the size of your grill.  But definitely start with the chicken since it takes the longest to cook.  

For the chicken, grill it about 7 minutes per side, or until it reaches an internal temperature of 160 degrees.  Remove from heat and cover with foil.

For the corn, grill, turning every 2 to 3 minutes, until the kernels are lightly charred all over, about 10 minutes total.

For the zucchini, grill it until it is well-browned and tender (but not mushy), about 4 to 5 minutes per side.

For the romaine, grill it 1 to 2 minutes per side, or until it is very lightly charred.

Meanwhile, prepare the dressing.  Add enough oil to the remaining oil-garlic-pepper mixture to reach a volume of 1/4 cup, then whisk in the lemon juice.  Taste and season with salt and pepper as needed.

Once everything is off the grill, begin building the salad.  Chop the romaine hearts into bite-sized pieces and add them to a large bowl.  Cut the kernels off the corn and add them to the romaine.  Cut the zucchini crosswise into 1/2 inch-thick slices, and add those as well.  Chop the chicken into bite-sized pieces.  Crumble the feta into the bowl, and top with the chopped basil.  Drizzle the dressing over the top, then toss well to combine.  

Divide among plates, then lightly sprinkle each serving with salt and freshly ground pepper.  Serve.


Sunday, April 20, 2014

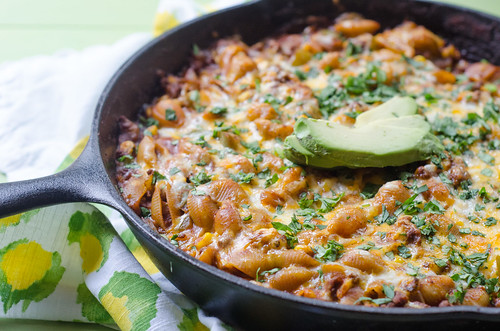
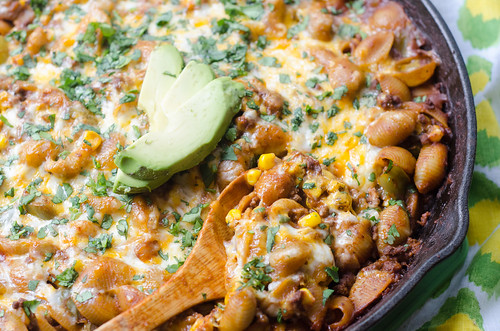
Skillet-Baked Tex-Mex Macaroni


Do you want to know how you can tell that something was REALLY good?  If you look at a picture of it two weeks later, when you are super full from a huge Easter lunch, and your mouth waters and your stomach growls.... you know it's good.

This skillet tex-mex macaroni is not only amazingly delicious, but it's cooked in under 30 minutes, and only dirties one pot.  It makes a perfect weeknight dinner, and it has all your bases covered:  Mexican food, pasta, spice, cheesiness, and it's reasonably healthy.


This skillet meal reminded me a bit of hamburger helper, but obviously it's better.  Joey and I really really loved this, and my mom asked for the recipe when she ate the leftovers for lunch during a visit.  

I really just cannot say enough good things about this dish, so I'll leave you with this:  rearrange your weekly meal plan and squeeze this in.  And then come back and tell me "thank you."  


Skillet-Baked Tex-Mex Macaroni
adapted from Pasta Revolution
serves 4
  • 1 Tbs canola oil
  • 1 cup finely chopped onion
  • 1 green bell pepper, stemmed, seeded, and chopped into small pieces
  • 1 jalapeño, seeds and ribs removed, minced
  • 3 cloves garlic, minced
  • 2 Tbs chili powder
  • pinch of cayenne pepper (optional)
  • 2 tsp cumin
  • 1/2 tsp paprika
  • kosher salt and freshly ground black pepper
  • 1 lb 90% lean ground beef
  • 2 cups water
  • 1 (15-oz) can tomato sauce (preferably from fire-roasted tomatoes, if you can find it)
  • 8 oz (about 2 cups) elbow macaroni or shells
  • 1 cup frozen corn
  • 1 (4.5 oz) can chopped green chiles, drained
  • 3 Tbs chopped fresh cilantro
  • 1 cup shredded cheddar cheese
  • 1 cup shredded Monterey Jack or Pepperjack cheese
  • avocado, sour cream, and/or hot sauce for serving
Preheat the oven to 475 degrees.

Heat the oil in a 12-inch nonstick skillet over medium heat.  Add the onion, bell pepper, and jalapeño and sauté until softened, 5 to 7 minutes.  

Stir in the garlic, chili powder, cumin, cayenne, paprika, and 1/2 teaspoon of salt.  Cook until fragrant, about 30 seconds.  

Add the beef, using a wooden spoon to break up any big pieces, and cook until it's no longer pink, 2 to 3 minutes.

Stir in the water, tomato sauce, and pasta.  Increase heat, cover, and bring to a vigorous simmer.  Stirring frequently, cook until the pasta is tender, 10 to 12 minutes.

Remove the skillet from heat and stir in the corn, green chiles, 2 tablespoons of the cilantro, and 1/2 cup of each of the cheeses.  Taste and season with salt and pepper as needed.  Sprinkle the remaining cheese over the top of the para, and bake until the cheese is melted, browned, and bubbly, 10 to 15 minutes.  

Cool 10 minutes, sprinkle with the remaining tablespoon of cilantro, and serve.


Monday, September 16, 2013

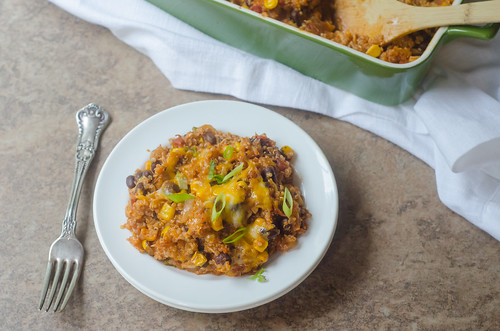
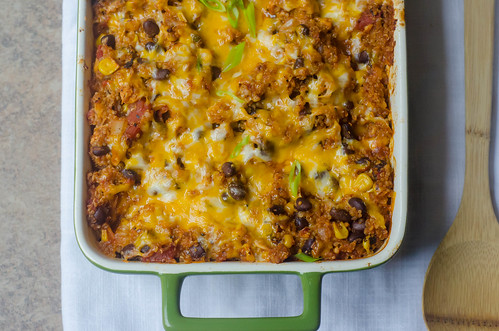
Chicken Enchilada Quinoa Bake


I've gotten out of the habit of meal-planning lately, and it's definitely been a stressor for me.  If I don't have a dinner planned out, I feel like I spend the majority of the day staring blankly into my fridge, pantry, and freezer, basically just willing something to magically appear or give me inspiration.  Or going through my Pinterest boards and saved recipes hoping that I miraculously have all the ingredients I need for a particular recipe that catches my eye.  I try to minimize my trips to the grocery store throughout the week, both for budgetary and logistical reasons (Three kids under 2.  No further explanation necessary).

On this particular day, I remembered that I had some shredded chicken and some extra enchilada sauce in the freezer - score!  Earlier that day I laid down the gauntlet for myself and decided we were having quinoa in some fashion, and cooked a few cups during nap time.  I'm pretty much always craving Mexican food; thus divine inspiration hit, and this casserole was born.

Chicken Enchiladas are one of my favorite foods of all times, so it should come as no surprise that I like to reincarnate them into as many different dishes as I can.  So far, pizza, dip, pasta, and zucchini boats have all been pretty well-received at our house.  So a cheesy, baked casserole seemed like a surefire win.  And obviously, it was.

I've gotten into the habit of using quinoa instead of rice 90% of the time, so I continued on with that trend here.  It adds a lot of protein to the dish, so combined with the chicken and black beans, this dinner packs a major protein punch.  I also mixed in some corn, enchilada sauce, a modest amount of cheese, and a few extra spices and seasonings before baking it in the oven.

As expected, we all loved this dish - and what's not to love?  It's comforting, cheesy, spicy, reasonably healthy, and reminiscent of my all-time favorite meal!


Chicken Enchilada Quinoa Bake

I already had chicken, enchilada sauce, and quinoa prepped, so this came together quite quickly.  Even if you are making everything at once, it can all be done pretty easily as well - as the chicken cooks, make the enchilada sauce and cook the quinoa, then it's just assemble and bake.  As a matter of fact, this would make a great make-ahead meal, so you could prep and assemble the night before or morning of, then just throw it in the oven when you get home.

  • 1 cup uncooked quinoa, rinsed
  • 2 cups water
  • 1 Tbs oil
  • 1 medium onion, diced
  • 1 jalapeño, seeds and ribs removed, and diced
  • 1 can black beans, drained and rinsed
  • 1 cup corn kernels (fresh or frozen)
  • 1 (15-oz) can fire-roasted diced tomatoes
  • 2 cups cooked and shredded chicken
  • 1 tsp cumin
  • 1 Tbs chile powder
  • 3/4 tsp salt
  • 1 cup enchilada sauce (recipe follows)
  • 2/3 cup cheddar cheese
  • 2/3 cup Monterey Jack cheese
  • sliced scallions and minced cilantro, for garnish
Preheat the oven to 350 degrees.  Lightly grease a medium baking dish.

Combine the quinoa and water in a medium saucepan and bring to a boil.  Cover, reduce heat, and simmer until most of the water is absorbed and the quinoa is cooked through, about 15 minutes.  Remove from heat and set aside.

In a medium saute pan, heat the oil over medium heat.  Add the onion and jalapeño, and sauté until softened, about 5-6 minutes.  Remove from heat and set aside.

In a large mixing bowl, combine the quinoa, black beans, corn, tomatoes, chicken, cumin, chile powder, salt, enchilada sauce, and 1/ 3 cup of each cheese.  Season with additional sat and pepper to  taste.  Mix well and pour into the prepared baking dish.  Sprinkle with the remaining cheese, and cover the dish with aluminum foil.

Bake 15-20 minutes, then remove foil.  Bake an additional 10-15 minutes, or until the cheese is melted and browning.  Rremove from the oven and allow to cool 10 minutes.  Sprinkle with chopped scallions and cilantro, and serve.

Red Enchilada Sauce
The America's Test Kitchen Healthy Family Cookbook

Note: This will make more than you need for this recipe, so I'd suggest just freezing the leftovers. You never know when you'll have an enchilada sauce emergency!
  • 1 tsp canola oil
  • 1 onion, minced
  • 3 garlic cloves, minced
  • 3 Tbs chile powder
  • 2 tsp ground cumin
  • 2 tsp sugar
  • 1 (15-oz) can tomato sauce
  • 1/2 cup water
  • salt and pepper
Heat the oil in a medium saucepan over medium-high heat.  Add the onion and cook until softened, 5 minutes.  Stir in the garlic, chile powder, cumin, and sugar, and cook, stirring constantly until fragrant, about 30 seconds.  Stir in the tomato sauce and water, and bring to a simmer.  Cook until slightly thickened, about 5 minutes.  Season with salt and pepper to taste.


Monday, August 19, 2013

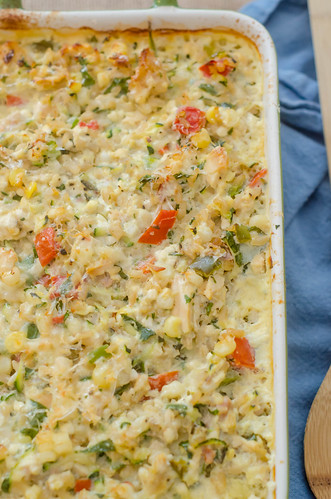
Chicken & Summer Vegetable Rice Casserole


Is there anything more comforting than a creamy, cheesy, casserole?  I typically reserve that type of meal for cold or gloomy weather, but this casserole is best served in the middle of summer.  It's  actually on the lighter side, thanks to cottage cheese, tons and tons of veggies, brown rice, and a modest amount of Parmesan - but it tastes just as cheesy, comforting, and homey as anything you've had at a church potluck or your grandmother's house.  I first started making this last summer, when I was in the throes of morning sickness.  It was one of the only things that ever sounded edible, which was a bonus - it was also the only way I could stomach vegetables.

I mix it up a little each time I make this, using whatever veggies I have on hand, or just using what sounds good at that moment.  I typically add shredded chicken to make it a complete meal, but you could leave the chicken out and serve this as a side dish or a vegetarian dinner as well.  My go-to combination has been tomatoes, zucchini, corn, onions, and bell peppers.

Another bonus?  No precooking of the vegetables is required.  Just throw it all together, bake, and serve.  This is also a great make-ahead meal.  I've assembled it the night before, then just baked the next day.  And I've taken it to a few friends who just had babies as well.  It's hearty, delicious, filling, and full of the summer's best produce.  Definitely a winner in my book!
Chicken & Summer Vegetable Rice Casserole
adapted from eat love drink, via Sunny Side Up in San Diego


  • 2 eggs
  • 1 tsp kosher salt
  • 1 tsp fresh black pepper
  • 2 tsp Dijon mustard
  • 2 cloves of garlic, minced
  • 1 cup cottage cheese (low fat is fine)
  • 1/2 cup grated Parmesan cheese
  • 2 cup cooked brown rice 
  • 1/2 cup finely diced onion
  • 1 1/2 cups seeded and chopped tomatoes
  • 1 medium zucchini, shredded on the large holes of a cheese grater
  • 1 large ear of corn, kernels cut from the cob 
  • 1/2 medium bell pepper, finely diced
  • 2 cups cooked and shredded chicken
  • 1/4 cup chopped fresh basil

Preheat oven to 350 degrees. Spray a square casserole dish or pie pan with nonstick spray and set aside.
In a large bowl, whisk together the eggs, salt, pepper, mustard, garlic, and cottage cheese. Add the rice, onion, tomatoes, zucchini, corn, bell pepper, chicken, and half the basil.  Stir well to combine.
Pour the mixture into the prepared dish, and use a spatula to smooth the top.  Sprinkle with the Parmesan cheese. Cover tightly with foil and bake for 30-40 minutes. Remove the foil and bake another 15-20 minutes, or until the cheese turns golden-brown.
Allow to cool for 15 minutes, garnish with the remaining basil, and serve.


Sunday, August 4, 2013

Pasta with Bacon, Toasted Corn, and Cherry Tomatoes


I might be nearing the point of needing a corn intervention.  I've been obsessed with it all summer, and I don't have any plans of stopping.  We've been enjoying it in our dinners at least twice a week, whether it's straight-up corn on the cob or incorporating it into other dishes... like crab cakes, pizza, risotto... and now into this pasta dish.  I even have a dessert in the works. Things are getting mighty crazy up in here!

So this pasta embodies everything I love about summer dinners.  It was super fast - allowing for maximum outside time both before and after dinner.  It didn't require many dishes to wash, or ingredients to buy.  You don't have to turn on the oven.  It has bacon (although let's be honest - that makes a good meal no matter what time of year it is).  And finally, it's full of peak-season produce.

The bacon is quickly cooked, then corn is toasted in the rendered bacon fat.  Cherry tomatoes are thrown in for good measure, and the whole thing is finished with some Parmesan cheese, fresh basil, and a squirt of lemon juice.

I was a little worried that it wouldn't really seem like a cohesive dish without a true sauce - I didn't want  pasta with just random ingredients thrown in.  But as the cherry tomatoes cook, some will burst, and that plus the pasta water and Parmesan cheese form a super flavorful sauce.  And these cute little corkscrews were perfect for trapping the corn kernels and bacon bits - maximum flavor in each bite!

School is starting in the next few weeks, and I know that weeknights are super busy.  Making this a great dinner to put on the table for your family.  Because whether you're trying to make the most out of the last vestiges of summer, or gearing up for a busy fall, this pasta dish will meet all your criteria.

Pasta with Bacon, Toasted Corn, and Cherry Tomatoes
adapted from America's Test Kitchen, Pasta Revolution
serves 4 to 6

  • 8 slices of bacon, chopped
  • 4 ears of corn, kernels cut from the cob
  • salt and pepper
  • 1 lb cherry or grape tomatoes, halved
  • 1 lb medium pasta shape
  • 2 oz. freshly grated Parmesan cheese (about 1 cup), plus extra for serving
  • juice of 1/2 lemon (about 1-2 Tbs)
  • 1/2 cup chopped fresh basil
Cook the bacon in a large nonstick skillet over medium-high heat until crisp, about 5 minutes, stirring often.  Use a slotted spoon to transfer it to a paper towel-lined plate, and drain off all but 2 tablespoons of the fat from the skillet.  Add the corn, 1/4 teaspoon of salt and cook until the corn is toasted and spotty brown, 7-10 minutes.  Add the tomatoes and cook, stirring often, about 3 minutes, or until they are slightly softened and starting to burst.

Meanwhile, bring a large pot of water to a boil.  Add 1 tablespoon of salt, then stir in the pasta.  Return to a boil and cook until al dente, stirring often (I usually cook it 1-2 minutes less than the recommended time on the box).

Reserve 1/2 cup of the cooking water, drain the pasta, and return it to the saucepan.  Stir in the bacon, corn and tomato mixture, Parmesan, basil, and lemon juice.  Add the reserved pasta water a little at a time to adjust the consistency as needed.  Season with salt and pepper as needed.  Divide among serving bowls, and pass extra parmesan at the table.


Tuesday, July 23, 2013

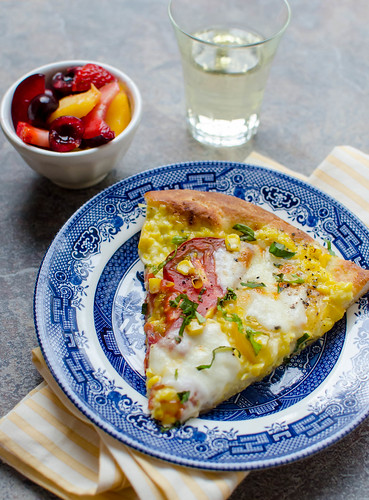
Pizza with Corn, Tomatoes, and Mozzarella


This pizza.  You guys.  It's pretty amazing. Admittedly, it's a little out there.  And you might be wrinkling your nose.  But stay with me.  Here's the breakdown:  fresh pizza dough - please, no canned dough (ever)!  Fresh tomatoes, mozzarella, corn, and basil.  And here's the crazy part:  instead of traditional red sauce, you use a puree of fresh corn, garlic, and Parmesan.  And it is ridiculously good.  It's basically creamed corn on a pizza.

As I've mentioned before, pizza night is one of my favorites because Caroline always helps me roll out the dough, spread the sauce, and add the toppings.  And of course sneak a few samples in the process.  When we made this pizza, she thought it was so funny that we were using corn instead of sauce.  "Corn  pizza sauce?!  Get out of town!"  But she ended up loving it just as much as I did.

This pizza is definitely a celebration of summer - there truly is nothing like summer produce.  Fresh sweet corn, heirloom tomatoes, fresh basil... it doesn't get any better than this.  Branch out and get crazy with your next pizza night - you definitely will not be disappointed.

Pizza with Corn, Tomatoes, and Mozzarella
adapted from Martha Stewart Living, August 2012
makes 1 12-14 inch pizza

If you are opposed to turning on your oven during the summer, this can easily be made on the grill.  Just have all of your toppings at the ready when you start, because it will cook quickly.

Since tomatoes, corn, and mozzarella all have high water contents, I like to lightly salt the tomatoes and then blot them with paper towels before adding them to the pizza.  I also gently remove some of the seeds and pulp from the slices.  But since the pizza cooks at such a high temperature, most of the water will evaporate anyway.  If there are any visible "puddles" when you take it out of the oven, just blot them with a a paper towel before serving.

  • 1 lb pizza dough
  • cornmeal, for sprinkling
  • 2 large ears of fresh corn
  • 1/2 oz Parmesan cheese, shredded (about 1/4 cup)
  • 1 large garlic clove, minced
  • 2 Tbs olive oil, plus more for brushing the dough
  • kosher salt
  • 1 large or 2 small heirloom tomatoes (a mixture of red and yellow tomatoes is the most visually appealing)
  • 6 oz fresh mozzarella, thinly sliced
  • 2 Tbs shredded fresh basil
Preheat the oven (with a pizza stone in it)  to 500 degrees Farenheit for at least 30 minutes.

Sprinkle a large square (about 14-16 inches) of parchment paper with cornmeal, and pull and stretch the dough into a large circle, oval, or rectangle.  Brush the outer edge with olive oil and set aside.

In a food processor, combine 1 1/2 cups of the corn, the parmesan cheese, garlic, olive oil, and 1/2 tsp of kosher salt.  Puree until mostly smooth, but leaving a few smaller chunks of corn.  Reserve any remaining corn for adding to the pizza.

Slice the tomatoes into 1/2-inch rounds.  If the tomatoes are large, cut each slice in half.  Arrange in a single layer over a kitchen towel or paper towel, and sprinkle lightly with salt.  Allow to sit 5 minutes, then gently blot with another towel.  Gently "poke out" as many of the seeds and pulp as you can from each slice.

Spread the corn puree over the dough, then top with the sliced tomatoes.  Arrange the mozzarella evenly over the top, then sprinkle the reserved corn over the mozzarella.  Season with salt and pepper to taste.

Transfer the pizza and parchment to the oven and cook 10-12 minutes, or until the cheese is melted, and the crust is browned.   Remove from the oven and allow to cool 5-10 minutes.  Scatter the basil over the top, slice, and serve.


Monday, June 17, 2013

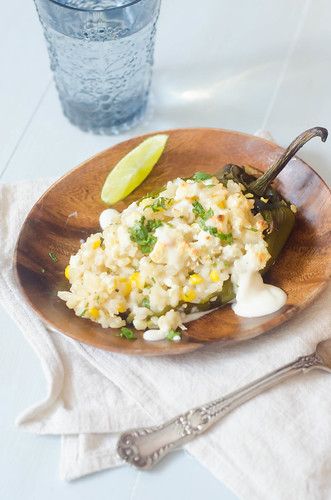
Corn Risotto-Stuffed Poblano Peppers


Oftentimes when I'm looking through a new cookbook or magazine, a recipe will jump out at me and I must.  Make.  Immediately.  Such was the case with these risotto-stuffed peppers.... except it's been 8 months since I first saw this recipe (you know, things happen.  Like giving birth to twins).  Corn, risotto, and roasted poblano peppers are some of my favorite foods, throw in Mexican beer, cilantro, and plenty of cheese, and it was a foregone conclusion that I'd love this dish.  There is really nothing like sweet summer corn.  It's truly one of the best foods in the world - while the recipe gives the option of fresh or frozen corn, using fresh corn at the height of the season really sets this meal apart.

I made this when we had our best friends over for dinner one night, and it was a great meal for entertaining - I roasted and prepped the peppers early in the afternoon, then just made the risotto and stuffed the peppers while we hung out in the kitchen chatting and snacking on chips, salsa, and guacamole.  I had actually planned to totally prep it ahead of time, cover, and refrigerate, but as it often does these days, the afternoon just got away from me.

This was a fun spin on stuffed peppers - the poblano provided a good amount of heat, and the creamy, sweet risotto was the perfect counterpart.  I loved the crumbled cheese on top, and the whole thing was finished with a drizzle of lime crema.  I only made 4-5 peppers, so I just baked the remaining risotto in a small casserole dish for the kids (and subsequently for the adults who wanted seconds).  It worked out really well since the poblanos I used were actually quite spicy.

If you're someone who refuses to turn on your oven in the summertime, I urge you to make an exception for this recipe - it's totally worth it!


Corn Risotto-Stuffed Poblanos
barely adapted from The Smitten Kitchen Cookbook
serves 6-8

  • 8 large fresh poblano peppers
  • 6 cups chicken or vegetable stock
  • 2 Tbs olive oil
  • 1 small onion, chopped
  • 2 cloves garlic, minced
  • 2 cups arborio rice
  • 3/4 cup beer, preferably a light Mexican beer (such as Corona)
  • 2  cups fresh corn kernels (from 2-3 cobs)
  • 1/4 cup chopped fresh cilantro, divided
  • 1 cup grated Monterey Jack cheese
  • 3/4 tsp kosher salt, plus more to taste
  • freshly ground black pepper
  • 1/3 cup crumbled queso fresco or feta cheese
  • 3 Tbs sour cream or Mexican creme, mixed with the juice of 1/2 lime and a pinch of salt
Preheat the broiler and arrange the peppers in a  single layer on a baking sheet.  Broil, turning every few minutes, until the peppers are charred and blistered all over.  Transfer to a glass bowl, cover with plastic wrap, and set aside for 10 minutes.  When the peppers are cool enough to handle, gently rub off the skins, and cut a slit lengthwise in each chile.  Carefully scrape out the seeds and ribs (leave some in for a bit more spice).  Set the peppers aside while you make the risotto.

To make the risotto, heat the stock in a medium saucepan over medium-low heat, and bring to a bare simmer.

In a large skillet or saucepan, heat the olive oil over medium heat.  Add the onion and sauté until it's softened and translucent, 5-7 minutes.  Add the garlic and salt, and cook for 1 minute.

Stir in the rice and cook 2-3 minutes, stirring constantly, until it's lightly toasted.  Pour in the beer and scrape up any bits from the bottom of the pan.  Simmer until it's mostly evaporated, 1-2 minutes.

Ladle 1 cup of the warm stock into the rice mixture and simmer until it's been absorbed, stirring frequently.  Add the remaining stock, 1/2 cup at a time, allowing the stock to be absorbed into the rice before the next addition.  Continue to stir often.

The total cooking time should be 25-30 minutes.  Along with the last addition of the stock, add the corn.

Though risotto is traditionally very loose, this one should be a bit thicker, so it can be used to stuff the peppers.  

Remove the risotto from heat and stir in the Monterey Jack cheese and 3 tablespoons of the cilantro.  Taste and season with additional salt and pepper if necessary.

Carefully fill each chile with the risotto.  If the chiles tear or rip, it's no big deal - they'll still taste great.
Arrange the stuffed chiles in a single layer in a baking dish and sprinkle with the queso fresco.  

Bake 10 to 15 minutes, until golden-brown on top.

To serve, drizzle the chiles with the lime crema and sprinkle with the remaining tablespoon of cilantro.


Tuesday, July 31, 2012

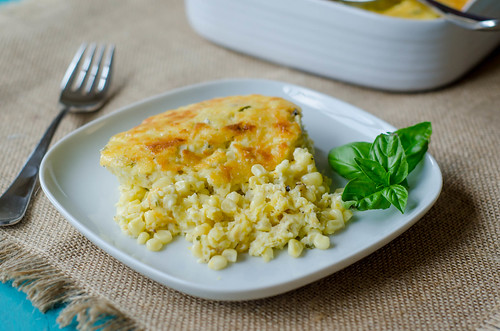
Summer Corn Pudding


Before I had Smith, I used to ask parents of multiple children if they secretly have a favorite.  I always kind of thought they were lying and just embarrassed to admit it when they all insisted that they didn't.  But now that I have two kids, I can honestly understand it.  Sure, sometimes I get more frustrated with one over the other, or have an easier time getting one to sleep, but they are both so fun and awesome in their own ways.  

So if someone were to ask me if I could pick my favorite summer produce, I'm pretty sure I'd go back and forth for days between corn ... tomatoes ... peaches ... cherries ... okra ... berries ... too hard to choose!  So how's this:  Favorite summer produce prepared as a savory "pudding" with super sharp cheddar, basil, and ricotta?  Corn would win!

Corn casserole is a popular side dish pretty much year round, but this is so much better than that - it uses fresh corn, and you just can't beat that flavor.  It also doesn't use a can of creamed corn (ick) or prepared cornbread mix.  Everything here is super fresh - and the final dish is really fantastic.  I served this as a side to pan-seard steaks, and it says a lot when I'm more excited about the side dish than I was about the main course.  It also reheats very well, so paired with a salad, this made for some killer lunches the rest of the week.

So maybe I can't pick a favorite child.  And maybe I can't pick a favorite summer vegetable.  But I can pick a favorite side dish featuring corn!

Summer Corn Pudding
adapted from Barefoot Contessa Family Style, by Ina Garten
serves 8
  • 6 Tbs unsalted butter
  • 5 cups fresh corn kernels, cut off the cobs (6 to 8 ears)
  • 1 cup chopped yellow onion
  • 4 eggs
  • 1 1/2 cups milk
  • 1/2 cup half-and-half
  • 1/2 cup yellow cornmeal
  • 1 cup ricotta (part skim is fine)
  • 1/4 cup chopped fresh basil leaves
  • 1 Tbs sugar
  • 2 tsp kosher salt
  • 3/4 tsp black pepper
  • 1 cup (8 oz) grated extra-sharp cheddar cheese
Preheat the oven to 375 degrees.  Lightly grease an 8 to 10-cup baking dish.

Melt the butter in a large skillet over medium-high heat.  Saute the onion until just softened, about 4 minutes.  Add the corn and sauté an additional 4 minutes or so.  Remove from heat and cool slightly.

Meanwhile, whisk together the eggs, milk, and half and half in a large bowl.  Whisk in the cornmeal and then the ricotta, then stir in the basil, sugar, salt, and pepper.  Add the corn and onion mixture and 3/4 cup of the grated cheddar and mix to combine.  Pour into the prepared baking dish and sprinkle the top with the remaining 1/4 cup cheddar.

Bake the pudding 35 to 45 minutes, until a knife inserted into the center comes out clean and the top begins to brown.  Allow to cool about 10 minutes before serving.


Monday, July 2, 2012

Barbecue Pasta Salad


A few weeks ago, we spent a week on St. George Island, Florida with Joey's parents.  We had a wonderful vacation - plenty of time for playing in the waves, reading outside on the porch, walks on the beach, and of course plenty of ice cream was consumed nightly. :)


Whenever we go on vacation with Joey's family, I get to be in charge of the food, and I had a great time planning the week's meals.  This year I only cooked 3 nights, and the other nights we either went out or ate leftovers.  It was a good balance for us - I didn't end up in the kitchen for hours every evening, and we were still able to enjoy some local cuisine, but we still enjoyed home-cooked leisurely meals in our beach house.  What I cooked this year:

Spicy Grilled Shrimp Po' Boys, Cajun-Grilled Corn on the Cob, Watermelon Slices
Pimento Cheeseburgers, BBQ Pasta Salad, Watermelon, Toasted Okra
Grilled Chicken Fajitas, Beans and Rice, Chips, Salsa, and Guacamole
also on the menu but we didn't get around to it - Grouper with Garlic-Shrimp Sauce, Mashed Potatoes, Sautéed Zucchini


The BBQ pasta salad was one of my favorite dishes, and what's even better - I was able to eat the leftovers for lunch throughout the week.  It's a step up from your basic creamy pasta salad.  Barbecue sauce is added, as are some fun spices and flavors - cider vinegar, chili powder, garlic, hot sauce, scallions, and a little honey.  And since I like a lot of "stuff" in my pasta salad, I added chopped onion, fresh corn, grape tomatoes, and shredded cheddar cheese.  If you really want to get crazy you could sprinkle it with crumbled bacon before serving.  It's a fun twist on the traditional, and often boring, pasta salad.  And one that would definitely be well-received at a cookout this week!

BBQ Pasta Salad
adapted from Cook's Illustrated, Summer Grilling 2009
serves 8 to 10

  • 1 lb elbow macaroni, or other pasta shape
  • salt
  • 1/2 cup diced sweet onion
  • 4 scallions, sliced thin
  • 2 Tbs cider vinegar
  • 1 tsp hot sauce, plus more for serving
  • 1 tsp chili powder
  • 1/8 tsp garlic powder
  • pinch cayenne pepper
  • 2 tsp honey
  • 1 cup mayonnaise (light is fine), or any combination of mayo and Greek yogurt to make 1 cup
  • 2/3 cup BBQ Sauce
  • 3 ears of corn, cooked as desired (roasting or grilling is my method of choice), kernels cut off
  • 1 1/2 cups shredded sharp cheddar cheese
  • 2 cups quartered grape tomatoes
Bring a large pot of water to a boil.  Add 1 tablespoon of salt and the pasta and cook until almost tender, about 5-7 minutes.  Drain in a colander and rinse with cold water until cool, then drain briefly, so that the pasta is still moist.  Transfer to a large bowl.

Stir in the onion, scallions, vinegar, hot sauce, chili powder, garlic powered, cayenne, and honey.  Let sit until the flavors are absorbed, about 2 minutes.  Stir in the mayonnaise and barbecue sauce, and sit unitl the salad is no longer watery, about 5 minutes.  Gently stir in the corn, cheese, and tomatoes, season with salt and pepper as needed, and serve.  

Salad can be covered and refrigerated for up to 2 days.  If the salad becomes dry from sitting, stir in a few tablespoons of water or barbecue sauce just before serving.


Sunday, June 17, 2012

Grilled Chicken Salad with Corn, Blueberries, and Feta


I know this sounds really weird.  And honestly, maybe even a bit unappetizing.  But trust me on this.  It's one of my new favorite salads.  It's light, refreshing, and full of so many wonderful flavors that you'll make this again and again over the summer.  The freshness and crunch from the corn pairs so well with the salty feta, and then the burst of sweetness from the blueberries just ties it all together.  Fresh herbs heighten the flavors even more, and you get a nice bite from diced red onion.

I was definitely a bit leery of this salad, and when Joey asked what we were having, I just told him grilled chicken salad.  But he loved it just as much as I did.  The old saying "if it grows together, it goes together" really rings true here.  Blueberries and corn both reach peak freshness in the summer, and they pair just wonderfully here.  I grilled some flatbreads alongside the chicken and corn, and it was a great vessel for the chicken salad.  Pita would also be great, or even toasted baguette slices.  Serve it over a bead of spinach or romaine for a nice light lunch.

Grilled Chicken Salad with Corn, Blueberries, and Feta 
adapted from  The Pioneer Woman Cooks

  • 2 boneless, skinless chicken breast halves (about 1 lb)
  • 1 ear corn, shucked
  • salt and pepper
  • olive oil, for brushing
  • 1 Tbs mayonaise (light is fine)
  • 3 Tbs Greek yogurt (or sour cream)
  • 2 Tbs milk
  • juice of 1/2 lemon
  • 1/2 tsp sugar
  • 1/3 cup + 2 Tbs crumbled feta cheese
  • 1-2 Tbs chopped fresh mint
  • 1 Tbs chopped fresh chives
  • 2-3 Tbs finely diced red onion
  • 3/4 cup fresh blueberries

Prepare grill.

Meanwhile, pound chicken to about 1/4-1/2 inch uniform thickness.  Brush with olive oil and season well with salt and pepper.  Rub the corn with olive oil and season with salt and pepper as well.

Grill the chicken about 5-7 minutes per side, turning once, until cooked through.  Grill the corn, turning every few minutes, until charred in spots and tender.  Remove from grill and set aside.

Meanwhile, whisk together the mayonnaise, yogurt, milk, lemon juice, sugar, and 1/3 cup feta.  Season to taste with salt and pepper.

Slice the corn off the cob and add to a large bowl.  Chop the chicken into bite-sized pieces and add to the bowl as well.  Stir in the onion, mint, and chives, and pour about half the dressing over the salad.  Mix well, taste, and add more salt and pepper as needed.  Gently fold in the blueberries.  Serve, then sprinkle individual servings with the remaining feta.


BLOG DESIGN BY: SHERBET BLOSSOM DESIGNS