Showing posts with label chicken. Show all posts

Monday, August 7, 2017

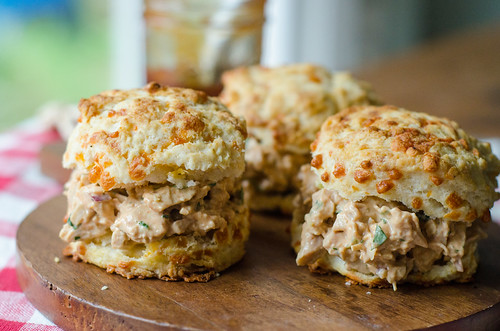
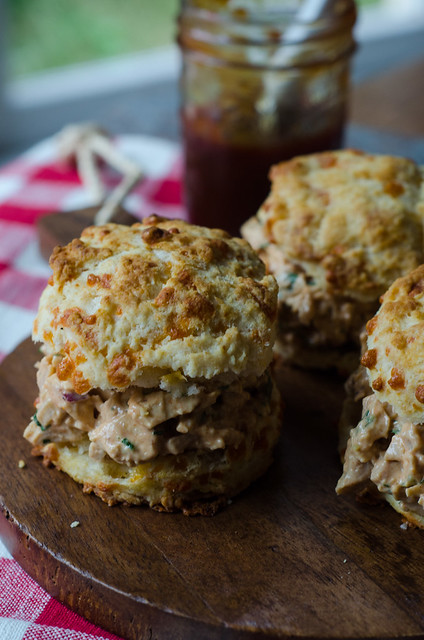
BBQ Chicken Salad Biscuits


Well, that's a wrap for Summer 2017.  Today was the big day -- three of the kids went back to school, and Smith even started Kindergarten!  This afternoon, everyone bounded off their buses with big smiles on their faces and good stories to tell, so overall it was a successful day.  Besides early mornings and new shoes, back to school also means that it's back to packing lunches for this mom.  By the end of the school year, I'm usually pretty tired of it and lunches tend to get a bit more lazy and standard, but I'm always enthusiastic and excited to pack fun lunches for at least the first few weeks of school ;)

This chicken salad is one of my favorite lunches or easy dinners.  And it swings both ways.  For those of you joining me in back to school lunch-packing, this salad is a great choice - make a big batch over  the weekend, and pack it in lunches all week long. It's great with corn on the cob and watermelon...helps the kids hold on to that last bit of summer ;). And if your'e still in summer-mode, this makes a great dinner to eat at the pool.  I pack the biscuits and chicken salad separately, then when everyone is ready to eat just build the biscuit sandwiches.

I'm a big fan of both BBQ flavors and chicken salad, so I honestly cant believe it's taken me this long to combine the two.  But have no fear, this chicken salad will be on heavy rotation for a long time.


BBQ Chicken Salad Biscuits

I use my usual recipe for flaky buttermilk biscuits here, with a handful of cheddar mixed in.  Any biscuit recipe you love will work though.

  • 3-4 cups chopped or shedded chicken (or 1 rotisserie chicken, pulled and shredded)
  • 2 Tbs very finely diced red onion
  • 1 scallioon, thinly sliced
  • 2 Tbs minced fresh parsley
  • 1 Tbs apple cider vinegar
  • 1/3 cup mayonnaise
  • 1/4 cup BBQ sauce
  • dash of hot sauce (plus more to taste)
  • 1/2 tsp smoked paprika
  • 1 tsp honey
  • salt and pepper to taste
Combine all the ingredients in a large bowl and stir well to combine.  Taste and season with salt and pepper as needed.  If the chicken salad is too dry, add extra mayo or bbq sauce.

To serve, split the biscuits in half, scoop the chicken salad on, and close to make a sandwich.  A slice of tomato or shredded lettuce also goes really well in. the sandwiches.


Tuesday, April 28, 2015

Chicken Burritos Mojados (Mexican Flag Burritos)

Burritos Mojados (Mexican Flag Burritos)

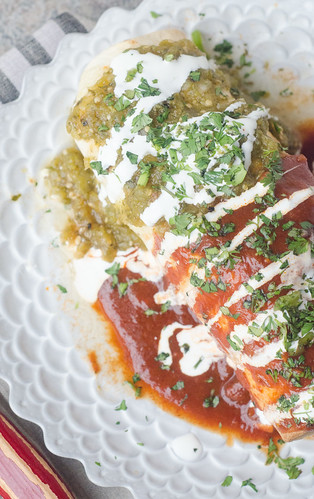
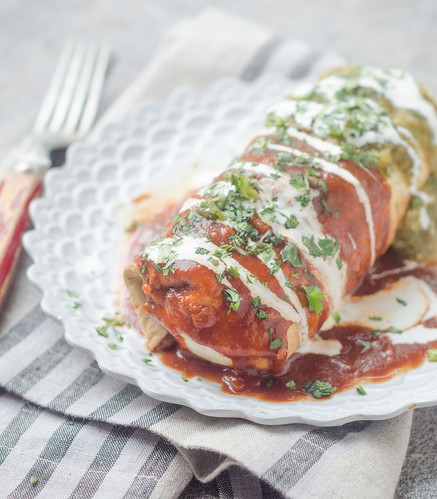
I told you guys I had an insane recipe to share this week, and this is it.  These burritos.  Oh man, they are something special.  They are filled with chicken, beans, rice, cheese, and avocado, then draped in three sauces that are inspired by the colors of the Mexican flag.  The red sauce is homemade red chile enchilada sauce, the green is roasted tomatillo salsa, and the white is Mexican crema.  Together they form perfect Mexican food harmony.  The smoky spiciness of the enchilada sauce complements the bright fresh tanginess from the salsa verde, and the smooth and creamy crema ties everything together.  I'm pretty sure that after every bite, I proclaimed these to be one of the best things I've ever made, and kept telling Joey "it's just like we're at a mexican restaurant!"

Burritos Mojados (Mexican Flag Burritos) 

These do take a bit of prep work, but it's all pretty well streamlined, and none of it's difficult or tedious.  You could even prep these in advance - make the salsa (or buy it, I promise I won't tell), make the sauce, cook and shred the chicken, and cook the rice.  Then just assemble and bake when you're ready.  The assembled burritos can also be prepped a few hours in advance as well.

I hope you're planning an all-out feast for Cinco de Mayo, and I think these burritos should be required.  They are something different than the typical tacos or fajitas, and totally worthy of a big celebration.  Margaritas not optional!

Burritos Mojados (Mexican Flag Burritos) 

Chicken Burritos Mojados (Mexican Flag Burritos)
adapted from ATK's The Best Mexican Recipes
serves 6

  • 2 1/4 cups chicken broth
  • 3/4 cup long grain white rice, rinsed
  • 1 (15-oz) can pinto beans, rinsed and drained
  • 4 Tbs chile powder
  • salt and pepper
  • 2 scallions, thinly sliced
  • 2 Tbs vegetable oil
  • 1/2 large white onion, diced
  • 3 cloves garlic, minced
  • 1 tsp cumin
  • 2 (8-oz) cans tomato sauce
  • 1 1/2 lbs boneless, skinless chicken breasts
  • 1/4 cup minced fresh cilantro
  • 6 (10-inch) flour tortillas
  • 2 avocados, halved, pitted, and cut into 1/2inch pieces
  • 8 oz monterey jack cheese, shredded
  • 1 1/2 cups tomatillo salsa
  • water, as needed
  • 1/2 cup Mexican crema (or sour cream)
Bring 1 1/4 cups of the broth, rice, beans, 2 teaspoons of chile powder, and 1/2 teaspoon of salt to boil in a medium saucepan over medium-high heat.  Cover, reduce heat to low, and cook until the rice is tender and the broth is absorbed, about 20 minutes.  Remove from heat, and allow to sit for 10 minutes, covered.  Stir in the scallions and set aside.

Meanwhile, heat the oil in a large saucepan over medium-high heat.  Add the onion and cook until it's just softened, 4-5 minutes.  Stir in the garlic, remaining 3 Tbs chile powder, and cumin, and cook until fragrant, about one minute.  Stir in the tomato sauce and remaining 1 cup of broth and bring to a simmer.  Nestle the chicken breasts into the sauce, cover, and reduce heat to medium-low.  Cook until the chicken is cooked through and registers 160 degrees, about 10 to 15 minutes, flipping halfway through.  Transfer the chicken to a cutting board, and once it's cool enough to handle, shred or chop into bite-sized pieces.  Taste the red sauce and season with salt and pepper as needed.
Preheat the oven to 350 degrees.  Line a baking sheet with foil and spray lightly with cooking spray.

In a large bowl, combine the rice and beans mixture, chicken, 1/4 cup of the red sauce, 2 Tbs of the cilantro, and cheese.  Season with salt and pepper and stir well.  

Wrap the tortillas in a damp kitchen towel and microwave until they are warm, about one minute.  

Working 1-2 tortillas at a time, mound 1 cup of the chicken and rice mixture in the center of each tortilla  Sprinkle with 2 tablespoons of avocado.  Fold the sides then the bottom of the tortilla over the filling, pulling back on it to tighten around the filling.  Roll tightly into a burrito.  Place the burrito seam side-down on the prepared baking sheet, and repeat with the remaining tortillas.  Cover rightly with foil, and bake until heated throughout, 20 to 30 minutes.

As the burritos are cooking, whisk a little water into the tomatillo salsa if it's thick.  Microwave until hot, about 1 minute.

To serve, distribute the burritos to individual plates.  Pour the tomatillo sauce over half of each burrito, and pour the red sauce over the other half.  Drizzle with cream, sprinkle with cilantro, and serve.


Tuesday, April 7, 2015

Chicken with Chorizo Salsa

Chicken with Chorizo Salsa 

Is there an ingredient that will without fail, cause you to make a recipe?  For me, it's chorizo.  Include that spicy, smoky sausage in basically any dish, and I'm powerless against it.  Lately I've been adding it to scrambled eggs in the morning, along with shredded zucchini and fresh cilantro.  It's quickly become my favorite breakfast, and my mouth is watering just thinking about it.

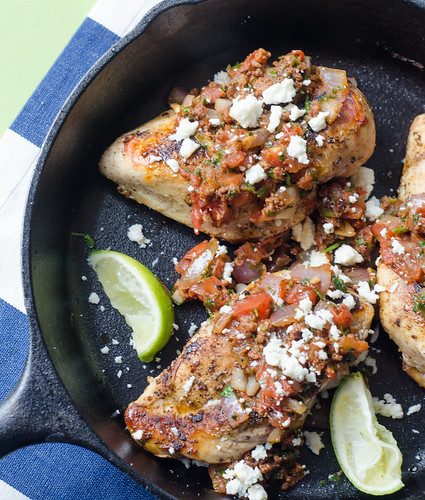
BUT I'm not here to talk about that breakfast today, I'm here to tell you about this chicken with chorizo salsa.  Yes, chorizo salsa.  This stuff is a revelation, and I pretty much want to eat it every day with every meal from now to eternity.  Sound good?

This is also a super easy and quick weeknight dinner.  You make the chorizo salsa, then cook the chicken in the drippings, giving you even more chorizo flavor.  I served this chicken over a bed of Mexican-style zucchini, and it made for such a wonderful, satisfying, and healthy meal.  Mexican food tends to be heavy and calorie-laden (at least the things I love are!), so having a nice and light Mexican dinner was a nice change of pace.  I enjoyed the leftovers all chopped up and stuffed into lettuce wraps for lunch the next day, so I highly recommend that you save some for that!

Chorizo = love.

Chicken with Chorizo Salsa
adapted from Cooking Light, Jan/Feb 2015
serves 4

  • 2 oz (1 link) Mexican pork chorizo
  • 4 (6-oz) boneless, skinless chicken breast halves, pounded to even thickness
  • kosher salt and freshly ground black pepper
  • 1/4 tsp ground cumin
  • 1 1/2 tsp canola oil
  • 1 cup seeded and chopped tomato (1 large)
  • 1/4 cup chopped fresh cilantro
  • 2 Tbs finely chopped red onion
  • juice of 1/2 lime
  • 1/4 cup crumbled queso fresco
Heat a large skillet over medium-high heat.  Remove the chorizo from its casing and crumble into the pan.  Cook, stirring constantly, for about 4 minutes.  Transfer the chorizo to a small bowl.

In a small bowl, combine 1/4 tsp of salt, 1/4 tsp of pepper, and the ground cumin.  Sprinkle the mixture over the chicken breasts.

Return the skillet to the stovetop and add the oil to the drip pins in the pan, swirling to coat.  Add the chicken to the pan and cook 5 minutes per side, or until it's cooked through (reaching 165 degrees as the internal temperature).  Remove the chicken from the pan, and cover with foil.

Once again, return the pan to the stovetop.  Add the tomato, cilantro, and onion, and cook, stirring constantly 1 to 2 minutes.  Add the chorizo, then stir in the lime juice.  Season to taste with salt and pepper and transfer the salsa to a small bowl.

To serve, place 1 chicken breast on each plate and top with about 2 tablespoons of the salsa and 1 tablespoon of cheese.  


Tuesday, March 17, 2015

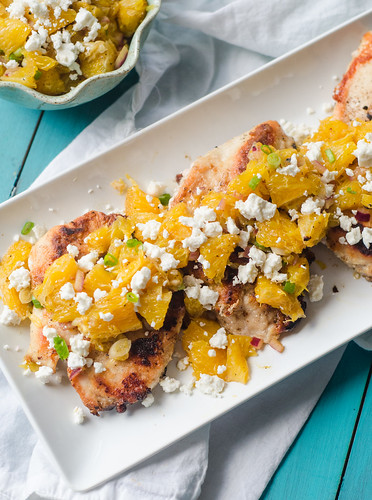
Chicken with Orange-Feta Salsa

DSC_0444

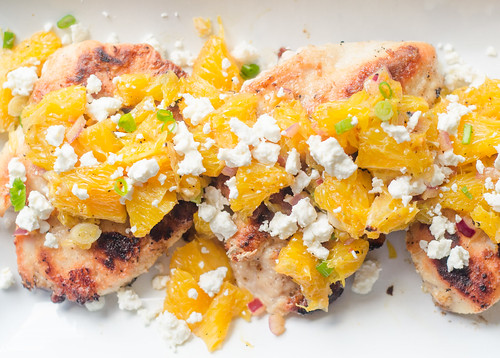
This dinner perfectly epitomizes the way I have been eating lately -- it's light, healthy, filling, and really pretty!  Don't you just love pretty food?  A super simple strategy for putting together a healthy and flavorful dinner is just pairing a lean protein with a quick salsa or relish.  Here, I paired seared chicken breast with a simple salsa of oranges, scallions, and feta cheese.  It's seemingly basic and simple, but it is SO bright and flavorful.  The combination of the sweet and sunny oranges pairs really well with the salty feta, and the scallions give it just enough bite to keep it interesting.  I think this salsa would be wonderful over any fish, shrimp, or even pork tenderloin.

I kept it simple when I made this chicken, and served it with roasted asparagus, but I think any green vegetable would be great.  The salsa was really tasty over the asparagus as well!  This dinner was a big hit all around, and we practically licked our plates clean.

As we're transitioning from winter to spring, we also transition to lighter, brighter meals, and this one is definitely a winner!

Chicken with Orange-Feta Salsa


Chicken with Orange-Feta Salsa
adapted from ATK's Healthy Family Cookbook
serves 4

Chicken
  • 1/3 cup all-purpose flour
  • 4 (6-oz) boneless, skinless chicken breasts, pounded to an even thickness
  • salt and pepper
  • 1 Tbs canola oil
Relish
  • 4 oranges
  • 2 cloves garlic, minced
  • 2 Tbs water
  • salt and pepper
  • 1/3 cup crumbled feat cheese
  • 3 scallions, sliced thin

Spread the flour into an even layer in a pie plate or shallow dish.  Pat the chicken dry with paper towels and season generously with salt and pepper.  Lightly dredge the chicken in the flour, and shake off the excess.

Heat the oil in a 12-inch nonstick skillet over medium-high heat.  Add the chicken and cook 6 minutes, then flip.  Reduce heat to medium and continue to cook until the chicken is cooked through (160-165 degrees), another 5 to 7 minutes.  Transfer the chicken to a platter and tent loosely with aluminum foil.  Remove the skillet from the heat, but don't wash yet!

For the relish:  

Slice the top and bottom off of the orange, then cut away the peel and the pith (the white part) with a paring knife.  Quarter the peeled orange, the slice each quarter cross-wise into 1 inch pieces.

Return the skillet to medium heat, and add the garlic.  Cook until fragrant, about 30 seconds, then stir in the oranges and water.  Scrape up any browned bits with a wooden spoon, then cook until th eoranges are just softened, 1 to 2 minutes.  

Remove the orange salsa from the pan into a medium bowl, then stir in the feta and scallions.  Taste and season with salt and pepper.

Arrange the chicken on a platter, then top with the salsa.  Serve.


Sunday, January 25, 2015

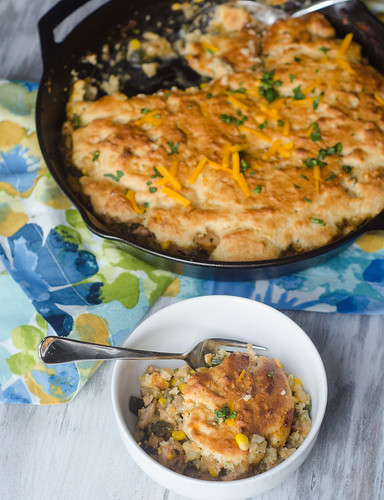
Skillet Chicken Tamale Pie

Skillet Chicken Tamale Pie

When I was growing up, one of my favorite dinners was tamale pie.  My mom made a vegetarian version, which still remains in my top 5 meals (sorry, I've been holding out -- I'll share it soon!).  In case you're unfamiliar with the concept of tamale pie, it's a baked casserole, the filling consisting of various vegetables, perhaps meat, Mexican spices, and topped with cornbread.  Yeah.  It's good.

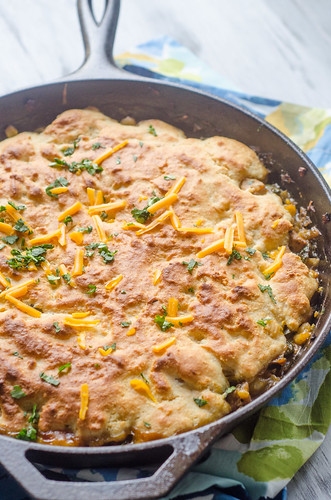
This version is pretty much a 180 from the tamale pie I had growing up, but I love it just as much.  The filling is chicken, poblano peppers, corn, hominy, and cheddar.  Topped with cornbread batter and baked, it is so comforting -- basically this is a Mexican-inspired chicken pot pie with cornbread instead of a pie crust on top.  As Ina would say, "How bad can that be?"

It's also a pretty light dinner, especially for something so filling and comforting.  It comes in at under 400 calories per serving, which makes this calorie-counting woman very happy.  Paired with a green salad, this made for a really wonderful dinner, and a few days worth of awesome lunches as well!

So I noticed that this is the third skillet dinner in a row that I've posted… hope you guys love them as much as we do!  Long live the skillet!


Skillet Chicken Tamale Pie 

Skillet Chicken Tamale Pie
adapted from America's Test Kitchen's Healthy Family Cookbook
serves 6

  • 1 lb boneless, skinless chicken thighs, trimmed of excess fat
  • kosher salt and freshly ground black pepper
  • 2 tsp canola oil
  • 1 onion, minced
  • 2 poblano peppers, stemmed, seeded, and chopped
  • 1 jalapeño, stemmed, seeded, and chopped (optional)
  • 3 cloves garlic, minced
  • 1 Tbs all purpose flour
  • 1 1/2 cups low-sodium chicken broth
  • 1 (15-oz) can hominy, drained and rinsed
  • 1 (7-oz) can mild chopped green chiles, drained
  • 1 cup frozen corn
  • 3/4 cup shredded extra sharp cheddar cheese
  • 1/4 cup minced fresh cilantro
Topping
  • 3/4 cup all-purpose flour
  • 3/4 cup cornmeal
  • 3 Tbs sugar
  • 3/4 tsp baking powder
  • 1/4 tsp baking soda
  • 1/2 tsp kosher salt
  • 3/4 cup buttermilk
  • 1 large egg
  • 1 Tbs unsalted butter, melted
  • 1/4 cup extra sharp cheddar cheese
Preheat the oven to 450 degrees.  

Pat the chicken dry and season liberally with salt and pepper.  Heat the oil in a 12-inch oven-safe skillet over medium-high heat.  Add the chicken and cook 6 to 8 minutes, flipping once, until it is golden-brown on both sides.  Transfer the chicken to a plate and leave the fat in the pan.

Add the onion, poblano, 1/2 teaspoon of salt, and 1/2 teaspoon of pepper to the pan and cook until it's softened and lightly browned, 5 to 7 minutes.  Stir in the garlic and flour and cook an additional minute.

Stir in the broth, hominy, chiles, and corn, and bring to as mimer.  Nestle the chicken in tot he mixture, cover, and reduce heat to medium-low.  Cook until the chicken is cooked through, about 10 minutes.

Remove the chicken from the skillet, and once it's cool enough to handle, shred it into bite-sized pieces.  Return the chicken to the skillet and stir to combine.  Stir in the cheddar and cilantro, taste, and season with additional salt and pepper if needed.  Remove from heat and cover to keep warm while you make the cornbread topping.

In a large bowl, whisk together the flour, cornmeal, sugar, baking powder, baking soda, and salt.  In a separate, smaller bowl, whisk together the buttermilk and egg.  Stir the buttermilk mixture into the flour mixture, just until no streaks of flour can be seen, then stir in the melted butter and cheddar cheese.  

Drop spoonfuls of the batter over the chicken filling, then smooth the top into an even layer, covering the filling completely.

Transfer the skillet to the oven and bake 15 to 20 minutes, or until the topping is golden and set.  Cool for 10 minutes before scooping into bowls and serving.


Sunday, January 18, 2015

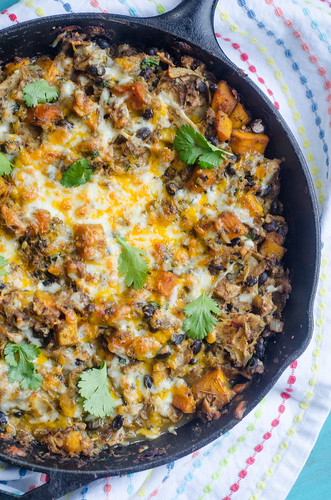
Black Bean and Butternut Squash Enchilada Verde Skillet

DSC_0074

There are very few foods that Joey doesn't like.  He's always a good sport and eats anything I cook, but sometimes it is just with… less enthusiasm, if you will.  One such food is butternut squash.  I try to be a considerate wife, so I make an effort to limit meals that have butternut squash.  However, we received one in our produce delivery recently, so it was just begging to be used up and turned into something delicious.

If there's one way to make an unpalatable veggie palatable, then I'd say it's to Mexican-ize it! (yes, that's a word).  Mix it with black beans, chicken, salsa verde, plenty of cheese, and the standard smoky, spicy spices.  That'll do it, no question.

This quick and easy skillet dinner is a family-favorite for us, and it's not only a perfect one-pot weeknight meal, but it's healthy and filling.  The leftovers reheat beautifully (should you have any), so it's great for lunch too.

Joey's former most-hated vegetable was brussels sprouts, and now he actually requests them.  So there's hope for butternut squash yet!  In the meantime, there's this butternut squash enchilada skillet.

Black Bean and Butternut Squash Enchilada Skillet
adapted from Mel's Kitchen Cafe and Ambitious Kitchen
serves 4 to 6

The spiciness of your finished dish will depend upon the spiciness of your peppers and salsa.  However, stirring in a spoonful of greek yogurt or sour cream will help tame the spice, especially for little ones.

  • 1 tablespoon canola oil
  • 1/2 large yellow onion, chopped
  • 1 green bell pepper, seeds and ribs removed, chopped
  • 2 cloves of garlic, minced
  • 1 jalapeno, seeded and diced (optional)
  • 4 cups diced butternut squash (from a small to medium butternut squash that has been peeled and seeded)
  • 1 teaspoon kosher salt, plus more as needed
  • 1/2 teaspoon black pepper
  • 1 teaspoon ground cumin
  • 2 teaspoons chili powder
  • 1/2 cup water
  • 1 (15-ounce) can black beans, rinsed and drained
  • 8 yellow or white corn tortillas, each cut into 8 wedges or strips
  • 2 cups salsa verde
  • 2 cups cooked, chopped chicken
  • 1/4 cup chopped fresh cilantro
  • 3/4 cup freshly shredded Monterey Jack cheese
  • 3/4 cup freshly shredded extra sharp cheddar cheese
In a large, 12-inch nonstick skillet, heat the oil over medium heat and add the onion, bell pepper, and jalapeño (if using).   Cook 5 to 7 minutes, until it is translucent and softened, then stir in the garlic, salt, pepper, cumin, and chili powder.  Cook for about 1 minute.  Add the butternut squash and stir well to coat with the spices.  Cook for 3 to 4 minutes, then add the water.  Cover and cook until the squash is tender, an additional 5 to 6 minutes, stirring often.

Stir in the beans, tortillas and salsa. Bring the mixture to a simmer and cook for a 3 to 4 minutes. 

Preheat the broiler.

Add the chicken, cilantro and 1/2 cup each of the Monterey Jack and cheddar cheeses. Stir to combine. Taste and season with additional salt and pepper as needed, then sprinkle the remaining cheese over the top.

Transfer the skillet to the oven and broil until the cheese is melted and beginning to brown, 2 to 3 minutes.  Scoop into shallow bowls and serve, garnishing with more cilantro, greek yogurt, and/or avocado.


Tuesday, January 13, 2015

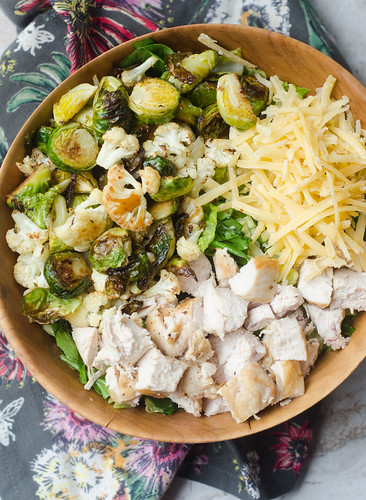
Roasted Winter Vegetable Chopped Chicken Salad

Roasted Winter Veggie Chopped Chicken Salad


Over the summer, I became totally obsessed with this grilled summer veggie chopped salad.  I made it once a week, on average.  My friend Annie made a riff on it and turned it into a fajita chopped salad, and that went into my rotation as well.  After the indulgences of the holidays, I've been reseting my diet, and I've majorly been craving that summer salad.  Zucchini and corn aren't exactly abundant these days, and it's too cold and rainy to grill, thus a seasonally appropriate winter roasted veggie salad was born.

Obviously you could use any combo of winter veggies here.  I happen to love roasted brussels sprouts and cauliflower together, so I went with that.  Carrots, butternut squash, sweet potatoes, onions, etc would also be lovely.  Or maybe even try roasting some apples or pears!  In lieu of the grilled romaine, I used a combination of chopped romaine and spinach.  However, if I'd had any kale on hand, I would have used that.  I think the hearty greens would work really well with the roasted veggies.

Roasted Winter Veggie Chopped Chicken Salad 

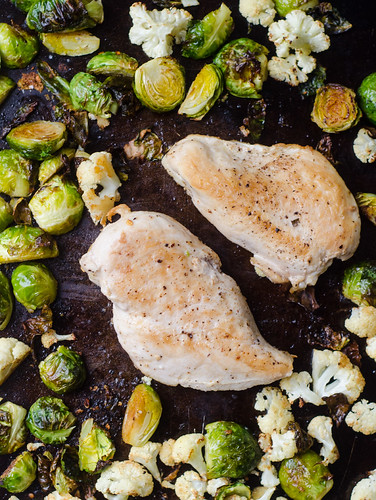
This was even easier than it's grilled counterpart, since you don't have to mess with preparing the grill.  I quickly seared the chicken on the stovetop, then finished it in the oven with the veggies.  I tossed it all together, along with some aged Gouda and lemon-garlic dressing.  This salad totally hit the spot.  The Gouda was an especially fantastic addition.

I've made it quite clear that I'm a summer-lover and a winter-hater, but this salad definitely makes the dreary weather more bearable.  I hope you enjoy it as much as I did!

Roasted Winter Veggie Chopped Chicken Salad 

Roasted Winter Vegetable Chopped Chicken Salad
serves 3-4

  • 12 oz brussels sprouts, stem-end cut off, halved, and quartered if large (about 3 cups of chopped sprouts)
  • 1/2 head cauliflower, cut into florets (about 2 1/2 cups)
  • 1/4 cup olive oil, plus 2 tsp
  • 3 cloves garlic, minced
  • kosher salt and freshly ground black pepper
  • 1/4 tsp red pepper flakes
  • 2 boneless, skinless chicken breasts, trimmed of excess fat
  • zest and juice of 1/2 lemon
  • 1 romaine heart, halved lengthwise and chopped into bite-sized pieces
  • 3-4 cups roughly chopped fresh spinach
  • 1/2 cup freshly grated aged Gouda
Preheat the oven to 400 degrees.  

In a small bowl, whisk together 1/4 cup of the oil, garlic, 1/2 teaspoon of salt and 1/2 teaspoon of pepper, and red pepper flakes.  Toss the brussels sprouts and cauliflower with 1 tablespoon of this mixture, then arrange in a single layer on a rimmed baking sheet.

Heat the remaining 2 teaspoons of oil in a skillet set over medium high heat.  Pat the chicken dry and season both sides with salt and pepper, then cook 2 to 3 minutes per side, until golden-brown.  

Place the chicken on the baking sheet with the vegetables, and cook for 10 minutes.  Turn the chicken over, stir the vegetables, and return the pan to the oven.  Cook an additional 5 to 10 minutes, or until the  vegetables are tender chicken is cooked through (check after 5 minutes, and take it out if it's reached 160 degrees in the center).  

Meanwhile, whisk the lemon zest and juice into the olive oil-garlic mixture.  Season to taste with additional salt and pepper.

Allow the chicken to rest for 5 minutes, then chop into large dice.  

Toss the romaine and spinach with the dressing, then gently mix in the vegetables, chicken, and gouda. Taste and season with additional salt and pepper if needed, and serve warm or at room temperature.


Tuesday, December 9, 2014

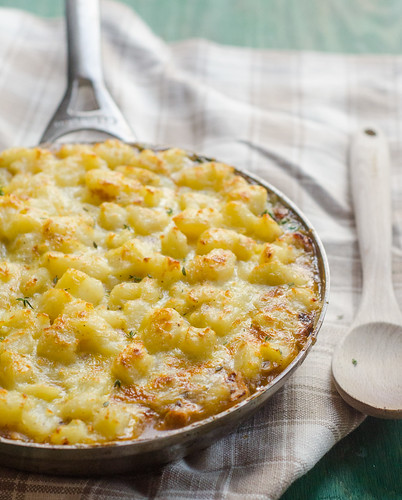
Skillet Chicken Shepherd's Pie

Skillet Chicken Shepherd's Pie

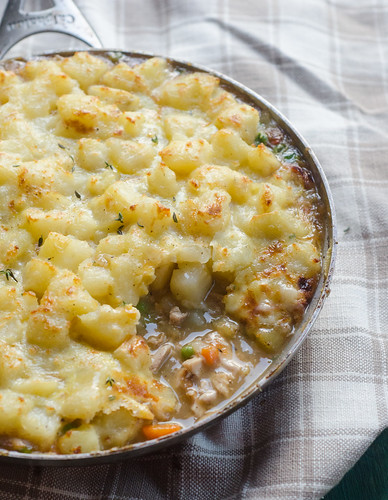
I've never been a big fan of shepherd's pie.  I don't have a good reason other than it's… just not my thing I guess.  But when I saw this version of shepherd's pie in the new Cook's Country Magazine, I couldn't resist.  I mean, look at those potatoes!  Look at that filling!  It's basically a chicken pot pie topped with buttery potatoes, then baked.  Nothing wrong with that, eh?

This shepherd's pie varies from the classic version in that it uses chicken instead of lamb (duh), but also in the potatoes.  Typically, a shepherd's pie is topped with mashed potatoes.  But in my experience, they often get dried out in the oven.  This version simply tosses cooked potatoes in butter, salt, and pepper, then spoons them over the filling.  An egg wash gives them a nice crispy top and pretty golden color, and I promise you this is world's better than dried out gummy mashed potatoes.

This was a huge hit with my whole family, and it's definitely becoming a new favorite in my house.  As we hunker down for what is sure to be a long, cold winter, I'm happy to have this comforting, delicious recipe in my repertoire.

Skillet Chicken Shepherd's Pie

Chicken Shepherd's Pie
barely adapted from Cook's Country, December/January 2015

  • 2 lbs bone-in, skin-on chicken thighs, trimmed of excess fat
  • kosher salt and freshly ground black pepper
  • 6 Tbs unsalted butter, divided
  • 1 onion, chopped
  • 3 medium carrots, peeled, halved lengthwise, and cut into 1/2-inch thick slices
  • 2 large cloves of garlic, minced
  • 2 tsp minced fresh thyme
  • 1/4 cup dry sherry or dry white wine
  • 1 1/2 cups chicken broth
  • 2 lbs russet potatoes, peeled and cut into 1-inch chunks
  • 2 Tbs cornstarch
  • 1 cup frozen peas, thawed
  • 1 Tbs lemon juice
  • 1 large egg, lightly beaten with 1 Tbs water
Adjust the oven rack to the upper-middle position and heat to 375 degrees F.  

Pat the chicken dry and season both sides generously with salt and pepper.  Melt 1 tablespoon of the butter in an oven safe 10-inch skillet over medium-high heat.  Cook the chicken in 2-3 batches, about 5 minutes per side, or until the chicken is well-borwned.  Transfer to a plate and pour off all but about 2 tablespoons of the fat from the skillet.

Return the skillet to heat and add the onions, carrots, and a large pinch of salt and pepper.  Cook, stirring often, until they are just softening, about 5 minutes.  Add the garlic and thyme and cook an additional 30 seconds.  Stir in the sherry and cook until most of the liquid has evaporated, about 1-2 minutes, scraping up any browned bits from the bottom of the pan with a wooden spoon.  Stir in the broth.

Return the chicken and any accumulated juices to the skillet, skin-side up.  Bring to a boil, reduce heat to medium-low, and cover.  Cook until the chicken registers 175 degrees on an instant-read thermometer, about 12 to 14 minutes.  

Remove the skillet from heat and use tongs to transfer the chicken to a clean plate.  Once he chicken is cool enough to handle, shred it into bite-sized pieces, discarding the skin and bones.

Meanwhile, place the potatoes in a medium saucepan and cover with about 1 inch of water.  Stir in 1 tablespoon of salt, and bring to a boil over high heat.  Reduce the heat to medium and cook at a strong simmer until the potatoes are fork-tender, about 10-12 minutes.  

Drain the potatoes and return to the pot.  Return the pot to the stove and cook over low heat, stirring gently, until all of the water has evaporated.  This will only take about 1 minute or so.  Remove from heat and gently stir in remaining 5 tablespoons of butter, 1/4 teaspoon of salt, and 1/2 teaspoon of pepper.  Taste and season with additional salt and pepper as needed.  Cover and set aside to keep warm.

Whisk the cornstarch together with 3 tablespoons of water.  Return the skillet with the broth and vegetables to the stovetop and bring to a boil.  Slowly whisk in the cornstarch  mixture, and cook until the thickened, 1 to 2 minutes.  Remove from heat, stir in the peas, lemon juice, and shredded chicken, and season to taste with salt and pepper.

Spoon the potatoes over the entire surface of the filling.  Brush the potatoes with the egg.  

Bake in the oven until the pie is bubbling, about 15 minutes.  Turn the oven to broil and cook until the potatoes are golden-brown, 3 to 5 minutes.  Cool for 15 minutes before serving.


Wednesday, November 12, 2014

Spicy Chicken with Sweet Potato, Black Bean, and Cranberry Salsa

Spicy Chicken with Black Bean, Cranberry, and Sweet Potato Salsa 

Maybe it's just the cynic in me, but anytime I see bloggers post "Day in the Life" posts, I assume that they wait for a busy day, or else save up all their errands and tasks to seem busier and more productive…. or they fake it to provide enough details that would be interesting to the rest of the internet world.  Because I know the majority of my own "day in the life" post would be pretty boring and mundane (or maybe even terrifying if it's a day that all my kids are home ;)).  However, every now and then I have a super busy and productive day, and I think to myself that it would be a day worthy of sharing, and I look like a rock star.  Then I remind myself that no one really cares about the minutiae of the life of a stay-at-home mom, and I go about my business.

Anywhoo, the day that I made this chicken was such a day.  I won't bore you with the details and minute-by-minute breakdown, but suffice to say, I was a busy bee.  As an aside, do you ever feel like the busier you are, the more efficiently you work?  I swear that the days that I have nothing pressing going on are my laziest and most unproductive days!

Spicy Chicken with Black Bean, Cranberry, and Sweet Potato Salsa

So all of this is to say that these were the thoughts I was having while I made this chicken dinner.  I was going out with friends for dinner that night, but I still wanted to feed the rest of the family something tasty and healthy.  And then I felt slighted that they all got to eat this for dinner without me, because it was GOOD.  The chicken is rubbed with a smoky, spicy spice blend, then quickly cooked on the stove top. The salsa doubles as a side, and the combo of the sweet potatoes, black beans, and cranberries was spot on.  Add some cilantro, peppers, and a simple lime dressing, and it creates a beautiful, healthy, and flavorful salad.  We especially loved the bursts of sweetness from the cranberries when paired with the smoky spice of the chicken.  The mixture also tastes great stuffed into a quesadilla with some pepperjack cheese.  And I'd definitely recommend serving this with chips and guacamole on the side.

At this time of year, we are all busy and frazzled, so it's always nice to have a healthy, quick meal in your back pocket.  Joey and I loved this so much, and I can't wait to make it again soon.  Maybe I'll even make it on a lazy day.

Spicy Chicken with Black Bean, Cranberry, and Sweet Potato Salsa

Spicy Chicken with Sweet Potato, Black Bean, and Cranberry Salsa
adapted from Fine Cooking, November 2014

  • 4 Tbs canola oil
  • 2 medium sweet potatoes, peeled and cut into 1/2-inch dice
  • kosher salt
  • 2 tsp chili powder
  • 1 tsp ground cumin
  • 1/4 tsp ground cayenne
  • 1 tsp smoked paprika
  • 4 boneless, skinless chicken breast halves, pounded to even thickness (about 1 inch thick)
  • 1 large garlic clove, mashed to a paste with a fork
  • juice of 1 lime
  • 1 (15-oz) can black beans, drained and rinsed
  • 1/3 cup finely chopped bell pepper
  • 1/4 cup finely diced red onion
  • 1 jalapeño, seeds and ribs removed, chopped (optional)
  • 1/4 cup dried cranberries, roughly chopped
  • 1/4 cup chopped fresh cilantro
  • freshly ground black pepper
Heat 1 tablespoon of the oil in a 12-inch nonstick skillet over medium heat.  Add the sweet potatoes and cook, stirring occasionally, until almost tender, about 10 minutes.  Stir in 1/2 teaspoon of salt and 1/4 cup of water.  Cover and cook for 1 minute.  Uncover and cook, stirring frequently, until the sweet potatoes are tender and the water has evaporated, about 3 minutes.  Transfer to a medium bowl and set aside.

Meanwhile, combine 1 teaspoon of the salt with the chili powder, cumin, cayenne, and paprika in a small bowl.  Rub the spice blend all over the chicken.

Heat 1 tablespoon of the oil in the now-empty skillet over medium-high heat.  Cook the chicken 3-4 minutes on each side, or until it is cooked through.  Transfer to a plate, cover loosely with foil, and allow to rest for 5 minutes.

As the chicken is cooking and resting, make the salsa.  In a small bowl whisk together the garlic, lime juice, and remaining 2 tablespoons of canola oil.  To the sweet potatoes, add the black beans, onions, peppers, cranberries, and cilantro.  Pour the dressing over the mixture, then toss gently to combine.  Taste and season with salt and pepper as needed.

To serve, slice the chicken and serve with the salsa.


Sunday, November 9, 2014

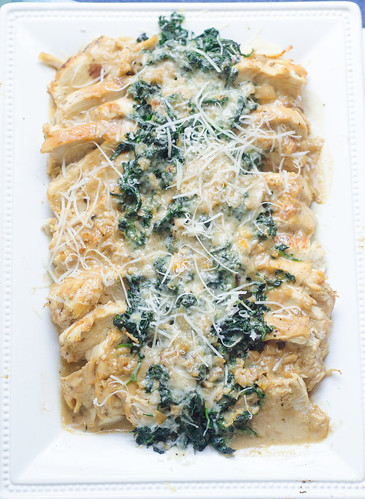
Chicken Florentine

Chicken Florentine 


Chicken Florentine has developed a bit of a bad reputation as a bland, boring, filler food for buffets and weddings.  What started out as a nice idea got muddled and mediocre somewhere along the way.  So let's remedy that, shall we?

If you dissect the dish, it seems like a good idea in theory:  chicken, spinach, and a creamy sauce.  So with that as the backbone, Cook's Country set out to create a killer version of the classic dish.

And their version?  Oh. My.  Goodness.  This chicken is easily one of the best things I've made all year.  Joey and my kids all agreed.  Juicy, perfectly cooked chicken, a cheesy, creamy, flavorful sauce, tender spinach, and more cheese to finish it all off.  Major love.  Allow me to take a moment to sing the praises of this sauce.  It's heaven on earth, I tell you.  Cream, chicken broth, a little lemon juice, and parmesan cheese make up the bulk of it, and it was so good that Joey practically drank it with a straw.

As we move into fall and winter, I'm definitely craving more homey, comforting dinners, and this is at the top of my list.  Serve it with a grain or starch of your choice (mmmm mashed potatoes!), a salad or roasted veggies, and you've got a really wonderful family dinner.  Joey proclaimed this to be his new favorite dinner, so I feel certain that it will be making many appearances on our table from here out!

Chicken Florentine
adapted from The Complete Cook's Country TV Show Cookbook
serves 4 to 6

  • 2 Tbs canola oil
  • 12 oz (12 cups) baby spinach
  • 4 (6-oz) boneless, skinless chicken breasts, trimmed
  • kosher salt and freshly ground black pepper
  • 1 shallot, minced
  • 2 cloves garlic, minced
  • 1 1/4 cups chicken broth
  • 1 1/4 cups water
  • 1 cup heavy cream
  • 6 Tbs freshly grated Parmesan cheese
  • 1 tsp lemon zest
  • juice of 1/2 lemon
Heat 1 tablespoon of the oil in a 12-inch skillet over medium-high heat.  Add the spinach and cook, stirring often, until wilted, 1 to 2 minutes.  Transfer the spinach to a colander set over a blow and drain as much liquid as possible, pressing down with the back of a spoon to extract more liquid.

Pat the chicken dry with paper towels and season generously on both sides with salt and pepper.  

Heat the remaining tablespoon of oil in the now-empty skillet over medium-high heat.  Add the chicken and cook 3-4 minutes per side, until golden.  Remove from pan to a plate or bowl.  

Add the shallots and garlic to the pan and cook about 1 minute, or until fragrant.   Stir in the broth, water, and cream.  Return the chicken to the pan and nestle into the liquid.  Bring to a boil, then reduce heat and simmer until the chicken is cooked through, about 10 minutes.  Transfer the chicken to a plate and cover with foil to keep warm.

Continue to simmer the sauce unit it's reduced to about 1 cup, which should take about 10 minutes.  Remove from heat and stir in 4 tablespoons of the Parmesan, lemon zest, and lemon juice.  Taste and season with salt and pepper as needed.

Preheat the broiler and adjust the oven rack to the upper-middle position.

Cut the chicken cross-wise into 1/2-inch slices and arrange on a  broiler-safe platter.  Scatter the spinach over the chicken, then pour the sauce over the spinach, then sprinkle with the remaining 2 tablespoons of Parmesan cheese.  Broil until golden-brown, about 3 to 5 minutes (but watch closely the whole time, since in my experience all broilers are very different!).

Serve.


Monday, October 6, 2014

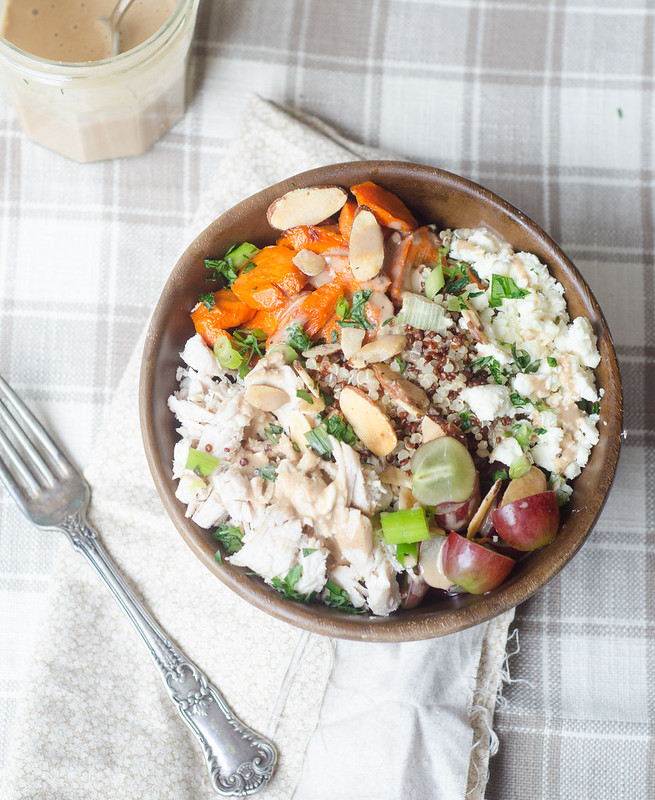
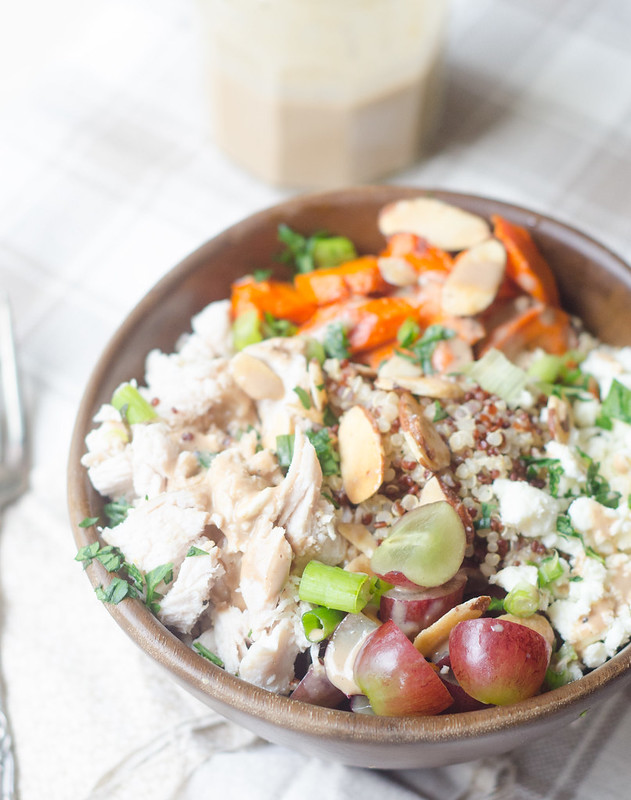
Harvest Quinoa Bowls with Grapes and Goat Cheese

Harvest Quinoa Bowls with Grapes and Goat Cheese

Quinoa bowls are my lunch of choice.  I usually throw them together based on what we have in the refrigerator, and what flavors I'm in the mood for.  No recipe usually, it's just more of a "use what I've got" thing.  But when I came across this combination in Cooking Light, I was immediately in love.

Carrots were an easy and low-maintenance option for the roasted veggie, but I think butternut squash, parsnips, or beets would also work really well with the rest of the flavors.  So many fall comfort foods are heavy and calorie-laden, but this is so fresh, light, and healthy.

These quinoa bowls make a pretty easy and healthy dinner, and the leftovers make for a fabulous lunch.  This was also a great meal for the kids as well.  I kept their portions "deconstructed," if you will:  carrots, grapes, and chicken, plus a side of quinoa, and a little bowl of the dressing for dipping.

The combination of roasted carrots and grapes intrigued me, and I couldn't stop myself from adding some crumbled goat cheese to the bowl as well.  With a sweet and smoky balsamic dressing, these quinoa bowls became an instant favorite.  I pretty much love everything about these bowls:  lots of protein from the chicken, quinoa, yogurt dressing, and goat cheese.  Little bursts of sweetness from the grapes and carrots.  Tangy, creamy, goat cheese.  Crunchy almonds.  Fresh and crisp lettuce.  Perfection all around,  I tell you.

Harvest Quinoa Bowls with Grapes and Goat Cheese

Harvest Quinoa Bowls with Grapes and Goat Cheese
adapted from Cooking Light, September 2014
serves 4

  • 2 cups (3/4-inch) diagonally cut carrot
  • 2 tsp olive oil
  • 1/2 tsp kosher salt, divided
  • 5 Tbs Greek yogurt
  • 2 Tbs balsamic vinegar
  • 1 Tbs honey
  • 1 Tbs water
  • 1/2 tsp ground cumin
  • 1/2 tsp ground black pepper
  • 1 1/2 cups cooked quinoa
  • 1 1/2 cups shredded (cooked) chicken breasts
  • 1 1/2 cups seeless red grapes, halved (quartered if large)
  • 1/2 cup thinly sliced scallions
  • 1/2 cup fresh parsley, chopped
  • 1/2 cup toasted sliced almonds
  • 1/3 cup crumbled goat cheese
  • 6 cups mixed salad greens, roughly chopped
Preheat the oven to 450 degrees Fahrenheit.  Toss the carrots with the oil and 1/4 teaspoon of the salt.  Arrange in a single layer on a rimmed baking sheet.  Bake for 15 minutes, or until they are browned and tender.

Meanwhile, combine the remaining 1/4 teaspoon of salt, yogurt, vinegar, honey, water, cumin, and black pepper in a small jar.  Cover and shake to combine.

In a large bowl, combine the carrots, chicken, quinoa, grapes, scallions, parsley, almonds, goat cheese, and mixed greens.  Toss gently with the dressing to combine.

Divide among bowls and serve.


Sunday, September 28, 2014

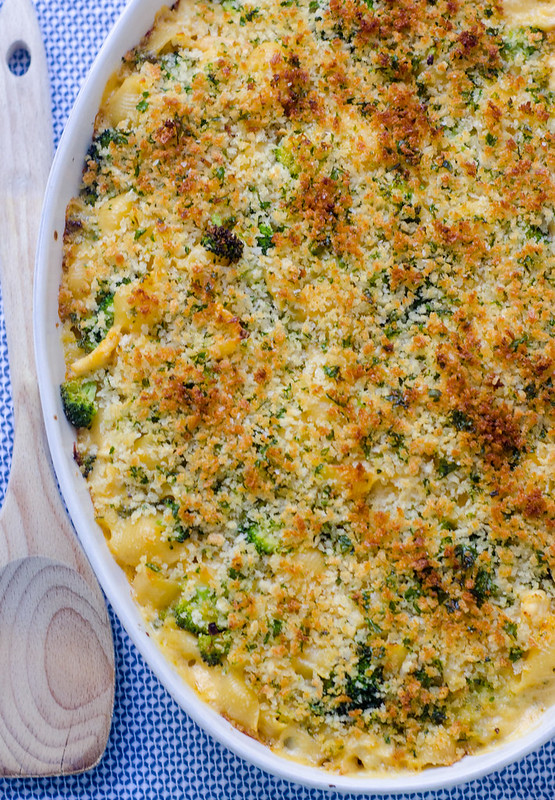
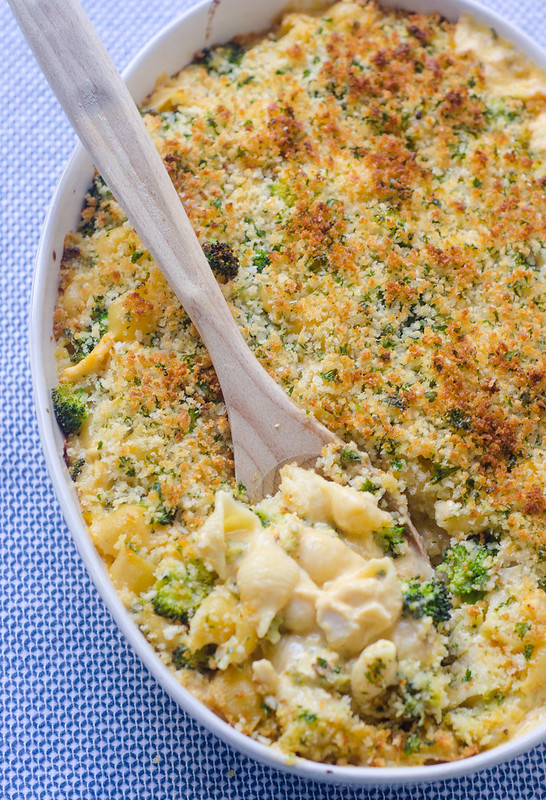
Cheesy Baked Shells with Broccoli and Chicken

Cheesy Baked Shells with Broccoli and Chicken 


Remember this absolutely amazing incredible mac and cheese recipe?  If you haven't made it yet, you really are missing out.  Because it really and truly is the best mac and cheese of all time.  I realize that's a lofty claim, but I have eaten a LOT of mac and cheese in my day, so I feel pretty confident in my assertion.

So anyway, I took that macaroni and cheese, and I added some broccoli and chicken to it.  To make it a full meal, of course.  Look, I can make an entire meal out of a big bowl of mac and cheese, but in the name of adult responsibility, I felt like a vegetable and a protein were needed.  So cheesy baked shells with broccoli and chicken were born!

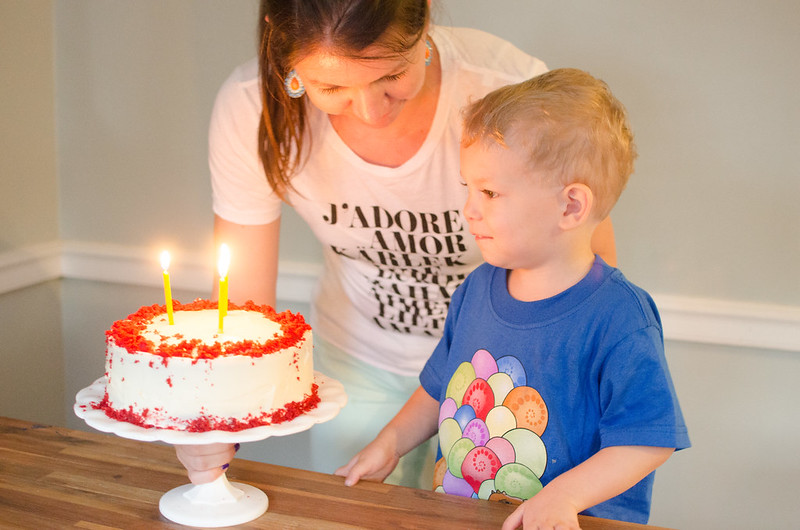
It's become a standing tradition to for me to make a big dinner for the kids' birthdays.  Smith turned three last week (obvious comment about time moving too quickly), and I'm going to be brutally honest here for a minute.  That kid has challenged me more than I thought possible.  At fifteen months, the poor guy was only a baby himself when Henry and Tucker came along and rocked our world, and he definitely didn't know exactly how to handle the upheaval.  We went though many tough phases with him:  sitting on the babies, pushing them over, throwing toys at them, stealing their milk and food, you name it.  Not to mention the normal day-to-day toddler meltdowns and challenges.

DSC_8965 

But in the past six months or so, there's been a shift.  He's gone from pushing the babies down, to helping them back up when they fall.  He no longer steals their milk, but is waiting at the bottom of the stairs with it every morning when they wake up.  He teaches them all the animal and dinosaur sounds.  He's there to give them hugs and kisses when they have their own epic tantrums.  And he's the referee between their toddler skirmishes now.  This guy was just meant to be a big brother.

So we celebrated my big boy's birthday with this cheesy baked pasta dish.  It's the best dinner I could think of for my little guy, and it was a hit with the whole family.  We're looking forward to another fun-filled year with this sweet boy!
DSC_8972

Cheesy Baked Shells with Broccoli and Chicken
adapted from this macaroni and cheese (which is from Cook's Illustrated)
serves 8 to 10
  • 1 recipe Panko Topping (follows)
  • salt
  • 4 cups chopped broccoli florets
  • 1 pound medium pasta shapes, such as shells
  • 6 Tbs unsalted butter
  • 2 medium garlic cloves, minced
  • 1 tsp dry mustard
  • 1/4 tsp cayenne pepper
  • 6 Tbs all-purpose flour
  • 2 1/4 cups low-sodium chicken or vegetable broth
  • 3 1/2 cups milk (low-fat is fine)
  • 1 pound colby jack cheese, shredded (about 4 cups)
  • 8 oz extra-sharp cheddar, shredded (about 2 cups)
  • 2 cups diced cooked chicken
  • ground black pepper
Preheat the oven to 400 degrees.

In a large microwave-safe bowl, toss the broccoli with a splash of water.  Cover with plastic wrap.  Cook 3-4 minutes, stirring after every minute, until the broccoli is bright green, and just tender.  Set aside.

Bring water to a boil in a large dutch oven set over high heat.  Add 1 tablespoon of salt and the pasta, and cook, stirring occasionally, until the pasta is just beginning to soften, about 5 minutes.  Drain the pasta and leave in the colander.

Wipe the pot dry, and add the butter, and set it over medium heat until melted.  Stir in the garlic, mustard, and cayenne, and cook until fragrant, about 30 seconds.  Stir in the flour, and cook, stirring constantly, until golden, about 1 minute.  Slowly whisk in the chicken broth and milk, and bring to a simmer.  Whisking often, cook until large bubbles form on the surface and the sauce is slightly thickened, about 15 minutes.  Remove from heat and stir in the cheeses until completely melted.  Season with salt and pepper to taste.

Stir the drained pasta, broccoli, and diced chicken into the cheese sauce, breaking up any clumps, until well combined.  Pour into a lightly greased 9x13 inch baking dish and sprinkle with crumb topping.

Bake uncovered, until the sauce is bubbling and the crumbs are crisp, 25-35 minutes. 


To store and serve later:  Wrap the dish tightly with foil, and refrigerate for up to 2 days.  To serve, bake in a 400 degree oven until the filling is hot throughout, about 40-45 minutes.  Remove the foil and continue to cook until the crumbs are crisp, 15-20 minutes.


Panko Topping

  • 1 cup panko bread crumbs
  • 2 Tbs unsalted butter, melted
  • 2 Tbs minced fresh parsley
  • salt and pepper
In a small bowl, combine the panko with the melted butter and parsley.  Season to taste with salt and pepper.


Tuesday, June 10, 2014

Grilled Summer Vegetable Chopped Salad


Alternately titled, "My Summer Obsession."  Or "Grilled Romaine Salad with Chicken, Zucchini, Corn, and Feta, with a Spicy Lemon-Garlic Dressing."  Do you see why I went with "Grilled Summer Veggie Chopped Salad?"

But no matter what you call it, this salad IS my summer obsession, and with the veggies coming into their primes, I see no signs of that slowing down any time soon.  My nutrition and diet as of late haven't exactly been ideal, and this salad has been a great way to kind of "reset."  It's healthy and light, but it's really filling and really delicious, so I don't feel deprived or bitter about giving up french fries.  And isn't there something so great about chopped salads?  I don't know what it is, but I just love them.

A few weeks ago, my sweet friend Courtney and her sweet family stopped by our house on their way through Atlanta.  We of course wanted to cook together, and the original version of this salad was on the menu.  A seemingly simple grilled salad of corn, zucchini, and feta, this salad ended up being my favorite dish of the night.  We all raved over it, and I haven't stopped thinking about it since.

The following week, I was craving it again, but this time I bulked it up with the addition of grilled chicken and grilled romaine.  And then the next week, I made it again.  You can see where this is going.

If you've never had grilled romaine,  I know it sounds kind of weird, but just trust me.  Grilling the romaine hearts gives them a great char and a little smoky flavor, but since they're only on the grill for a few minutes, they don't get gross and mushy.  Like I said, you have to just trust me on this that grilled romaine is amazing.

This is an easy dinner, one that only dirties a few dishes, it's healthy, and it celebrates the produce of the season.  Will you pretty please make this for dinner tonight?


Grilled Summer Vegetable Chopped Salad
inspired by Cook's Country, June/July 2014
  • 1/3 cup extra virgin olive oil, plus more for dressing
  • 3 cloves garlic, minced
  • kosher salt and freshly ground black pepper
  • 1/4 tsp red pepper flakes
  • zest of half a lemon
  • 2 ears corn, husk and silks removed
  • 3 medium zucchini, sliced lengthwise into 1/2-inch-thick planks
  • 2 heads of romaine hearts, halved lengthwise
  • 1 lb boneless skinless chicken breasts, trimmed
  • juice of half a lemon
  • 2 Tbs chopped fresh basil
  • 1/2 cup crumbled feta cheese (about 2 oz)
Prepare the grill to cook at medium-high heat.  Allow to preheat at least 15 to 20 minutes.

Meanwhile, whisk together the oil, garlic, 1/2 teaspoon of salt, 1/2 teaspoon of pepper, lemon zest, and red pepper flakes.

Brush the zucchini, corn, and romaine with oil, then pour about 1 tablespoon of the oil mixture over the chicken breasts,  Brush them with the oil then discard the brush (In other words, don't dip it back into the mixture, because it will contaminate the oil since the chicken is raw!).  Reserve the remaining oil mixture to use for the dressing.

Clean the cooking grate, then place the chicken, zucchini, romaine, and corn on the grill.  This may need to be done in batches, depending on the size of your grill.  But definitely start with the chicken since it takes the longest to cook.  

For the chicken, grill it about 7 minutes per side, or until it reaches an internal temperature of 160 degrees.  Remove from heat and cover with foil.

For the corn, grill, turning every 2 to 3 minutes, until the kernels are lightly charred all over, about 10 minutes total.

For the zucchini, grill it until it is well-browned and tender (but not mushy), about 4 to 5 minutes per side.

For the romaine, grill it 1 to 2 minutes per side, or until it is very lightly charred.

Meanwhile, prepare the dressing.  Add enough oil to the remaining oil-garlic-pepper mixture to reach a volume of 1/4 cup, then whisk in the lemon juice.  Taste and season with salt and pepper as needed.

Once everything is off the grill, begin building the salad.  Chop the romaine hearts into bite-sized pieces and add them to a large bowl.  Cut the kernels off the corn and add them to the romaine.  Cut the zucchini crosswise into 1/2 inch-thick slices, and add those as well.  Chop the chicken into bite-sized pieces.  Crumble the feta into the bowl, and top with the chopped basil.  Drizzle the dressing over the top, then toss well to combine.  

Divide among plates, then lightly sprinkle each serving with salt and freshly ground pepper.  Serve.


Thursday, May 22, 2014

Bourbon-Brown Sugar Grilled Chicken


Ahhh Memorial Day weekend.  The unofficial start of summer.  Despite having such a horrendous winter, I feel like the summer really snuck up on us.  But here we are, on the last day of school, staring summer right in the face.  To the lazy mornings, afternoons spent at the pool, impromptu trips to the ice cream shop, and evenings playing outside:  I welcome you with open arms!  And to grilling dinner every night:  I welcome you with open arms as well!

And to incorporating bourbon into dinner:  Joey welcomes that with open arms!  He is definitely a bourbon and scotch guy, so I knew this dinner would be a home run with him.  Spoiler alert:  it was.

It's also super easy and low-maintenance.  You mix together  super simple marinade, let it do it's thing for several hours, then grill it up.   Thanks to the brown sugar and sugar from the bourbon, you get gorgeous grill marks, and amazing caramelization on the chicken.  It's good stuff.  If you want another punch of bourbon-brown sugar flavor (which, I'm sure you do), you can boil the marinade and thicken it it into a luscious sauce.  For spooning over the chicken.  Or for eating by the spoonful.  I won't judge.

Don't like chicken?  This would be fantastic with pork tenderloin, steak, or even salmon.  Go wild!


Bourbon-Brown Sugar Grilled Chicken
adapted from Southern Living, All Fired Up
serves 4-6

  • 2 lbs boneless-skinless chicken breasts or thighs
  • 1/4 cup firmly packed light brown sugar
  • 1/4 cup minced green onions, plus more for serving
  • 1/4 cup bourbon
  • 1/4 cup low-sodium soy sauce
  • 1/4 cup Dijon mustard
  • large pinch of red pepper flakes
  • 1/2 tsp freshly ground black pepper
  • kosher salt
  • 1/2 tsp cornstarch
Trim the chicken of any visible fat.  

In a gallon-sized freezer bag, combine the brown sugar, green onions, bourbon, soy sauce, mustard, and peppers.  Close the bag and shake to mix well.  Season the chicken lightly with salt, and add to the bag with the marinade.  

Seal the bag and chill in the refrigerator for 8 hours, or up to overnight.

Preheat the grill to 350-400 degrees (medium-high heat).  Reserve the marinade, and grill the chicken about 7 minutes per side, or until it registers 165 degrees Fahrenheit on an instant-read thermometer.  Remove the chicken from the grill, cover with foil, and allow to rest for 10 minutes.

As the chicken rests, pour the marinade into a small saucepan and whisk in the cornstarch.  Bring to a boil over medium heat.  Cook, stirring constantly, 1 to 2 minutes.

Slice the chicken, drizzle the sauce over the top, and sprinkle with sliced green onions.  Serve.


Monday, May 19, 2014

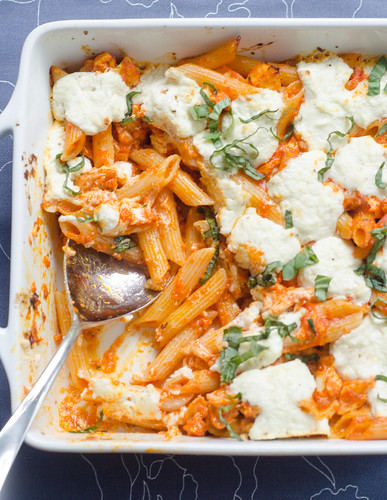
Baked Penne with Roasted Red Pepper Sauce and Goat Cheese


Some flavors and ingredients just inherently go together, and in my humble opinion, roasted red peppers and goat cheese are one of them.  I've been making this pasta for the past two years, and I'm sorry to say that I'm only now sharing it with you.

The sauce is a simple roasted red pepper sauce, with the addition of some cheese, shallots, herbs, and a little lemon.  A pinch of red pepper flakes give it just a hint of spice, and the luxurious and vibrant sauce coats the pasta beautifully.  A mixture of goat and ricotta cheeses dot the top of the baked pasta dish, and the creamy cheese with the bold sauce just work.  I always add a little shredded chicken for some extra protein, but this is great as a vegetarian meal as well.

This baked pasta dish is super easy to prep, and is perfect for serving to guests.  Something about this dish seems just so "springtime" to me, so that's when I make it the most.  Therefore, I of course always serve it with simple roasted asparagus, and a light white wine.

Roasted Red Peppers + Goat Cheese = True Love Forever.

Baked Penne with Roasted Red Peppers and Goat Cheese
adapted from Pasta Revolution
serves 4

  • 8 oz (2 1/2 cups) dried penne pasta
  • kosher salt and black pepper
  • 4 oz (1/2 cup) ricotta cheese
  • 4 oz goat cheese, softened
  • 1 tsp lemon zest
  • 6 Tbs extra virgin olive oil
  • 3 cups roasted red peppers, patted dry and chopped coarse (3-4 peppers)
  • 2 oz Parmesan cheese, grated (1 cup)
  • 1/3 cup fresh parsley leaves
  • 1 shallot, chopped
  • 2 tsp minced fresh thyme
  • 1 Tbs fresh basil, plus more for serving
  • 2 cloves garlic, smashed
  • juice of 1/2 lemon
  • pinch of red pepper flakes
  • 2 cups shredded cooked chicken
Heat the oven to 450 degrees and lightly grease an 8-inch square baking dish.

Bring a large pot of water to a boil, season with 1 tablespoon of salt, and add the pasta.  Cook until it is just shy of al dente, 8 to 9 minutes.  Drain the pasta and return to the pot.

Meanwhile, mix the ricotta, goat cheese, lemon zest, 1 tablespoon of oil, 1/4 teaspoon of salt, and 1/4 teaspoon of pepper in a medium bowl.  Set aside.

In a food processor, combine the peppers, Parmesan, remaining 5 tablespoons of oil, parsley, shallot, thyme, garlic, basil, lemon juice, and roasted red paper flaws,  Season with 1/4 teaspoon of salt and 1/4 teaspoon of pepper.  Puree until smooth, about 30 seconds, scraping down the sides of the bowl if necessary.  Taste and season with additional salt and paper as needed.

Add the sauce to the pot with the pasta, and stir in the chicken.  Mix well to combine.  Pour the mixture into the prepared baking dish, and drop dollops of the cheese mixture over the top.

Bake until bubbly and browning, about 15 minutes.  Allow to cool 10 to 15 minutes, sprinkle additional basil over the top, and serve.


Thursday, April 10, 2014

Artichoke Pesto Chicken Pizza


It's Pizza Friday!  It's a thing, right?

I've come to the conclusion that it's time to start making two pizzas for my family on pizza night.  One just barely feeds everyone, and that's only if I serve a substantial side dish.  Or maybe I should just stop making pizzas that are so good that we all inhale an entire pizza in less than 10 minutes?  Then maybe Caroline won't cry when she doesn't get seconds because her brothers (and parents) ate the rest of the pizza?

.... We'll go with a second pizza.

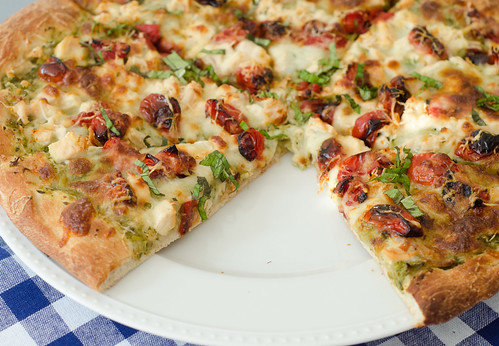
This pizza is a riff on a pesto pizza, utilizing one of my favorite spring veggies:  artichokes!  I mixed up an easy artichoke pesto, slathered it on the crust, then topped it with plenty of cheese, shredded chicken, and roasted tomatoes.  Such a simple combo, but such a great pizza.

It was a gorgeous evening, so we carried our dinner outside and ate on the deck.  After the pizza was demolished in mere minutes, the kids all toddled around in the yard, and I sat and relaxed with a nice glass of rose'.  Life is good in the springtime.  Especially with pizza and wine.


Artichoke Pesto-Chicken Pizza

Artichoke Pesto
adapted from Confections of a Foodie Bride

This will make more pesto than you need, but it is wonderful as a sandwich spread, stuffing for chicken or pork, bruschetta topping, pasta mix-in, etc.  Or you could probably freeze it pretty easily and save it for another pizza!

  • 9 oz artichoke hearts (frozen or canned, drained and patted dry)
  • 2 cloves garlic, smashed
  • 1/4 cup basil leaves
  • 2 Tbs fresh parsley leaves
  • 1 cup fresh spinach
  • 1 tsp lemon zest
  • juice of 1/2 lemon
  • 1/2 cup Parmesan cheese
  • pinch of red pepper flakes
  • 4-5 Tbs olive oil
  • salt and pepper to taste
Combine all the ingredients except the olive oil in a food processor, and puree until smooth, stopping to scrape down the bowl as needed.  With the food processor running, slowly pour 4 tablespoons of the olive oil through the feed tube.  Add an extra tablespoon of oil if the pesto still seems thick - you want it to be easy to spread.  Taste and season with salt and pepper as needed.

Pizza
  • 1 1/2 cups halved grape tomatoes
  • olive oil
  • kosher salt and freshly ground black pepper
  • 1 lb pizza dough
  • cornmeal
  • 1/2 cup artichoke pesto
  • 1 1/4 cups shredded mozzarella cheese
  • 1/2 cup shredded Parmesan cheese
  • 1 cup cooked and shredded chicken
  • 2 Tbs chopped fresh basil
On a rimmed baking sheet lined with parchment paper, toss the tomatoes with 1 tablespoon of olive oil, a big pinch of salt, and a pinch of sugar.  Turn on the oven to 500 degrees, place a baking stone on the bottom rack, and roast the tomatoes while the oven preheats.  Stir them every 5-6 minutes, roasting for 10-15 minutes total, or until they are browned, caramelized, and have released a lot of their liquid.  Keep a close eye on them though, because they will burn easily.  Remove the tomatoes from the oven and transfer the baking stone to the top rack.  Keep the oven on as you prepare the rest of the pizza.
Sprinkle a large square of parchment paper with cornmeal, then roll and stretch the pizza dough into a 12-14 inch circle.  Brush the outer edge with olive oil, and spread the artichoke pesto in a thin layer in the center.
Top the pesto with 1 cup of mozzarella, then scatter the chicken and tomatoes over the cheese.  Sprinkle the remaining mozzarella and the parmesan over the top.

Carefully transfer the pizza + parchment to the oven and bake 10-12 minutes, or until the dough is browned and the cheese is melted and bubbly.  Allow to cool 10 minutes, sprinkle the top with basil, slice, and serve. 


Monday, March 10, 2014

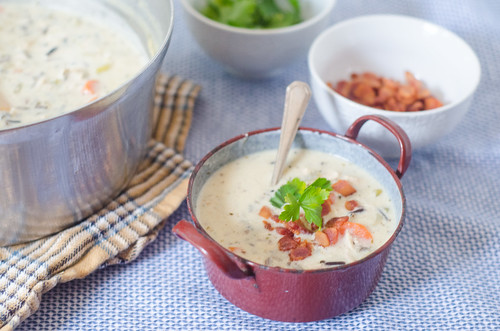
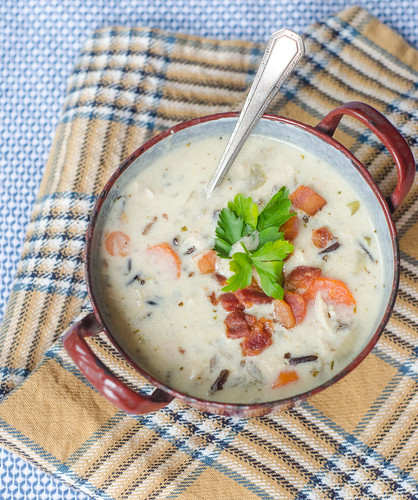
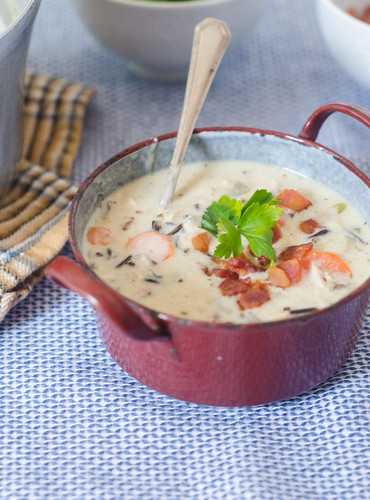
Creamy Chicken and Wild Rice Soup with Bacon


Is it spring yeeeeeeeet???  I'm hopeful that the gorgeous weather is here to stay in my part of the country; but realistically, I know we are in for at least one more cold snap.  And what do you eat when there's a cold snap?  Soup!


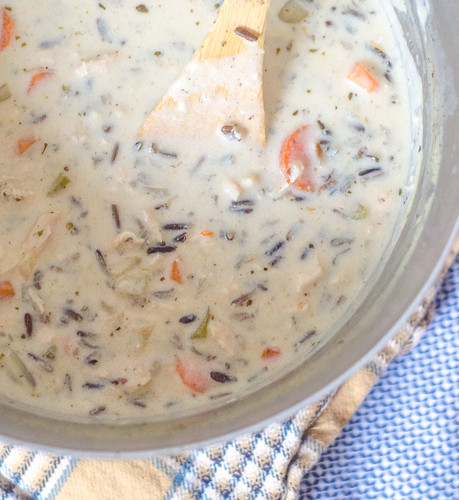
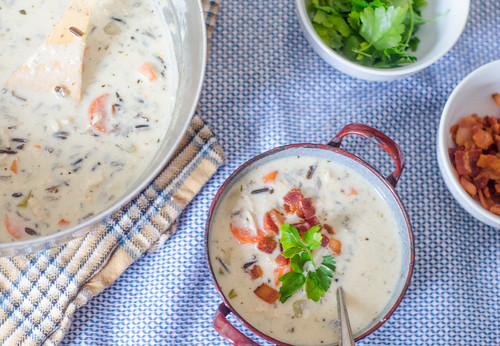
This soup is everything you want in a bowl of comfort food.  There's chicken, rice, tender vegetables, bacon, and it all comes together in a rich, creamy broth.  Creamy soups are definitely one of my guilty pleasures, and one that I only indulge on occasion.  But this soup is so so worth the splurge.


I served this with my buttermilk drop biscuits and fall harvest pear salad, and it was a great meal on a cold and rainy night.  And then subsequently, I enjoyed the leftovers for lunch for the next 3 days.  It reheats well, is warm, comforting and delicious, and makes enough to feed an army (or a family of 6, and then some!).  Go ahead and put this on your menu the next time the weather is cold and dreary.  It feeds the body and warms the soul.


Creamy Chicken & Wild Rice Soup
barely adapted from Elly Says Opa!
serves 6

  • 4 strips of bacon, chopped
  • 1 Tbs butter
  • 3 medium carrots, peeled and sliced
  • 3 ribs celery, sliced
  • 1 medium onion, diced
  • 2 cloves garlic
  • kosher salt and freshly ground black pepper
  • 1/2 tsp dried thyme, or 1 Tbs chopped fresh thyme
  • 1 bay leaf
  • 6 cups chicken broth
  • 2/3 cup raw wild rice
  • 2 cups shredded or chopped cooked chicken
  • 1/4 cup flour
  • 1 1/2 cups half and half
  • fresh parsley, for garnish
Heat a large pot or Dutch oven over medium-high heat.  Add the bacon and cook, stirring frequently, until it is crispy and has rendered most of it's fat.  Use a slotted spoon to transfer it to a paper towel-lined plate and set aside.  Drain all but 1 tablespoon of the fat, and return the pot to the stovetop.

Decrease the heat to medium and add the carrots, onions, celery, and garlic.  Cook until the vegetables begin to soften, about 3 to 5 minutes, stirring often.  Stir in the dried thyme, 3/4 teaspoon of salt, 1/2 teaspoon of pepper, and the bay leaf.  

Add the chicken broth and wild rice and bring to a low boil.  Cover, reduce the heat, and simmer 35 to 40 minutes, or until the rice is almost cooked through, but still has a bit of a bite.  

Stir in the chicken and cook an additional 5 to 10 minutes, or until the rice is done.

In a liquid measuring cup, add the flour to 1 cup of the half and half.  Whisk until the flour is mostly incorporated, then whisk in the remaining 1/2 cup of half-and half.  Slowly whisk the mixture into the pot, then stirring continuously, cook until the soup is thickened and heated though, another 5 minutes or so.

Remove from heat and allow to sit another 10 minutes, as it will thicken a bit as it cools.  Taste and season with additional salt and pepper if needed.

Divide among serving bowls, and sprinkle each serving with bacon and fresh parsley.  Serve.


BLOG DESIGN BY: SHERBET BLOSSOM DESIGNS