Wednesday, May 30, 2012

Pesto Turkey Burgers


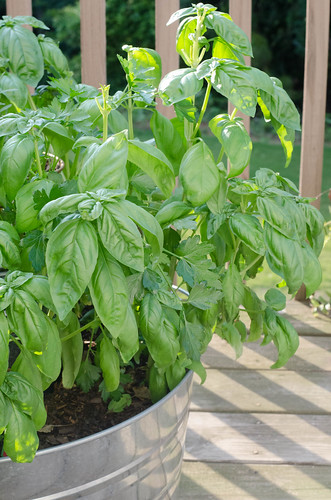
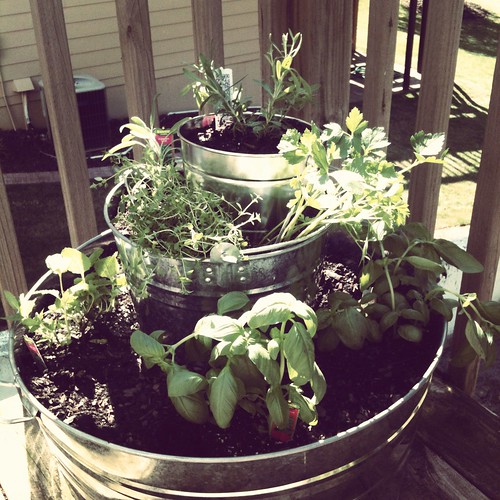
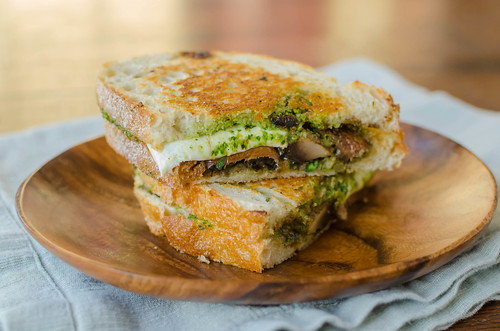
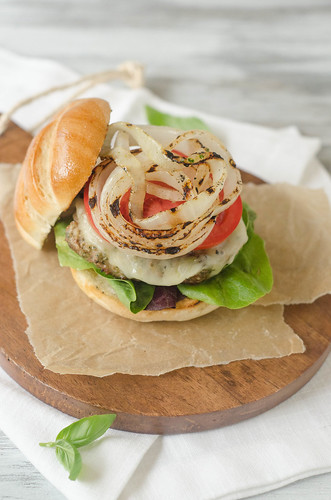
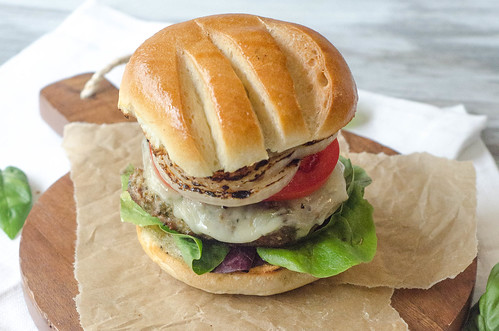
As I mentioned in my container gardening post, I have a plethora of basil.  Pesto is always a great way to use some, but it's what to do with the pesto that can pose the problem.  Obviously tossing with pasta is an easy way to use it, but I like to shake things up, so I mixed some pesto into ground turkey and made pesto turkey burgers!  Topped with a thick slice of tomato, some grilled onions, melted provolone cheese, and a smear of pesto on a toasted bun, you have a mighty fine burger.

Turkey burgers have the reputation of being dry, crumbly, and tasteless, but the pesto certainly solves those problems.  The olive oil in the pesto keeps the burgers moist, and of course they taste bright and fresh thanks to the basil and fresh garlic.

If you're looking to mix up your summer grilling, give these a try.  Any number of sides - especially grilled vegetables - would go well with this - I went with grilled asparagus caprese salad, and it was a stellar choice.  Happy grilling!


Pesto Turkey Burgers
adapted from Oishii Food


Pesto
adapted from Cook's Illustrated
  • 1/4 cup pine nuts, toasted
  • 5 medium garlic cloves, unpeeled
  • 2 cups packed fresh basil leaves
  • 2 Tablespoons Italian parsley
  • 1/3 cup extra virgin olive oil
  • salt
  • 1/4 cup grated Pamesan cheese
Toast nuts in a small skillet over medium heat, stirring frequently, until golden brown. Add to the food processor. Add the garlic cloves to the skillet and toast, tossing frequently, until the skins are toasted and garlic is fragrant. Peel and add to food processor as well.

Process until finely chopped, and add remaining ingredients except cheese. Process until finely chopped.  Transfer to a small bowl, add the cheese, and adjust seasonings if necessary.


Burgers

  • 1/4 cup pesto, plus more for serving
  • 1 1/4 lbs ground turkey
  • 1 tsp dijon mustard
  • 1 clove garlic, minced
  • salt and pepper
  • 4 slices provolone cheese
  • 4 buns, split open and brushed with olive oil
  • 1/2 sweet onion, sliced into thick rings
  • 4 tomato slices
  • lettuce
Prepare grill.  

In a medium bowl, combine the pesto, ground turkey, Dijon mustard, garlic, and salt and pepper.  Lightly but thoroughly mix to combine.  Form into 4 equal-sized patties.

Brush the grates of the grill with olive oil, and grill the burgers 4-6 minutes per side, or until cooked through.  When the burgers are almost done, top each patty with a slice of cheese, close the grill cover, and cook until the cheese has melted.  As the burgers cook, also grill the onions, turning once.  Toast the buns on the grill about 1 minute, or until golden-brown.

Top the burgers with lettuce, tomato, and grilled onions.  Spread a small amount of pesto on one of the buns and serve.


Tuesday, May 29, 2012

Baked Tomatoes with Quinoa, Corn, and Green Chiles


Quinoa has been the grain* du jour for quite some time now, and what with it's health benefits, great taste, and versatility, I don't see that changing anytime soon.  My usual way of eating quinoa is like pasta salad - cooked, mixed with a dressing of some sort, and loaded with veggies.  This dish however, is something a little different.  Quinoa is mixed with roasted poblano peppers, corn, onions, and a host of herbs and spices, stuffed into hollowed out tomatoes, topped with Colby Jack cheese, and baked.  The tomato turns soft and sweet, the quinoa mixture has tons of great flavor and textures, and who doesn't like their dinner, smothered in melted cheese?

While this somewhat involved, especially for a summer meal, you could do portions of it ahead of time - or fully assemble it and then just bake the tomatoes off when you're ready to eat.   The recipe moves pretty quickly though, and its streamlined to make the most of your time.  I suppose you could serve these on the side with grilled chicken, pork, or steak, but I loved them as our entree.  I served a salad with avocado, black beans, and mango on the side.

While this is cooked in the oven, I would be willing to bet that it could be done on the grill as well.  Rather than broiling the poblanos, corn, and onions, you could definitely grill them.  And then instead of baking the assembled tomatoes, throw them on the grill for a few minutes to heat them through and melt the cheese.  If anyone tries this method, definitely let me know!

*I know that quinoa is not actually a grain, but I kind of consider it to be one for all intents and purposes, since that it typically how it is served.  


Baked Tomatoes with Quinoa, Corn, and Green Chiles
adapted from Cooking Light, June 2012
makes 6 tomatoes

  • 2 poblano chiles
  • 4 ears corn
  • 1 cup chopped red onion
  • 6 large ripe tomatoes
  • 1 cup uncooked quinoa
  • 1/4 cup water
  • 1 Tbs chopped fresh cilantro
  • 2 scallions, thinly sliced
  • 1 Tbs olive oil
  • juice of 1 lime
  • 1 tsp kosher salt, divided
  • 1 tsp ground cumin
  • pinch of cayenne pepper (optional)
  • 1/2 tsp chile powder
  • 1/4 tsp freshly ground black pepper 
  • 6 oz Colby Jack cheese, shredded (about 1 1/2 cups)
Preheat the broiler to high.  

Cut the poblano chiles in half lengthwise and discard the seeds and membranes.  Place the chiles, skin-side-up, on a foil-lined baking sheet, and flatten with your hand.  Broil about 8 minutes, or until the skin is blistered and blackened.  Remove the chile to a medium bowl, cover with plastic wrap, and allow to steam for about 10 minutes.  Peel and rinse the chiles, then coarsely chop.

Meanwhile, add the corn and onion to the pan.  Broil, tossing once or twice, about 10 minutes, or until charred and blackened in spots.  Add the corn and onion to the bowl with the chiles.  

Preheat the oven to 350 degrees.

Cut the tops off the tomatoes.  Carefully scoop out the tomato pulp, leaving the shells intact.  Drain the pulp through a sieve set over a bowl, pressing with the back of a spoon to extract as much liquid as possible.  Reserve 1 1/4 cups of the tomato juices, and discard the pulp and seeds.  Sprinkle the inside of the tomatoes with 1/2 teaspoon of salt (total, not each).  Invert the tomatoes onto a lint-free kitchen towel and stand 30 minutes.  Blot the insides of the tomatoes dry with a paper towel or kitchen towel.

As the tomatoes drain, cook the quinoa.  Place the quinoa in a strainer and rinse well under cold water, stirring as you rinse.  Drain well.  Combine the quinoa, reserved tomato liquid, 1/4 cup water, and 1/4 teaspoon salt in a medium saucepan.  Bring to a boil, cover, reduce heat to a simmer, and cook 15 minutes, or until the liquid is absorbed.  Remove from heat and fluff the quinoa with a fork.

Add the quinoa to the bowl with the corn, chiles, and onion, and stir in the cilantro, scallions, olive oil, lime juice, 1/4 teaspoon salt, cumin, cayenne, chile powder, pepper, and 1/2 cup cheese.  

Spoon about 3/4 cup of the quinoa filling into each of the tomatoes.  Divide the remaining cheese evenly over the tops and bake about 15 minutes, or until the cheese has melted.   Remove from the oven and serve.


Thursday, May 24, 2012

Blackberry Lemonade


Behind margaritas, lemonade is the quintessential summer drink.  Over the past year or so I've been experimenting with different variations - sparkling strawberry lemonade, basil-infused lemonade, sparkling lemonade, roasted peach lemonade, limeade, and now this blackberry lemonade.

To be honest, I made this out of necessity, but I'm so very glad that I did.  We were getting ready to head to the beach for the week, and I wanted to rid our house of any and all produce that could spoil.  I had some blackberries and lemons in the fridge, so the blackberry limeade recipe that I saved a year ago became sparkling blackberry lemonade!

This comes together in minutes, is a perfect balance of sweet and sour, and most importantly - look how pretty it is!  I am totally addicted to sparkling water, so I of course love it in this lemonade.  The little bubbles are so refreshing, and it makes the drink seem fancy and special.  This would make a wonderful addition to a cookout this weekend, and if you're looking for an adult beverage, I think vodka, gin, or even sparkling wine would be great.   

Note:  I like my lemonade on the tart side, so feel free to use less lemon juice and/or increase the sugar for a sweeter drink.  Also, if you don't want sparkling lemonade, just omit the sparkling water and replace with 2 cups of still water.

Sparkling Blackberry Lemonade
  • 4 cups cold water, divided
  • 3 cups blackberries
  • 3/4 cup sugar (can increase to 1 cup if your blackberries are especially tart)
  • 1 cup freshly squeezed lemon juice
  • 2 cups sparkling water
In a blender or food processor, combine the blackberries and 1 cup of the water.  Puree until smooth, then press the mixture through a fine-mesh strainer to remove the seeds.  In a pitcher, combine the blackberry puree, sugar, lemon juice, and the remaining water.  Stir well to dissolve the sugar.

Chill until ready to serve, and top with the sparkling water just before serving.


Wednesday, May 23, 2012

Galvanized Tub Container Herb Garden


My dad is an amazing gardener.  Growing up, he grew pretty much all the veggies that we ate.  If I had to guess, probably 2 acres of our land was a giant garden.  In retrospect, I wish I had appreciated it a bit more.  But at the time, all I knew was I hated shucking corn and shelling beans.  And that it really smelled up the house when my mom made and canned pickles.

These days, however, I'm grateful for his expertise.  When I wanted to plant my own garden a few years ago, I immediately sought his advice.  And his advice was to start with tomatoes and herbs.  So I've been doing the container garden thing on our back deck for the past few years, with moderate success.  My tomatoes never get very big, but my herbs usually do alright.  This year, I decided to skip the tomatoes, since I can get plenty at the farmer's market.  And I wanted to do something cute with my herbs.  As an aside, my dad would probably be mortified to know that I said that.  He doesn't like "cute."


Thanks to the wonder of pinterest, I came across an idea to do a tiered herb garden using galvanized tubs. I drilled several holes into the bottom of each tub to allow the water to drain, and then filled them with potting soil, planted my herbs, and stacked them up.

I bought everything I needed from Lowe's, but I'm sure you could also find the supplies at Home Depot or any other hardware store.  I bought three tubs - the largest one is about 2 feet across, the middle one is about 1 foot, and the smallest is 7 inches.  At first I looked in the gardening section, but I eventually found the tubs in the paint section.


As far as what to plant where, I thought it would be best to plant the herbs that tend to grow the most in the largest tub.  But I'm no expert, so I could have totally botched that.  So here's what I planted:

2 basils
1 mint
1 parsley
1 rosemary
1 sage
1 thyme
1 lavender

I already have chives and oregano in other pots, otherwise I would have planted those as well (or in place of something else).

Amazingly, everything is totally flourishing, and at this point, I have more herbs than I will know what to do with.  I think I may actually need to move the basil to its own pot?

With Memorial Day weekend coming up, it's a great time to plant some herbs if you haven't already.  This project took me less than an hour, and that was with Caroline "helping" me.  I absolutely love cooking with fresh herbs, and now I have pretty much anything I'd want at my disposal.

Are you planting a garden this year, and if so, what are you planting?  I may give in and plant a few tomato plants after all, or perhaps some jalapeƱos or zucchini.


source:  inspired by The Vintage Wren


Tuesday, May 22, 2012

Salted Caramel Cheesecake Cupcakes


My husband is obsessed with salted caramel in desserts.  He was first exposed to it with these sweet and salty brownies, and then with these salted caramel chocolate chip cookie bars.  And now these cheesecakes.


If there is anything better than cheesecake, then it'd be cheesecake cupcakes.  A perfectly sized, individual portion of cheesecake.  And if there is anything better than cheesecake cupcakes, it's salted caramel cheesecake cupcakes.  I kind of feel like I should just stop talking right now and share the recipe, because I don't know what else to say about these.  They have effectively usurped any previous favorite dessert and are basically the best thing ever.


You start with a graham cracker crust.  Then you mix up a standard cheesecake batter, mixing in salted caramel sauce so the entire cheesecake is permeated with that wonderful flavor.  And just before baking, swirl in more salted caramel sauce.


If you don't want to make your own salted caramel sauce, the one from Trader Joe's is actually pretty good, so you can save time by buying that.  Also, when swirling the caramel into the cheesecake batter, it's easier when the caramel is warm - I just heated it in the microwave for about 15-20 seconds, and it was much easier to swirl.  


Salted Caramel Cheesecake Cupcakes
basic cheesecake adapted from Martha Stewart's Cupcakes
makes 16 cupcakes

For the crust:

  • 3/4 cups finely ground graham crackers (about 6 graham crackers)
  • 1 1/2 Tbs unsalted butter, melted
  • 1 1/2 Tbs sugar
  • pinch of salt
For the Cheesecakes:
  • 16 oz cream cheese, softened to room temperature
  • 3/4 cup sugar
  • 1/8 tsp salt
  • 1/2 tsp vanilla extract
  • 2 eggs
  • 3 Tbs salted caramel sauce, plus more for swirling (just under 1/4 cup)
Preheat the oven to 325 degrees and line 2 muffin tins with liners.

Stir together the graham cracker crumbs, butter, sugar, and salt.  Press 1 tablespoon of the mixture into the bottom of each lined cup (a shot glass works really well for pressing the mixture down).  Bake about 5 minutes and set muffin pans aside while you mix the cheesecake batter.

With an electric mixer, beat the cream cheese until fluffy.  With the mixer on low speed, add the sugar in a slow steady stream.  Scrape down the bowl as needed.  Add the salt, vanilla, and then add the eggs one at a time, mixing well between each addition.  Stir in the 3 tablespoons of salted caramel sauce.

Spoon 3 tablespoons of filling into each lined muffin cup.  Then dollop about 1/2 teaspoon (total) of salted caramel sauce in a few spots (this works best if the sauce is warm).  Use a toothpick or skewer to swirl the caramel into the batter.

Bake 22-25 minutes, rotating the pans halfway through, until the filling is set.  Remove from the oven to cool completely, then chill in the refrigerator for at least 4 hours before serving.


Sunday, May 20, 2012

Portabello & Spinach Pesto Panini


Not that we encourage Caroline to mispronounce words, but Joey and I catch ourselves saying certain words the same way she does, even if it's not the right way.  Like we call Smith "Baby Sniff" more often than not.  Her cousin Georgia is "Joorjha."  She eats "yodirt" every morning.  And "grill the cheese" sandwiches for lunch.  She is also very particular.  She did not appreciate being served this sandwich for dinner.  Because grill the cheese is for lunch.  Everyone should know this.  Joey and I, however, were more than happy to eat these for dinner.  And for the record, I ate one for lunch the next day, so Caroline can rest easy.

You start by oven-roasting portabello mushrooms and onion slices, then layer them onto thick and hearty sandwich bread with fresh mozzarella, spinach pesto, and a splash of balsamic vinegar.  Grill it or cook in a panini press, and you have one heck of a sandwich.  This is a very quick and easy dinner, but you could shave even more time off by mixing up your pesto and roasting the veggies earlier in the day or the night before.

I'm pretty sure most combinations of roasted veggies grilled on bread with pesto and cheese would make a wonderful sandwich, but this particular variation is really great. It makes a nice light dinner when served with a seasonal salad.  Or a great lunch.  For the record, Caroline eventually ate her sandwich, and of course she loved it.  Because not matter the time of day - who doesn't like a fancy-pants grilled cheese?

Portabello & Spinach Pesto Panini
adapted from Yes, I Want Cake


  • 2 cups packed fresh spinach, arugula, or basil (or a combo of any of these)
  • 2 Tbs chopped fresh parsley
  • 1 garlic clove, roughly chopped
  • 1/3 c pine nuts, lightly toasted
  • juice of 1/2 lemon
  • 1/4 c olive oil
  • 1/3 cup parmesan cheese
  • salt and pepper


  • 4 slices of thick sandwich bread
  • 1 Portobello mushroom
  • 1 Tbs olive oil, plus more for the bread
  • 1 Tbs soy sauce
  • 1 Tbs balsamic vinegar, plus more for drizzling
  • 1/2 small onion, sliced into rings
  • 4 slices of fresh mozzarella
  • 1/4 C prepared pesto
Combine the spinach, parsley, garlic, pine nuts, and lemon juice in the bowl of a food processor fitted with the steel blade.  Puree until everything is chopped very small, scrape down the bowl, and then with the processor running, stream in the olive oil.  Remove the pesto a small bowl, stir in the Parmesan cheese, and season to taste with salt and pepper.


Meanwhile, preheat the oven to 425 degrees.  Toss the mushroom caps and onions with the olive oil, soy sauce, balsamic vinegar, and salt and pepper to taste.  Cook on a rimmed baking sheet, with the mushrooms cap side-down, about 10-15 minutes.  Cool slightly, then slice the mushrooms.


Brush one side of each piece of bread with olive oil, then spread 1 tablespoon of pesto on the other side of each slice.  Layer the mushrooms, onions, and 2 slices of mozzarella on each sandwich, drizzle with balsamic vinegar, then top with the other slice of bread, olive oil-side up.


Heat a nonstick skillet over medim-high heat and cook the sandwiches, flipping when golden-brown, a few minutes per side.


Thursday, May 17, 2012

Grilled Rosemary Chicken Kabobs with Sweet & Sour Apricot Sauce


It seems like there should only be a finite number of ways to prepare grilled chicken.  Yet I feel like every time we have grilled chicken, it's different than the last time.  There are so many cuisines and flavors to draw from, it's easy to keep things interesting.

While I already have a recipe for grilled rosemary chicken posted, and yes, this is also grilled rosemary chicken, believe me when I say that they are totally different recipes.  Aside from the obvious fact that these are kabobs, they just have different flavor profiles.

This recipe has a bit of a kick due to the crushed red pepper flakes, but it is easily tamed by the sweet and sour apricot dipping sauce.  If you don't feel like going through the trouble of chopping and threading the chicken onto the skewers, then just grill the thighs by themselves.

I went ahead and made this a 100% grilled dinner by grilling some potatoes and asparagus, and we all thoroughly enjoyed it.  It's low-maintenace, healthy, easy, and fast.  Exactly what you want in a summer meal.


Grilled Rosemary Chicken Kabobs with Sweet & Sour Apricot Dipping Sauce
adapted from Fine Cooking, via Tracey's Culinary Adventures

  • 3 teaspoons minced fresh rosemary, divided
  • 1 teaspoon dark brown sugar 
  • 1 teaspoon kosher salt 
  • 1/2 teaspoon freshly ground black pepper 
  • 1/4-1/2 teaspoon crushed red pepper flakes 
  • 1 tablespoon vegetable oil 
  • 1 1/4 lb boneless, skinless chicken thighs, trimmed of excess fat and cut into 1-inch cubes
  • 1/2 cup apricot preserves 
  • 2 tablespoons rice vinegar 
Combine 2 teaspoons of the rosemary, the brown sugar, salt, pepper and red pepper flakes in a small bowl. Place the chicken in a medium bowl, and drizzle the oil over it, tossing to coat. Sprinkle the spice mixture over the chicken and toss to coat well.

Preheat your grill to medium-high heat (400-450 F), and oil the grates lightly .  While the grill is heating, thread the chicken cubes onto skewers.

Meanwhile, make the dipping sauce: Combine the remaining teaspoon of rosemary, the apricot preserves, a pinch of salt, and the rice vinegar in a small saucepan. Set over low heat and stir just until the mixture is heated through. Remove from heat and cover to keep warm.

Arrange the kebabs on the grill and cook, turning every 3 minutes or so, until they are slightly charred on all sides and cooked through, about 12-15 minutes total. Transfer the kebabs to a platter to rest for about 5 minutes.  Serve with the warm dipping sauce.


Tuesday, May 15, 2012

Cilantro-Lime Salmon Burgers


I'm having a bit of a moral dilemma these days with Caroline.  She seems to have made the connection that we eat animals, and she is not happy about it.  It all started with one of baby Smith's teething toys.  He has one that's shaped like a fish, and one day as he was chewing on it, we had this conversation:

Caroline:  Baby Smith!  You silly baby boy - we don't eat fish!
Me:  Caroline, we do eat fish.  We ate salmon last night
Caroline:  Mommy, that's so silly.  Salmon's not fish.
Me:  Yes it is.
Caroline: (now getting upset).  No mommy, we don't eat fish that swim in the oceans and rivers.
Me:  Yes, Caroline, we do.
Caroline:  (now crying)  No!  We only eat fish from the grocery store!

 I am so touched and moved that she is so passionate and convicted, but I also don't want to count out an entire food group for her just yet.  I tried to explain the circle of life, but I think I only made it worse because then she realized that we also eat chickens, cows, and pigs.  Even though I mostly only buy organic, free range, wild-caught, etc, she doesn't see the distinction and wants no part of it.  Luckily, we eat vegetarian a good bit, so it's only been an issue a few times during dinner.  She hasn't wanted to eat beef, since the cow is her favorite animal.  Or crab, since it's her favorite "fish." I'm still at a bit of a loss about what to do and how to handle it, but so far I've just told her what we're having for dinner and then let her decide.  That's the thing about parenting - it's totally on the job training.

And now to move on to the recipe, I'll talk about these burgers!  Caroline did actually eat these.  One of the biggest complaints I hear about salmon is that wild-caught salmon (which IMO is the only kind worth buying!) is too expensive.  Yes, it is pricey, but the great thing about this recipe is that one pound of salmon makes four servings.  So it's definitely a more affordable option if you want to get those omega fatty acids!

And it's no wonder that these were such a hit with the whole family - they are full of all of our favorite things:  cilantro, lime juice, jalapeƱos... a quick cilantro lime yogurt sauce adds a cool creaminess, and topping with avocado and extra hot sauce amps up the flavor even more.  These were quick and easy, and a fun new way to eat salmon.  And a fun new burger to add to my repertoire.  Since apparently cows are off the menu for a while ;-)

Cilatnro-Lime Salmon Burgers
adapted from Cooking Light, May 2009

  • 1 lb salmon, skim removed 
  • 1 Tbs greek yogurt
  • 3 Tbs chopped fresh cilantro
  • juice of 1 lime
  • 1 tsp lime zest
  • 1/3 cup panko bread crumbs
  • 1 garlic clove, minced
  • 1 jalapeƱo, seeds and ribs removed, minced
  • 2 Tbs chopped green onion (about 2 scallions)
  • 1/2 tsp kosher salt
  • dash of hot sauce
  • freshly cracked black pepper
  • 1 Tbs vegetable oil
Cilantro-Lime Sauce
  • 1/4 cup Greek yogurt (low fat or fat free is fine)
  • 2 Tbs lime juice
  • 2 Tbs chopped cilantro
  • salt and pepper
  • a few dashes of hot sauce
To serve:
  • 1 avocado, peeled, pitted, and sliced
  • handful of spinach leave or lettuce leaves, rinses
  • 4 burger buns, split and toasted
  • hot sauce, for passing at the table
Chop the salmon into 1-2 inch chunks, and transfer it to a food processor.  Add the greek yogurt, cilantro, lime juice and zest, bread crumbs, garlic, jalapeƱo, green onion, salt and pepper, and hot sauce.  Pulse several times to chop the salmon into small pieces and combine with the other ingredients. 

Form the mixture into 4 equal-sized patties, each about 3/4-inch thick.  Chill at least 30 minutes, or for up to several hours.

Meanwhile, whisk together all the ingredients for the cilantro-lime sauce.  Cover and chill until ready to use.

Heat the oil in a nonstick (or cast iron) skillet over medium high heat.  Carefully place the burgers in the skillet and cook 2 minutes.  Flip, then cook an additional 2 minutes.

Serve each burgers on a toasted bun with spinach, the cilantro-lime juice, and sliced avocado.  Pass the hot sauce at the table for serving.


Sunday, May 13, 2012

Spicy Kale-Stuffed Shells


What dishes do you think of when you hear the term "comfort food?"  For me, anything from my childhood gives me the warm fuzzies.   Stuffed shells was my favorite meal growing up.  My mom always cooked us any meal we requested on our birthdays, and stuffed shells was always my choice.  So anytime I have stuffed shells in any form it makes me think of my birthdays.   My mom's recipe was pretty basic - just the standard cheese filling stuffed into big shells, smothered in marinara, and topped with more cheese.  I'd still eat that any night of the week, but this version is a little different.

It's still a vegetarian dish, and it's still just a basic cheese filling and marinara sauce, but with a few twists.  In addition to the cheese filling, the shells are also stuffed with chopped kale.  And the marinara sauce is garlicky and spicy.  But of course they are still topped with melty, gooey cheese.  

I've discussed Joey's lukewarm feelings towards kale already, but suffice to say when kale is mixed with cheese, stuffed into pasta, and then topped with a spicy marinara and more cheese, he eats it.  And Caroline did too.  She likes spicy food, so this wasn't too hot for her, but if you or your kids are sensitive to heat then just adjust the red pepper flakes accordingly.  

This most definitely fits the bill as comfort food, but it's one you can feel good about eating - it's loaded with kale, uses low-fat cottage cheese, and only calls for a modest amount of cheese.  It's a dish that I know I'll make again and again, and I hope that it's one that reminds my own kids of their childhood as well.

Spicy Kale-Stuffed Shells
adapted from the Spicy Kale Lasagna by A Couple Cooks
  • 8 oz jumbo shells
  • 3/4-1 lb kale, washed, stems removed, and roughly chopped
  • 2 cups low-fat cottage cheese
  • 1/2 cup freshly grated parmesan cheese  
  • 1 cup shredded mozzarella cheese 
  • 2 Tbs minced fresh parsley or basil
  • 2 tablespoons olive oil 
  • 2 cloves garlic 
  • 1/2 teaspoon red pepper flakes 
  • 16 oz can crushed tomatoes (with herbs, if available) 
  • 1/2 tsp dried oregano
  • Kosher salt 
  • Fresh ground pepper
Preheat the oven to 375 degrees, and lightly grease  square baking dish or a pie plate.

Boil the shells according to the package directions, drain, and set aside.

Meanwhile, heat a large skillet over medium-high heat.  Add the kale and a splash of water, stirring the kale until it's wilted and softened, about 5 minutes.  Remove the pan from heat, transfer the kale to a strainer and set aside.

Return the pan to the stove, add the oil, and heat over medium heat until shimmering.  Add the garlic and red pepper flakes, and stirring constantly, cook until fragrant, about 1 minute.  Add the tomatoes, dried oregano, and 1/2 teaspoon of salt.  Bring to a simmer and cook 5-10 minutes, stirring occasionally.

Meanwhile, wrap the kale in a lint-free kitchen towel or paper towels and squeeze out as much moisture as possible.  Chop into small pieces and set aside.  

Strain the cottage cheese through a strainer, pressing to remove as much liquid as possible.  Transfer the strained cheese to a medium bowl and stir in 1/3 cup of the parmesan cheese, 3/4 cup of the mozzarella, herbs, and kale.  Season with 1/2 teaspoon of salt and pepper to taste.

To assemble the shells, spread a thin layer of the tomato sauce in the bottom of the baking dish.  Use a spoon to fill each shell with the kale-cottage cheese mixture, then arrange in a single layer in the dish.  Pour the remaining sauce over the pasta, then sprinkle with the remaining Parmesan and mozzarella.

Bake, covered, 25-30 minutes, or until the sauce is bubbly and the cheese has melted.  Remove the foil for the last 5 minutes or so.  Let stand about 5-10 minutes before serving.


Thursday, May 10, 2012

Baked BBQ Pork Taquitos


Ever since last winter, these baked chicken taquitos have been a perennial favorite in our house.  I always have a few in the freezer to cook up for a last minute lunch, and Joey gets really excited whenever they're on the menu (which, according to him, is not often enough).  Every time I make them, I start thinking up other variations.

It just so happens that we have several pounds of pulled pork in the freezer at any given time, so it only seemed natural to marry the two.  Kind of like that friends episode where Joey has to choose between a big tub of jam and the hot girl at the Xerox place:  put your hands together, my friend.  Put your hands together.  Joey said he liked these even better than the original chicken taquitos, and dare I say I agreed?

So here's the rundown on what I did:  I used pulled pork instead of chicken, but I think chicken would work just as well here.  I know I'm always looking for ways to use leftover meat, and this is a great solution.  I used cream cheese as the binder, just as in the original recipe, but I would love to try ranch dressing next time.  then I used bbq sauce instead of salsa, and seasoned the mixture with spices that I would use for pulled pork:  paprika, brown sugar, mustard, etc.  Baked up until they are perfectly crispy, then dipped in a  combo of ranch dressing and bbq sauce, these were pretty much perfection.

I still have a few more taquito variations of my sleeve, but it's going to be hard to stray from these and the chicken ones from here on out.... I suppose that somehow I'll manage ;-)

Baked BBQ Pork Taquitos
inspired by these Baked Chicken Taquitos (which are from Our Best Bites)

  • 3 oz. cream cheese, softened to room temperature (reduced-fat is fine)
  • 1/3 cup bbq sauce
  • 1/2 tsp paprika
  • 1/2 tsp chile powder
  • 1/2 tsp garlic powder (or 1 garlic clove, minced)
  • 1/2 tsp mustard powder
  • 1/2 tsp brown sugar
  • 1/2 tsp liquid smoke
  • pinch red pepper flakes
  • kosher salt and pepper to taste
  • 1/4 cup diced onion
  • 3 scallions, thinly sliced
  • 2 Tbs minced fresh cilantro or parsley
  • hot sauce (optional)
  • 2 cups shredded or chopped cooked pork or chicken
  • 1 cup sharp cheddar cheese
  • 8-10 (6-inch) corn or flour tortillas
  • cooking spray
  • Ranch Dressing and/or BBQ Sauce, for serving
Preheat the oven to 425 degrees and spray a baking sheet with cooking spray. 

In a large bowl, combine the cream cheese with the bbq sauce, paprika, garlic powder, mustard, brown sugar, liquid smoke, chile powder, red pepper flakes, cilantro, scallions, onion, and 1/4 tsp kosher salt.  Fold in the pork and cheese.  Taste and season with additional salt and pepper if necessary.  Add hot sauce if you like things spicy!

Working 3-4 tortillas at a time, stack them on a microwave-safe plate and cover with a damp paper towel.  Cook 30 seconds, or until tortillas are soft and pliable. 

Spoon 2-3 tablespoons of filling onto the lower third of each tortilla, and roll tightly.  Place seam side-down on the prepared baking sheet.  Repeat with remaining tortillas and filling.

Spray the taquitos lightly with cooking spray, sprinkle with salt.  Bake 15-20 minutes, or until the tortillas are crisp and golden-brown.  Serve with bbq sauce and ranch dressing for dipping.


Wednesday, May 9, 2012

Back to Basics: Quick & Easy BBQ Sauce


As sacrilegious as it may be, I was never a fan of bbq growing up.  I didn't eat meat, so no pulled pork, smoked chicken, or ribs for me.  And don't get me started on those horrendous "bbq" flavored potato chips.  So it was quite a surprise when I was pregnant with Caroline and my biggest craving was bbq pulled pork.  I just couldn't get enough.  I fully expected my love of bbq to go away once I had her, but it's almost four years later, and it's still going strong.

When the craving first hit, I was pretty partial to Williamson Bros. (a local bbq place) and Sweet Baby Ray's bbq sauces.  But as any kitchen fiend would, I eventually decided that I could and should be making my own bbq sauce!  

There are countless recipes out there for homemade bbq sauce, but this one is my standby.  It's no-cook, and comes together in literally two minutes.  Just add all the ingredients and whisk them together.  It also keeps really well in the fridge.  It's made with things that you probably already have in your pantry, and while it is pretty basic and no-frills, it's just what you want - a little sweet, a tad spicy, a little smokey.  The perfect addition to pulled pork or grilled chicken.  And it's open to countless variations:

  • add extra hot sauce or a few chopped chipotle chiles for a spicy sauce
  • mix in a few tablespoons of peach or raspberry preserves for a fruity version
  • stir in some mustard for a South Carolina-style hybrid
  • add some hoison sauce, sesame oil, and rice wine vinegar for an Asian flair
  • add some pineapple puree and soy sauce for some Hawaiian-style
  • If you want to make things grown up, stir in a few tablespoons of beer or bourbon
No matter which route you decide to take, this is an easy, no-frills base recipe that is great on it's own.  And now what to do with all that sauce?  I'll be sharing a super-fun idea tomorrow, but for now, check out these ideas from around the blogosphere:

BBQ Chicken Burgers (one of our favorite dinners)
BBQ Chicken Wings (also works well on grilled chicken breasts or thighs)
Hawaiian BBQ Pork (or chicken) Pizza
Pulled Pork Empanadas with Chipotle-Peach BBQ Sauce (Confections of a Foodie Bride)
BBQ Chicken Salad with Creamy BBQ-Cilantro-Lime Dressing (Erin's Food Files)
Cheeseburgers with BBQ Caramelized Onions (Elly Says Opa)
BBQ Chicken Tacos with Blue Cheese Slaw (Prevention, RD)
BBQ Portabello Sliders (How Sweet It Is)
BBQ Chicken, Brie, and Plaintain Wraps - totally intrigued by these (My Life as a Mrs.)
BBQ Pork Enchiladas (Branny Boils Over)

I'm always looking for new and fun ideas, so what's your favorite use of BBQ sauce?

Quick and Easy BBQ Sauce
barely adapted from America's Test Kitchen

  • 1 1/2 cups ketchup
  • 1/2 cup molasses
  • 2 Tablespoons cider vinegar
  • 3 Tablespoons honey
  • 1 1/2 teaspoons hot sauce
  • 1/2 teaspoon liquid smoke
  • salt and pepper
Whisk together all the ingredients in a medium bowl.  Taste and season with additional salt, pepper, honey, and/or hot sauce.  Store covered, in the refrigerator, for several weeks.


Monday, May 7, 2012

Grilled Halloumi with Grape Relish


When I was a young single girl living in the city, my girlfriends and I used to go to dinner at a Greek restaurant called Taverna Plaka.  Whether or not it was authentic, I have no idea.... but I'm leaning towards not.  It was a really fun place though - good drinks and food, a fun atmosphere, and belly dancers.  We'd have dinner, then hit up some of our favorite bars to find cute boys.   My favorite thing to order (along with a few fruity martinis) was Halloumi cheese flambeed in ouzo.  They brought it to the table and set it on fire, which always caused a spectacle. Then once the fire goes out, you're left with gooey, rich, and ridiculously decadent cheese.

So let's call that the "bad boy" cheese - a little dangerous, soaked in liquor, and not at all good for you.  Pretty much what I chased back in those days.  And if that's the case, then this grilled halloumi would totally be husband material.  It's grilled, not soaked in liquor - much safer, right?  And it's topped with a sweet relish of grilled grapes, toasted walnuts, and fragrant rosemary.  Much better for you in the long run.  This is my "Joey" cheese.  And I love it.

The grape relish plays just wonderfully off of the grilled halloumi and the slightly garlicky bread.  If you're not familiar with halloumi, it is a mild and slightly salty cheese that doesn't melt like most cheeses.  When grilled, it gets softer and creamy, but still holds it's shape.  This was a nice romantic dinner that we enjoyed together after the kids were in bed.  On the patio, with a refreshing rose'.  It's a far cry from my single girl days, and I'm totally okay with that.


Grilled Halloumi with Rosemary-Grape Relish & Garlic Bread
adapted from Fine Cooking, May 2011

  • 1/2 medium red onion, cut into 2-3 thick slices 
  • extra-virgin olive oil 
  • Kosher salt and freshly ground black pepper 
  • 12 oz. halloumi cheese, cut into 1/2-inch slabs 
  • 1 large clove garlic, minced 
  • 1  loaf ciabatta, cut into 1/2-inch-thick slices 
  • 1/2 cup walnuts 
  • 1 tsp. minced fresh rosemary 
  • 1 bunch seedless black or red grapes (about 1 lb) 
  • 2 to 3 tsp. balsamic vinegar 
Prepare a high gas or charcoal grill fire.

Drizzle the onion slices with 2 tsp. of the oil and lightly season them with salt and pepper. In a small bowl, mix 2 Tbs. of oil, the garlic, and a pinch each of salt and pepper; brush the mixture evenly over one side of the bread slices.  Drizzle the grapes with olive oil.

Meanwhile, toast the walnuts in a small skillet over medium heat, stirring frequently, until golden-brown, 4 to 5 minutes. 
Transfer the walnuts to the bowl of a food processor and add the rosemary.  Pulse a few times, until the walnuts are coarsely chopped.

Slice the halloumi into 1/2-inch thick slabs and rub both sides of each piece with olive oil. 

Put the onion slices and bunch of grapes on the grill grate. Cover and grill, turning once, until the grapes are bursting and the onions are grill marked, about 10 minutes.   Coarsely chop the onion and add it to the food processor.  Using tongs or your hands, pull the grapes off of the stems and transfer to the food processor.  Add a pinch of salt and the balsamic vinegar, and pulse a few times.

Clean and oil the grill grate. Put the bread and cheese on the grate and grill uncovered, turning once, until marked on both sides, 4 to 5 minutes.

Divide the cheese, bread, and relish among 4 plates and serve immediately.


Tuesday, May 1, 2012

Frozen Mango Margaritas


When we go out for Mexican, I am a creature of habit.  I order a margarita on the rocks, no salt.  I make an exception at one particular Mexican restaurant, where I order a prickly pear margarita.  I have no idea what a prickly pear is, but it makes a darn tasty margarita!

So even though I'm a boring margarita patron at restaurants, I love experimenting with fun new flavors at home.  Blackberry-Thyme is a good one.  Peach is a summer favorite, and cranberry and pomegranate are mainstays during the fall.  But one thing is pretty constant - always on the rocks.  So these mango margaritas were most definitely outside of my comfort zone.  And I liked it!

On our honeymoon, the resort in St. Lucia made the most delicious mango daiquiris.  It was basically just mango puree, rum, and lime juice.  Nothing else.  I definitely enjoyed my fair share.  These margaritas reminded me a bit of those wonderful drinks in paradise.  Mango, lime, and tequila are the stars, with a subtle sweetness from the triple sec and the tiniest bit of sugar.

I used frozen mango to keep the flavor even more pure (and because I had some in the freezer already), but feel free to use fresh and just add a bit more ice.

And if you are looking for more fun margaritas, check out my friend Shawnda's blog.  She is the margarita queen, and not to be sacrilegious, but I'm pretty sure that Cinco de Mayo is her Christmas.  Bottoms up!


Frozen Mango Margaritas
adapted from The Complete Book of Mixed Drinks, via Cook Like a Champion

  • 3 oz silver tequila
  • 1 1/2 - 2 oz triple sec
  • 1 cup crushed ice
  • 1/3 cup freshly squeezed lime juice
  • 2 tsp sugar
  • 2 cups frozen mango chunks
  • spent lime wedges, for rimming the glasses
  • 1 tsp sugar + 1/2 tsp kosher salt for rimming the glasses
Combine all the ingredients through the mango in a blender and blend until smooth.  Check the consistency and add lime juice, more tequila, or ice as needed.

Use a spent lime half to moisten the rims of the glasses.  On a small plate, combine the sugar and salt and dip the glass to coat the rims in the mixture.  Divide the margaritas between the glasses and serve immediately.


BLOG DESIGN BY: SHERBET BLOSSOM DESIGNS