Showing posts with label southern. Show all posts

Monday, August 10, 2015

Okra-Cornmeal Cakes with Whipped Goat Cheese

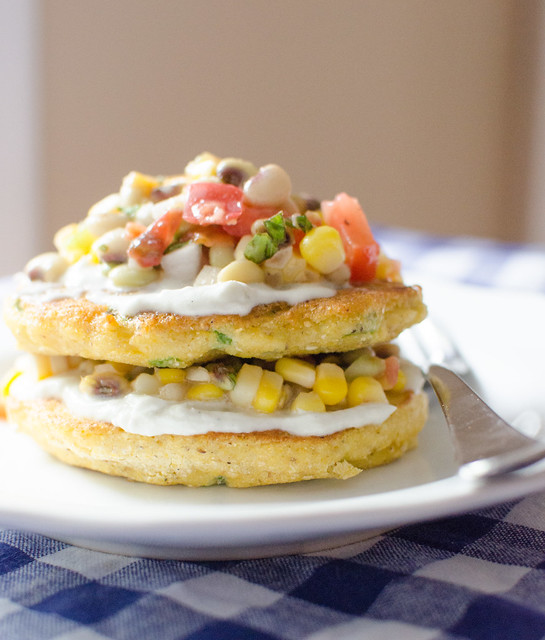
Okra Cornmeal Cakes with Whipped Goat Cheese and Black Eyed Pea Salad

I'm not always the best at "going with the flow, " and I don't particularly consider myself to be easy going.  I like order.  I like plans.  And I like to know what's coming and what to expect.  I only like surprises if I didn't know the surprise was coming (as in, don't tell me "I have a surprise for you!"  and then make me wait!). Oh, right.  I'm also impatient.

Thus, cooking on the fly is not really my thing.  Sure, I make up and develop my own recipes, but it's always with a plan in place already, or at the very least, a general idea of what I'm going for.  Never do I start cooking dinner without having at least a vague idea of what I want to end up eating.
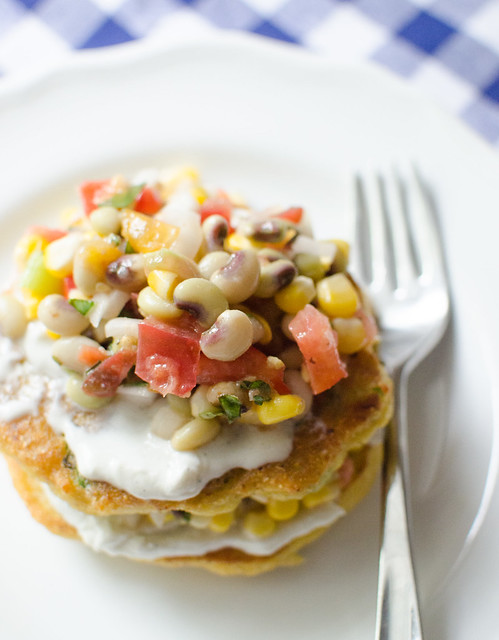
Okra Cornmeal Cakes with Whipped Goat Cheese and Black Eyed Pea Salad 

 But maybe I should.  Because that's what I did when I created this dinner.  I picked up a bounty of beautiful produce that morning at the farmer's market, with no real intention or plan for any of it.  I knew I wanted to make a veggie-heavy dinner that night, but that's all the direction I had.  So I started by cooking my black eyed peas and chopping some veggies.  I thought about making some sort of bean burger with the black eyed peas, a southern vegetable risotto, a hash topped with a runny egg, or a simple veggie-heavy salad.  But then I struck gold when I recalled these okra-cormeal pancakes I've had saved for ages.  And I thought they'd go well with my black eyed pea salad.  I was done!  Or so I thought… I'd picked up a wheel of the most amazing aged goat cheese that morning at the market, and I decided to incorporate that as well.

I ended up creating a napoleon of sorts… or rather, stacks of deliciousness if you don't want to use fancy terminology.  Buttery, crisp okra cornmeal pancakes, topped with whipped goat cheese and black eyed pea salad… repeat layers.  Absolutely incredible, and for sure one of the highlights of my summer cooking.   This dinner totally hit the spot, and we were exclaiming and "mmm-ing" with every bite.  My picky toddlers even ate the pancakes, okra and all!

So lesson learned:  sometimes it's nice to loosen the reigns a bit, and just cook through improv. And while I'm at it, maybe I should apply that same advice to my life.  It can't hurt, right?!
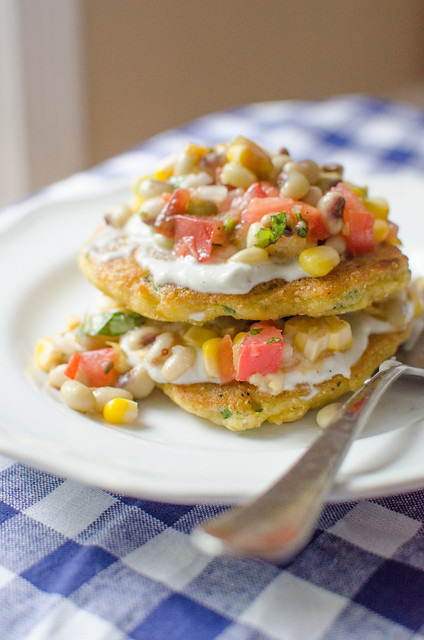
Okra Cornmeal Cakes with Whipped Goat Cheese and Black Eyed Pea Salad 

Okra-Cornmeal Cakes with Whipped Goat Cheese
cakes adapted from Basic to Brilliant, Y'all; Whipped Goat Cheese from Smitten Kitchen

  • 2 cups yellow cornmeal
  • 2 tsp baking powder
  • 1 tsp sea salt
  • 1 egg, lightly beaten
  • 2 Tbs melted butter
  • 1 1/2 cups water, plus more if needed
  • 8 oz okra, stems trimmed, sliced 1/2 inch thick
  • 1 jalapeño, cored, seeded, and finely chopped
  • 1 clove garlic, minced
  • canola oil, for frying
  • 3 Tbs heavy cream
  • 4 oz goat cheese, softened
  • black eyed pea salad
Line a baking sheet with paper towels or a lint-free kitchen towel, and set aside.  

Prepare the batter by whisking together the cornmeal, baking powder, and salt in a large bowl.  Combine the egg, butter, and water in a large liquid measuring cup.  Pour into the dry ingredients and whisk until just incorporated.  Add the okra, jalapeño, and garlic, and stir to combine, using a wooden spoon (The batter is thick, but not dry.  Add water if needed, a few tablespoons at a time).

Heat half of the oil over medium heat in a 12-inch skillet, preferably cast iron.  Scoop 1/4 cup of batter into the skillet, and use the back of a spoon or the measuring cup to press the batter into an even layer.  Repeat with more batter to make as many pancakes as you can fit into a single layer without crowding (likely 3-4 per batch).  Cook until the bottoms of the cake are brown and bubbles begin to form on the tops, about 2 to 3 minutes.  Use a spatula to turn the cakes, and cook on the second side, an additional 2 to 3 minutes.  Transfer to the lined baking sheet, sprinkle with salt and pepper, and repeat with the remaining batter and oil.  

Meanwhile, use an electric mixer to whip the heavy cream until peaks form.  Add the goat cheese and beat until the cheese is light and fluffy.

To assemble, spread about a tablespoon of the whipped goat cheese on an okra cake, and top that with a spoonful of the black eyed pea salad.  Repeat with another okra cake, more goat cheese, and finally a healthy spoonful of salad.  Serve.


Monday, August 3, 2015

Summer Tomato and Black Eyed Pea Salad

Summer Tomato and Black Eyed Pea Salad 

I'd like to introduce you to one of my favorite dishes of all time.  This salad is pretty much on repeat for me all summer long.  Fresh black eyed peas are one of my favorite summer treats, and they really shine in this salad.  The creamy peas, fresh tomatoes, sweet corn, and tangy vinaigrette all come together in perfect summer vegetable harmony.  I make a big batch of it to go with dinner one night, then eat it in various ways throughout the week - as is, over greens for lunch, over chicken or fish, rolled up into a wrap with turkey and cheese, and my personal favorite, as a salsa with tortilla chips for a snack.  Most recently I used this salad in an absolutely killer dish, and I'll be sharing the details of that later this week!

This salad is not only versatile, but the flavor combinations are endless as well.   As written here, it is very simply and neutrally seasoned, but I sometimes like to use lime juice, cilantro, and add some jalapeños to the mix as well.  I've also been known to mix in a little crumbled bacon.  A huge variety of veggies work well here too -- green beans, okra, shredded zucchini, bell peppers… really anything you find at the farmer's market this time of year will work beautifully.  What grows together, goes together!

Summer Tomato and Black Eyed Pea Salad
barely adapted from Bon Appétit,Y'all, by Virginia Willis

  • 3 ears of corn, shucked
  • 2 cups fresh or frozen black eyed peas (or lady peas, or any other field pea)
  • 2 large tomatoes, cored, seeded and chopped
  • 1/2 sweet onion, preferably Vidalia, finely diced
  • 1 stalk of celery, finely diced
  • 1 clove garlic, minced
  • 1/2 cup basil, chopped
  • 3 Tbs fresh parsley, chopped
  • 2 Tbs apple cider vinegar
  • pinch of sugar
  • 1 tsp Dijon mustard
  • 1/4 cup canola oil
  • kosher salt and freshly ground black pepper
Bring a large pot of salted water to a boil.  Add the corn and cook until tender, 2 to 3 minutes.  Use tongs to remove from the pot, and drain them on a paper towel-lined plate.

Return the water to a boil and add the black eyed peas.  Simmer until they are tender but not mushy, 15 to 20 minutes (cooking time will depend on their freshness, so start checking by tasting around 12 to 15 minutes).

Meanwhile, use a sharp knife to cut the corn kernels off the cob.  Place them in a large bowl, and add the tomatoes, onion, celery, garlic, and basil.  

Once the peas are cooked, drain them in a colander and rinse well with cold water.  Drain them very well, shaking to remove as much water as possible, then add them to the bowl with the other vegetables as well.

To make the dressing, whisk together the oil, mustard, and sugar in a small bowl.  Whisking constantly, slowly stream in the oil.  Season with salt and pepper.

Gently stir the dressing into the salad, taste, and season with additional salt and pepper as needed. 


Sunday, April 12, 2015

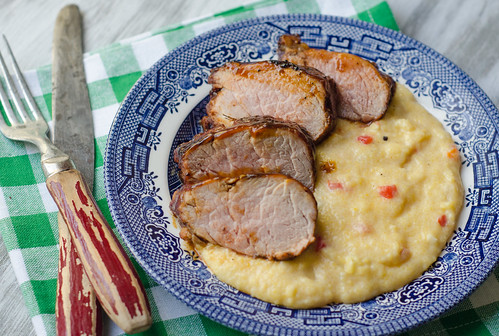
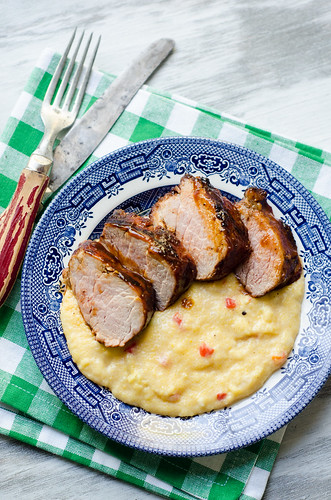
BBQ Glazed Pork Tenderloin over Pimento Cheese Grits

BBQ Glazed Pork Tenderloin over Pimento Cheese Grits 

Any southern lady worth her salt has a good recipe for pimento cheese in her back pocket.  Traditionalists hold strong to the idea that pimento cheese should be used only for dipping crackers and spreading on white bread.  I myself am a bit liberal when it comes to my pimento cheese consumption, and firmly believe that the sky's the limit!  I mean, I made pimento cheese macarons last year.   Clearly I'm no traditionalist.  So while pimento cheese grits aren't that out there, they are a fun spin on both grits and pimiento cheese -- two of my favorite southern delicacies.  And to top it with grilled and glazed pork tenderloin?  Pure southern perfection.

I'm imagining serving this at a dinner party.  Start with fried green tomatoes.  Serve grilled or cornmeal-crusted okra on the side.  And finish with an Arnold Palmer Layer Cake or Peach Cobbler.  To drink?  If you can find it, La Peche Mode, a peach saison by Three Taverns Brewery here in Atlanta.  This beer pairs perfectly with the spicy pork and creamy grits.

I realize that some parts of the country are still blanketed in snow, but please.  The minute you can, dust off your grill and make this dinner.  You'll be so happy, and I'll grant you all southerner cards for the day!

BBQ Glazed Pork Tenderloin over Pimento Cheese Grits 

BBQ Glazed Pork Tenderloin over Pimento Cheese Grits

  • 1 lb pork tenderloin, trimmed of excess fat
  • 3 Tbs BBQ Spice Rub (recipe below)
  • 1 Tbs canola oil
  • 1/2 cup BBQ sauce
  • 2 Tbs butter
  • 1/2 cup chopped onion
  • 2 cloves garlic
  • 1/4 tsp dry mustard powder
  • 1/8 tsp cayenne pepper
  • kosher salt and freshly ground black pepper
  • 1 cup stone-ground grits
  • 2 cups water
  • 2 cups milk
  • 1 1/2 cups extra sharp cheddar cheese
  • 4 oz diced pimentos, drained (or 1/2 roasted red pepper, diced)
  • 2 Tbs heavy cream or half and half
Prepare the grill to cook over medium-high heat.  Brush the grates with cooking oil.

In a small bowl, combine the BBQ spice rub and the canola oil to form a paste.  Rub over the pork tenderloin.

Place on the grill and cook, turning every 4-5 minutes, until the meat registers 140 degrees in the center.  For the last 5-6 minutes, brush with the bbq sauce.  Remove the tenderloin from the grill, cover with foil, and allow to rest for 5 to 10 minutes.  Brush once more with bbq sauce, and slice.

As the pork is cooking, make the grits.  Melt the butter in a medium saucepan over medium heat.  Add the onions.  Cook, stirring often, until they are softened and translucent, 5 to 6 minutes.  Add the garlic, mustard powder, cayenne pepper, 3/4 teaspoon of kosher salt, and 1/2 teaspoon of pepper.  Cook for an additional minute, then slowly whisk in the water and milk.  

Bring to a boil and whisk in the grits.  Reduce the heat to medium-low, and cook until the grits are creamy, about 20 to 25 minutes.  Whisk often to keep lumps from forming and to keep the grits from sticking to the bottom of the pan.

Remove the saucepan from heat and stir in the cheese, pimentos, and cream.  Taste and season with additional salt and pepper as needed.

To serve, spoon the grits onto a plate and arrange a few slices of pork over the top.  


BBQ Spice Rub
America's Test Kitchen, Healthy Family Cookbook

  • 3 Tbs brown sugar
  • 3 Tbs smoked paprika
  • 2 Tbs dry mustard powder
  • 2 Tbs pepper
  • 1 Tbs onion powder
  • 1 Tbs garlic powder
  • 1 Tbs ground cumin
  • 2 tsp kosher salt
  • 1/2 tsp cayenne pepper
Combine all the spices in a small bowl and stir to combine well.  This can be stored at room temperature in an airtight container for about a month.


Thursday, September 4, 2014

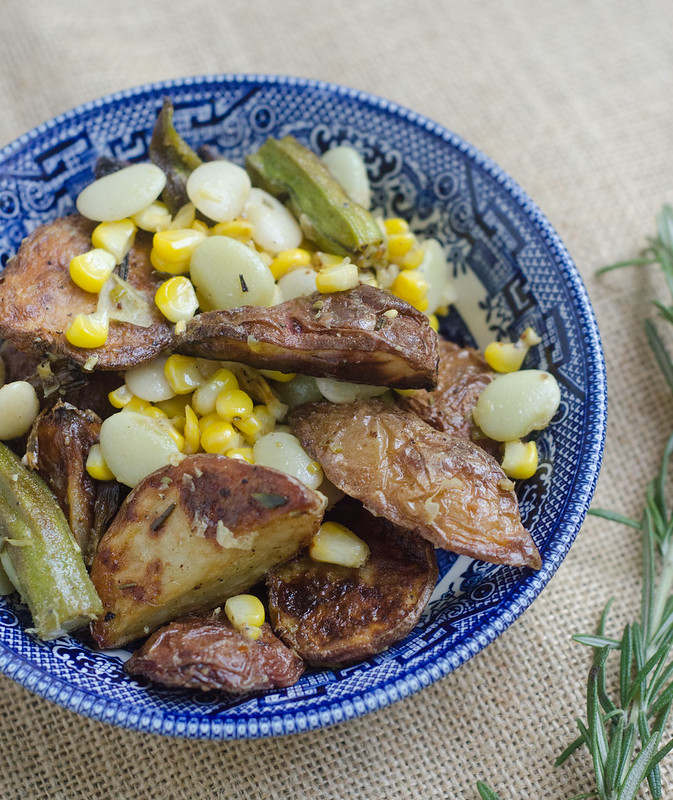
Farmer's Market Roasted Vegetable Salad

Farmer's Market Roasted Vegetable Salad 

Do you go to the farmer's market over the weekend?  We love going on Saturday mornings.  The kids get to eat popsicles and crepes, and I get to peruse the stalls and pick out beautiful produce, fresh flowers, good meats, eggs, cheese… it's pretty much my favorite time of the week.  Oftentimes I have a plan of what to buy, and what I'm going to make with it.  But I'm also a pretty bad impulse shopper, and sometimes I just can't help myself.  Exhibit A:  Lima beans.  Or butter beans, if you're from the south.

Look, I know they have a bad reputation and some would put them in the "gross vegetable" category, but hear me out.  When they're fresh, and when they're cooked and seasoned properly, they are one of my favorite veggies.  They're creamy and buttery, and absolutely delicious.

So back to the farmer's market and impulse purchases.  Between our weekly produce delivery, and our trips to the farmer's market, there's been no shortage of amazing food in our fridge this summer.  I took that gorgeous produce and made a wonderful salad with it.  Here's what's going on in there:  roasted potatoes, okra, corn, lima beans, and onions, dressed with a lemon-rosemary vinaigrette.  It's delicious hot and right out of the oven, it's great at room temperature, and it's wonderful served chilled over a bed of greens.  What I'm saying here, is that it's just a really great dish!

I served this with my Peach Chutney and Goat Cheese Burgers, and it was a wonderful meal.  And then I enjoyed the salad leftovers for lunch the next few days.

This is pretty infinitely adaptable as well:  add some squash or zucchini, maybe sprinkle some goat cheese or feta over the top, add some fresh tomatoes at the end, mix up the veggies… the sky's the limit here.

Farmer's Market Roasted Vegetable Salad
adapted from Food and Wine (via Elly Says Opa)

  • 2 lbs small potatoes, such as red-skinned, yukon gold, or fingerling
  • 2 large fresh rosemary sprigs, plus 1/2 tsp minced fresh rosemary
  • 1/4 cup olive oil
  • kosher salt
  • freshly cracked black pepper
  • 3/4 lb okra, tops and tips trimmed off
  • 2 ears corn
  • 2 cups fresh (rehydrated) lima beans, rinsed and picked through
  • juice of 1/2 lemon
  • 1 tsp Dijon mustard
  • 1 shallot, finely minced
Preheat the oven to 450 degrees Fahrenheit.  

Halve the potatoes lengthwise and toss with 2 tablespoons of oil, rosemary, 3/4 tsp salt, and 1/2 tsp pepper.  Arrange in a single layer on a rimmed baking sheet, and cook for 20 minutes, stirring once halfway through.  Add the okra to the pan, and stir to combine.  Arrange the corn on the edge of the pan, and cook an additional 20 to 30 minutes, or until the potatoes are well-browned and tender, and the okra is cooked through.  When cool enough to handle, cut the corn off the cobs.

Meanwhile, bring a medium saucepan of water to a boil.  Add 1 teaspoon of salt and the lima beans, and cook until the lima beans are fork-tender and soft, 15 to 20 minutes.  Drain and set aside.

In a large bowl, whisk together the remaining 2 tablespoons of olive oil, lemon juice, dijon, 1/2 tsp salt, 1/2 tsp pepper, remaining rosemary, and shallot.  Add the roasted vegetables and lima beans, and toss well to coat with the dressing.  Serve immediately, at room temperature, or chilled.


Tuesday, August 19, 2014

Biscuits & Peach Jam-Buttermilk Ice Cream

Biscuits and Peach Jam-Buttermilk Ice Cream

If you're looking for the ultimate southern ice cream, I think this is it.  Made by a midwesterner no less ;).  But it's got the southern trifecta:  biscuits, peaches, and buttermilk.  Swirls of peach jam and crispy, buttery, slightly salty biscuit crumbles are mixed into a tangy buttermilk base, creating a great flavor profile of sweet-salty-tangy-creamy.   It's good stuff, right here.

I was admittedly a little apprehensive about biscuits being mixed into ice cream - it seems like it could have been a textural disaster - but I crumbled my biscuits into really small pieces, so it was just a nice little crispy and salty contrast to the creamy ice cream and sweet jam.

In short, I Joey Tribbiani'ed my love for peaches, biscuits, and ice cream, and "put my hands together." I urge you to do the same.

Biscuits and Peach Jam-Buttermilk Ice Cream

Biscuits and Peach Jam-Buttermilk Ice Cream
barely adapted from Jeni's Splendid Ice Cream Desserts
makes about 1 quart

  • 1 1/4 cups heavy cream
  • 2 Tbs cornstarch
  • 3 oz (6 Tbs) cream cheese, softened to room temperature
  • 1/4 tsp flaky sea salt
  • 2/3 cup sugar
  • 2 Tbs light corn syrup
  • 2 cups buttermilk
  • 1/2 cup crumbled sweet cream shortcakes (recipe follows)
  • 1/2 cup Peach jam, chilled (recipe follows)
Whisk about 1/4 cup of the cream with the cornstarch in a small bowl to make a smooth slurry.  Whisk the cream cheese and salt in a medium bowl until smooth.  

Combine the remaining cup of cream, the sugar, and the corn syrup in a medium saucepan.  Bring to a boil over medium-high heat and boil for 4 minutes, stirring periodically.  

Remove from heat and gradually whisk the corn starch mixture into the cream mixture.  Return the pot to the heat and cook, stirring constantly with a heat-proof spatula, until slightly thickened, about 30 seconds.  Remove from heat.

Slowly whisk the hot cream mixture into the cream cheese until smooth.  Whisk in the buttermilk.

Cover with plastic wrap and chill for several hours, or overnight.

Assemble your ice cream maker and pour the ice cream base into the maker.  Freeze according to manufacturer's instructions.  Use a rubber spatula to mix the crumbled biscuits into the ice cream, then layer into a storage container, alternating layers of ice cream and jam.  Press a sheet of parchment paper directly against the surface of the ice cream and seal with an airtight lid.  Freeze until firm, at least 4 hours.

Sweet Cream Shortcakes
  • 1 1/2 cups self-rising flour (only White Lily will do)
  • 2 Tbs cold unsalted butter
  • 1 1/3 cups heavy cream
Preheat the oven to 450 degrees.  Butter a 9x9 inch baking dish.  

Put the flour and butter in a food processor and pulse 15 times.  Add the cream and pulse until the dough comes together into a shaggy mass.  

Turn the dough out onto a lightly floured surface and knead briefly to bring it together.  Fold the dough in half, then fold it over itself two or three times.  Press the dough into the prepared pan.

Bake 15 to 20 minutes, or until lightly golden brown.  Remove from the oven and cool on a rack. 

Once it's cool, crumble enough of the biscuits to make 1/2 cup of crumbs.  Spread them in an even layer on a parchment-lined plate and freeze until needed.


Peach Jam
  • 2 large peaches, peeled, pitted, and cut into large chunks
  • 3/4 cup sugar
  • juice of 1/2 lemon
Puree the peaches and measure out 1 cup of the puree for the jam.  Reserve any remaining puree for another use (recommended:  bellinis).  

Combine the peach puree, sugar, and lemon juice in a medium saucepan.  Bring to a boil over medium-high heat, stirring to dissolve the sugar, and boil for 8 minutes (or until it is thickened slightly).  Remove from heat and cool to room temperature, then refrigerate until ready to use.


Sunday, August 17, 2014

The Ultimate Summer Menu Planner

Hi, friends!  Long time no post.  I took a bit of an unplanned break from the blog over the past few weeks to spend more time with the family, wind down summer vacation, try (and failed) to get my house organized, and get Caroline ready to start the first grade (how is the possible).  I missed posting, but I have to admit - it was a nice respite for me, and it gave me the much-needed time to clear my head, then immediately fill it back up with ideas for future posts, recipes, and all things Pink Parsley!  So in the next few weeks, I have a lot to share:  a quick recap of a weekend trip we took to the mountains, the rebirth of my "Feeding my Family" series with a post all about school lunches, and several great recipes that you will definitely want to make before summer's end.

So speaking of summer's end, I've been thinking of all the things I still want to make before it's too late. And that got me thinking about all the delicious meals I've made over the course of the past few years.  And THAT led me to putting together this post for you all.  I'm featuring five menus that you should definitely make before Labor Day.  I'm including drinks, apps, and desserts within each menu, but if you're just looking for a quick and easy weeknight meal, feel free to tone it down a bit (or not!).

Enjoy!

The Summer Meal of 2014

The Ultimate Summer Meal

I have made this exact menu three different times this summer for entertaining.  In fact, my mother-in-law even requested it for her Bible Study group this weekend.  This summer salad has become a classic with me and several of my friends and blog readers, and I beg you to at the very least, make the salad for dinner one night this week!  And the ice cream…. I haven't blogged it, but that's purely because I can't keep it it around long enough to photograph it.  It is the best ice cream I've ever made, and one that I will be making every year for the rest of my life.  If you don't have an ice cream maker, this ice cream is the perfect reason to buy one.  Just simply amazing.

Fresh Peach Wine Coolers
Cheesy Baked Vidalia Onion Dip (Bakin' and Eggs)
Grilled Summer Vegetable Chopped Salad
Tomato-Basil Bruschetta
Sweet Corn & Black Raspberry Ice Cream (Annie's Eats)


Low Country Love

Low Country Summer Menu

This is another meal that I've made several times.  When we go to the beach with our friends, each family is in charge of dinner one night out of the week, and this has become our go-to dinner.  Now I make it semi-frequently at home as well, and it's another great meal for entertaining.

Strawberry Rosé Sangria
Low-Country Grill
Garlic Cheddar Biscuits (add one cup of cheddar and a few cloves of minced garlic to my buttermilk drop biscuits)
Sliced Watermelon
Peach Cobbler


Summer Fiesta

Summer Fiesta Menu

You know I couldn't make a menu compilation without including Mexican food, right?  I'm pushing my spicy citrus-grilled shrimp tacos, but feel free to use your favorite taco here instead if you want something else (chicken, ground beef, beer-battered fish, etc).  

Summer Margaritas
Bacon-Chipotle Guacamole
Spicy Citrus Grilled Shrimp Tacos
Mexican Grilled-Corn Salad
Blackberry Pie Bars


The Ultimate Southern Summer Dinner

Southern Summer Menu

You are also probably unsurprised that I'm including a southern menu, right?  This southern feast will leave everyone full and happy!  It's reminiscent of the "Sunday dinners" that we used to have after church, but with updated recipes (and Bourbon!).

Blackberry Lemonade (spike with bourbon for an adult beverage!)
Pimento Cheese
BBQ Chicken Kabobs
Cornmeal-Crusted Okra
Summer Corn Pudding
Flaky Buttermilk Biscuits
Brown Sugar-Cinnamon Peach Pie


Summer Classics, Reinvented

summer classic, reinvented menu

This menu takes summer classics, and turns them on their head for a fun new spin.  This is great for casual entertaining, or just a weeknight dinner with your family.  Who doesn't like pizza and rice krispie treats?

Summer Shandy (1/4 cup lemonade + 3/4 cup Hefeweizen beer, served chilled)
Black Eyed Pea Hummus
BLT Pizza
Watermelon-Cherry Tomato Salad
S'Mores Rice Krispie Treats


I hope you found something you are just dying to make this week.  I'll be back later this week with some more dinner ideas, plus an ice cream that you definitely don't want to miss out on!  Happy Monday!


Monday, July 21, 2014

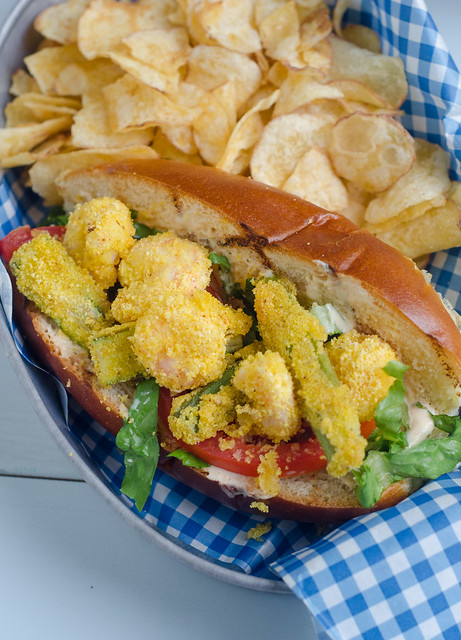
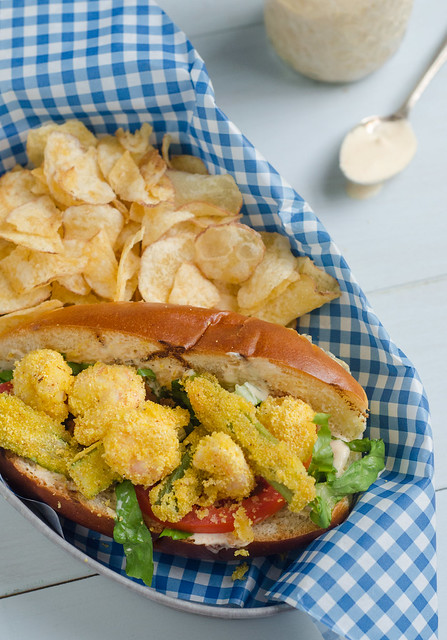
Oven-Fried Shrimp & Okra Po' Boys (and a po' boy salad)

Oven-Fried Shrimp & Okra Po' Boys

Oyster po' boys are one of my favorite foods ever.  Love the bread, love the fried oysters, love the remoulade sauce… it's all good.  But… not good for you.  Like, at all.  So it's relegated to a "once a year, only order it on vacation" food. That doesn't mean I don't crave it though.  And when I do - there's this sandwich.  No, it's not the same as the real oyster deal.  But it's pretty darn good.  And oh, about 1,000 calories less.  So it's a winner all-around.

When I first saw these in Cooking Light, I got so excited because HOW have I never thought of an okra po' boy before??  Genius!  Instead of being deep-fried, the shrimp and okra are tossed in buttermilk, then coated with spicy Cajun-spiked cornmeal.  They are baked in the oven, and come out perfectly crispy and delicious.

Another way that these cut calories is portion control.  Instead of being served on a big honking baguette, they are served in hot dog buns - like a lobster roll.  Definitely splurge and buy fresh hot dog buns from the bakery for these; or better yet, make your own!  A spicy and creamy remoulade sauce rounds them out, and I'd recommend serving simply with some chips, or go all-out summer and add some corn on the cob and watermelon.

Oven-Fried Shrimp & Okra Po' Boys

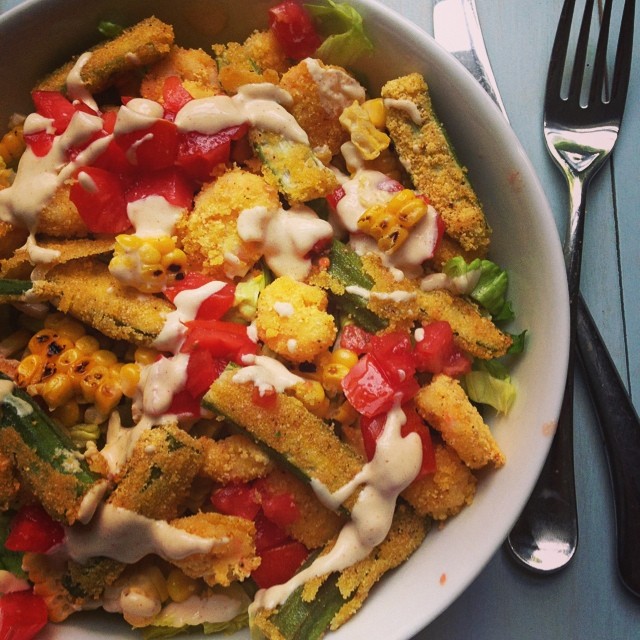
As for me?  I had a hankering for a salad that night (I told you, I'm obsessed with salads this summer).  So I turned my sandwich into a big salad with romaine, tomatoes, grilled corn, then okra and shrimp, and thinned out the remoulade with a little buttermilk to make a kick-ass dressing.  Winner winner, po' boy dinner.

Turned my shrimp and okra po' boy into a salad.  #greatdecision #clblogger #clkickingdishes #pinkparsley #summertime

Oven-Fried Shrimp & Okra Po' Boys
 Cooking Light, June 2014

The sandwiches were a little messy for the kids to eat, so I ended just giving them the okra and shrimp with some remoulade for dipping.  They loved this, and I think it would be a fun appetizer served this way too!

  • 15 small okra pods, trimmed and halved lengthwise
  • 1/2 low-fat buttermilk, divided
  • 1/2 tsp kosher salt, plus more as needed
  • 10 oz medium shrimp, deveined, peeled, and tails removed (preferably gulf shrimp)
  • 1 Tbs all-purpose flour
  • 2/3 cup yellow cornmeal
  • 1 1/2 tsp Cajun or Creole seasoning
  • 3 Tbs canola oil
  • 4 top-split, hot dog buns, toasted
  • 1/2 cup thinly sliced romaine or iceberg lettuce
  • 1 medium tomato, halved lengthwise and sliced
  • Remoulade sauce (recipe below)
Place a baking sheet in the oven and preheat  to 450 degrees.


  1. Combine the okra and 2 tablespoons buttermilk and 1/4 teaspoon of the salt in a medium bowl; gently stir to coat.
  2. Place shrimp in a medium bowl. Sprinkle with flour; toss well to coat. Drizzle with remaining 6 tablespoons buttermilk, and sprinkle with remaining 1/4 teaspoon salt; toss to coat. Drain okra and shrimp through a sieve; discard liquid.

  3. Combine cornmeal and Cajun seasoning in a large zip-top plastic bag. Add okra and shrimp; seal bag, and shake well to coat.

  4. Carefully remove pan from oven; drizzle with oil, then use a brush to coat the entire bottom of the pan with the oil.. Remove shrimp and okra from cornmeal, shaking off excess, and arrange in a single layer on the pan. Bake for 5 minutes.  Carefully flip the okra and corn, then bake an additional 4 to 5 minutes, or until the shrimp and okra are cooked through.
  5. Spread about 1 tablespoon of the rémoulade on one side of hot dog buns; divide lettuce and tomato evenly among buns.  top with the shimp and okra and serve.
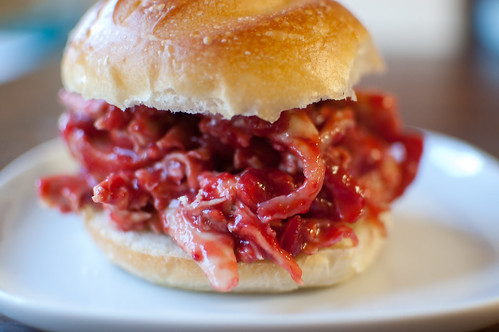
Remoulade Sauce
adapted from Annie's Eats

  • 1/4 cup plus 2 tbsp. light mayonnaise
  • 1/4 cup Greek yogurt
  • 2 Tbs dijon mustard
  • 1 clove garlic, minced
  • 1½ Tbs pickle juice
  • ½ tsp prepared horseradish
  • ¼ tsp cayenne pepper
  • ¼ tsp smoked paprika
  • Dash of hot sauce
Combine all the ingredients in a small bowl and whisk to combine.  Cover and refrigerate until ready to use.


Monday, May 26, 2014

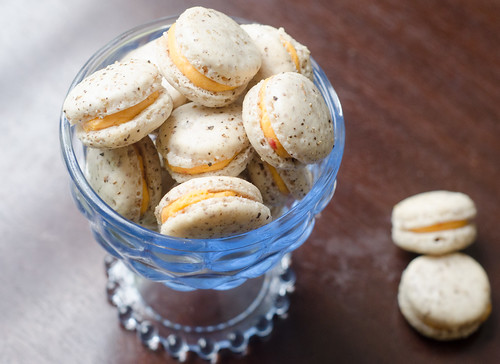
Savory Pimento Cheese Macarons


A few years ago, Joey and I started a birthday tradition.  On my birthday, we make a reservation at a nice restaurant, book a hotel room, and make a weekend out of being tourists in our own city.  It is such a fun weekend for us, and one that I look forward to all year long.

This year we went to Restaurant Eugene, which I had been wanting to try for years.  It was by far the best meal I've ever had in Atlanta, and one that I will certainly remember for years to come.  We went all out and ordered the chef's tasting menu, complete with wine pairings.  In between courses, we were treated to several "gifts from the chef."  Little bites and small dishes meant to cleanse the palate or give you a little surprise.

The most memorable one?  A savory macaron with pimento cheese filling.  Yes, really.  It was a subtly sweet macaron shell, spiked with a hefty dose of black pepper.  Inside was a creamy and sharp pimento cheese filling.  This fusion-style French cookie combined my love for macarons with my undying love for pimento cheese, and I immediately knew that I MUST recreate this amazing cookie in my own kitchen.

I used my standard macaron shell recipe, decreased the sugar just a bit, and added black pepper, salt, and a pinch of cayenne pepper and dry mustard powder.  For the filling, you could certainly just slather pimento cheese on the cookies, but I pureed some pimento cheese with a  bit of heavy cream and piped it on.

These cookies are unique and novel.  There's just  hint of sweetness in the macaron shell, which plays nicely off of the spicy pepper and sharp cheddar filling.  These would be just lovely set out as part of a cheese tray, or to serve at a brunch, shower, or party.  They are rich and bold, so you really won't eat more than one at a time, which makes them perfect for a party.  I always like to serve something a bit unexpected and unusual, and these pimento cheese macarons fit the bill perfectly.

Savory Black Pepper and Pimento Cheese Macarons
macaron shell adapted heavily from these vanilla bean macarons

  • 110 g almond meal
  • 175 g sifted confectioner's sugar
  • 1 tsp freshly ground black pepper
  • 1/4 tsp kosher salt
  • pinch cayenne pepper
  • pinch dry mustard powder
  • 100 g egg whites, aged at room temperature for a day (about 3 eggs)
  • 30 grams granulated sugar
  • 3/4 cup pimento cheese
  • 2-3 Tbs heavy cream
Line 2 baking sheets with parchment paper or silicone mats. 

In a medium bowl whisk together the almond meal, confectioner's sugar, pepper, salt, cayenne pepper, and mustard powder.  Set aside.

In the bowl of a stand mixer fitted with a whisk attachment, whip the egg whites until foamy, then gradually stream in the granulated sugar and continue to whip until a shiny, glossy meringue forms (but not dry).

Remove the bowl from the stand mixer, and add the almond mixture.  Using a rubber spatula, briskly and quickly fold the almond meal into the egg whites.  After a few brisk strokes, slow down and then gently incorporate the rest into the batter.You want a batter that flows and "ribbons" for at least 5 seconds.

Pour the batter into a pastry bag fitted with a large round tip.  Pipe the batter into 1 1/2-inch rounds, spacing them about 1-inch apart.

Whack the baking sheets on the counter a few times, then allow to sit at room temperature 45 minutes-1 hour, or until a hard shell forms.

As the shells rest, prepare the filling.  Add the pimento cheese to the bowl of a food processor and pulse several times.  Add the heavy cream, one tablespoon at a time, until it is smooth and thinned to a pipe-able consistency.

Meanwhile, preheat the oven to 300 degrees.  Bake the macarons 8-10 minutes, depending on size.  Allow to cool completely on the pan before using a small spatula to remove them.  Match the cookies according to size and pipe filling on half, using the other half to form a sandwich.


Monday, November 25, 2013

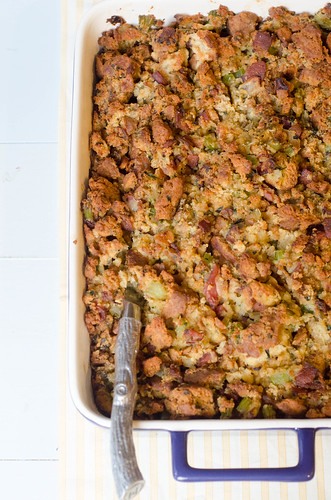
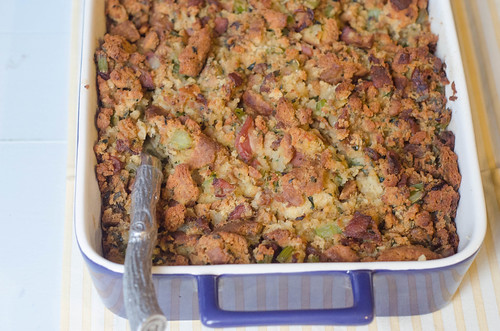
Biscuit, Bacon, and Oyster Stuffing


I know oyster stuffing can seem.... weird.  But it's a thing.  It's a quite popular thing in certain regions of the US, in fact.  I myself could never bring myself to make it or try it ... the thought of biting into an oyster hiding in my dressing kind of icked me out.  It's a textural issue for me.  But I had the idea to chop the oysters prior to mixing them into the dressing, so you get all the wonderful, briny flavor, but none of the unappetizing slimy texture.  Win and win!

I've previously sung the praises of this southern-style cornbread dressing, and really had zero interest in trying another dressing recipe... ever.  But when this biscuit and bacon dressing was recommended to me, I couldn't resist.  I mean, a stuffing recipe made totally out of biscuits?  With bacon?  Sold.

The oysters were a great addition - the briny flavor was a great counterpart to the salty bacon and rich biscuits.  This dressing is absolutely amazing, and I beg you not to be scared off by the addition of the oysters.  In fact, when I made this, I made no mention of the oysters, and Joey immediately proclaimed it to be the best stuffing he's ever had.  Oysters in your dressing.  Do it.


Biscuit, Bacon, and Oyster Dressing
adapted from Williams-Sonoma and Cook Like a Champion

  • 12 cream biscuits (1.5  times this recipe)
  • 1 lb bacon, diced
  • 1 large onion, minced
  • 5 celery stalks, diced; and their leaves minced
  • 1/4 cup minced fresh parsley
  • 2 Tbs minced fresh sage
  • 2 Tbs minced fresh thyme
  • 10-12 fresh oysters, shucked*
  • 3 1/2 cups chicken broth
  • kosher salt and freshly ground black pepper
  • 2 Tbs unsalted butter, cut into 1/2-inch pieces
Preheat the oven to 350 degrees.  Crumble the biscuits into 1-inch pieces, and spread evenly on a baking sheet.  Toast 20-25 minutes, or until the biscuits are lightly browned.  Remove from oven, set aside to cool, and increase the temperature to 375 degrees.

Meanwhile, in a large skillet, cook the bacon until browned and crispy, stirring often.  Use a slotted spoon to remove the bacon to a paper towel-lined plate.  Pour all but 3 tablespoons of the fat.

Add the onions to the skillet and cook until they begin to soften, 5 to 6 minutes.  Add the celery, celery leaves, parsley, sage, and thyme, and cook, stirring often, until the vegetables are softened and beginning to brown, another 5 to 7 minutes.  

Meanwhile, add the oysters to the food processor and pulse a few times to finely mince.  Set aside.

In a large mixing bowl, gently stir to combine the biscuit pieces, sautéed vegetables, and oysters.  Pour the chicken broth over the mixture and mix well.  Pour the mixture into a greased 9x13 inch baking dish.  Sprinkle the butter pieces over the top and cover the dish with foil.

Bake 30 minutes, then remove the foil and bake an additional 20-25 minutes, or until the top is golden-brown and crispy.  Allow to cool 10 minutes before serving.  

*If you don't want to shuck your own oysters, oysters can be purchased already shucked, in pint containers.  They are packed in their own liqueur, so just drain the liquid off before chopping.


Thursday, June 7, 2012

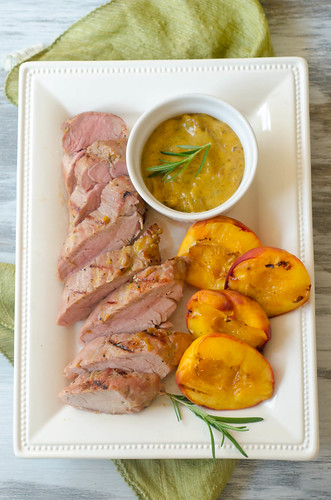
Peach Dijon-Glazed Pork Tenderloin


Southern cooking sometimes gets a bad reputation.  People ask if it's all Paula Deen and fat back.  While yes, we do have those things, it's so much more than that.  I would argue that southern food has the richest traditions in the country.  It's about seasonal, fresh food that you harvest yourself - ask any born and bred southerner how many hours they spent on their porches shelling beans and shucking corn.  It's about family and fellowship - go to any little old lady's house after church on Sunday and you'll definitely find a veritable feast to feed any and all visitors and kinfolk.  And it's about tradition - every family has their own recipe for biscuits, pimento cheese, and banana pudding.

I love it when I find other chefs and authors who feel the same way as I do.  Virginia Willis is one of my favorite cookbook authors and southern women, and her cooking embodies what I love about southern cuisine.  Heavily steeped in tradition and family, seasonal, with fun twists to update classics.

Peaches and pork are both iconic in the south, and this dish combines the two in a super fast, easy, and delicious dinner.  Pork tenderloin is briefly brined in a brown-sugar salt mixture, then grilled.  As it finishes up on the grill, it's brushed with a sweet and spicy glaze of peach preserves and Dijon mustard.  I grilled some peaches on the side because - hey - it's peach season here, and why not?  The pork is juicy and flavorful thanks to the brine and it's stint on the grill, and it pairs perfectly with the glaze and grilled peaches.

I served this with goat cheese grits and grilled asparagus, and it was pretty much the perfect early-summer dinner.  The whole meal embodied everything I love about southern cuisine - grits, pork, peaches, seasonal, and most of all, loved by the whole family!


Peach-Dijon Glazed Pork Tenderloin
barely adapted from Basic to Brilliant, Y'all, by Viriginia Willis

  • 1/4 cup kosher salt
  • 3/4 cup firmly packed brown sugar
  • 2 cups boiling water
  • 3 cups ice cubes
  • 2 (1 1/2 lb to 2 lb) pork tenderloins, trimmed
  • 1/2 cup peach preserves
  • 1 Tbs finely chopped fresh rosemary
  • 1/3 cup Dijon mustard
  • freshly ground black pepper
Combine the salt and brown sugar in a large heatproof bowl.  Add the boiling water and stir to dissolve, then stir in the ice cubes.  Stir until the water has cooled to warm room temperature, and add the pork tenderloins.  Cover the bowl with plastic wrap and refrigerate 30 minutes (Don't brine any longer, or the pork will be too salty!).

Meanwhile, stir together the peach preserves, rosemary, and Dijon.  Season to taste with salt and pepper.

Prepare the grill.  

Remove the tenderloins from the brine, rinse well, and pat dry with paper towels.  Season with black pepper.

Grill, turning once, until the internal temperature reaches 145 degrees, about 15 minutes.  During the last few minutes, brush with the peach-dijon mixture.

Remove to a cutting board and cover with aluminum foil.  Allow to rest about 5 to 10 minutes.  Slice on the diagonal and serve immediately with the remaining sauce.


Thursday, May 10, 2012

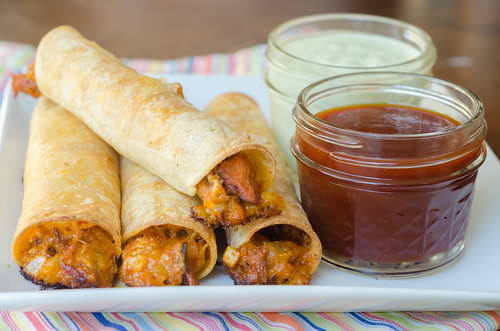
Baked BBQ Pork Taquitos


Ever since last winter, these baked chicken taquitos have been a perennial favorite in our house.  I always have a few in the freezer to cook up for a last minute lunch, and Joey gets really excited whenever they're on the menu (which, according to him, is not often enough).  Every time I make them, I start thinking up other variations.

It just so happens that we have several pounds of pulled pork in the freezer at any given time, so it only seemed natural to marry the two.  Kind of like that friends episode where Joey has to choose between a big tub of jam and the hot girl at the Xerox place:  put your hands together, my friend.  Put your hands together.  Joey said he liked these even better than the original chicken taquitos, and dare I say I agreed?

So here's the rundown on what I did:  I used pulled pork instead of chicken, but I think chicken would work just as well here.  I know I'm always looking for ways to use leftover meat, and this is a great solution.  I used cream cheese as the binder, just as in the original recipe, but I would love to try ranch dressing next time.  then I used bbq sauce instead of salsa, and seasoned the mixture with spices that I would use for pulled pork:  paprika, brown sugar, mustard, etc.  Baked up until they are perfectly crispy, then dipped in a  combo of ranch dressing and bbq sauce, these were pretty much perfection.

I still have a few more taquito variations of my sleeve, but it's going to be hard to stray from these and the chicken ones from here on out.... I suppose that somehow I'll manage ;-)

Baked BBQ Pork Taquitos
inspired by these Baked Chicken Taquitos (which are from Our Best Bites)

  • 3 oz. cream cheese, softened to room temperature (reduced-fat is fine)
  • 1/3 cup bbq sauce
  • 1/2 tsp paprika
  • 1/2 tsp chile powder
  • 1/2 tsp garlic powder (or 1 garlic clove, minced)
  • 1/2 tsp mustard powder
  • 1/2 tsp brown sugar
  • 1/2 tsp liquid smoke
  • pinch red pepper flakes
  • kosher salt and pepper to taste
  • 1/4 cup diced onion
  • 3 scallions, thinly sliced
  • 2 Tbs minced fresh cilantro or parsley
  • hot sauce (optional)
  • 2 cups shredded or chopped cooked pork or chicken
  • 1 cup sharp cheddar cheese
  • 8-10 (6-inch) corn or flour tortillas
  • cooking spray
  • Ranch Dressing and/or BBQ Sauce, for serving
Preheat the oven to 425 degrees and spray a baking sheet with cooking spray. 

In a large bowl, combine the cream cheese with the bbq sauce, paprika, garlic powder, mustard, brown sugar, liquid smoke, chile powder, red pepper flakes, cilantro, scallions, onion, and 1/4 tsp kosher salt.  Fold in the pork and cheese.  Taste and season with additional salt and pepper if necessary.  Add hot sauce if you like things spicy!

Working 3-4 tortillas at a time, stack them on a microwave-safe plate and cover with a damp paper towel.  Cook 30 seconds, or until tortillas are soft and pliable. 

Spoon 2-3 tablespoons of filling onto the lower third of each tortilla, and roll tightly.  Place seam side-down on the prepared baking sheet.  Repeat with remaining tortillas and filling.

Spray the taquitos lightly with cooking spray, sprinkle with salt.  Bake 15-20 minutes, or until the tortillas are crisp and golden-brown.  Serve with bbq sauce and ranch dressing for dipping.


Tuesday, April 17, 2012

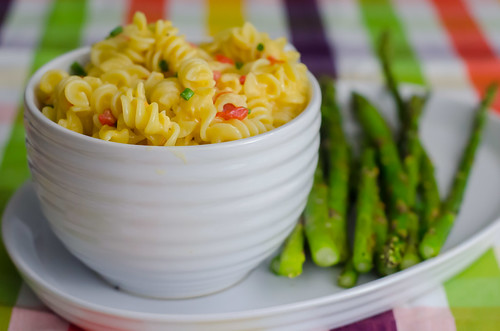
Recipe Remix: Pimento Cheese Macaroni and Cheese


I've made my obsession with pimento cheese abundantly clear on here, so no need to rehash that.  Therefore, I'll just get right to the point and share yet another dish that's a variation of pimento cheese.

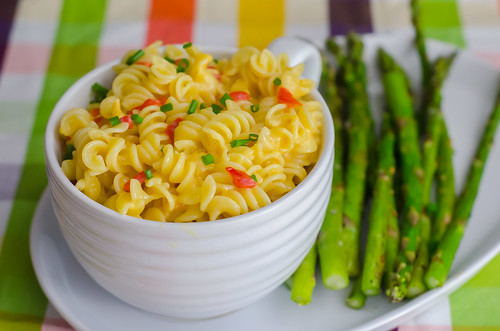
One night for whatever reason, my planned dinner wasn't happening, so I was scrounging.  It's times like this when I fall back on pantry staple meals so we don't succumb to take-out or delivery pizza.  When I think of pantry staple meals, pasta is always a safe bet for me.  We always have dried pasta of some sort and several random cheeses in the fridge, so some variation of macaroni and cheese is usually the fallback.  Especially considering that it is Caroline's absolute favorite food in the whole world (her words).  You can never have too many versions, right?

I used this creamy stovetop macaroni and cheese as the base recipe, adjusting the ingredients to the flavor profile I was going for.  The final product was just what I wanted:  supremely creamy and cheesy with just a little kick.  And it was ready and on the table in under half an hour.  You can't beat that!


Pimento Cheese Macaroni and Cheese
adapted from Italian Style Stovetop Macaroni and Cheese, originally from Macaroni and Cheese

  • 12 oz. dried pasta shapes (smaller shapes work best)
  • 1 clove garlic, minced
  • large pinch of red pepper flakes
  • dash of worcestershire sauce
  • 8 oz shredded extra sharp cheddar cheese
  • 4 slices American cheese, torn into small pieces
  • 1/4 cup milk, half-and-half, or cream
  • 4 oz. Greek yogurt (low fat or nonfat is fine)
  • 2 Tbs unsalted butter, at room temperature
  • 4 oz. jar of diced pimentos, drained and rinsed
  • salt and pepper to taste
  • snipped fresh chives, for garnish
Bring a large pot of salted water to boil and cook the pasta to al dente, according to the directions on the package.

Drain the pasta, reserving 1 cup of the pasta water (I used to always forget to save the water, so now I put a measuring cup in the strainer while the pasta is cooking, so I don't forget).

Return the pasta to the pot and stir in the garlic, worcestershire sauce, and red pepper flakes.  Add the cheese a handful at a time, stirring well between each addition.  Stir in the Greek yogurt, butter, and milk, and stir until all the cheese has melted and the sauce is creamy and smooth.  Stir in the pimentos, season to taste with salt and pepper and garnish with chives before serving.


Sunday, February 5, 2012

Red Velvet Oreos


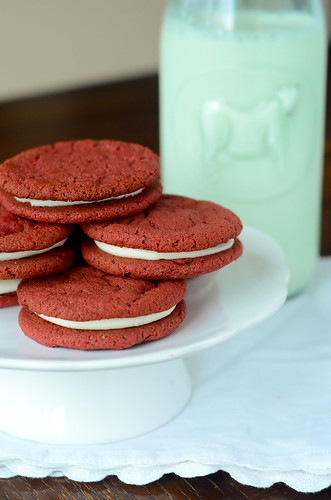
Is there a cookie in the world that is more universally loved than the oreo?  I dare you to find one.  So what if you combined the beloved oreo with a classic flavor combination - red velvet?  You will end up with one awesome cookie.

I honestly don't know where I thought of this.  I'd been wanting to make red velvet cookies, but most of the recipes started with a box of cake mix, and I don't really like to bake out of the box.  So I was just driving down the road, thinking about cooking and food (as usual), and the idea hit me like a ton of bricks.  Red.  Velvet.  Oreos.  With cream cheese filling, of course.  To me, red velvet is characterized by a light chocolate taste, a bit of tang/sourness from buttermilk, and of course the red color.  I've had a recipe for homemade oreos saved for months, so I figured I could just adapt it to my liking.  Of course I added some red food coloring and decreased the chocolate, but I was stumped a bit when it came to the buttermilk.  Should I just add vinegar?  Add a few tablespoons of buttermilk and hope it didn't affect the chemistry of the cookie?  And then I had another idea:  buttermilk powder.  Many people keep it on hand so they don't have to worry about buttermilk going bad.  Just like powdered milk, you just add water to the powder.  But since powdered milk is often used in baked goods, I figures why not try buttermilk powder?  And it worked!  These cookies are slightly chocolately with that characteristic buttermilky tang.  Fill them with cream cheese icing and you have one addicting cookie.


Now that the Super Bowl is over and it's time to start thinking about Valentine's Day, you should definitely consider these cookies as a strong possibility for a festive dessert.  They would be so fun to send in with you child to school, or just for dessert or a special snack.  They are literally mixed up in minutes, and before you know it you'll be snacking on your new favorite cookie.


These came out a little bit larger than I'd expected, so I've adjusted the instructions below.  I found buttermilk powder at my local Super Target, but I'm sure it's also available at most well-stocked grocery stores.


Red Velvet Oreos
inspired by Retro Desserts, via Annie's Eats and Smitten Kitchen

For the cookies:
  • 1 1/4cups all-purpose flour
  •  5 Tbs unsweetened Dutch process cocoa powder
  • 3 Tbs buttermilk powder
  • 1 tsp baking soda
  • ¼ tsp baking powder
  • ¼ tsp salt
  • 1 1/4 cups sugar
  • 10 Tbs (1¼ sticks) unsalted butter, at room temperature
  • 1 1/2 - 2 tsp red food coloring
  • 1 large egg
For the filling:

  • 4 tbsp. (¼ cup) unsalted butter, at room temperature
  • 3 oz. cream cheese, chilled
  • 2 cups confectioners’ sugar, sifted
  • pinch of salt


Preheat the oven to 350˚ F.  Line two baking sheets with silicone baking mats or parchment paper.

In a food processor or the bowl of an electric mixer, combine the flour, cocoa powder, buttermilk powder, baking soda, baking powder, salt, and sugar.  Pulse a few times to combine.  Cut the butter into tablespoon size pieces, and add them to the bowl and pulse or mix briefly to incorporate.  In a small bowl, lightly beat the egg and stir in the food coloring. Pour into the mixture and pulse or mix until a cohesive mass forms.

Scoop about 2 teaspoons of batter onto the baking sheet.  Continue scooping, spacing the dough balls a couple of inches apart.  With moistened fingers, gently press down on the dough balls to flatten slightly.  Bake for 9-11 minutes, rotating the pans halfway through baking.  Cool the cookies completely on the baking sheet. 

To make the filling, combine the butter and cream cheese in the bowl of an electric mixer.  Beat on medium-high speed until smooth.  Add the confectioners’ sugar and salt to the bowl and mix on low speed just until incorporated, then increase the speed to medium-high and beat until light and fluffy, about 2-3 minutes.  

To assemble the cookies, match them up by size.  Use a pastry bag fitted with a  round tip to pipe a swirl of filling onto the flat side of one cookie of each pair.  Sandwich together with the remaining cookie and press down so that the filling reaches the edges.


Thursday, November 17, 2011

Maple-Bacon Biscuit Bake


I feel like I should simultaneously apologize and say "You're welcome" for posting this recipe.  It is so bad but so good at the same time.  Bad/good that it is prepped and ready in under an hour.  Bad/good that it is sinful and decadent.  Bad/good that it makes a lot of biscuts.  So you can hoard it all for yourself or share the wealth with several people.

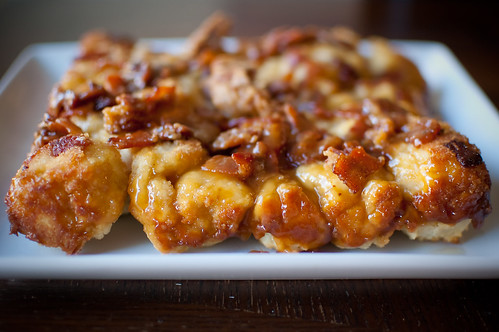
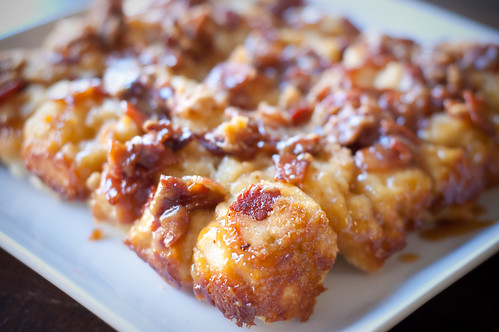
It's sort of a cross between an upside down cake and monkey bread.  The maple-bacon mixture is poured into the bottom of a pan, and then biscuit dough is dropped over it.  After a quick bake in the oven, it is inverted onto a platter and then served monkey bread-style.  Just grab a biscuit and chow down.  Some of the bacon-maple mixture did stick to the pan, but I just scraped it off onto the biscuits.  I do think it would have been better to have lined the pan with parchment though.  I've added that step in my version below.


I think this would be a great treat to make if you are hosting guests in the coming week.  I would say you should make it Thanksgiving morning, but I personally try to eat light and healthy for breakfast - I want to save my calories for the big meal!  But if you are one of those crazies (like me) who gets up early to shop on Black Friday, this would certainly be a welcome thing to come home to after a morning/night of fighting the crowds. 


It's hard to say whether this is best served hot from the oven or at room temperature.  Obviously it's hard to beat it when it's fresh from the oven, but once it cools for a bit, the bacon-maple mixture hardens into sort of a candy.  Honestly, I'm not one of those people who thinks bacon is great in desserts, but this is really wonderful.  So who knows, maybe I'm a convert and you'll be seeing some bacon cupcakes on here soon ;-)


Maple-Bacon Biscuit Bake
adpated from King Arthur Flour


Maple-Bacon Syrup
  • 8 oz bacon, cut into 1/2-inch pieces
  • 1/3 cup brown sugar
  • 1/4 cup all-purpose flour
  • 1/4 cup maple syrup
  • 2 Tbs reserved bacon fat
Biscuits
  • 2 cups all-purpose flour
  • 2 tsp baking powder
  • 1/2 tsp salt
  • 4 Tbs cold butter
  • 1 cup cold buttermilk
Preheat the oven to 475 degrees.  Line a 9-inch round pan or 8-inch square pan with parchment paper, and spray with cooking spray.

Cook the bacon in a skillet until browned and crispy.  Use a slotted spoon to transfer to a paper towel, and reserve 2 tablespoons of the rendered fat.

In a medium bowl, whisk together the syrup, flour, brown sugar, and rendered fat.  Spread over the bottom of the baking pan, and sprinkle the bacon evenly over the top.

For the biscuits, whisk the dry ingredients together in a mixing bowl.  Drop the butter into the mixture, and using your fingers, a pastry blender, or 2 knives, work it into the dry ingredients until the mixture is crumbly and has pea-sized pieces of butter.  Add the buttermilk, and stir to make a sticky dough.

Drop the dough over the maple-bacon mixture using a cookie scoop or large spoon.

Bake for 10 minutes, turn off the oven, and leave the pan in the oven for an additional 5 to 10 minutes, until the biscuits are golden brown.

Remove from the oven and immediately invert onto a serving plate.  Lift off the pan and the parchment paper, and serve.

Sunday, November 13, 2011

Pulled Turkey Sandwiches with Cranberry BBQ Sauce


One of my favorite things to do is to reinvent leftovers, and one of the best times to do that is Thanksgiving.  For one, just reheating meat and eating it isn't very appetizing to me, plus I would get sooo tired of just eating turkey like that for days on end.  But when I have other options, it makes leftovers exciting.  I will certainly be making this sandwich after Thanksgiving this year.  It is also a double win because it uses leftover cranberry sauce as well.    Actually, it is a triple win because it is also very quick and easy.  Just shred or chop some turkey and whip up this easy BBQ sauce.
I pretty much always make my own BBQ sauce now:  it is easy, cheap, and I like knowing exactly what I'm eating.  For this, you might be tempted to just mix the cranberry sauce into a bottle of  purchased BBQ sauce, but I think it would end up too sweet.  I used my typical BBQ sauce recipe, omitting the molasses and honey, and adding a bit more hot sauce to compensate for the sweetness of the cranberry sauce.  I served this with baked sweet potato fries, and we enjoyed a fun and casual Thanksgiving-esque dinner.

Thanksgiving Leftover Ideas
Turkey Cranchiladas (Pink Parsley)
Leftover Panini (Annie's Eats)
Turkey Tacos with Cranberry Salsa (Simply Recipes)
Turkey Noodle Soup (Smells Like Home)
Turkey Croquettes (Martha Stewart)
Wheatberry & Turkey Salad (The Meaning of Pie)
Turkey a la King (Real Mom Kitchen)


Cranberry BBQ Sauce
adapted from this Easy BBQ Sauce
  • 3/4 cup ketchup
  • 1 Tbs cider vinegar
  • 1 tsp hot sauce (or to taste)
  • 1 tsp Dijon mustard
  • 1/2 tsp liquid smoke
  • salt and pepper
  • 1/2-1 cup cranberry sauce
  • honey (optional)
Whisk together the first 5 ingredients in a medium bowl, and add salt and pepper to taste.  Whisk in the cranberry sauce, starting with 1/2 cup and adding more as desired.  I added almost a full cup when I made this. Add additional hot sauce if desired, or honey if you want a sweeter sauce.

Toss with shredded turkey and serve on toasted buns.


Thursday, November 10, 2011

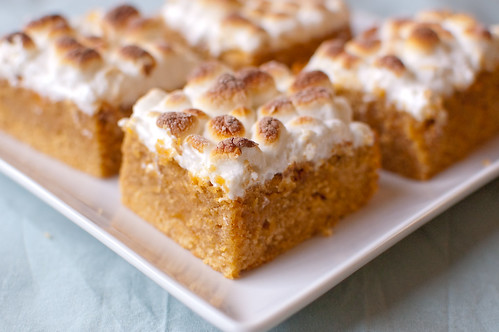
Sweet Potato Casserole Cookie Bars


Sweet potato casserole is one of my favorite Thanksgiving dishes, but let's face it:  you're basically eating dessert that's being disguised as a vegetable.  So why not drop the act and actually eat it as a dessert?  That's what these bars are, and they are a delicious dessert at that.  Or a delicious snack.  Or if I'm being totally honest here, a delicious breakfast.

The bars are denser than cake, and a little lighter than a brownie or blondie.  Sweet potato puree is mixed into a batter that's full of warm fall spices:  cinnamon, nutmeg, and ginger.  And then after they are baked, they are topped with marshmallows and toasted.  Is there anything better than toasted marshmallow?  I think not.

If you are looking for a casual dessert or snack for the Thanksgiving season, these are a great choice.  I'm thinking that I'll make them for our next tailgate - portable, festive, and most importantly, delicious. 


Sweet Potato Casserole Cookie Bars
adapted from Scarletta Bakes
  • 1 medium sweet potato
  • 1/2 cup unsalted butter, at room temperature
  • 1 cup packed brown sugar
  • 2 large eggs
  • 1 tsp vanilla extract
  • 1/2 tsp salt
  • 1 tsp ground cinnamon
  • 1/8 tsp nutmeg
  • 1/8 tsp ground ginger
  • 1 1/2 cups all-purpose flour
  • half of a 10.5 oz bag of mini marshmallows
Preheat the oven to 400 degrees.  Scrub the sweet potato and poke a few holes in the top with a fork.  Bake 45 min to an hour, until it is cooked through and soft.  Remove from oven, allow to cool until it is cool enough to handle, then peel and mash with a fork until smooth.  Measure out 3/4 cup of the puree and set aside.

Decrease the oven temperature to 350 degrees.  Line an 8x8 inch baking dish with foil, and spray with cooking spray.

In the bowl of a stand mixer fitted with the paddle attachment, cream the butter and sugar at medium speed until light and fluffy, 3 to 5 minutes.  Add the eggs, one at a time, scraping down the bowl as needed.  Mix in the vanilla and the salt, cinnamon, nutmeg, and ginger.  With the mixer on low, slowly add the flour, and mix until just incorporated.  Using a rubber spatula, fold in the sweet potato puree.

Pour the batter into the prepared pan and bake 26-30 minutes, or until a toothpick inserted into the center comes out clean.  Scatter the marshmallows over the top, being sure to cover the entire pan.  Preheat the broiler, and broil the bars until the marshmallows are dark golden-brown.  You may have to rotate the pan a few times depending on how evenly your broiler cooks. 

Remove from oven and allow to cool to room temperature before cutting into bars.


Sunday, October 30, 2011

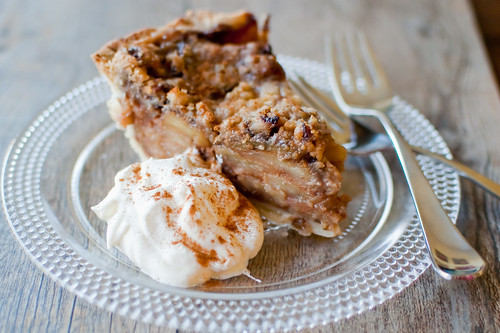
PPQ: Southern Comfort Caramel Apple Pie


I am so excited by Caroline's current favorite book.  I loved the Amelia Bedelia series when I was growing up, and I recently bought Caroline Amelia Bedelia's First Apple Pie.  She loves the book, and we pretty much have it memorized because we've read it so many times.  So a few weeks ago when she asked if we could make "Caroline's first apple pie," I was all about it.  I started looking up some recipes, when I remembered that we had this one coming up for Project Pastry Queen. 


This was a fun activity for us to do together.  She loves helping me in the kitchen, and she was especially excited to make this pie.  And of course we had a great time baking it together, but the best part was obviously eating it together.  O.M.G. this was awesome.  The apples are first sauteed in lots of brown sugar, butter, and cinnamon, and then the juices are mixed with Southern Comfort and heavy cream to make a caramel sauce.  The apples are then mixed with the caramel, poured into a pie shell, covered with a streusel topping of butter, brown sugar, and pecans, and baked.  Obviously your house will smell amazing while this bakes.  And the resulting pie is nothing short of amazing as well. The apples are sweet and spicy, and the caramel sauce has such a wonderful sweetness and warmth thanks to the Southern Comfort.  And the streusel topping is great as well - buttery, sweet, and crunchy.

I ate this several ways:  straight out of the pie plate, with some whipped cream, and with vanilla ice cream.  All were equally great, so it is up to you how you serve it up.  I think cinnamon ice cream would be an especially great accompaniment as well.  Or if you wanted to get really decadent, top it with ice cream and some caramel.

Sarah of 20-Something Cupcakes chose this week's recipe, and she has the full version on her blog.  The only changes I made were to add some nutmeg to the filling and topping, and I made my pie crust in my food processor instead of by hand.  Check out the Project Pastry Queen webpage to see how everyone else fared with this pie.  I think it's a safe assumption that it was a hit all-around!


Thursday, October 20, 2011

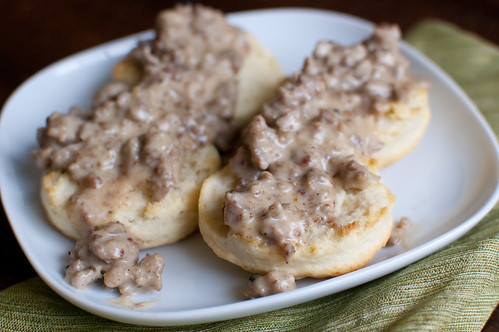
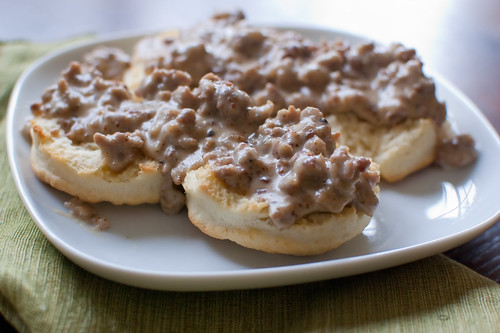
Biscuits and Gravy


"It smells like my grandmother's house in here" is possibly one of the greatest compliments you could hear from your husband.  That's what Joey said as I cooked this breakfast - biscuits baking in the oven, sausage browning in the cast iron skillet on the stove...  it's definitely homey and comforting.  Biscuits and gravy is one of my favorite breakfasts, but I hadn't indulged in it in probably 7 years.  However, when I saw my friend Courtney post this, I suddenly NEEDED to make them.  Immediately.

I have two biscuit recipes that I toggle between, these fluffy buttermilk biscuits and easy drop biscuits.  But I decided to make the ones Courtney posted because I was intrigued by cream biscuits.  They use heavy cream as the fat source instead of butter, but they were somehow still light, flaky, and buttery.  And they came together very quickly, which is always a plus.  The sausage gravy is really easy too - just brown the sausage, then use the rendered fat as the base for the gravy.  I started browning the sausage as the biscuits were cooking in the oven, and it was all done around the same time.

I love comfort foods as the weather cools down, and this is a great breakfast for lazy weekend mornings.


Cream Biscuits
adapted from The New Best Recipe, via Cook Like a Champion
makes 8 biscuits
  • 2 cups all-purpose flour, plus extra for dusting your work surface
  • 2 tsp sugar
  • 2 tsp baking powder
  •   3/4tsp kosher salt
  • 1 1/2 cups heavy cream

Place oven rack in the upper-middle position and preheat oven to 425º. Line a baking sheet with parchment paper.

In a medium bowl, whisk together flour, sugar, baking powder and salt. Stir in 1 1/4 cups of cream with a wooden spoon until a dough forms, about 30 seconds. Turn the dough out onto a lightly floured surface, leaving behind any flour left in the bottom of the bowl. Use the remaining 1/4 cup of cream to moisten any flour left in the bowl and add to the dough. Gather into a ball and knead for about 30 seconds or until smooth.

Use your hands to shape the dough into a 3/4-inch thick circle. Using a 2 1/2-inch floured cutter, cut the biscuits into rounds and place on prepared baking sheet. Reshape the dough once to cut additional biscuits.To make ahead of time, wrap the baking sheet in plastic and refrigerate for up to 2 hours before baking. Bake biscuits until golden brown, about 15 minutes, rotating the pan halfway through baking.

Sausage Gravy
adapted from Food Network, via Cook Like a Champion
  • 12 ounces bulk pork sausage
  • 2 Tbs all-purpose flour
  • 2 cups milk (low-fat is fine)
  • Salt and freshly ground black pepper, to taste

Heat a medium skillet (preferably cast iron) over medium-high heat. Add the sausage and cook until well-browned, about 7 minutes, breaking it up with a wooden spoon. Using a slotted spoon, transfer to a plate and set aside, keeping the rendered fat in the pan.


Sprinkle the flour into the skillet and whisk for about 1 minute. Continue whisking while slowly adding the milk. Bring to a boil, then reduce heat and simmer for about 2 minutes. Add a generous pinch of salt and pepper to taste. Stir in sausage and serve immediately over split biscuits.


Sunday, September 11, 2011

PPQ: King Ranch Chicken


The past week has been unseasonably cool here in Atlanta.  I am not normally one to be wishing away summer, but the break in heat was actually pretty nice - especially being 9 months pregnant.  We were still feeling the effects a tropical storm, so the weather was drizzly and cool, and comfort food was in order.  So this was actually a really great choice for this week's Project Pastry Queen recipe.

I'd heard of King Ranch Chicken before, but never really had the desire to make it myself - until I saw Rebecca Rather's completely-from-scratch version.  She even goes so far as to make her own chicken stock for it!  I didn't go that far, since I had just made 32 cups of chicken stock a few weeks ago.  So I took the easy way out and used that and just bought a rotisserie chicken.

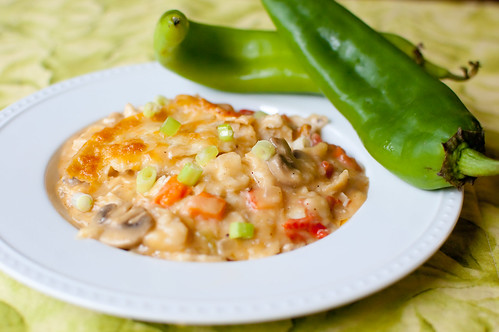
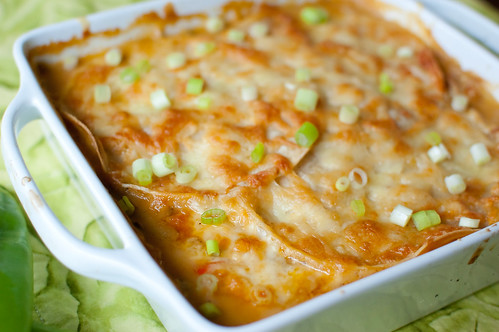
King Ranch Chicken Casserole is essentially a chicken tortilla casserole - it is creamy, spicy, and cheesy.  How bad could that be?  You build a cream sauce from scratch instead of opening a can of cream of whatever soup.  It starts with a stick (!) of butter, then peppers, onions, and mushrooms are sauteed.  You add flour to thicken the sauce, then whisk in chicken stock and some cream (or milk, or half-and-half) and let it simmer to thicken a bit.  The sauce is then layered with corn tortillas, cheese, and chopped chicken.  After baking, you are left with a completely comforting casserole.

The recipe makes a 9x13 inch casserole, but I split it up and froze half for an easy meal for when the baby comes.  I'd also like to note that it calls for New Mexican Hatch Chiles, and while normally I would just use a poblano instead,  they are in season right now and The Fresh Market is awesome, so I was able to get my hands on some.  We loved the tangy-spicy flavor they contributed, and I plan to go buy more to roast and freeze so I can enjoy them year-round.

Jody of Savory to Sweet has the full recipe posted if you're interested in making this.  And you should be, because it is pretty awesome!


Sunday, September 4, 2011

PPQ: Texas Pecan Pie Bars


How do you pronounce "pecan?"  Do you say puh-con, pee-con, or pee-can?  I personally go with puh-con, but when talking about pie, I say pee-can pie.  Though for some reason I call these puh-con pie bars.  No reason, it's just the way it comes out.  I'm not sure if the different pronunciations are regional, or if they are just a personal thing.  But either way, pecan pie is definitely a popular and well-loved dessert.  And just like any dessert, turning it into portable portions is always a hit.

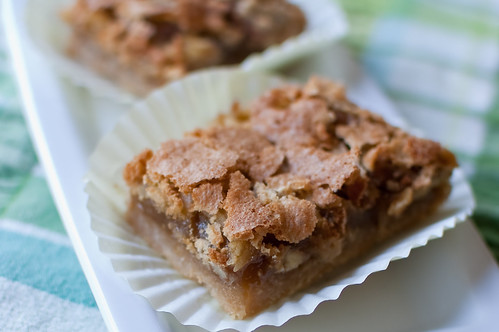
These bars start with a shortbread crust, and are then topped with a sweet, sticky filling that's studded not only with pecans, but with shredded coconut as well.  The coconut doesn't really contribute much flavor, but adds a great texture.  And as they bake, the top forms a nice crackly crust.

These are super sweet, and I'm sure you could decrease the sugar quite a bit.  But the whole point of pecan pie is to be sweet and sticky, so I don't think I'll change a thing next time I make these.  I took a platter of them to a neighborhood potluck, and everyone seemed to enjoy them.  And serving them out of cupcake liners definitely helps with the sticky filling!

This week's recipe was chosen by Beth of The Powdered Plum.  She has the full recipe posted on her blog if you are interested!


BLOG DESIGN BY: SHERBET BLOSSOM DESIGNS