Showing posts with label cookies/bars. Show all posts

Sunday, January 11, 2015

Funfetti Sugar Cookie Bars

Funfetti Sugar Cookie Bars

While it only feels like two days ago, two years ago I posted about the birth of our twins, Henry and Tucker.  Those tiny, wrinkly, cuddly little babies that completed our family.  I'm going to try and keep it together and not turn this into a sob-fest of a post, but OMG HOW in the world are my babies two years old?!

I remember waxing poetic last year on their birthday.  I talked about how insuperable they were, how sweetly they played together, how they did everything at the same time, together.  Things are much different now.  They've grown into their own distinct little people. And while they don't seem to connect on the same level they did as infants, they are still each other's best friend.


Tucker has a big personality; he wears his heart on his sleeve already, and lives life with so much passion.  His highs are high and his lows are low. His cheeks are the most kissable cheeks I've ever kissed, and he will forever be my little cuddle-bug.  He loves being held and cuddled, and Joey and I like to call him "the lego."  Because when you pick him up and hold him on your hip, he just fits perfectly.  He snaps right into position like a little lego.


And Henry.  Sweet sweet Henry.  The baby of my babies.  He has such an innocence about him, and the most angelic little face.  He seems to experience the world on a different wavelength than most of us.  He has the softest, sweetest little voice, and I dare you to look into his big brown eyes without melting.  But don't let them fool you:  he's all boy, and climbs, jumps, runs, and roughhouses more than you'd believe.  He's always on the go, and he doesn't stay in one place for long.  But when he slows down, sits down, and lays his head on my shoulder…. it's the best feeling in the world.

My favorite time of day is getting the boys up from their nap.  They are hanging out in their cribs, and when I open their door, they stand up, grab the crib rail, and start jumping and laughing.  These boys turned our lives upside down, but somehow they also turned them right side up.  I can't imagine the world without Henry and Tucker, and I feel so lucky that I get to be their mom.

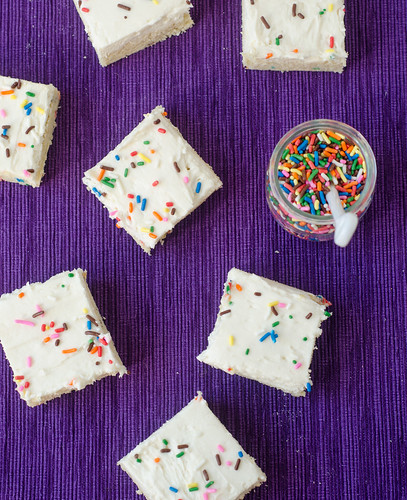
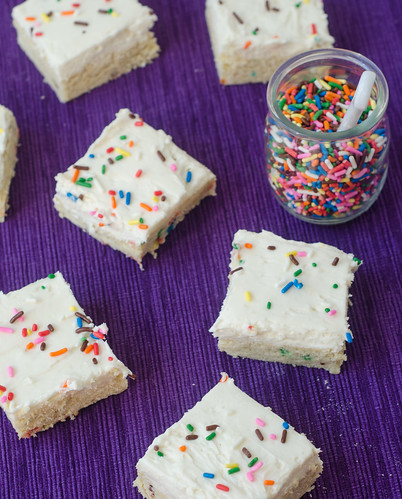
We celebrated Henry and Tucker's second birthday this weekend, and I'll be sharing all the details of their party very soon.  But for now, I want to share these funfetti sugar cookie bars.  They have become a bit of a tradition in our family.  I love making them to send to school for birthday treats for all the kids.  Cupcakes can be messy, but these are smaller and more portable, yet still just as cute.  And come on - find me a kid who doesn't love sprinkles?!

These have not only become birthday treats for our family, but I make them anytime I need a last-minute dessert to take somewhere.  They are equally adaptable as far as colors go, so they can be festive for any holiday or occasion!  I've made them for Valentine's Day, Christmas, soccer parties using team colors, and Halloween; and I foresee them being made using school colors for football games, spirit days, and the like as the kids get older.

These bars are so easy, so fun, and most importantly, absolutely delicious.  Sprinkles make everything fun!
Funfetti Sugar Cookie Bars

Funfetti Sugar Cookie Bars
adapted from  Smells Like Home

  • 2 1/2 cups all-purpose flour
  • 1/2 tsp salt
  • 1/4 tsp baking soda
  • 1/2 cup (1 stick) unsalted butter, at room temperature
  • 1 cups sugar
  • 2 large eggs
  • 1 tsp vanilla extract
  • 3 Tbs sprinkles
Preheat oven to 350° F. Lightly grease a 9x13 inch baking dish and set aside. 

Whisk the flour, salt, and baking soda together in a large bowl; set aside.

In the bowl of a stand mixer fitted with the paddle attachment, beat the butter and sugar together on medium-high speed until light and fluffy, about 2 minutes. Beat in the eggs one at a time, beating well after each addition and scraping down the bowl as needed. Mix in the vanilla.

Turn off the mixer and pour the dry ingredients into the bowl along with the sprinkles. On low speed, combine the dry ingredients into the wet ingredients, mixing until they are just incorporated.

Lightly press the dough into the prepared baking sheet. Bake for 10 to 15 minutes, until a toothpick inserted into the center of the pan comes out clean. The bars will still look pale with barely a hint of browning around the edges. 

Transfer the pan to a wire rack to allow the bars to cool completely in the pan.

Whipped Vanilla Frosting
  • 1 cup (2 sticks) unsalted butter, at room temperature
  • 2 cups confectioners' sugar, sifted
  • 2 tbsp heavy
  • 1 tsp vanilla extract 
  • Pinch of salt
  • Food coloring (gel, liquid, or paste), if you want colored frosting
In the bowl of a stand mixer fitted with the paddle attachment, beat the butter for 6 to 8 minutes on medium speed; it will be very pale and light. Add in the sugar, milk, vanilla, and salt and mix on low for 1 minute and then on medium speed for 6 minutes; the frosting will be very light and fluffy. If using food coloring, blend it in until it is fully incorporated.

Use an offset spatula to frost the fully-cooled bars in the pan.  Use a sharp knife to slice them into your desired size and shape, garnish with more sprinkles, and serve.


Monday, November 10, 2014

Cranberry-Oat Bars

Cranberry-Oat Bars


As we move into Thanksgiving and Christmas, I've begun gathering ideas and recipes for holiday baking.  So as I work my way through the never-ending pile of recipes I've amassed, I'll share the clear winners with you.  Sound good?

These bars?  Already clear winners.  Cranberries are one of my favorite winter fruits, and I can't ever resist a dessert that features these beauties.  The cranberries are paired with a buttery, chewy, spiced cookie crust, and the combination is truly outstanding.  I loved the extra texture that the oats gave the crust, and the addition of brown sugar and cinnamon gave it a nice sweet warmth that perfectly complemented the sweet-tart cranberries.

Cranberry Oat Bars

I caught myself sneaking bite after bite all afternoon, cutting off a tiny corner, then going back for more.  Caroline ate one as an after school treat, and immediately asked if I would make them for Thanksgiving.  Indeed, I think I just might.

And hey - these have fruit, eggs, and oats in them… that automatically qualifies them as a healthy breakfast food, right?  I think so.

Cranberry Oat Bars

Cranberry-Oat Bars
barely adapted from ATK's Best Ever Christmas Cookies
makes 24 bars

  • 2 cups fresh or frozen cranberries
  • 1/2 cup granulated sugar
  • 1/4 cup water
  • 2 cups old-fashioned rolled oats
  • 1 1/2 cups all-purpose flour
  • 1 tsp ground cinnamon
  • 1/2 tsp kosher salt
  • 16 Tbs unsalted butter, at room temperature
  • 1 1/2 cups packed light brown sugar
  • 1 large egg, at room temperature
  • 1/4 cup pecans, chopped (optional, I omitted)
In a medium saucepan, bring the cranberries, water, and sugar to a boil over medium heat.  Cook, stirring often, for 2 to 3 minutes, or until the cranberries have burst and the juice is starting to thicken.  Remove from heat and allow to cool for at least 30 minutes.

Adjust the oven rack to the lower-middle position and and heat the oven to 325 degrees.  Line a 9x13 inch baking dish with foil, allowing it to hang over on 2 sides (to form a sling).  Lightly grease with cooking spray or butter.

In a medium bowl, whisk together the oats, flour, cinnamon, and salt.  Set aside.

In the bowl of a stand mixer fitted with the paddle attachment, beat the butter and brown sugar on medium-high speed until light and fluffy, about 3 minutes.  Add the egg and mix until combined.  Reduce the speed to low and gradually add the flour/oat mixture, mixing until it is just combined.

Transfer 2/3 of the dough to the prepared pan, and press into an even layer.  The dough is pretty sticky, so use a piece of plastic wrap to help you.  Spread the cranberry mixture in an even layer over the dough, then drop walnut-sized pieces of the remaining dough over the cranberries.

Bake 40 to 45 minutes, or until the top is golden-brown, rotating the pan halfway through.

Remove from oven and cool on a cooling rack for at least 2 hours.  Use the foil overhangs to lift the bars out of the pan and cut into 24 equal pieces.  Serve.


Monday, May 26, 2014

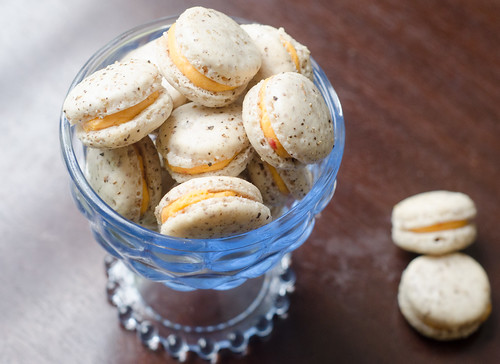
Savory Pimento Cheese Macarons


A few years ago, Joey and I started a birthday tradition.  On my birthday, we make a reservation at a nice restaurant, book a hotel room, and make a weekend out of being tourists in our own city.  It is such a fun weekend for us, and one that I look forward to all year long.

This year we went to Restaurant Eugene, which I had been wanting to try for years.  It was by far the best meal I've ever had in Atlanta, and one that I will certainly remember for years to come.  We went all out and ordered the chef's tasting menu, complete with wine pairings.  In between courses, we were treated to several "gifts from the chef."  Little bites and small dishes meant to cleanse the palate or give you a little surprise.

The most memorable one?  A savory macaron with pimento cheese filling.  Yes, really.  It was a subtly sweet macaron shell, spiked with a hefty dose of black pepper.  Inside was a creamy and sharp pimento cheese filling.  This fusion-style French cookie combined my love for macarons with my undying love for pimento cheese, and I immediately knew that I MUST recreate this amazing cookie in my own kitchen.

I used my standard macaron shell recipe, decreased the sugar just a bit, and added black pepper, salt, and a pinch of cayenne pepper and dry mustard powder.  For the filling, you could certainly just slather pimento cheese on the cookies, but I pureed some pimento cheese with a  bit of heavy cream and piped it on.

These cookies are unique and novel.  There's just  hint of sweetness in the macaron shell, which plays nicely off of the spicy pepper and sharp cheddar filling.  These would be just lovely set out as part of a cheese tray, or to serve at a brunch, shower, or party.  They are rich and bold, so you really won't eat more than one at a time, which makes them perfect for a party.  I always like to serve something a bit unexpected and unusual, and these pimento cheese macarons fit the bill perfectly.

Savory Black Pepper and Pimento Cheese Macarons
macaron shell adapted heavily from these vanilla bean macarons

  • 110 g almond meal
  • 175 g sifted confectioner's sugar
  • 1 tsp freshly ground black pepper
  • 1/4 tsp kosher salt
  • pinch cayenne pepper
  • pinch dry mustard powder
  • 100 g egg whites, aged at room temperature for a day (about 3 eggs)
  • 30 grams granulated sugar
  • 3/4 cup pimento cheese
  • 2-3 Tbs heavy cream
Line 2 baking sheets with parchment paper or silicone mats. 

In a medium bowl whisk together the almond meal, confectioner's sugar, pepper, salt, cayenne pepper, and mustard powder.  Set aside.

In the bowl of a stand mixer fitted with a whisk attachment, whip the egg whites until foamy, then gradually stream in the granulated sugar and continue to whip until a shiny, glossy meringue forms (but not dry).

Remove the bowl from the stand mixer, and add the almond mixture.  Using a rubber spatula, briskly and quickly fold the almond meal into the egg whites.  After a few brisk strokes, slow down and then gently incorporate the rest into the batter.You want a batter that flows and "ribbons" for at least 5 seconds.

Pour the batter into a pastry bag fitted with a large round tip.  Pipe the batter into 1 1/2-inch rounds, spacing them about 1-inch apart.

Whack the baking sheets on the counter a few times, then allow to sit at room temperature 45 minutes-1 hour, or until a hard shell forms.

As the shells rest, prepare the filling.  Add the pimento cheese to the bowl of a food processor and pulse several times.  Add the heavy cream, one tablespoon at a time, until it is smooth and thinned to a pipe-able consistency.

Meanwhile, preheat the oven to 300 degrees.  Bake the macarons 8-10 minutes, depending on size.  Allow to cool completely on the pan before using a small spatula to remove them.  Match the cookies according to size and pipe filling on half, using the other half to form a sandwich.


Monday, March 31, 2014

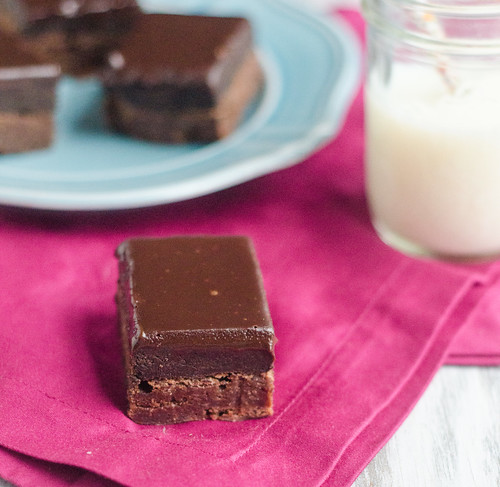
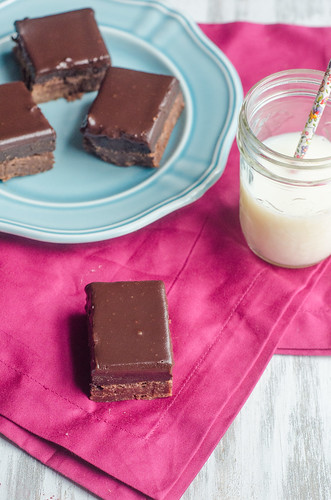
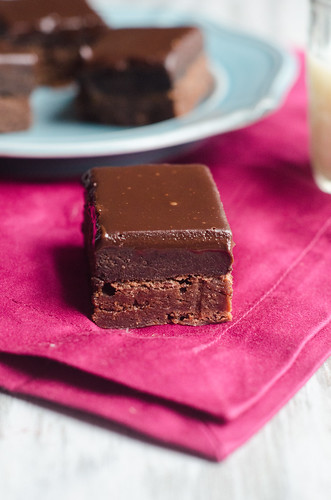
Oreo Truffle Brownies


Do you remember seven or eight years ago, when oreo truffles were all the rage?  I was all but sent home if I showed up at a party without them, and my friends nicknamed them "balls of fury," haha!  They were a super simple mixture of crushed oreos and cream cheese, then rolled into balls and dipped in melted chocolate.  So easy, but always alway always a huge crowd pleaser.


These brownies are a majorly updated and decadent version of those little truffles, and my gosh are they good!  You start with a pretty simple and basic pan of brownies,  top them with that oreo-cream cheese mixture, and finish them off with a layer of chocolate ganache.  Um, yeah.  They're amazing.

Oreo-anything will always be a huge hit with my family, but these brownies were definitely a grand slam-home run-major win.  How could they not be?  These are definitely one of the best treats to come out of my kitchen, and I foresee many more pans of these delicious brownies being made in the near future.


Oreo Truffle Brownies
adapted from Chef in Training, via Good Thymes & Good Food

  • 1 cup unsalted butter, softened to room temperature
  • 2 cups granulated sugar 
  • 4 large eggs 
  • 1 tsp vanilla extract 
  • ½ cup cocoa powder 
  • 1 ⅓ cups all-purpose flour 
  • ½ tsp salt 
  • 30 Oreo cookies
  • 6 oz cream cheese, softened to room temperature 
  • 1 cup heavy cream or half-and-half
  • 10 oz semi-sweet chocolate chips

Preheat oven to 350° F and line a 9x13-inch baking pan with aluminum foil, leaving an overhang on the two long sides. Spray with cooking spray and set aside. 

In the bowl of an electric mixer, cream butter and sugar together until light and fluffy, about 2 minutes. Add eggs one at a time, and mix well, scraping down the bowl as necessary.  Add vanilla, salt, cocoa, and flour.  Mix until just combined, being careful not to over mix.


Pour batter into the prepared pan and bake for 20-25 minutes, until a toothpick comes out with just a few crumbs attached.  Transfer to a wire cooling rack and cool completely. 


While the brownies are cooling, make the Oreo truffle layer. In the bowl of a food processor, pulse cookies into fine crumbs. Add the cream cheese and pulse until combined. 


Once brownies are completely cool, carefully spread the Oreo truffle layer over brownies with an offset spatula and/or clean hands -  this doesn't have to be perfect, since it will be covered with ganache.

To make the ganache, heat the cream in small saucepan over medium heat until it is simmering.  Meanwhile, place the chocolate chips in a medium heat-proof bowl.  Pour the hot cream over the chocolate, and allow to sit for 2-3 minutes.  Whisk the cream and chocolate together until the chocolate is melted and smooth.  Pour the ganache over Oreo layer and spread with an offset spatula. Chill in the refrigerator until fully set.  To slice and serve, lift the brownies out of the pan using the foil overhang, then use a sharp knife to cut into small squares.


Sunday, February 16, 2014

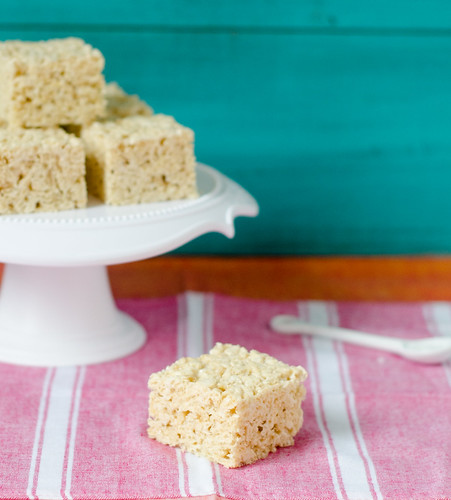
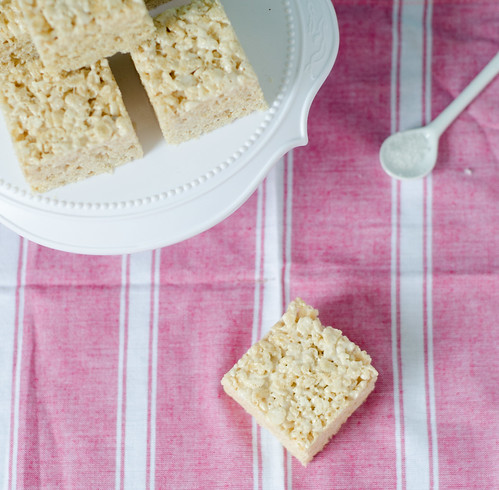
Salted Brown Butter Rice Krispies Treats


As all older siblings tend to do, my brother picked on me quite a bit growing up.  I remember one such prank quite vividly, and I'm sure he does too.  One morning, I poured myself a bowl of Rice Krispies, then got up from the table to do something.  When I returned and took a big bite, my cereal was so salty that I almost threw up.  I, being a (slightly manipulative) little sister, immediately burst into tears, and of course my brother was punished.  His punishment?  He had to eat the entire bowl of salty rice krispies.  Parenting win, right there.

It feels kind of awkward to write about such an unpalatable experience, especially when I'm sharing with you the best rice krispies treats ever, but as I added salt to these babies, I couldn't help but remember that prank. So about these rice krispies treats.  I don't want to sound overly effusive or lame to be waxing poetic about such a simple treat, but hear me out.

I've seen tons of crazy add-ins and variations on the ubiquitous treat, some sounding great and some causing me to scratch my head a little.  But what makes this version so great is its simplicity.  There's more butter, and it's browned.  And a sprinkle of sea salt helps to balance out the sweetness of the treats.  Like fleur de sel, brown butter automatically gives every dessert a flair of sophistication and an extra depth of flavor.  It's not that you'll taste these and immediately proclaim that you can taste the browned butter.  More likely, you'll taste them and wonder what's in there that makes them taste so darn good.  You still have that nostalgic and homey childhood treat, but it's matured a bit - much like us, I dare say.  I don't think my brother would still pour salt into my cereal, but I daresay he would love these salted treats!


Salted Brown Butter Rice Krispies Treats
The Smitten Kitchen Cookbook

  • 8 Tbs unsalted butter, plus more for greasing the pan
  • heaping 1/4 tsp fleur de sel, or other flaky sea salt
  • 10 oz miniature marshmallows
  • 6 cups rice krispies cereal
Butter a 9-inch square baking dish and set aside.

In a large pot, melt the butter over medium-low heat, whisking and swirling it often.  After it melts, it will foam, then turn golden, then finally start to brown and smell nutty.  

As soon as this happens, remove the pan from heat and stir in the marshmallows and sea salt.  the residual heat in the pan should be enough to melt the marshmallows, but if they aren't melting, return the pan to the stovetop over low heat, stirring constantly, just until they melt.

Remove the pan from heat and quickly stir in the cereal.  Immediately transfer the mixture to the prepared pan, then use a buttered spatula to spread the mixture evenly to the corners and edges. and smooth the top.

Allow to cool, then cut into squares.  If you are are terribly impatient, you can just eat it with a spoon.  I won't tell anyone.


Thursday, December 12, 2013

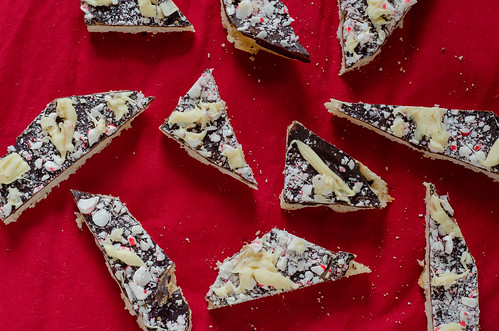
Peppermint Bark Cookies


I really began to love cooking around the time I graduated from college when I moved into a "fancy grown-up" apartment with a spacious kitchen - the apartment complex had a security gate and everything!  My previous apartment was pretty much exactly what you'd expect from a crappy college apartment, so I really felt like I was living the good life.  My roommate was a guy I'd been friends with since my freshman year of college, and through him and his friends, I eventually met Joey (another story for another day).  So all in all, it was a great time in my life.

That winter, I attended several holiday parties:  a cocktail party with friends, my work party, family parties, random Friday night gatherings, etc.  And through them all, I became quite the creature of habit.  I brought a cold veggie pizza appetizer, and peppermint bark.  While peppermint bark is a pretty standard holiday offering, I felt like mine was super special - my "secret" was using half peppermints and half spearmints - fancy! 

It has been quite a while since I've made peppermint bark, so these cookies brought back a lot of memories of the old days.  Like my secret ingredient peppermint bark, this is a little different than the usual as well.  You have the standard melted chocolate, crushed mints, and white chocolate drizzle, but underneath that candy blanket lies a buttery, crisp, shortbread cookie.  It takes the ubiquitous holiday dessert up a notch or two, and is definitely a little unexpected.  I like to think of these peppermint bark cookies as sort of the evolution of the standard dessert.  It only seems natural to take a perfectly good piece of peppermint-studded chocolate and add a tasty cookie underneath, right?  Next to some of the fancy and frilly holiday cookies, simple peppermint bark can seem a bit humble and boring, so the evolution of turning it into a cookie helps it keep up with the Joneses.  Plus, it's really fun to cut and break it into jagged, irregular pieces.  :)

As Caroline and Smith helped me pat out the dough, crush the mints, and drizzle the chocolate, I thought about how much things have changed in what's really a short amount of time.  Back then, if you'd told me that I'd have FOUR kids, I would have laughed my young and wrinkle-free little head off.  But life's full of surprises, and just like peppermint bark, you adapt and evolve.  And in this case, I couldn't be happier to do just that.

Peppermint Bark Cookies
barely adapted from Bon Appetit, December 2009
makes approximately 36 cookies, depending on how you cut/break them
  • Nonstick cooking spray
  • 2 cups all purpose flour
  • 1/4 tsp kosher salt
  • 1 cup (2 sticks) unsalted butter, softened to room temperature
  • 1 cup sugar
  • 1 teaspoon vanilla extract
  • 1 large egg yolk
  • 6 ounces bittersweet chocolate, chopped
  • 1/2 cup (about 3 oz) finely chopped red-and-whitestriped hard peppermint candies or candy canes - a few pulses in the food processor 
  • 2 ounces white chocolate 


Preheat oven to 350°F. Spray 13 x 9 x 2-inch metal baking pan with nonstick spray, and line the bottom of the pan with a long strip of parchment paper.  Leave an overhang on both short sides of the pan.  

Whisk flour and salt in medium bowl and set aside. 

Using an electric mixer fitted with the paddle attachment, beat the butter in large bowl until creamy, about 2 minutes.  Gradually beat in sugar, and continue beating until the mixture is light and fluffy, about 3 minutes.  Beat in vanilla, then egg yolk. Gradually add flour mixture, beating on low speed just until it's combined.

Drop the dough by tablespoonfuls into prepared baking pan, spacing evenly. Using moistened fingertips, press dough to form even layer over bottom of pan, then pierce dough all over with a fork.

Bake the cookie base until it's light golden brown, slightly puffed, and the edges begin to come away from sides of pan, about 30 minutes. Remove from the oven and place the pan on a cooling rack.  iImmediately sprinkle the chopped chocolate over the cookie base, and let stand until the chocolate softens, about 3 minutes.  Using a small offset spatula, spread the chocolate over the top of the cookie in a thin, even layer.  Immediately sprinkle the chopped peppermint candies on top.

Stir white chocolate in medium metal bowl set over saucepan of simmering water until it is melted and smooth.  Remove from the heat, and using a fork, drizzle and drop the white chocolate over the cookies.  Alternatively, you can spoon the melted white chocolate into a pastry bag, cut a small hole at the tip, and drizzle it over the mints.  Chill until white chocolate is set, at least 30 minutes.

Using the paper overhang as an aid, lift the cookie from pan and transfer to a cutting board.  Use a large knife to cut the cookie into irregular pieces.


Thursday, December 5, 2013

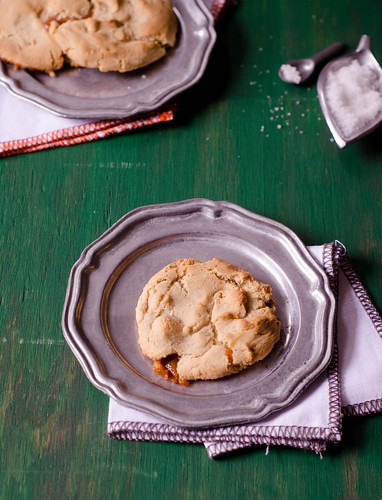
Caramel-Filled Brown Butter Cookies


Earlier this fall, when I made these apple cider caramels, my pal Annie and I were texting about their awesomeness.  Predictably, our texts turned to all the different treats we could make using them, and when Annie mentioned stuffing them into a browned butter cookie, I knew I'd be making them ASAP.

As a general rule, I'm not so much into turducken desserts, but I am head over heels in love with these cookies.  They are the perfect balance of sweet and salty, and chewy and crispy.  The center is obviously gooey and sweet from the caramel, and the edges are perfectly crispy.  The small amount of salt in the caramels themselves helps to balance out their sweetness and the sweetness of the cookie, as does a tiny sprinkle of sea salt over the top of each cookie.  The browned butter gives the cookies a slightly toasted flavor, and just a hint of apple cider comes through from the caramels.  Just a whisper of cinnamon comes through, giving them just a little warmth and spice.  These are the Mary Poppins of cookies:  Perfectly perfect in every way.


Caramel-Filled Browned Butter Cookies
slightly adapted from Annie's Eats and Ambitious Kitchen
  • 1 cup (8 oz) unsalted butter
  • 2 1/4 cups all-purpose flour
  • 1 1/4 tsp baking soda
  • 1/4 tsp ground cinnamon
  • 1/2 tsp fleur de sel, plus more for sprinkling
  • 1 lightly packed cup brown sugar
  • 1/2 cup granulated sugar
  • 1 large egg + 1 egg yolk
  • 2 1/2 tsp vanilla extract
  • 1 Tbs greek yogurt or sour cream
  • 20 apple cider caramels (or other 1x1inch caramels)
In a medium skillet, melt the butter over medium heat.  Whisking continuously, continue to cook the butter until it begins to turn brown and smell nutty.  Immediately remove from heat and pour into a bowl.  Set aside to cool slightly.

In a medium bowl, whisk together the flour, baking soda, cinnamon, and fleur de sel.  Set aside.

To make the cookies, combine the brown sugar, granulated sugar, and butter in the bowl of an electric mixer fitted with the paddle attachment.  Beat at medium speed until well-combined.  Add the egg + egg yolk, vanilla, and sour cream and mix well.  Reduce the speed to low and slowly add the flour mixture, mixing until just incorporated.  

Preheat the oven to 350 degrees.  Line two baking sheets with parchment paper or silicone mats.

Measure out about 2 tablespoons of the dough, and roll into a ball.  Flatten the dough ball in the palm of your hand, then place a caramel in the center.  Fold the edges over the caramel, enclosing it in the dough.  Transfer to the prepared baking sheet, and repeat with the remaining dough, spacing the dough balls about 2-3 inches apart.  Transfer to the refrigerator and chill at least 30 minutes.

Bake 13-15 minutes, or until the edges are golden-brown the the cookies are set, rotating the pans halfway through baking.  Remove from the oven and immediately sprinkle each cookie lightly with sea salt.  Allow to cool slightly before transferring to a wire rack (or before eating them!).

Note:  These are best eaten warm, and will harden the following day.  To enjoy, just reheat in the microwave briefly (about 10-15 seconds).


Tuesday, November 26, 2013

Cranberry-Swirl Cheesecake Bars


T-minus one day before Thanksgiving.  If you're hosting, I hope you have your menu set.  Actually,  I hope you have a good head start on all of your cooking and prep.  As for me, I'm not hosting, but I'll be contributing the stuffing, gravy, and mashed potatoes to our family's lunchtime feast.  We'll go to my in-laws' house for dinner, and I'm bringing roasted veggies and a pumpkin cheesecake tart with gingersnap crust for Thanksgiving 2.0.

If we're honest with ourselves, one of the best things about Thanksgiving dinner is the entire fridge full of leftovers.  I truly do love turkey day leftovers almost as much as the meal itself.  I enjoy maybe one to two meals of straight up reheated dinner, and then beyond that I will try and reinvent everything as best I can.  These turkey cranchiladas are a perennial favorite around here (we actually had them for dinner Tuesday night!).  And this pulled turkey sandwich with cranberry BBQ sauce is anther standby - especially if you use smoked turkey. But if you are looking to make another dessert - and really, who isn't - use your leftover cranberry sauce to make cheesecake bars.

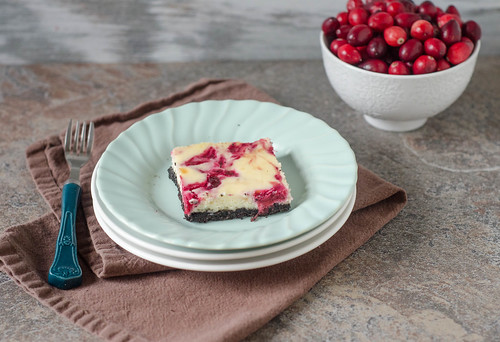
 You might be tired of pumpkin pie by now, and these cheesecake bars are a nice change of pace.  They start with a chocolate cookie crust, topped with a sweet and creamy cheesecake layer, and finally finished with a swirl of cranberry sauce.  They are the perfect blend of sweet-tart, and they are totally irresistible.  I initially planned to use a graham cracker or gingersnap crust, but I think the chocolate is a great and unexpected twist.  With the festive swirl of cranberry sauce, they look quite festive for Christmas as well.  A perfect treat to move us from Thanksgiving into Christmas.

I hope you all have the loveliest of Thanksgivings!

Cranberry-Swirl Cheesecake Bars
adapted from these raspberry-lemon cheesecake bars

  • 20 oreo sandwich cookies
  • 2 Tbs unsalted butter, melted
  • 16 oz cream cheese at room temperature
  • 1/2 cup Greek yogurt or sour cream
  • 3/4 cup granulated sugar
  • 2 eggs
  • 3/4 cup cranberry sauce
  • 1-2 Tbs water
Preheat the oven to 325 degrees, and line a 9x13 inch baking dish with foil, leaving an overhang on the long sides.  Spray lightly with cooking spray.

Add the cookies to the food processor, and process until the cookies become crumbs.  Transfer to a medium bowl with the melted butter.  Stir to combine well. Press the mixture into the prepared pan, using your hands or the bottom of a glass.  Bake 8-10 minutes, then transfer to a wire rack to cool.

Meanwhile, using an electric mixer (hand or stand mixer is fine), beat the cream cheese and sour cream together at medium speed until smooth.  Add the sugar, and mix 2-3 minutes at medium-high speed, scraping down the sides of the bowl as needed.  Add the eggs, one at a time, mixing well between each addition, then mix in vanilla extract.  Pour the mixture over the crust and use a spatula to smooth the top.

In the now-empty food processor, puree the cranberry sauce with water until it is smooth.  Drop spoonfuls of the cranberry sauce over the cheesecake batter, then use a toothpick to create swirls over the top.

Bake 35-40 minutes, or until the cheesecake is just set and no longer jiggles in the middle.  Allow to cool to room temperature, then cover and refrigerate at least 4 hours before serving.  To serve, lift the cheesecake from the pan using the foil overhang, then slice into squares with a clean, sharp knife.


Thursday, October 17, 2013

Salted Caramel Apple Crumble Bars


When you think of fall desserts, apple pie has got to be the first thing that comes to mind.  And for good reason - it's timeless, classic, and between the soft, spiced apples and the flaky crust, it's hard to beat.  There are a million and one different recipes and versions of apple pie out there, but between you and me, this Southern Comfort Caramel Apple Pie from The Pastry Queen is the best one.

Anyway, while apple pie is the quintessential fall dessert, there is something about pie bars that just make me so happy.  They are cute, low-maintenance, much easier to make than a whole pie, and the smaller portions are nice when you're watching your calories -- although to be honest, that flies out the window if you eat four in one sitting..... um, no comment there.


I've had these caramel apple pie bars saved for over a year now, and I figured that between having a big batch of homemade apple cider caramels, and a gajillian apples on hand... it was just meant to be.

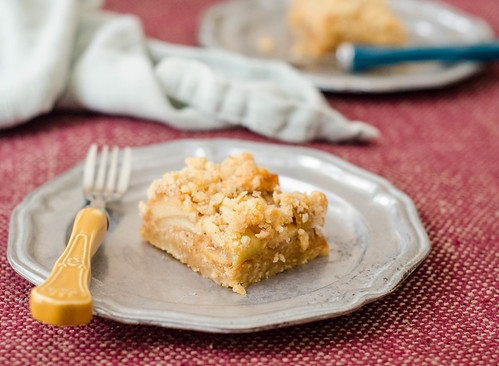
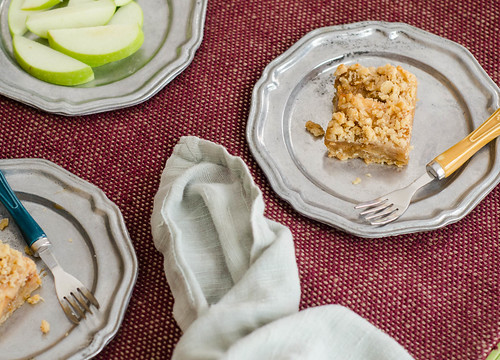
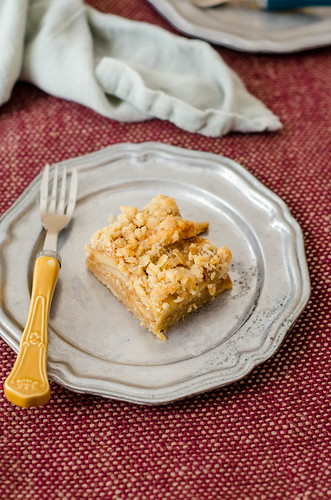
These bars are not only super easy, but they are now Joey's favorite dessert.  They start with a quick crust of flour, oats, and butter, and it's spiked with just enough cinnamon and brown sugar for a subtle spiced undertone.  The filling is a combo of melted down caramels and buttery, spiced apples.  More of the crust mixture is sprinkled over the top along with just a little bit of sea salt, and the result is truly great.


I sent most of the batch to a friend who just had a baby, and Joey and I have managed to put away the rest.  I would be sad that they're gone, but I'm making another batch this weekend for the twins' baptism luncheon.

Dare I say caramel apple pie bars > apple pie?  Is that blasphemous?


Salted Caramel Apple Pie Bars
barely adapted from Annie's Eats
makes 16 bars


Dough:
  • 1 1/2 cups all-purpose flour
  • 1 cup old-fashioned oats
  • 1/3 cup sugar
  • 1/3 cup lightly packed brown sugar
  • 3/4 tsp baking powder
  • 1/2 tsp salt
  • 1/4 tsp ground cinnamon
  • 12 Tbs cold unsalted butter, cut into small pieces
  • 1 large egg yolk
  • 1 tsp vanilla extract
  • fleur de sel, for sprinkling

Filling:

  • 2 Tbs unsalted butter
  • 4 large (or 5 medium) apples, peeled, cored, and sliced
  • 3 Tbs sugar
  • 1 tsp cinnamon
  • dash of ground nutmeg
  • pinch of salt
  • 9 oz caramels, unwrapped
  • 2 Tbs heavy cream

Preheat the oven to 375 degrees.  Line an 8x8 inch square baking dish with foil, leaving an overhand on 2 sides.

To prepare the dough, add the flour, oat, brown sugar, baking powder, salt, and cinnamon together in a large bowl, and whisk to combine.  Scatter the butter over the top using a pastry blender (or 2 forks), and cut the butter into the dry ingredients until the mixture resembles coarse meal.  Stir in the egg yolk and vanilla and mix or knead until a cohesive dough forms.

Press about two-thrids of the dough into an even layer in the prepared baking pan.  Bake 12-14 minutes, or until it's light golden-brown.

Meanwhile, prepare the filling.  Melt the butter in a large skillet over medium heat.  Add the apples, sugar, cinnamon, and nutmeg, and cook the apples, stirring often, until they are softened and caramelized, about 15 minutes.  Remove from heat and set aside.

For the caramel layer, melt the caramels and heavy cream in a medium saucepan, over medium heat, stirring often, until smooth.  

To assemble the bars, spread the caramel over the baked crust.  Arrange the apples over the caramel in a single layer.  Finally, crumble the remaining dough mixture over the apples.  Sprinkle lightly with fleur de sel.

Return the pan to the oven and bake until the caramel is bubbly and the top is golden-brown, 22-25 minutes.  Cool completely before slicing and serving, or scoop it with a large spoon to serve it cobbler-style.


Thursday, September 19, 2013

Snickerdoodles


Over the weekend, Caroline asked me what my favorite cookie is, and I had to think long and hard.  On the one had, it's hard to beat a good chocolate chip cookie.  Or a chewy peanut butter cookie.  But eventually, I decided that snicker doodles are my favorite.  Growing up, my mom had  Mrs. Field's Cookies, and we used to bake out of it quite often.  Snickerdoodles were always my favorite, mostly because I loved rolling them in the cinnamon-sugar (and subsequently licking my fingers, of course).  They are definitely the cookie that reminds me of my childhood the most, thus earning them the top spot of my cookie preferences. :)

So this weekend, as Caroline and I made these snickerdoodles, I felt like I had come full circle.  I portioned out the dough and rolled it into balls, she rolled them around in the cinnamon-sugar, and we sat in front of the oven to watch them bake.  We split one, warm from the oven, as soon as they were cool enough to grab, and I was instantly transported back to my mom's kitchen.  These cookies tasted exactly like the ones I used to eat as a child.  And then, when I looked over the recipe I used, I saw that it was in fact from Mrs. Field's Cookie Cookbook!  Full circle, indeed!

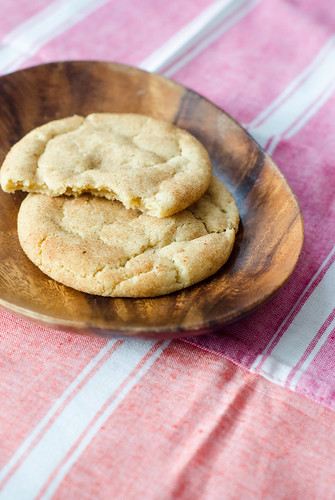
Whether it's because they are nostalgic for me or not, these snickerdoodles really are perfection.  Soft and chewy on the inside, with just a touch of crispiness around the edges, and that oh-so-important cinnamon-sugar coating.   Love at first bite.

Snickerdoodles
makes 16-18 cookies
  • 1 1/2 cups flour
  • 1/4 tsp salt
  • 1/2 tsp baking soda
  • 1/4 tsp cream of tartar
  • 1/2 cup butter (1 stick), softened to room temperature
  • 1/2 cup granulated sugar
  • 1/3 cup brown sugar
  • 1 egg
  • 1/2 teaspoon vanilla extract

For Rolling
  • 2 Tbs granulated sugar
  • 1 tsp cinnamon
In a medium bowl, whisk together the flour, salt, baking soda, and cream of tartar.  Set aside.

In a large mixing bowl, cream the butter and sugars together at medium-high speed until smooth and creamy.  Add the egg and vanilla, and mix until well-combined.

Add the flour mixture, and mix at low speed just until the dry ingredients are incorporated.  Cover the bowl and chill in the refrigerator 30 minutes to 1 hour.

Meanwhile, preheat the oven to 300 degrees Fahrenheit, and line 2 baking sheets with parchment paper.  In a small bowl, mix together the granulated sugar and cinnamon.

Measuring out about 2 1/2 tablespoons portions, roll the dough into a small ball.  Roll the ball in the cinnamon-sugar mixture, and transfer to the prepared baking sheet.  Press very lightly with the palm of your hand to just slightly flatten the ball.  Repeat with the remaining dough, spacing each ball about 2-3 inches apart.

Bake the cookies 12-14 minutes, rotating the pans top to bottom and front to back about halfway through.  They will still seem under baked, but they'll cook more as they rest, and will be soft and chewy in the middle.


Wednesday, August 14, 2013

Peanut Butter & Jelly Bars


Is there any sandwich out there as iconic as PB&J?  I know it was my sandwich of choice growing up, and Caroline and Smith seem to be falling in line as well.  It's been Caroline's go-to lunch for the past few years, and lately she's taken to replacing the bread with graham crackers to make pb&j crackers.  Smart girl, that Caroline.

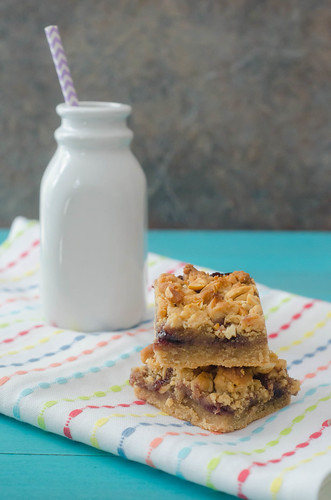
I thought that the first day of school deserved a special after school snack, so I baked these up for her on Monday afternoon while the boys napped.  They start with a base of peanut butter cookie dough.  A thick smear of jelly tops the bottom layer, and then more peanut butter cookie dough is dolloped over the jelly.  A big handful of chopped peanuts tops it off, and then they're baked.  The jelly seeps into the peanut butter layers, and you're left with a truly indulgent, nostalgic dessert.

I've been making these bars for the past 6 years or so, so I've adapted them a bit to my tastes and preferences.  First, I increased the jelly.  I really love peanut butter, but I prefer a pb&j that's heavy on the jelly.  Feel free to use any flavor you want - I love raspberry, strawberry, and blackberry.  This time I used grape to turn them into a true throw-back dessert.  I also like to use half roasted peanuts and half honey-roasted peanuts.  Because when are honey-roasted peanuts a bad idea?

 Caroline loved having such a fun treat for a snack, and she thought it was pretty cool that I turned a sandwich into a dessert.


Peanut Butter and Jelly Bars 
adapted from The Barefoot Contessa at Home
 
makes 24 bars
  • 1/2 pound (2 sticks) unsalted butter at room temperature, plus more for greasing the pan
  • 1 1/2 cups sugar
  • 1 teaspoon vanilla extract
  • 2 large eggs, at room temperature
  • 2 cups creamy peanut butter (18 ounces)
  • 3 cups all-purpose flour,
  • 1 teaspoon baking powder
  • 1 1/4 teaspoons kosher salt
  • 2  cups jam, jelly, or preserves any flavor 
  • 1/4 cup salted peanuts, coarsely chopped
  • 1/4 cup honey-roasted peanuts, coarsely chopped
Preheat the oven to 350 degrees.  Line a 9x13 inch pan with foil, leaving a 1-inch overhang on all sides.  Spray with cooking spray.

Using the paddle attachment, cream the butter and sugar in the bowl of an electric mixer on medium speed until light yellow, about 2 minutes. With the mixer on low, add the eggs, vanilla, and peanut butter, and mix until well combined.  Scrape down the sides and bottom of the mixing bowl.

Meanwhile, sift together the flour, baking powder, and salt. Slowly add to the peanut butter mixture, and mix until just combined.

Spread 2/3 of the dough in the prepared pan, using a knife to spread it evenly. Spread the jam over the dough, and drop small globs of the remaining dough evenly over the jam. Sprinkle the peanuts over the top and bake for 45 minutes, or until golden brown. Cool completely, and cut into small squares.  They cut much cleaner if they are chilled, so I usually cool them to room temperature, then put them in the refrigerator for a few hours before slicing and serving.  They also taste great chilled!


Thursday, August 1, 2013

Lemon-Raspberry Cheesecake Bars


Normally I am eating peaches like they're going out of style every summer (because they are, come September), but this has been the summer of raspberries.  I've been buying several pints at a time each week at the grocery store, and between Caroline, Smith, and myself, we've been demolishing them pretty quickly.  Eaten straight from the carton, smashed onto toast or into yogurt... they aren't last lasting long around here.  I have a list of raspberry recipes that's a mile long, but we can't manage to keep them around long enough.  This week, however, I was determined, and doubled up on my raspberry purchase.

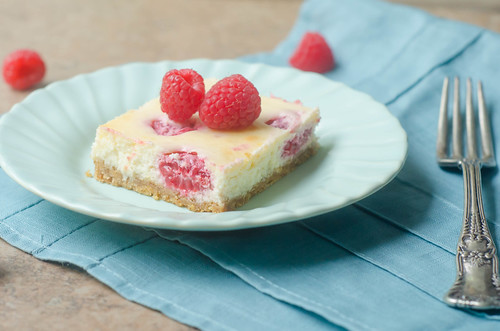
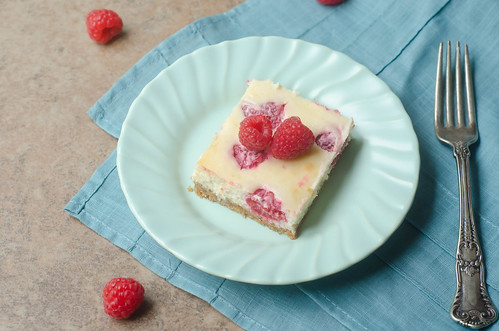
I had a little trouble deciding what to make first, but these cheesecake bars quickly won out.  They are low-maintance, easy, and also:  cheesecake.  There's a buttery, crisp graham cracker crust, topped with a creamy, sweet-tart lemon cheesecake filling, and beautiful bursts of fresh raspberries scattered throughout.  

Summer is winding down (sob), so don't let it pass you by without making these cheesecake bars.  


Lemon-Raspberry Cheesecake Bars
adapted From Annie's Eats' Lemon-Blueberry Cheesecake Bars
  • 2 cups graham cracker crumbs
  • 3 Tbs sugar
  • 8 Tbs butter, melted
  • 16 oz cream cheese, at room temperature
  • 1/2 cup Greek yogurt or sour cream
  • 3/4 cup + 1 Tbs sugar
  • 2 eggs
  • 1 tsp vanilla extract
  • 1 Tbs lemon zest
  • 2 Tbs freshly squeezed lemon juice 
  • 1 pint fresh raspberries
Preheat the oven to 325 degrees.  Line a 9x13 inch baking pan with aluminum foil, leaving an overhang on two sides.  Spray lightly with cooking spray and set aside.

In a medium bowl, use a fork to mix together the graham cracker crumbs, sugar, and butter.  Press the mixture into the prepared pan, using your hands or the bottom of a glass.  Bake 8-10 minutes, then transfer to a wire rack to cool.

Meanwhile, using an electric mixer (hand or stand mixer is fine), beat the cream cheese and sour cream together at medium speed until smooth.  Add the sugar, and mix 2-3 minutes at medium-high speed, scraping down the sides of the bowl as needed.  Add the eggs, one at a time, mixing well between each addition, then mix in the vanilla, lemon zest, and lemon juice.

Gently fold in the raspberries with a wooden spoon or spatula, then pour the mixture over the crust.  Use the spatula to carefully smooth the top.

Bake 35-40 minutes, or until the cheesecake is just set and no longer jiggles in the middle.  Allow to cool to room temperature, then cover and refrigerate at least 4 hours before serving.  To serve, lift the cheesecake from the pan using the foil overhang, then slice into squares with a clean, sharp knife.


Thursday, May 9, 2013

Strawberry-Rhubarb Pie Bars


A few weeks ago, we made the trek to my hometown of McDonough, Georgia to visit my family.  While we were down there, we met my dad and his wife at Southern Belle Farm for some strawberry picking!  Caroline and Smith were both really excited to pick the berries this year: Caroline proclaimed every berry she picked to be "the most perfect strawberry ever," and Smith was very involved in the quality control testing.  We left with two gallons of strawberries and bellies full of homemade strawberry ice cream.


I of course already had more recipe ideas than I did strawberries, and sadly, I barely made a dent in my list.  However, I used the last of the berries to make these strawberry-rhubarb pie bars, and they were definitely a great use of those beautiful strawberries!

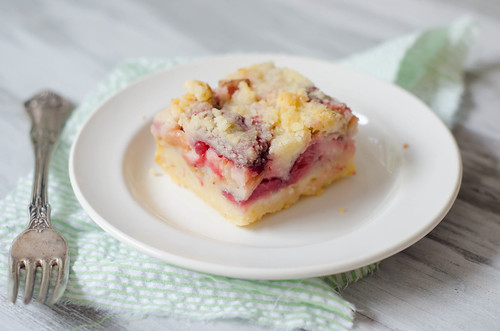
I used the base of these blackberry pie bars and adapted the filling to suit the new flavors.  The result was a fantastic dessert:  a buttery crust that transforms into a sweet, custardy filling, with the slightest sour notes from rhubarb, and finally topped with more buttery, crumbly crust.  The crust kind of fades into the filling, creating an ombre of flavor and texture.  Absolutely delicious!

My dad's favorite dessert is strawberry-rhubarb pie, so I feel like I should have waiting to post these before Father's Day, but I guarantee these will be a hit with any moms in your life as well.  Or anyone in your life for that matter!

Strawberry-Rhubarb Pie Bars
adapted from The Pastry Queen's Blackberry Pie Bars
makes one 9x13 inch pan.

Crust and Topping

  • 3 cups all-purpose flour
  • 1 1/2 cups sugar
  • 1/4 tsp salt
  • 1 1/2 cups (3 sticks) unsalted butter, chilled
Fruit Filling

  • 4 large eggs
  • 1 1/2 cups sugar
  • 3/4 cup buttermilk
  • 3/4 cup flour
  • pinch salt
  • zest of 1/2 lemon
  • 1 tsp vanilla extract
  • 8 oz. strawberries, hulled and halved (quartered if they are large berries)
  • 8 oz. fresh or frozen rhubarb, cut into 1/2-inch slices
To make the crust and topping, preheat the oven to 350 degrees.  Grease a 9x13 inch baking pan. 

Combine the flour, sugar, and salt in the bowl of a food processor.  Pulse a few times to mix.  Cut the butter into 1/2-inch cubes, and add to the flour mixture.  Process until the butter is evenly distributed but the mixture is still crumbly, 30-60 seconds.

Reserve 2 cups of the mixture to use as the topping.  Press the remaining mixture into the bottom of the pan, and bake 12-15 minutes.  Cool for at least 10 minutes.

To make the filling, whisk the eggs in a large bowl, then add the sugar, buttermilk, flour, salt, lemon zest, and vanilla extract.  Gently fold in the berries and rhubarb and spoon the mixture over the crust.  Sprinkle the remaining flour mixture evenly over the filling, and bake 55 to 65 minutes.

Cool at least 1 hour before cutting into bars, or scoop out of the pan to serve cobbler-style.


BLOG DESIGN BY: SHERBET BLOSSOM DESIGNS