Showing posts with label appetizer. Show all posts

Sunday, September 13, 2015

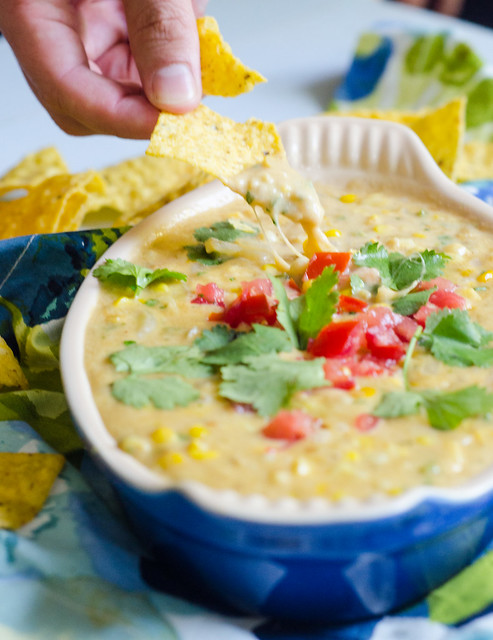
Sweet Corn Queso Dip

Sweet Corn Queso Dip 

Normally as we round the corner into the fall, I'm digging in my heels and refusing to acknowledge the end of summer.  I'm definitely not one of those people who turns into PUMPKIN EVERYTHING in mid august… or mid September even.  Up until September 23rd, I'm firmly still in summer-mode.  Thus, while bloggers everywhere are bringing you pumpkin and apples, I'm bringing you sweet corn queso dip.  I might not be a cool, up to the minute blogger, but I'm living in the now.  And the now is gorgeous weather, football, corn, and queso.  Queso is always in the now.

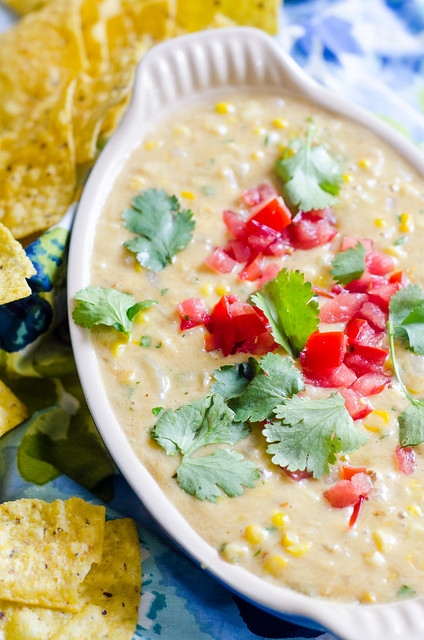
This queso is a little more than just corn mixed into queso.  You puree some of the kernels, then mix in whole kernels; thus creating a perfect corny bite.  While this is an ode to summer corn, it's also pretty much a perfect snack for watching football, cooking out, or just sitting outside and enjoying the perfect weather with a margarita.

I'm pretty much a sucker for any queso dip, but combining it with some of my favorite summer produce was revolutionary.  We all huddled around this scooping, dipping, and munching until the dish was scraped clean.  So whether you are a fall-lover or a stage five summer-clinger, this dip will definitely make you happy!  Long live queso!

Sweet Corn Queso Dip

Sweet Corn Queso Dip
adapted from Food and Wine, December 2013

While you can definitely use frozen corn for this, I'd highly recommend that you use fresh corn when it's in it's peak!  

  • 3 cups fresh corn kernels (4-5 ears).
  • reserved cobs from corn
  • 2 Tbs canola oil
  • 1 poblano chile, stemmed, seeded, and diced
  • 1/2 medium onion, diced
  • 2 cloves garlic, minced
  • kosher salt
  • 1 tsp chile powder
  • 8 oz Monterey Jack cheese, shredded
  • 2 Tbs minced fresh cilantro
  • cilantro, tomatoes, onions, jalapeño slices, etc for garnish
Cut the kernels from the cob.  Using the back of a spoon, scrape the spent cobs to "milk" them.  

In a blender, combine half the corn kernels, the corn milk, and 1/3 cup of water.  Puree until smooth.

In a medium skillet, heat the oil over medium heat.  Add the poblano and onion, and cook until softened, stirring often, about 5 minutes.  Stir in the remaining corn, a big pinch of salt, garlic, and chile powder.  Cook an additional 2 to 3 minutes.

Add the corn puree and stir to combine.  Bring to a simmer.  Cook until slightly thickened, about 2 minutes.

Reduce the heat to low and stir in the cheese, a little at a time, until it is melted and incorporated.  Remove from heat and stir in the cilantro, then season with additional salt if needed.  Garnish with diced tomatoes, more cilantro, jalaponeo slice, etc.  Serve immediately with tortilla chips.


Sunday, June 22, 2014

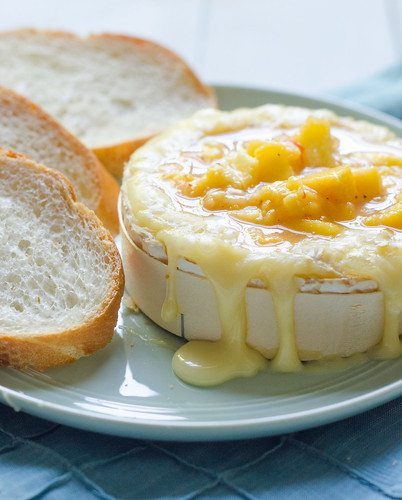
Sweet & Spicy Peach-Baked Brie


Oh baked brie, how I love you so.  Is there any other appetizer out there that is guaranteed to disappear at a party?  Anytime I serve it, it really is gone.  Someone (ahem, not naming names) will even stand over the plate and scrape up every last bit of cheese.  We wouldn't want to waste imported cheese, now would we?

My typical preparation of baked brie is a wheel of brie, raspberry preserves, and then I wrap it up in puff pastry.  This particular version is a new twist, and one that I will definitely be making again and again!

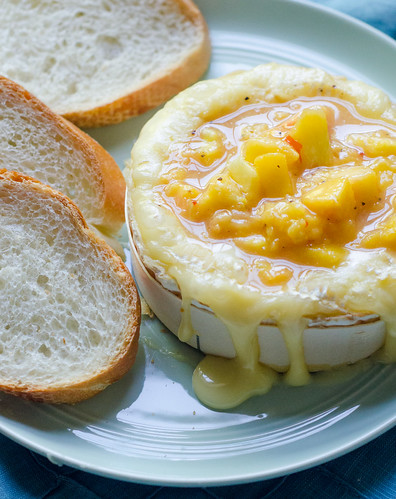
Peaches are by far my favorite summer fruit, so to combine them with melty, gooey, deliciously creamy brie was a match made in heaven.  Especially since the said peaches are tossed with some spicy red pepper jelly and a bit of Dijon mustard.  The heat from the jelly and mustard is tamed a bit by the sweet peaches, and then the creamy brie ties them both together.  A huge bonus is that this comes together in just minutes, is super easy, and I guarantee that it will be a crowd pleaser.

As if you needed another reason to love peaches.  Or brie.  Or summer.


Sweet & Spicy Peach-Baked Brie
adapted from Southern Living, June 2014

  • 1 Tbs pepper jelly
  • 1 tsp Dijon mustard
  • pinch red pepper flakes
  • 1/4 tsp kosher salt
  • pinch freshly ground black pepper
  • 1 large peach, peeled, pitted, and diced
  • 1 Brie round (about 13 oz), packed in a wooden box
  • crackers or baguette slices, for serving
Preheat the oven to 350 degrees.  

Stir together the jelly, mustard, pepper flakes, kosher salt, and black pepper in a small bowl.  Set aside.

Unwrap the brie; use a vegetable peeler to scrape off the rind from the top of the wheel.  Use a spoon to scoop out 1/2 inch of brie from the center.  Eat what you scooped out ;).

Place the box on a rimmed baking sheet, and bake for 10 minutes.  Spoon the peach mixture over the top, mounding it slightly.  Bake another 5 minutes, or until the cheese is melted and the peaches are heated through.

Carefully transfer the brie + the box to a serving platter.  Serve immediately with crackers or bread.


Monday, May 26, 2014

Savory Pimento Cheese Macarons


A few years ago, Joey and I started a birthday tradition.  On my birthday, we make a reservation at a nice restaurant, book a hotel room, and make a weekend out of being tourists in our own city.  It is such a fun weekend for us, and one that I look forward to all year long.

This year we went to Restaurant Eugene, which I had been wanting to try for years.  It was by far the best meal I've ever had in Atlanta, and one that I will certainly remember for years to come.  We went all out and ordered the chef's tasting menu, complete with wine pairings.  In between courses, we were treated to several "gifts from the chef."  Little bites and small dishes meant to cleanse the palate or give you a little surprise.

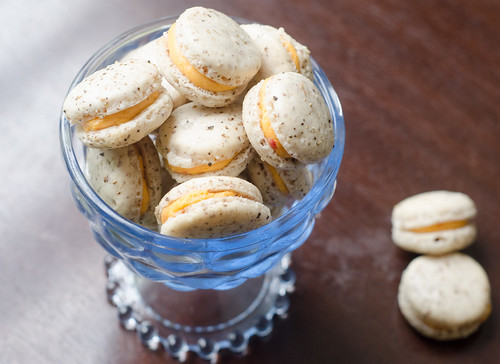
The most memorable one?  A savory macaron with pimento cheese filling.  Yes, really.  It was a subtly sweet macaron shell, spiked with a hefty dose of black pepper.  Inside was a creamy and sharp pimento cheese filling.  This fusion-style French cookie combined my love for macarons with my undying love for pimento cheese, and I immediately knew that I MUST recreate this amazing cookie in my own kitchen.

I used my standard macaron shell recipe, decreased the sugar just a bit, and added black pepper, salt, and a pinch of cayenne pepper and dry mustard powder.  For the filling, you could certainly just slather pimento cheese on the cookies, but I pureed some pimento cheese with a  bit of heavy cream and piped it on.

These cookies are unique and novel.  There's just  hint of sweetness in the macaron shell, which plays nicely off of the spicy pepper and sharp cheddar filling.  These would be just lovely set out as part of a cheese tray, or to serve at a brunch, shower, or party.  They are rich and bold, so you really won't eat more than one at a time, which makes them perfect for a party.  I always like to serve something a bit unexpected and unusual, and these pimento cheese macarons fit the bill perfectly.

Savory Black Pepper and Pimento Cheese Macarons
macaron shell adapted heavily from these vanilla bean macarons

  • 110 g almond meal
  • 175 g sifted confectioner's sugar
  • 1 tsp freshly ground black pepper
  • 1/4 tsp kosher salt
  • pinch cayenne pepper
  • pinch dry mustard powder
  • 100 g egg whites, aged at room temperature for a day (about 3 eggs)
  • 30 grams granulated sugar
  • 3/4 cup pimento cheese
  • 2-3 Tbs heavy cream
Line 2 baking sheets with parchment paper or silicone mats. 

In a medium bowl whisk together the almond meal, confectioner's sugar, pepper, salt, cayenne pepper, and mustard powder.  Set aside.

In the bowl of a stand mixer fitted with a whisk attachment, whip the egg whites until foamy, then gradually stream in the granulated sugar and continue to whip until a shiny, glossy meringue forms (but not dry).

Remove the bowl from the stand mixer, and add the almond mixture.  Using a rubber spatula, briskly and quickly fold the almond meal into the egg whites.  After a few brisk strokes, slow down and then gently incorporate the rest into the batter.You want a batter that flows and "ribbons" for at least 5 seconds.

Pour the batter into a pastry bag fitted with a large round tip.  Pipe the batter into 1 1/2-inch rounds, spacing them about 1-inch apart.

Whack the baking sheets on the counter a few times, then allow to sit at room temperature 45 minutes-1 hour, or until a hard shell forms.

As the shells rest, prepare the filling.  Add the pimento cheese to the bowl of a food processor and pulse several times.  Add the heavy cream, one tablespoon at a time, until it is smooth and thinned to a pipe-able consistency.

Meanwhile, preheat the oven to 300 degrees.  Bake the macarons 8-10 minutes, depending on size.  Allow to cool completely on the pan before using a small spatula to remove them.  Match the cookies according to size and pipe filling on half, using the other half to form a sandwich.


Thursday, May 1, 2014

Tequila-Infused Chorizo Queso Fundido


I'm going on the record as saying that it is impossible to eat at a Mexican restaurant and NOT order a bowl of cheese dip.  Fact.  It's also a fact that no matter how big the bowl is, or how many of you there are at the table, the dip will be absolutely demolished.  You'll be scraping the bowl for any little vestige of melted cheese you can get on your chip.  I know I'm not the only one.

So now that it's out there what a big fan of queso dip I am, let me tell you another fact.  This tequila-infused chorizo queso?  Blows all other cheese dips out of the water.  Like, majorly.  It's the stuff Mexican food dreams are made of.  What, you don't have dreams about Mexican food?

In case you can't tell, I really really love this dip.  Melted cheese is pretty fantastic on it's own, but adding tequila?  And chorizo?  That turns it into perfection.

I don't care what your plans are for this weekend, or for Cinco de Mayo.  But please promise me that you'll make this dip?  I'm contemplating making it Friday, Saturday, and Sunday night.  Overkill?

Tequila-Infused Chorizo Queso Fundido
adapted from Fiesta at Rick's
serves 4ish

  • 6 oz fresh chorizo, casings removed
  • canola oil
  • 1 large tomato, cored, seeded, and cut into 1/4-inch pieces
  • 1 cup chopped white onion
  • 1 jalapeño pepper, stemmed, seeded, and chopped (optional - the chorizo may be enough spice for you on it's own.  Just use your judgment based on your spice preferences)
  • salt
  • 3 Tbs silver tequila
  • 8 oz Mexican melting cheese, such as chihuahua or quesadilla, or Monterey Jack
  • 1/3 cup loosely packed chopped cilantro, divided
Heat an 8 to 10-inch skillet over medium-high heat, and crumble the chorizo into the pan.  Cook, stirring often to break up the chunks, until the chorizo is cooked through, about 5 minutes.  Use a slotted spoon to remove the chorizo to a paper towel-lined plate.

Add enough canola oil to have a total of 1 tablespoon of fat in the skillet, and add the onion, tomatoes, and chile peppers.  Season lightly with salt.  Cook, stirring often, until the onion begins to soften and brown, about 5 to 7 minutes.  

Add the tequila and cook, stirring occasionally, until the tequila has reduced to a thick glaze, about a minute or two.  Stir in half the cilantro.

Reduce the heat to medium-low and add the cheese, a handful at a time, stirring well to melt the cheese.  As soon as the cheese is melted, remove the skillet from heat, sprinkle the chorizo and remaining cilantro over the top, and serve with tortilla chips and/or warm flour tortillas.


Wednesday, April 16, 2014

Spring Vegetable Goat Cheese Dip


I wax poetic about this every year around this time, but gosh, I love spring.  There's a certain feeling of hope and renewal in the air, and a positive, excited energy all around.  The weather is gorgeous, everything blooms and blossoms... it really is the best time of the year.  Along with spring being my favorite season, Easter is probably my favorite holiday.  Both from the religious and cultural points of view, I love all that it stands for and symbolizes.  And from a totally shallow standpoint, I love the clothes. ;)  Seriously, I'm dying over my kids' Easter outfits this year!

There are a million and one things I love about spring, and I won't bore you with the list.  Instead, I'll hone in on the produce.  Don't get me wrong, summer produce is pretty much incomparable, but spring produce is so special in its own right.  It's the first green we've seen in months.  It's bright and fresh and sweet.  And I love it all.


So naturally, in order to elevate the veggie love, what did I do?  I mixed those beautiful green spring vegetables with a bunch of goat cheese and served it with bread.  Naturally.  Adding bread and goat cheese to anything basically makes it a winner in my book.

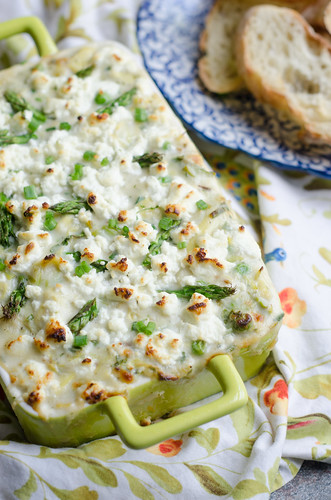
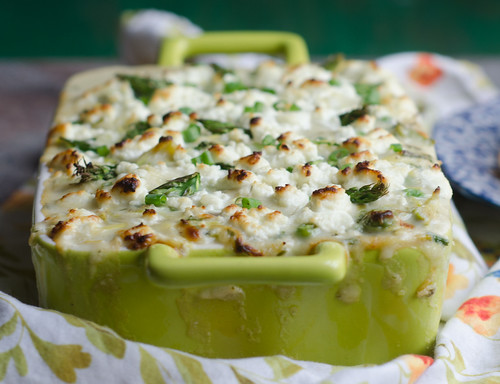
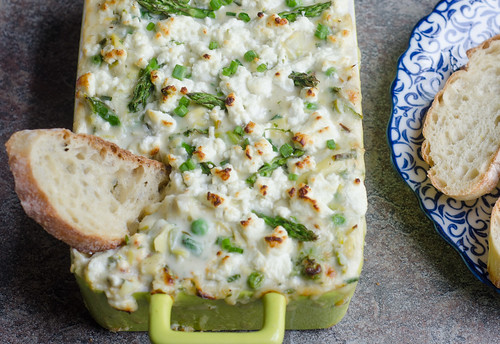
Let me run down the list of gorgeous ingredients in this dip:  asparagus, peas, artichokes, leeks, a whole mess of herbs, mozzarella, and goat cheese.  I mean, come on.  What's not to love there?  This is basically a spin on spinach-artichoke dip, so you still have that familiar cheesy flavor and texture, but it's just gussied up with some extra veggies and goat cheese.


If you're still finalizing your Easter menu, definitely add this as an appetizer.  Everyone will stand around eating it until its gone, and by then dinner will be ready and on the table!

Spring veggie and goat cheese dip.  Do it.


Spring Vegetable Goat Cheese Dip
adapted from Bon Appetit, April 2012
serves 4-6

  • 1 cup 3/4-inch pieces asparagus, spears reserved (so only the stalks)
  • 2 Tbs unsalted butter
  • 2 medium leeks
  • 2 Tbs all-purpose flour
  • 1 1/4 cups milk
  • 1-2 Tbs dry white wine
  • 1 cup grated mozzarella
  • kosher salt and freshly ground black pepper
  • 1 (14.5 oz) can artichoke hearts, drained and chopped
  • 1/4 cup fresh or frozen peas
  • 2 Tbs chopped fresh chives
  • 2 Tbs chopped fresh parsley
  • 2 Tbs chopped fresh mint
  • 2 Tbs chopped fresh basil
  • 1/2 tsp lemon zest
  • 1 Tbs lemon juice
  • 4 oz crumbled goat cheese, divided
Preheat the oven to 425 degrees and lightly grease a 4 to 5 cup baking dish.  Set aside.

Bring a medium saucepan of salted water to a boil, and add the asparagus pieces (but not the tips).  Boil for 1-2 minutes, drain, and rinse with cold water.  Set aside.

Return the now empty saucepan to the stovetop and melt the butter over medium heat.  Add the leeks and 1/4 teaspoon of salt.  Cook, stirring often, until the leeks are soft, about 10 minutes.  

Whisk in the flour and cook, whisking constantly, 1 to 2 minutes.  Slowly whisk in the milk, and bring to a simmer, continuing to whisk frequently.  Cook until the mixture is slightly thickened, 3 to 4 minutes, and remove from heat.  

Stir in the mozzarella, artichokes, peas, all the herbs, lemon zest and juice, 1/4 teaspoon of pepper, and 2 ounces of the goat cheese.  Taste and season with additional salt and pepper as needed.

Spoon the dip into the prepared baking dish, and arrange the reserved asparagus spears over the top.  Sprinkle with the remaining 2 ounces of goat cheese, transfer to the oven, and cook 15 to 20 minutes, or until the dip is hot and bubbly and the cheese is beginning to brown.  

Allow to cool slightly before serving, and serve with toasted bread slices or crackers.


Thursday, March 27, 2014

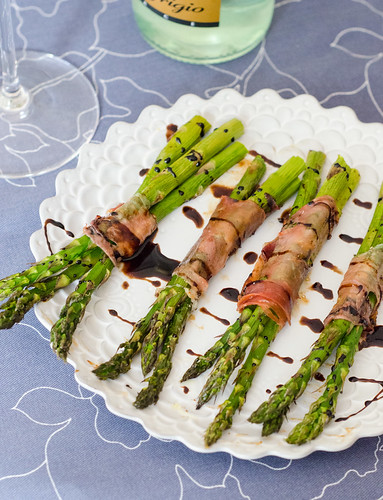
Prosciutto-Wrapped Asparagus Bundles


This is one of those embarrassingly easy recipes that I make dozens of times a year.  As soon as spring rolls around and asparagus comes into season, this becomes my go-to appetizer and pot luck contribution.  It's great straight out of the oven, at room temperature, and even chilled; so you really can't go wrong.

I love to drizzle these with a balsamic glaze, but it's certainly not necessary.  Just an extra little touch that makes them even more special.

Same deal with the Dijon mustard.  I brush each piece of prosciutto lightly with the mustard, and I think it imparts a nice little bit of spiciness, and it helps cut the rich saltiness of the prosciutto.  So while you could just simply wrap some asparagus with prosciutto and call it a day, the mustard and prosciutto are what elevate this dish to truly wonderful.

I hope everyone has a wonderful weekend - perhaps one that involves these little babies and a few glasses of wine?


Prosciutto-Wrapped Asparagus Bundles

  • 1 lb asparagus, woody ends trimmed
  • 4 oz thinly sliced prosciutto, halved horizontally
  • 1-2 Tbs Dijon mustard
  • extra virgin olive oil
  • kosher salt and freshly ground black pepper
  • balsamic glaze, for serving*
Preheat the oven to 400 degrees and lightly grease a rimmed baking sheet.

Brush each slice of prosciutto lightly with the Dijon mustard, and wrap tightly around 3-4 spears of asparagus.  Lay each bundle seam side-down on the baking sheet.

Drizzle lightly with oil, then sprinkle the asparagus VERY lightly with salt.  Season with freshly ground black pepper.

Bake 10-15 minutes, or until the asparagus is tender and cooked-through, and the asparagus is slightly browned and crispy.

Before serving, drizzle with balsamic glaze.

*To make a balsamic glaze, heat 1 cup of balsamic vinegar in a small saucepan over medium-high heat.  Bring to a boil and cook until it is thickened and reduced by half, 15-20 minutes.  Remove from heat and cool.


Thursday, January 30, 2014

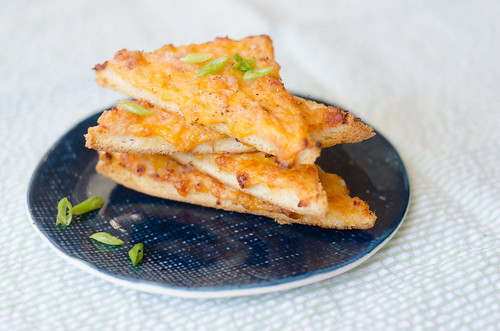
Bacon and Cheddar Toasts


As you have no doubt seen all over the news by now, the past few days in Atlanta have been nothing short of insane.  I wanted to write about it all and share some thoughts, but to be honest, I'm still having trouble processing it and wrapping my head around it all.   I'll just say that our family was extremely fortunate on Tuesday that Joey only spent over two hours in the car before abandoning it and walking three miles home in the snow.  And that we are incredibly lucky that we only live a mile from the school.  After waiting over two hours for her to arrive home on the bus, I set out on foot to the school, when I happened upon the bus just outside our neighborhood.   She got off the bus thinking that she'd just had the greatest adventure of all-time, and I fought back tears of relief.  My mother in law was stuck in traffic near our house, just a few miles from home, but roads were closing and traffic was grid-locked, so she wisely gave up and came to stay with us for the night.

Those are small and petty inconveniences compared to the children who had to spend the night in the school gymnasium because bus service was discontinued and their parents were stranded somewhere in the snow... or worse, the children who had to spend the night on their buses that were stranded on deserted roads.  Or the woman who gave birth to a baby on the interstate.  Or the thousands of people who never made it home that night.  The silver lining was that good samaritans were out in full force, and reading the stories of all the acts of kindness and selflessness brought me to tears.  It's a good reminder of the wonderful human nature that comes out in times of crisis.

So what does all of this have to do with bacon and cheese toast?  Not much, other than as I waited for my family to come home, I engaged in some wicked emotional eating, and downed an embarrassing number of these little babies.  And then I made another batch that night; and Joey, his mother, and I all just stood around the baking pan, drinking wine and eating these toasts as we watched all the reports and news roll in.

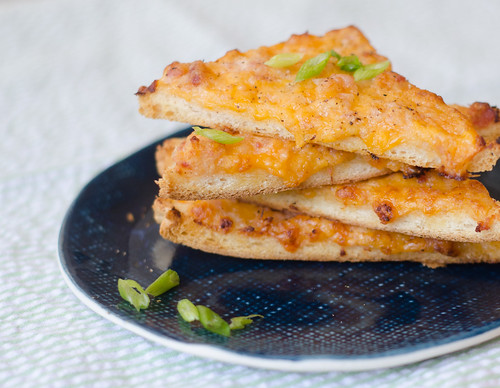
These are embarrassingly easy, but amazingly delicious and addictive.  It's a simple mixture of sharp cheddar, bacon, onion, and horseradish, then it's spread on pieces of bread, and baked until the cheese is melted and gooey, the bacon is cooked through, and the bread is nice and crispy.  It's a familiar concept with a kicked-up flavor profile, thanks to the bite from the horseradish and onion.

These are an ideal make-ahead dish and can be flash frozen before baking, or chilled for several hours in the refrigerator.  This makes them perfect for serving at parties.  Like, perhaps a Super Bowl party this weekend?  They also make a nice easy breakfast, snack, or accompaniment to a salad or soup.  With a recipe as easy as this in your arsenal, you'll always have something to make for parties, potlucks, or unexpected visitors during a snowstorm.


Bacon and Cheddar Toasts
adapted from Gourmet Today
makes 28 triangles

While I usually use thick-cut bacon, thin, lean bacon is best here.  Discard the extra fatty parts of the bacon.

Using a food processor is optional, but I think the mixture spreads easier and the flavors meld better with the food processor.

These are utterly irresistible straight out of the oven, but no one will turn them down at room temperature either.

  • 8 oz extra-sharp cheddar, grated (about 2 cups)
  • 8 oz cold lean bacon, finely chopped
  • 2/3 cup coarsely chopped white onion
  • 2 Tbs prepared horseradish
  • 1/2 tsp salt
  • 1/4 tsp freshly ground black pepper
  • 14 thin slices of white sandwich bread (recommended:  Pepperidge farm)
  • sliced scallions or chives for garnish
In the bowl of a food processor, combine the cheese, bacon, onion, horseradish, salt, and pepper.  Pulse a few times to combine well.

Spread a heaping tablespoon of the cheese mixture onto each of the bread slices, spreading it all the way to the edges.  Arrange in a single layer on a baking sheet, cover the bread with wax paper or parchment paper, and place in the freezer for 15 minutes.  Alternatively, store in the refrigerator for at least 2 hours, or overnight.

When ready to bake, preheat the oven to 375 degrees.  

Trim the crusts off the bread, then slice each piece in half diagonally.  Arrange on a greased baking sheet  15 minutes, or until the cheese is melted and the edges are beginning to brown.  Sprinkle with scallions or chives and serve.


Monday, December 16, 2013

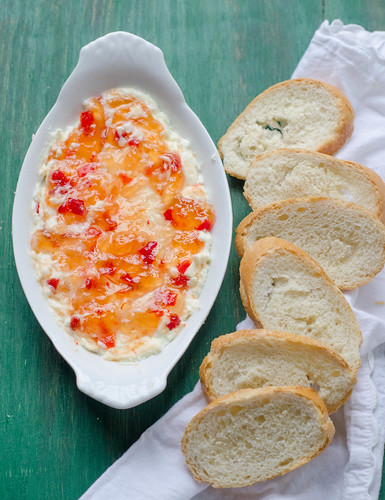
Pepper-Glazed Goat Cheese Gratin


During the holidays, and really throughout the entire year, it's nice to have a super easy appetizer in your back pocket.  One that you can make on short notice - like if you have last minute guests stop by, or if you forget that you're supposed to bring a dish to share to a meeting, party, or event.  Or if you don't have time to make anything time-consuming.  We've all been there.

Let this be your "go-to" appetizer.  It is embarrassingly easy, pretty and festive, and always well-received.  Do you need more convincing?  It's equally tasty fresh out of the oven, at room temperature, and chilled.  Oh, and it only calls for three ingredients.

Goat cheese and pepper jelly are a great combination (try it on a grilled cheese and thank me later).  Creamy, tangy goat cheese + addictively sweet and spicy pepper jelly spread on a piece of crusty bread?  This is a winner all around.

Pepper-Glazed Goat Cheese Gratin
inspired by Food and Wine

  • 10 oz creamy goat cheese, softened to room temperature
  • 4 oz cream cheese, softened to room temperature (low-fat is fine)
  • large pinch of kosher salt
  • 1/2 cup pepper jelly
Preheat the oven to 400 degrees Fahrenheit.  Combine the goat cheese, cream cheese, and salt in a medium bowl, mixing well to combine.  Spread in a lightly greased 8x8 inch baking dish or other small baking dish.

Whisk the pepper jelly in a small bowl to smooth out any lumps, then spread in an even layer over the cheese.

Bake 7-8 minutes, then turn on the broiler and cook an additional 2-3 minutes, until the top is bubbly.  

Allow to cool slightly, then serve with toasted baguette slices or crackers.


Sunday, December 1, 2013

Baked Pumpkin & Chorizo Taquitos


Hello, December.  According to Caroline, it's now acceptable to decorate for Christmas, listen to holiday music, and read books about Christmas and baby Jesus.  And we did all three of those things today.  The only thing we missed was sitting in front of the fireplace drinking hot chocolate.  Luckily, we still have 23 days to get that done before Christmas.  But that doesn't mean that she wasn't upset that it didn't happen tonight.  Five year olds are not known for their patience.

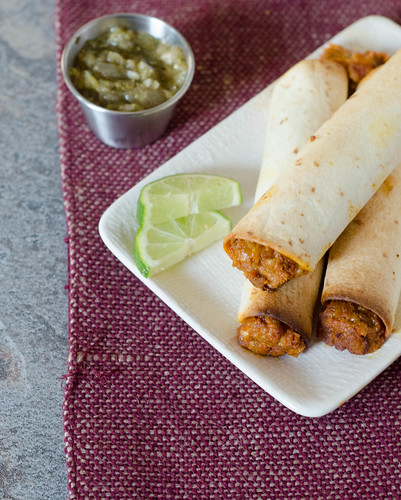
So now that the holidays are in full swing, does that mean that the pumpkin-everything craze is over?  I sure hope not!  I much prefer pumpkin spice lattes over the holiday drinks.. and pumpkin-cream cheese muffins still make me pretty happy.  And these pumpkin taquitos.  My oh my, are they delicious.    The original recipe was for pumpkin taquitos, but I added chorizo.  I thought the spicy meat and added texture would work really well with the creamy, sweet pumpkin... big shock:  it was a great addition.  I mean, to be honest, adding chorizo to pretty much anything will make me happy, but these taquitos were one of my favorite recent dinners.

Joey tends to be lukewarm to most pumpkin offerings, but he really loved these (see above comment re:  chorizo).  They are spicy, but not too spicy, with just a hint of sweetness from the pumpkin.  And the crispy, crunchy shell is a great foil to the creamy, cheesy filling.  We dipped these in my roasted tomatillo salsa, and everyone loved this meal.

So whether you are still pumpkin-obsessed, or firmly in the "No pumpkin past Thanksgiving" camp, think you'll love these.  They are quick and easy, can be made ahead of time, and your whole family will love them.


Baked Pumpkin & Chorizo Taquitos
significantly adapted from The New Southwest by Meagan Micozzi

  • 8 oz fresh chorizo, casings removed
  • 3/4 cup diced yellow or white onion (about half a medium onion)
  • 2 cloves garlic, minced
  • 1 1/2 cups pumpkin puree
  • 1/2 tsp kosher salt
  • 1 tsp ground cumin
  • 1 tsp chili powder
  • 2 Tbs minced fresh cilantro
  • 2 Tbs Greek yogurt or sour cream
  • juice of 1/2 lime
  • 1 1/2 cups shredded Monterey Jack or Pepperjack cheese
  • 14-15 small flour or corn tortillas
  • 1 Tbs canola oil
  • roasted tomatillo salsa, for serving
Preheat the oven to 425 degrees Fahrenheit.  Line a baking sheet with foil and spray lightly with cooking spray, or brush with oil.

Heat a large skillet over medium heat.  Add the chorizo, and cook, breaking up the large clumps, until it is starting to brown and the fat is beginning to render off, 3-4 minutes.  Add the onion and cook an additional 10 minutes, or until the chorizo is cooked through and the onions are soft.  Stir in the garlic and cook 1-2 minutes, then remove the pan from heat.  Set aside.

Meanwhile, in a large bowl, stir together the pumpkin, salt, cumin, chili powder, Greek yogurt, shredded cheese, cilantro, and lime juice.  Fold in the chorizo-onion mixture and stir until incorporated.

Stack the tortillas on a plate, cover with a damp paper towel, and microwave for 30 second intervals, until they are warm and pliable.  Top each tortilla with 3 tablespoons of the filling, roll tightly, and place seam side-down on the prepared baking sheet.  Brush each taquito with oil, and sprinkle lightly with salt.

Bake 15 to 20 minutes, or until the taquitos are golden-brown and crispy.  Cool slightly, then serve with roasted tomatillo salsa.


Wednesday, June 27, 2012

Cherry & Goat Cheese Crostini


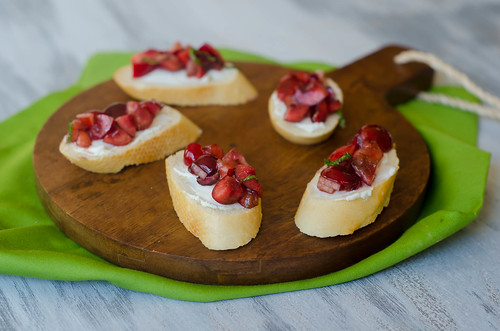
I look forward to cherry season all year long.  Like any good food blogger, I save countless recipes that I can't wait to try.  And without fail, the first few pounds of cherries that we buy go straight from the bag into our mouths.  Once I get that out of my system, I start churning out recipes.  Like this crostini.

When we had our best friends over for dinner a few weeks ago, for some reason I was really struggling with what to serve for an appetizer.  I wanted to do some sort of bruschetta or crostini, but nothing was coming to mind, so I just started browsing my favorite food blogs.  Of course Annie had the answer - cherry and goat cheese crostini!

Since I was throwing this together at the last minute, I didn't have time to go to the store.  So I just improvised and hoped for the best.  I assembled what I thought to be way more than we'd eat, but they were all gone pretty quickly.  This crostini is super fast and easy, and I'll definitely be enjoying it all summer long.

Fresh Cherry and Goat Cheese Crostini
inspired by Fine Cooking, via Annie's Eats

  • 1 cup pitted and chopped fresh cherries
  • 1 shallot, finely diced
  • 2 Tbs chopped fresh mint
  • 1 Tbs chopped fresh basil
  • splash of balsamic vinegar
  • splash of olive oil
  • salt to taste
  • 4 oz. fresh goat cheese, at room temperature
  • about 18 1/2-inch thick baguette slices, lightly toasted
In a medium bowl, mix together the cherries, shallot, mint, basil, balsamic vinegar, and olive oil.  Taste and season with salt as needed.

Spread a thin layer of goat cheese on each piece of bread, then top with the cherry mixture.  Serve immediately.


Monday, May 7, 2012

Grilled Halloumi with Grape Relish


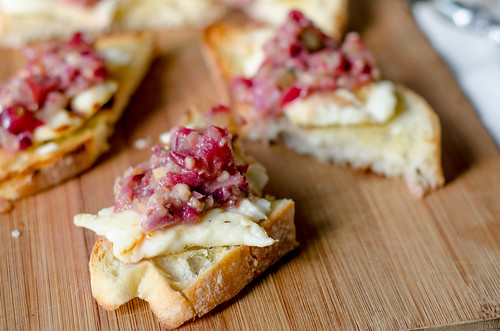
When I was a young single girl living in the city, my girlfriends and I used to go to dinner at a Greek restaurant called Taverna Plaka.  Whether or not it was authentic, I have no idea.... but I'm leaning towards not.  It was a really fun place though - good drinks and food, a fun atmosphere, and belly dancers.  We'd have dinner, then hit up some of our favorite bars to find cute boys.   My favorite thing to order (along with a few fruity martinis) was Halloumi cheese flambeed in ouzo.  They brought it to the table and set it on fire, which always caused a spectacle. Then once the fire goes out, you're left with gooey, rich, and ridiculously decadent cheese.

So let's call that the "bad boy" cheese - a little dangerous, soaked in liquor, and not at all good for you.  Pretty much what I chased back in those days.  And if that's the case, then this grilled halloumi would totally be husband material.  It's grilled, not soaked in liquor - much safer, right?  And it's topped with a sweet relish of grilled grapes, toasted walnuts, and fragrant rosemary.  Much better for you in the long run.  This is my "Joey" cheese.  And I love it.

The grape relish plays just wonderfully off of the grilled halloumi and the slightly garlicky bread.  If you're not familiar with halloumi, it is a mild and slightly salty cheese that doesn't melt like most cheeses.  When grilled, it gets softer and creamy, but still holds it's shape.  This was a nice romantic dinner that we enjoyed together after the kids were in bed.  On the patio, with a refreshing rose'.  It's a far cry from my single girl days, and I'm totally okay with that.


Grilled Halloumi with Rosemary-Grape Relish & Garlic Bread
adapted from Fine Cooking, May 2011

  • 1/2 medium red onion, cut into 2-3 thick slices 
  • extra-virgin olive oil 
  • Kosher salt and freshly ground black pepper 
  • 12 oz. halloumi cheese, cut into 1/2-inch slabs 
  • 1 large clove garlic, minced 
  • 1  loaf ciabatta, cut into 1/2-inch-thick slices 
  • 1/2 cup walnuts 
  • 1 tsp. minced fresh rosemary 
  • 1 bunch seedless black or red grapes (about 1 lb) 
  • 2 to 3 tsp. balsamic vinegar 
Prepare a high gas or charcoal grill fire.

Drizzle the onion slices with 2 tsp. of the oil and lightly season them with salt and pepper. In a small bowl, mix 2 Tbs. of oil, the garlic, and a pinch each of salt and pepper; brush the mixture evenly over one side of the bread slices.  Drizzle the grapes with olive oil.

Meanwhile, toast the walnuts in a small skillet over medium heat, stirring frequently, until golden-brown, 4 to 5 minutes. 
Transfer the walnuts to the bowl of a food processor and add the rosemary.  Pulse a few times, until the walnuts are coarsely chopped.

Slice the halloumi into 1/2-inch thick slabs and rub both sides of each piece with olive oil. 

Put the onion slices and bunch of grapes on the grill grate. Cover and grill, turning once, until the grapes are bursting and the onions are grill marked, about 10 minutes.   Coarsely chop the onion and add it to the food processor.  Using tongs or your hands, pull the grapes off of the stems and transfer to the food processor.  Add a pinch of salt and the balsamic vinegar, and pulse a few times.

Clean and oil the grill grate. Put the bread and cheese on the grate and grill uncovered, turning once, until marked on both sides, 4 to 5 minutes.

Divide the cheese, bread, and relish among 4 plates and serve immediately.


Sunday, April 29, 2012

Bacon-Chipotle Guacamole


Without a doubt, guacamole is one of my favorite snacks (um, meals).  Just a good, classic, guacamole:  avocados, garlic, cilantro, jalapeño, and lots and lots of lime juice.  So it's hard to stray from that classic version, but if anything will make me jump ship it's this.  I have two words for you  bacon.  chipotle.  Yes, indeed.

This guacamole is one that people who "don't even like guacamole" will inhale.  We brought this to a neighborhood block party, and that is what I heard over and over again.  "I don't even like guacamole or avocados, but that stuff is GOOD!"

The bacon gives the guacamole a fun crunch, while also of course adding some of the best flavor on earth.  The chipotle's smokiness plays really well off of that of the bacon, while also providing some heat.  It truly is the perfect combination.

Guacamole is a must at any respectable Cinco de Mayo party, so I highly recommend you gussy up your usual version and make this.  I promise you it will be well-received.

Bacon-Chipotle Guacamole
barely adapted from Fiesta at Rick's, by Rick Bayless
makes about 3 cups

  • 4 strips of bacon, preferably thick-cut, applewood-smoked bacon
  • 3 ripe avocados (about 1 1/4 lbs)
  • 1/3 cup finely chopped white onion
  • 3 canned chipotles en adobo - seeds removed optional - finely minced
  • 1 tomato, cored, seeded, and finely chopped
  • 1/4 cup chopped cilantro
  • 1 clove garlic, minced
  • juice of 1 lime
  • kosher salt to taste
Chop the bacon into 1/2-inch pieces and cook in a large skillet until browned and crispy.  Remove to a paper towel-lined plate to drain.

Meanwhile, cut each avocado in half, remove the seed, and scrape out the flesh from the peel.  Add it to a medium mixing bowl and mash with a fork into a coarse puree.  

Add the onion to a small strainer and briefly rinse under cold water (this helps tame the "bite" of raw onion).  Shake off the excess water and transfer to the bowl with the avocados.  Add the bacon, chipotle chiles, tomato, cilantro, garlic, and lime juice.  Mix well, then season to taste with salt. 

Serve immediately.


Friday, April 13, 2012

Balsamic Strawberry & Goat Cheese Flatbread


I've been pretty obsessed with strawberries this spring, but I've been even more obsessed with the strawberry-balsamic combo.  It all started with this strawberry-caprese salad, and it's continued into this flatbread and even a dessert (recipe coming soon!).  So given this recent love, I was absolutely ecstatic to find a strawberry-balsamic vinegar at a local oil & vinegar store (yes, a whole store that sells all sorts of oils and vinegars.  Yes, I'm in love).

One Saturday afternoon, we decided to have a casual snacky dinner - we had some cheeses leftover from various gatherings and recipes, some hummus, and some other little things that needed to be used up.  So we just made that dinner.  However, I was kind of in the mood to cook, and was itching to use my new vinegar, so I also whipped up this flatbread.  We called some neighbors, and before we knew it, we were all outside watching the kids play, drinking a glass of wine, and stuffing our faces.

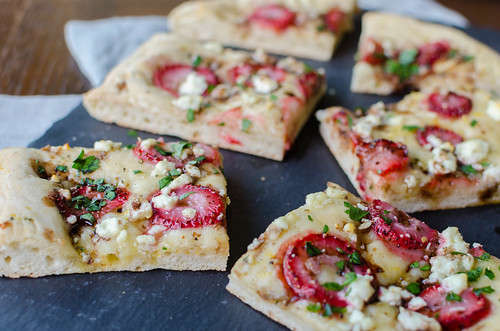
It's a basic pizza dough with a little lemon zest kneaded in, then drizzled with olive oil, some lemon juice, thinly sliced strawberries, crumbles of goat cheese, baked, and then finished with a sprinkling of basil and a drizzle of balsamic vinegar.  Heaven.  The strawberries get so flavorful when roasted in the oven, and then the addition of lemon zest brightens up the flavors.

This flatbread was a great addition to our little buffet, but I also think it would make a great appetizer for a dinner party, served as lunch with a side salad, or as part of a brunch.  It's a little bit sweet, a little bit savory, and completely delicious.  Strawberries = love.


Balsamic Strawberry & Goat Cheese Flatbread
inspired by Joy the Baker

  • 1 lb of pizza dough
  • zest and juice of 1 lemon
  • olive oil, for drizzling
  • 1 cup thinly sliced strawberries
  • about 1/2 cup crumbled goat cheese
  • good balsamic vinegar
  • 1-2 basil leaves, minced
Preheat the oven to 375 degrees.

On a well-floured surface, sprinkle about half the lemon zest over the pizza dough.  Knead it into the dough until well-incorporated, and then press the dough into a rectangle that measures about 12x9 inches (it doesn't have to be exact).  Drizzle with olive oil and about 1 tablespoon of the lemon juice.

Sprinkle the strawberries over the dough, followed by the goat cheese, and then drizzle lightly with the vinegar.

Bake 25-30 minutes, or until the dough is cooked through and just turning golden.  Drizzle with a little more balsamic vinegar and sprinkle with basil.  Cut into squares and serve warm or at room temperature.


Friday, February 17, 2012

Crab and Brie Stuffed Mushrooms for Courtney's Virtual Shower


I don't even really know how to start this post about my good friend Courtney.  I'm afraid that no matter what I say, it will sound trite and won't convey how much I adore her.  She is truly one of the sweetest, most genuine, adorable, and all-around-awesome girls I've ever met.  When you have really great friends like Courtney, the distance doesn't really matter so much.  We talk almost every day via email and/or text, so it feels like she's right here in Atlanta sometimes.  But it's extra awesome when you actually get to hang out in real life.  And lucky me, I've gotten to hang out with her three times!


We were roomies at Blog Her Food in Atlanta last year, and of course we stayed up way too late all weekend talking and laughing.  Then, I was able to randomly meet her for lunch one day as she was passing through Atlanta with her husband and adorable dog.  And finally, last weekend, a few of our blogging friends turned real life friends surprised her with a visit to Richmond!  It was a virtual-shower turned real-life-shower, and was awesome to say the least. I'll be posting more about our adventures next week.


Courtney is expecting a baby girl in just a few weeks, so today I am excited to host a virtual shower for my sweet friend.  Below are all the dishes that her friends and blogging-buddies contributed, so be sure to visit their blogs for the recipes.  And stop by Cook Like a Champion to congratulate Courtney and Eric on their impending bundle of joy!  They are going to make the best parents, and I can't wait for them to welcome their little girl into the world!

Amy of Sing for Your Supper has a brand new baby girl herself, so she knows exactly what Courtney has to look forward to!  She mixed up a Virgin Peach Sangria to enjoy.  This looks so fruity and refreshing, and perfect for a baby shower.  I loved drinking mocktails when I was pregnant, and I still do.  I can't wait to try this!


Nikki of Pennies on a Platter made these adorable Cream Puffs with Strawberry-Mascarpone Filling.  I love this play on strawberry shortcake, and I never would have thought to serve cream puffs this way.  So cute!


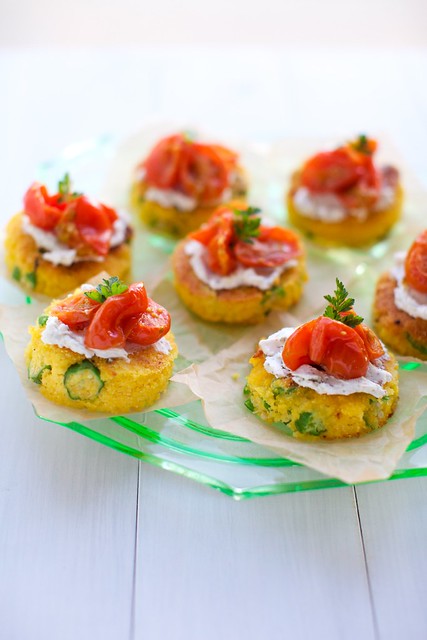
Annie from Annie's Eats knew that the way to Courtney's heart is through southern food, so she made a sophisticated take on fried okra:  Okra-Cornmeal Cakes with Chevre and Roasted Tomatoes.  I absolutely love everything about this dish, and I definitely plan on making it myself soon!


Cate from Cate's World Kitchen made these pretty Pink Lemonade Cupcakes.  I know the mom-to-be loves lemonade, so what better way to serve it than in a cupcake?  Am I right?

Karin of This Wife Bakes is the cake queen, and she baked up this Blood Orange Marmalade Cake  I have never heard of blood orange marmalade, but I'm pretty sure I need it in my life stat.


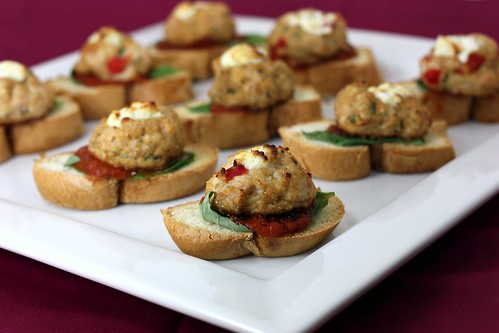
Elly of Elly Says Opa made these absolutely awesome looking Goat Cheese-Stuffed Chicken Meatball Crostini.  Seriously, how amazing does that sound?? 


Our friend Branny from Branny Boils Over made Nutella Swirl Blondies.  Courtney, Branny, and I were out for breakfast at Blog Her Food in May when Branny tasted Nutella for the first time.  Obviously that is a milestone worth remembering in one's life, so these blondies are a perfect contribution.  And how cute are they?  I love individual-sized desserts!


Tara of Smells Like Home went all out with these Sweet and Salty Cupcakes.  I love the combination, and I'm pretty sure I could eat my weight in these.  I also happen to know that Courtney is a big fan of salted caramel, so these are right up her alley.  Great job, Tara!!


Shannon of The Curvy Carrot contributed these gorgeous Mushroom and Mascarpone Tarts  I absolutely adore mascarpone cheese, and anything with mushrooms is always going to be a winner.  Love them!


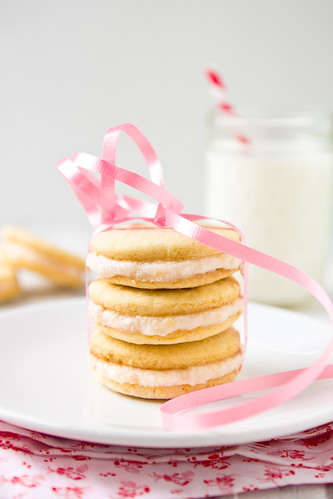
The lovely Shawnda from Confections of a Foodie Bride made these sweet little Pink Grapefruit Cookies.  They are perfect for a baby shower, especially for a baby girl with their pretty pink filling!


These Strawberry Shortcake Sliders from Ryan of Ryan Bakes are so adorable!  Miniature food is always more fun, isn't it?!  How cute!


 Amy from The Gastronome Tart put together these Savory Apple Galettes with a side salad.  I love savory baking, and these look insanely delicious! 


Kelsey from Apple a Day baked up these gorgeous Raspberry White Chocolate Tartlets.  White chocolate and raspberry go so well together, and I know our sweet mom-to-be would absolutely love these pretty little desserts!

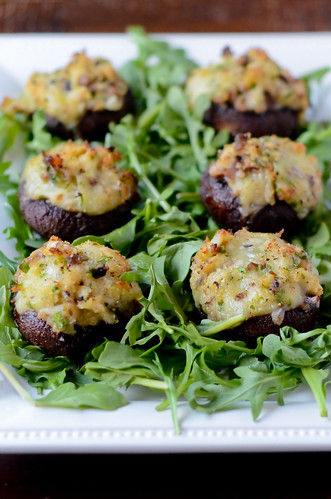
And finally, for my contribution.  When we visiting Courtney last weekend and were walking around Whole Foods, she let it slip that she'd never tried Brie before.  We promptly threw two wheels in her cart, and told her she needed to try it ASAP.  So I knew I wanted to incorporate the delicious and creamy cheese into my dish for her virtual shower.  These crab and brie stuffed musrooms are pretty much the bomb.  Stuffed mushrooms of any sort are always a winner in my book, but stuff them with sweet crab and creamy brie, and you pretty much have the best thing ever.  I know that Courtney would love these, and my only regret is that we can't enjoy them together.  I miss you, friend!  I can't wait to see you again, and I really can't wait to meet that sweet baby girl!!


Crab and Brie Stuffed Mushrooms
Pink Parsley Original
  • 12-16 mushrooms
  • 3 Tbs olive oil, divided
  • kosher salt and freshly ground black pepper
  • 1/4 cup minced shallot
  • 1/4 cup mascarpone cheese (cream cheese can be substituted)
  • 2 Tbs minced fresh parsley
  • 2 tsp lemon zest
  • 1/4 cup freshly grated Parmesan cheese
  • 1 cup cubed brie (brie, rind removed, cut into 1/4-inch cubes)
  • 1/4 cup panko bread crumbs
  • 1 cup lump crabmeat, picked through for shells
  • juice of 1/2 lemon
Preheat the oven to 350 degrees.

Remove the stems from the mushrooms, chop them finely, and set aside.

In a medium bowl, toss the mushroom caps with 2 tablespoons of oil, salt, and pepper.  Arrange in a single layer on a lightly greased baking sheet, open-side up.  Set the bowl aside to use for the filling.

In a medium skillet, heat the remaining tablespoon of oil over medium heat.  Saute the shallot and reserved mushroom stems until softened, 3-4 minutes.  Remove from heat, stir in the mascarpone cheese, and transfer the mixture to the bowl.

Mix in the parsley, lemon zest, Parmesan, brie, and panko.  Lightly fold in the crabmeat.  Season with salt and pepper to taste.

Spoon the filling into the mushroom caps, and bake 15-20 minutes, or until the mushrooms are browned and the filling is hot and bubbly.  Remove from oven and squeeze the lemon juice over the mushrooms before serving.


Pin It


Tuesday, January 31, 2012

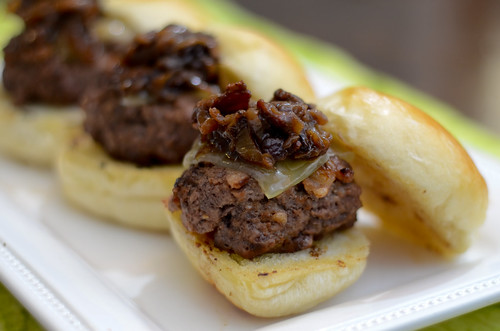
Bacon Sliders with Bacon-Balsamic-Onion Jam


Burgers are great, and I love them, but there is something about sliders that is just so goshdarn cute!  I've actually made these burgers three times, and I love them the most as sliders.  They are very rich and pretty heavy, so I think the smaller portion is the way to go.  Incidentally, they would also make great finger food for the Super Bowl.  I'm not a huge professional football fan, but I do love eating snack food, so I definitely always look forward to Super Bowl parties!

So what makes these burgers so great?  You start with a pretty simple burger - meat, a few seasonings, and the kicker:  chopped bacon.  Thanks to the fat content of the bacon, these won't really dry out, so you don't have to worry about overcooking them.  However, if you make these as sliders, you should be sure to chop the bacon pretty small so that it cooks fully.  No one likes pieces of half-cooked bacon, right?  The bacon-balsamic-onion jam is the best part of these burgers though.  I don't think I even need to elaborate on that anymore.  Bacon.  Balsamic.  Caramelized onions.  The end.  FYI it is also an insanely wonderful addition to grilled cheese should you have any left over :)  I finished these sliders off with some Gruyere cheese, but I think blue cheese would be really great as well.  Or even a super sharp cheddar. 

If you are looking for more Super Bowl food ideas, check out the Featured Recipes Page.  I've updated it with some great options that will all be well-received at any party!

Bacon Sliders with Bacon-Balsamic-Onion Jam
adapted from Fine Cooking, July 2011, via Cook Like a Champion and Annie's Eats

For the jam:
  • 4 thick slices applewood-smoked bacon, cut crosswise into 1/2-inch strips
  • 1 large red onion, halved and thinly sliced
  • Kosher salt and freshly ground black pepper
  • 1 tsp sugar
  • 1/3 cup balsamic vinegar 
  • 1/2 teaspoon Dijon mustard
  • 1/3 cup water


For the burgers:
  • 2 thick slices applewood-smoked bacon
  • 1-1/2 pounds ground beef (85% lean)
  • 1 teaspoon Worcestershire sauce
  • 1 teaspoon Kosher salt
  • 1/2 teaspoon freshly ground black pepper
  • 1 tsp Dijon mustard
  • 1 Tbs balsamic vinegar
  • 7-8 slider buns or dinner rolls, split
  • Sliced Gruyere cheese, optional

Cook the bacon in a large skillet set over medium heat until lightly browned, about 8 minutes. Use a slotted spoon to transfer to paper towels to drain. Discard all but about 2 tablespoons of oil from the skillet.

Add the onion to the skillet, season with salt and pepper to taste, add the sugar, cover, and cook for 2 minutes. Uncover and add a splash of water, then scrape up any browned bits from the bottom of the skillet. Cover and continue cooking, stirring occasionally, until the onions are soft, about 10 minutes. Stir in the vinegar, mustard and water. Return the bacon to the skillet and simmer until the liquid has thickened and most of it has been absorbed, 2-4 minutes. Transfer the jam to a small bowl, add another splash of balsamic vinegar, and set aside.  The jam can be left at room temperature until ready to serve, or refrigerated for up to 2 days.

To make the burgers, mince the bacon. In a large bowl, combine the beef, bacon, Worcestershire sauce, salt, pepper, mustard, and balsamic vinegar.  Gently mix into the ground beef, using your hands or a fork.  Divide the ground beef mixture evenly into 7-8 portions (depending on the size of your buns), and form each portion into a patty that will fit onto the slider bun. 

Heat a large (preferably nonstick or cast iron) skillet over medium-high heat and add the patties.  Cook 3-4 minutes on each side, or until they reach your desired degree of doneness (I personally like my burgers cooked to medium-well).  Top with slices of cheese for the last minute or two of cooking, or place under the broiler to melt.

Toast the buns, add the burger, and top with about 1 tablespoon of the jam.  Serve immediately.


Wednesday, December 21, 2011

Bacon-Blue Cheese Dip


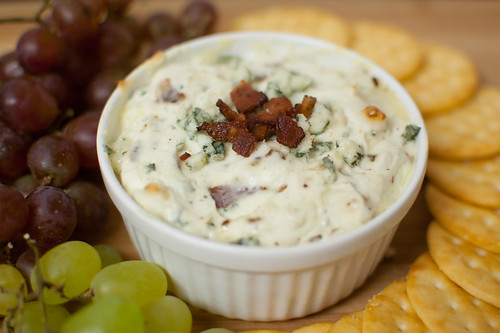
Two ingredients that immediately make me want to make a recipe.  Bacon.  Blue Cheese.  Combine the two?  It is sure to be a hit.  This dip was a wonderful snack (err ... dinner) for us the night we decorated our house for Christmas.  Warm, cheesey, bacon-y... and it was equally good once it had cooled to room temperature.  It also comes together quite quickly, and can be prepped in advance.  So when it's time to serve, just pop it in the oven for a few minutes, and you're good to go!
If you are still looking for a quick and easy appetizer for your Christmas dinner, or if you are a planner and you're already putting together a menu for New Year's Eve, this is a great choice. 


Bacon-Blue Cheese Dip
adapted from Southern Living, December 2004
  • 7 slices bacon, chopped (preferably thick-cut, applewood smoked bacon)
  • 2 cloves garlic, minced
  • 2 (8-oz) packages cream cheese, softened (reduced fat is fine)
  • 1/3 cup half-and-half, heavy cream, or Greek yogurt
  • 4 oz crumbled blue cheese
  • 2 Tbs chopped fresh chives
  • salt and pepper to taste
  • grapes, for serving
  • crackers, for serving
Preheat the oven to 350 degrees.

Cook the bacon in a skillet until browned and crispy.  Remove with a slotted spoon and drain on a paper towel-lined plate.  Pour off all but about 1 tsp fat, and add the garlic.  Saute until fragrant, about 1 minute.

Beat cream cheese in a large bowl with an electric mixer until smooth.  Add the bacon (reserve a small amount for garnish), garlic, half-and-half, blue cheese, and chives.  Stir to combine and season with salt and pepper to taste.  Spoon into a lightly greased serving dish, and bake 15 to 20 minutes, or until golden and bubbly.  Garnish with reserved bacon and allow to cool slightly before serving.  Serve with grapes and crackers.


Thursday, October 6, 2011

Buttery Soft Pretzels


It's funny how our lives and priorities change over the course of just a few years.  Five years ago, it took a wedding or a funeral to cause us to miss a Georgia Tech home football game.  And it had to be a close friend or family member at that (kidding, kind of).  This year, we've only gone to one game.  We spend our Saturday mornings at Caroline's soccer games and now cuddling with our new baby.  And while I do miss seeing our friends and tailgating, I love our family time even more.

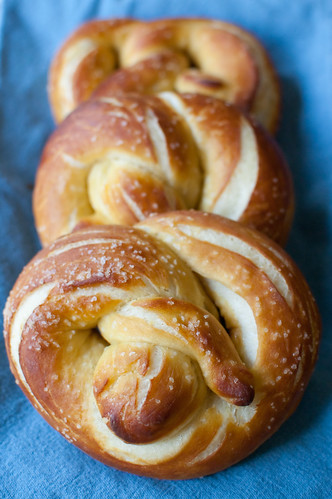
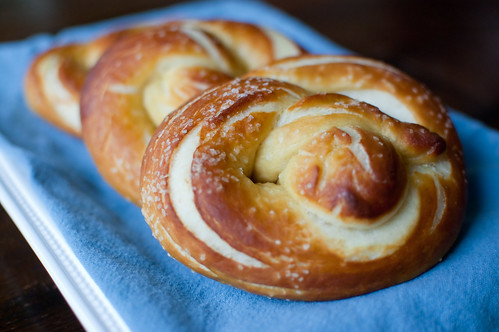
Now we watch the games at home in the comfort of our living room, during Caroline's naptime.  And I like to make some sort of fun snack to munch on while we watch.  While I made ham and cheese stuffed pretzel bites a few years ago, I had not yet tackled classic soft pretzels.  They were actually pretty easy and low maintenance.  The only "tricky" part was shaping and boiling, but even those steps were pretty easy once you got the hang of it. 

These are pretty big pretzels, but I think you could easily make them smaller.  Which I will probably do when I make these for a tailgate or party.  While huge mall food court pretzels are great, when you have other food in your spread it makes more sense to serve smaller portions.

I followed the recipe as written, but instead of brushing the pretzels with egg wash, I brushed them with butter - both before and after baking.  Partly because of Caroline's egg allergy, but mostly because I love the buttery pretzels at the mall.  Annie of Annie's Eats has great step-by-step pictures of the shaping process, and she also did some testing on making these ahead and freezing.  So if you are interested in that, check out her post.


Soft Pretzels
adapted from Alton Brown, via Annie's Eats
makes 8 large pretzels

For the dough:

  • 1½ cups warm water (110-115° F)
  • 1 Tbs sugar
  • 2 tsp kosher salt
  • 2¼ tsp instant yeast
  • 22 oz all-purpose flour (about 4½ cups)
  • 4 Tbs unsalted butter, melted
  • Vegetable oil
For finishing:
  • cooking spray
  • 10 cups water
  • 2/3 cup baking soda
  • 4 Tbs unsalted butter, melted
  • kosher (or pretzel) salt

To make the dough, combine the water, sugar, salt and yeast in the bowl of a stand mixer fitted with the paddle attachment.  Mix on low speed until the yeast is dissolved.  Add the flour and melted butter and mix until the dough just comes together.  Switch to the dough hook and knead on medium speed until the dough is smooth and clears the sides of the bowl, about 5 minutes.  Transfer the dough to a bowl lightly greased with vegetable oil, turning once to coat.  Cover with plastic wrap and let rise in a warm place, about 50-55 minutes or until doubled in bulk.

Preheat the oven to 450 degrees.  Line two baking sheets with parchment paper and spray lightly with cooking spray.  Bring the water and baking soda to a boil in a large saucepan or stockpot.

Meanwhile, divide the dough into 8 equal pieces (a kitchen scale makes this very easy).  Working one piece at a time, roll the dough into a 24-inch long rope.  Make a U-shape with the dough, and holding the ends of the rope, cross them over each other and onto the bottom of the U-shape to form a pretzel.  Transfer the pretzel to the baking sheet and repeat with the remaining dough.

Working 1-2 pretzels at a time, place into the boiling water and boil for 30 seconds, flipping once.  Use a slotted spoon or skimmer to remove the pretzels from the water and transfer back to the baking sheet.  Repeat with all the pretzels.

Using 2 tablespoons of the melted butter, brush the pretzels with the butter.  Sprinkle each pretzel with salt, and bake until they are a dark golden-brown, about 12-14 minutes. Brush with the remaining butter, transfer to a cooling rack for at least 5 minutes, and serve.


BLOG DESIGN BY: SHERBET BLOSSOM DESIGNS