Showing posts with label snack. Show all posts

Wednesday, October 24, 2012

Very Berry Applesauce


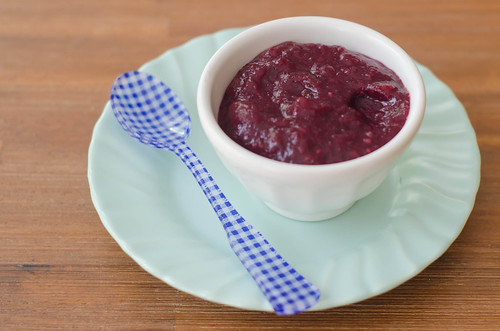
People often ask me for "kid friendly" dinner and snack ideas.  While I hate to be unhelpful, the truth is, we don't really differentiate between kid meals and adult meals.  For the most part, Caroline and Smith eat what we eat.  I'm glad that so far we've managed to avoid the curse of the picky eater, and hopefully we'll continue to be lucky in that regard with all of our kids.  However, some foods are definitely really big hits with Caroline and Smith.  This berry applesauce was one such snack.  I threw this together on a whim the night I made the roasted veggie-stuffed potatoes, and Caroline and Smith both had seconds of the applesauce.

Since berries are no longer in season (sad face), I used a bag of frozen mixed berries.  I believe it was raspberries, blueberries, and blackberries.  And since the berries tend to be pretty sweet on their own, I used tart Granny Smith apples for the applesauce.  It was super simple to throw together, and with no added sweeteners, it's a super healthy snack or dessert option for little ones.  I think Caroline, Smith, and I had a bowl of this for our afternoon snacks every single day until it ran out.  Plus, it's super cute when Caroline asks for "Vewy Bewwy Applesauce."


But the fun doesn't have to stop with berry applesauce.  In the past, I have used a wide variety of fruits and even veggies as add-ins.  Butternut squash, sweet potatoes, carrots, pears, pumpkin puree, and peaches have all been big hits in our house.  Feel free to play around with any of the above fruits, or get crazy and make-up your own combination.  Brussels Sprouts Applesauce, anyone? ;-)

Very Berry Applesauce
a Pink Parsley Original

We like a slightly chunky texture because it makes it easier for caroline to feed herself without drips.  If you prefer or need a thinner texture, then use a food processor or blender, then strain it through a colander.  This would also be a good method if the seeds from the berries bother you.

  • 5-6 medium-large apples, peeled, cored, and roughly chopped (I used Granny Smith)
  • 1 (16-oz) bag frozen mixed berries, thawed, with juices reserved
  • 1 tsp ground cinnamon
  • pinch of salt
  • splash (maybe 1/4 cup) apple cider or water
Combine all the ingredients in a large saucepan set over medium heat.  Cook, stirring occasionally, until he apples are softened, about 15-20 minutes.  Use an immersion blender to puree the sauce, leaving a few chunks of the apples and berries.

If the applesauce seems too thin, bring to a boil and allow to cook until it's thickened to your liking.  Allow to cool to room temperature before serving.  Store in an airtight container in the refrigerator, or portion it into freezer bags and freeze.


Sunday, April 29, 2012

Bacon-Chipotle Guacamole


Without a doubt, guacamole is one of my favorite snacks (um, meals).  Just a good, classic, guacamole:  avocados, garlic, cilantro, jalapeƱo, and lots and lots of lime juice.  So it's hard to stray from that classic version, but if anything will make me jump ship it's this.  I have two words for you  bacon.  chipotle.  Yes, indeed.

This guacamole is one that people who "don't even like guacamole" will inhale.  We brought this to a neighborhood block party, and that is what I heard over and over again.  "I don't even like guacamole or avocados, but that stuff is GOOD!"

The bacon gives the guacamole a fun crunch, while also of course adding some of the best flavor on earth.  The chipotle's smokiness plays really well off of that of the bacon, while also providing some heat.  It truly is the perfect combination.

Guacamole is a must at any respectable Cinco de Mayo party, so I highly recommend you gussy up your usual version and make this.  I promise you it will be well-received.

Bacon-Chipotle Guacamole
barely adapted from Fiesta at Rick's, by Rick Bayless
makes about 3 cups

  • 4 strips of bacon, preferably thick-cut, applewood-smoked bacon
  • 3 ripe avocados (about 1 1/4 lbs)
  • 1/3 cup finely chopped white onion
  • 3 canned chipotles en adobo - seeds removed optional - finely minced
  • 1 tomato, cored, seeded, and finely chopped
  • 1/4 cup chopped cilantro
  • 1 clove garlic, minced
  • juice of 1 lime
  • kosher salt to taste
Chop the bacon into 1/2-inch pieces and cook in a large skillet until browned and crispy.  Remove to a paper towel-lined plate to drain.

Meanwhile, cut each avocado in half, remove the seed, and scrape out the flesh from the peel.  Add it to a medium mixing bowl and mash with a fork into a coarse puree.  

Add the onion to a small strainer and briefly rinse under cold water (this helps tame the "bite" of raw onion).  Shake off the excess water and transfer to the bowl with the avocados.  Add the bacon, chipotle chiles, tomato, cilantro, garlic, and lime juice.  Mix well, then season to taste with salt. 

Serve immediately.


Tuesday, October 25, 2011

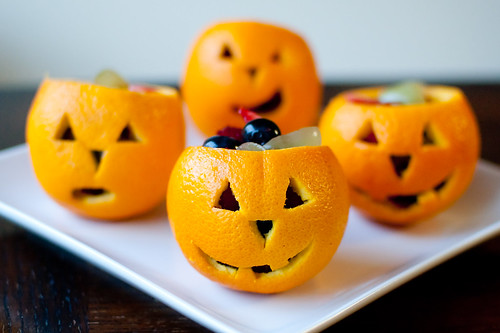
Snack-o-Lantern Fruit Cups


Even though Halloween's main focus is candy candy candy, when it comes to snacks for kids, I like to keep it (fairly) healthy when I can.  Rest assured they will eat plenty of the junky stuff on Halloween night, so for a snack or party, why not offer a healthier option?  I was in charge of sending in snacks for Caroline's preschool class this week, and since they are talking about pumpkins all week, I wanted to tie it in.  I could think of tons of great ideas for pumpkin themed desserts and not-so-good-for-you snacks, but I was having trouble coming up with something healthy.

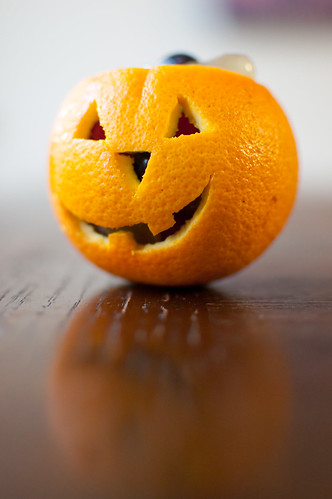
These cute little snack-o-lanterns definitely fit the bill though.  It is simply an orange that has been hollowed out and filled with fruit.  Super adorable, and actually not that difficult.  The sky's the limit when it comes to the faces.  We thought it'd be fun to do a different face on each one.  And they really are nothing more than a super cute vessel to hold fruit salad.  You can definitely fill them with any fruit you want - I used a mix of strawberries, blueberries, and grapes, since I knew those fruits are well-liked by toddlers. 

I was kind of dreading making these because I thought it would be incredibly tedious and take forever.  But with Joey's help, I think we were done and the kitchen was cleaned in under an hour.  I scooped and cleaned out the oranges, and left the creativity to Joey - he had a lot of fun coming up with different faces.  That day I had actually bought a pumpkin carving kit, so I used the small serrated knife to cut the faces.  It worked really well, though I think you could use a paring knife or exacto knife as well.

As far as scooping out the insides, I first used a knife to cut out a big cone from the orange, and then used my fingers to pull out the rest of the fruit.  I found that if you could get your fingers into the pith, it would pull up the segments much easier and cleaner. And if you don't get every little piece of orange, its okay.  Just do the best you can.

When I showed them to Caroline, she was so excited.  After I picked her up from school that day and asked her if she liked the snack, she said she did, but "We don't eat the pumpkin, just the fruit inside.  Nooooo"  It makes me wonder who tried to eat the orange peel :-)  So I think all of her friends at school enjoyed the snack, and I'm planning to make these again for Halloween night.  We are having dinner with a few neighbors and their kids, so these would be a fun and nutritious snack to eat before gorging themselves on candy ;-)


Snack-o-Lantern Fruit Cups
adapted from Disney Family Fun, via Pennies on a Platter

Slice the top off of each orange.  Discard it or save it for serving with the cups. Use a sharp knife to cut a cone out of the orange, then use a spoon and/or your fingers to scrape out the remaining orange segments.  Rinse the outside of each orange under cold water, then set upside down on a clean kitchen towel.

Cut out the eyes, nose, and mouth as you like.

Cover and refrigerate until ready to use.  Fill with desired fruit up to 2-3 hours before serving.


Thursday, October 6, 2011

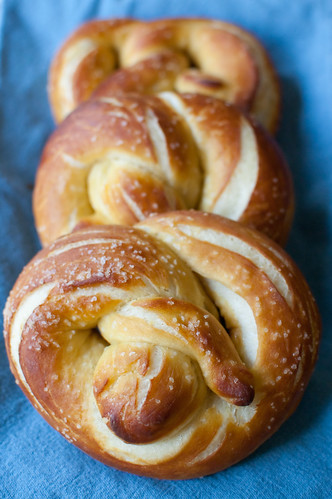
Buttery Soft Pretzels


It's funny how our lives and priorities change over the course of just a few years.  Five years ago, it took a wedding or a funeral to cause us to miss a Georgia Tech home football game.  And it had to be a close friend or family member at that (kidding, kind of).  This year, we've only gone to one game.  We spend our Saturday mornings at Caroline's soccer games and now cuddling with our new baby.  And while I do miss seeing our friends and tailgating, I love our family time even more.

Now we watch the games at home in the comfort of our living room, during Caroline's naptime.  And I like to make some sort of fun snack to munch on while we watch.  While I made ham and cheese stuffed pretzel bites a few years ago, I had not yet tackled classic soft pretzels.  They were actually pretty easy and low maintenance.  The only "tricky" part was shaping and boiling, but even those steps were pretty easy once you got the hang of it. 

These are pretty big pretzels, but I think you could easily make them smaller.  Which I will probably do when I make these for a tailgate or party.  While huge mall food court pretzels are great, when you have other food in your spread it makes more sense to serve smaller portions.

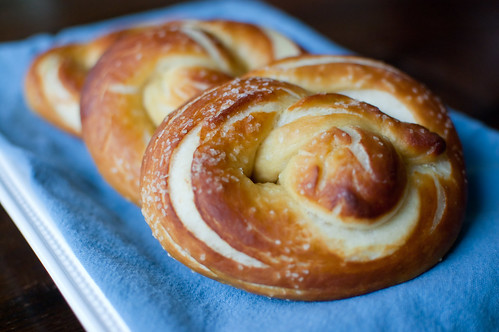
I followed the recipe as written, but instead of brushing the pretzels with egg wash, I brushed them with butter - both before and after baking.  Partly because of Caroline's egg allergy, but mostly because I love the buttery pretzels at the mall.  Annie of Annie's Eats has great step-by-step pictures of the shaping process, and she also did some testing on making these ahead and freezing.  So if you are interested in that, check out her post.


Soft Pretzels
adapted from Alton Brown, via Annie's Eats
makes 8 large pretzels

For the dough:

  • 1½ cups warm water (110-115° F)
  • 1 Tbs sugar
  • 2 tsp kosher salt
  • 2¼ tsp instant yeast
  • 22 oz all-purpose flour (about 4½ cups)
  • 4 Tbs unsalted butter, melted
  • Vegetable oil
For finishing:
  • cooking spray
  • 10 cups water
  • 2/3 cup baking soda
  • 4 Tbs unsalted butter, melted
  • kosher (or pretzel) salt

To make the dough, combine the water, sugar, salt and yeast in the bowl of a stand mixer fitted with the paddle attachment.  Mix on low speed until the yeast is dissolved.  Add the flour and melted butter and mix until the dough just comes together.  Switch to the dough hook and knead on medium speed until the dough is smooth and clears the sides of the bowl, about 5 minutes.  Transfer the dough to a bowl lightly greased with vegetable oil, turning once to coat.  Cover with plastic wrap and let rise in a warm place, about 50-55 minutes or until doubled in bulk.

Preheat the oven to 450 degrees.  Line two baking sheets with parchment paper and spray lightly with cooking spray.  Bring the water and baking soda to a boil in a large saucepan or stockpot.

Meanwhile, divide the dough into 8 equal pieces (a kitchen scale makes this very easy).  Working one piece at a time, roll the dough into a 24-inch long rope.  Make a U-shape with the dough, and holding the ends of the rope, cross them over each other and onto the bottom of the U-shape to form a pretzel.  Transfer the pretzel to the baking sheet and repeat with the remaining dough.

Working 1-2 pretzels at a time, place into the boiling water and boil for 30 seconds, flipping once.  Use a slotted spoon or skimmer to remove the pretzels from the water and transfer back to the baking sheet.  Repeat with all the pretzels.

Using 2 tablespoons of the melted butter, brush the pretzels with the butter.  Sprinkle each pretzel with salt, and bake until they are a dark golden-brown, about 12-14 minutes. Brush with the remaining butter, transfer to a cooling rack for at least 5 minutes, and serve.


Wednesday, September 21, 2011

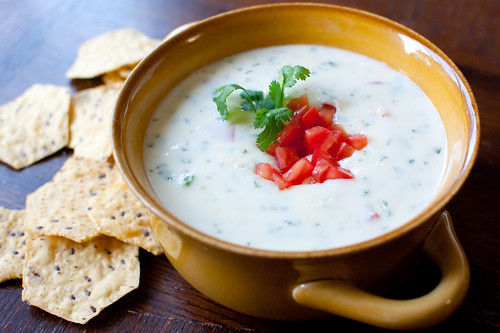
Restaurant Style Queso Blanco


I've pretty much been a giant goody-goody my entire life, though I did have one "rebellious" streak in high school.  Our dress code dictated that all shoes must have a strap across the back - so no flip flops, mules, etc.  Well all my cute shoes were backless, so sometimes I'd wear them anyway.  Most of my teachers didn't really enforce the rule, especially because I was a good student and never caused problems anyway, but one particular history teacher was a stickler.  So one day when my best friend Emilie and I both dared to defy the system and wear backless sandals, we were sent home to change. 

Since it was during this history teacher's class and we were in no hurry to get back to school after changing shoes, so we decided to have an early lunch out.  We went to our favorite Mexican restaurant and had chips, salsa, and queso.  Lunch of champions.  So that's pretty much the extent of my teenage rebellion.

Even now, anytime we go out for Mexican food, I like to order queso.  And I always wondered what exotic hard-to-find cheese they must use to achieve that perfect flavor and consistency.  It turns out that they use White American.  Incredibly exotic and hard to find, right?

One of the best things about queso is that you can change it up as much as you want according to your tastes and preferences.  And there are so many delicious uses for it (besides drinking it of course):  nachos, cheese fries, poured over tacos or burritos, served over a baked potato... the possibilities are endless.  And I have an especially delicious use for it to share in the next few days...

Make it as mild or as spicy as you'd like by adding extra jalapenos.  Or get really crazy and use a habanero instead.  Add extra cilantro and tomatoes if you want, make it more substantial with some crumbled chorizo... again, the possibilities are endless.

This makes a pretty good amount of dip, so you can either make less or save the extra for later snacking.  it reheats well in the microwave - I just add a little extra milk or water and stir it every 15 seconds or so until it's the right consistency and temperature. 

Just like it's restaurant counterpart, homemade queso dip is definitely worth skipping school for ;-)

Restaurant-Style Queso Dip
barely adapted from Confections of a Foodie Bride
  • 1 Tbs canola or vegetable oil
  • 1/4 cup minced white onion
  • 1-2 jalapenos, seeds and ribs removed, minced
  • 12 oz white American cheese (I ask the deli to just give it to me in a big block vs slicing it), shredded
  • 4 oz Monterrey Jack or Pepperjack cheese, shredded
  • 1/2-1 cup milk, half-and-half, or heavy cream
  • 1-2 roma tomatoes, seeds removed, diced
  • 2-3 Tbs chopped fresh cilantro
  • salt to taste
In a 12-inch skillet, heat the oil to medium heat and saute the onion and jalapenos until softened, 3-5 minutes. 

Reduce the heat to medium-low.  Adding a little cream and a handful of cheese or so at a time, stir constantly until the cheese is mostly melted.  Continue adding cheese and cream, stirring constantly, until all the cheese has melted.  Add extra milk or cream until you reach your desired consistency.  I actually add a little extra milk at this point to thin it out even more.  Since it thickens upon standing, I make it a little thinner than I'd like so that when it's time to eat, it is the perfect consistency.

Stir in the tomatoes and cilantro, and season with salt.  Serve immediately.


Thursday, September 1, 2011

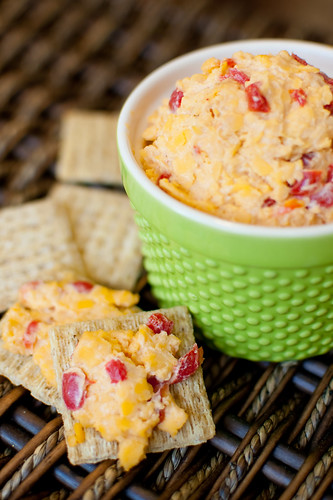
Back to Basics: Pimento Cheese


So often on my blog I post twists, variations, and "amped up" versions of classic dishes.  But recently I've been getting requests for my favorite recipes for things like sandwich bread, pizza dough, chocolate chip cookies, etc.  And while I do make these things quite often, for some reason I never feel compelled to post them.  I've always assumed that everyone else has their own "go-to" recipes for these things, so would they really care to see mine?  Well maybe not, but I've decided to share them with you anyway :-).  So I've started a new series called "Back to Basics," in which I'll be highlighting my favorite recipes for.... the basics.  Or what I consider to be basics for my kitchen in any case.

I realize that some people may think pimento cheese is a weird dish to start out highlighting for this series, but for me, it really is a basic recipe.  I have made this countless times, and it is my go-to appetizer to serve when we have friends over, go to potlucks, or just to keep in the fridge for when the craving strikes.  Oftentimes I've made a dish using pimento cheese, or highlighting it in a different way, so I thought I'd share my base recipe.  For those of you unfamiliar with this southern delicacy, pimento cheese is simply extra sharp cheddar mixed with pimentos (or roasted red peppers), just enough mayonnaise to hold it together, and a few seasonings.  It is most classically enjoyed on a sandwich or spread on crackers, but I've made it my life's mission to find as many other ways to serve it as well.

One of the many wonderful things about pimento cheese is that it's open to so many adaptations:
  • make it extra spicy by using half pepperjack cheese, and a roasted poblano pepper instead of pimentos
  • add crumbled bacon
  • substitute some of the cheddar for goat cheese
  • add some fresh herbs
  • add a spoonful of horseradish for a kick
  • add some chopped dill pickles or relish
  • shred an apple and add that to the mix for a sweet-savory combo
My version of pimento cheese doesn't really call for anything special, aside from the addition of Greek yogurt.  Because I'm not a huge fan of mayo, I like to cut the flavor with the yogurt, plus it makes it a tad bit healthier.  As I said, this is just my base recipe, so feel free to adjust the seasonings and spices to your taste. 


Pimento Cheese, My Way
Pink Parsley Original
  • 8oz. extra sharp cheddar, shredded
  • 4 oz. diced pimientos
  • 2 Tbs Greek yogurt
  • 2 Tbs mayonnaise (light is fine)
  • 1/4-1/2 tsp crushed red pepper flakes
  • 1/2 tsp Worcestershire sauce
  • 1/8 tsp chili powder
  • squeeze of lemon juice
  • salt and pepper to taste
Drain the pimientos and pat dry with a paper towel.

In a medium bowl, combine all the ingredients, and use a rubber spatula to combine.  Taste and adjust seasonings to your preference.  Before serving, refrigerate at least 1 hour to allow the flavors to meld.


Monday, June 27, 2011

Caramelized Onion Dip


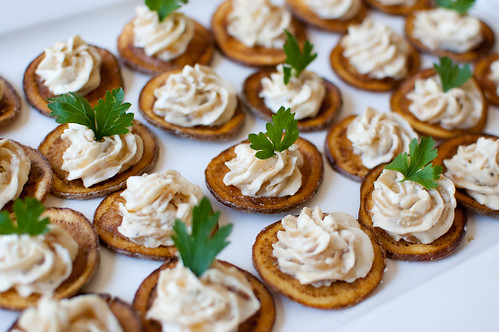
It's become a bit of a running joke in my circle of friends that I hate onion dip.  I'm sure you know the one I'm talking about - onion soup mix, stirred into sour cream?  Everyone else seems to love it, and it's always a staple at parties, tailgates, and get-togethers.  However, I'm just not crazy about it, and it does nothing for me.  But to use caramelized onions as the base?  I can get behind that!  I first made this dip for my birthday party this year, and I was immediately smitten.  So when I planned my Trashy to Classy Cocktail Party last month, I knew it was the perfect dish to include.  Obviously just serving it as a dip wasn't classy enough though, so I turned it into a canape of sorts by piping the dip onto a homemade potato chip, and garnishing with a fresh parsley leaf.  These looked so cute, and were a great addition to my menu - the dip is familiar to everyone, but it was just classed up.  I actually only assembled enough to fit on my serving tray, so I put out the rest in the kitchen as chips and dip - and both were gone in no time.

The dip is really easy to make, and can be made ahead - actually I think it tastes best on the second or third day.  So it is a great choice for entertaining.  When I've made this in the pat, I just serve it with kettle chips or a good-quality store bought brand, but making your own chips definitely takes them to the next level.  It's certainly not necessary, but it sure was tasty.

Since it's summer and I'm in Georgia, I couldn't help but to use Vidalia onions in my dip, and it made it even more special.  I also have decreased the butter, as it can seem kind of greasy otherwise.  Finally, I'm not noting this in the recipe, but I've subbed out part of the mayo for Greek yogurt in the past as well - it's just a personal preference for me because I'm not a huge mayo fan, and can find the flavor overpowering. 

If you're looking for an appetizer to take to a Fourth of July cookout this weekend, this makes a great option - and I may just be coming around to onion dip after all :-)


Caramelized Onion Dip
adapted from The Barefoot Contessa, by Ina Garten
  • 2 large yellow or Vidalia onions
  • 3 Tbs unsalted butter
  • 3 Tbs olive oil
  • 1/4 tsp cayenne pepper
  • 1 tsp kosher salt
  • 1/2 tsp freshly ground black pepper
  • 4 oz cream cheese, room temperature
  • 1/2 cup sour cream
  • 1/2 cup mayonnaise
 Cut the onions in half and slice them into 1/8-inch thick slices.  You should have about 3 cups of onions. *

Heat the butter and oil in a large saute pan on medium heat.  Add the onions, cayenne, salt, and pepper and saute for 10 minutes.  Reduce the heat to medium-low and cook, stirring occasionally, for 20 more minutes, until the onions are browned and caramelized.  Allow to cool slightly.

Combine the cream cheese, sour cream, and mayonnaise in the bowl of an electric mixer fitted with a paddle attachment.  Beat until smooth, add the onions, and mix until well-combined.  Taste for seasonings.  Serve immediately, or chill to serve later.  Bring to room temperature before serving.

*When I made this dip for the party, I actually diced the onions to make for easier piping.  Both work fine, but if you dice them, they will caramelize a little faster, so just keep an eye on them.


Monday, May 23, 2011

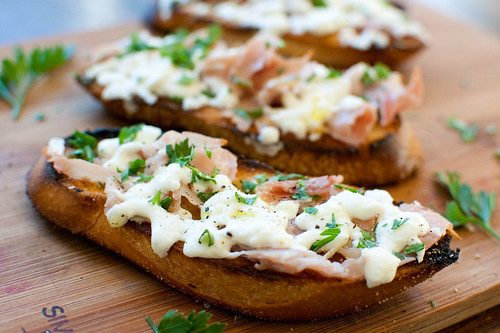
Grilled Bruschetta with Prosciutto & Mozzarella


Once warm weather hits, it is hard to keep myself from grilling every meal and every course for each meal.  It's not just the end result of grilling that I enjoy, but the act itself.  From igniting the first flame, to seeing those beautiful grill marks, to enjoying the final, smoky result, I love it all. 

This grilled bread made a fantastic appetizer for a pasta dish we enjoyed a few weeks ago.  This is incredibly simple, and very versatile as well - serve as a light lunch with a side salad, as part of an appetizer spread for a party, as a side with grilled meat or a pasta dish, or just on it's own as a snack. 

These grilled breads are also incredibly easy - just slice the bread, grill, rub with garlic, top with cheese and prosciutto, and return to the grill just long enough to melt the cheese.  In my opinion, the most important step of this recipe is rubbing with garlic.  I loved loved loved the garlicky bite that these had, and it truly took this dish from good to great.


Grilled Bruschetta with Prosciutto and Mozzarella
adapted from The Barefoot Contessa, How Easy is That?
  • 6-8 slices of Tuscan bread or a French Baguette, sliced 3/4-inch thick
  • 1 large garlic clove, cut in half
  • olive oil
  • 2 oz. thinly sliced prosciutto, torn into pieces
  • 2 oz. fresh smoked mozzarella, grated
  • 3 Tbs minced fresh herbs - parsley, basil, oregano, etc
  • freshly ground black pepper
Prepare the grill to medium-high heat.  Clean the grates and brush with oil.

Brush each slice of bread with olive oil.  Grill for 2 minutes, until golden on one side.  Remove from grill and place grilled-side up on a platter. As soon as it's cool enough to handle, rub the grilled side with the cut garlic.  The harder you rub, the more garlicky the bread will be.

Place the torn prosciutto over the grilled side of the bread and top with the shredded mozzarella.  Return to the grill, cover, and cook just until the cheese is melted, 1-2 minutes.

Drizzle with additional olive oil and sprinkle with pepper and herbs.  Serve.


Wednesday, February 2, 2011

Pimiento Cheese Fritters for Annie


As I mentioned in the Virtual Holiday Party post, one of the biggest benefits of blogging for me is the friendships I've developed along the way.  One of these friendships is with the ever-fabulous and famous Annie, of Annie's Eats.  She is one of the most talented, smart and funny people I know, and I'm so glad to consider her a friend.  I am positively thrilled for her and her sweet family because she is going to have a baby girl in April!  Being a mom to a girl myself, I know how much fun they are, how cute (and dangerous) the clothes are, and how incredibly sweet and cuddly they are. 

In honor of Annie's impending baby girl, Courtney of Cook Like a Champion put together a virtual baby shower for our dear Annie.  Of course I was excited to participate - I had so much fun with the virtual holiday party, and I was looking forward to another fun blogger shindig.


Since Annie is from the midwest and I'm a southern gal, I wanted to introduce a bit of southern culture to her and the other participants.  I really don't think I've ever been to a bridal or baby shower where pimiento cheese wasn't served, so I decided that I would make that my contribution.  But this shower is for one of my favorite foodies, so I knew I needed to step it up.   

For those of you who aren't familiar with pimiento cheese, it is basically a spread for sandwiches that is made up of extra sharp cheddar,diced pimientos (or roasted red peppers), enough cayenne for a small kick, and just enough mayo to bind it all together.  I treat it as a condiment and eat it on everything from toasted pita, to grilled cheese sandwiches, as a dip for veggies, to burgers. 

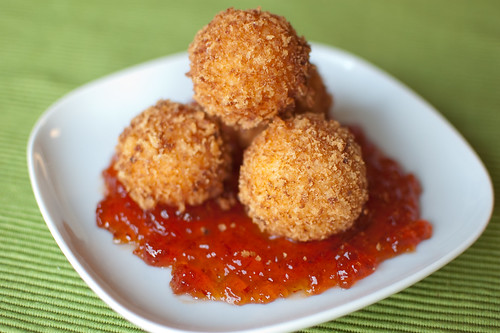
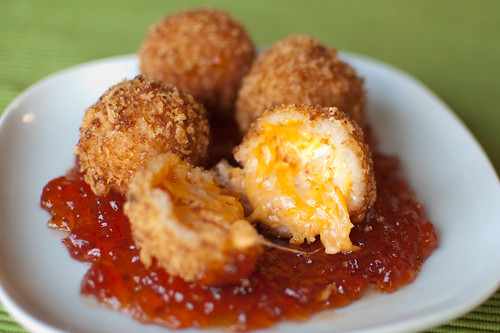
One of our favorite restaurants in the area is Relish, and the focus is modern southern cuisine.  They are quite famous for these pimiento cheese fritters, and whether we go there for lunch or dinner, we always order a plate of them.  They are crispy on the outside, and filled with melted, gooey cheese on the inside.  Dipped in a sweet-spicy pepper jelly, they are one of the most addictive snacks (or meals) ever.

I actually tried to make some fritters a few weeks back when I made fried green tomatoes, but they completely melted into the hot oil and were a massive failure.  I did a little research, and actually found the recipe from Relish.  The keys to successful fritters are using a combination of cream cheese and mayo for stability, and completely covering the cheese with the panko coating.  Once those things are taken care of, they are easy-peasy.  It is both exciting and dangerous how easy and delicious these fritters are, and since Relish has sadly closed, at least now I know I can get my fix at home.


Both Annie and Courtney have the full round-up of what everyone else contributed to the party.  Be sure to check it out - there are so many yummy dishes that it makes me even more sad that we're not throwing a real-life shower!  Congratulations, Annie!


sidenote:  this recipe makes a LOT of fritters.  I actually only made 1/4 of the recipe when I made these and ended up with 10 fritters, so adjust the quantities accordingly.


Pimiento Cheese Fritters
recipe from Relish, via 11 Alive News
  •  1 1/4 lbs extra sharp cheddar cheese, grated
  • 8 oz. pepperjack cheese, grated
  • 4 oz. cream cheese, at room temperature
  • 1/4 cup roasted red peppers, chopped
  • 1 1/3 tsp Cajun seasoning
  • 1/4 cup mayo
  • pinch kosher salt
  • 2 cups flour
  • 2 cups buttermilk
  • 4 cups panko bread crumbs
  • 1 gallon peanut or vegetable oil, for frying
  • red pepper jelly, for serving
Combine the cheddar and pepperjack cheeses in a large bowl.  In the bowl of a food processor fitted with the steel blade, add the cream cheese, peppers, Cajun seasoning, mayo, and salt.  Puree until smooth, then combine with the  cheese.  Use a rubber spatula to combine well.  Season with additional salt if necessary.  Chill at least 2 hours, or overnight.

Scoop tablespoon-size portions of the pimiento cheese and roll them into smooth balls.  Arrange them in a single layer on a parchment-lined baking sheet.

Into 3 separate shallow dishes, add the flour, buttermilk, and panko.  Dip each ball first into the flour, shaking off any excess.  Next roll in the buttermilk, and finally coat with panko.  Repeat the buttermilk and panko, being sure that the entire ball is covered - if any of the cheese is showing, it will leak out while frying.  Continue until all the pimiento cheese has been coated.  Return to the refrigerator and chill at least 1 hour.

Add the oil to a large pot.  Place the pot over medium heat until the oil reaches 350 degrees.  Fry the pimiento cheese 6-8 fritters at a time, for 3-4 minutes, until they are golden-brown.  Remove with a slotted spoon or skimmer and place on a paper towel-lined plate to drain.  Continue until all the fritters have been fried.  Serve immediately with pepper jelly.


Wednesday, December 22, 2010

Sugared Cranberries


Have you ever had a cranberry completely on its own?  No sugar, no cooking, just straight out of the bag?  I gave one to Caroline recently because I was cooking something and she asked for it.  This girl loves sour - she'll eat a lemon slice - but her face was priceless when I gave her a cranberry.  Then, just so I didn't feel like the worst mother in the world, I ate one.  And then promptly spit it out.  Really, really tart.  And not good at all.  If anything, it made me feel worse that she actually ate the whole thing.  Then again, she's stopped scavenging for ingredients so much while I'm cooking, so there's a plus...

In any case, this is quite literally one of the easiest things I've posted here.  Just make a simple syrup, then soak the cranberries in it overnight (or up to a few days).  Roll the cranberries in some sugar, and let them dry - and you're done!  The simple syrup infuses the cranberries with a subtle sweetness, then the sugar coating gives them a nice crunch and of course sweetens them up even more.

These pretty, sparkly cranberries were originally intended to be a garnish for the black and white cranberry tarts.  However, the tarts were so pretty on their own that I didn't think these were necessary.  Instead, they became a yummy snack!  Crunchy and on the outside, tart on the inside.  They keep really well, so they are an ideal snack to put out for holiday parties or unexpected guests.  I know you can't tell from the picture, but they really do sparkle and glitter - so pretty!  And Caroline went to town once these were finished - at least she's not scarred for life.


One Year Ago:  Creamy Chicken Lasagna


Sugared Cranberries
Cooking Light, December 2003
  • 2 cups granulated sugar
  • 2 cups water
  • 2 cups fresh cranberries
  • 3/4 cup superfine sugar (or granulated sugar processed for 30 seconds in a food processor)
In a medium saucepan, combine the sugar and water and cook over medium-low heat, stirring until the sugar dissolves.   Bring to a simmer, and remove from heat.  Stir in the cranberries, then transfer the mixture to a medium bowl.  Cover and refrigerate at least 8 hours, or overnight.

Drain the syrup from the cranberries (save it to make yummy drinks, or to soak a cake).  Place the superfine sugar in a shallow dish, and add the cranberries.  Stir lightly to coat completely, then transfer the cranberries to a baking sheet.  Allow to dry at least one hour before serving.


Tuesday, December 14, 2010

Black Eyed Pea Hummus


I feel like I need to apologize.  See, I try to post a good variety of healthy dinners, with a few indulgent meals and treats thrown in.  But it seems like lately I've been sharing more and more sweets and fewer healthy dinners.  I feel like maybe I should apologize, but hey - they're all delicious, so I don't feel that bad.  Plus, it's the holidays - and people want sweets at this time of year!

However, people also want snacks and appetizers.  'Tis the season for cocktail parties and potlucks, and when I can, I like to take a healthy option.  There are sure to be plenty of dishes filled with cheese, butter, meat, etc.  One of my favorite things to make is hummus, and this is a fun twist.  You can really  make hummus out of any bean:  black beans (which is Joey's favorite), white bean, and of course the classic hummus made with chickpeas. 

If you've been reading my blog for a while, you may remember the Beer Pairing Dinner that Joey and I hosted this summer, and I served this as a bonus course while people arrived and milled around.  I actually made the accompanying corn bread sticks to use as dippers, and while they tasted fine, I wouldn't recommend them simply because they broke when dipped into the hummus, and were a bit dry as well.  Pita chips are just fine with these, as are corn chips and veggies. 

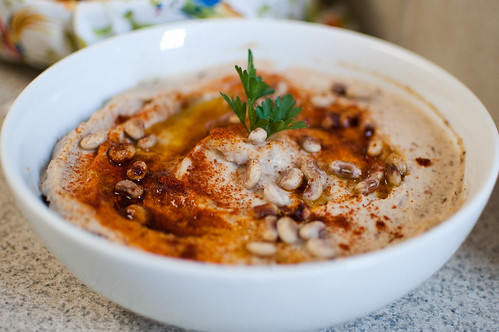
The black eyed peas give the hummus a nice southern twist, and I think it would be a welcome addition to any buffet or party.  In fact, I think I'll make it again for New Years Day at my in-laws house.  After all, black eyed peas do represent money for the coming year. :-)


Black Eyed Pea Hummus
adapted from Carolina Cooking by Debra Zumstein, originally from 700 Dayton - The Mansion at Forsyth Park
  • 1 (16-ounce) can black eyed peas, rinsed and drained
  • 2 cloves garlic, chopped
  • 1/4 cup tahini paste, well stirred
  • juice of 1 lemon
  • 1/3 cup extra virgin olive oil, plus more for drizzling
  • kosher salt and freshly ground black pepper
  • 1/4 tsp paprika, plus more for sprinkling
  • pinch cayenne
  • 1 Tbs minced fresh parsley leaves
In the bowl of a food processor fitted with a steel blade, combine the black eyed peas (reserving 2 tablespoons), garlic, salt and pepper, paprika, cayenne, and parsley,  Process 15 seconds, until almost fully ground.

In a small measuring cup, combine the tahini, lemon juice, and oil.  With the machine running, pour through the feed tube and continue to process 1 minute, until the mixure is smooth.  If it seems too thick, add water, a few teaspoons at at time, until the desired consistency is acheived.

Transfer to a serving bowl, sprinkle with paprika, drizzle with olive oil, and scatter the remaining black eyed peas over the top.  Serve immediately or chill until ready to serve.


Friday, November 5, 2010

Roasted Figs and Prosciutto


So in case you haven't heard yet, Ina Garten's new cookbook is pretty flipping awesome.  Never have I gone through a cookbook before and wanted to make every.single.recipe.  I have had the book for just over a week, and I've already made 6 recipes from it.  And I have 3 more on the docket to make in the next few days.  I think I might have a problem.

As I was reading through How Easy is That the first time, I loved the look of these figs, but cried a little inside because figs are pretty much gone around here by this time of year.  However, I saw figs on sale at Fresh Market for $3 a pint the very next day!  Score!  Yes, they were from California and not at all local, but I couldn't help myself.  And hey, at least they weren't flown in from Asia or South America.

Last Friday my neighbor came over for some girl talk and wine, and I told her I'd put together a few appetizers for us to snack on.  I made the baked fontina (OMG) and these figs.  I also put out a fruit salad, but we barely touched it.  I'm actually a big fan of fruit salad, but when I have roasted figs and prosciutto and baked fontina with a baguette in front of me, what do you expect? 

This is one of the easiest appetizers I've ever made.  Cut cut the figs in half, trim the prosciutto into strips, wrap, and bake.  Simple and delicious.  Roasting the figs really brings out their flavor, and the prosciutto crisps up just a big which is nice. I opted to brush with a little honey and olive oil, then top with a crack of black pepper.  I really am not a fan of the word "succulent,"  but that is really the best word I can use to describe these figs (I'm also not a fan of the word moist, while we're on the subject).

People often ask me for appetizer ideas for Italian pasta dinners that aren't bread-y or carb-y, and I think this would be a great option.  I'd love to play around with them even more next time, and maybe add a little goat cheese or blue cheese in there.  Now how bad could that be?


One Year Ago: Moroccan-Spiced Lamb Patties with Peppers and Feta


Roasted Figs & Prosciutto
adapted from Ina Garten, How Easy is That?
  • 20 fresh figs
  • 15-20 slices Italian prosciutto (about 8 ounces)
  • 2 Tbs olive oil
  • 2 tsp honey
  • black pepper
Preheat the oven to 425 degrees.

Snip the hard stems off the figs, and cut in half lengthwise through the stem.  With a small sharp knife, cut the prosciutto lengthwise into inch-wide strips. 

Wrap a slice of prosciutto around the center of each fig half, with the ends overlapping. 

In a small bowl, whisk together the olive oil and honey.  Brush each fig with the mixture, and top with freshly cracked black pepper.

Roast for 10 minutes, or until the prosciutto is a little crisp and the figs are warmed through.  Serve warm.


Thursday, October 28, 2010

Vanilla Bean Applesauce

A few weeks ago, my sister came to visit for the weekend.  I sent Joey off to his parents' house with Caroline, and we had a true girls' weekend.  No boys, no babies, just us sisters.  We ate yummy food, drank wine, had girl talk, and just enjoyed spending time together.  Our big outing of the weekend was driving to the North Georgia mountains and going apple picking (I know, we're wild and crazy).  We made a day of it and had lunch there, took our time browsing the store for gourmet goodies, and picking apples.  We came home with over 70 pounds!  The majority of the apples went towards making a year's worth of applesauce.  Most of it was pretty straightforward - apples, cinnamon, and a pinch of salt.  But you know I have to do something "weird and fancy" as my sister would say.  So I found this recipe from Martha Stewart for applesauce that is full of fun stuff - ginger, apple cider, and a vanilla bean.  One of my favorite things about using vanilla beans is the cute little black specks that they leave behind!  The vanilla flavor isn't overpowering, but it lends a subtle depth of flavor that I just loved.  I also really loved the flavor from the apple cider and subtle spice from the ginger.  All in all, its not any more complicated than plain applesauce, but it is certainly more fun to eat!


One Year Ago:  Maple-Cider Glazed Chicken


Vanilla Bean Applesauce
adapted from Martha Stewart
makes 1 1/2 quarts
  • about 5 pounds ripe, firm apples (such as Gala or Granny Smith), peeled, cored, and cut into wedges
  • 2 Tbs granulated sugar
  • 1 cup apple cider
  • 1 large cinnamon stick
  • 1 tsp ground cinnamon
  • 1 tsp ground ginger
  • 1/2 tsp ground nutmeg
  • juice of 1/2 lemon
  • 1 vanilla bean, split lengthwise and scraped
  • 1 tsp vanilla extract
  • pinch of kosher salt
Combine all the ingredients in a large saucepan over medium heat.  Cook, covered, 50-60 minutes, stirring often, until the apple have broken down.  Add more apple cider if necessary to keep the apples from scorching.

Remove the vanilla bean pod and the cinnamon stick, and mash with a wooden spoon.  Adjust seasonings as necessary.  Allow to cool and store in an airtight container in the refrigerator or freezer.


Tuesday, October 26, 2010

Halloween Candy Bark

Go ahead and file this little treat under the "why didn't I think of that" category.  It seems so simple, really.  Peppermint bark is so popular around the holidays, so why not make a fall version?  Take leftover candy and basically make a giant candy bar.  The ultimate candy bar, if you will.  Seriously so genius.  Let me break it down for you:  You start by spreading a layer of melted chocolate on a baking sheet, then you top that with broken candy bars, honey roasted peanuts, and Reese's pieces, and finish it off with a drizzle of white chocolate.  Once the chocolate sets, you break it into chunks, and feast!

The recipe calls for Butterfingers, Reese's cups and Heath Bars, but you could certainly mix things up and use pretty much any variety or combination of candy bars.  I think this would also be delicious with marshmallows, pretzels, or oooh maybe Fritos!

If you can wait until after Halloween, this is a great way to use up candy that you have left over from trick-or-treaters, but I wouldn't blame you one bit if you went right out and bought the ingredients to make it tomorrow.  I put a few in a plastic bag, tied it with a ribbon, and gave it to a friend who had us over for dinner.  It made such a cute presentation, that I plan to do the same thing for our neighbors and Caroline's teachers at school.  Anything to get this addictive snack out of my house.


One Year Ago:  Creepcakes


Halloween Peanut Butter and Toffee Candy Bark
Bon Appetit, October 2010
  • 1 pound bittersweet chocolate chips
  • 3 (2.1-ounce) Butterfinger bars, cut into 1-inch chunks
  • 3 (1.4-ounce) Heath bars, cut into 1-inch chunks
  • 8 (0.55-ounce) peanut butter cups, each cut into 8 wedges
  • 1/4 cup honey roasted peanuts
  • Reese's pieces, and/or yellow and orange M&M's
  • 3 ounces white chocolate
Line a baking sheet with foil.  Melt the bittersweet chocolate in a medium saucepan over low heat, stirring constantly.  Remove from heat and pour over the foil-lined baking sheet.  Spread to an even layer that is about 12x10 inches.

Sprinkle the candy and peanuts over the chocolate, pressing lightly to adhere.  Be sure the all the candy is in contact with the chocolate.

Melt the white chocolate over low heat, stirring constantly.  Use a spoon or a fork to drizzle the white chocolate over the candy.

Chill at least 30 minutes, or until firm.  Break into 1-2 inch chunks.


Tuesday, October 5, 2010

Pumpkin-Maple Granola


One of my favorite summer breakfasts is Greek yogurt, fresh berries or peaches, and granola.  Its filling, delicious, and nutritious.  I have made my own granola in the past, but it has been a long time.  I'd forgotten how much tastier homemade is (though really, isn't that the case with just about everything?)!

I'd had the idea to make pumpkin granola, and there were several versions online that caught my eye, but none were "the one."  Some had added sugar, which I knew I didn't want, some had obscure (to me anyway) syrups or ingredients that I don't keep on hand, and the proportions just seemed off for some.  So I just decided to start experimenting and see what I could come up with.

I was really pleased with how this granola turned out.  A little sweetness from the maple syrup and dried fruit, a little spice from the cinnamon and nutmeg, and a nice toasty flavor from the oats and nuts.  The whole combination is just about perfect - not too sweet, and utterly addictive.  I've had to stop myself from constantly grabbing handful after handful as I pass through the kitchen.  Besides snacking on it, I've enjoyed it in my morning yogurt with chopped apples or pears, and I've also added to to salads for lunch - its a great crunchy topping!

One Year Ago:  Butternut Squash Risotto


Pumpkin Spice and Maple Granola
a Pink Parsley Original
  • 3/4 cup pumpkin puree
  • 1/2 cup pure maple syrup
  • 1/4 cup canola oil
  • 2 Tbs honey
  • 3 cups old-fashioned oats
  • 1/3 cup flax seeds
  • 1/2 cup pepitas
  • 1/2 cup whole almonds
  • 1/3 cup sunflower seeds
  • 2/3 cup coconut
  • 2 Tbs cinnamon
  • 1/2 tsp nutmeg
  • 1/4 tsp ground ginger
  • 1 tsp salt
  • 1/3 cup golden raisins
  • 1/3 cup dried cranberries
  • 1 cup chopped dried figs
Preheat the oven to 350, and line a baking sheet with parchment paper.  In a large bowl, whisk together the pumpkin, maple syrup, oil, and honey.  Add the oats, flax, pepitas, almonds, sunflower seeds, coconut, and spices, and mix well to combine.

Transfer to the baking sheet and spread to distribute the mixture to a uniform thickness.  Cook 30-40 minutes, stirring the granola every 10 minutes, until golden-brown and crispy.

Allow to cool to room temperature, and mix in the dried fruit.  Store in an airtight container.


Friday, April 30, 2010

BBQ Chicken Wings


As a general rule, wings aren't my favorite food.  Its just a lot of work to end up with such a small amount of  meat.  However, when my neighbors hosted a wing cook-off, I was game.  I have been all about the grill lately, so I knew I wanted to grill the wings, rather than deep-fry them.  I also assumed that others would bring hot wings, so I wanted to do something a little different. 

This recipe is surprisingly simple, and the results are absolutely fantastic.  I bought whole chicken wings, and butchered them myself, separating the drumstick from the wing, and discarding the wingtips.  They are then seasoned with a simple blend of salt, pepper, and cayenne, and grilled.  Cook's Illustrated uses an unusual method of grilling the wings over moderate heat first, to cook the meat and crisp the skin, then cranking up the heat to high while basting them with sauce, in order to get a nice char and glaze on them.  Their recipe for pantry barbecue sauce couldn't be any simpler, and its miles better than any bottle you can buy in the store. 

There was no voting or official winner for the cook-off, but Joey said he liked my wings the best.  Not that he's biased :-)


Barbecued Chicken Wings
adapted from Cook's Illustrated, Summer Grilling
makes about 2 dozen wings
  • 1 teaspoon table salt
  • 1 teaspoon ground black pepper
  • 1/8 teaspoon cayenne pepper
  • 2 1/2 pounds of whole chicken wings
  • vegetable oil for cooking grate
Pantry Barbecue Sauce
  • 1 1/2 cups ketchup
  • 1/2 cup molasses
  • 2 Tablespoons cider vinegar
  • 3 Tablespoons honey
  • 1 1/2 teaspoons hot sauce
  • 1/2 teaspoon liquid smoke
  • salt and pepper
For the barbecue sauce, whisk all the ingredients together in a small bowl, and season with salt and pepper.  Set aside.

Prepare grill:  turn all burners to high, cover, and heat grill about 15 minutes.  Turn all burners to medium-low, adjusting as needed, to maintain the temperature around 350.

Cut through the wings at the joint between the drumstick and the center wing.  Cut through the joint between the wing and the wingtip, and discard the wingtip.

Combine the salt, pepper, and cayenne in a small bowl.  Pat the wings dry with paper towels, and rub evenly with spice mixture.

Clean and oil the cooking grate, and place wings in the center of the grill.  Cover and cook until the skin is crisp and golden, about 15-20 minutes, turning once.

Turn all burners to high, and continue to cook, flipping and brushing with sauce, until glazed and deep brown, about 5 minutes longer.  Transfer wings to a platter, and brush with additional sauce before serving.


Sunday, January 17, 2010

Meyer Lemon-Glazed Madeleines


Until last week, I had never even tasted a madeleine, much less made them, but I agreed to make some for a baby shower, so I set to work!  Peabody is a great resource for pretty much any delectable baked good, so I looked there first.  I also had in the back of my head that I'd like to use meyer lemons, since I had just bought some from Trader Joe's.  Lo and behold, she has a recipe for Meyer Lemon-Glazed Madeleines! 

They aren't terribly difficult to make, you just have to be careful not to overfill the molds or overmix the batter.  And the glaze is so tasty, I could probably drink it!  In case you've never had a madeleine either, they are little shell-shaped cookies that are actually delicate little cakes.  So pretty!  I loved using meyer lemons - they are sweeter than regular lemons, but still retain a bit of tartness, and not as sweet as oranges. 

These were so fun and pretty, and I can't wait to try out some different variations!


Meyer Lemon-Glazed Madeleines
adapted from Culinary Concoctions by Peabody
makes at least 64 mini Madeleines, or 24 standard sized ones
  • 3 large eggs, at room temperature
  • 2/3 cup sugar
  • 1/8 teaspoon kosher salt
  • 1 1/4 cup all purpose flour
  • 1 teaspoon baking powder
  • zest of 1 Meyer Lemon
  • 9 Tablespoons unsalted butter, melted, then cooled to room temperature
For the glaze:
  • 3/4 cup powdered sugar
  • 1 Tablespoon of juice from a Meyer Lemon
  • 2 Tablespoons water
Brush the Madeleine mold with melted butter, then lightly coat with flour.  Shake off the excess and place the mold in the refrigerator.

Zest the lemon into the melted butter.

Using an electric mixer, beat the eggs, sugar, and salt until thickened and frothy, about 5 minutes.

Combine the flour and baking powder, and sift into the egg mixture, folding as you go with a rubber spatula.  Mix until just combined.

Drizzle the melted butter/lemon zest into the batter, a few spoonfuls at a time, folding gently.  Again, mix until just combined, and be careful not to overmix.

Refrigerate the batter for at least 1 hour, or overnight.  Preheat the oven to 425.  Use a teaspoon to drop the batter into the Madeleine molds, filling each one 3/4 full.  Do not spread, the batter will spread as it bakes.

For mini madeleines, bake 5-7 minutes, for standard madeleines, bake 8-9 minutes, or until the cakes feel just set.

As they bake, whisk the powdered sugar, lemon juice, and water together to make the glaze. 

Gently remove the madeleines from the mold using a spoon, and cool on a cooling rack.  After they have cooled about 3-5 minutes, dip the scalloped side in the glaze, and return to the cooling rack to cool completely and set the glaze.

They are best eaten the day they are made, but can be stored overnight loosely covered.


Monday, January 11, 2010

Rustic Roasted Salsa


Santa brought me Rick Bayless's Mexican Everyday this Christmas, and I was so incredibly excited.  This was probably the #1 cookbook on my wishlist, and I couldn't wait to start breaking it in.  So far I have been very impressed.  I love his philosophy of "everyday eating."  Basically he discusses the importance of portion control and a well-balanced diet.  Plenty of vegetables, good carbs, etc.  He also stresses that is important to "feast" every once in a while for special occasions.  Most of the recipes are actually pretty healthy, and so far, they have all been very tasty!

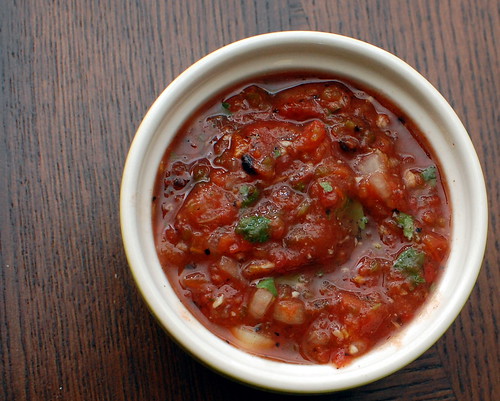
The first recipe I'll be sharing with you is his recipe for Rustic Roasted Salsa.  One of my favorite things about summer is the abundance of tomatoes and fresh produce.  I absolutely love making salsa in the summer, and pretty much have it in my fridge at all times.  So I kind of fall out of the habit as the weather gets colder, and the tomatoes go out of season.  This is a great alternative to fresh salsa, using good quality canned diced tomatoes, then roasting the garlic and jalapenos to add some extra depth of flavor to the salsa.  The result was spicy, smokey, but still fresh.  The key is to use good tomatoes.  I used Muir Glen Organic Fire Roasted, and they really have great flavor. 

This is very simple to throw together, and keeps well when refrigerated.  I snacked on this for a few days, then used the rest to make some black bean chili. 


Rustic Roasted Tomato Salsa
adapted from Rick Bayless, Mexican Everyday
makes about 2 cups
  • 2 fresh jalapeno peppers
  • 4 garlic cloves, unpeeled
  • 1/2 cup finely chopped white onion
  • 1 15-ounce can diced fire-roasted tomatoes in juice
  • 1/3 cup (loosely packed) roughly chopped cilantro
  • juice of 1/2 lime, or 1 teaspoon cider vinegar
  • Salt and Pepper
Heat a small skillet over medium heat, and dry roast the peppers and garlic, until soft and blotchy in spots.  The peppers will take about 10 minutes, and the garlic will take about fifteen.

Meanwhile, rinse the onion in a fine-mesh strainer under cold water.  Shake to dry, and set aside.

Stem and peel the jalapenos, and scrape out the seeds and membranes (or leave them if you want the salsa extra spicy)!  Peel the garlic, and transfer it to a food processor, along with the jalapenos.  Pulse until they are finely chopped, then add the tomatoes (with their juice), and pulse a few more times to make the salsa as smooth or as coarse as you want.  Pour the mixture into a medium bowl, and add the onion, cilantro, and lime juice.  Stir to combine, and add salt to taste.  Cover and refrigerate, or serve immediately.


Saturday, January 2, 2010

BB: Sausage-Stuffed Mushrooms


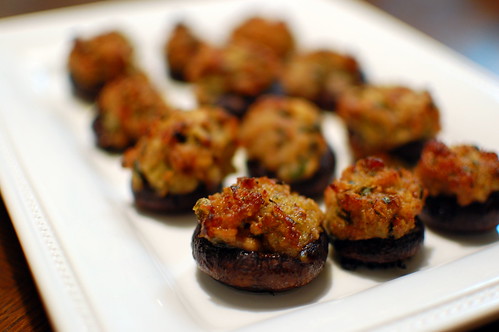
The second December recipe for Barefoot Bloggers was chosen by Michelle of Welcome to the Club.  She chose sausage-stuffed mushrooms, which was a perfect choice for December.  I actually made these 3 times:  for my extended family's Christmas Party, Joey's family gathering, and finally for New Year's Eve.  They were all eaten at all of the parties.

In the past when I make stuffed mushrooms, I've kept it simple:  low fat cream cheese, bulk sausage, Parmesan, and parsley.  These were from Ina, so of course they were slightly more elegant and upscale.  The mushrooms are stemmed and tossed in olive oil and Marsala wine.  Then the stems are chopped and sauteed with Italian sausage, green onion, garlic, panko, and parsley.  Rich Marscapone cheese is then swirled in, and the mushroom caps are filled and baked.  The result is pretty much the perfect stuffed mushroom.  A little salty from the sausage and Parmesan, earthy from the mushrooms, and a little sweet from the Marsala wine and Marscapone cheese. 

They come together quite easily; the only issue I had was that there was still plenty of filling leftover after stuffing the mushrooms.  Therefore, I suggest that you use 16 ounces of mushrooms.  And don't worry about that being too many.  There won't be any leftovers, no matter how many you make.

Sausage-Stuffed Mushrooms


Tuesday, December 29, 2009

Ham and Cheddar Pretzel Bites


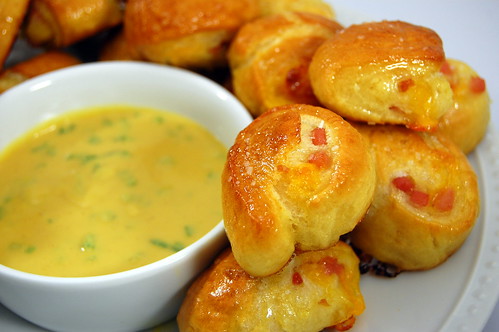
As soon as I saw these little snacks in the October issue of Gourmet (RIP), I knew I would be making them, and soon.  I have been dying to try my hand at homemade pretzels, and I loved the idea of having bite sized snacks - add cheese and ham, and I am a happy girl.  I just love any sort of bite-sized or single serve food.  I love grazing on appetizers and dips all night.  In fact, I will be making these again on Thursday for our mini New Year's Eve gathering.  My sister and niece are in town visiting, and I know that our girls will love munching on these.

I honestly don't know why I was so intimidated to try pretzels.  They were surprisingly easy and painless to put together.  You have to plan ahead, but nothing about the recipe is particularly challenging or tedious.  The original recipe called for country ham, but my local grocery store didn't carry it.  I just bought some smoked ham and diced it.  Also, while the jalapeno mustard was tasty, I think next time I will puree it so the jalapenos are better incorporated, and add more honey as well, to give it a sweet finish.  I made this change in my version of the recipe below.

I took these to a party to watch my beloved Georgia Tech Yellow Jackets clinch the ACC title, so they are now somewhat of a good luck charm.  I guess I will have to make them again when we play Iowa in the Orange Bowl next week.


Ham and Cheddar Pretzel Bites with Jalapeno Mustard
adapted from Gourmet, October 2009
makes about 4 dozen
  • 1 1/2 teaspoons active dry yeast
  • 2 Tablespoons plus 1 tsp packed brown sugar, divided
  • 1/4 cup warm water (110-115 degrees F)
  • 1 cup warm milk (110-115 degrees F)
  • 2 1/2-3 cups all-purpose flour
  • 1/2 cup finely chopped ham (3 ounces)
  • 1/2 cup finely chopped sharp Cheddar
  • 6 cups water
  • 4 tsp baking soda
  • 1/2 cup dijon mustard
  • 2 Tablespoons chopped jalapenos
  • 1/4 cup mild honey
  • 1/2 stick unsalted butter, melted
  • 1-2 Tablespoons coarse salt
Stir together the yeast, 1 teaspoon brown sugar, and warm water in a large bowl.  Set aside until foamy, 5-8 minutes.  In another bowl, stir together the remaining 2 Tablespoons brown sugar and warm milk until dissolved.

Add 2 1/2 cups of the flour and the milk mixture to the yeast.  Stir with a wooden spoon until a soft dough forms.  Add the remaining flour as needed.  Turn the dough out onto a lightly floured surface, and gently knead a few times, forming a smooth ball.

Brush the inside of a clean bowl with olive oil.  Transfer the dough to the bowl, and cover tightly with plastic wrap.  Allow to rise in a draft free, warm room for about 2 hours, until dough has doubled in size and bubbles appear on the surface.

Turn out dough onto a lightly floured surface.  Divide into 4 equal pieces.  Lightly dust your hands and rolling pin with flour.  Roll dough and stretch into a 12-inch long rope.  Flatten and arrange so the long side is facing you.  Use the rolling pin or your hands to form a 12x4 inch rectangle.  Gently press 1/4 of the ham and cheddar into the bottom third of the dough, and roll as tightly as possible to form a rope.  Cut into 12 1-inch pieces and transfer to a sheet pan lined with parchment paper.  Repeat with remaining 3 portions of dough.

Let rest, uncovered, at room temperature, for 30 minutes.  Meanwhile, preheat oven to 400.

Bring 6 cups of water to a boil.  Add the baking soda and reduce heat to a gentle simmer

Cook pretzels in batches, cooking about 20 seconds each, turning once.  They should be slightly puffed.  Use a slotted spoon to transfer them back to the baking sheets.

Bake until puffed and golden-brown, about 15 minutes.  The cheese might ooze out, but that's okay.

Brush warm pretzel bites with melted butter, and sprinkle with salt.

To make the jalapeno mustard, pulse the jalapenos in a food processor until finely ground.  Add the honey and mustard, and process until evenly mixed.

Serve pretzels warm or at room temperature.


BLOG DESIGN BY: SHERBET BLOSSOM DESIGNS