Showing posts with label bacon. Show all posts

Tuesday, August 9, 2016

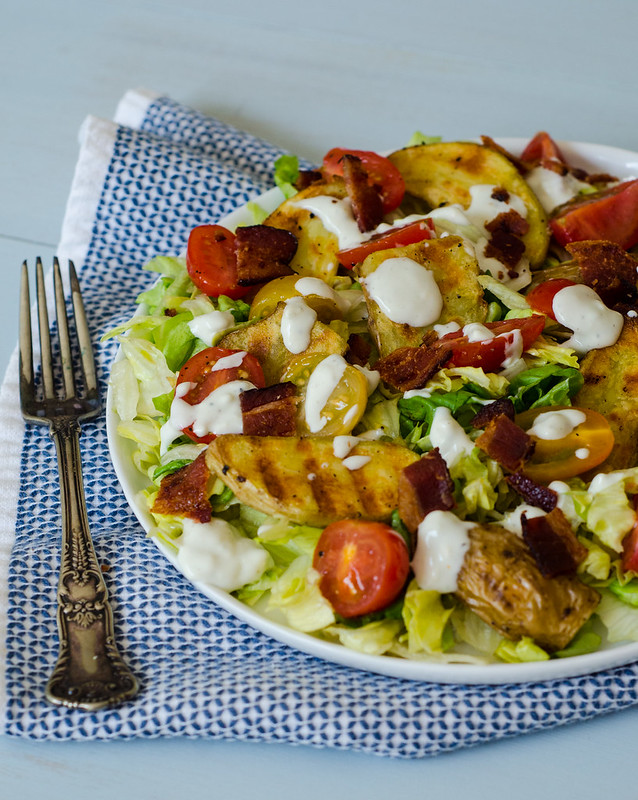
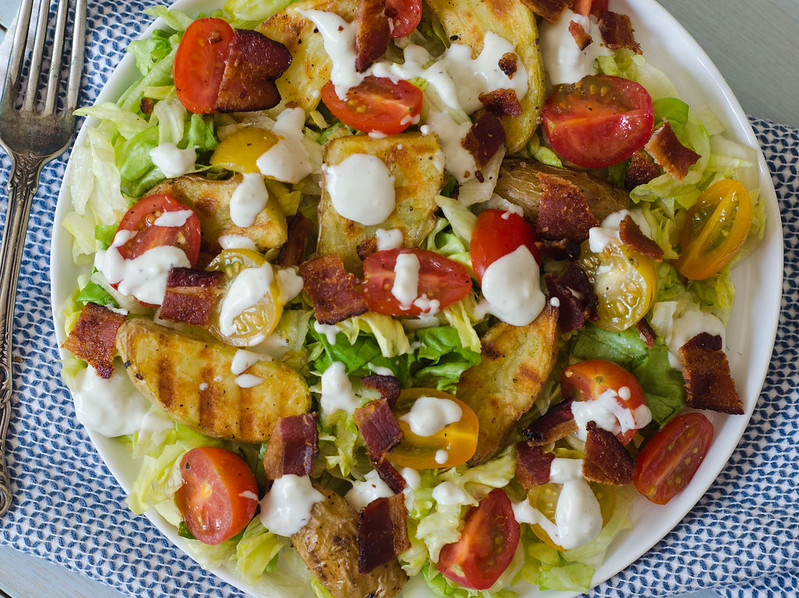
Grilled Potato BLT Salad with Blue Cheese Dressing


As evidenced by the archives of my blog, we eat tons of salads in the summer.  I can't get enough of my chopped summer veggie grilled salad, a classic caprese, watermelon feta salad, basic caesar, and everything in between.  And now I have this amazing salad to add to the rotation.

I first made this salad over Memorial Day weekend, and I served it as a side dish to grilled New York Strips.  Wouldn't you know, I all but ignored my perfectly cooked steak, and just totally devoured this salad instead!  I continued the obsession all summer long, making this for lunches quite often, and it makes for a wonderful dinner as well.  I've never made a salad with two dressings, but the combination of the light vinaigrette and the drizzle of rich blue cheese dressing works so well.  The bracing vinaigrette is mellowed by the blue cheese, and the pungent blue cheese is sharpened by the vinaigrette.  Love all around.

I have this bad habit of "remembering" what I need for recipes I've made in the past, and instead of checking the actual source, I just buy what I think I need.  Unsurprisingly, this leaves me short of ingredients quite often, but I've gotten pretty good at improvising.  Last time I made this, I was out of sour cream and buttermilk, and I used Mexican crema and mayonnaise instead with no ill effects.  It's also forgiving for the herbs;  scallions or grated onion work well in place of the chives, or add basil or parsley to the dressing or vinaigrette as well.  You can roast the potatoes instead of grilling, and grilled zucchini is a great addition too.  Basically, this is a super forgiving and adaptable salad, so feel free to take your own liberties with the recipe/  And should you have any potatoes leftover, they are ridiculously addictive dipped into the blue cheese dressing.


Grilled Potato BLT Salad with Blue Cheese Dressing
adapted from Fine Cooking, June/July 2016

There are several components to this salad, but they are all really easy and it comes together quite quickly, especially if you prep the dressing and vinaigrette ahead of time.

Blue Cheese Dressing

  • 2 oz blue cheese, crumbled (about 1/2 cup)
  • 1/4 cup sour cream, plain yogurt, or mayonnaise
  • 1/4 cup buttermilk, creme fraiche, or crema
  • 1 tsp chopped dill
  • 1 tsp snipped fresh chives
  • 1/2 tsp red wine vinegar
  • dash of hot sauce
  • kosher salt and freshly ground black pepper
For the Vinaigrette
  • 1/2 cup red wine vinegar
  • 1 small shallot, minced
  • 1/2 tsp Dijon mustard
  • 2/3 cup extra-virgin olive oil
  • kosher salt and black pepper
For the Salad
  • 2 lb fingerling potatoes, halved lengthwise, or quartered if very large
  • kosher salt
  • 24 cherry tomatoes, halved
  • freshly ground black pepper
  • 1 head of iceberg lettuce, quartered and very thinly sliced (or 2 romaine hearts, halved and thinly sliced)
  • 1/2 cup thinly sliced fresh basil
  • 6 oz thick-sliced bacon, cooked and crumbled
Prepare your grill to cook at medium-high heat.  

Make the dressing:  In a medium bowl, whisk together the blue cheese, sour cream, buttermilk, dill, chives, vinegar, and hot sauce.  Taste and season with salt and pepper.  Cover and set aside.

Make the vinaigrette:  In a mason jar, combine the vinegar, shallot, and mustard.  Shake well to combine.  Add the oil and shake again, then season to taste with salt and pepper.

Cook the potatoes and make the salad:  Put the potatoes in a medium saucepan and cover with 1 inch of water.  Season with 2 Tbs salt, and bring to a boil over medium high heat.  Boil for 3 minutes, then drain the potatoes in a large colander and rinse with cool water.  

Spread the potatoes on a rimmed baking sheet to completely cool and dry until you're ready to grill.  They can sit for up to 2 hours at room temperature, or up to 8 hours, covered in the refrigerator.

Meanwhile, toss the cherry tomatoes with 1/4 cup of the vinaigrette, 1/2 tsp salt, and 1/2 tsp pepper and set aside.

Toss the potatoes with 1/4 cup of the vinaigrette, 1 tsp salt, and 1/2 tsp pepper.  Grill the potatoes, turning once, for about 3-4 minutes per side, or until they are tender throughout and nicely marked.  Taste and season with additional salt if needed.

In a large bowl, combine the lettuce with basil and about 1/2 cup of the vinaigrette.  Divide evenly among plates and top with potatoes, tomatoes, and bacon, and drizzle with the blue cheese dressing.  Serve.


Tuesday, July 7, 2015

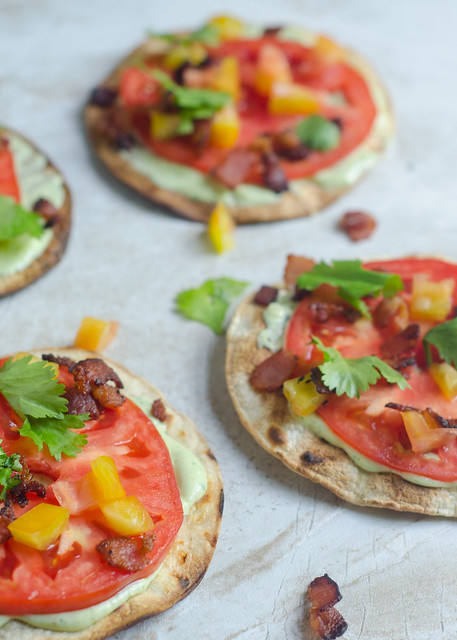
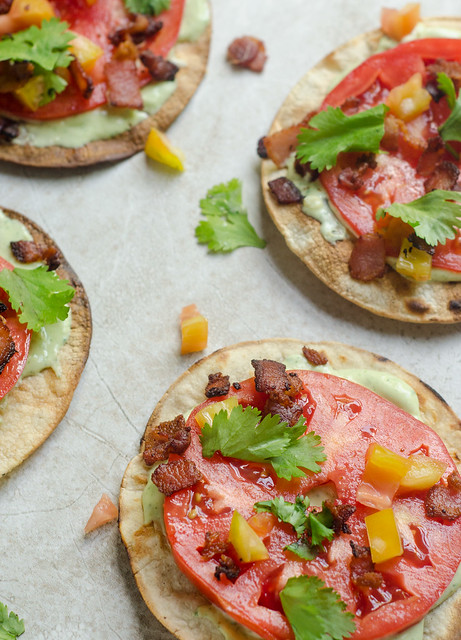
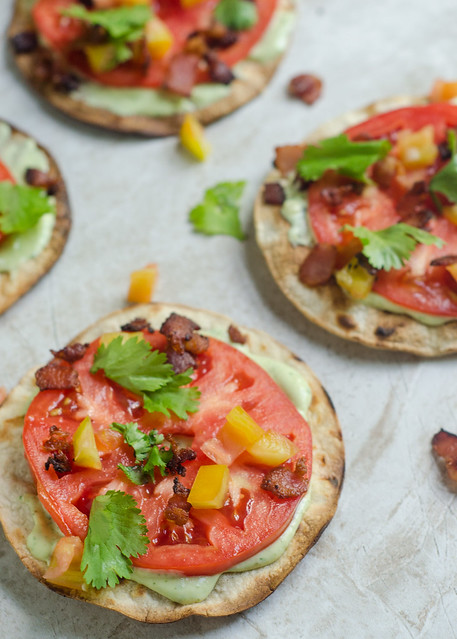
Grilled BLT Tostadas

Grilled BLT Tostadas

My favorite summer meal is a simple one:  a BLT sandwich, watermelon, and chips.  Because I love the BLT combo so much, I like to try out different variations and vehicles for the B, the L, and the T.  Thus, when a mexican-inspired BLT was brought to my attention, I'm pretty sure I gasped aloud and headed straight into my kitchen to whip it up.

This ingenious dish comes from none other than the Mexican food genius himself, Rick Bayless.  So it comes as no surprise that it is absolutely amazing and out of this world good.  These are also super quick and easy, which is another requirement for an ideal summer meal.  

DSC_1437 

Corn tortillas are brushed with bacon fat (yes!), then quickly grilled to crisp them up.  You slather them with an avocado-lime cream sauce, then top with tomatoes, crumbled bacon, and cilantro.  Finish with a sprinkle of salt and a squeeze of fresh lime juice, and you have Mexican BLT perfection.  I served these with grilled Mexican street corn, watermelon slices, and of course watermelon margaritas.  No Mexican summer meal is complete without those!  This was one of my favorite dinners of the summer, and one I'll for sure be making many times before fall!

The avocado cream sauce makes more than you'll likely need, but you can store it for a few nights in the refrigerator (just know it may discolor a bit).  The leftovers are great for making… more BLT tostadas, proper BLTs, or just using as a dip for veggies or tortilla chips.

DSC_1442 

Grilled BLT Tostadas
adapted from More Mexican Everyday, by Rick Bayless
serves 4 to 6
  • 12 corn tortillas
  • 1 cup Mexican crema* 
  • juice of 1/2 lime, plus more for serving
  • 1/2 jalapeño, seeds and ribs removed
  • 1/4 cup chopped cilantro, plus more for garnish
  • 1/2 an avocado, roughly chopped
  • salt
  • 6-8 slices thick-cut bacon, cut cross-wise into 1/2 inch pieces
  • 1 lb heirloom tomatoes
Prepare the grill to medium-high heat.

Meanwhile, lay the tortillas in a single layer and let them dry for about 30 minutes.  This will help them crisp up on the grill, rather than fall apart.

As the tortillas dry, combine the cream, lime juice, jalapeño, cilantro, avocado, and 1/4 tsp salt in a food processor or blender.  Puree until the mixture is smooth and creamy.  Taste and adjust the lime juice and salt to your preference.  Scrape the cream sauce into a bowl, cover, and set aside.

Cook the bacon in a large skillet, stirring often, until it is crispy and browned.  Use a slotted spoon to remove it from the skillet and drain on a paper towel-lined plate.  Pour the fat into a small heatproof bowl and set aside.

Core the tomatoes.  Choose one tomato (probably the largest) to slice, and slice into 1/2-inch slices.  Seed and chop the rest of the tomatoes.  

Brush the tortillas on both sides with the reserved bacon fat.  Transfer them to the grill and cook, turning and rotating every 30 seconds or so, until the tortillas are golden brown and crisp.  This will probably take 5 to 10 minutes.  

Remove the tortillas to a serving platter, and spread each one with  avocado sauce.  Top with the sliced tomato, and sprinkle with bacon, cilantro, and diced tomatoes.  Lightly sprinkle each tostada with salt, and a squeeze of lime juice.  Serve immediately.

*a half-and-half mixture of sour cream and mayonnaise can also be used here, but try and find crema if you can!  My local Kroger and Publix both carry it, for what that's worth!


Sunday, November 30, 2014

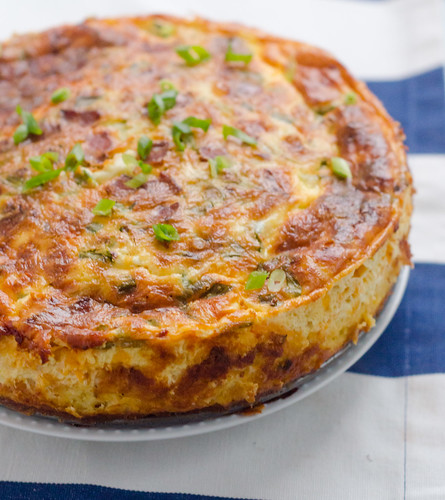
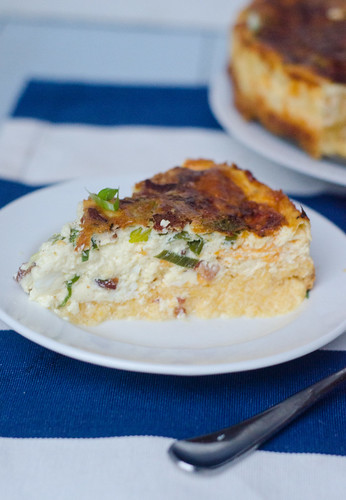
Bacon-Cheddar Quiche with a Grits Crust

Bacon-Cheddar Quiche with a Grits Crust 

Is it just me, or did November absolutely fly by?  Guys, I made it!  I posted every single day for the whole month!  This exercise was really good for me.  It forced me to go a little outside my comfort zone, and kind of reignited my passion for blogging.  And while I don't plan on posting every day in December, I do plan to keep the momentum going and post at least 3-5 days per week.  I kind of loved doing the weekend posts.  Putting together themed menus and party ideas is so much fun, and I also liked giving you a snapshot into our life… and I'll be honest, I always love sharing pictures of my cute kids :)

So now we move on to the holidays.  A time for family, celebration, decadence, and extravagance.  And this quiche kind of embodies all of those things.  This recipe makes a big deep dish quiche, which is big enough to serve several people.  It's decadent, rich, and definitely worthy of a celebration!  The grits crust is the stuff dreams are made of.  I mean, really.  And the quiche filling is custardy, rich, creamy, and absolutely delicious.  

this is definitely not a light and healthy dish.  It's the opposite, actually.  There's bacon, tons of cheese, heavy cream, half-and-half… yeah.  But it's a great dish for a celebration, and a great dish to share.  I actually think it would be pretty perfect for Christmas morning.  It can be prepped and assembled the night before, then just pop it in the oven to bake while you open presents in the morning.

I hope you're ready for some holiday cheer around here… because I have a lot to share with you in the next few weeks.  Get ready!

Bacon-Cheddar Quiche with a Grits Crust 

Bacon-Cheddar Quiche with a Grits Crust
adapted from Southern Living, December 2014
serves 10
  • 6 thick-cut bacon slices, chopped
  • 2 1/4 cups milk
  • 2 Tbs butter
  • 1/2 cup uncooked stone-ground grits
  • 2 tsp kosher salt, divided
  • 1 tsp black pepper, divided
  • 2 1/2 cups shredded extra sharp cheddar cheese
  • 6 large eggs
  • 2 1/2 cups half-and-half
  • 1 cup heavy cream
  • 1/3 cup thinly sliced scallions
  • 1/4 tsp red pepper flakes
Preheat the oven to 350 degrees F.  Lightly grease a 9-inch springform pan and place it on a foil-lined rimmed baking sheet.

Cook the bacon in a large skillet over medium heat until crispy.  Remove to a paper towel-lined plate using a slotted spoon.  

Transfer 1 tablespoon of the drippings to a medium saucepan.  Add the milk and butter and bring to a boil over medium heat.  Slowly whisk in the grits, 1 teaspoon of salt, and 1/2 teaspoon of pepper.  Cook, whisking constantly, for about 15 minutes (or until the grits are very thick).  Remove from heat and let stand for 10 minutes.  Stir in 1 cup of the cheese and 1 egg.  Spread the grits in an even layer in the prepared springform pan and bake for 25 minutes, or until they are lightly browned.  Remove from the oven and sprinkle the remaining cheese over the grits, spreading it to the edges.  Allow to cool for 15 minutes.*

Reduce the oven temperature to 325 degrees.  In a large bowl, combine the half-and-half, remaining eggs, cream, scallions, 1 tsp salt, 1/2 tsp pepper, and the red pepper flakes.  

Pour the mixture over the grits and sprinkle the bacon over the top.  

Bake for 1 hour and 15 minutes, or until the quiche is lightly browned and just set (barely jiggles when lightly agitated).  Let stand for 20 minutes before serving.

To serve, run a sharp knife around the edges of the quiche, remove the sides of the pan, and serve.

*At this point the grits crust and the egg mixture can be stored separately overnight in the refrigerator.  To serve, assemble and bake as directed.


Tuesday, November 11, 2014

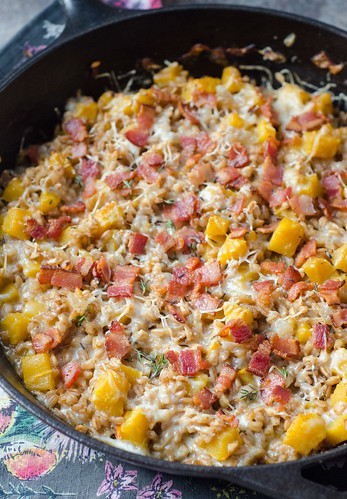
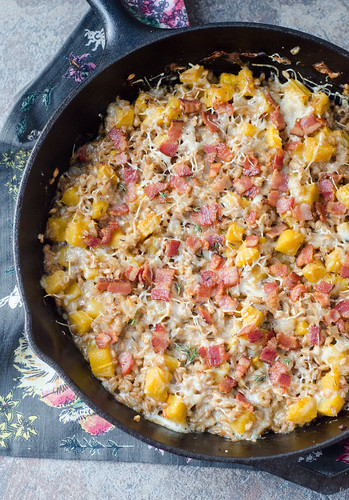
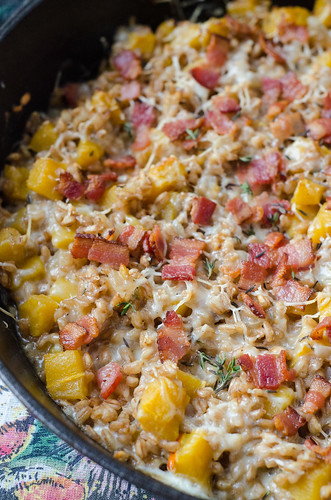
Cheesy Baked Farro with Butternut Squash and Bacon

Cheesy Baked Farro with Butternut Squash and Bacon


You guys know I love me some Ina Garten, so when her new book became available for preorder, I snatched it right up.  I'll be totally honest and say that I was actually a bit skeptical of this one though - it's called "Make it Ahead," and I wasn't sure how many new and exciting recipes and ideas she'd bring to the table.  I have a few make-ahead cookbooks already, and it seems as though they mostly just recycle the same types of recipes over and and over again.  As it turns out, I was pleasantly surprised to be wrong, because this cookbook is amazing.  I found myself starring almost every single recipe, and I've loved everything I've made thus far.

I have a few of the recipes lined up to share in the next few weeks, and today I'm starting with the cheesy baked faro with butternut squash and bacon.  It seems like every few years a "new" grain comes on the scene, and becomes the grain du jour.  Quinoa was a big one a few years ago, and lately I've been seeing more and more farro recipes.  So is quinoa out and farro in?  I'm not ready to give up on quinoa just yet, but I'm definitely excited to start cooking more with farro!

Cheesy Baked Farro with Butternut Squash and Bacon

If this recipe is any indication, then farro's stock will be rising exponentially in my house.  I absolutely loved the slightly chewy, nutty flavor of the grain, and it paired perfectly with the subtle sweetness of the squash and salty bacon.  Oh yeah, and it has fontina and parmesan cheeses too.  The texture of the finished dish was almost risotto-like.  Creamy, luxurious… and are you ready to hear the best part?  It's all cooked in one pan.  I prepped and assembled the dish during the boys' nap time, then threw it in the oven to finish off when Joey got home from work.

Total winner winner farro dinner.

Cheesy Baked Farro with Butternut Squash and Bacon

Cheesy Baked Farro with Butternut Squash and Bacon
adapted from Make it Ahead, by Ina Garten

  • 4 slices thick-cut bacon, cut into large dice
  • 1 Tbs unsalted butter
  • 1 large yellow onion, diced
  • 2 tsp fresh thyme leaves
  • kosher salt and freshly ground black pepper
  • 1 1/2 cups pearled farro
  • 3 cups chicken or vegetable stock
  • 3 cups (3/4-1 inch) diced butternut squash
  • 1 cup grated fontina cheese
  • 1/2 cup freshly grated Parmesan cheese
Preheat the oven to 375 degrees.

In a 12-inch oven-safe skillet, cook the bacon over medium-high heat until it's just brown, but not yet crispy.  Use a allotted spoon to remove to a paper towel-lined plate to drain, leaving the bacon drippings in the pan.  Reduce heat to medium.

Drain all but 2 tablespoons of the bacon fat, then melt the butter in the pan.  Add the onion and cook 6 to 8 minutes, until it's tender and beginning to brown.  Stir in the thyme, 1 teaspoon of salt, and 1 teaspoon of pepper, and cook for one minute.  Add the farro and chicken stock, stir, and bring to a simmer.  

Scatter the squash over the farro mixture, cover, and bake for 30 minutes, or until the squash and farro are tender.  Be sure to check the pan at least once during the cooking time, and add more stock if the mixture seems dry.

Stir in the fontina cheese, then sprinkle the bacon and parmesan cheese over the wash and farro.  Bake uncovered for 15 to 20 minutes, or until most of the liquid has evaporated.  

Serve hot directly from the pan.

To Make it Ahead:  Assemble the dish, including the bacon and parmesan, and refrigerate for up to 2 days.  Bake 20-25 minutes before serving.


Friday, June 27, 2014

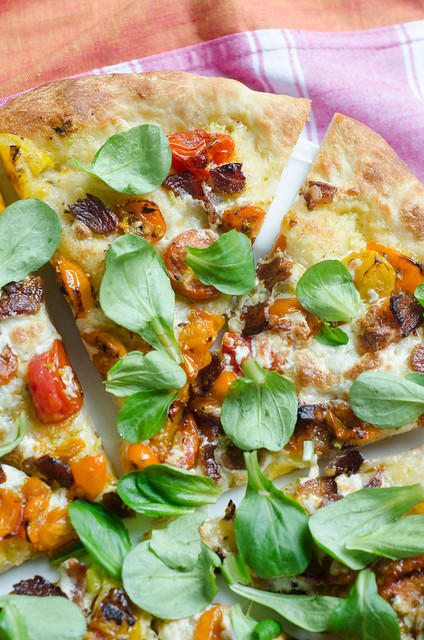
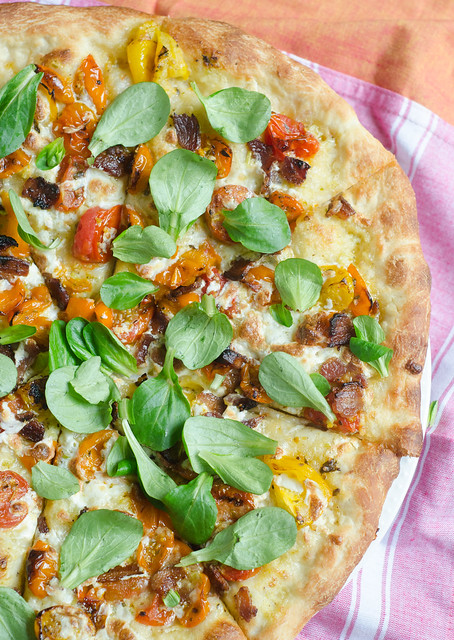
BLT Pizza

BLT Pizza


On Monday, I wrote an ode to baked brie, and today I'm here with an ode to the BLT.  Is there a summer meal more perfect than a BLT?  A juicy homegrown tomato, perfectly crispy and salty bacon and fresh crisp lettuce.  I think I may need a moment.  I have been pretty vocal about my distaste for mayonnaise, but this is one capacity in which I think it is crucial.  I typically like to mix it with some fresh herbs and/or garlic before spreading it on the bread for my BLT, which not only adds another layer of flavor to your sandwich, but it helps mask the "mayo" taste. ;)  I could eat a BLT for lunch and dinner every day in the summer and never get tired of it.

But this isn't about a sandwich, this is about a pizza.  And this pizza is definitely worth writing about.  I've been wanting to make a BLT pizza for years now, but could never quite conceptualize it.  Leave it to Cooking Light to not only make a really freaking delicious pizza, but one that's actually relatively healthy and light.  Imagine that!

So remember how I said I hate mayo, but I use it on my BLT's mixed with herbs and garlic?  Well that's exactly what you'll use as the sauce here.  I know it sounds kind of icky to use mayo on a pizza, but it's just a small amount, and it almost "melts" into the dough, and it gives the pizza a rich and creamy taste.  I also added my beloved roasted tomatoes to the pizza, sprinkled some bacon over those, and then topped it with a modest amount of cheese.  After it bakes, comes the "L."  Simply scatter some fresh leaves of your choice over the pizza before serving.  The original recipe called for arugula, but it's not my favorite green, so I used mache instead.

I've yet to even have my first BLT sandwich of the summer, but I'm pretty sure that the BLT pizza is going to become a regular occurrence around here as well.  BLT sandwich for lunch, BLT pizza for dinner?  Overkill?

BLT Pizza

BLT Pizza with White Sauce
adapted from Cooking Light, July 2014
serves 4

  • 1 lb cherry or grape tomatoes, halved or quartered if large
  • 1 tsp dried oregano
  • 1/2 tsp freshly cracked black pepper
  • kosher salt
  • 3 slices bacon
  • 1/4 cup canola or reduced-fat mayonnaise
  • 1 Tbs extra virgin olive oil, plus more for brushing the dough
  • 1 Tbs minced fresh scallions
  • 1 Tbs minced fresh parsley
  • 2 cloves garlic, minced or grated
  • 1 lb fresh pizza dough
  • 1 Tbs cornmeal
  • 2 oz part-skim mozzarella cheese, shredded (about 1/2 cup)
  • 1 cup greens of your choice (recommend mache, spinach, or arugula)
Preheat the oven to 400 degrees.  Arrange the tomatoes in a single layer on a foil-lined baking sheet, and sprinkle with the oregano and pepper.  Scoot the tomatoes towards the center of the baking sheet and fit the bacon around the edges.  Bake for 20 minutes, stirring the tomatoes halfway through.  Drain the bacon on a paper towel-lined plate then break into bite-sized pieces.

Place a pizza stone in the oven and increase the temperature to 500 degrees.

Meanwhile, whisk together the mayonnaise, oil, scallions, parsley, and garlic in a small bowl.  

Sprinkle the cornmeal over a large square of parchment paper, then roll and stretch the pizza dough into a 12-inch circle.  Spread the mayo mixture over the dough, leaving a 1-inch border, then brush the border lightly with olive oil.

Scatter the tomatoes and bacon over the sauce, then sprinkle with the cheese.  Transfer to the pizza stone in the oven, and bake 10 minutes, or until the crust is browned and the cheese is melted and bubbly.

Allow to cool 10 minutes.  Top with greens, cut into 8 slices, and serve.


Thursday, January 30, 2014

Bacon and Cheddar Toasts


As you have no doubt seen all over the news by now, the past few days in Atlanta have been nothing short of insane.  I wanted to write about it all and share some thoughts, but to be honest, I'm still having trouble processing it and wrapping my head around it all.   I'll just say that our family was extremely fortunate on Tuesday that Joey only spent over two hours in the car before abandoning it and walking three miles home in the snow.  And that we are incredibly lucky that we only live a mile from the school.  After waiting over two hours for her to arrive home on the bus, I set out on foot to the school, when I happened upon the bus just outside our neighborhood.   She got off the bus thinking that she'd just had the greatest adventure of all-time, and I fought back tears of relief.  My mother in law was stuck in traffic near our house, just a few miles from home, but roads were closing and traffic was grid-locked, so she wisely gave up and came to stay with us for the night.

Those are small and petty inconveniences compared to the children who had to spend the night in the school gymnasium because bus service was discontinued and their parents were stranded somewhere in the snow... or worse, the children who had to spend the night on their buses that were stranded on deserted roads.  Or the woman who gave birth to a baby on the interstate.  Or the thousands of people who never made it home that night.  The silver lining was that good samaritans were out in full force, and reading the stories of all the acts of kindness and selflessness brought me to tears.  It's a good reminder of the wonderful human nature that comes out in times of crisis.

So what does all of this have to do with bacon and cheese toast?  Not much, other than as I waited for my family to come home, I engaged in some wicked emotional eating, and downed an embarrassing number of these little babies.  And then I made another batch that night; and Joey, his mother, and I all just stood around the baking pan, drinking wine and eating these toasts as we watched all the reports and news roll in.

These are embarrassingly easy, but amazingly delicious and addictive.  It's a simple mixture of sharp cheddar, bacon, onion, and horseradish, then it's spread on pieces of bread, and baked until the cheese is melted and gooey, the bacon is cooked through, and the bread is nice and crispy.  It's a familiar concept with a kicked-up flavor profile, thanks to the bite from the horseradish and onion.

These are an ideal make-ahead dish and can be flash frozen before baking, or chilled for several hours in the refrigerator.  This makes them perfect for serving at parties.  Like, perhaps a Super Bowl party this weekend?  They also make a nice easy breakfast, snack, or accompaniment to a salad or soup.  With a recipe as easy as this in your arsenal, you'll always have something to make for parties, potlucks, or unexpected visitors during a snowstorm.


Bacon and Cheddar Toasts
adapted from Gourmet Today
makes 28 triangles

While I usually use thick-cut bacon, thin, lean bacon is best here.  Discard the extra fatty parts of the bacon.

Using a food processor is optional, but I think the mixture spreads easier and the flavors meld better with the food processor.

These are utterly irresistible straight out of the oven, but no one will turn them down at room temperature either.

  • 8 oz extra-sharp cheddar, grated (about 2 cups)
  • 8 oz cold lean bacon, finely chopped
  • 2/3 cup coarsely chopped white onion
  • 2 Tbs prepared horseradish
  • 1/2 tsp salt
  • 1/4 tsp freshly ground black pepper
  • 14 thin slices of white sandwich bread (recommended:  Pepperidge farm)
  • sliced scallions or chives for garnish
In the bowl of a food processor, combine the cheese, bacon, onion, horseradish, salt, and pepper.  Pulse a few times to combine well.

Spread a heaping tablespoon of the cheese mixture onto each of the bread slices, spreading it all the way to the edges.  Arrange in a single layer on a baking sheet, cover the bread with wax paper or parchment paper, and place in the freezer for 15 minutes.  Alternatively, store in the refrigerator for at least 2 hours, or overnight.

When ready to bake, preheat the oven to 375 degrees.  

Trim the crusts off the bread, then slice each piece in half diagonally.  Arrange on a greased baking sheet  15 minutes, or until the cheese is melted and the edges are beginning to brown.  Sprinkle with scallions or chives and serve.


Tuesday, January 7, 2014

Bacon, Potato, and Caramelized Onion Pizza


Do I post too much pizza here?  Is there such a thing as too much pizza?  I don't think there is.

This pizza is a thing of beauty.  Allow me to break it down for you:  Chewy, perfect pizza dough.  Sweet caramelized onions.  Carb-o-licious roasted potatoes.  Salty bacon.  Mozzarella and gruyere.  Are you drooling yet?

I know that potatoes on pizza seem kind of odd and maybe a tad redundant (carbs + carbs?), but they provide a nice earthy flavor and wonderful added texture to the pizza.  They are briefly roasted, just to cook them through, and then once they are added to the pizza, they get beautifully browned and crispy. The old adage of "Bacon makes everything better" is certainly true here as well.

I typically let the seasons guide me in my pizza-making, using as much fresh and seasonal produce as I can.  That sadly doesn't work as well in the winter, but this is a great option if you are like-minded about that sort of thing.  It's definitely a hearty and indulgent pizza, but when served alongside a leafy green salad with beets and oranges, it is a lovely and seasonally appropriate meal.

We're hunkered down in the cold along with the rest of the country, and as if you needed another reason to make a pizza - having your oven on for this will really warm up your kitchen for you!

Bacon, Potato, and Caramelized Onion Pizza
barely adapted from Annie's Eats

  • 1 cup thinly sliced small potatoes, such as fingerling, red potatoes, or Yukon golds
  • 2 Tbs olive oil, divided, plus more for brushing
  • Salt and pepper
  • 1 large onion, halved pole-to-ple and thinly sliced
  • Pinch of sugar
  • 1 lb pizza dough
  • cornmeal, for sprinkling
  • 1 cup shredded mozzarella cheese
  • 1 cup shredded shredded gruyere cheese
  • 3 slices bacon, cooked until crisp, and crumbled

  • Preheat the oven to 400˚ F, and place your pizza stone in the oven.  Line a baking sheet with parchment paper or foil. In a bowl, combine the sliced potatoes with 1 tablespoon of the olive oil and season with coarsely ground salt and pepper. Arrange in a single layer on the prepared baking sheet.
    Bake, flipping the slices over once, until the potatoes are just beginning to brown, about 10-15 minutes. Remove from the oven and let cool.  
    Meanwhile, make the caramelized onions.  Heat the remaining tablespoon of olive oil in a 12-inch skillet over medium heat.  Add the sliced onions to the pan, and stir in the sugar, salt, and pepper.  Reduce the heat to medium-low.  Cook the onions, stirring occasionally, until golden brown and fully caramelized, about 15-20 minutes.  Remove from heat and set aside.
    To make the pizza,  increase the temperature to 500˚ F, and preheat it for at least 30 minutes.  Roll and stretch out the the pizza dough into a 12-14 inch round on a piece of parchment paper that's been sprinkled with cornmeal.  Brush the perimeter of the dough with olive oil, and then sprinkle about two thirds of the shredded cheeses over the dough. Top with the caramelized onions, potato slices, and crumbled bacon, arranging them as evenly as you can over the cheeses. Sprinkle with the remaining shredded cheese.
    Transfer the pizza to the preheated pizza stone, and bake until the cheese is melted and bubbling and the crust is lightly browned, about 10-12 minutes.  Remove from the oven and allow to cool slightly before slicing and serving.


Sunday, August 4, 2013

Pasta with Bacon, Toasted Corn, and Cherry Tomatoes


I might be nearing the point of needing a corn intervention.  I've been obsessed with it all summer, and I don't have any plans of stopping.  We've been enjoying it in our dinners at least twice a week, whether it's straight-up corn on the cob or incorporating it into other dishes... like crab cakes, pizza, risotto... and now into this pasta dish.  I even have a dessert in the works. Things are getting mighty crazy up in here!

So this pasta embodies everything I love about summer dinners.  It was super fast - allowing for maximum outside time both before and after dinner.  It didn't require many dishes to wash, or ingredients to buy.  You don't have to turn on the oven.  It has bacon (although let's be honest - that makes a good meal no matter what time of year it is).  And finally, it's full of peak-season produce.

The bacon is quickly cooked, then corn is toasted in the rendered bacon fat.  Cherry tomatoes are thrown in for good measure, and the whole thing is finished with some Parmesan cheese, fresh basil, and a squirt of lemon juice.

I was a little worried that it wouldn't really seem like a cohesive dish without a true sauce - I didn't want  pasta with just random ingredients thrown in.  But as the cherry tomatoes cook, some will burst, and that plus the pasta water and Parmesan cheese form a super flavorful sauce.  And these cute little corkscrews were perfect for trapping the corn kernels and bacon bits - maximum flavor in each bite!

School is starting in the next few weeks, and I know that weeknights are super busy.  Making this a great dinner to put on the table for your family.  Because whether you're trying to make the most out of the last vestiges of summer, or gearing up for a busy fall, this pasta dish will meet all your criteria.

Pasta with Bacon, Toasted Corn, and Cherry Tomatoes
adapted from America's Test Kitchen, Pasta Revolution
serves 4 to 6

  • 8 slices of bacon, chopped
  • 4 ears of corn, kernels cut from the cob
  • salt and pepper
  • 1 lb cherry or grape tomatoes, halved
  • 1 lb medium pasta shape
  • 2 oz. freshly grated Parmesan cheese (about 1 cup), plus extra for serving
  • juice of 1/2 lemon (about 1-2 Tbs)
  • 1/2 cup chopped fresh basil
Cook the bacon in a large nonstick skillet over medium-high heat until crisp, about 5 minutes, stirring often.  Use a slotted spoon to transfer it to a paper towel-lined plate, and drain off all but 2 tablespoons of the fat from the skillet.  Add the corn, 1/4 teaspoon of salt and cook until the corn is toasted and spotty brown, 7-10 minutes.  Add the tomatoes and cook, stirring often, about 3 minutes, or until they are slightly softened and starting to burst.

Meanwhile, bring a large pot of water to a boil.  Add 1 tablespoon of salt, then stir in the pasta.  Return to a boil and cook until al dente, stirring often (I usually cook it 1-2 minutes less than the recommended time on the box).

Reserve 1/2 cup of the cooking water, drain the pasta, and return it to the saucepan.  Stir in the bacon, corn and tomato mixture, Parmesan, basil, and lemon juice.  Add the reserved pasta water a little at a time to adjust the consistency as needed.  Season with salt and pepper as needed.  Divide among serving bowls, and pass extra parmesan at the table.


Tuesday, October 2, 2012

Bacon, Brussels Sprouts, and Goat Cheese Pizza


Food blogging has introduced me to many things - some great friends, a renewed love of seasonal cooking, turning any baked good into red velvet, bacon in everything imaginable, and cookie dough treats galore.  However, one thing that I didn't expect to gain from food blogging is my love of brussels sprouts.  Just two years ago, not only had I never even tried a brussels sprout, but I wrinkled my nose at the mere mention of them.  I know, I know, unfounded bias.  But they are always the veggie that people use as an example of something gross.  Then I saw tons of bloggers share recipes for brussels sprouts that actually looked... tasty.  So I figured I should practice what I preach with my children and actually try it before I declare my hatred.  So I kept it simple and just roasted them with salt, pepper, and olive oil.

And then something funny happened... I liked them!  I couldn't wait to try out tons of new recipes that featured the cute little cabbages.  But sadly, Joey wasn't a fan.  He is always a good sport and tries anything, likes most foods, etc.  So I try to honor it if he doesn't like a specific food. For the most part I relegated them to a side dish for me, while I roasted a pan of broccoli for Joey.  Or I waited until he wasn't home for dinner to make a brussels sprouts-centric dish for Caroline and me.

But when Courtney posted a pizza featuring brussels sprouts, I decided to try again.  I figured if anything would convert Joey to a brussels sprouts lover it would be pizza.  With bacon.  And cheese.  Sadly, he said that it wasn't his favorite pizza ever... though he did still eat 3 pieces.  And Caroline and Smith both loved it, so I'd consider that a win.

The brussels sprouts are tender, but they also get that super tasty char around the edges.  Before being added to the pizza, they are tossed with some olive oil, a touch of vinegar, garlic, shallots, and red pepper flakes to give them even more flavor.  The original recipe called for cheddar, mozzarella, and feta, but I went with cheddar, Parmesan, and goat cheese.  I think many combos would be great, including blue cheese (oh how I miss you...).  Or if God-forbid, you aren't a fan of brussels sprouts, I think many other veggies would work well here - broccoli, cauliflower, zucchini, corn, mushrooms... whatever you have on hand and love is sure to produce a fabulous pizza.

Brussels Sprouts, Bacon, and Goat Cheese Pizza
adapted from Shutterbean, via Cook Like a Champion

  • 1 lb pizza dough
  • 4 pieces of bacon, chopped
  • 5-6 Brussels sprouts, halved lengthwise and thinly sliced
  • 1 Tbs olive oil, plus more for brushing the dough
  • 1 Tbs balsamic vinegar
  • 3 cloves of garlic, thinly sliced
  • pinch of red pepper flakes
  • 1 large shallot, thinly sliced
  • salt and pepper
  • 1/2 cup shredded sharp aged white cheddar
  • 1/3 cup freshly grated Parmesan cheese
  • 1/3 cup crumbled goat cheese
Place a pizza stone or sheet pan in the oven and preheat to 500 degrees for about 30 minutes.

Meanwhile, cook the bacon in a medium skillet, stirring often, until just crispy and lightly browned, 4-6 minutes.  Use a slotted spoon to transfer the bacon to a paper towel-lined plate.  Reserve the bacon grease for another use.

In a medium bowl, toss the brussels sprouts with the shallots, garlic, oil, vinegar, and red pepper flakes. Season with salt and pepper.

On a piece of parchment paper lightly dusted with cornmeal, stretch the pizza dough into a 14-inch circle.  Brush the perimeter with olive oil.

Sprinkle the dough with the cheddar and parmesan, leaving a thin border around the edge.  Evenly distribute the brussels sprouts mixture, then top with the bacon and goat cheese.

Carefully transfer the pizza and parchment to the stone in the oven, and bake 10-12 minutes, or until the crust is browned and the toppings are cooked through.  Remove from the oven and allow to cook 5-10 minutes before slicing and serving.


Sunday, April 29, 2012

Bacon-Chipotle Guacamole


Without a doubt, guacamole is one of my favorite snacks (um, meals).  Just a good, classic, guacamole:  avocados, garlic, cilantro, jalapeño, and lots and lots of lime juice.  So it's hard to stray from that classic version, but if anything will make me jump ship it's this.  I have two words for you  bacon.  chipotle.  Yes, indeed.

This guacamole is one that people who "don't even like guacamole" will inhale.  We brought this to a neighborhood block party, and that is what I heard over and over again.  "I don't even like guacamole or avocados, but that stuff is GOOD!"

The bacon gives the guacamole a fun crunch, while also of course adding some of the best flavor on earth.  The chipotle's smokiness plays really well off of that of the bacon, while also providing some heat.  It truly is the perfect combination.

Guacamole is a must at any respectable Cinco de Mayo party, so I highly recommend you gussy up your usual version and make this.  I promise you it will be well-received.

Bacon-Chipotle Guacamole
barely adapted from Fiesta at Rick's, by Rick Bayless
makes about 3 cups

  • 4 strips of bacon, preferably thick-cut, applewood-smoked bacon
  • 3 ripe avocados (about 1 1/4 lbs)
  • 1/3 cup finely chopped white onion
  • 3 canned chipotles en adobo - seeds removed optional - finely minced
  • 1 tomato, cored, seeded, and finely chopped
  • 1/4 cup chopped cilantro
  • 1 clove garlic, minced
  • juice of 1 lime
  • kosher salt to taste
Chop the bacon into 1/2-inch pieces and cook in a large skillet until browned and crispy.  Remove to a paper towel-lined plate to drain.

Meanwhile, cut each avocado in half, remove the seed, and scrape out the flesh from the peel.  Add it to a medium mixing bowl and mash with a fork into a coarse puree.  

Add the onion to a small strainer and briefly rinse under cold water (this helps tame the "bite" of raw onion).  Shake off the excess water and transfer to the bowl with the avocados.  Add the bacon, chipotle chiles, tomato, cilantro, garlic, and lime juice.  Mix well, then season to taste with salt. 

Serve immediately.


Thursday, November 17, 2011

Maple-Bacon Biscuit Bake


I feel like I should simultaneously apologize and say "You're welcome" for posting this recipe.  It is so bad but so good at the same time.  Bad/good that it is prepped and ready in under an hour.  Bad/good that it is sinful and decadent.  Bad/good that it makes a lot of biscuts.  So you can hoard it all for yourself or share the wealth with several people.

It's sort of a cross between an upside down cake and monkey bread.  The maple-bacon mixture is poured into the bottom of a pan, and then biscuit dough is dropped over it.  After a quick bake in the oven, it is inverted onto a platter and then served monkey bread-style.  Just grab a biscuit and chow down.  Some of the bacon-maple mixture did stick to the pan, but I just scraped it off onto the biscuits.  I do think it would have been better to have lined the pan with parchment though.  I've added that step in my version below.


I think this would be a great treat to make if you are hosting guests in the coming week.  I would say you should make it Thanksgiving morning, but I personally try to eat light and healthy for breakfast - I want to save my calories for the big meal!  But if you are one of those crazies (like me) who gets up early to shop on Black Friday, this would certainly be a welcome thing to come home to after a morning/night of fighting the crowds. 


It's hard to say whether this is best served hot from the oven or at room temperature.  Obviously it's hard to beat it when it's fresh from the oven, but once it cools for a bit, the bacon-maple mixture hardens into sort of a candy.  Honestly, I'm not one of those people who thinks bacon is great in desserts, but this is really wonderful.  So who knows, maybe I'm a convert and you'll be seeing some bacon cupcakes on here soon ;-)


Maple-Bacon Biscuit Bake
adpated from King Arthur Flour


Maple-Bacon Syrup
  • 8 oz bacon, cut into 1/2-inch pieces
  • 1/3 cup brown sugar
  • 1/4 cup all-purpose flour
  • 1/4 cup maple syrup
  • 2 Tbs reserved bacon fat
Biscuits
  • 2 cups all-purpose flour
  • 2 tsp baking powder
  • 1/2 tsp salt
  • 4 Tbs cold butter
  • 1 cup cold buttermilk
Preheat the oven to 475 degrees.  Line a 9-inch round pan or 8-inch square pan with parchment paper, and spray with cooking spray.

Cook the bacon in a skillet until browned and crispy.  Use a slotted spoon to transfer to a paper towel, and reserve 2 tablespoons of the rendered fat.

In a medium bowl, whisk together the syrup, flour, brown sugar, and rendered fat.  Spread over the bottom of the baking pan, and sprinkle the bacon evenly over the top.

For the biscuits, whisk the dry ingredients together in a mixing bowl.  Drop the butter into the mixture, and using your fingers, a pastry blender, or 2 knives, work it into the dry ingredients until the mixture is crumbly and has pea-sized pieces of butter.  Add the buttermilk, and stir to make a sticky dough.

Drop the dough over the maple-bacon mixture using a cookie scoop or large spoon.

Bake for 10 minutes, turn off the oven, and leave the pan in the oven for an additional 5 to 10 minutes, until the biscuits are golden brown.

Remove from the oven and immediately invert onto a serving plate.  Lift off the pan and the parchment paper, and serve.


Wednesday, May 4, 2011

Barbecued Chicken Kebabs


This might be the weirdest method I've ever used when cooking.  I always joke with my cooking friends that Cook's Illustrated just likes to mess with their readers - like "let's add this crazy step and see if people actually do it!"  I for one would just like to know how they come up with this stuff.  Take this recipe for example.  The good folks at CI wanted to "rescue" them from a fate of overcooked and dry meat.  They acknowledged that the problem is that chicken is too lean to hold up to the high heat of the grill.  Since these are bbq glazed, bacon seems like a natural pairing with the chicken, but they struggled with how to incorporate it.  After trying several methods, they finally,somehow, figured out that the best method is to - get this - pulse the bacon in a food processor to form a paste, then coat the chicken with it.  Crazy, right?!

But it worked!  This was definitely one of the best dinners we'd had in a while, and Joey and Caroline both seemed to agree.  The bacon does keep the chicken from drying out, while simultaneously giving it a smoky flavor.  Joey proclaimed this to be one of his favorite dinners, so I have a feeling I'll be making bacon paste all summer!


Grilled Barbecued Chicken Kebabs
adapted from Cook's Illustrated, May/June 2011
serves 6

Sauce
  • 1/2 cup ketchup
  • 1/4 cup molasses or honey
  • 2 Tbs grated onion (grated on the large wholes of a box grater)
  • 2 Tbs Worcestershire Sauce
  • 2 Tbs Dijon mustard
  • 2 Tbs cider vinegar
  • 1 Tbs brown sugar
  • hot sauce, to taste
Kebabs
  • 2 pounds boneless, skinless chicken thighs or breasts, trimmed of excess fat and cut into 1-inch cubes
  • 2 tsp kosher salt
  • 2 Tbs sweet paprika
  • 4 tsp sugar
  • 2 tsp smoked paprika
  • 1/8 tsp cayenne pepper
  • 2 slices bacon, cut into 1/2-inch pieces
  • skewers
For the sauce, bring all the ingredients to a simmer in a small saucepan over medium heat.  Cook, stirring occasionally, until the sauce thickens and reaches a ketchup-like consistency and is reduced to about 1 cup, 5 to 7 minutes.  Remove from heat.  Transfer 1/2 cup of the sauce to a small bowl and set aside to serve with the cooked chicken.

For the kebabs, toss the chicken with the salt in a large bowl.  Cover with plastic wrap and refrigerate at least 30 minutes, or up to 1 hour.

For a gas grill, turn all the burners to high, close the lid, and heat 15-20 minutes.

Meanwhile, pat the chicken dry with paper towels.  Combine the paprikas, sugar, and cayenne in a small bowl.

Process the bacon in a food processor until a smooth paste forms, 30-45 seconds, scraping down the bowl  twice during processing.  Add the bacon paste and the spice mixture to the chicken and toss to coat using your hands or a rubber spatula.  Thread the meat onto skewers, rolling or foldin meat as necessary to maintain 1-inch cubes.

Scrape the cooking grate clean with a grill brush.  Leave the primary burner on high and turn off the other burners.  Place the kebabs over the hot burner and grill, covered, turning one-quarter of a turn every 2 minutes or so, until well browned and slightly charred, 8 to 10 minutes.

Brush the top surface of the kebabs with 1/4 cup sauce; flip and cook until the sauce is browned in spots, about 1-2 minutes.  Flip again and brush with remainign 1/4 cup sauce; continue to cook until browned in spots and cooked through, about 1-2 minutes.

Remove from grill and allow to rest 5 minutes.  Serve, passing barbecue sauce separately.


Tuesday, December 7, 2010

Cajun Red Beans & Rice


I realize that my blog has been inundated by recipes for rich, indulgent sweets and desserts, and for that I'm sorry.  Well not too sorry, actually - it has all been quite tasty.  But I have been eating something other than chocolate cheesecake and cookies.  In fact, I've been eating some pretty delicious dinners.  Like this red beans and rice recipe.  It is also relatively healthy, which is a nice bonus during the time of year for overindulgence.

Years ago, when I was a vegetarian, red beans and rice was one of my favorite dinners that my mom prepared.  And while this is reminiscent of that dinner, this version has both bacon and andouille sausage. So vegetarian it is not, but delicious it is.  I used to shy away from any recipe that starts with dried beans, but I don't know why.  They aren't difficult to prepare, and they have much less sodium than the canned variety.  And as they cook, they become so creamy and delicious.  Sure, they take longer to cook, but in that time they are permeated by all sorts of delicious flavors.  The recipe calls for an overnight soak, but I opted for a quick-brine and only soaked them for an hour.  Both versions are included below. 

This meal does take some time to cook, but most of it is inactive.  Its a great dinner to make on a cold day when you don't want to leave the house.  There are a few noteworthy ingredients in this recipe.  The red wine vinegar may seem a little out of place, but it provides a really nice acidic bite to the final dish.  And the scallions gave the whole dish a nice and fresh brightness.  The bacon may seem a little out of place, but tasso is traditionally used in Louisiana.  However, it can be hard to find outside of the area, so bacon plus some additional spices makes an acceptable substitute.  And finally, in an effort to make this a little healthier, I used chicken andouille sausage in lieu of traditional pork sausage.

We all really enjoyed this dinner, and Caroline practically inhaled it.  It really was the perfect dinner to enjoy on a cold night (along with some traditional Southern cornbread), and I am certain I'll be making this dinner all winter long.


One Year Ago:  Salted Cocoa-Roasted Nuts


Cajun Red Beans and Rice
adapted from Cook's Illustrated, Jan/Feb 2010
serves 6 to 8
  • 1 pound small red beans, rinsed and picked over
  • Salt
  • 4 slices of bacon, chopped fine
  • 1 medium onion, chopped fine (about 1 cup)
  • 1/2 cup chopped green bell pepper (1/2-1 pepper)
  • 1/2 cup chopped celery (1-2 ribs)
  • 3 medium garlic cloves, minced
  • 1 tsp fresh thtyme, minced
  • 1 tsp paprika
  • 2 bay leaves
  • 1/4 tsp cayenne pepper
  • ground black pepper
  • 3 cups chicken broth
  • 6 cups water
  • 10 ounces andouille or chicken andouille sausage, halved lengthwise and cut into 1/4-inch slices
  • 2 tsp red wine vinegar, plus more for seasoning
  • 3 scallions, sliced thin
  • hot sauce, for serving
Dissolve 3 tablespoons of salt in 4 quarts of water in a large pot and add the beans.  For the overnight brine, allow to soak at least 8 hours, or up to 24 hours.  For the quick-soak method, bring the pot to a boil over high heat.  Boil for 1 minute, then remove from heat, cover, and stand for 1 hour.  Drain and rinse the beans.

In a large dutch oven, cook the bacon over medium heat, stirring frequently.  Cook until browned and almost fully rendered, 5 to 8 minutes.  Add the onion, bell pepper, and celery, and cook, stirring frequently, until softened, 6-7 minutes.  Add the garlic, bay leaves, thyme, paprika, cayenne pepper, and 1/4 teaspoon black pepper.  Cook until fragrant, about 1 minutes, stirring constantly.

Stir in beans, broth, and water.  Bring to a boil over high heat, then reduce heat but just enough to still maintain a vigorous simmer.  Stirring occasionally, cook 45-60 minutes, or until the beans are soft and the liquid has begun to thicken.

Stir in the sausage and 2 teaspoons of the red wine vinegar.  Cook until the liquid is thick and the beans are fully tender and creamy, about 30 minutes.  Season to taste with additional salt, pepper, and vinegar.  Serve over rice, sprinkled with scallions and passed with hot sauce.


Wednesday, August 25, 2010

BB: Ultimate Grilled Cheese


Ina Garten has a new cookbook coming out - it will be released in October, and is called How Easy is That?  How Ina is that??  In case the title didn't give it away, its focus is straightforward recipes perfect for entertaining and everyday cooking.  Tara, the brains behind Barefoot Bloggers, was offered an advanced copy of it to test out some recipes and share with her fellow blogging pals.  This month, we made Ultimate Grilled Cheese, as chosen by another one of my favorite bloggers, Rebecca of Ezra Pound Cake.

When I saw the title of this recipe, I had to wonder what exactly makes it the "ultimate" grilled cheese.  Well, you start with sourdough bread.  Butter each piece.  Then you spread each piece with an incredibly rich sauce of mayo, dijon, Parmesan cheese, salt, and pepper.  Scatter some bacon on top of the sauce, then pile on extra sharp cheddar and Gruyere.  So yeah, this sandwich doesn't mess around.

Joey was really excited by this sandwich.  Me?  Well it was certainly delicious of course.  It was a tiny bit too rich for me though, especially since I'm not the biggest fan of mayo (even though I actually decreased it when I made it).  I think if I had stopped at half a sandwich I would have been better off.  Still - add bacon, cheddar, and gruyere to anything and you can't go wrong. I'm just glad I served it with a light salad.

If you're interested to see what else will be included in Ina's latest cookbook, head over to Smells Like Home and check out what she's made so far.  And I for one can't wait to pick up a copy come October!

One Year Ago:  Pimiento Cheese with Bacon


Ultimate Grilled Cheese
Ina Garten, How Easy is That?
makes 6 sandwiches
  • 12 slices thick-cut bacon
  •  1 cup good mayonnaise
  • 1/4 cup Dijon mustard
  • 1/4 cup freshly grated Parmesan cheese
  • 1  tsp kosher salt
  • 1/2 tsp freshly ground black pepper
  • 12 slices sourdough bread
  • 6 tbsp butter, at room temperature
  • 6 oz Gruyere  cheese, grated
  • 6 oz extra-sharp Cheddar, grated
 Preheat the oven to 400 degrees.  Line the bacon on a rack set over a baking sheet, and bake for 20-30 minutes, or until browned and crispy.  Transfer to a paper towel-lined plate and allow to drain, then chop into 1-inch pieces.

Meanwhile, make the sauce.  Mix together the mayonnaise, mustard, salt and pepper, and Parmesan.  Combine the Gruyere and cheddar in a medium bowl.  Spread the sauce on each slice of bread, then top half the slices with bacon.  Top the bacon with 1/3 cup of cheese.

Form sandwiches, pressing each one down.  Butter the top half of each sandwich.  Melt 1-2 Tablespoons of butter in a large nonstick skillet, and grill have the sandwiches buttered-side up, flipping after a few minutes.  Repeat with remaining sandwiches.  Serve immediately.


Monday, March 22, 2010

Bacon Wrapped Pork Medallions with Cherry Sauce


Sometimes on Friday nights I like to make a "restaurant style" meal, put Caroline to bed a little early, and have a date night at home.  Such was the case last Friday, when I made this meal.  This meal looks fancy, but is actually pretty quick to throw together.  I decided to wrap the pork medallions with bacon... well... because its bacon.  It created a little more work (wrapping the medallions, browning the sides in the pan), but the final result was quite delicious.  I did think the smokiness of the bacon played nicely off the sweetness of the cherry sauce.


I served this with a simple risotto and roasted asparagus (so excited for spring produce!), and we drank a lovely Oregon Pinot Noir with it.  All in all, a perfect date night meal!


Bacon-Wrapped Pork Medallions with Red Wine, Cherry, and Rosemary Sauce
adapted from Cook's Illustrated, The New Best Recipe
  • 1 pork tenderloin, trimmed of excess fat and silver skin
  • 1 teaspoon kosher salt
  • 1/2 teaspoon pepper
  • 8 slices of bacon (preferrably Applewood smoked)
  • 1 Tablespoon olive oil
  • 3/4 cup red wine
  • 1/2 cup dried cherries
  • 2/3 cup low-sodium chicken broth
  • 2 teaspoons minced fresh rosemary
  • salt and ground black pepper
Arrange the bacon on a microwave-safe plate, and cook 1-3 minutes, until several tablespoons of fat has rendered off.  Transfer the bacon to a paper towel and allow to cool slightly.

Meanwhile, slice the tenderloin into 1-inch slices.  Season both sides with salt and pepper.  Wrap each medallion with a slice of bacon, cutting off the excess at the end if necessary.  Secure with a toothpick.

Heat the oil in a large, heavy-bottomed skillet, until shimmering.  Working in batches if necessary, sear each medallion about 1 minute per side, or until nicely browned.  Use tongs to turn the medallions, so as not to scrape off the sear.  Turn each medallion onto its side and brown the bacon as well. Transfer the pork to a plate.

Set the now-empty skillet over medium-high heat and add the red wine and cherries.  Cook, scraping up the browned bits with a wooden spoon, until the liquid reduces to 2-3 Tablespoons, about 2-3 minutes.

Increase the heat to high and add the broth, rosemary, and any accumulated juices from the plate of the medallions.  Cook until the sauce reaches the consistency of maple syrup, about 2 minutes.

Remove the toothpicks from the pork, and add the pork to the sauce, turned to coat.  Simmer to heat the pork through, about 1-2 minutes.  Season with salt and pepper to taste.

Transfer the pork to a serving plate, and spoon the sauce over the meat.  Serve immediately.


Friday, January 22, 2010

Brown Sugar Bacon Waffles


I really don't know what to say about these waffles except... well.... you really should make them this weekend.  They are pretty much the best waffles I've ever had.  You all know I'm a big fan of the sweet and savory combo, so it should come as no surprise that these were such a favorite. 

Thick slices of applewood smoked bacon are cooked with brown sugar, then broken into bite-sized pieces (try not to just gobble the bacon up at this point).  It is then mixed into a waffle batter that is made with brown-sugar instead of granulated, and just a touch of cinnamon.  Drizzle the finished product with some pure maple syrup, and eat with some fresh berries.  You have the perfect breakfast. 


Brown Sugar Bacon Waffles
adapted from Joy the Baker


For the Bacon
  •  10 slices of bacon
  • 1/4 cup brown sugar
Preheat the oven to 375.  Spray a baking sheet with cooking spray, and line with foil.  Spray the foil with cooking spray, and line the bacon in a single layer on the foil.  Sprinkle each slice with brown sugar.  Bake until the bacon is crispy, and the sugar is caramelized, about 10-15 minutes.  Immediately transfer the bacon to a cutting board, and when cooled enough to handle, break into bite-sized pieces. Set aside.


For the Waffles
  • 3 cups all-purpose flour
  • 1 Tablespoon baking powder
  • 1 teaspoon baking soda
  • 1 teaspoon salt
  • 1/4 cup brown sugar
  • 1/4 teaspoon cinnamon
  • 2/3 cups canola oil
  • 4 large eggs
  • 2 teaspoons vanilla extract
  • 2 1/2 cups buttermilk
Set your waffle iron a clean level surface, and set to preheat.

Whisk together the flour, baking powder, baking soda, salt, cinnamon, and brown sugar together in a large bowl.  In a medium bowl, whisk together the oil, eggs, vanilla extract, and buttermilk.  Make a well in the center of the dry ingredients, and fold in the wet ingredients.  Stir until just combined (its okay to still be lumpy).  Gently fold in the bacon, being careful not to overmix.

Cook in the waffle maker according to manufacturer's instructions. 

Serve with maple syrup and fresh berries.


Thursday, January 7, 2010

Green Bean Bundles


Another hit from The Pastry Queen, these green bean bundles are so fun and delicious!  Who doesn't want their food wrapped in bacon?  They were a festive addition to our New Year's Day spread.  The marinade gives the beans a great flavor, and as the bacon cooks, the beans absorb that delicious salty, smoky flavor.  They are perfect to make ahead and just bake off while you prepare the more labor intensive dishes of your meal.  These would also be great served as an appetizer on a buffet. 

Seriously, The Pastry Queen is quickly moving up the ranks as one of my favorite chefs.  I have yet to make anything that wasn't absolutely delightful, and I'm looking forward to working my way through her cookbooks!


Green Bean Bundles
adapted from The Pastry Queen Christmas, by Rebecca Rather
yields 6-8 servings
  • 1 1/2 lbs green beans, washed and trimmed
  • 1/2 cup (1 stick) unsalted butter
  • 1/2 teaspoon dry mustard
  • 1 teaspoon packed brown sugar
  • 2 cloves garlic, minced
  • 1/4 teaspoon kosher salt
  • 8 ounces of bacon, each piece cut in half width-wise
Bring a large saucepan of water to a boil over high heat, and blanch the beans 3-4 minutes, or until they are bright green in color and pliable but still very crunchy.  Drain and run them under cold water.  Place in a shallow, ovenproof casserole dish and pat dry with a paper towel.

In a small saucepan, melt the butter over medium heat.  Add the garlic, mustard, salt, and brown sugar.  Pour the mixture over the green beans, cover with plastic wrap, and refrigerate for at least 4 hours, or overnight.

Preheat the oven to 375.  Gather 8-9 beans at a time and make bundles.  Wrap with a slice of the (halved) bacon, and lie seam-side down in a greased baking sheet or casserole dish.  Pour remaining marinade over the top.

Bake, uncovered, for 45 minutes, or until the bacon is cooked through and the beans look wrinkled.  Cook under the broiler for an additional 1-2 minutes to crisp the bacon even more, if desired.  Serve warm or at room temperature.


BLOG DESIGN BY: SHERBET BLOSSOM DESIGNS