Showing posts with label comfort food. Show all posts

Sunday, October 18, 2015

Turkey Meatloaf Meatballs

Turkey Meatloaf Meatballs 

Thank you all so very much for your kind words, comments, emails, stories, messages, and support in response to my last post.  I've been trying to write this post for the last three and half weeks, but I can't ever seem to find the right words to express my gratitude. I've finally realized that all I really have to say in response is "thank you."  It means so much to me that so many of you reached out to me following Henry's autism diagnosis, and I really just cannot put my gratitude and love into words.  Our family has been so touched by the support we've received from my internet friends, and we're so humbled and thankful for the community we have here.  Truly, you guys have brought tears to my eyes, a smile to my face, and happiness to my heart.

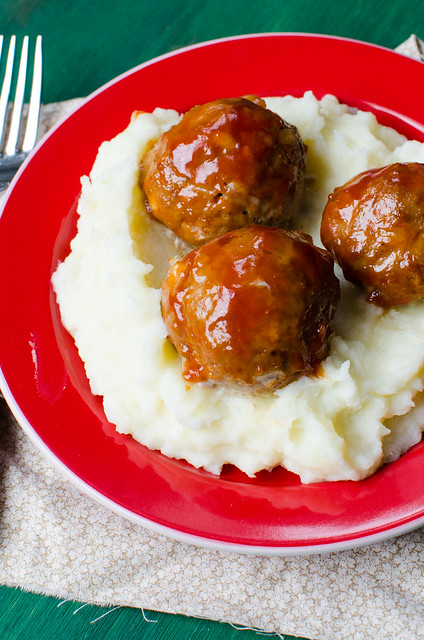
Oftentimes when I lack the words like this, I allow food to speak for me.  Cooking and baking for others is definitely how I show my love and friendship, so I can think of nothing better to share with you now than pure comfort food -- in the form of meatloaf meatballs.  To me, meatloaf is the quintessential comfort food.  However, it's not the healthiest meal out there, and it's not very practical for a weeknight unless you prep it ahead of time.  Enter -- turkey meatloaf meatballs!

These meatballs are healthier than traditional meatloaf, since they are made with ground turkey, and they are faster to assemble and cook as well.  For some reason my kids are more likely to eat a meatball than a meat-loaf, so they were a BIG hit with the little ones as well!

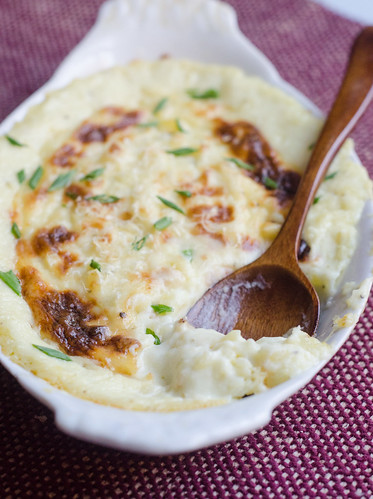
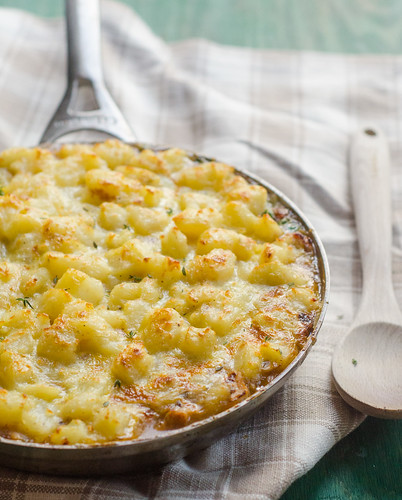
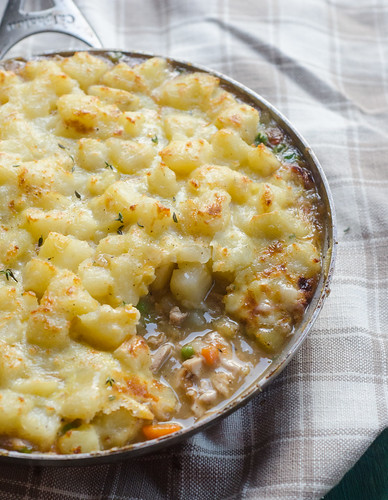
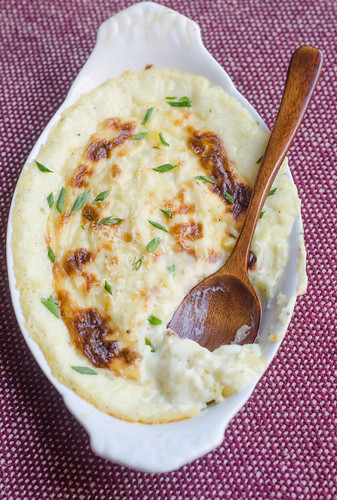
For a brief moment, I considered keeping this dinner really healthy, and serving the meatballs over cauliflower puree…. but I quickly came to my senses and affirmed that mashed potatoes just aren't optional when it comes to eating meatloaf.  A side of roasted brussels sprouts rounded out this meal, and we all left the table with happy bellies and happy hearts.

Turkey Meatloaf Meatballs
glaze from Cook's Illustrated

  • 1 lb ground turkey
  • 1/2 large yellow onion, finely diced
  • 2 cloves garlic, minced
  • kosher salt and freshly ground black pepper
  • 2 tsp finely minced fresh parsley
  • 1 Tbs worcestershire sauce
  • 1/4 cup panko breadcrumbs
  • 1 egg, lightly beaten
Glaze
  • 1/4 cup ketchup
  • 1/2 tsp hot sauce
  • 1 1/2 tsp brown sugar
  • 2 Tbs apple cider vinegar
  • 1/4 tsp ground coriander
Preheat the oven to 400 degrees and line a baking sheet with a sheet of aluminum foil.  Spray it lightly with cooking spray.

In a large bowl, combine the ground turkey, onion, garlic, 3/4 tsp salt, 1/2 tsp pepper, parsley, Worcestershire sauce, tomato paste, breadcrumbs, and the egg.  Gently but thoroughly use your hands to combine the mixture and incorporate all the ingredients.

Use an ice cream scoop or 1/4 cup measure to form meatballs, and arrange them in a single layer on the prepared baking sheet.

Bake the meatballs for 11 to 12 minutes.

Meanwhile, combine all the ingredients for the glaze in a small saucepan.  Bring to a boil then reduce to a simmer and cook until it's thickened and syrupy, about 5 minutes. Divide the glaze between 2 small bowls.

Using half the glaze, brush the meatballs all around.  Return them to the oven and cook an additional 4 to 5 minutes.  Remove from the oven and brush with the remaining glaze.  Serve the meatballs over mashed potatoes.


Sunday, January 4, 2015

Baked Pasta with Cauliflower in a Spicy Pink Sauce

Baked Pasta with Cauliflower in a Spicy Pink Sauce 

I know it's January, and that means resolutions, healthy eating, and no carbs.  Thus, I bring you a cheesy, creamy, baked pasta dish.  Sorry not sorry.  There is cauliflower in here though, so… it balances out, right?  In all seriousness, this is a decadent, hearty, filling, and comforting dinner.  One that will definitely stick to your ribs on a cold winter night.

This is a pretty basic baked pasta dish, with just a few add-ons that catapult it into the "super delicious" category.  First, the spicy pink sauce.  A simple marinara sauce is amped up with the addition of a little cream and some red pepper flakes.  The rich cream pairs nicely with the spiciness from the pepper.  Secondly, it uses fontina instead of mozzarella, which gives it a slightly creamier, more complex flavor. Finally, the addition of cauliflower not only adds a textural counterpoint to the soft and tender pasta, but it balances out some of the richness as well.  I served this as a vegetarian main course, but I think some spicy sausage would be great it here as well, or even just served alongside the pasta.

Despite having several components, this does come together pretty easily.  However, I see no reason why you couldn't assemble it ahead of time and bake it when you're ready for dinner.  Just add a few extra minutes to the baking time.

And then have a salad on the side.  Because you know, resolutions and all.

Baked Pasta with Cauliflower in a Spicy Pink Sauce 

Baked Rigatoni with Cauliflower in a Spicy Pink Sauce
barely adapted from Fine Cooking
serves 6 to 8


  • 3 Tbs olive oil
  • 2 (28-oz) cans whole tomatoes
  • 1 large yellow onion, halved and thinly sliced
  • 1 1/4 tsp kosher salt
  • 4 cloves garlic, minced
  • 1/2 cup heavy cream
  • 1/4 cup chopped fresh flat-leaf parsley
  • 1/2 tsp crushed red pepper flakes
  • 1 lb dried pasta, such as rigatoni or corkscrews
  • about 4 cups small cauliflower florets (from 1 large head)
  • 2 1/2 cups shredded Fontina cheese (about 10 oz)
  • 2 oz freshly grated Parmigiano- Reggiano (about 3/4 cup)


  • Position a rack in the center of the oven and heat the oven to 450°F . Grease a 9x13-inch baking dish with 1 Tbs. olive oil.

    Pour off 1 cup of juice from one of the cans of tomatoes and discard it. In a blender or food processor, purée both cans of tomatoes with their remaining juice and set aside.

    Heat the remaining 2 Tbs olive oil in a large skillet over medium-high heat. When the oil is shimmering, add the onions and 1/4 teaspoon of the salt and cook, stirring occasionally, until nicely browned, 5 to 10 minutes. Add the garlic and pepper flakes and cook until fragrant, about 1 minute.

    Add the puréed tomatoes and cream (be careful; it will splatter), plus the remaining 1 teaspoon of salt. Bring to a boil over medium-high heat, reduce to a gentle simmer, and cook for 15 minutes, stirring occasionally, so that the sauce thickens slightly. Taste for salt and pepper and remove from the heat and stir in the parsley.

    Meanwhile, bring a large stockpot pot or Dutch oven of water to a boil and add 1 tablespoon of salt. Add the pasta and cook  until it’s al dente, 8 to 10 minutes. During the last 2-3 minutes of cook time, add the cauliflower and cook with the pasta.  Drain well and return to the pot.  Stir in the tomato sauce and 1 1/2 cups of the Fontina cheese.  Mix well to combine.
    Transfer to the prepared baking dish and spread evenly. Top the pasta with the remaining 1 cup Fontina and then the Parmigiano-Reggiano.

    Bake uncovered until the cheese is golden brown, about 15 minutes. Cool for 10 minutes before serving.


    Sunday, December 14, 2014

    Crockpot Beef and Barley Soup

    Crockpot Beef and Barley Soup

    Oh boy.  The past week in our house has been pretty miserable.  Tuesday morning, Tucker was sent home from school with a fever.  Wednesday, he was diagnosed with the flu.  Thursday morning, Henry was sent home with a fever, and the flu followed.  Saturday afternoon, Joey and I both succumbed to the flu.  Not fun.  Knocking on wood, but so far Caroline and Smith are healthy.  And we hope to keep them that way.

    Have you and/or your family gotten sick yet this year?  It's a doozy!  So I have a recommendation for you.  Make a big pot of this beef and barley soup.  Eat some, then freeze some.  So if/when you get sick, you have something nourishing and comforting to eat without any work.

    My sweet friend Katy dropped off some chicken and orzo soup to us this afternoon, and it was so very much appreciated by my whole family.  We've been subsisting on take-out, crackers, and applesauce; thus, a filling and healthy meal was a treat.  So I have another suggestion.  Make a big pot of this soup.  Split it in half, and then take half to a friend who's sick.  I know you have a sick friend who could use this, no?  Tis the season for giving, and all.

    Oh, and about this soup?  It's really very good.  Tender beef, a rich broth, and filling barley.  This soup far exceeded our expectations.  It takes only minutes to prepare, and the payoff is huge. This immediately became one of our favorites soups, and I'm already planning to make it again very soon… to share with friends, of course.

    Crockpot Beef and Barley Soup

    Crockpot Beef and Barley Soup
    adapted from The Make-Ahead Cook
    serves 6 to 8

    • 2 medium white or yellow onions, chopped fine
    • 2 Tbs tomato paste
    • 2 Tbs olive oil
    • 1 Tbs minced fresh thyme
    • 2 cloves garlic, minced
    • 1 (28-oz) can crushed tomatoes
    • 2 cups beef broth
    • 1 1/2 cups chicken broth
    • 3 medium carrots, peeled and chopped
    • 1/3 cup low-sodium soy sauce
    • 1/4 cup dry red wine
    • 1/3 cup pearl barley
    • 1 dried bay leaf
    • 2-3 lbs beef blade roast, trimmed of excess fat and cut into 4 chunks
    • kosher salt and freshly ground pepper
    • 1/4 cup minced fresh parsley, for serving
    In a large microwave-safe bowl, combine the onions, tomato paste, oil, thyme, garlic, and 1 teaspoon of salt.  Stir well to combine and microwave for 5 minutes, or until the onions are softened.  Transfer to the slow cooker.

    Stir in the tomatoes, beef broth, chicken broth, carrots, soy sauce, wine, and barley.  Generously season the beef with salt and pepper and nestle it into the slow cooker.

    Cover and cook until the beef is tender, 9 to 10 hours on low, or 6 to 7 hours on high.

    Carefully transfer the beef to a cutting board.  When it's cool enough to handle, shred into bite-sized pieces with 2 forks, discarding any fat.  

    Use a large spoon to skim any fat from the surface of the soup.  Stir in the shredded beef and season with salt and pepper to taste.  Stir in the parsley and serve.


    Tuesday, December 9, 2014

    Skillet Chicken Shepherd's Pie

    Skillet Chicken Shepherd's Pie

    I've never been a big fan of shepherd's pie.  I don't have a good reason other than it's… just not my thing I guess.  But when I saw this version of shepherd's pie in the new Cook's Country Magazine, I couldn't resist.  I mean, look at those potatoes!  Look at that filling!  It's basically a chicken pot pie topped with buttery potatoes, then baked.  Nothing wrong with that, eh?

    This shepherd's pie varies from the classic version in that it uses chicken instead of lamb (duh), but also in the potatoes.  Typically, a shepherd's pie is topped with mashed potatoes.  But in my experience, they often get dried out in the oven.  This version simply tosses cooked potatoes in butter, salt, and pepper, then spoons them over the filling.  An egg wash gives them a nice crispy top and pretty golden color, and I promise you this is world's better than dried out gummy mashed potatoes.

    This was a huge hit with my whole family, and it's definitely becoming a new favorite in my house.  As we hunker down for what is sure to be a long, cold winter, I'm happy to have this comforting, delicious recipe in my repertoire.

    Skillet Chicken Shepherd's Pie

    Chicken Shepherd's Pie
    barely adapted from Cook's Country, December/January 2015

    • 2 lbs bone-in, skin-on chicken thighs, trimmed of excess fat
    • kosher salt and freshly ground black pepper
    • 6 Tbs unsalted butter, divided
    • 1 onion, chopped
    • 3 medium carrots, peeled, halved lengthwise, and cut into 1/2-inch thick slices
    • 2 large cloves of garlic, minced
    • 2 tsp minced fresh thyme
    • 1/4 cup dry sherry or dry white wine
    • 1 1/2 cups chicken broth
    • 2 lbs russet potatoes, peeled and cut into 1-inch chunks
    • 2 Tbs cornstarch
    • 1 cup frozen peas, thawed
    • 1 Tbs lemon juice
    • 1 large egg, lightly beaten with 1 Tbs water
    Adjust the oven rack to the upper-middle position and heat to 375 degrees F.  

    Pat the chicken dry and season both sides generously with salt and pepper.  Melt 1 tablespoon of the butter in an oven safe 10-inch skillet over medium-high heat.  Cook the chicken in 2-3 batches, about 5 minutes per side, or until the chicken is well-borwned.  Transfer to a plate and pour off all but about 2 tablespoons of the fat from the skillet.

    Return the skillet to heat and add the onions, carrots, and a large pinch of salt and pepper.  Cook, stirring often, until they are just softening, about 5 minutes.  Add the garlic and thyme and cook an additional 30 seconds.  Stir in the sherry and cook until most of the liquid has evaporated, about 1-2 minutes, scraping up any browned bits from the bottom of the pan with a wooden spoon.  Stir in the broth.

    Return the chicken and any accumulated juices to the skillet, skin-side up.  Bring to a boil, reduce heat to medium-low, and cover.  Cook until the chicken registers 175 degrees on an instant-read thermometer, about 12 to 14 minutes.  

    Remove the skillet from heat and use tongs to transfer the chicken to a clean plate.  Once he chicken is cool enough to handle, shred it into bite-sized pieces, discarding the skin and bones.

    Meanwhile, place the potatoes in a medium saucepan and cover with about 1 inch of water.  Stir in 1 tablespoon of salt, and bring to a boil over high heat.  Reduce the heat to medium and cook at a strong simmer until the potatoes are fork-tender, about 10-12 minutes.  

    Drain the potatoes and return to the pot.  Return the pot to the stove and cook over low heat, stirring gently, until all of the water has evaporated.  This will only take about 1 minute or so.  Remove from heat and gently stir in remaining 5 tablespoons of butter, 1/4 teaspoon of salt, and 1/2 teaspoon of pepper.  Taste and season with additional salt and pepper as needed.  Cover and set aside to keep warm.

    Whisk the cornstarch together with 3 tablespoons of water.  Return the skillet with the broth and vegetables to the stovetop and bring to a boil.  Slowly whisk in the cornstarch  mixture, and cook until the thickened, 1 to 2 minutes.  Remove from heat, stir in the peas, lemon juice, and shredded chicken, and season to taste with salt and pepper.

    Spoon the potatoes over the entire surface of the filling.  Brush the potatoes with the egg.  

    Bake in the oven until the pie is bubbling, about 15 minutes.  Turn the oven to broil and cook until the potatoes are golden-brown, 3 to 5 minutes.  Cool for 15 minutes before serving.


    Tuesday, November 18, 2014

    Bourbon Sweet Potato and Apple Casserole with a Pecan Crust

    Bourbon Sweet Potato and Apple Casserole with a Pecan Crust
    On my Thanksgiving table there are non-negotiables.  Turkey, duh.  Gravy, cranberry sauce, a legit green vegetable, mashed potatoes, and sweet potatoes.  I will forever and ever have a soft spot for sweet potatoes topped with marshmallows.

    And while I'll never turn down those ubiquitous marshmallow sweet potatoes, I can't help but cringe a bit as well.  I mean, have you ever made a classic sweet potato casserole?  Do you know how much sugar is in there?  Cups.  CUPS of sugar, in a "vegetable" side dish.  No wonder they're so good!  You might as well just move that pyrex to the dessert table.

    So for the past few years I've been making sweet potatoes that highlight the actual sweet potatoes, and qualify as a reasonable side dish, not a dessert disguised as a vegetable.  And this year, I finally found the ultimate sweet potato dish.  Mashed sweet potatoes.  Apples.  Bourbon.  And an herbed pecan crust.  Yeah, this is good stuff.

    In lieu of actual spices to this dish, whole spices are simmered with cream and then strained out, leaving behind a whisper of scent and subtle flavors.  The bourbon lends a gentle smoky, sweet flavor.  And the apples contrast to the sweet potatoes both in texture and sweetness.  The tartness of the granny smiths works really well with the lightly spiced sweet potatoes.  The crispy bread crumb and pecan topping gives the dish much-needed texture and crunch, rounding out the whole thing perfectly.  This recipe highlights the actual sweet potatoes, rather than disguising them in mounds of sugar and marshmallows.  I think it's safe to say that I've finally found the perfect sweet potato dish.  No question.

    Bourbon Sweet Potato and Apple Casserole with a Pecan Crust 

    Bourbon Sweet Potato and Apple Casserole with a Pecan Crust
    barely adapted from Fine Cooking, Holiday Dishes 2014
    serves 8

    • 3 lbs sweet potatoes (about 3 large)
    • 4 Tbs unsalted butter
    • kosher salt and freshly ground black pepper
    • 4 oz toasted pecans
    • 4-5 slices rustic white bread (such as sourdough or country bread), torn into pieces
    • 2 Tbs fresh parsley leaves
    • 1 cup heavy cream
    • 1 inch fresh ginger, sliced as thinly as possible
    • 2 whole star anise
    • 1 cinnamon stick
    • 3 Tbs bourbon
    • 1 1/2 tsp vanilla extract
    • 3 large Granny Smith apples, peeled, cored, and thinly sliced
    Preheat the oven to 400 degrees.  Prick the sweet potatoes all over with a fork and arrange on a baking sheet.  Bake for 55 to 60 minutes, or until they are completely tender when pierced with a fork.  Let them rest until they are cool enough to handle.*   Reduce the temperature to 375 degrees.

    Discard the skins and put the flesh in a mixing bowl.  Use a fork or potato masher to mash the potatoes (they don't have to be perfectly smooth!).  Set the bowl aside.

    To make the crumb topping, combine the pecans, bread, and parsley in a food processor.  Pulse until the nuts and bread are coarsely chopping.  Transfer to a small mixing bowl.  Melt 2 tablespoons of the butter and mix into the bowl, along with a generous pinch of kosher salt.  Set aside.

    To infuse the cream, combine the heavy cream, ginger, star anise, and cinnamon stick in small saucepan.  Bring to a boil, watching carefully so it doesn't boil over.  Remove from heat immediately, cover, and let steep for 15 to 20 minutes.  Strain through a fine-mesh strainer into a liquid measuring cup, pressing down on the solids to extract as much liquid as possible.  Stir in 2 tablespoons of the bourbon, the vanilla extract, and 1/4 teaspoon of salt.  

    While the cream-spice mixture is steeping, melt the remaining 2 tablespoons of butter in a 12-inch skillet over medium-high heat.  Add the apples, season with 1/4 teaspoon of salt, and toss well.  Increase the heat to high, and cook, stirring frequently, until the apples are softened and lightly browned, 5 to 6 minutes.  

    Remove from heat and stir in the remaining tablespoon of bourbon.  Stir until it evaporates, which should only take a few seconds.  Stir in 1/3 cup of the infused cream.  

    To assemble the casserole, lightly grease a shallow 3-quart baking dish (such as a 9x13 inch dish).  Stir in the remaining cream to the mashed sweet potatoes, and season generously with salt to taste.  

    Arrange the apples across the bottom of the baking dish, then spread the sweet potatoes over the apples in an even layer.**  Sprinkle the pecan-crumb mixture over the sweet potatoes.

    Bake at 375 degrees until the crumb topping is dark brown and the casserole is heated through, about 25 minutes.  Serve.

    *This is a great thing to do ahead of time.  Bake your sweet potatoes off at least a day in advance, then when you are ready to assemble, you have them ready to go.

    **At the point, the casserole and the crumb topping can be stored (seperately) in the refrigerator overnight.  When ready to bake, sprinkle the topping over the sweet potatoes and add a few extra minutes to the cooking time.


    Sunday, November 16, 2014

    (Make Ahead) Goat Cheese Mashed Potatoes

    Goat Cheese Mashed Potatoes


    So I had mashed potatoes as my lunch yesterday.

    Ohhhh boy.  These potatoes.  In the words of Uncle Jesse, "Have mercy."  They're really really good.  I feel like I could probably just stop right here, because really, these need no further explanation.  But I'm verbose and annoying, so I'll keep going.

    While these are goat cheese mashed potatoes, they aren't JUST goat cheese mashed potatoes.  There's also garlic.  Lots of it.  And herbs.  And butter.  And Parmesan cheese.  They are impossibly creamy and rich, and I'd venture to say that they could easily be the best dish on your Thanksgiving table.

    The Barefoot Contessa really hit it out of the park with these.  Because not only are the incredibly delicious, but you can prep the whole dang thing ahead of time and just bake it off on Thanksgiving day.  No muss, no fuss.  No leftovers.

    DSC_9651

    Make Ahead Goat Cheese Mashed Potatoes
    barely adapted from Ina Garten, The Barefoot Contessa Make it Ahead
    serves 6 to 8

    • 3 lbs Yukon Gold Potatoes, peeled and cut into 1-inch pieces
    • 5 large garlic cloves
    • Kosher salt and freshly ground black pepper
    • 8 oz garlic and herb goat cheese, at room temperature
    • 4 Tbs unsalted butter, at room temperature
    • 1 1/2 cups sour cream
    • 3/4 cup milk
    • 1/2 cup freshly grated Parmesan cheese
    • snipped fresh chives, for serving
    Preheat the oven to 375 degrees.  Grease a 9x13 inch baking dish and set aside.

    Place the potatoes, garlic, and 1 tablespoon of salt in a large pot.  Fill with water so that the potatoes are all completely submerged.  Bring to a boil over high heat, then reduce to a simmer and cook for 20 to 25 minutes, or until the potatoes are fork-tender.

    Drain the potatoes and garlic, then transfer to the bowl of a stand mixer fitted with the paddle attachment.*  Beat at medium-low speed until the potatoes are smooth, then while they are still hot use a wooden spoon to mix in the goat cheese, butter, sour cream, milk, 2 teaspoons of salt, and 1 teaspoon of pepper.  Taste and season with additional salt and pepper as needed.

    Pour the mixture into the prepared baking dish and sprinkle parmesan over the top.  Bake 30 to 40 minutes, or until the potatoes are bubbly and lightly browned.  Sprinkle with fresh chives and serve hot.

    *Alternatively, you could use a food mill/potato ricer, or just a potato masher and mash the potatoes by hand.

    **To make it ahead, assemble the dish, including the parmesan, and refrigerate for up to 3 days.  Bake before serving.


    Thursday, November 13, 2014

    (Crockpot) Potato, Cheddar, and Ale Soup

    Potato, Cheddar, and Ale Soup

    Guys.  It is really freaking cold outside.  I know I'm a southerner, and I have a low tolerance for cold weather, but come on.  Below freezing in November?  This is Georgia, not Minnesota!  I know the rest of the country is experiencing the same low temperatures, so let's all bundle up together and eat comfort food, sounds good?

    What kinds of foods do you eat when it's frigid outside?  I always go for soups, stews, and chili.  They are the quintessential cold weather food.  And this Potato, Cheddar, and Ale Soup is basically the perfect cold-weather comfort food.  It's full of carbs, cheese, it's warm and comforting, and there's beer involved.  I think that covers all the bases.

    What's more, this is a crockpot meal, so it's the perfect soup to set and go.  Just a few minutes of work when you're ready to serve, and you have a hot, comforting bowl of cheesy comforting goodness on the table.

    Winter, I may hate you, but I love your comfort food.

    Potato, Cheddar, and Ale Soup

    Potato, Cheddar, and Ale Soup
    barely adapted from Slow Cooker Revolution, Volume 2

    • 1 1/2 lbs yukon gold or russet potatoes, peeled and cut into 1/2-inch pieces
    • 1 medium onion, chopped (about 1 cup)
    • 2 Tbs canola oil
    • 2 cloves garlic, minced
    • 1 tsp minced fresh thyme
    • 1 tsp dried mustard
    • kosher salt and pepper
    • 3 1/2 cups chicken broth
    • 1 cup beer, preferably a lager*
    • 2 cups shredded sharp cheddar cheese
    • 1/2 cup heavy cream
    • 3 scallions, sliced thin
    Combine the potatoes, onion, oil, garlic, thyme, mustard, and 1 teaspoon of salt in a microwave safe bowl, and microwave 5 minutes, or until the onions are tender.  Transfer the the slow cooke, and stir in the broth and beer.  Cover and cook on low for 4 to 5 hours, or until the potatoes are tender.

    Working in 2-3 batches, puree the soup in a blender until smooth.  Return the soup to the slow cooker and stir in the cheddar until evenly melted, then whisk in the cream.  If the soup seems too thick, add a bit more broth.  Taste and season with salt and pepper.

    Serve, sprinkling each serving with scallions and extra cheddar.

    *You really want to go with a mild lager for this.  Stronger flavored ales can create a biter aftertaste.  


    Tuesday, November 11, 2014

    Cheesy Baked Farro with Butternut Squash and Bacon

    Cheesy Baked Farro with Butternut Squash and Bacon


    You guys know I love me some Ina Garten, so when her new book became available for preorder, I snatched it right up.  I'll be totally honest and say that I was actually a bit skeptical of this one though - it's called "Make it Ahead," and I wasn't sure how many new and exciting recipes and ideas she'd bring to the table.  I have a few make-ahead cookbooks already, and it seems as though they mostly just recycle the same types of recipes over and and over again.  As it turns out, I was pleasantly surprised to be wrong, because this cookbook is amazing.  I found myself starring almost every single recipe, and I've loved everything I've made thus far.

    I have a few of the recipes lined up to share in the next few weeks, and today I'm starting with the cheesy baked faro with butternut squash and bacon.  It seems like every few years a "new" grain comes on the scene, and becomes the grain du jour.  Quinoa was a big one a few years ago, and lately I've been seeing more and more farro recipes.  So is quinoa out and farro in?  I'm not ready to give up on quinoa just yet, but I'm definitely excited to start cooking more with farro!

    Cheesy Baked Farro with Butternut Squash and Bacon

    If this recipe is any indication, then farro's stock will be rising exponentially in my house.  I absolutely loved the slightly chewy, nutty flavor of the grain, and it paired perfectly with the subtle sweetness of the squash and salty bacon.  Oh yeah, and it has fontina and parmesan cheeses too.  The texture of the finished dish was almost risotto-like.  Creamy, luxurious… and are you ready to hear the best part?  It's all cooked in one pan.  I prepped and assembled the dish during the boys' nap time, then threw it in the oven to finish off when Joey got home from work.

    Total winner winner farro dinner.

    Cheesy Baked Farro with Butternut Squash and Bacon

    Cheesy Baked Farro with Butternut Squash and Bacon
    adapted from Make it Ahead, by Ina Garten

    • 4 slices thick-cut bacon, cut into large dice
    • 1 Tbs unsalted butter
    • 1 large yellow onion, diced
    • 2 tsp fresh thyme leaves
    • kosher salt and freshly ground black pepper
    • 1 1/2 cups pearled farro
    • 3 cups chicken or vegetable stock
    • 3 cups (3/4-1 inch) diced butternut squash
    • 1 cup grated fontina cheese
    • 1/2 cup freshly grated Parmesan cheese
    Preheat the oven to 375 degrees.

    In a 12-inch oven-safe skillet, cook the bacon over medium-high heat until it's just brown, but not yet crispy.  Use a allotted spoon to remove to a paper towel-lined plate to drain, leaving the bacon drippings in the pan.  Reduce heat to medium.

    Drain all but 2 tablespoons of the bacon fat, then melt the butter in the pan.  Add the onion and cook 6 to 8 minutes, until it's tender and beginning to brown.  Stir in the thyme, 1 teaspoon of salt, and 1 teaspoon of pepper, and cook for one minute.  Add the farro and chicken stock, stir, and bring to a simmer.  

    Scatter the squash over the farro mixture, cover, and bake for 30 minutes, or until the squash and farro are tender.  Be sure to check the pan at least once during the cooking time, and add more stock if the mixture seems dry.

    Stir in the fontina cheese, then sprinkle the bacon and parmesan cheese over the wash and farro.  Bake uncovered for 15 to 20 minutes, or until most of the liquid has evaporated.  

    Serve hot directly from the pan.

    To Make it Ahead:  Assemble the dish, including the bacon and parmesan, and refrigerate for up to 2 days.  Bake 20-25 minutes before serving.


    Sunday, November 9, 2014

    Chicken Florentine

    Chicken Florentine 


    Chicken Florentine has developed a bit of a bad reputation as a bland, boring, filler food for buffets and weddings.  What started out as a nice idea got muddled and mediocre somewhere along the way.  So let's remedy that, shall we?

    If you dissect the dish, it seems like a good idea in theory:  chicken, spinach, and a creamy sauce.  So with that as the backbone, Cook's Country set out to create a killer version of the classic dish.

    And their version?  Oh. My.  Goodness.  This chicken is easily one of the best things I've made all year.  Joey and my kids all agreed.  Juicy, perfectly cooked chicken, a cheesy, creamy, flavorful sauce, tender spinach, and more cheese to finish it all off.  Major love.  Allow me to take a moment to sing the praises of this sauce.  It's heaven on earth, I tell you.  Cream, chicken broth, a little lemon juice, and parmesan cheese make up the bulk of it, and it was so good that Joey practically drank it with a straw.

    As we move into fall and winter, I'm definitely craving more homey, comforting dinners, and this is at the top of my list.  Serve it with a grain or starch of your choice (mmmm mashed potatoes!), a salad or roasted veggies, and you've got a really wonderful family dinner.  Joey proclaimed this to be his new favorite dinner, so I feel certain that it will be making many appearances on our table from here out!

    Chicken Florentine
    adapted from The Complete Cook's Country TV Show Cookbook
    serves 4 to 6

    • 2 Tbs canola oil
    • 12 oz (12 cups) baby spinach
    • 4 (6-oz) boneless, skinless chicken breasts, trimmed
    • kosher salt and freshly ground black pepper
    • 1 shallot, minced
    • 2 cloves garlic, minced
    • 1 1/4 cups chicken broth
    • 1 1/4 cups water
    • 1 cup heavy cream
    • 6 Tbs freshly grated Parmesan cheese
    • 1 tsp lemon zest
    • juice of 1/2 lemon
    Heat 1 tablespoon of the oil in a 12-inch skillet over medium-high heat.  Add the spinach and cook, stirring often, until wilted, 1 to 2 minutes.  Transfer the spinach to a colander set over a blow and drain as much liquid as possible, pressing down with the back of a spoon to extract more liquid.

    Pat the chicken dry with paper towels and season generously on both sides with salt and pepper.  

    Heat the remaining tablespoon of oil in the now-empty skillet over medium-high heat.  Add the chicken and cook 3-4 minutes per side, until golden.  Remove from pan to a plate or bowl.  

    Add the shallots and garlic to the pan and cook about 1 minute, or until fragrant.   Stir in the broth, water, and cream.  Return the chicken to the pan and nestle into the liquid.  Bring to a boil, then reduce heat and simmer until the chicken is cooked through, about 10 minutes.  Transfer the chicken to a plate and cover with foil to keep warm.

    Continue to simmer the sauce unit it's reduced to about 1 cup, which should take about 10 minutes.  Remove from heat and stir in 4 tablespoons of the Parmesan, lemon zest, and lemon juice.  Taste and season with salt and pepper as needed.

    Preheat the broiler and adjust the oven rack to the upper-middle position.

    Cut the chicken cross-wise into 1/2-inch slices and arrange on a  broiler-safe platter.  Scatter the spinach over the chicken, then pour the sauce over the spinach, then sprinkle with the remaining 2 tablespoons of Parmesan cheese.  Broil until golden-brown, about 3 to 5 minutes (but watch closely the whole time, since in my experience all broilers are very different!).

    Serve.


    Wednesday, November 5, 2014

    Tomato Soup with Broiled Cheddar

    Roasted Tomato Soup with Broiled Cheddar.  Tomato Soup meets French Onion Soup. 


    When I think of perfect pairings, one of the first things that come to mind is tomato soup + grilled cheese.  It's classic, nostalgic, comforting, and no matter what, it always ALWAYS hits. the. spot.  If I order tomato soup at a restaurant, it goes without saying that I'll also order a grilled cheese.  And if goes without saying that the best way to enjoy this killer combo is by dunking the grilled cheese into the soup with each bite.  Even as a small toddler, Caroline knew how to eat a grilled cheese and tomato soup.

    One day while I was out running, thinking about food (as one does while running), inspiration hit.  What if I took the best part of French onion soup (the bread and melty cheese, obviously), and eliminate the middle man-extra step of dunking?  Serve tomato soup with the grilled cheese right on top!  And how is this not already a thing?  It seems so obvious and amazing.

    This roasted tomato soup was absolutely fabulous on it's own, but when I added a thick slice of toasted sourdough bread and melted super sharp cheddar cheese over the top… well, it elevated it to pure bliss. This was a big BIG hit with my whole family, and I thoroughly enjoyed the leftovers the rest of the week.

    So let's make this happen, shall we?  Next time you make tomato soup, slap some bread and cheese on top, throw it under the broiler, and prepare for your life to be changed.

    Roasted Tomato Soup with Broiled Cheddar

    Roasted Tomato Soup with Broiled Cheddar
    Soup adapted from Annie's Eats
    • 3 lbs ripe tomatoes, halved with seeds scooped out
    • ¼ cup plus 2 Tbs olive oil
    • 1 Tbs kosher salt
    • 1½ tsp black pepper
    • 2 Tbs unsalted butter
    • 2 cups chopped onion
    • 6 cloves garlic, minced
    • 1/4 tsp red pepper flakes
    • 1 (28 oz) can whole tomatoes
    • 1 cup fresh basil leaves, torn
    • 1 tsp fresh thyme leaves
    • 3 1/2 cups low-sodium chicken stock
    • 1/2 cup heavy cream or half-and-half
    • sourdough bread, cut into 1/2-inch slices
    • freshly shredded extra sharp cheddar cheese
    Preheat the oven to 400˚ F.  Combine the tomato halves, ¼ cup of olive oil, salt and pepper in a large bowl; toss well to combine.  Arrange the tomato halves in a single layer on a large baking sheet.  Roast the tomatoes for 45 minutes.

    In a large stockpot or Dutch,  melt the remaining 2 tablespoons of olive oil with the butter over medium heat.   Add the onions, garlic and red pepper flakes to the pot and cook, stirring occasionally, until slightly softened, about 7 to 10 minutes.  Stir in the canned tomatoes, roasted tomatoes, basil, thyme and chicken stock, and bring to a boil.  Reduce the heat and simmer, uncovered, 40 minutes.

    Use an immersion blender to puree the soup until completely smooth.  (Alternatively, you can use a blender or food processor.  If you do, be sure to vent the steam and be very careful not to spill the hot liquid!)  Stir int he cream.  Taste and season with salt and pepper as needed.

    Preheat the broiler and ladle the soup into oven-safe bowls.  Toast the bread in the oven until it is just crisp and beginning to turn golden-brown.  Add a slice of bread to the top of each bowl of tomato soup, and sprinkle a few tablespoons of the cheese over the bread.  Place the bowls on a baking sheet and broil until the cheese is melted, bubbly, and browned.  Remove from the oven and allow to cool 5 to 10 minutes before serving.


    Monday, October 20, 2014

    Short Rib and Wild Mushroom Cheesesteaks

    Short Rib and Wild Mushroom Cheesesteaks

    I know, I know.  You cheesesteak purists are probably rolling your eyes at me.  A true cheesesteak is an art form.  And it doesn't include braised short ribs, wild mushrooms, or fancy cheese.  But you know… it's hard to argue with short ribs, wild mushrooms, and fancy cheese, right?  Right.

    This recipe was born from a big bowl of cabernet-braised short ribs sitting in my fridge.  I made a big batch for a shower I threw over the weekend, and I wanted to do something noteworthy with the leftovers.  I thought about pasta, pot pie, mac and cheese… and then inspiration hit:  cheesesteak sandwiches.  But not just any cheesesteaks.  They needed to be elevated to a level worthy of using these precious short ribs.  So I added wild mushrooms.  And Gruyere cheese.  And then I took a bite and swooned.  And then Joey swooned.  And then Caroline swooned.  And then Smith threw his on the floor.  And Joey picked it up and ate it.  No wasting short rib sandwiches!  #truth.  #notashamed

    I served these sandwiches with Parmesan-Truffle Oven Fries and some fresh fruit, and we felt like we were eating dinner at a trendy gastropub.

    Like I said, I used leftover short ribs for these sandwiches, and it made for a super quick and easy weeknight meal.  But if you don't happen to have a bunch of short ribs hanging out in your fridge (who are you?), then you can definitely braise some up on a Saturday or Sunday then have them ready to go for some quick meals throughout the week.  Or next time you make short ribs, throw a few extra in there, then shred them and freeze them.  I cannot think of any situation in which having short ribs on hand would be a bad thing.

    Short Rib and Wild Mushroom Cheesesteaks 

    Short Rib and Wild Mushroom Cheesesteaks
    • 1 Tbs butter
    • 1 medium yellow onion, halved and thinly sliced
    • 1 small green bell pepper, seeded and thinly sliced
    • kosher salt and freshly ground black pepper
    • 5 oz wild mushrooms (shiitakes, chanterelles, oyster, etc.  or a mixture), thinly sliced
    • 2 cloves garlic, minced
    • 3 cups shredded braised short ribs
    • 1/4 cup dry red wine (or beef broth, or a dark beer)
    • 4 sandwich rolls, halved and buttered
    • 4 slices Gruyere or sharp provolone cheese
    Preheat the oven to 375 degrees.

    In a large skillet, melt the butter over medium heat.  Add the onions and bell pepper, and cook, stirring often, until they begin to soften, about 5 minutes.  Add the mushrooms and 1/2 teaspoon of salt.  Saute, stirring often, until the mushrooms are softened and cooked through, about 6 to 8 minutes.

    Stir in the garlic and stirring constantly, cook an additional 30 seconds.

    Gently fold in the short ribs, and cook until they are heated through, 2 to 3 minutes.  Stir in the wine, scraping up any browned bits from the bottom of the pan.  Taste the mixture and season with salt and pepper to taste.

    Divide the filling evenly among the sandwich rolls, then top each with a slice of cheese.  

    Close the sandwich and bake 5 to 6 minutes, or until the roll is hot and the cheese is melted.  Serve immediately.


    Monday, October 13, 2014

    Pumpkin Enchilada Casserole with Poblano-Pepita Salsa


    Pumpkin Enchilada Casserole with Poblano-Pepita Salsa

    Something about the transition from summer to fall causes me to feel pulled to the kitchen.  As we say goodbye to playing outside until dusk, catching lightning bugs, and evenings at the pool, we welcome cozy evenings in front of the fireplace, sipping hot cocoa, comfort food, and trips to the pumpkin patch.   I love spending a lazy afternoon cooking and baking while the boys nap.  I gravitate towards simple and quick recipes in the summer, but the fall has me slowing down, taking my time, and enjoying the process as much as the final result.  

    And this dinner is indeed a process.  There's homemade enchilada sauce, a fresh pumpkin filling, and a roasted tomatillo-poblano-pepita salsa.  And yes, it is pretty much perfection.  While it is a bit time-consuming, nothing is difficult, and should you be pressed for time, any of the components can be made ahead.  And heck, you could assemble the whole thing ahead and then just cook it when you're ready!

    Pumpkin Enchilada Casserole with Poblano-Pepita Salsa 


    This is an impressive main dish for a fall dinner party, and since I love putting together menus, here's what else I'd serve with it (and actually, most of this is what I did serve with it).

    Apple Habanero Margaritas
    Chips and Guacamole
    Orange-Avocado Salad
    Baked Cinnamon-Sugar Donuts with Vanilla Ice Cream (this is my take on churros).

    After all my whining about the end of summer, with dinners like this, I guess I can now say that I'm ready to embrace fall.  Let's do this.

    Pumpkin Enchilada Casserole with Poblano-Pepita Salsa


    Pumpkin Enchilada Casserole with Poblano-Pepita Salsa
    adapted from Fine Cooking
    enchilada sauce adapted from America's Test Kitchen

    Enchilada Sauce
    • 1 medium onion, chopped fine
    • 2 jalapenos, seeded and chopped fine
    • 1 teaspoon canola oil
    • 3 medim cloves garlic, minced
    • 3 Tablespoons chili powder
    • 2 teaspoons ground cumin
    • 2  teaspoons sugar
    • 1 15-oz can tomato sauce
    • 1 cup water
    Filling
    • 2 Tbs canola oil
    • 1 large yellow onion, diced
    • 1 jalapeño, seeded and chopped fine
    • 4 cloves garlic, minced
    • 1 Tbs ground cumin
    • pinch of sugar
    • 3 cups of 1/2-inch diced pumpkin or other winter squash (peel, seed, then chop the pumpkin)
    • 1/2 cup chicken or vegetable broth
    • 3 Tbs fresh minced cilantro
    • kosher salt
    For Assembly
    • vegetable oil
    • 10 6-inch corn tortillas
    • 2 cups Monterey Jack cheese
    • 1 cup sharp cheddar cheese
    • Poblano Pepita Salsa (recipe follows)
    • Mexican crema or sour cream, for serving

    Combine the onion, jalapeno, 1/2 teaspoon salt, and oil in a large saucepan. cover and cook over medium-low heat, stirring often, until the onions and peppers have softened, 8-10 minutes. Stir in the garlic, chili powder, cumin, and sugar, and cook until fragrant, less than 30 seconds. Stir in the tomato sauce, water, and chopped tomato. Bring to a simmer, and cook until slightly thickened, 5 minutes.  Remove from heat and strain through a fine-mesh sieve into a medium bowl.  Set aside.

    Meanwhile, make the filling.  Heat the olive oil in a 12-inch skillet set over medium-high heat.  Add the onion and jalapeño, and cook until lightly browned and softened, 10 minutes.  Add the garlic, cumin, 3/4 teaspoon of salt, and sugar and cook one minute, or until it's fragrant.  Stir in the pumpkin.  Lower the heat to medium, add the broth, cover, and simmer until the pumpkin is just tender, about 10 minutes.  Taste and season with additional salt if needed.  Stir in the cilantro.

    To assemble the casserole, preheat the oven to 350 degrees and brush a 9x13 inch baking dish with oil.  

    Heat a small nonstick or cast-iron skillet to medium-high.  Working one tortilla at a time, heat them in the skillet until softened and beginning to brown in spots, about 1 minute per side.   

    Spread 3/4 cup of the sauce evenly over the bottom of the dish.

    Arrange 5 of the tortillas over the sauce, cutting them to fit if necessary.

    Spread 1/2 cup of the sauce over the tortillas.  Spoon all of the filling evenly over the sauce, then sprinkle with 1 cup of the monterey jack cheese.

    Pour 1/2 cup of sauce over the cheese and arrange the remaining 5 tortillas over the sauce (again, cutting the tortillas as needed to fit).  

    Spread the remaining sauce over the tortillas then top with the remaining cheese.

    Cover with foil and bake 20 minutes.  Remove the foil and bake an additional 10 to 15 minutes, or until the cheese is browning and bubbly.  

    Allow to cool 10 minutes before serving with the salsa and crema.

    Poblano-Pepita Salsa
    • 2 medium poblano chiles
    • 1 lb tomatillos, husked and rinsed
    • 1/2 cup unsalted, roasted, and hulled pepitas
    • 1/4 cup packed chopped fresh cilantro
    • kosher salt
    • juice of 1/2 lime
    Halve the tomatillos and arrange in a single layer on a rimmed baking sheet with the poblanos.

    Char under a broiler until the tomatillos are dark and browned in spots and the chiles are blackened on all sides, flipping as needed.  Transfer the chiles to a bowl and cover with plastic wrap.  Cool 10 minutes.  Peel, stem, and coarsely chop the chiles.

    Coarsely chop the pepitas in a food processor by pulsing 5 to 6 times.  Transfer to a medium bowl.  Add the tomatillos, chiles, cilantro, and salt to the now-empty bowl, and pulse several times to get a chunky salsa.  Add to the bowl with the pepitas and stir to combine.  Stir in the lime juice.  Taste and season with salt as needed.


    Sunday, September 28, 2014

    Cheesy Baked Shells with Broccoli and Chicken

    Cheesy Baked Shells with Broccoli and Chicken 


    Remember this absolutely amazing incredible mac and cheese recipe?  If you haven't made it yet, you really are missing out.  Because it really and truly is the best mac and cheese of all time.  I realize that's a lofty claim, but I have eaten a LOT of mac and cheese in my day, so I feel pretty confident in my assertion.

    So anyway, I took that macaroni and cheese, and I added some broccoli and chicken to it.  To make it a full meal, of course.  Look, I can make an entire meal out of a big bowl of mac and cheese, but in the name of adult responsibility, I felt like a vegetable and a protein were needed.  So cheesy baked shells with broccoli and chicken were born!

    It's become a standing tradition to for me to make a big dinner for the kids' birthdays.  Smith turned three last week (obvious comment about time moving too quickly), and I'm going to be brutally honest here for a minute.  That kid has challenged me more than I thought possible.  At fifteen months, the poor guy was only a baby himself when Henry and Tucker came along and rocked our world, and he definitely didn't know exactly how to handle the upheaval.  We went though many tough phases with him:  sitting on the babies, pushing them over, throwing toys at them, stealing their milk and food, you name it.  Not to mention the normal day-to-day toddler meltdowns and challenges.

    DSC_8965 

    But in the past six months or so, there's been a shift.  He's gone from pushing the babies down, to helping them back up when they fall.  He no longer steals their milk, but is waiting at the bottom of the stairs with it every morning when they wake up.  He teaches them all the animal and dinosaur sounds.  He's there to give them hugs and kisses when they have their own epic tantrums.  And he's the referee between their toddler skirmishes now.  This guy was just meant to be a big brother.

    So we celebrated my big boy's birthday with this cheesy baked pasta dish.  It's the best dinner I could think of for my little guy, and it was a hit with the whole family.  We're looking forward to another fun-filled year with this sweet boy!
    DSC_8972

    Cheesy Baked Shells with Broccoli and Chicken
    adapted from this macaroni and cheese (which is from Cook's Illustrated)
    serves 8 to 10
    • 1 recipe Panko Topping (follows)
    • salt
    • 4 cups chopped broccoli florets
    • 1 pound medium pasta shapes, such as shells
    • 6 Tbs unsalted butter
    • 2 medium garlic cloves, minced
    • 1 tsp dry mustard
    • 1/4 tsp cayenne pepper
    • 6 Tbs all-purpose flour
    • 2 1/4 cups low-sodium chicken or vegetable broth
    • 3 1/2 cups milk (low-fat is fine)
    • 1 pound colby jack cheese, shredded (about 4 cups)
    • 8 oz extra-sharp cheddar, shredded (about 2 cups)
    • 2 cups diced cooked chicken
    • ground black pepper
    Preheat the oven to 400 degrees.

    In a large microwave-safe bowl, toss the broccoli with a splash of water.  Cover with plastic wrap.  Cook 3-4 minutes, stirring after every minute, until the broccoli is bright green, and just tender.  Set aside.

    Bring water to a boil in a large dutch oven set over high heat.  Add 1 tablespoon of salt and the pasta, and cook, stirring occasionally, until the pasta is just beginning to soften, about 5 minutes.  Drain the pasta and leave in the colander.

    Wipe the pot dry, and add the butter, and set it over medium heat until melted.  Stir in the garlic, mustard, and cayenne, and cook until fragrant, about 30 seconds.  Stir in the flour, and cook, stirring constantly, until golden, about 1 minute.  Slowly whisk in the chicken broth and milk, and bring to a simmer.  Whisking often, cook until large bubbles form on the surface and the sauce is slightly thickened, about 15 minutes.  Remove from heat and stir in the cheeses until completely melted.  Season with salt and pepper to taste.

    Stir the drained pasta, broccoli, and diced chicken into the cheese sauce, breaking up any clumps, until well combined.  Pour into a lightly greased 9x13 inch baking dish and sprinkle with crumb topping.

    Bake uncovered, until the sauce is bubbling and the crumbs are crisp, 25-35 minutes. 


    To store and serve later:  Wrap the dish tightly with foil, and refrigerate for up to 2 days.  To serve, bake in a 400 degree oven until the filling is hot throughout, about 40-45 minutes.  Remove the foil and continue to cook until the crumbs are crisp, 15-20 minutes.


    Panko Topping

    • 1 cup panko bread crumbs
    • 2 Tbs unsalted butter, melted
    • 2 Tbs minced fresh parsley
    • salt and pepper
    In a small bowl, combine the panko with the melted butter and parsley.  Season to taste with salt and pepper.


    Sunday, July 6, 2014

    Summer Vegetable Skillet Lasagna

    Summer Vegetable Skillet Lasagna

    Two years ago, I posted a recipe for Skillet Lasagna, and it's still one of the most popular recipes on this here blog.  And for good reason:  it's super easy, fast, and amazingly delicious.  Since the first time I made it, I've been mulling over other variations, one of which being a skillet lasagna that features the beautiful produce of summer.  But lo and behold, good old America's Test Kitchen pulled through and provided me with just that!

    This skillet lasagna features tomatoes, zucchini, and squash.  It is just as low-maintenace as the original, if not more so.  It's also super delicious, and was a hit with everyone in my family - if that's not a ringing endorsement, I don't know what is!

    Everything cooks in one skillet, so this is really as easy as it gets.  Minimum work, maximum reward.  What more do you want?  Lazy summer days turn into lazy summer dinners here, and I couldn't be happier about it!

    Summer Vegetable Skillet Lasagna 

    Summer Vegetable Skillet Lasagna
    barely adapted from America's Test Kitchen's Best Summer Recipes
    serves 4 to 6

    • 2 Tbs extra virgin olive oil
    • 1 medium white onion, chopped fine
    • 4 cloves garlic, minced
    • 1/4 tsp crushed red pepper flakes
    • 1 (28-oz) can fire-roasted diced tomatoes, drained with juice reserved
    • kosher salt and freshly ground black pepper
    • 10 curly-edged lasagna noodles, broken into 2-inch lengths
    • 1 (8-10-oz) zucchini, cut into 1/2-inch pieces
    • 1 (8-10 oz) yellow summer squash, cut into 1/2-inch pieces
    • 1/4 cup shredded fresh basil
    • 8 oz (1 cup) ricotta cheese, divided

    Heat the oil over medium-high heat in a 12-inch nonstick skillet.  Add the onion and cook until softened, about 3 to 4 minutes.  Stir in the garlic and red pepper flakes and cook until fragrant, about 1 minute.

    Drain the can of tomatoes into a 2-cup liquid measuring cup.  Add enough water to the reserved tomato juice to equal 2 cups.

    Pour the tomato-water mixture over the onions, then stir in 1 teaspoon of salt and 1/2 teaspoon of pepper.  Scatter the noodles over the the top, then layer the tomatoes over the noodles.  Bring to a simmer, stir, and reduce heat to medium.

    Cover the pan and cook about 10 minutes, stirring occasionally.  Stir in the zucchini and squash, and cook for 8 more minutes, or until the noodles and squash are tender.

    Add the basil and 1/2 cup of the ricotta.  Stir until the sauce is creamy, season to taste with additional salt and pepper, remove from heat, and dollop the remaining 1/2 cup of ricotta over the top.  Allow to cool 5 to 10 minutes, and serve.


    Sunday, April 20, 2014

    Skillet-Baked Tex-Mex Macaroni


    Do you want to know how you can tell that something was REALLY good?  If you look at a picture of it two weeks later, when you are super full from a huge Easter lunch, and your mouth waters and your stomach growls.... you know it's good.

    This skillet tex-mex macaroni is not only amazingly delicious, but it's cooked in under 30 minutes, and only dirties one pot.  It makes a perfect weeknight dinner, and it has all your bases covered:  Mexican food, pasta, spice, cheesiness, and it's reasonably healthy.


    This skillet meal reminded me a bit of hamburger helper, but obviously it's better.  Joey and I really really loved this, and my mom asked for the recipe when she ate the leftovers for lunch during a visit.  

    I really just cannot say enough good things about this dish, so I'll leave you with this:  rearrange your weekly meal plan and squeeze this in.  And then come back and tell me "thank you."  


    Skillet-Baked Tex-Mex Macaroni
    adapted from Pasta Revolution
    serves 4
    • 1 Tbs canola oil
    • 1 cup finely chopped onion
    • 1 green bell pepper, stemmed, seeded, and chopped into small pieces
    • 1 jalapeño, seeds and ribs removed, minced
    • 3 cloves garlic, minced
    • 2 Tbs chili powder
    • pinch of cayenne pepper (optional)
    • 2 tsp cumin
    • 1/2 tsp paprika
    • kosher salt and freshly ground black pepper
    • 1 lb 90% lean ground beef
    • 2 cups water
    • 1 (15-oz) can tomato sauce (preferably from fire-roasted tomatoes, if you can find it)
    • 8 oz (about 2 cups) elbow macaroni or shells
    • 1 cup frozen corn
    • 1 (4.5 oz) can chopped green chiles, drained
    • 3 Tbs chopped fresh cilantro
    • 1 cup shredded cheddar cheese
    • 1 cup shredded Monterey Jack or Pepperjack cheese
    • avocado, sour cream, and/or hot sauce for serving
    Preheat the oven to 475 degrees.

    Heat the oil in a 12-inch nonstick skillet over medium heat.  Add the onion, bell pepper, and jalapeño and sauté until softened, 5 to 7 minutes.  

    Stir in the garlic, chili powder, cumin, cayenne, paprika, and 1/2 teaspoon of salt.  Cook until fragrant, about 30 seconds.  

    Add the beef, using a wooden spoon to break up any big pieces, and cook until it's no longer pink, 2 to 3 minutes.

    Stir in the water, tomato sauce, and pasta.  Increase heat, cover, and bring to a vigorous simmer.  Stirring frequently, cook until the pasta is tender, 10 to 12 minutes.

    Remove the skillet from heat and stir in the corn, green chiles, 2 tablespoons of the cilantro, and 1/2 cup of each of the cheeses.  Taste and season with salt and pepper as needed.  Sprinkle the remaining cheese over the top of the para, and bake until the cheese is melted, browned, and bubbly, 10 to 15 minutes.  

    Cool 10 minutes, sprinkle with the remaining tablespoon of cilantro, and serve.


    Sunday, April 6, 2014

    Creamy Sausage & Spinach-Stuffed Baked Potatoes


    According to my kindergartener, the months of March and April are spent in a tug-of-war between winter and spring.  Winter is holding on tight, trying to force a few more cold days, while spring is trying its hardest to warm things up and get plants and flowers to bloom.  I thought that was a pretty apt description, and I for one am rooting for spring.  Caroline, however, is having a mental tug-of-war, herself.  On the one hand, she loves playing outside and planting flowers.  But on the other hand, "the cold never bothered [her] anyway."  Yes, she really says that; and yes, she is obsessed with Frozen and Queen Elsa.

    Today was certainly a tug-of-war between the two seasons.  It wasn't terribly cold, but there was a definite chill in the air, it was overcast all day, and there were intermittent rain showers throughout the day as well.

    Days like this mean comfort food for dinner, and these potatoes fit the bill nicely.  Baked potatoes are one of my favorite foods, but what if you stuff them with a creamy and cheesy mixture of sausage, tomatoes, and spinach?  Pretty wonderful.  This is total comfort food, but a little outside the normal comfort food triangle of pasta-casserole-pot roast.  I get burnt out a bit on some of the typical comfort foods, and this was a nice change of pace.

    I took advantage of nap time to make dinner - baking the potatoes and mixing up the filling.  But it was pretty quick, and could definitely be done at dinnertime as well.  Or, you could bake the potatoes and cook the filling the night before, then just reheat when it's time to eat, making this a pretty great make-ahead meal.  I served these potatoes with some roasted asparagus, and it was a hit all-around.  It's practically a complete meal on its own, so just serve it with your veggie or salad of choice and call it a day.

    Who will win the tug-of-war this week?  I'm still pulling for spring!


    Creamy Sausage & Spinach-Stuffed Baked Potatoes
    adapted from Weeknights with Giada
    serves 4

    • 4 (8 to 10-oz) russet potatoes, scrubbed clean
    • 2 Tbs olive oil, divided
    • 1 cup diced yellow onion (1 small)
    • kosher salt and freshly ground black pepper
    • 3 cloves garlic, minced
    • pinch of red pepper flakes
    • 8 oz sweet or spicy turkey sausage, casings removed (or a combo of the two)
    • 1 1/2 cups marinara sauce
    • 4 cups baby spinach
    • 1/2 cup (4 oz) mascarpone cheese
    • 1/2 cup grated Parmesan cheese, plus more for serving
    • 3 Tbs chopped fresh basil leaves

    Preheat the oven to 375 degrees.

    Brush the potatoes with 1 tablespoon total of the olive oil, and sprinkle generously with salt and pepper.    Poke several holes in the tops with a fork, then bake in s single layer on a baking sheet for 45 minutes to 1 hour, or until they are tender when pierced with knife.

    Meanwhile, heat the remaining oil in a large skillet over medium-high heat.  Add the onion, 1 teaspoon of salt, and 1/2 teaspoon of pepper.  Cook, stirring often, about 3 minutes.  Stir in the garlic and red pepper flakes and cook until fragrant, about 1 minute.  Add the sausage, and use a wooden spoon to break it into bite-sized chunks.  Cook until browned and cooked through, 5 to 7 minutes.

    Stir in the marinara sauce and spinach.  Bring the mixture to a low boil and cook until the spinach is wilted.  Remove from heat and stir in the mascarpone, parmesan cheese, and 2 tablespoons of the basil.  Taste and season with additional salt and pepper if needed.

    Once they are cool enough to handle, cut a slit in the top of each potato and gently squeeze the ends to form an opening.  Use a fork to break up the insides  bit, then season lightly with salt and pepper.

    Spoon the sausage mixture into each potato, garnish with the remaining basil, and serve, passing the extra parmesan at the table.


    Tuesday, March 25, 2014

    Creamy Poblano-Tortilla Casserole


    Creamy Poblano-Tortilla Casserole.  Pretty much any of those words on their own send me running to the kitchen, but combined?  Oh man, it's dangerous.  This casserole is made up of layers of crispy baked tortilla chips, a creamy, cheesy sauce, a tangy and spicy filling, and lots and lots of poblano peppers.  It's creamy, cheesy, crunchy, spicy, and well... just really freaking good.

    I couldn't decide if this reminded me more of mac & cheese or an enchilada casserole... then I realized that I didn't care.  It was so awesome that there's no need to label it or compare it to anything else (though of course then I really wanted to make this green chile mac & cheese as a result, ha!).

    Like I tend to do most days, I prepped this baby during nap time, then just popped it in the oven when Joey was on his way home.  I also put together a quick citrus and avocado salad to balance out the spice and richness of the casserole.  This was the perfect meal for the end of winter - comforting and homey, but with plenty of brightness and spice from the poblanos.  A winner all-around.


    Creamy Poblano-Tortilla Casserole
    adapted from Gourmet Today
    serves 4

    While this is a vegetarian dish, I see no reason why you couldn't stir some shredded chicken, pork, or ground beef or turkey into the filling.  


    Filling
    • 9 (6- to 7-inch) corn tortillas
    • 3/4  pound poblano chiles, roasted and peeled (about 3 large poblano peppers)
    • 2  Tbs vegetable oil
    • 2  cups chopped white onions
    • 1 jalapeño pepper, seeds and ribs removed, minced
    • 2 cloves garlic, minced
    • 1  teaspoon salt
    • 1  (14- to 15-ounce) can diced tomatoes
    • 1/4 cup fresh cilantro, chopped
    Sauce and topping
    • 2  Tbs unsalted butter
    • 2  Tbs all-purpose flour
    • 1 1/2  cups milk
    • 1 1/2 cups freshly grated cheddar cheese
    • 1 1/2 cups freshly grated  Monterey Jack cheese 
    • 1/2  tsp salt
    • 1/4  tsp pepper
    Toast the tortilla wedges: Put racks in upper and lower thirds of oven and preheat to 400 degrees F. Stack tortillas and cut into 8 wedges. Spread tortilla triangles in one layer on two large baking sheets and bake, stirring occasionally and switching position of pans halfway through baking, until crisp and pale golden, 10 to 15 minutes. Cool tortillas, and leave the oven on.

    Prepare the chiles: Open chiles and spread flat; discard seeds and stems and cut out ribs. Cut chiles lengthwise into 1/4-inch-wide strips. Reserve about 1/4 cup for garnish, and roughly chop those strips into small pieces.

    Make the filling: Heat oil in a 10-inch heavy skillet over medium-low heat until hot but not smoking. Add onions, jalapeño, and garlic and cook, stirring occasionally, until softened, about 5 minutes. Stir in salt, tomatoes with juice, and remaining poblano strips and simmer for 2 minutes. Remove from heat and stir in the chopped cilantro.

    Make the sauce: Melt butter in a medium saucepan over  medium-low heat. Add flour and cook, whisking constantly, for 2 minutes. Add milk in a steady stream, whisking, and continue to cook and cook, whisking occasionally, until the sauce is slightly thickened, 3-4 minutes. Remove from heat and gradually add 2 cups of the cheese, stirring until cheese is melted, then add salt and pepper.

    Assemble and bake: Arrange half of the tortillas in a greased 2-quart baking dish. Spoon filling evenly over top. Cover with remaining tortillas. Pour sauce over tortillas (tips of tortillas will stick up) and sprinkle with the remaining cup of cheese and reserved poblanos.  Bake, uncovered, in the upper third of oven until gratin is bubbling and top is golden, about 30 minutes.

    Allow to cool 5-10 minutes before serving.


    BLOG DESIGN BY: SHERBET BLOSSOM DESIGNS