Showing posts with label sandwiches. Show all posts

Saturday, November 22, 2014

10 Sandwiches for Leftover Turkey

Thanksgiving leftovers are just meant for sandwiches.  Now there is nothing wrong with keeping it simple - turkey, lettuce, tomato, maybe a little mayo.  But I like to mix things up, so I thought I'd share some fun sandwiches I've rounded up from around the web.  Which one of these sandwiches calls out to you?


This Pulled Turkey Sandwich with Cranberry BBQ Sauce is from the archives of my own blog.  I love this not only because of my obsession with bbq, but it also helps you use up leftover cranberry sauce!


Any good Friends fan knows all about the turkey sandwich with the moist maker.  I have a particular affinity for all the Friends Thanksgiving episodes (more coming this week on this topic!); so this sandwich from Spoon Fork Bacon is pretty much perfect.  I will definitely be making this sandwich after Thanksgiving!


Oh, my.  Baked Turkey Sliders with Cranberry-Bacon Chutney and Browned Sage Butter.  Is anyone else drooling right now?  My friend Shawnda killed it with these little beauties.  I can totally see us making a big tray of these to snack on while we watch our beloved Yellow Jackets get stomped by UGA on Saturday.  We like to dull our pain with food.


And my friend Annie also killed it with this Thanksgiving Leftovers Panini.  It has turkey, cranberry sauce, and brie, and it's made with pumpkin bread!  Amazing.

I love the idea of waffle sandwiches for breakfast the day after Thanksgiving, and how gorgeous are these Pumpkin Waffle Breakfast Sandwiches from Running to the Kitchen?  There's cranberry sauce, turkey, and a fried egg, all on a pumpkin waffle.  Love.


Chicken Salad on a Croissant is one of my favorite sandwiches, and I almost always use leftover turkey to make a batch of this Apple-Almond Chicken Salad Sandwiches.  It's a great quick lunch, or a few scoops of this with crackers makes a nice snack as well.


While it's not really a true sandwich, I couldn't write the post without including these Turkey Tostadas with Cranberry-Chipotle Sauce from Apple a Day.  You guys know that I eat Mexican food any chance I get, and I love this idea!


This Open Faced Hot Turkey Sandwich from Simply Recipes is so simple, but it looks so comforting and delicious.  Sometimes simple really is best.


I love Cuban sandwiches, so this spin with roasted turkey and a cranberry-dijon mayo makes me so happy.


And finally, for a sandwich with a totally different flavor profile, Jamie Oliver's Turkey Banh Mi.  How gorgeous is that sandwich?  I really want to just face-plant right into it.  mmm, cilantro.


These sandwiches all look so amazing, and I might have to roast a turkey just to use for sandwiches.  I really and truly can't decide which one to make first!


Monday, October 20, 2014

Short Rib and Wild Mushroom Cheesesteaks

Short Rib and Wild Mushroom Cheesesteaks

I know, I know.  You cheesesteak purists are probably rolling your eyes at me.  A true cheesesteak is an art form.  And it doesn't include braised short ribs, wild mushrooms, or fancy cheese.  But you know… it's hard to argue with short ribs, wild mushrooms, and fancy cheese, right?  Right.

This recipe was born from a big bowl of cabernet-braised short ribs sitting in my fridge.  I made a big batch for a shower I threw over the weekend, and I wanted to do something noteworthy with the leftovers.  I thought about pasta, pot pie, mac and cheese… and then inspiration hit:  cheesesteak sandwiches.  But not just any cheesesteaks.  They needed to be elevated to a level worthy of using these precious short ribs.  So I added wild mushrooms.  And Gruyere cheese.  And then I took a bite and swooned.  And then Joey swooned.  And then Caroline swooned.  And then Smith threw his on the floor.  And Joey picked it up and ate it.  No wasting short rib sandwiches!  #truth.  #notashamed

I served these sandwiches with Parmesan-Truffle Oven Fries and some fresh fruit, and we felt like we were eating dinner at a trendy gastropub.

Like I said, I used leftover short ribs for these sandwiches, and it made for a super quick and easy weeknight meal.  But if you don't happen to have a bunch of short ribs hanging out in your fridge (who are you?), then you can definitely braise some up on a Saturday or Sunday then have them ready to go for some quick meals throughout the week.  Or next time you make short ribs, throw a few extra in there, then shred them and freeze them.  I cannot think of any situation in which having short ribs on hand would be a bad thing.

Short Rib and Wild Mushroom Cheesesteaks 

Short Rib and Wild Mushroom Cheesesteaks
  • 1 Tbs butter
  • 1 medium yellow onion, halved and thinly sliced
  • 1 small green bell pepper, seeded and thinly sliced
  • kosher salt and freshly ground black pepper
  • 5 oz wild mushrooms (shiitakes, chanterelles, oyster, etc.  or a mixture), thinly sliced
  • 2 cloves garlic, minced
  • 3 cups shredded braised short ribs
  • 1/4 cup dry red wine (or beef broth, or a dark beer)
  • 4 sandwich rolls, halved and buttered
  • 4 slices Gruyere or sharp provolone cheese
Preheat the oven to 375 degrees.

In a large skillet, melt the butter over medium heat.  Add the onions and bell pepper, and cook, stirring often, until they begin to soften, about 5 minutes.  Add the mushrooms and 1/2 teaspoon of salt.  Saute, stirring often, until the mushrooms are softened and cooked through, about 6 to 8 minutes.

Stir in the garlic and stirring constantly, cook an additional 30 seconds.

Gently fold in the short ribs, and cook until they are heated through, 2 to 3 minutes.  Stir in the wine, scraping up any browned bits from the bottom of the pan.  Taste the mixture and season with salt and pepper to taste.

Divide the filling evenly among the sandwich rolls, then top each with a slice of cheese.  

Close the sandwich and bake 5 to 6 minutes, or until the roll is hot and the cheese is melted.  Serve immediately.


Sunday, September 7, 2014

Root Beer Turkey Sloppy Joes

Root Beer Sloppy Joes 

Now that school's back in session and after school activities are in full-swing, our evenings just got really busy, really fast.  So I'm always on the lookout for dinners that are healthy, quick and easy, and appealing to the whole family.

I was a vegetarian growing up, so I didn't eat a lot of Sloppy Joes.  And to be honest, even once I ate meat again, they didn't really seem all that appealing.  But after having these… boy have I been missing out!  Ground turkey, a great blend of sweet and savory seasonings, tomato sauce, and finally, just enough root beer to lend a subtle caramel finish.  Good stuff, these sandwiches.

Even better, they fit the bill for my dinner trifecta:  healthy, fast, and kid-approved.  I served these with zucchini tots and fresh fruit, and it was a really great dinner.   The turkey mixture is also one of those great foods that tastes even better the next day, so I had some pretty great lunches over the course of the week as well.

Do you have any strategies for quick and easy weeknight meals?  This will be an upcoming topic for my "Feeding my Family" series, so I'd love to have some reader-advice to include!

Root Beer Sloppy Joes
adapted from Cooking Light, September 2014

  • 2 tsp canola oil
  • 3/4 cup chopped white onion
  • 1 lb ground turkey
  • 2 cloves garlic, minced
  • 1 tsp dry mustard powder
  • 1 tsp chili powder
  • 1 tsp tomato paste
  • 3/4 cup tomato sauce
  • 1 Tbs apple cider vinegar
  • 1/2 tsp hot sauce
  • 1/4 cup root beer
  • 1 Tbs Worcestershire sauce
  • kosher salt and freshly ground black pepper
  • 4 hamburger buns, toasted
Heat the canola oil in a large nonstick skillet over medium heat.  Add the onion, and cook 3 minutes, or until it's just beginning to soften.  Stir in the ground turkey, breaking up the meat as you stir and cook.  Cook 4 minutes, or until the meat is just beginning to brown.  

Add the garlic, mustard, chili powder, tomato paste, and 1/2 teaspoon of kosher salt.  Cook, stirring constantly, until the mixture is fragrant.  Stir in the tomato sauce, vinegar, hot sauce, root beer, and Worcestershire sauce.  Bring to a simmer and cook 5 to 7 minutes, or until the mixture is slightly thickened.  

Divide the mixture among the bottom halves of the buns, top with the top halves, and serve.


Monday, July 21, 2014

Oven-Fried Shrimp & Okra Po' Boys (and a po' boy salad)

Oven-Fried Shrimp & Okra Po' Boys

Oyster po' boys are one of my favorite foods ever.  Love the bread, love the fried oysters, love the remoulade sauce… it's all good.  But… not good for you.  Like, at all.  So it's relegated to a "once a year, only order it on vacation" food. That doesn't mean I don't crave it though.  And when I do - there's this sandwich.  No, it's not the same as the real oyster deal.  But it's pretty darn good.  And oh, about 1,000 calories less.  So it's a winner all-around.

When I first saw these in Cooking Light, I got so excited because HOW have I never thought of an okra po' boy before??  Genius!  Instead of being deep-fried, the shrimp and okra are tossed in buttermilk, then coated with spicy Cajun-spiked cornmeal.  They are baked in the oven, and come out perfectly crispy and delicious.

Another way that these cut calories is portion control.  Instead of being served on a big honking baguette, they are served in hot dog buns - like a lobster roll.  Definitely splurge and buy fresh hot dog buns from the bakery for these; or better yet, make your own!  A spicy and creamy remoulade sauce rounds them out, and I'd recommend serving simply with some chips, or go all-out summer and add some corn on the cob and watermelon.

Oven-Fried Shrimp & Okra Po' Boys

As for me?  I had a hankering for a salad that night (I told you, I'm obsessed with salads this summer).  So I turned my sandwich into a big salad with romaine, tomatoes, grilled corn, then okra and shrimp, and thinned out the remoulade with a little buttermilk to make a kick-ass dressing.  Winner winner, po' boy dinner.

Turned my shrimp and okra po' boy into a salad.  #greatdecision #clblogger #clkickingdishes #pinkparsley #summertime

Oven-Fried Shrimp & Okra Po' Boys
 Cooking Light, June 2014

The sandwiches were a little messy for the kids to eat, so I ended just giving them the okra and shrimp with some remoulade for dipping.  They loved this, and I think it would be a fun appetizer served this way too!

  • 15 small okra pods, trimmed and halved lengthwise
  • 1/2 low-fat buttermilk, divided
  • 1/2 tsp kosher salt, plus more as needed
  • 10 oz medium shrimp, deveined, peeled, and tails removed (preferably gulf shrimp)
  • 1 Tbs all-purpose flour
  • 2/3 cup yellow cornmeal
  • 1 1/2 tsp Cajun or Creole seasoning
  • 3 Tbs canola oil
  • 4 top-split, hot dog buns, toasted
  • 1/2 cup thinly sliced romaine or iceberg lettuce
  • 1 medium tomato, halved lengthwise and sliced
  • Remoulade sauce (recipe below)
Place a baking sheet in the oven and preheat  to 450 degrees.


  1. Combine the okra and 2 tablespoons buttermilk and 1/4 teaspoon of the salt in a medium bowl; gently stir to coat.
  2. Place shrimp in a medium bowl. Sprinkle with flour; toss well to coat. Drizzle with remaining 6 tablespoons buttermilk, and sprinkle with remaining 1/4 teaspoon salt; toss to coat. Drain okra and shrimp through a sieve; discard liquid.

  3. Combine cornmeal and Cajun seasoning in a large zip-top plastic bag. Add okra and shrimp; seal bag, and shake well to coat.

  4. Carefully remove pan from oven; drizzle with oil, then use a brush to coat the entire bottom of the pan with the oil.. Remove shrimp and okra from cornmeal, shaking off excess, and arrange in a single layer on the pan. Bake for 5 minutes.  Carefully flip the okra and corn, then bake an additional 4 to 5 minutes, or until the shrimp and okra are cooked through.
  5. Spread about 1 tablespoon of the rĂ©moulade on one side of hot dog buns; divide lettuce and tomato evenly among buns.  top with the shimp and okra and serve.
Remoulade Sauce
adapted from Annie's Eats

  • 1/4 cup plus 2 tbsp. light mayonnaise
  • 1/4 cup Greek yogurt
  • 2 Tbs dijon mustard
  • 1 clove garlic, minced
  • 1½ Tbs pickle juice
  • ½ tsp prepared horseradish
  • ¼ tsp cayenne pepper
  • ¼ tsp smoked paprika
  • Dash of hot sauce
Combine all the ingredients in a small bowl and whisk to combine.  Cover and refrigerate until ready to use.


Sunday, May 20, 2012

Portabello & Spinach Pesto Panini


Not that we encourage Caroline to mispronounce words, but Joey and I catch ourselves saying certain words the same way she does, even if it's not the right way.  Like we call Smith "Baby Sniff" more often than not.  Her cousin Georgia is "Joorjha."  She eats "yodirt" every morning.  And "grill the cheese" sandwiches for lunch.  She is also very particular.  She did not appreciate being served this sandwich for dinner.  Because grill the cheese is for lunch.  Everyone should know this.  Joey and I, however, were more than happy to eat these for dinner.  And for the record, I ate one for lunch the next day, so Caroline can rest easy.

You start by oven-roasting portabello mushrooms and onion slices, then layer them onto thick and hearty sandwich bread with fresh mozzarella, spinach pesto, and a splash of balsamic vinegar.  Grill it or cook in a panini press, and you have one heck of a sandwich.  This is a very quick and easy dinner, but you could shave even more time off by mixing up your pesto and roasting the veggies earlier in the day or the night before.

I'm pretty sure most combinations of roasted veggies grilled on bread with pesto and cheese would make a wonderful sandwich, but this particular variation is really great. It makes a nice light dinner when served with a seasonal salad.  Or a great lunch.  For the record, Caroline eventually ate her sandwich, and of course she loved it.  Because not matter the time of day - who doesn't like a fancy-pants grilled cheese?

Portabello & Spinach Pesto Panini
adapted from Yes, I Want Cake


  • 2 cups packed fresh spinach, arugula, or basil (or a combo of any of these)
  • 2 Tbs chopped fresh parsley
  • 1 garlic clove, roughly chopped
  • 1/3 c pine nuts, lightly toasted
  • juice of 1/2 lemon
  • 1/4 c olive oil
  • 1/3 cup parmesan cheese
  • salt and pepper


  • 4 slices of thick sandwich bread
  • 1 Portobello mushroom
  • 1 Tbs olive oil, plus more for the bread
  • 1 Tbs soy sauce
  • 1 Tbs balsamic vinegar, plus more for drizzling
  • 1/2 small onion, sliced into rings
  • 4 slices of fresh mozzarella
  • 1/4 C prepared pesto
Combine the spinach, parsley, garlic, pine nuts, and lemon juice in the bowl of a food processor fitted with the steel blade.  Puree until everything is chopped very small, scrape down the bowl, and then with the processor running, stream in the olive oil.  Remove the pesto a small bowl, stir in the Parmesan cheese, and season to taste with salt and pepper.


Meanwhile, preheat the oven to 425 degrees.  Toss the mushroom caps and onions with the olive oil, soy sauce, balsamic vinegar, and salt and pepper to taste.  Cook on a rimmed baking sheet, with the mushrooms cap side-down, about 10-15 minutes.  Cool slightly, then slice the mushrooms.


Brush one side of each piece of bread with olive oil, then spread 1 tablespoon of pesto on the other side of each slice.  Layer the mushrooms, onions, and 2 slices of mozzarella on each sandwich, drizzle with balsamic vinegar, then top with the other slice of bread, olive oil-side up.


Heat a nonstick skillet over medim-high heat and cook the sandwiches, flipping when golden-brown, a few minutes per side.


Thursday, March 8, 2012

Everything Sandwich Bread


I really really really love bagels.  And while I've made them once, it was kind of a cheater recipe, and I've been dying to try them for real.  A few weeks ago I got a major craving for everything bagels, and thought maybe I'd try them over the weekend.  Well, we ended up having a lot to do and I didn't really have time for it, but the craving never went away - and why I didn't just go to the bagel place for one, I don't know.  I like to make things complicated.  So anyway, I thought of a way that I could satisfy my craving and save on time - make sandwich bread flavored with the everything spices!

I took my favorite basic sandwich bread dough and mixed some of the spice blend right into the dough.  I then sprinkled more of the spice blend over the top.  The result?  Everything perfection!  This bread really does have the flavor of an everything bagel.  And it makes an incredible breakfast sandwich - melty cheese, a fried egg, and bacon.  Amazing.  Also great?  A sandwich at lunch - I loved it with cucumbers, tomato, avocado, and lettuce.  And it makes a pretty great BLT as well.  And a great turkey sandwich.  And great cheese toast.  Really it's great with just about.... everything (see what I did there?).


Everything Sandwich Bread
adapted from Baking Illustrated's American Sandwich Bread

*the onions and garlic on the top may get a little too brown during the cooking time.   Check on them about half-way through, and if they are getting too dark too quickly, tent the loaf with foil.
  • 3 3/4 cups (18 3/4 oz) all-purpose flour
  • 2 tsp kosher salt
  • 1 cup cold buttermilk
  • 1/3 cup boiling water
  • 2 Tbs unsalted butter, melted
  • 3 Tbs honey
  • 1 envelope (about 2 1/4 tsp) instant yeast
Everything Mix
adapted from Annie's Eats
  • 2 tsp poppy seeds
  • 2 tsp sesame seeds
  • 2 tsp dried minced garlic
  • 2 tsp dried minced onion
  • 3/4 tsp kosher salt
Adjust one oven rack to the lowest position, and another to the middle position.  Heat the oven to 200 degrees.  When it is preheated, maintain the temperature for 10 minutes, then turn off the oven.

Bring the water to a boil in a small saucepan.  Remove from heat and add the cold buttermilk and stir to combine.

Mix 3 1/2 cups of the flour and the salt in the bowl of a stand mixer fitted with a dough hook.  Add the buttermilk/water mixture, butter, honey, and yeast to a liquid measuring cup.  Turn the mixer on low, and add the liquid in a slow stream, increasing the speed of the mixer as you go to medium.  Continue mixing until the dough is smooth and satiny, stopping to scrape the dough from the hook as needed. Sprinkle in 1 tablespoon of the everything spice mix.  Knead about 10 minutes, adding flour 1 Tablespoon at a time, as necessary to keep the dough from sticking to the sides of the bowl.

Turn the dough out onto a lightly floured surface and knead to form a smooth ball, about 15 seconds.

Place the dough in a lightly oiled bowl, rubbing the dough around the bowl to coat with the oil.  Cover tightly with plastic wrap and place the bowl in the oven until the dough doubles in size, 50-60 minutes.

Turn out onto the floured surface and gently press the dough into a rectangle that is 1 inch thick and 9 inches long.  With the long side facing you, roll the dough firmly into a cylinder, pressing with your fingers as you roll to make sure the dough sticks to itself.  Turn the dough seam-side up and pinch it closed.

Place the dough seam-side down in a greased 9x5 inch loaf pan, and press it gently to make sure it touches all four sides of the pan.  Sprinkle with the everything spice mix (you don't have to use all of it - I think I used a few more teaspoons of it), lightly pressing with your hands to adhere the spices to the dough.  Cover with a clean kitchen towel and allow to rise in a warm spot until the dough almost doubles in size, 20-30 minutes.

Preheat the oven to 350 degrees.  Place an empty baking pan on the lowest rack of the oven.  Bring 2 cups of water to a boil and pour  into the empty pan.  Set the loaf onto the middle rack, and bake until an instant-read thermometer inserted into the center of the loaf reads 195 degrees, about 40-50 minutes.

Remove the bread from the pan and cool to room temperature on a wire rack.  Slice and serve.


Sunday, November 13, 2011

Pulled Turkey Sandwiches with Cranberry BBQ Sauce


One of my favorite things to do is to reinvent leftovers, and one of the best times to do that is Thanksgiving.  For one, just reheating meat and eating it isn't very appetizing to me, plus I would get sooo tired of just eating turkey like that for days on end.  But when I have other options, it makes leftovers exciting.  I will certainly be making this sandwich after Thanksgiving this year.  It is also a double win because it uses leftover cranberry sauce as well.    Actually, it is a triple win because it is also very quick and easy.  Just shred or chop some turkey and whip up this easy BBQ sauce.

I pretty much always make my own BBQ sauce now:  it is easy, cheap, and I like knowing exactly what I'm eating.  For this, you might be tempted to just mix the cranberry sauce into a bottle of  purchased BBQ sauce, but I think it would end up too sweet.  I used my typical BBQ sauce recipe, omitting the molasses and honey, and adding a bit more hot sauce to compensate for the sweetness of the cranberry sauce.  I served this with baked sweet potato fries, and we enjoyed a fun and casual Thanksgiving-esque dinner.


Thanksgiving Leftover Ideas
Turkey Cranchiladas (Pink Parsley)
Leftover Panini (Annie's Eats)
Turkey Tacos with Cranberry Salsa (Simply Recipes)
Turkey Noodle Soup (Smells Like Home)
Turkey Croquettes (Martha Stewart)
Wheatberry & Turkey Salad (The Meaning of Pie)
Turkey a la King (Real Mom Kitchen)


Cranberry BBQ Sauce
adapted from this Easy BBQ Sauce
  • 3/4 cup ketchup
  • 1 Tbs cider vinegar
  • 1 tsp hot sauce (or to taste)
  • 1 tsp Dijon mustard
  • 1/2 tsp liquid smoke
  • salt and pepper
  • 1/2-1 cup cranberry sauce
  • honey (optional)
Whisk together the first 5 ingredients in a medium bowl, and add salt and pepper to taste.  Whisk in the cranberry sauce, starting with 1/2 cup and adding more as desired.  I added almost a full cup when I made this. Add additional hot sauce if desired, or honey if you want a sweeter sauce.

Toss with shredded turkey and serve on toasted buns.


Tuesday, August 2, 2011

Peach, Prosciutto, and Brie Panini


I am pretty sure that if Joey had to choose, sandwiches would be his favorite dinner.  And I'm certain that his choice would have nothing to do with the fact that it basically generates 3 dishes for him to wash - a pan, a knife, and a cutting board.  I try and plan a sandwich night once every week or two.  More in the summer - there are BLTs to be eaten then!

I'm not sure where I got the idea for this particular sandwich - I'm sure I saw something similar somewhere, but I'm glad I made it - I've made my love for peaches quite clear, just as my love for sweet + savory, so it should come as a shock to no one that this was a big hit in our house.  Peaches - good.  Prosciutto - good.  Brie - goooood.  Seriously, is there anything that is not made better by the addition of brie? 


More Sandwich Love:
Apple-Almond Chicken Salad
Chicken Caesar Clubs
Tomato, Mozzarella, and Pesto Paninis
Goat Cheese and Strawberry Grilled Cheese
Shrimp Rolls 
Ultimate Grilled Cheese 


Peach, Prosciutto, and Brie Panini
a Pink Parsley Original
  • 4 slices good sandwich bread
  • butter
  • Dijon mustard
  • Peach preserves
  • 1 peach, peeled and sliced
  • 4 slices prosciutto
  • 1-2 oz brie
Butter one side of each piece of bread.  Flip over and spread 2 slices with mustard and the other 2 slices with peach preserves.

Preheat a nonstick skillet or panini press.  Layer the prosciutto, peaches, and brie over the prepared bread, and top with the remaining bread to make a sandwich.

Cook 2-3 minutes per side, or until browned and crispy, and the cheese is melted.  Allow to cool 1-2 minutes before serving.


Tuesday, May 3, 2011

Goat Cheese & Strawberry Grilled Cheese Sandwich


Lately I have been really obsessed with goat cheese.  Or to be more specific, goat cheese + fruit.  Most often I just add both to a salad, but there have been a few stand-out dishes that were a bit more involved.  I came across this recipe in Southern Living a few months ago, and I've been waiting for a chance to make it ever since.  During strawberry season, we always have at least one big container of strawberries in the fridge, yet somehow I just kept forgetting about this.  But one day when pickings were slim for lunch, I was going to just make a snack plate of some fruit and cheese, when I suddenly remembered this recipe.  Luckily, I had pretty much everything on hand, so I excitedly threw this together.

And I absolutely LOVED it.  Given my love for all things fruit and goat cheese, that should come as no shock though.  And while I loved the cheese and the strawberries together, what made this sandwich killer was the pepper jelly.  Just a hint of spice mixed with the sweet strawberries and tangy goat cheese just put it over the top.  This made an awesome lunch, and one I plan to enjoy as often as possible during strawberry season.

Want more goat chese?
Blueberry-Goat Cheese Focaccia
Grilled Asparagus with Rosemary and Goat Cheese
Peppered Pear and Goat Cheese Scones
Roasted Beet Salad with Goat Cheese and Spicy Pecans
Herb and Goat Cheee Biscotti
Goat Cheese Bruschetta


Goat Cheese and Strawberry Grilled Cheese
adapted from Southern Living, March 2011
makes 3 sandwiches
  • 4 oz. goat cheese, softened
  • butter
  • 6 slices bread
  • 5 tsp red pepper jelly
  • 3/4-1 cup sliced fresh strawberries
  • 6 large basil leaves, sliced thin
  • salt and pepper to taste
Heat a large skillet or griddle over medium heat.

Spread one side of each slice of bread lightly with butter.  Flip the bread over, spread half the slices with pepper jelly, and top with half the goat cheese.  Lay the strawberry slices in a single layer, sprinke with basil, salt, and pepper, then spread goat cheese on the remaining slices of bread.  Top the strawberry side with the reamining bread.

Cook sandwiches 2-3 minutes per side, or until golden-brown.  Serve.


Tuesday, April 19, 2011

Shrimp Rolls


Not to be all "neener neener," but as you are reading this, I'm lounging on the beautiful beaches of the Gulf of Mexico sipping a (non-alcoholic) frosty drink.  So instead of rubbing it in, I thought I'd share a fun, summery, and beachy dish.

A few weeks ago I got a major craving for a lobster roll.  Which is funny considering that I've never even eaten one.  I actually had everything I needed on hand, except for well, the lobster.  And to be completely honest, I am not jazzed about doing the whole live-lobster thing.  So I decided to just adapt and make shrimp rolls instead. 

Even though I've never had a lobster roll, I have read about them, so I know that they are very simple and only have a few ingredients.  The idea is to let the lobster shine, so I took the same approach with shrimp.  I served them with fresh fruit and potato chips, and we enjoyed a refreshing and low-maintenance meal.  I only made enough for 2 rolls, but I'd imagine this would keep well for a few days in the refrigerator.  In fact, it would make a great lunch... and since I have access to beautiful Gulf shrimp, I may have to run into town and pick up some shrimp to make some today...


Shrimp Rolls
Pink Parsley Original
makes 2 sandwiches
  • 8 oz. shrimp, peeled and deveined
  • 1 bay leaf
  • 1 lemon, quartered
  • 1 tsp peppercorns
  • 1/2 shallot, minced finely
  • 1 Tbs mayonnaise
  • 2 Tbs Greek yogurt
  • 1 tsp Dijon mustard
  • 1 Tbs minced fresh parsley
  • juice of 1/2 lemon
  • 1/2 tsp honey
  • tabasco sauce, to taste
  • salt and pepper to taste
To serve:
  • 2 top-split hot dog buns
  • butter
  • lemon wedges
Bring a large pot of water to boil.  Add the bay leaf, salt, lemon, and peppercorns.  Fill a large bowl with ice water and set aside.  Add the shrimp to the boiling water and cook 1-3 minutes, until they are pink, opaque, and the tail curl in.  Remove from the pot and plunge into the ice water to stop cooking.  Allow to cool.

Drain the shrimp and spread out on a clean, lint-free kitchen towel or paper towels to dry.  Remove the tails and chop the shrimp into bite-sized pieces.

In a medium bowl whisk together the mayonnaise, yogurt, mustard, parsley, shallot, lemon juice, honey, salt and pepper, and Tabasco sauce. Add the shrimp and stir well to coat.  Season with additional salt, pepper, and Tabasco sauce if desired.  Chill in the refrigerator while you prepare the buns, or for several hours.

To prepare the buns, butter the outer sides.  In a nonstick skillet, toast the buns on both sides until golden-brown and crisp.

To serve, pile the shrimp into each bun and pass additional lemon wedges.


Monday, March 7, 2011

PPQ: Apple-Almond Chicken Salad


I am a big fan of chicken salad.  Served on a croissant, it is one of my favorite lunches ever.  And to be honest, I don't understand why anyone would eat it any other way.  I also don't bother eating it if it doesn't have fruit and toasted nuts in it.  I just love the crunch and the sweetness.  I realize there are some crazy people out there who don't like fruit in their chicken salad, but that is just crazy talk to me!

Though I make chicken salad quite often, I have never thought to blog it.  I don't use a recipe really, just more of a method:
  1. Cut the mayo by at least half with Greek yogurt
  2. Add lots of extra dijon
  3. Use some sort of fresh herb (parsley, chives, basil, thyme...)
  4. Something for sharpness (onion, scallion, shallot...)
  5. Have at least 1 fruit.  I prefer apples and grapes, but have used both peaches and pineapple in a moment of desperation.
  6. Dried raisins or cranberries
  7. toasted nuts (almonds, pecans, walnuts, pistachios, pine nuts....)
  8. And my "secret" ingredient is a big squirt of honey.  It gives the whole salad a little sweetness vs just getting it when you bite into the fruit.
So when Shawnda chose apple-almond chicken salad with homemade mayonnaise for her Project Pastry Queen choice,  I immediately flipped to the recipe to see if it fit my criteria.  And it did meet most of my guidelines!  I could easily (and dramatically) increase Dijon, and add honey and dried cranberries.  However, I ended up changing her recipe up so much that I really shouldn't say I even participated this week. 

I didn't make my own mayo.  Since I always use at least half Greek yogurt, I didn't really feel like going through the trouble.  I would like to make my own at some point though, in hopes that it will make me actually like mayonnaise instead of abhorring it.  I also didn't have celery or red onion on hand, so I just omitted the celery, and I used shallot instead of the onion.  And finally, I didn't have any parsley, so I added a combination of chives, fresh oregano, and basil.

Even though I pretty much butchered the recipe, I still loved this chicken salad.  I loved the sweetness from the apples, the crunch from the toasted almonds, and the hit of fresh herbs.  Once I made all of my adjustments, it really was my perfect chicken salad.

Head over to Confections of a Foodie Bride for the full (and correct) recipe, and check back next week for my choice!


Wednesday, October 20, 2010

Grilled Chicken and Vegetable Wrapinis


I feel like I've been posting an overabundance of indulgent treats lately, so I'd like to share something healthy, easy, and quite tasty. 

One of the questions I receive the most is what to do with leftovers.  I for one eat them for lunch, or I reinvent them for later dinners.  One of my favorites is using leftover veggies on a salad at lunchtime, or making quesadillas with leftover meat.  These wraps were born out of the need to use up leftover grilled vegetables and chicken from a tailgate.  I recalled Annie posting open-faced veggie melts last week, and I thought maybe I'd do something similar.  I'm not really sure how that turned into grilled wraps, but I'm not sorry at all.  I just diced up the veggies and chicken into bite-sized pieces, added some fresh tomato, topped with some provolone, and wrapped them up.  Then I grilled them (improvising with a heavy saucepan since I don't have a panini press), and served with Caesar dressing for dipping.  The beauty of these is that they are completely customizable - shrimp, beef, or pork tenderloin would work wonderfully here, and any number of veggies or types of cheese would be great as well.

Joey isn't typically the biggest fan of leftovers (especially leftover veggies), but he definitely loved these wraps.  And you can bet that the next time we have grilled chicken and veggies (which will probably be next week), I'll make enough to use in some delicious wrapinis later!

One Year Ago:  Risotto Marsala


Grilled Chicken and Vegetable Wrapinis
a Pink Parsley Original
  • 2 large tortillas
  • 3/4-1 cup mixed cooked vegetables, chopped into bite-sized pieces
  • 1 cooked boneless, skinless, chicken breast half, shredded
  • 1 tomato, seeded and chopped
  • 2 slices provolone cheese, each torn in half
  • olive oil
  • Caesar Salad Dressing, for dipping
Preheat a large skillet over medium heat.  Add 1-2 teaspoons of the oil to the skillet

Lay both tortillas flat and evently distribute the vegetables, chicken, and tomatoes between them.  Top each with the provolone cheese, and close ends then roll tightly.  Lay seam side down in the skillet, then brush the tops with oil.  Using a heavy saucepan, press down on the wraps to flatten them.  Cook, with the saucepan on top, 2-3 minutes, and flip.  Continue to cook until the wraps are golden brown, remove from pan, and cut in half.  Serve with Caesar dressing for dipping.


Wednesday, August 25, 2010

BB: Ultimate Grilled Cheese


Ina Garten has a new cookbook coming out - it will be released in October, and is called How Easy is That?  How Ina is that??  In case the title didn't give it away, its focus is straightforward recipes perfect for entertaining and everyday cooking.  Tara, the brains behind Barefoot Bloggers, was offered an advanced copy of it to test out some recipes and share with her fellow blogging pals.  This month, we made Ultimate Grilled Cheese, as chosen by another one of my favorite bloggers, Rebecca of Ezra Pound Cake.

When I saw the title of this recipe, I had to wonder what exactly makes it the "ultimate" grilled cheese.  Well, you start with sourdough bread.  Butter each piece.  Then you spread each piece with an incredibly rich sauce of mayo, dijon, Parmesan cheese, salt, and pepper.  Scatter some bacon on top of the sauce, then pile on extra sharp cheddar and Gruyere.  So yeah, this sandwich doesn't mess around.

Joey was really excited by this sandwich.  Me?  Well it was certainly delicious of course.  It was a tiny bit too rich for me though, especially since I'm not the biggest fan of mayo (even though I actually decreased it when I made it).  I think if I had stopped at half a sandwich I would have been better off.  Still - add bacon, cheddar, and gruyere to anything and you can't go wrong. I'm just glad I served it with a light salad.

If you're interested to see what else will be included in Ina's latest cookbook, head over to Smells Like Home and check out what she's made so far.  And I for one can't wait to pick up a copy come October!

One Year Ago:  Pimiento Cheese with Bacon


Ultimate Grilled Cheese
Ina Garten, How Easy is That?
makes 6 sandwiches
  • 12 slices thick-cut bacon
  •  1 cup good mayonnaise
  • 1/4 cup Dijon mustard
  • 1/4 cup freshly grated Parmesan cheese
  • 1  tsp kosher salt
  • 1/2 tsp freshly ground black pepper
  • 12 slices sourdough bread
  • 6 tbsp butter, at room temperature
  • 6 oz Gruyere  cheese, grated
  • 6 oz extra-sharp Cheddar, grated
 Preheat the oven to 400 degrees.  Line the bacon on a rack set over a baking sheet, and bake for 20-30 minutes, or until browned and crispy.  Transfer to a paper towel-lined plate and allow to drain, then chop into 1-inch pieces.

Meanwhile, make the sauce.  Mix together the mayonnaise, mustard, salt and pepper, and Parmesan.  Combine the Gruyere and cheddar in a medium bowl.  Spread the sauce on each slice of bread, then top half the slices with bacon.  Top the bacon with 1/3 cup of cheese.

Form sandwiches, pressing each one down.  Butter the top half of each sandwich.  Melt 1-2 Tablespoons of butter in a large nonstick skillet, and grill have the sandwiches buttered-side up, flipping after a few minutes.  Repeat with remaining sandwiches.  Serve immediately.


Tuesday, July 13, 2010

Jalapeno-Cheddar Sandwich Bread

 
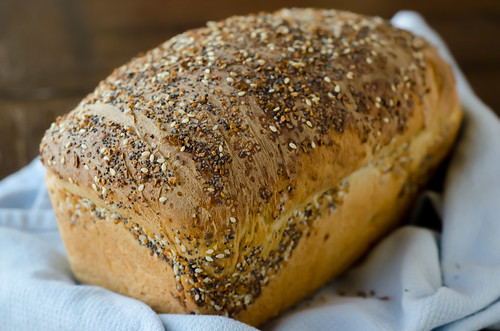
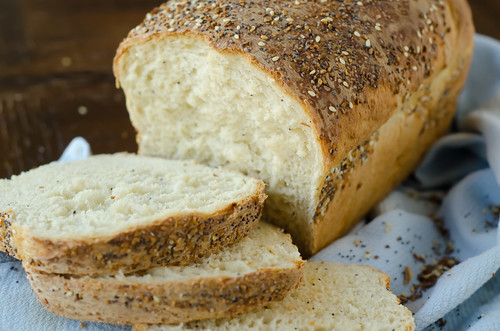
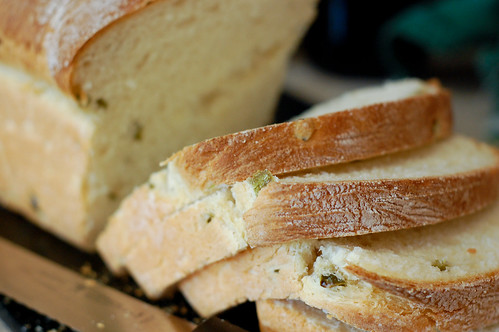
I realize that this is the third recipe for a jalapeno-cheddar bread I'm posting on my blog, but they are all different and delicious in their own ways, I promise (In case you're curious, here are the other two).  Its not overkill, really.  I wanted to make some sandwich bread last week, so I turned to my trusty Baking Illustrated for a no-fail recipe.  I had originally planned to making a wheat bread, you know, for health.  But then somewhere along the way I decided that jalapeno-cheddar sounded much better. :-)

As far as the recipe goes, it is a pretty straightforward bread recipe.  Mix, knead, rise, shape, proof, bake.  I didn't do anything special to the technique for making it jalapeno-cheddar.  I just tossed the pepper and cheese with a little flour and threw it in the mixer with everything else.  I'm not sure if that's the "right" way to incorporate mix-ins into bread, but it worked this time!


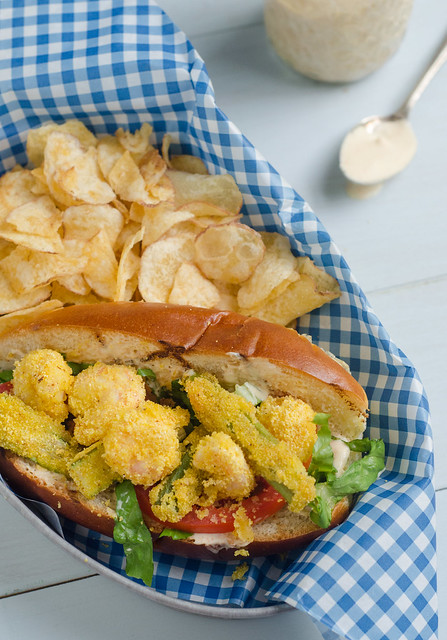
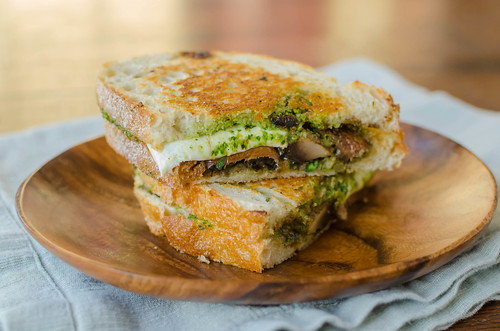
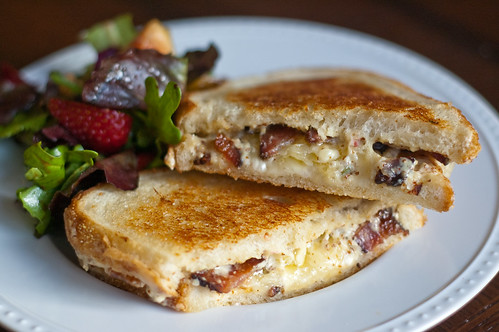
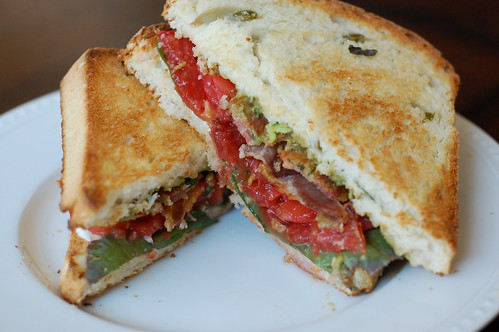
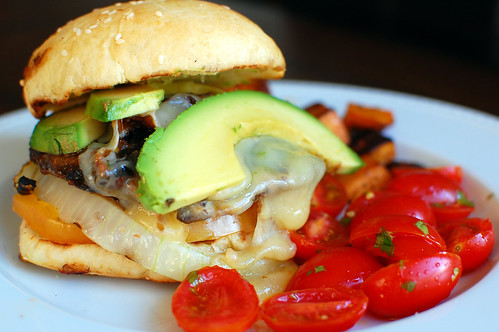
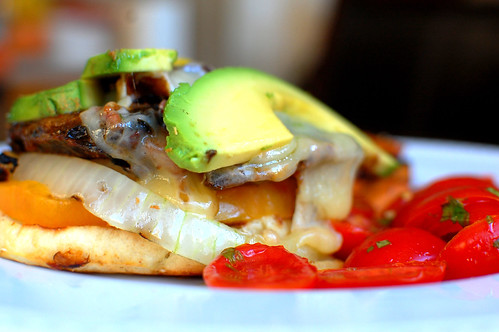
Joey really loved this bread.  So much in fact, that he said I should start making it every week.  It made the best BLT's ever, and is really tasty for breakfast with a little butter and honey.  I don't know that I'll make it every week (I have so many recipes waiting to be made!), but it will definitely make frequent appearances.


Jalapeno-Cheddar Sandwich bread
adapted from Buttermilk Sandwich Bread, Baking Illustrated
makes one 9-inch loaf
  • 3 3/4 cups (18 3/4 ounces) unbleached all-purpose flour, plus more for dusting the work surface
  • 2 teaspoons salt
  • 1 cup cold buttermilk
  • 1/3 cup water
  • 2 Tablespoons unsalted butter, melted
  • 3 Tablespoons honey
  • 1 envelope (about 2 1/4 teaspoons) instant yeast
  • 2-3 jalapenos, seeds and ribs removed, diced
  • 1 cup shredded cheddar cheese (the sharper, the better)
Adjust one oven rack to the lowest position, and another to the middle position.  Heat the oven to 200 degrees.  When it is preheated, maintain the tempeature for 10 minutes, then turn off the oven.

Toss the jalapeno and cheddar with 1 Tablespoon of flour in a small bowl.

Bring the water to a boil in a small saucepan.  Remove from heat and add the cold buttermilk and stir to combine.

Mix 3 1/2 cups of the flour andthe salt in the bowl of a stand mixer fitted with a dough hook.  Add the buttermilk/water mixture, butter, honey, and yeast to a liquid measuring cup.  Turn the mixer on low, and add the liquid in a slow stream, increasing the speed of the mixer as you go to medium.  Continue mixing until the dough is smooth and satiny, stopping to scrape the dough from the hook as needed.  After about 2-3 minutes add the jalapeno-cheese mixture, and continue to knead about 10 minutes total, adding flour 1 Tablespoon at a time, as necessary to keep the dough from sticking to the sides of the bowl.

Turn the dough out onto a lightly floured surface and knead to form a smooth ball, about 15 seconds.

Place the dough in a lightly oiled bowl, rubbing the dough around the bowl to coat with the oil.  Cover tightly with plastic wrap and place the bowl in the oven until the dough doubles in size, 50-60 minutes.

Turn out onto the floured surface and gently press the dough into a rectangle that is 1 inch thick and 9 inches long.  With the long side facing you, roll the dough firmly into a cylinder, pressing with your fingers as you roll to make sure the dough sticks to itself.  Turn the dough seam-side up and pinch it closed.

Place the dough seam-side down in a greased 9x5 inch loaf pan, and press it gently to make sure it touches all four sides of the pan.  Cover with a clean kitchen towel and allow to rise in a warm spot until the dough almost doubles in size, 20-30 minutes.

Preheat the oven to 350 degrees.  Place an empty baking pan on the lowest rack of the oven.  Bring 2 cups of water to a boil and pour  into the empty pan.  Set the loaf onto the middle rack, and bake until an instant-read thermometer inserted into the center of the loaf reads 195 degrees, about 40-50 minutes.

Remove the bread from the pan and cool to room temperature on a wire rack.  Slice and serve.


Friday, June 4, 2010

Tomato, Mozzarella, & Pesto Paninis


Any combination of basil, mozzarella, and tomato is sure to be a winner in my book, so I'm completely kicking myself for not trying these paninis sooner.  I've owned The Barefoot Contessa at Home for over 3 years now, and I always drool over this recipe, but have never gotten around to making it.  I think the reason being is that I don't own a panini press, and I really wanted those cute little lines (yes, I'm that anal).  Well a few weeks ago, I had a stroke of genius, and decided to weight them down on my grill (I do realize others have thought of this before me, but I felt pretty inventive).  It worked like a charm, and we enjoyed some of the best sandwiches we've had in a long time. So simple, so delicious.


Tomato, Mozzarella, & Pesto Paninis
adapted from Ina Garten, The Barefoot Contessa at Home
makes 6 sandwiches
  • 2 large ripe beefsteak tomatoes
  • 1 (16-ounce) ball fresh mozzarella
  • 12 slices bakery white bread, sliced 1/2-inch thick
  • about 1 cup pesto
  • kosher salt
  • balsamic vinegar
  • olive oil
Preheat grill.

Meanwhile, core the tomatoes and slice the tomatoes and mozzarella 1/4-inch thick.

Spread the bread slices out on a work surface.  Pour olive oil into a small bowl, and using a pastry brush, brush each bread slice with the oil.  Flip the slices over, and spread each slice evenly with pesto.  On half the bread, place a layer of mozzarella (about 2 slices per sandwich), followed by a layer of tomato.  Sprinkle the tomatoes with kosher salt and drizzle with balsamic vinegar.

Oil the grates of the grill, and working 3 sandwiches at a time, lay all the bread slices on the grill, and close the cover.  After 2-3 minutes, you should have grill marks, make sandwiches, by laying the pesto-only slices on top.  Weight the sandwiches down with either bricks wrapped well in foil, or heavy, oven-safe skillets.  Alternatively, you could lay a baking sheet on top and weight that down with bricks.

Grill an additional 1-3 minutes, or until the mozarella starts to ooze.  Repeat with remaining sandwiches.  Cut each sandwich in half, and serve warm.


Thursday, April 29, 2010

Chipotle Portobello Burgers


Here is yet another successful meatless meal.  Joey was actually surprised when I told him the "patty" was a mushroom.  He just assumed it was turkey or beef given how flavorful it was.  Success!  I'm honestly not surprised that its delicious - the mushroom caps are marinated in a spicy and flavorful chipotle dressing, grilled, and served on a burger bun with grilled onions, tomatoes, pepperjack cheese, and avocado.  

However, a word to the wise:  don't make these for company or on a first date.  They are incredibly messy to eat, and I would actually almost classify this as a fork and knife burger.  Joey and I have been married long enough that neither of us cares about being neat and clean... and let's face it.  No matter what I'm eating, I still manage to wear half.  Quite honestly, Caroline may very well be a cleaner eater than her mother.

We had a few mushrooms leftover, and I turned the ingredients into a salad for lunch.  Another success!  Loved this burger, and I'll be making it again and again this summer - just not for people that we need to impress.


Chipotle Portobello Burgers
adapted from Ezra Pound Cake, originally from Steven Raichlen
makes 4 burgers

Marinade
  • 3-4 chipotle peppers in adobo sauce
  • 3 cloves garlic
  • 1/2 cup chopped onion
  • 2 Tablespoons balsamic vinegar
  • 1/3 cup vegetable oil
  • coarse salt and ground black pepper
Burgers
  • 4 portobello mushroom caps, wiped clean with a paper towel
  • 1 large sweet onion, cut into rings
  • 2-3 Tablespoons butter, melted
  • 4 buns or rolls
  • 4 slices pepperjack cheese
  • 4 tomato slices
  • 1 avocado, halved, pitted, and cut into slices
Combine the ingredients for the marinade in the food processor.  Puree until smooth, and pour over mushroom caps.  Turn to coat, cover with plastic wrap, and refrigerate 30 minutes - 1 hour.

Preheat grill to medium-high heat.  Skewer the onions, or prepare vegetable basket for grill.

Grill mushrooms, gill side down, on the grill, brushing with extra marinade.  Brush the onion slices with oil and season with salt and pepper.  Grill alongside the mushrooms.  After 3 minutes, flip the mushrooms and onions, and brush with remaining marinade.  Allow to cook until tender and sizzling.  Lay a slice of cheese over each mushroom and continue to cook until it is melted and bubbly.

Brush buns with melted butter, and grill until toasted and lightly browned.

Starting with the bottom half of each bun, layer the onion, tomato, mushroom, and avocado.  Serve immediately.


Monday, April 5, 2010

BB: Chicken Caesar Club Sandwiches


I really feel like I say this every month, but when I saw this March's Barefoot Blogger selections, I was so excited.  Particularly, I was excited to try this sandwich.  I have had my eye on it every since I bought Barefoot Contessa at Home 3 years ago, and for some reason I had never gotten around to it.  So thank you to Karen of Shortbread for finally forcing me to make it.

This is now one of my favorite sandwiches, and Joey agrees that it is phenomenal.  Seriously.  I love ciabatta and caesar salad, so it should come as no shock that it interested me.  Add in a flavorful Caesar dressing, crisp proscuitto, salty Parmesan, and peppery arugula, and you have a seriously delicious sandwich.  It is quick to throw together, but its a nice elegant twist on sandwiches for dinner.

I saw that Tara made hers into a salad, and that made me think of making it as a panzanella.  I really really can't wait to try that. 


Caesar Club Sandwich
adapted from The Barefoot Contessa at Home
  • 2 split (1 whole) chicken breasts, cooked any way (grilled, baked, poached, etc), sliced thickly
  • 4 ounces proscuitto
  • 1 large garlic clove, smashed and coarsely chopped
  • 2 Tablespoons chopped fresh parsley
  • 1 1/2 teaspoons anchovy paste
  • 1 teaspoon Dijon mustard
  • 1 1/2 Tablespoons freshly squeezed lemon juice
  • 1/2 cup plain Greek yogurt, or mayonnaise
  • 1 large Ciabatta loaf
  • 2 ounces baby arugula, washed and spun dry
  • 2-3 ounces Parmesan, shaved
Preheat the oven to 350.

Place the proscuitto on a parchment-lined baking sheet, and cook 8-12 minutes, until crisp.  Set aside to drain on paper towels.

Place the garlic and parsley in the bowl of a food processor, and process until minced.  Add the anchovy paste, lemon juice, mustard, and yogurt and process again to make a smooth dressing.

Slice the bread in half horizontally, and toast, cut side up, 5-7 minutes.

Spread the cut sides of each half with dressing.  Place half the arugula on the bottom piece of bread, then layer the Parmesan, prosciutto, and chicken.  Finish with another layer of the arugula, and drizzle with remaining dressing. 

Close the sandwich and cut into individual servings. 


Thursday, July 16, 2009

Venezuelan Stuffed Corn Cakes


Stuffed corn cakes, or arepas, are a popular street food in South America. They have recently become popular in the US, and a few months ago, they even made an appearance on Throwdown with Bobby Flay. Joey and I always enjoy watching Throwdown. In case you aren't familiar with the premise, Chef Bobby Flay challenges the "best of the best" with their signature dish. He has a few days to perfect his version of it, and is then judged by a panel. Its always neat to see local favorites doing what they love, and its funny to watch a celebrity chef flounder a bit.

Anyway, a few months ago we saw an episode in which Flay threwdown with arepas, and Joey and I both commented that the dish looked great. When I saw this recipe in America's Test Kitchen, I knew I had to give it a try.

These were fairly easy to put together. I always get a little nervous when I work with dough, even though these cakes were very simple. My only issue is that they didn't seem to puff up as much as I expected, but maybe that's just the recipe. They were a little denser than I expected is all. I also should have cooked them maybe 1 minute longer, as the very center was still a little soft. Overall this was a very satisfying dinner. We all absolutely loved the filling though. I could have eaten the entire bowl by the spoonful!

Venezuelan Corn Cakes with Chicken and Avocado Filling
source: America's Test Kitchen

Filling
  • 1 cup cooked chicken, shredded into bite size pieces
  • 1 ripe avocado, halved, pitted, and cut into small chunks
  • 2 Tablespoons minced fresh cilantro
  • 2 scallions, sliced thin
  • juice of half a lime
  • 1/4 teaspoon chili powder
  • 1/4 teaspoon kosher salt
  • 1/4 teaspoon cracked pepper
Mix all of the ingredients together and adjust seasonings to taste. Cover with plastic wrap and refrigerate until needed

Corn Cakes
  • 2 cups masarepa blanca (precooked corn flour - white corn meal can be subbed)
  • 1 teaspoon salt
  • 1 teaspoon baking powder
  • 2 1/2 cups warm water
  • 1/4 cup vegetable oil
Preheat oven to 400.

Whisk the masarepa, salt, and baking powder together in a medium bowl. Gradually add the water and stir to form a dough. Using a generous 1/3 cup of dough, form eight 3-inch rounds, each about 1/2 inch thick.

Heat 2 Tablespoons of oil in a nonstick skillet over medium-high heat until simmering. Add 4 of the corn cakes and cook until golden on both sides, about 4-6 minutes total. Transfer to a parchement lined baking sheet, and repeat with remaining oil and corn cakes.

Bake until the corn cakes sound hollow when tapped on the bottom, about 10-15 minutes. Split the cakes open using a fork or paring knife as you would an English muffin, and stuff each with a generous 3 Tablspoons of filling. Serve immediately.


BLOG DESIGN BY: SHERBET BLOSSOM DESIGNS