Showing posts with label Project Pastry Queen. Show all posts

Sunday, October 30, 2011

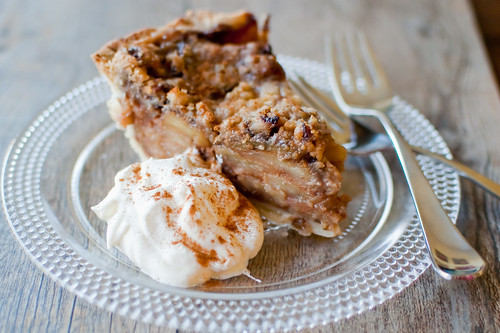
PPQ: Southern Comfort Caramel Apple Pie


I am so excited by Caroline's current favorite book.  I loved the Amelia Bedelia series when I was growing up, and I recently bought Caroline Amelia Bedelia's First Apple Pie.  She loves the book, and we pretty much have it memorized because we've read it so many times.  So a few weeks ago when she asked if we could make "Caroline's first apple pie," I was all about it.  I started looking up some recipes, when I remembered that we had this one coming up for Project Pastry Queen. 


This was a fun activity for us to do together.  She loves helping me in the kitchen, and she was especially excited to make this pie.  And of course we had a great time baking it together, but the best part was obviously eating it together.  O.M.G. this was awesome.  The apples are first sauteed in lots of brown sugar, butter, and cinnamon, and then the juices are mixed with Southern Comfort and heavy cream to make a caramel sauce.  The apples are then mixed with the caramel, poured into a pie shell, covered with a streusel topping of butter, brown sugar, and pecans, and baked.  Obviously your house will smell amazing while this bakes.  And the resulting pie is nothing short of amazing as well. The apples are sweet and spicy, and the caramel sauce has such a wonderful sweetness and warmth thanks to the Southern Comfort.  And the streusel topping is great as well - buttery, sweet, and crunchy.

I ate this several ways:  straight out of the pie plate, with some whipped cream, and with vanilla ice cream.  All were equally great, so it is up to you how you serve it up.  I think cinnamon ice cream would be an especially great accompaniment as well.  Or if you wanted to get really decadent, top it with ice cream and some caramel.

Sarah of 20-Something Cupcakes chose this week's recipe, and she has the full version on her blog.  The only changes I made were to add some nutmeg to the filling and topping, and I made my pie crust in my food processor instead of by hand.  Check out the Project Pastry Queen webpage to see how everyone else fared with this pie.  I think it's a safe assumption that it was a hit all-around!


Sunday, October 9, 2011

PPQ: Curried Butternut Squash Soup


It's my turn to choose a recipe for Project Pastry Queen again!  And being that I have an newborn at home, I thought I'd go easy and simple.  And I figured if I chose a savory recipe, then there's a nobrainer dinner one night.  I have trouble putting down my cuddly baby long enough to make dinner, much less do any extra baking. 

This is actually the second time I made this soup.  I served it when I hosted book club around this time last year, and we all loved it.  Sometimes when I order butternut squash soup at a restaurant, it is bland and leaden with cream.  This one is the opposite - it's full of spices and with just a touch of cream. The curry powder just gives the soup a really nice warmth.  And when combined with cinnamon, a little nutmeg, paprika, just a pinch of cayenne, and ginger, it's a soup that really does taste like fall.  Cozy, warm, and comforting.  And as a bonus, it reheats really well, so it makes for an excellent lunch the next day.

To see how everyone else liked the soup, check out Project Pastry Queen.  And next week we're going big with a Bourbon Pumpkin Tart.


Curried Butternut Squash Soup
adapted from The Pastry Queen, by Rebecca Rather
serves 4 to 6
  • 2 Tbs unsalted butter or olive oil
  • 1/2 medium yellow onion, chopped
  • 1 large carrot, peeled and sliced
  • 1 1/2 lbs butternut squash, peeled, seeded, and cubed
  • 1 medium russet potato, peeled and cubed
  • 1 tsp ground ginger
  • 1 tsp ground cinnamon
  • 1 1/2 Tbs curry powder
  • 1/4 tsp nutmeg
  • pinch cayenne
  • 1/2 tsp salt
  • 2 cups chicken stock
  • 1/2 cup milk (low fat or fat-free is fine)
  • 1/2 cup heavy cream (optional)
  • 1 tsp honey
  • 1/2 tsp paprika
  • Freshly ground black pepper
  • Sour cream or Greek yogurt, for garnish
Melt the butter in a large saucepan or Dutch oven over medium-high heat.  Add the onion and carrot and saute over medium heat for about 3 minutes, or until the onions begin to soften.  Add the squash potato, ginger, cinnamon, curry powder, nutmeg, cayenne, and salt.  Saute for 2 minutes.  Add the stock, milk, cream, honey, and paprika and bring the soup to a boil.  Decrease the heat, cover the pot, and simmer the soup over low heat for about 45 minutes, or until the vegetables are soft.

Working in batches, puree the soup in a blender or food processor until smooth.  Add black pepper to taste.  If the soup seems too thick, add more milk or chicken stock.  Serve hot with a dollop of sour cream or Greek yogurt on top.


Sunday, September 11, 2011

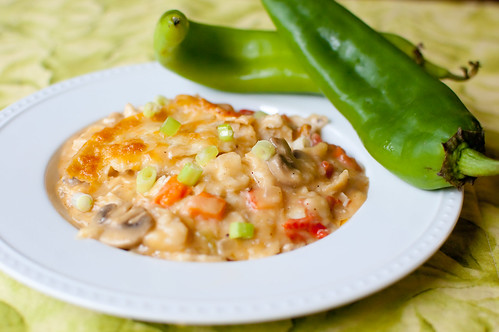
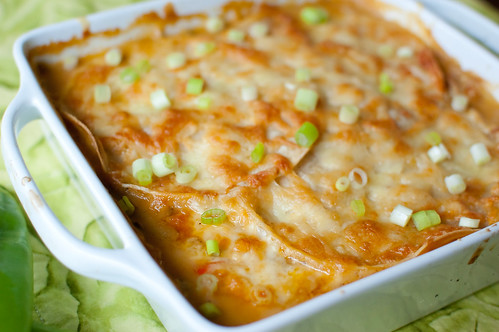
PPQ: King Ranch Chicken


The past week has been unseasonably cool here in Atlanta.  I am not normally one to be wishing away summer, but the break in heat was actually pretty nice - especially being 9 months pregnant.  We were still feeling the effects a tropical storm, so the weather was drizzly and cool, and comfort food was in order.  So this was actually a really great choice for this week's Project Pastry Queen recipe.

I'd heard of King Ranch Chicken before, but never really had the desire to make it myself - until I saw Rebecca Rather's completely-from-scratch version.  She even goes so far as to make her own chicken stock for it!  I didn't go that far, since I had just made 32 cups of chicken stock a few weeks ago.  So I took the easy way out and used that and just bought a rotisserie chicken.

King Ranch Chicken Casserole is essentially a chicken tortilla casserole - it is creamy, spicy, and cheesy.  How bad could that be?  You build a cream sauce from scratch instead of opening a can of cream of whatever soup.  It starts with a stick (!) of butter, then peppers, onions, and mushrooms are sauteed.  You add flour to thicken the sauce, then whisk in chicken stock and some cream (or milk, or half-and-half) and let it simmer to thicken a bit.  The sauce is then layered with corn tortillas, cheese, and chopped chicken.  After baking, you are left with a completely comforting casserole.

The recipe makes a 9x13 inch casserole, but I split it up and froze half for an easy meal for when the baby comes.  I'd also like to note that it calls for New Mexican Hatch Chiles, and while normally I would just use a poblano instead,  they are in season right now and The Fresh Market is awesome, so I was able to get my hands on some.  We loved the tangy-spicy flavor they contributed, and I plan to go buy more to roast and freeze so I can enjoy them year-round.

Jody of Savory to Sweet has the full recipe posted if you're interested in making this.  And you should be, because it is pretty awesome!


Sunday, September 4, 2011

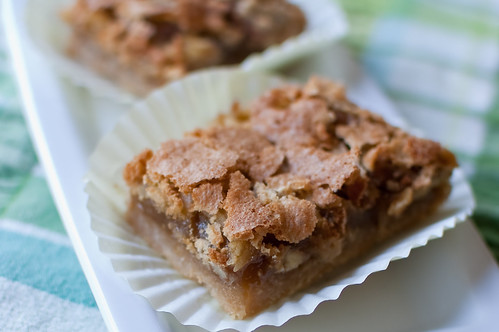
PPQ: Texas Pecan Pie Bars


How do you pronounce "pecan?"  Do you say puh-con, pee-con, or pee-can?  I personally go with puh-con, but when talking about pie, I say pee-can pie.  Though for some reason I call these puh-con pie bars.  No reason, it's just the way it comes out.  I'm not sure if the different pronunciations are regional, or if they are just a personal thing.  But either way, pecan pie is definitely a popular and well-loved dessert.  And just like any dessert, turning it into portable portions is always a hit.

These bars start with a shortbread crust, and are then topped with a sweet, sticky filling that's studded not only with pecans, but with shredded coconut as well.  The coconut doesn't really contribute much flavor, but adds a great texture.  And as they bake, the top forms a nice crackly crust.

These are super sweet, and I'm sure you could decrease the sugar quite a bit.  But the whole point of pecan pie is to be sweet and sticky, so I don't think I'll change a thing next time I make these.  I took a platter of them to a neighborhood potluck, and everyone seemed to enjoy them.  And serving them out of cupcake liners definitely helps with the sticky filling!

This week's recipe was chosen by Beth of The Powdered Plum.  She has the full recipe posted on her blog if you are interested!


Sunday, August 21, 2011

PPQ: Cappuccino Cheesecakes


Sometimes I think I'm the best mom ever, and sometimes I'm embarrassed that my 3 year old outsmarts me.  I gave up coffee at the beginning of this pregnancy, but over the past few months I've become quite addicted to decaf iced lattes.  Luckily I can make them at home, but when I go to Target I'll sometimes treat myself to one from Starbucks.  One such time I was wandering around Target, enjoying my drink, when Caroline asked for a sip.  I told her it was mommy's drink, and that she wouldn't like it.  But she just kept asking.  Since it was decaf, I figured I'd let her have a sip and she'd learn her lesson.  Well, she took a sip, her face lit up, she proclaimed it "yummy," and asked for more.  Yeah, that one backfired.  Mom of the Year.

So apparently she seems to have inherited my love for coffee over Joey's dislike for it.  I love love love coffee and anything that is coffee flavored.  So when Sarah of 20 Something Cupcakes chose Cappuccino Cheesecakes for Project Pastry Queen, I was stoked.  I am always drawn to coffee flavored desserts, I love cheesecake, and it's a cute, individualized dessert.  Win win win. 

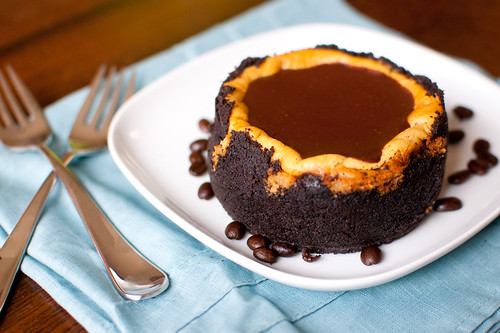
These cheesecakes start with an oreo crust, are filled with a coffee flavored cheesecake, and then topped with chocolate ganache.  The instructions call for the cheesecakes to be baked in mini tartlette pans, but I have cute mini cheesecake pans that rarely get used, so I went with those instead.  I halved the recipe and ended up with 2 full pans and one that was half-filled.  However, these are actually big enough to share with a date or a friend.

I also added a big splash of Kahlua to the batter to amp up the coffee flavor, and used mocha flavored chocolate for the ganache. I received a bar from Scharffen Berger in my BlogHer Food swag bag, and thought this would be a perfect opportunity to try it.  The resulting cheesecake was rich, chocolatey, and pretty much perfect.  They come together quite easily and quickly, and are made several hours ahead of time, so they would be ideal for entertaining.  So many people like to drink coffee at the end of the meal, so why not combine that with dessert?

Sarah has the full recipe posted on her blog.  And next week we're making a big over-the-top cake again!  With lots of chocolate!


Sunday, July 31, 2011

Chocolate Chip Scones


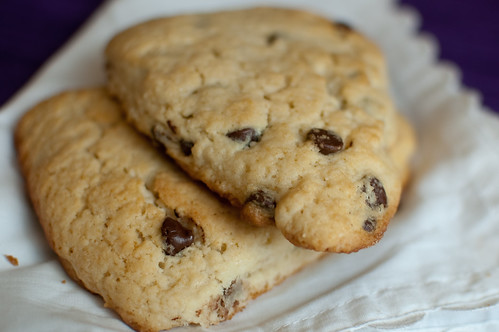
Scones are one of those breakfast items that are really just a dessert in disguise.  That's not to say I don't love them - I just try not to kid myself into thinking I'm being healthy when I eat one.   I chose these scones for my Project Pastry Queen choice this week because I knew that Joey would love them.  He goes nuts for pretty much any dessert that's chocolate chip-based.  

Mine spread a bit while baking, but it wasn't really a problem.  I stayed true to the recipe with the exception of the pecans - I omitted, as I usually do with nuts in desserts.  I also brushed the tops with some melted butter before baking.  I think a glaze would be extra decadent on these - I think a coffee or mocha glaze would be especially tasty!  Next time I make these I think I'll make the scones smaller though - they were pretty massive when made as directed.

As with most scones, these came together quite quickly, and were equally as low-maintenance.  I only wish I had saved half of them to freeze and bake later - I have a feeling they would have been much appreciated come September when I have a newborn!

Check out the Project Pastry Queen page to see how everyone else enjoyed the scones, and next week we're making more brownies!


Chocolate Chip Scones
The Pastry Queen
makes 8 giant scones
  • 1 cup pecans (optional)
  • 3 cups all-purpose flour
  • 1 cup sugar
  • 1/2 tsp salt
  • 1 Tbs baking powder
  • 10 Tbs unsalted butter, chilled
  • 1 tsp vanilla extract
  • 1 1/2 - 2 cups cold heavy cream
  • 1 cup semisweet chocolate chips
  • 2 Tbs butter, melted
Preheat the oven to 350 degrees.  Arrange the pecans in a single layer on a baking sheet and toast 7 to 9 minutes, or until golden brown and aromatic.  Coarsely chop the pecans ad set aside.

Increase the oven temperature to 425 degrees.

Process the flour, sugar, salt, and baking powder for 30 seconds in te bowl of a food processor fitted with a metal blade.  Cut the butter into 1/2-inch cubes and add to the flour mixture.  Pulse about 15 times, or until the mixture is crumbly.

Stir the vanilla into the cream.  With the food processor running, slowly pour 1 1/2 cups of the cream through the feed tube.  Stop the food processor as soon as the cream has been added.  If the dough has begun to stick together in a ball, remove it.  If not, add more cream, 1 tablespoon at a time, and pulse until the dough begins to clump up and form a ball.

Place the dough on a lightly floured flat surface and knead in the chocolate chips and pecans, handling the dough as little as possible.  Form the dough into a 3/4-inch thick round and cut into 8 wedges.  Place on an ungreased baking sheet, brush with melted butter, and bake 10-15 minutes, until the scones are a light golden brown.  Serve warm or a room temperature.  The scones are best the day they are made.


Sunday, July 17, 2011

PPQ: Peanut Butter Cookies


If I were forced to choose my favorite cookie (though please don't make me!), I would be hard-pressed to go with anything other than a classic peanut butter cookie.  I, like so many others, just love peanut butter - I love it straight from the jar by the spoonful, on toast, with jelly for a sandwich, mixed with chocolate in pretty much anything... I even love it in savory applications - peanut sauce, anyone? And I'm happy to report that I've passed that love on to my daughter.  Her lunches pretty much rotate between peanut butter and jelly sandwiches, peanut butter on crackers, and peanut butter bananas.  Just last week, we stopped at Starbucks on our way to church.  I leaned over Joey to order my (decaf) iced coffee, then Joey ordered his coffee.  And from the backseat we hear "Please, peanut butter jelly, please!"  Smart Caroline, wanted to place her order, too!

This week was Wildcard Week for Project Pastry Queen, which means we can go back and make a recipe that we've missed along the way.  I don't know why I didn't make these the first time around - I'm guessing maybe I still had some lingering morning sickness or first trimester exhaustion?  Either way, I'm glad I went back to make them this week!

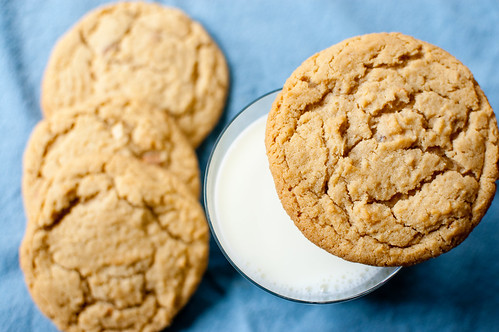
Actually, these are originally peanut butter and jelly cookies.  And while I think that sounds wonderful, I just felt like being basic this week.  So I just made some giant peanut butter cookies instead.  They are wonderfully soft and chewy, with just the right amount of crunchiness around the edges.  And with honey-roasted peanuts mixed right into the dough, you get an extra dose of crunch.


These are without a doubt the best peanut butter cookies I've ever made.  They really are pretty much perfect - and enjoyed with a cold glass of milk, it doesn't get much better.

Sarah of 20-something Cupcakes has the full recipe posted on her blog.  Check out the Project Pastry Queen website to see what everyone else made this week, and next week we're making a giant, peachy cake - complete with Dulce de Leche!


Sunday, July 10, 2011

PPQ: Arnold Palmer Layer Cake


I made this cake for Project Pastry Queen, but it was not the chosen recipe.  Well, the cake itself, buttermilk cake, was.  But it's supposed to have Jack Daniels buttercream.  A silky, Italian meringue buttercream spiked with whiskey.  And while I do love cooking with it, I don't feel comfortable eating it while I'm pregnant.  So using the beverage inspiration, I came up with a pregnant-friendly alternative - Arnold Palmer cake!  For those of you who are unfamiliar with the drink, it is just sweet tea + lemonade. 

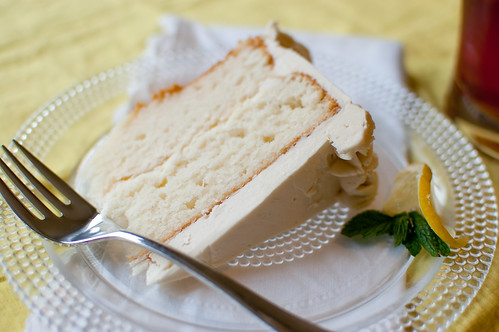
I did follow the recipe for the buttermilk cake, and it was a wonderful white cake.  Prior to this, I actually have yet to find a white or yellow cake recipe that I love, so I am excited to have this recipe in my repertoire now.  And going with the beverage-spiked icing, I made a swiss meringue buttercream spiked with sweet tea.  I reduced some tea down to a syrup, added that to my buttercream, then added some more tea to amp up the flavor.  It is still a subtle flavor, but it does intensify the longer it sits.  I reduced 1 cup of tea down to 2 tablespoons of syrup, but I think next time I would start with 2 cups and reduce to 1/4 cup.  And for the lemonade component, I used a lemon cream filling:  whipped cream + lemon curd.

The resulting cake was really fantastic.  A soft and light buttermilk cake, sweet-tart filling, and buttery and sweet frosting.  I absolutely loved this cake, and since the flavors are subtle, it makes for a really light and summery dessert. 

Thanks to Beth of The Powdered Plum for choosing the cake; my apologies for taking so many creative liberties!  I really do want to try the Jack Daniels Buttercream, so I know it will be on my short-list once I have the baby.  I'm thinking it would go really well with a chocolate cake!

Beth has the recipe posted, and check out Project Pastry Queen to see how the other members liked the cake.


Sweet Tea Buttercream
makes about 5 cups
adapted from Martha Stewart's Vanilla Swiss Meringue Buttercream
  • 2 cups sweet tea, plus more as needed
  • 5 egg whites
  • 1 cup + 2 Tbs cups sugar
  • pinch of salt
  • 2 cups (4 sticks) unsalted butter, cut into tablespoons, at room temperature
Bring the tea to a boil in a medium saucepan set over medium heat. Cook until reduced to about 1/4 cup.  Remove from heat and cool to room temperature.

Combine the egg whites, sugar, and salt in the bowl of a stand mixer set over a small pan of simmering water.  Whisk constantly by hand until the sugar has dissolved and reaches 160 degrees. (the mixture should feel completely smooth when rubbed between your fingertips).

Attach the bowl to the stand mixer and fit with the whisk attachment.  Starting on low speed and gradually increasing to medium-high speed, mix until still (but not dry) peaks form.  Continue mixing until until the mixture is light, fluffy, glossy, and completely cool (test by touching the bottom of the mixing bowl), about 10 minutes.

With the mixer on medium-low speed, add the butter 2 tablespoons at a time, mixing well between each addition.  Scrape down the sides of the bowl, increase the speed to medium, and mix until the buttercream comes together (it can take up to several minutes, but it will come together eventually).  Switch to the paddle attachement and beat at medium-low speed to remove air bubbles, about 2 minutes.  Add the syrup, and mix to combine.  Taste and add more sweet tea if desired.


Lemon Cream Filling
  • 2/3 cup cold heavy whipping cream
  • 2 Tbs lemon curd
Whip the cream at high speed until soft peaks form.  Gently fold in the lemon curd.


Sunday, June 19, 2011

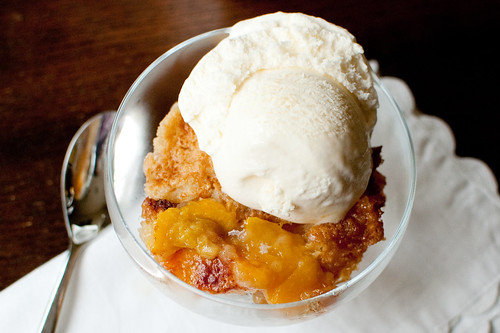
PPQ: Peach Cobbler


It's my turn to host Project Pastry Queen again, and I've noticed a pattern.  Every single one of my recipe choices has been a fruit-based treat.  For a self-proclaimed chocoholic, I am actually a bit surprised by that!  Though I'll be honest:  this time I was thisclose to choosing a cake with Jack Daniels icing, since I knew my week landed on Father's Day and Joey loves Jack.  However, I decided to be selfish, since I wouldn't have been able to eat a cake that frosted with whiskey.  Plus, peaches are coming into season here, and what kind of Georgia-girl would I be if I don't choose peaches??

This peach cobbler is nothing fancy or complicated - just a really basic dessert.  The kind you'll find at a church picnic or your grandmother's house.  Fresh, sweet peaches with a doughy and buttery crust.  You'll want to serve this warm, with vanilla ice cream; though I did eat my fair share straight from the dish, and it still tasted pretty fantastic. 

I stayed pretty true to the recipe, but I added a bit of cinnamon to the peaches to give them a little warmth and bring out more sweetness.  I started to make these into individual cobblers, but in the end decided to stay rustic and family-style. 

I hope all the dads out there have a happy Father's Day!  See how everyone else liked this cobbler, and check back next week - we're baking up muffins that use an entire lemon!

Hill Country Peach Cobbler
adapted from The Pastry Queen, by Rebecca Rather
  • 1/2 cup (1 stick) unsalted butter
  • 1 cup granulated sugar
  • 1 cup all-purpose flour
  • 1 Tbs baking powder
  • pinch salt
  • 3/4 cup milk 
  • 3 cups sliced fresh peaches
  • 1/2 tsp ground cinnamon
  • 1/2 cup firmly packed brown sugar
Preheat the oven to 350.

Melt the butter in a small saute pan set over medium-high heat until it bubbles and turns a nutty-brown color.  Watch it carefully to prevent it from burning.

Pour the butter into an 8-inch square baking dish.

In a medium bowl, stir together the granulated sugar, flour, baking powder, salt, and milk.  Pour the mixture over the butter, but do not stir.

Arrange the peaches evenly on top of the batter, and sprinkle with cinnamon and then the brown sugar.

Bake the cobbler for 40-45 minutes, until the top is golden brown.  Miraculously, the batter will migrate from the bottom of the pan to the top to cover the peach slices.  Serve warm with vanilla ice cream, or at room temperature.


Tuesday, May 17, 2011

PPQ: Sticky Fingers Bars


This week's Project Pastry Queen recipe is a doozy.  I have been drooling over these for years now, but for some reason couldn't ever get around to making them.  And it is most definitely one of the most decadent recipes I've ever made.  You start with a shortbread crust that is dotted with chopped peanuts.  Top it with chopped Snickers bars.  Top that with a sweet and gooey filling that's reminiscent of pecan pie filling.  Finish with a layer of peanut butter, more peanuts, and finally, a drizzle of chocolate.  So yeah, pretty intense.

The good news is, for as many components as they have, they couldn't be easier to put together.  Though maybe that should be bad news. 

Tara of Smells Like Home has the full recipe posted on her blog.  Thanks Tara - I'll see you in two days for BlogHer Food!!  (Is anyone else going??)


Sunday, May 8, 2011

PPQ: Blackberry Pie Bars


It's my turn again for Project Pastry Queen.  I flipped through the book and chose these bars immediately.  I had actually made them two years ago, but adapted them to be Raspberry Pie Bars.  I remember loving them, but sadly I never blogged them.  I've been wanting to make them ever since, but just hadn't gotten around to it... what with all the other decadent, delicious recipes I've been making from The Pastry Queen.

While these are called "pie" bars, I don't really think they were like pie.  To me, it was more like a double-crusted crumble, but that's okay too.  They were still super yummy - buttery pastry, sweet filling, crumbly topping.  They are a cinch to throw together, and are a great way to use up frozen berries - you know, to make room for more berries in your freezer this summer.

While I was tempted to recreate the raspberry bars from before, I stuck with blackberries this time.  I added a little lemon zest and almond extract to the filling, and I think it brightened up the flavor nicely.  I served these as a simple dessert with vanilla ice cream when we had friends over for dinner, and I've eaten one every day since.  As much as I liked them warm and fresh from the oven, they are equally delicious straight from the fridge.

Check out Project Pastry Queen to see how everyone else liked these bars, and come back next week - we are making another bar recipe - one that I've been drooling over for years now!


Blackberry Pie Bars
adapted from Rebecca Rather, The Pastry Queen

Crust and Topping
  • 3 cups all-purpose flour
  • 1 1/2 cups sugar
  • 1/4 tsp salt
  • 1 1/2 cups (3 sticks) unsalted butter, chilled
Fruit Filling
  • 4 large eggs
  • 2 cups sugar
  • 1 cup sour cream
  • 3/4 cup flour
  • pinch salt
  • zest of 1/2 lemon
  • 1 tsp almond extract
  • 2 (16-oz) packages frozen blackberries, thawed and drained
To make the crust and topping, preheat the oven to 350 degrees.  Grease a 9x13 inch baking pan.

Combine the flour, sugar, and salt in the bowl of a food processor.  Pulse a few times to mix.  Cut the butter into 1/2-inch cubes, and add to the flour mixture.  Process until the butter is evenly distributed but the mixture is still crumbly, 30-60 seconds.

Reserve 1 1/2 cups of the mixture to use as the topping.  Press the remaining mixture into the bottom of the pan, and bake 12-15 minutes.  Cool for at least 10 minutes.

To make the filling, whisk the eggs in a large bowl, then add the sugar, sour cream, flour, salt, lemon zest, and almond extract.  Gently fold in the berries and spoon the mixture over the crust.  Sprinkle the remaining flour mixture evenly over the filling, and bake 45 to 55 minutes.

Cool at least 1 hour before cutting into bars, or scoop out of the pan to serve cobbler-style.


Monday, May 2, 2011

PPQ: Gulf Coast Shrimp Quesadillas


As I mentioned a previous post, I recently went on vacation to the Gulf of Mexico with Joey's parents.  We had a great time, Caroline had the time of her life playing in the sand, and we of course enjoyed delicious seafood all week.  No matter what we were having for dinner, we almost always bought some fresh shrimp to eat as well.  And even though I knew this recipe was coming up, for some reason I didn't think to make these quesadillas while we had access to the freshest seafood imaginable.  Instead, I made them a few days after we returned - kind of a "farewell to our vacation" meal of sorts.

I actually made and posted this recipe back in the very early days of my blog.  So while I thought of just linking to the recipe, I decided the post could use some updating and the picture could definitely use an upgrade! However, one thing that didn't change was how much we enjoyed this meal.

I still made a few changes, just as I had before:

- added a little tequila to the onions and peppers - because even though I can't drink it, I still like to cook with it
- chopped the shrimp before adding to the tortillas
- did the "folded quesadilla" method verses using 2 tortillas
- used chile powder instead of cayenne for the shrimp rub
- decreased the Siracha - for my 2 year old's palate

I also served these with guacamole, which I highly recommend.  So if you are still looking for a Cinco de Mayo idea and want something fresh and bright, definitely check out these quesadillas!

Shawnda has the full recipe posted on her blog, Confections of a Foodie Bride.  

If you are wanting more Cinco de Mayo ideas, check out some of these recipes - they are all favorites in our house!


Vegetable Enchiladas
Chipotle-Grilled Pork Tacos
Mexican Cherry Tomato Salad
Baked Chicken Taquitos
Chorizo, Potato, and Mushroom Tacos
Roasted Tomatillo Salsa
Spicy Citrus Shrimp Tacos
Ground Beef Tacos (the home-fried shells make these tacos)
Mexican Corn Salad
Strawberry, Mango, and Avocado Salad
Blackberry-Thyme Margaritas


Sunday, April 17, 2011

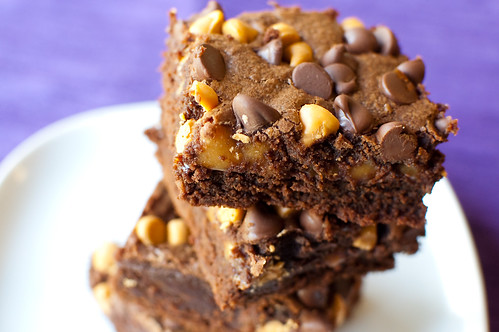
PPQ: Caramel-Filled Brownies


In the ever so eloquent words of my sister, these brownies are "the shizz."  I have to say, I agree.  A thick layer of caramel  is sandwiched between two layers of rich and chocolately brownies.  It is intense and wonderful.  A little more work than a typical brownie, but these are so so worth it.  First, the brownie batter is mixed up.  Half is baked briefly, then a layer of caramel is poured over it.  The rest of the batter is layered on, then topped with chocolate chips and baked to chocolate perfection. 

I used half butterscotch chips instead of all chocolate, and I think the butterscotch was really great with the caramel filling.  I also omitted the pecans, as usual.  Other than that, I stayed true to the recipe, though I was tempted to add some sea salt to the caramel to make these salted caramel-filled brownies.  Maybe next time.

This recipe was chosen by Beth of The Powdered Plum.  She has the full recipe posted on her blog.  Next week:  Buttermilk Pecan Pie!


Monday, April 11, 2011

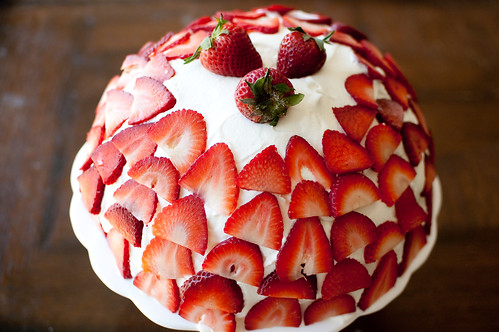
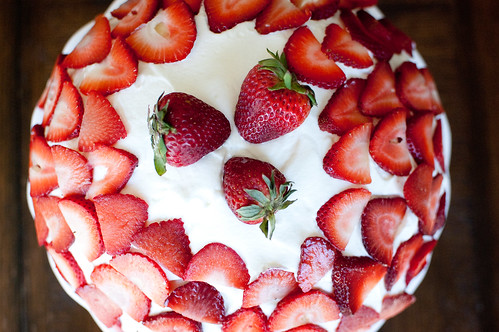
PPQ: Strawberry-Ricotta Cake


This week's Project Pastry Queen recipe was chosen by Amanda of Fake Ginger.  This was actually one of the first recipes that caught my eye when I first flipped through The Pastry Queen, but I was a little put off by the method she uses to assemble the cake.  First, an angel food cake is baked and sliced into 3 even layers.  Then comes the weird part.  It's layered in a mixing bowl with a sweetened ricotta filling, then inverted and iced with freshly whipped cream and topped with fresh strawberries.  The mixing bowl step is what threw me off.  I just couldn't envision the finished product.

I considered making cupcakes instead, but in the end I was really just curious to see how this would turn out.  And guess what?  It wasn't as weird or difficult as I expected!  I have several mixing and serving bowls, so I just took a look and estimated  which one looked the best.  The layers fit perfectly in the bowl, and after chilling the cake for about an hour, it unmolded perfectly!


The ricotta filling is really what makes this cake special.  The combination of the light and fluffy angel food cake with the sweet and creamy ricotta is really wonderful.  I enhanced my filling a bit by adding a few tablespoons of strawberry preserves, and I also halved the heavy cream to keep the filling nice and thick. 

After it was assembled, it was almost too pretty to slice into - almost.  The cake almost tastes like a trifle - the ricotta filling is partially absorbed by the cake, and the fresh strawberry slices and whipped cream tie it all together.  This is really just a fancy version of strawberry shortcake.  And a delicious one at that!

Amanda has the full recipe posted on her blog.  And check back next week for caramel-filled brownies!


Sunday, March 20, 2011

PPQ: Green Chile Crab Cakes with Tomatillo Salsa


There are certain flavors and ingredients that will automatically make me gravitate towards a recipe.  Some include (but are not limited to) tomatillos, roasted poblano peppers, and crab will always make want to drop everything and make it.  So imagine my delight when this week's Project Pastry Queen recipe choice was Green Chile Crab Cakes with Tomatillo Salsa.  I have almost picked these for my choice every single time, but I have always been lured away by sweets and desserts.

This is a pretty standard recipe for crab cakes, with just a few fun twists:  Roasted poblanos are added to the mix, along with jalapeno, cilantro, lime juice, and red bell pepper.  They are then served with roasted tomatillo salsa, which is pretty much my favorite condiment ever.

I stayed pretty true to the recipe, however I did add some jalapeno, cilantro, and lime juice to the salsa.  The original recipe makes 8 crab cakes, but I only made 4 since they were just for Joey and me.  I kicked myself afterward, because leftover cakes would have been great on a salad, or better yet, as a burger with some melted pepperjack cheese and extra salsa.  Next time...

Tara of Smells Like Home has the full recipe posted on her blog.  Next week we have another doozy of a desset:  Toffee Bar Brownie Torte.


Sunday, March 13, 2011

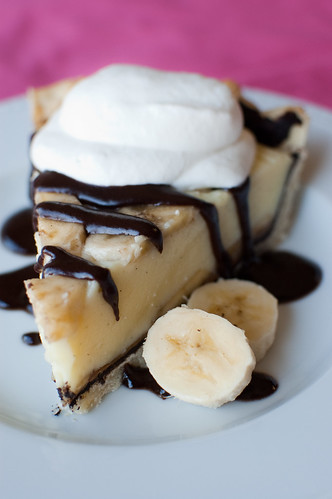
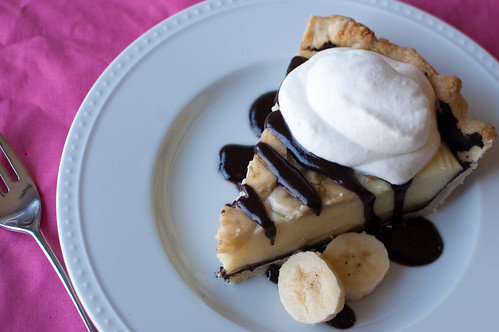
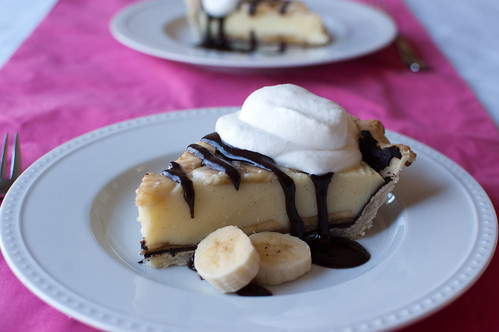
PPQ: Peanut Butter-Banana Cream Pie with Hot Fudge Sauce


I went to college at Georgia Tech, so I am pretty comfortable with my lot in life as a nerd.  And as a nerd, I know that Pi is 3.14159...  However, I distinctly remember a tutor my freshman year sitting at a white board writing out probably dozens of the digits.  That he had memorized.  In his spare time.  For fun.  So call me a nerd, but in college, I like to think I was actually kind of cool (compared to the rest of my school, that is). 

So why am I talking about Pi?  Well March 14th is 3/14, which is affectionately referred to as "Pi Day."  Our college also hosted a road race called the "Pi Mile,"  which was, you guessed it, 3.14 miles.  I told you I went to a nerdy school.

Around the blog world, fellow nerds like to celebrate Pi Day by baking a pie.  And wouldn't you know, my turn to host Project Pastry Queen fell on 3/13.  I have been dying to make this pie, and I thought this would be the perfect opportunity.  This pie is kind of a big undertaking.  Let's break down what we have here:  A homemade pie crust, topped with melted chocolate, peanut butter, a vanilla-bean-banana custard filling, homemade hot fudge sauce, and freshly whipped cream.  That is a lot of components.  And it dirties a lot of dishes - just ask Joey, my trusty dish washer.


But again, let's look at what we have here.  How could that not be the best pie ever?  The crust is one of the flakiest crusts I've ever made, and I think this will be my standard pie crust from now on.  After the crust is baked and cooled, it is brushed with bittersweet chocolate, then that is topped with a layer of peanut butter and sliced bananas.  The real star here though, is the custard filling.  It is a typical vanilla bean custard, but it is stabilized by gelatin that has been dissolved in banana liqueur.  I had never used it in a recipe before, but it was actually kind of fun - it smells like banana laffy taffy (which I happen to love.  Don't judge)!  The pie is then topped with more bananas and chilled overnight.  When you are ready to serve, you make hot fudge sauce and whip some cream, and you are good to go.

Even though there seems to be a lot going on here, it all works well together and all the flavors play harmoniously off each other.  Peanut butter, bananas, and chocolate are all made to go together, so this pie is truly (and incredibly rich and decadent) work of art.

Check out how everyone else liked this pie, and come back next week for Rebecca's take on crabcakes!


Franny's Fave Peanut Butter-Banana Cream Pie with Hot Fudge Sauce
The Pastry Queen, by Rebecca Rather


Crust
  • 2 cups all-purpose flour
  • 1/2 tsp salt
  • 2 Tbs sugar
  • 2/3 cup (11 Tbs) chilled unsalted butter
  • 4-5 Tbs ice water
Filling
  • 1/4 cup banana liqueur, such as creme de banane
  • 1 envelope + 1/2 tsp unflavored gelatin
  • 1 vanilla bean
  • 2 3/4 cups milk
  • 4 large egg yolks
  • 3/4 cup sugar
  • 3 Tbs corn starch
  • 3 oz bittersweet chocolate
  • 2 ripe bananas
  • lemon-lime soda
  • 1/4 cup creamy peanut butter, at room temperature
Hot Fudge Sauce
  • 1 cup heavy cream
  • 1/4 cup firmly packed brown sugar
  • 2 Tbs unsalted butter
  • 1 cup semisweet chocolate chips
  • 6 oz bittersweet chocolate, chopped
  • pinch salt
  • 1-2 Tbs whiskey (optional)
Whipped Cream Topping
  • 2 cups chilled heavy cream
  • 1/2 cup powdered sugar
3/4 cup roasted peanuts, coarsely chopped


To make the crust:  Preheat the oven to 425 degrees.  Using a mixer fitted with the whisk attachment, combine the flour, salt, and sugar on low speed for about 30 seconds.  Cut the chilled butter into 1/2-inch cubes.  Add the butter to the flour mixture and combine on low speed for 1-2 minutes, until the mixture looks crumbly, with bits of dough the size of dried currants.  Add 4 tablespoons of ice water, 1 tablespoon at a time, mixing on low speed for 10 seconds after each addition.  After the last addition, the dough should start to stick together.  If not, continue to mix about 10 more seconds.  If it is still dry and crumbly, add the remaining tablespoon of water.  Gently mold the dough into a disk, wrap in plastic wrap, and refrigerate at least 1 hour.

Unwrap the dough and transfer to a lightly floured work surface.  Roll it into a 1/8-inch thick circle large enough to cover the bottom and sides of a 9-inch pie plate (I actually had quite a bit of dough left over after I trimmed it).  To keep the dough from sticking, gently pick up the dough periodically as you roll it out and rotate it in place, adding more flour as necessary.

Wrap the dough lightly over the rolling pin and set it in the ungreased pie plate.  Press it into place and crimp the outside edges with your fingers or a fork.  Use a fork to prick the bottom of the unbaked crust.  cover the bottom and sides of the crust with a sheet of parchment paper, and fill with pie weights or dried beans.

Bake for 10 minutes.  Remove the parchment and weights.  If the crust isn't golden-brown, return to the oven for 1-3 minutes.  Cool on a rack until the custard filling is ready.


To make the filling:  Pour the banana liqueur into the bowl of a double boiler, and sprinkle the gelatin on top.  Allow to soften for 5 minutes.  Set the bowl over a small saucepan filled with 2 inches of simmering water and warm the gelatin until it has completely dissolved and looks clear.  Remove from heat and set aside.

Cut the vanilla bean pod in half lengthwise.  Combine with the milk in a small saucepan and bring to a boil.  Remove from heat, cover, and let the vanilla steep in the milk while preparing the yolk mixture.

In a large bowl, whisk the egg yolks.  Add the sugar gradually, whisking constantly until the mixture lightens in color to a lemony hue.  Whisk in the cornstarch.  Pour the milk through a strainer into a glass measuring cup or a pitcher with a spout.  Slowly pour the milk into the egg yolk mixture, whisking constantly.  Pour the mixture into a clean saucepan set over medium heat and whisk constantly until it begins to thicken and coats the back of a spoon.  Reduce the heat and whisk for 2 more minutes.  Remove from heat and whisk in the gelatin mixture, being sure to incorporate it thoroughly.  Let the filling cool completely, about 30 minutes.

In the meantime, melt the chocolate in a small bowl in the microwave, cooking 20-30 seconds at a time.  Using a pastry brush, evenly coat the bottom and sides of the crust with the chocolate.  Refrigerate the pie crust while the chocolate hardens and sets, 10-15 minutes.

Slice the bananas diagonally and brush them with lemon-lime soda to prevent discoloration.  Spread the peanut butter evenly over the bottom of the baked crust.  Layer on half the banana slices, all the filling, and the remaining slices.

Cover the pie with plastic wrap, making sure the plastic comes in direct contact with any custard that isn't covered by a banana.  Refrigerate the pie overnight before serving.


To make the fudge sauce:  Heat the cream and brown sugar in a medium saucepan over medium heat.  When the sugar is dissolved, stir in the butter, chocolate chips, and bittersweet chocolate.  Stir over medium-low heat until the chocolate is melted and the mixture is smooth.  Stir in the salt and remove from heat.  Stir in the whiskey and cover to keep warm until ready to serve the pie.  The sauce can be reheated in the microwave or on the stovetop over low heat.


To make the topping:  Using a mixer fitted with a whisk attachment, whip the cream until soft peaks form, about 1-2 minutes (do not overbeat).  Whip in the powdered sugar.

To serve the pie, cut it into wedges, add a dollop of whipped cream, and top with hot fudge sauce.  Sprinkle with peanuts if desired (I forgot to do this!).


Monday, March 7, 2011

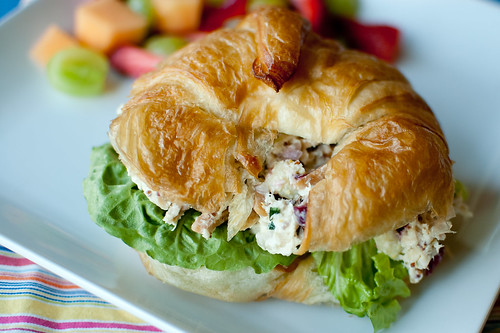
PPQ: Apple-Almond Chicken Salad


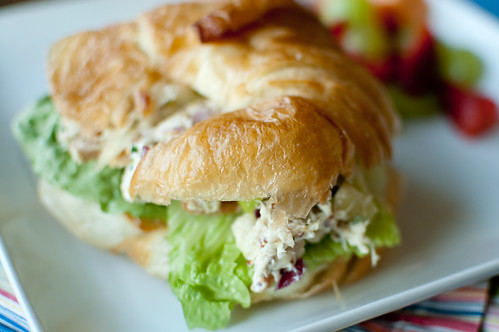
I am a big fan of chicken salad.  Served on a croissant, it is one of my favorite lunches ever.  And to be honest, I don't understand why anyone would eat it any other way.  I also don't bother eating it if it doesn't have fruit and toasted nuts in it.  I just love the crunch and the sweetness.  I realize there are some crazy people out there who don't like fruit in their chicken salad, but that is just crazy talk to me!

Though I make chicken salad quite often, I have never thought to blog it.  I don't use a recipe really, just more of a method:
  1. Cut the mayo by at least half with Greek yogurt
  2. Add lots of extra dijon
  3. Use some sort of fresh herb (parsley, chives, basil, thyme...)
  4. Something for sharpness (onion, scallion, shallot...)
  5. Have at least 1 fruit.  I prefer apples and grapes, but have used both peaches and pineapple in a moment of desperation.
  6. Dried raisins or cranberries
  7. toasted nuts (almonds, pecans, walnuts, pistachios, pine nuts....)
  8. And my "secret" ingredient is a big squirt of honey.  It gives the whole salad a little sweetness vs just getting it when you bite into the fruit.
So when Shawnda chose apple-almond chicken salad with homemade mayonnaise for her Project Pastry Queen choice,  I immediately flipped to the recipe to see if it fit my criteria.  And it did meet most of my guidelines!  I could easily (and dramatically) increase Dijon, and add honey and dried cranberries.  However, I ended up changing her recipe up so much that I really shouldn't say I even participated this week. 

I didn't make my own mayo.  Since I always use at least half Greek yogurt, I didn't really feel like going through the trouble.  I would like to make my own at some point though, in hopes that it will make me actually like mayonnaise instead of abhorring it.  I also didn't have celery or red onion on hand, so I just omitted the celery, and I used shallot instead of the onion.  And finally, I didn't have any parsley, so I added a combination of chives, fresh oregano, and basil.

Even though I pretty much butchered the recipe, I still loved this chicken salad.  I loved the sweetness from the apples, the crunch from the toasted almonds, and the hit of fresh herbs.  Once I made all of my adjustments, it really was my perfect chicken salad.

Head over to Confections of a Foodie Bride for the full (and correct) recipe, and check back next week for my choice!


Tuesday, February 1, 2011

PPQ: Pear-Ginger Quick Bread


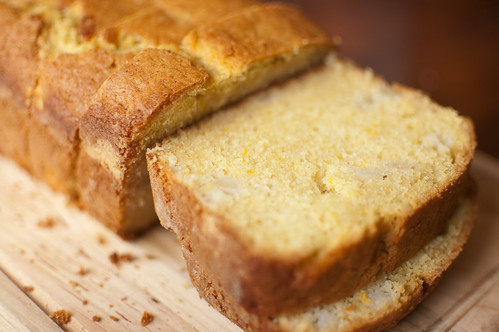
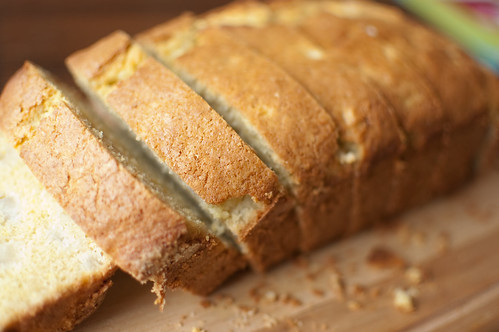
This week's Project Pastry Queen recipe is another one of those that I've been wanting to make for quite some time.  I love the pear-ginger combination, and quick breads are always a nice treat to have around.  This bread is studded with fresh pears and ginger, and tastes light and fresh thanks to the addition of both lemon and orange zest.  It smelled so good as it baked, and I couldn't stop myself from eating two slices in about five minutes. 

Simple and straightforward, this bread is in the oven within ten minutes, and in about an hour you'll have a wonderfully sweet, fragrant, and delicious breakfast or snack.  Thanks to Aliza of Baker by Night for choosing this yummy recipe.  She has the full recipe posted on her blog.

Next week:  Emergency Fruit Crostatas


Sunday, January 16, 2011

PPQ: Kolaches


When we were given the opportunity to go back and cook something that we've missed along the way for Project Pastry Queen, I knew immediately that I wanted to do the kolaches.  This was the very first recipe chosen for the group, and I've been wanting to make these ever since I bought the cookbook almost 2 years ago.  Yes, I know I could have made them any time, but I just never got around to it.

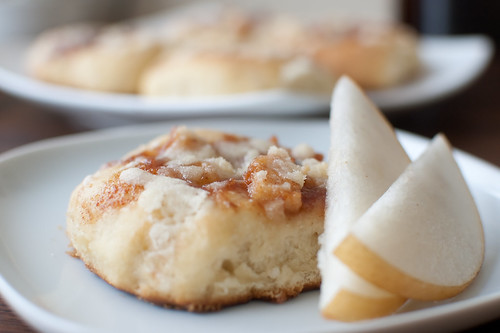
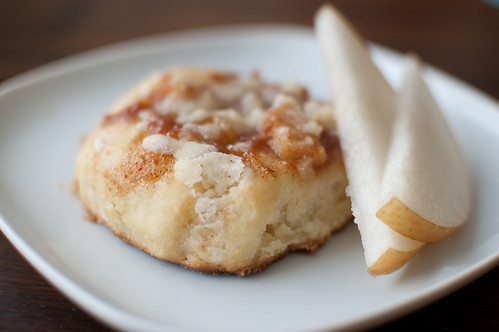
To be honest, I had never even heard of a kolache before this cookbook, but apparently they are popular in Texas.  They are soft and sweet pastry bun, with a sweet or savory filling.  Rebecca gives several variations in the book, and while I am positively dying to make the peach variation, peaches are not in abundance this time of year.  So I worked with what I had and concocted a pear-ginger filling.  I really really liked the combination, but I'm still anxious to make peach kolaches this summer.

These do have a lot of steps, and may seem complicated, but they are actually quite simple to put together.  The dough is made, chilled overnight, then shaped, filled, and baked the next morning.  I would say these have less than an hour of active prep time.  Now just as fair warning, this recipe makes a LOT of kolaches, but I halved it with no problems.  We still had several leftover, but I just sent them to my neighbors.  They really taste best the day they are made anyway.

Thanks to Shawnda, for both choosing this recipe way back in the summer, and for giving us the chance to play catch-up.  Hop over to Project Pastry Queen to see what everyone else made this week!


Kolaches
adapted from The Pastry Queen and Confections of a Foodie Bride
makes 16 to 18 buns


Dough
  • 2 cups milk
  • 1 (1/4-ounce) package instant yeast
  • 1/2 cup lukewarm water (110-115 degrees)
  • 1 stick unsalted butter
  • 2 large eggs
  • 1 1/4 cups sugar
  • 2 tsp salt
  • 8 1/2 cups all-purpose flour
Pear-Ginger Filling
  • 2 cups diced pears
  • 1 cup pear-ginger jam OR 1 cup pear jam + 1 tsp freshly grated ginger
  • 1/2 tsp ground cinnamon
  • pinch of salt
  • 1/4 tsp ground ginger
Streusel Topping
  • 1/2 cup all-purpose flour
  • 1/2 cup sugar
  • 3 Tbs chilled unsalted butter, cut into small pieces
To make the dough, warm the milk and water in the microwave until it reaches 110-115 degrees.  Stir in the yeast.  Melt the butter and set aside to let cool 5 minutes.

In the bowl of a stand mixer fitted with a paddle attachment, combine the eggs, sugar, salt, and melted butter.  Add the milk and yeast mixture, and with the mixer on low speed, gradually add the flour, 2 cups at a time.  Keep adding flour until it is completely incorporated and the dough just begins to hold together.  The dough will be sticky, moist, and light.

Lightly oil a large bowl and transfer the dough to the bowl.  Cover with plastic wrap, and place in a warm, draft-free room to rise.  Rise until it has doubled in size, 1 to 2 hours (a dent will remain when the dough is touched lightly).  Leaving the dough in the bowl, punch once or twice to deflate, recover with the plastic wrap, and refrigerate at least 4 hours, or overnight.

To make the filling, place the jam in a microwave safe bowl and heat 15-30 seconds.  Stir in the pears, cinnamon, salt, and ginger.  Set aside.

Grease a 12x17 inch baking sheet, and with lightly oiled fingertips, shape the dough into 2 1/2-inch diameter balls (about the size of a small lime).  Arrange them evenly on the baking sheet, 3 across and 6 down.

To fill the kolaches, use your thumb or fingertips to make a generous indentation in the middle of each dough ball, being sure not to pierce the bottom of the dough.  Mound about 1-2 tablespoons of the pear filling in each indentation.  Cover the rolls with a clean, lint-free kitchen towel, and let them rise in a warm, draft-free place until puffed and almost doubled in size, about 1 hour.

Preheat the oven to 375 degrees.

To make the streusel topping, mix the flour, sugar, and butter in a medium bowl, using a fork or pastry cutter (or your fingers) to incorporate the butter until the mixture is crumbly.  Scatter the topping over the kolaches just before baking.

Bake until lightly browned on top, 25 to 30 minutes.  Allow to cool 20 minutes before serving.


Sunday, January 9, 2011

PPQ: Big Hair Lemon-Lime Meringue Tarts


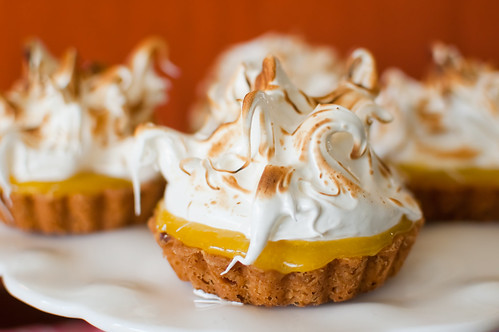
Ever since I bought The Pastry Queen, I have wanted to make these tarts.  Seriously, how fun are they?  Plus, they are Rebecca Rather's signature dessert.  If out of all the decadent and mouth-watering desserts she features in her cookbook, these are what she's known for, then I HAD to make them.  I also had so much fun making the chocolate version over the summer, so I was really looking forward to this week's recipe. 

In all actuality, these are nothing more than a lemon-meringue pie that's been gussied up.  Buttery, shortbread crust that is studded with almonds, tart lemon-lime curd, and heaps of fluffy meringue.  But isn't this so much more fun?

I was a little concerned after I made the citrus curd - it was mouth-pucking it was so tart.  But once it's combined with the rich crust and the sweet meringue, it all balances out.  Obviously styling the meringue is the most fun part of the assembly - Joey really liked helping, and I let him torch it since he's a boy and likes to play with fire.  I think Caroline would have loved helping too, but well, I didn't feel like making a trip to the emergency room for an allergy attack (she is allergic to eggs).

Thanks to Sarah for picking yet another fabulous, over the top dessert.  Check out her blog for the full recipe, and check back next week - it's gonna get wild (card)!


BLOG DESIGN BY: SHERBET BLOSSOM DESIGNS