Showing posts with label pears. Show all posts

Thursday, December 29, 2011

Sparkling Pear Sangria


Sangria is one of my favorite cocktails to serve at a party.  It can be made ahead of time, in large batches, and everyone loves it.  Plus, there are endless variations out there.  White wine sangria made with peaches is one of my favorites, and this Pomegranate Sangria is my go-to during the winter months.  Well, it was anyway.  Now this sparkling pear sangria holds that spot. 

If you are still looking for a fun and festive cocktail for New Year's Eve, look no further.  Vodka, Pear nectar, lemon juice, and sparkling wine.  What's not to love?  Joey has a theory when it comes to mimosas - that they are pretty nearly impossible to screw them up.  100% orange juice = good.  100% champagne = good.  Any combination of the two?  Good!  I'd venture to say that the same is true for sangria.  Though actually I guess you actually could add too much vodka to this one and it might be a bit strong. 

This is mixed up in literally 2 minutes.  Then just chill it in the fridge until you're ready to serve.  Pop open your champagne, and you're good to go!  The bubbles make it fun and festive, the pear flavor is nice and prominent, and there's just enough kick from the vodka to keep it interesting.  We enjoyed these for "cocktail hour," and I'm already looking forward to having another one on New Year's Eve. 

Happy New Year's, everyone!  Thanks for being so awesome - see you in 2012!


Sparkling Pear Sangria
adapted from The Bonne Femme Cookbook, by Wini Moranville
makes 4-5 drinks


Pear nectar can be found in the Mexican food section of your grocery store, or in the juice section.  One can costs about 50 cents.  Regular vodka is fine, but if you happen to come across it, pear vodka would be even better.
  •  6 oz vodka (pear vodka is optional)
  • 2 oz freshly squeezed lemon juice
  • 5 oz pear nectar
  • sparkling wine, preferably a sweeter variety, chilled
  • thinly sliced pear slices, for serving
In a small pitcher, combine the vodka, lemon juice, and pear nectar.  Refrigerate until chilled.  When ready to serve, fill champagne flutes 2/3 to 3/4 of the way full, and top with champagne.  Drop a pear slice into each glass and serve immediately.


Sunday, October 16, 2011

Fall Harvest Pear Salad


An alternate title for this post could be "My Favorite Salad."  I've been making this salad for probably 4-5 years now, so I thought it was high time I shared it with you.  It is pretty much my go-to salad between the months of September to March, and I have taken it to countless dinners and parties as well.  One of my favorite lunches is this salad served with a baked sweet potato.  The general make-up of the salad is dark leafy greens, dried cranberries, sliced pears, a crumbly cheese, and toasted pecans, held together by a light raspberry vinaigrette.

There are also countless variations.  Sometimes I use pralined pecans for extra sweetness.  I mix up the cheeses depending upon my mood and what I have in the fridge - goat cheese is my favorite, but I also like blue cheese and feta.  You don't have to use pecans either - slivered almonds are great, as are walnuts.  Raisins can be used instead of dried cranberries.  And you could even use a sliced apple instead of a pear.  I've used a mixture of red wine vinegar and balsamic in a pinch, but I prefer to use raspberry or pomegranate - I like the extra sweetness, and it's a little milder in flavor.  I got really crazy last week and added some cubes of roasted butternut squash.  If I want to make meal out of it, I love serving rosemary grilled chicken breasts over the salad - add a crusty roll or some bread, and it's even a nice enough dinner to serve company.

Feel free to play around with the quantities of the components.  I rarely measure anything; I just toss in however much you want. These are just estimates. No matter how you build your salad, or how you serve it, this is a huge crowd-pleaser!


Fall Harvest Pear Salad
Pink Parsley Original


Raspberry Vinaigrette
  • 2 Tbs raspberry preserves
  • 2-3 tsp Dijon mustard
  • 1/4 cup raspberry or sherry vinegar
  • 1/4 tsp Herbes de Provence
  • 1/4 tsp kosher salt
  • 1/8 tsp ground black pepper
  • 1/4 tsp sugar
  • 1/8-1/4 cup olive oil
Salad
  • 4 oz mixed greens
  • 4 oz baby spinach or arugula
  • 1/4 cup crumbled goat cheese
  • 2-3 Tbs dried cranberries
  • 1/4 cup toasted pecans
  • 1-2 ripe but firm pears, sliced
To make the vinaigrette, whisk together the raspberry preserves, mustard, vinegar, herbs, salt, sugar, and pepper.  Pour in the olive oil in a slow and steady stream, whisking constantly.

In a large bowl, toss the greens lightly with the dressing, reserving some for later.  Top with dried cranberries, cheese, and pecans.  Sprinkle lightly with salt and pepper.  Fan the pears over the top of the salad, and drizzle with more dressing if desired (You definitely don't have to use all the dressing.  It will keep well in the refrigerator for later use).


Tuesday, February 1, 2011

PPQ: Pear-Ginger Quick Bread


This week's Project Pastry Queen recipe is another one of those that I've been wanting to make for quite some time.  I love the pear-ginger combination, and quick breads are always a nice treat to have around.  This bread is studded with fresh pears and ginger, and tastes light and fresh thanks to the addition of both lemon and orange zest.  It smelled so good as it baked, and I couldn't stop myself from eating two slices in about five minutes. 

Simple and straightforward, this bread is in the oven within ten minutes, and in about an hour you'll have a wonderfully sweet, fragrant, and delicious breakfast or snack.  Thanks to Aliza of Baker by Night for choosing this yummy recipe.  She has the full recipe posted on her blog.

Next week:  Emergency Fruit Crostatas


Sunday, January 16, 2011

PPQ: Kolaches


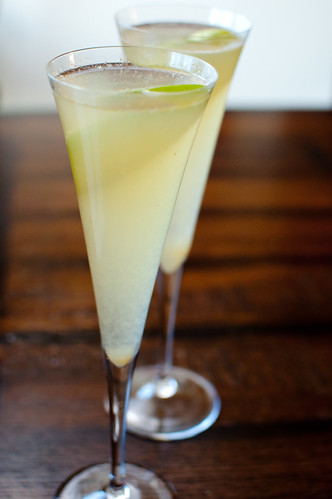
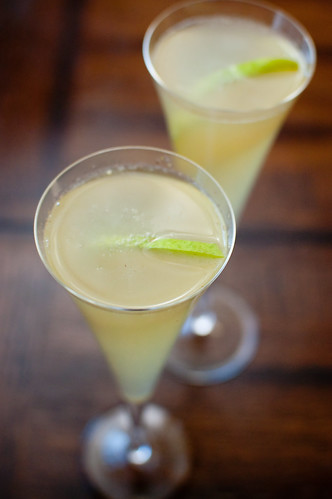
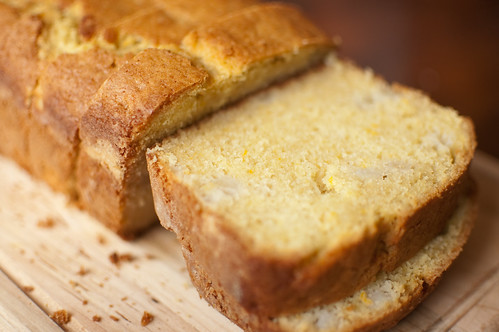
When we were given the opportunity to go back and cook something that we've missed along the way for Project Pastry Queen, I knew immediately that I wanted to do the kolaches.  This was the very first recipe chosen for the group, and I've been wanting to make these ever since I bought the cookbook almost 2 years ago.  Yes, I know I could have made them any time, but I just never got around to it.

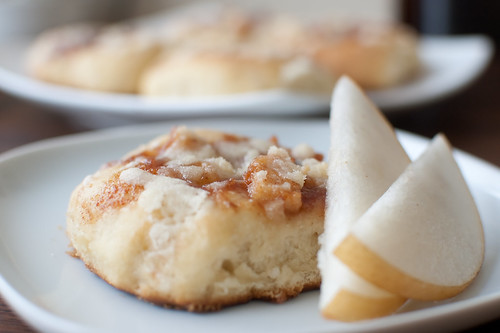
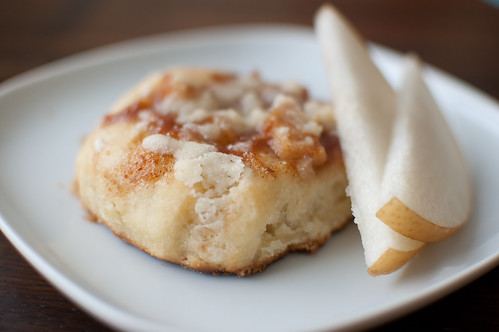
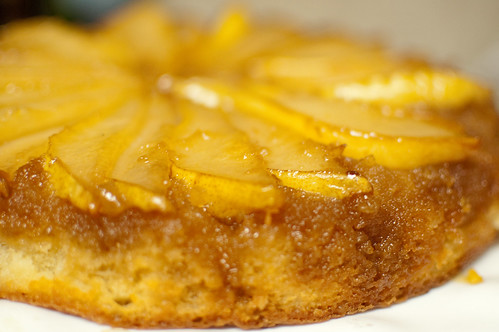
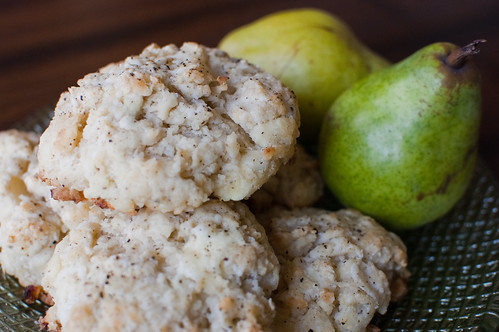
To be honest, I had never even heard of a kolache before this cookbook, but apparently they are popular in Texas.  They are soft and sweet pastry bun, with a sweet or savory filling.  Rebecca gives several variations in the book, and while I am positively dying to make the peach variation, peaches are not in abundance this time of year.  So I worked with what I had and concocted a pear-ginger filling.  I really really liked the combination, but I'm still anxious to make peach kolaches this summer.

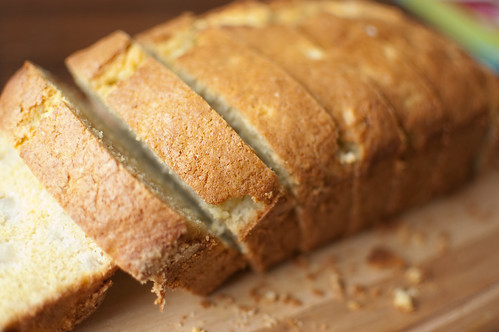
These do have a lot of steps, and may seem complicated, but they are actually quite simple to put together.  The dough is made, chilled overnight, then shaped, filled, and baked the next morning.  I would say these have less than an hour of active prep time.  Now just as fair warning, this recipe makes a LOT of kolaches, but I halved it with no problems.  We still had several leftover, but I just sent them to my neighbors.  They really taste best the day they are made anyway.

Thanks to Shawnda, for both choosing this recipe way back in the summer, and for giving us the chance to play catch-up.  Hop over to Project Pastry Queen to see what everyone else made this week!


Kolaches
adapted from The Pastry Queen and Confections of a Foodie Bride
makes 16 to 18 buns


Dough
  • 2 cups milk
  • 1 (1/4-ounce) package instant yeast
  • 1/2 cup lukewarm water (110-115 degrees)
  • 1 stick unsalted butter
  • 2 large eggs
  • 1 1/4 cups sugar
  • 2 tsp salt
  • 8 1/2 cups all-purpose flour
Pear-Ginger Filling
  • 2 cups diced pears
  • 1 cup pear-ginger jam OR 1 cup pear jam + 1 tsp freshly grated ginger
  • 1/2 tsp ground cinnamon
  • pinch of salt
  • 1/4 tsp ground ginger
Streusel Topping
  • 1/2 cup all-purpose flour
  • 1/2 cup sugar
  • 3 Tbs chilled unsalted butter, cut into small pieces
To make the dough, warm the milk and water in the microwave until it reaches 110-115 degrees.  Stir in the yeast.  Melt the butter and set aside to let cool 5 minutes.

In the bowl of a stand mixer fitted with a paddle attachment, combine the eggs, sugar, salt, and melted butter.  Add the milk and yeast mixture, and with the mixer on low speed, gradually add the flour, 2 cups at a time.  Keep adding flour until it is completely incorporated and the dough just begins to hold together.  The dough will be sticky, moist, and light.

Lightly oil a large bowl and transfer the dough to the bowl.  Cover with plastic wrap, and place in a warm, draft-free room to rise.  Rise until it has doubled in size, 1 to 2 hours (a dent will remain when the dough is touched lightly).  Leaving the dough in the bowl, punch once or twice to deflate, recover with the plastic wrap, and refrigerate at least 4 hours, or overnight.

To make the filling, place the jam in a microwave safe bowl and heat 15-30 seconds.  Stir in the pears, cinnamon, salt, and ginger.  Set aside.

Grease a 12x17 inch baking sheet, and with lightly oiled fingertips, shape the dough into 2 1/2-inch diameter balls (about the size of a small lime).  Arrange them evenly on the baking sheet, 3 across and 6 down.

To fill the kolaches, use your thumb or fingertips to make a generous indentation in the middle of each dough ball, being sure not to pierce the bottom of the dough.  Mound about 1-2 tablespoons of the pear filling in each indentation.  Cover the rolls with a clean, lint-free kitchen towel, and let them rise in a warm, draft-free place until puffed and almost doubled in size, about 1 hour.

Preheat the oven to 375 degrees.

To make the streusel topping, mix the flour, sugar, and butter in a medium bowl, using a fork or pastry cutter (or your fingers) to incorporate the butter until the mixture is crumbly.  Scatter the topping over the kolaches just before baking.

Bake until lightly browned on top, 25 to 30 minutes.  Allow to cool 20 minutes before serving.


Wednesday, December 8, 2010

Blue Cheese Cheesecake with Pear-Onion Jam


Cheesecake is one of my all-time favorite desserts.  Classic cheesecake, pumpkin cheesecake, chocolate cheesecake, fruity cheesecake, carrot cheesecake, gingerbread cheesecake, red velvet cheesecake... I've made them all and loved them all.  And while I have seen several recipes for savory cheesecakes, they've always seemed a little too "out there" for me.  I feel like having an unappetizing cheesecake is terrible because let's face it - a cheesecake is huge, and that is a lot of food going to waste.  So I've always shied away from them, even though I was intrigued.

That is, until a few weeks ago.  Some of the women on my street get together every so often for girls' night; we all bring appetizers and drinks, and basically we sit around and gossip and chat until the wee hours of the night.  Our most recent night however, posed a small dilemma.  We were going to be at Georgia Tech all day tailgating and going to a football game, so we weren't expecting to be home in time for me to spend a lot of time making a dish.  Therefore, I wanted to have something that I could make ahead of time.  I searched and searched for something that appealed to me and that would appeal to my friends (who all LOVE food, so I didn't want to do something plain or generic).  Finally I stumbled upon this blue cheese cheesecake.  Jackpot!

I bought a really nice blue cheese from Whole Foods since it played such a starring role.  As the cake baked, I prepared the pear-onion jam, then I refrigerated both components separately.  The end result was so delicious.  The pungent blue cheese flavor was definitely prominent, but was contrasted nicely by the tangy cream cheese and sweet pear-onion jam.  There are so many adaptations as well.  Use goat cheese instead of blue cheese, replace the asiago with parmesan, use gruyere... and as for the jam, fig-onion jam would be lovely, as would a jam of apples.  I absolutely loved this, and couldn't resist snacking on it all night long. 

Luckily, we ended up having so much food that there was enough leftover for me to put out a big wedge as an appetizer for our Fake Thanksgiving dinner the next day.  Served with crackers and apple slices, this makes a great appetizer for nibbling, and I think it would make an absolutely lovely addition to a cheese tray as well. 


Blue Cheese Cheesecake with Pear-Onion Jam
adapted from Culinary Concoctions by Peabody
  • 3 (8-ounce) packages cream cheese, softened to room temperature
  • 8 ounces blue cheese, crumbled
  • 6 ounces Asiago cheese, shredded
  • 4 large eggs
  • 1/4 cup heavy cream
  • 1/4 tsp freshly ground black pepper
Preheat the oven to 350 degrees.  Grease a 9-inch springform pan.

In the bowl of a stand mixer fitted with the paddle attachment, cream the cream cheese, asiago, and blue cheese until smooth and creamy.  Add the eggs, one at a time, beating well after each addition.  Add the cream and pepper and mix to combine. 

Pour the mixture into the springform pan and bake uncovered, in a water bath, until browned on top and barely set in the center, 45 to 50 minutes.  Cool completely and refrigerate several hours or overnight before serving.


Pear-Onion Jam
  • 4 cups onions, diced
  • 2 tsp olive oil
  • 2 cups peeled and chopped pears
  • 2 Tbs raspberry or pear vinegar
  • 1 cup brown sugar, lightly packed
  • 1/4 tsp kosher salt
  • pinch cayenne pepper
Saute onions in the oil over medium heat until softened and browned. Reduce heat and cook an addtional 10-15 minutes, until they are beginning to caramelize.  Add the pears, vinegar, brown sugar, salt, and cayenne.  Cook until pears are slightly softened but still crisp. 

Using a slotted spoon, remove the pears and onions from the skillet into a medium bowl, leaving behind as much of the liquid as possible.  Increase heat to medium and cook until the mixture has thickened into a glaze.  Mix into the pears and onions, cover, and refrigerate until ready to serve.

To serve, pour the pear-onion jam over the cheesecake, then remove the sides of the springform pan.  Serve with crackers, bread, or apple slices.


Wednesday, November 24, 2010

Warm Pear-Ginger Upside Down Cake


I'm sure that by now you've already planned your Thanksgiving desserts, bought all the ingredients, and have started prepping (no?), but just in case you're still looking for a fabulous dessert, here it is.  When I bought The Pastry Queen Christmas last year, this was one of the first recipes that I marked to save.  I actually never got around to making it last Christmas, but this year I was determined to do it.  The original recipe calls for you to serve it with Amaretto Whipped Cream, which I think would be really good, but one of our dinner guests is pregnant, and rather than make a seperate batch of whipped cream, I just made plain whipped cream.  Which was still super delicious.  However, when I warmed up the last piece yesterday for Joey and I to split, I spiked the whipped cream with a little bourbon - and yeah, that was good too ;-).

I prepped this cake before our friends arrived, then as we sat down to dinner, I popped it in the oven.  It cooks for close to an hour, so its perfect timing to sit down to eat, have a few minutes for your food to settle, then start in on dessert.  I realize this may not be ideal for traveling, since its best served warm, but I think you could just pop it in the oven for a few minutes to heat it up before serving.  I also reheated individual slices in the microwave for 20 seconds and it was perfect.

The best part of this cake is most definitely the edges - I loved the caramelized sugar and ginger, and the sweet pears were such a great addition.  When I asked Joey what his favorite part of our Spainsgiving meal was, he chose this dessert.  Which says a lot, because he's not really a fruit person or a dessert person. 


Other holiday dessert ideas:
Apple Spice Layer Cake with Caramel-Swirl Icing
Pralined Pumpkin Cheesecake
Caramel Apple Cheesecake Pie
Cinnamon Cupcakes with Pumpkin Icing
Pear Maple Cobblers
 
I hope everyone has a safe and happy Thanksgiving!!


Warm Pear Ginger Upside-Down Cake
The Pastry Queen Christmas by Rebecca Rather


Topping
  • 1/2 cup unsalted butter
  • 1/2 cup firmly packed brown sugar
  • 2-3 ripe but firm pears, such as Bartlett or Anjou
  • 2 Tbs finely chopped candied ginger
Cake
  • 1/2 cup unsalted butter, at room temperature
  • 1 cup granulated sugar
  • 2 large eggs
  • 1 1/3 cups all-purpose flour
  • 1 1/2 tsp baking powder
  • 1/4 tsp kosher salt
  • 1/2 cup buttermilk
  • 1 1/2 tsp vanilla extract
  • 2 Tbs finely chopped candied ginger
Preheat the oven to 350 degrees.  Place the butter and brown sugar in a 9 inch cake pan and cook in the oven about 10 minutes, or until it is melted and bubbly.  Meanwhile, core the pears and cut into 1/4-inch-thick slices.

Remove the pan from the oven and arrange the pears on top of the mixture in a circular pattern.  Don't worry if you end up with a second layer of pears. Sprinkle the candied ginger evenly over the pears.

To make the cake:  Using an electric mixer fitted with the paddle attachment, cream the butter and sugar together on medium-high speed until light and fluffy, about 3 minutes.

Add the eggs one at a time, beating well between each addition.  Beat in the vanilla extract.  In a medium bowl, whisk together the flour, baking powder, and salt.  Add the flour mixture in 3 increments, alternating with the milk, starting and ending with the flour.  Beat on low speed between each addition. 

Stir in the ginger and pour the batter evenly over the pears, using a spatula to smooth the top.  Bake 40-55 minutes, until the cake is cooked through and light golden-brown.  Insert a toothpick into the center to test for doneness. 

Remove from the oven and immediately invert onto a large cake plate.  Allow to cool about 15 minutes.  Serve with whipped cream or vanilla ice cream.


Thursday, October 7, 2010

Peppered Pear and Goat Cheese Scones


I'm really regretting using my Friends reference to the beef trifle in a previous post - because this one is definitely more of a head-scratcher.  Pear scones - good.  Goat cheese scones - good.  Peppered scones - good.  All three?  Somehow, it's gooooood.

I was actually pretty apprehensive about these as I mixed them up, but I was so intrigued that I forged on.  I was also tempted to decrease the pepper, but it turns out that the combination of the sweet pears and spicy pepper was my favorite part of these scones.  I was even more apprehensive as I shaped them, because they were really crumbly and dry.  But again, I forged on, and when they came out of the oven they had transformed into moist, flavorful scones.  Absolute perfection.  I served these on the side of a main-dish salad that very night, and then enjoyed the leftovers for breakfast and snacks. 

The only other problem I had with the recipe is that my scones didn't brown on top.  I know its a minor complaint, but I think next time I'll brush the tops with melted butter instead of milk.  This was such a surprising cooking success, and I can't wait to make them again - perhaps an apple and cheddar version next time?


Peppered Pear and Goat Cheese Scones
adapted from Savory Baking, by Mary Cech
makes 6-8 scones
  • 2 cups all-purpose flour
  • 1 1/2 tsp baking powder
  • 2 Tbs granulated sugar
  • 1 1/4 tsp kosher salt
  • 1 tsp freshly cracked black pepper, plus extra for sprinkling
  • 1 stick butter, grated and frozen for 10-15 minutes
  • 1 medium pear, peeled, cored, and roughly chopped
  • 4 ounces goat cheese, crumbled into walnut-sized pieces
  • 1/2 cup buttermilk or yogurt
  • 2 Tablespoons whole milk
  • 1 Tablespoon butter, melted
Preheat the oven to 375 degrees and line a baking sheet with parchment paper.  Stir together the flour, baking powder, sugar, salt, and 1 tsp of the pepper in a medium bowl.  Add the butter, pears, and goat cheese, and stir to incorporate.

Pour the buttermilk and whole milk over the flour mixture and lightly blend with a spatula.  The dough may look dry, but it will come together in the oven.

Using a 1/3 cup measuring cup, scoop the dough into mounds evenly spaced on the baking sheet.  Brush the scones with the melted butter, and sprinkle with extra pepper.  Bake until lightly browned, about 25 minutes.  Serve warm or at room temperature.


Sunday, October 3, 2010

PPQ: Pear Maple Cobblers


It's my turn to pick the Project Pastry Queen recipe again!  I love it when its my turn, but I definitely feel the pressure.  What if no one wants to make my recipe?  What if no one likes it?  I have been pretty obsessed with fall fruits lately, so it came down to a choice between pears, apples, and pumpkins for me.  I figured others would choose pumpkin (I was right), and since I'd made both the caramel-apple cheesecake pie and the apple-spice layer cake recently, I went with pears.  And since I absolutely love maple, I went with pear-maple cobblers.

This is a great dessert for entertaining, and they are easy to make as a last minute dessert.  The filling comes together in minutes, and as it bakes, the cobbler topping is quickly thrown together.  This is a super easy dessert that would be absolutely fabulous with either some maple-spiked whipped cream or cinnamon ice cream. 

I made a few small changes.  The nutmeg was a little heavy-handed for my taste, so I'd recommend cutting half of it with cinnamon.  I also diced my pears, as the thought of quartered pears didn't seem quite right.  I also added an extra pear for every 2 cobblers to make a higher pear-to-cobbler ratio.  All in all, this is a wonderful fall dessert.  It will definitely stay in my rotation as an easy dessert option - you know, when you just need something sweet.

We're going savory next week - Brie and Brisket Quesadillas!


Individual Pear-Maple Cobblers
adapted from The Pastry Queen
makes 6 servings
  • 5 pears, peeled, cored, and chopped
  • 2/3 cup pure maple syrup
  • 2 Tbs all-purpose flour
  • 1/4 tsp salt
  • 1 tsp vanilla extract
  • 1/4 tsp ground nutmeg
  • 2 Tbs chilled usalted butter, sliced into 6 even pats
Cobbler Topping
  • 1 1/2 cups all-purpose flour
  • 2 1/4 tsp baking powder
  • 1/4 tsp ground nutmeg
  • 1/4 tsp ground cinnamon
  • 1/2 cup (1 stick) unsalted butter, chilled
  • 1/2 cup + 1 Tbs heavy cream
  • 1/2 cup  + 1 Tbs maple syrup
  • 1 tsp vanilla extract
  • 3 Tbs sugar
Preheat the oven to 425.  Combine the pears, maple syrup, four, salt, vanilla, and nutmeg in a bowl.  Stir well and divide the mixture evenly among six ramekins.  Top each with one pat f butter.  Bake until heated through and bubbly, about 18-20 minutes.

To make the topping, combine the flour, baking powder,  and1/8 tsp nutmeg in the bowl of a food processor fitted with a steel blade.  Combine the remaining nutmeg, cinnamon, and sugar in a small bowl and set aside.  Melt 2 tablespoons of the butter and set aside.  Cut the remaining 6 tablespoons into 6 pieces and add them to the flour mixture.  Process until fine crumbs form.  Add the cream, maple syrup, and vanilla, and process until just combined.  Drop by spoonfuls over the warm pear filling.  Brush the topping with the melted butter, and sprinkle with the reserved sugar mixture.

Bake 14 minutes, until golden-brown and firm to the touch.  Serve warm.


Monday, January 4, 2010

Pork Tenderloin with Pears and Shallots


Other than chicken, pork tenderloin is the cut of meat we eat most often.  I love that it is lean, cooks pretty quickly, and can be adapted to so many tastes and dishes.  I also really love to pair pork with fruit.  I just think the fruit brings out the natural sweetness from the pork, and the sweet and savory combo is one of my favorites.

This particular recipe is great for so many reasons:  it is a quick and easy meal, would be perfect for entertaining, and is fairly healthy.  The sauce is finished with pear nectar, and it makes it seem so luscious and elegant. 


Pork with Pears and Shallots
adapted from Bon Appetit, January 2010
  • 3 Tablespoons olive oil
  • 3 garlic cloves, minced
  • 1 Tablespoon chopped fresh thyme
  • 1 1 1/4 lb pork tenderloin, trimmed
  • 3 large shallots, peeled, stemmed, and quartered
  • 3 unpeeled Bosc pears, cored and quartered
  • 4 teaspoons butter, at room temperature
  • 2 teaspoons all-purpose flour
  • 1/2 cup dry white wine
  • 1 1/2 cups low-sodium chicken broth
  • 3/4 cup pear nectar
  • kosher salt and black pepper
Preheat the oven to 475.  Combine the oil, garlic, 1/2 teaspoon kosher salt, 1/4 teaspoon pepper, and thyme in a small bowl.  Toss half the mixture with the pears and shallots, and rub the other half over the pork.

Heat a large ovenproof skillet over medium-high heat.  Add the pork and shallots.  Brown the pork on all sides, about 7 minutes total, and toss the shallots occasionally.  Transfer the shallots to a platter, and transfer the pork to a baking sheet and place in the oven.  Bake until an instant-read thermometer reads 145, about 8-12 minutes.

Meanwhile, using the same skillet, saute the pears over medium-high heat, turning once or twice, until browned and softened.  Transfer the pears to the platter.

Mash the butter and flour together in a small cup or bowl.  Add the white wine to the skillet, and cook, scraping up the browned bits.  Add the chicken broth, pear nectar, and pear nectar to the same skillet.  Boil until sauce thickens, and season with salt and pepper.

After pork has rested at least 10 minutes, slice and arrange on the platter with pears and shallots.  Drizzle sauce over the platter, and serve with additional sauce if desired.


BLOG DESIGN BY: SHERBET BLOSSOM DESIGNS