Showing posts with label scones. Show all posts

Monday, October 28, 2013

Apple-Cheddar Scones


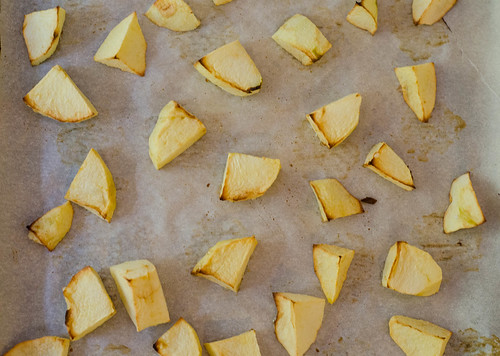
I know it's a super popular regional thing, but for some reason I just can't really get behind apple pie with cheddar cheese.  Don't get me wrong - I love apples and cheddar together - on sandwiches, as a snack, or in a salad.  But I have some sort of a mental block against trying the combo in a pie.  What I don't have a mental block against, however, is the apple-cheddar combo in a scone.  The base of the scone is soft, tender, and buttery, with a subtle cheddar flavor.  What makes these scones truly special, however, are the roasted apples.  You peel and roughly chop apples, then roast them to concentrate to flavor and cook off excess moisture.  They are added to the dough, and you are rewarded with little bursts of sweetness to balance out the more savory scone.

I've taken to only baking up a few scones anytime I make a batch, and freezing the rest to enjoy on a weekday morning.  It's such a special treat to have a freshly baked scone on a random morning!


So side note: as I mentioned, I only baked up a few of these right off the bat, then smuggled them into the dining room to photograph before releasing them to my little ones.... I look through the door as I'm snapping some shots, and this is what I see.  :)  Never a dull moment in our house!  For the record:  the scones were devoured in a matter of minutes by my crew.



Apple pie with cheddar:  yay or nay?

Apple-Cheddar Scones
adapted from The Perfect Finish via Smitten Kitchen and Smells Like Home
makes 6 large scones


  • 1 lb firm, tart apples, like Granny Smith (2-4 apples, depending on size)
  • 1 1/2 cups all-purpose flour
  • 1/4 cup sugar
  • 1/2 Tbs baking powder
  • 1/2 tsp kosher salt plus additional for egg wash
  • 6 Tbs unsalted butter, chilled and cut into 1/2-inch cubes 
  • 2 1/2 oz sharp white cheddar, shredded (1/2 cup)
  • 1/4 cup heavy cream
  • 2 large eggs
  • 1 1/2 Tbs coarse sugar, for sprinkling

  • Preheat oven to 375 degrees F, and line a baking sheet with parchment paper.

    Peel, core, and chop each apple into about 16-24 pieces (roughly chopped, really). Toss them onto the baking sheet, spreading them out into one layer.  Bake for 20 minutes until they are slightly browned and look like they are starting to dry out.  Leave the oven on.  


    Let apples cool completely – either at room temperature for about an hour, or if you are in a hurry, pop them in the freezer, baking sheet and all.  

    While the apples roast and cool, whisk the flour, sugar, baking powder, and salt together in a medium bowl; set aside.


    After the apples cool, add them along with the butter, cheese, heavy cream, and one egg to the bowl of a stand mixer fitted with the paddle attachment.  Sprinkle the flour mixture over the ingredients in the bowl.  With the mixer on low speed, mix the ingredients until they just come together to form a dough – do not overmix.  The butter will still be in large-ish chunks and the dough will be sticky.  If you don’t have a stand mixer, you can do this step by hand using your fingers or a pastry cutter to work the butter into the flour.  This could also be done in a food processor, fitted with the dough-blade.


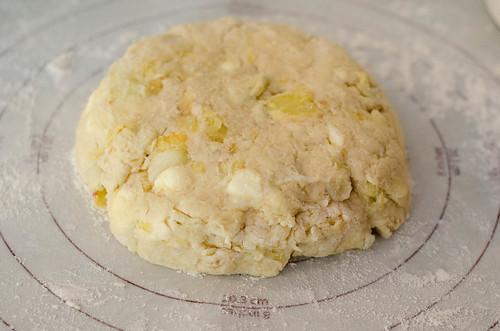
    Turn the dough out onto a well-floured surface and sprinkle the top of the dough with more flour.  Lightly flour your hands, then work the dough together into a disk then flatten disk to a 6-7 inch circle, about 1 1/4 inches high.  With a floured knife or bench scraper, cut the dough into 6 triangles.  


    Line the now cooled baking sheet with a new piece of parchment paper or grease it with butter.  Transfer the dough triangles to the baking sheet, leaving at least 2 inches between each piece.

    Beat the remaining egg and a pinch of salt together in a small bowl.  Brush the tops of the scones with the beaten egg then sprinkle some sugar on the top of each piece.  Bake for 25-30 minutes, or until the tops are golden brown. 


     Allow the scones to cool at least 10 minutes before serving.  The scones are best served warm and within 1 day of making them.  To freeze, arrange the scones in a single layer on a parchment-lined baking sheet, move to the freezer until they are frozen solid.  Transfer the scones to a freezer bag, and when you're ready to eat them,  just add a few minutes to the baking time.


    Thursday, February 28, 2013

    Honey-Cinnamon Scones


    I know I'm not the only one who does this - but one of my worst habits is failing to read recipes all the way through before I start cooking.  Especially if it's something basic or familiar.  Like these scones, for example.  I figured, "Hey, they're scones!  I'll whip them up before bed, then freeze them overnight, pop them in the oven first thing, and we'll have fresh scones for breakfast tomorrow.  Easy peasy!"  What I failed to realize, however, is that these scones are no ordinary scones.  I should have known better based purely on the fact that they come from Thomas Keller's Bouchon Bakery cookbook.  There are multiple steps and chills, and while none of it is difficult, it is time-consuming.  Lucky for me, I was able to work these in in-between middle of the night feedings, and it wasn't so bad.   And when we woke up Sunday morning, they were ready to be baked and enjoyed!

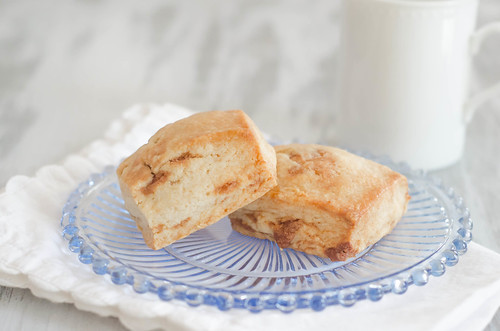
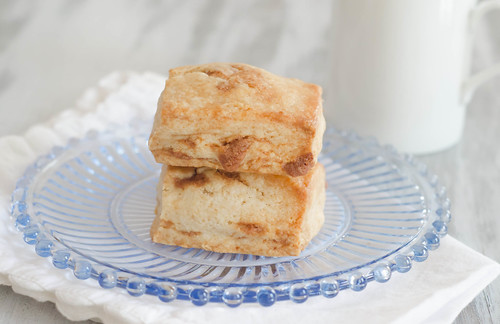
    Worth it?  Absolutely!  The scones themselves were soft and tender, and rose sky-high during baking. The little pockets of honey-cinnamon butter were little bursts of flavor.  And as they came out of the oven, the scones were brushed with honey butter for some extra sweetness.


    There are a few interesting aspects to the recipe as well.  The scones use part all-purpose flour, and part cake flour.  This helps them achieve a lightness that would be present in a cake or cupcake, but the sturdiness that you expect from a scone.  Typically when I make scones, the butter is cut into the flour, but not fully incorporated, so as to create a light and tender product.  In this recipe, the butter is fully incorporated into the dry ingredients.  Though because of the multiple chills and the cubes of honey-cinnamon butter, the scones are still light and tender.  As for the multiple chills, first the honey-cinnamon butter is frozen, then cut into small cubes.  After being incorporated into the scone dough, the dough is shaped into a large rectangle and chilled again.  And finally, the scones are cut and frozen solid before baking.  All of this results in a uniquely delicious scone.  The spice of the cinnamon plays nicely off the sweetness of the cinnamon.

    These were a nice treat for a Sunday morning.  And since I only baked half and froze the other half, they can be a lovely treat any day of the week!


    Honey Cinnamon Scones
    barely adapted from Bouchon Bakery
    makes 12 large scones

    The ingredients are given in weight and volume below, but I highly suggest using the weight measurements, as they will produce a superior end result.

    Honey-Cinnamon Butter Cubes

    • 30 g (3 Tbs) all-purpose flour
    • 30 g (2 1/2 Tbs) sugar
    • 1 1/2 tsp ground cinnamon
    • 30 g (about 2 Tbs) cold, unsalted butter, cut into 1/4-inch cubes
    • 20 g (1 Tbs) clover honey
    Scone Dough
    • 152 g (1 cup + 1 1/2 Tbs) all-purpose flour
    • 304 g (2 1/4 cup + 2 Tbs) cake flour
    • 12.5 g (2 1/2 tsp) baking powder
    • 2.5 g (1/2 tsp) baking soda
    • 91 g (1/4 cup + 3 1/2 Tbs) granulated sugar
    • 227 g (8 oz) cold, unsalted butter, cut into 1/4-inch pieces
    • 135 g (1/2 cup + 2 Tbs) heavy cream
    • 135 g (1/2 cup + 2 Tbs) creme fraiche, sour cream, yogurt, or buttermilk
    Honey Butter Glaze
    • 4 Tbs melted butter
    • 1 Tbs honey
    For the Cinnamon-Honey Cubes:  Place the flour in a medium bowl.  Sift in the sugar and cinnamon and whisk to comine.  Add the butter cubes, and toss to coat.  Using your (clean) fingers, break up the butter until no large pieces remain.  Mix in the honey using a spatula, mixing until a smooth paste forms.

    Press the paste into a 4-inch square on a sheet of plastic wrap.  Wrap tightly and freeze until solid, at least 2 hours.  this can also be prepared and frozen for up to 1 week.

    When ready to make the scones, cut the butter paste into 1/4-inch cubes and chill until ready to use.

    For the Scones:  Sift the flours, baking powder, baking soda, and sugar into the bowl of a stand mixer fitted with the paddle attachment.  Mix on the lowest setting for about 15-20 seconds to combine.  

    Add the butter and, on the lowest setting, pulse to begin incorporating it into the dry ingredients.  Increase the speed to the low and mix for about 3 minutes, or until no large pieces remain.

    With the mixer running, slowly pour in the cream.  Add the creme fraiche (or substitute) and mix for about 30 seconds, or just until all the dry ingredients are moistened and the dough comes together around the paddle.  Scrape down the sides of the bowl and the paddle, and pulse a few times to combine.

    Using a wooden spoon, stir in the honey-cinnamon butter cubes.  They may begin to break up a bit, but that's okay.  It will give the finished product a marbled look.

    Dump the dough onto a lightly-floured surface, and mound the dough to form a cohesive dough.  Place the dough between 2 pieces of plastic wrap, and using your hands, form it into a 7x10 inch block, smoothing the top and straightening the edges.  Transfer to a cookie sheet and refrigerate for 2 hours or freeze for about 30 minutes, or until the dough is firm.

    Line a baking sheet with a silpat or parchment paper.  Using a sharp knife, cut the block of dough lengthwise into thirds and crosswise into quarters, creating 12 square scones.

    Arrange the scones on the prepared baking sheet, leaving a small space between them.  Cover with plastic wrap, and freeze until frozen solid, at least 2 hours, but preferably overnight (the scones can be frozen for up to 1 month).

    When ready to bake, preheat the oven to 350 degrees for a standard oven, or 325 degrees for a convection oven.  Line a sheet pan with parchment paper, and arrange the scones 1-inch apart.  Bake 28 to 30 minutes (standard) or 20 to 23 minutes (convection), or until the scones are cooked through and lightly golden-brown on top.

    As the scones bake, whisk together the honey and melted butter.  Brush the tops and sides of the scones with the honey butter as soon as you take them out of the oven.  Serve.  

    The scones are best eaten the day they are made, but can be stored in a covered container for 1-2 days.  


    Sunday, January 29, 2012

    Vanilla Bean Scones


    As I've mentioned several times before, my daughter Caroline has an egg allergy.  She's actually allergic to several things, but that's the only food allergy (that we know of).  I know that I should be glad that it's not deadly, and that she is otherwise very happy and healthy, but to be completely honest, it makes me really sad sometimes.  Like when we go to a birthday party and all the other kids are eating cake, and she's eating the graham cracker that I brought along for her.  Or when she doesn't get to eat the fun snacks at preschool, and just eats her boring goldfish.  Last week was "circus week" at school, and when I asked what she had for a snack, she told me that she had her crackers, but that her friends had "cupcakes shaped like clowns."  Luckily, she understands that "eggs can make her sick," but I still feel a little tug at my heart when she misses out.  I know it's not the end of the world that she doesn't get the occasional cupcake (first world problems, right?), but I hate that she is limited and restricted, and that she'll probably feel left out as she gets older.  We are having her retested next month, so we're cautiously optimistic that she's outgrown it, but I'm trying not to get my hopes up. 

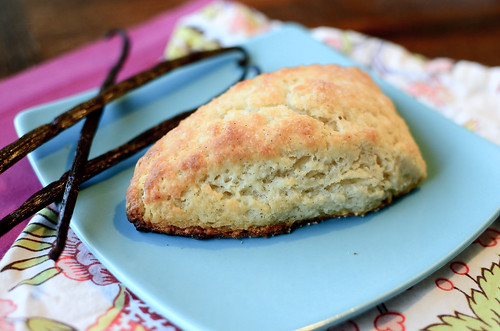
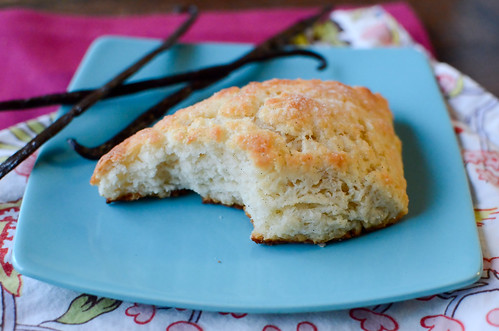
    In any case, when I make things like these scones, it almost makes me forget about her allergy - they are naturally egg free!  And insanely delicious, at that.  I used the base recipe from these blueberry scones, and adapted it to my liking - adding a vanilla bean, some vanilla extract, and vanilla Greek yogurt - triple the vanilla flavor!  I also decreased the salt a bit and added a little more sugar.  I had originally planned to top these with a vanilla glaze, but after tasting them, it definitely wasn't necessary.  Not to sound overly effusive, but these are easily the best scones I've ever made.  I know that vanilla may sound boring, but they are light and fluffy, buttery, perfectly sweet, and the best part is the crispy top and bottom.  They are brushed with butter and sprinkled with sugar before baking, and the sugar caramelizes a bit.  So perfect.  This recipe makes eight scones, and I'm very embarrassed to admit that I probably ate five of them over the course of three days....

    Possibly the best part about making these scones was letting Caroline help me, and then taste one.  She loved it, and it was so nice to allow her the special treat.  When I make things like this, it doesn't make her allergy seem so bad.


    Vanilla Bean Scones
    adapted from these Blueberry Scones, which are from America's Test Kitchen
    makes 8 scones
    • 8 Tablespoons cold butter, plus more for brushing
    • 2 cups all-purpose flour
    • 1/2 cup + 2 Tbs granulated sugar, plus more for sprinkling
    • 2 teaspoons baking powder
    • 1/4 teaspoon baking soda
    • 3/4 teaspoon kosher salt
    • 1 vanilla bean, split open and seeds scraped out
    • 1 Tbs vanilla extract
    • 1/2 cup vanilla Greek yogurt
    • 1/2 cup milk or buttermilk
    Grate the butter on the large holes of a box grater onto a plate lined with parchment paper, and freeze.

    Preheat oven to 425, and combine the dry ingredients.  Stir in frozen butter.  Whisk together the vanilla bean, yogurt, vanilla extract, and whole milk, and stir into the dry ingredients with a wooden spoon until just combined.  The dough will be crumbly, but that's okay.

    Turn out onto a well-floured surface, and knead a few times until it forms a ball.  Roll out into a 12x12 inch square.  Using a bench scraper, fold the dough into thirds, then fold into thirds again in the opposite direction to form a square.  Place on the parchment-lined plate, and freeze for 5 minutes.

    Roll out to a 12x12 inch square again.  Carefully roll up, as you would cinnamon rolls.  Press the roll into a 4-inch wide rectangle.  Using the bench scraper, cut into 4 equal-sized rectangles.  Then cut each rectangle diagonally to make 2 triangles.

    Place on a baking sheet lined with parchment paper.  At this point the scones can be baked or refrigerated overnight.  Brush with melted butter, then sprinkle with sugar.  Bake 18-25 minutes, or until golden-brown. 


    Sunday, July 31, 2011

    Chocolate Chip Scones


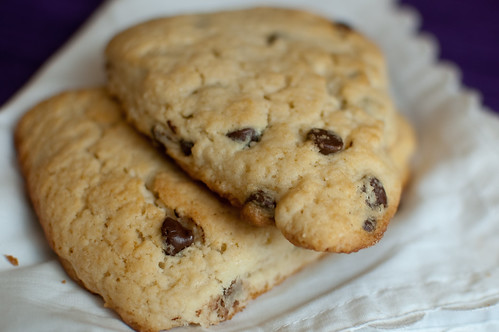
    Scones are one of those breakfast items that are really just a dessert in disguise.  That's not to say I don't love them - I just try not to kid myself into thinking I'm being healthy when I eat one.   I chose these scones for my Project Pastry Queen choice this week because I knew that Joey would love them.  He goes nuts for pretty much any dessert that's chocolate chip-based.  

    Mine spread a bit while baking, but it wasn't really a problem.  I stayed true to the recipe with the exception of the pecans - I omitted, as I usually do with nuts in desserts.  I also brushed the tops with some melted butter before baking.  I think a glaze would be extra decadent on these - I think a coffee or mocha glaze would be especially tasty!  Next time I make these I think I'll make the scones smaller though - they were pretty massive when made as directed.

    As with most scones, these came together quite quickly, and were equally as low-maintenance.  I only wish I had saved half of them to freeze and bake later - I have a feeling they would have been much appreciated come September when I have a newborn!

    Check out the Project Pastry Queen page to see how everyone else enjoyed the scones, and next week we're making more brownies!


    Chocolate Chip Scones
    The Pastry Queen
    makes 8 giant scones
    • 1 cup pecans (optional)
    • 3 cups all-purpose flour
    • 1 cup sugar
    • 1/2 tsp salt
    • 1 Tbs baking powder
    • 10 Tbs unsalted butter, chilled
    • 1 tsp vanilla extract
    • 1 1/2 - 2 cups cold heavy cream
    • 1 cup semisweet chocolate chips
    • 2 Tbs butter, melted
    Preheat the oven to 350 degrees.  Arrange the pecans in a single layer on a baking sheet and toast 7 to 9 minutes, or until golden brown and aromatic.  Coarsely chop the pecans ad set aside.

    Increase the oven temperature to 425 degrees.

    Process the flour, sugar, salt, and baking powder for 30 seconds in te bowl of a food processor fitted with a metal blade.  Cut the butter into 1/2-inch cubes and add to the flour mixture.  Pulse about 15 times, or until the mixture is crumbly.

    Stir the vanilla into the cream.  With the food processor running, slowly pour 1 1/2 cups of the cream through the feed tube.  Stop the food processor as soon as the cream has been added.  If the dough has begun to stick together in a ball, remove it.  If not, add more cream, 1 tablespoon at a time, and pulse until the dough begins to clump up and form a ball.

    Place the dough on a lightly floured flat surface and knead in the chocolate chips and pecans, handling the dough as little as possible.  Form the dough into a 3/4-inch thick round and cut into 8 wedges.  Place on an ungreased baking sheet, brush with melted butter, and bake 10-15 minutes, until the scones are a light golden brown.  Serve warm or a room temperature.  The scones are best the day they are made.


    Thursday, October 7, 2010

    Peppered Pear and Goat Cheese Scones


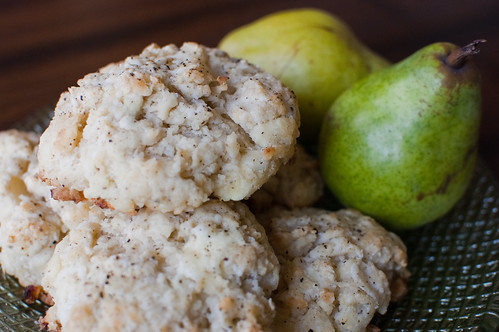
    I'm really regretting using my Friends reference to the beef trifle in a previous post - because this one is definitely more of a head-scratcher.  Pear scones - good.  Goat cheese scones - good.  Peppered scones - good.  All three?  Somehow, it's gooooood.

    I was actually pretty apprehensive about these as I mixed them up, but I was so intrigued that I forged on.  I was also tempted to decrease the pepper, but it turns out that the combination of the sweet pears and spicy pepper was my favorite part of these scones.  I was even more apprehensive as I shaped them, because they were really crumbly and dry.  But again, I forged on, and when they came out of the oven they had transformed into moist, flavorful scones.  Absolute perfection.  I served these on the side of a main-dish salad that very night, and then enjoyed the leftovers for breakfast and snacks. 

    The only other problem I had with the recipe is that my scones didn't brown on top.  I know its a minor complaint, but I think next time I'll brush the tops with melted butter instead of milk.  This was such a surprising cooking success, and I can't wait to make them again - perhaps an apple and cheddar version next time?


    Peppered Pear and Goat Cheese Scones
    adapted from Savory Baking, by Mary Cech
    makes 6-8 scones
    • 2 cups all-purpose flour
    • 1 1/2 tsp baking powder
    • 2 Tbs granulated sugar
    • 1 1/4 tsp kosher salt
    • 1 tsp freshly cracked black pepper, plus extra for sprinkling
    • 1 stick butter, grated and frozen for 10-15 minutes
    • 1 medium pear, peeled, cored, and roughly chopped
    • 4 ounces goat cheese, crumbled into walnut-sized pieces
    • 1/2 cup buttermilk or yogurt
    • 2 Tablespoons whole milk
    • 1 Tablespoon butter, melted
    Preheat the oven to 375 degrees and line a baking sheet with parchment paper.  Stir together the flour, baking powder, sugar, salt, and 1 tsp of the pepper in a medium bowl.  Add the butter, pears, and goat cheese, and stir to incorporate.

    Pour the buttermilk and whole milk over the flour mixture and lightly blend with a spatula.  The dough may look dry, but it will come together in the oven.

    Using a 1/3 cup measuring cup, scoop the dough into mounds evenly spaced on the baking sheet.  Brush the scones with the melted butter, and sprinkle with extra pepper.  Bake until lightly browned, about 25 minutes.  Serve warm or at room temperature.


    Sunday, August 1, 2010

    PPQ: Peach Jam Scones


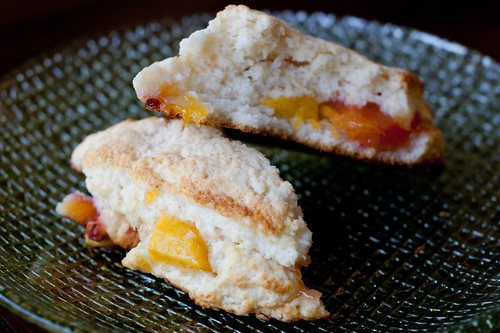
    My choice for this week's Project Pastry Queen is Peach Jam Scones.  I pored over the cookbook for a few hours, and I went back and forth between a few recipes before finally settling on these.  I just can't resist peaches!

    Both of my sisters were in town for a night, so I made these for breakfast.  We all really liked them - our daughters included!  The combination of the jam and fresh peaches make them nice and sweet, and the scone is light and fluffy.

    I used a trick I learned from Cook's Illustrated and grated the butter, then froze it before adding it to the dry ingredients.  It helps the butter become incorporated easier, thereby keeping the butter nice and cold, giving you a flakier scone.  I wold recommend working fast though - my scones spread a bit in the oven.  I think refrigerating or freezing them briefly would also help.

    Next week:  More peaches!  Peach and Cream Cheese Tart coming up!


    Peach Jam Scones
    adapted from The Pastry Queen, by Rebecca Rather
    makes 8 really big scones
    • 6 cups all-purpose flour
    • 1 1/4 cups sugar
    • 1/4 cup baking powder
    • 1/4 teaspoon salt
    • 1 1/2 cups unsalted butter, very cold (3 sticks)
    • 1 1/2-2 cups buttermilk
    • 1/2 cup peach jam
    • 3 fresh peaches, peeled, sliced, and pitted
    • 1 Tablespoon melted butter
    Preheat oven to 425.  Grate the butter on the large holes of a grater, and place in the freezer for at least 10-15 minutes.

    In the bowl of a food processor, combine the flour, 1 cup of sugar, baking powder, and salt for 30 seconds.  Add the butter and pulse a few times.  With the processor running, slowly pour 1 1/2 cups of the buttermilk through the feed tube.

    Stop the processor as soon as all the milk has been added.  If the dough has formed a ball, remove it onto a floured surface.  If not, add more buttermilk, 1 Tablespoon at a time, and pulse until the dough begins to clump up and form a ball.

    On a lightly floured surface, use your hands to pat the dough into a 1/4-inch rectangle, about 12 by 10 inches.  Spread a thin layer of jam lengthwise over half the dough and arrange the peach slices over the jam.  Fold the plain dough over the jam-side to make a 12 by 5 inch rectangle with the peaches and jam folded inside.  Cut the dough into 4 rectangles, then cut each rectangle diagonally into 2 triangles.  Brush each scone with melted butter and sprinkle with the remaining 1/4 cup sugar.

    Bake on an ungreased cookie sheet for 10 to 15 minutes, until the scones are light golden brown.  Serve warm or at room temperature.


    Sunday, March 14, 2010

    Blueberry Scones


    Most people say that they look forward to the weekends because they have time to make a bigger, more substantial breakfast.  Not me.  I have infinitely more time during the week (not that I make big elaborate breakfasts... Caroline and I love our oatmeal!).  We almost always have plans for Saturday mornings, whether its a tennis match, a road race, tailgate, or going to visit my family.  And don't get me started on Sunday mornings.  Nevermind that we have a permanent alarm clock that prevents us from sleeping past 7am, we always manage to be racing out the door for church with no time to spare.

    So I actually am more inclined to want a grab-and-go breakfast on the weekend.  Which brings us to these scones. They certainly can be made the day you plan to eat them, but they are also perfect if you make them the night before, refrigerate, and then bake them off in the morning.  In fact, I have made them several times, and I feel like I get a higher rise when I prep them the night before and refrigerate overnight.  I'm sure that has to do with the butter being very cold and helping to produce the tall scones.  I also realized that I added the incorrect amount of baking powder, so that definitely had an effect as well!

    The scones pictured were made and baked the same day, and they didn't bake up as high as they have previously.  But they still tasted fantastic!  Tender, moist, and sweet, with perfect little bursts of blueberry throughout.  This is definitely the most unusual technique for making the scones as well.

    First, the butter is grated and frozen, so there are are nice bits of butter throughout the dough.  The dough is rolled out, then folded, and rolled out again, as if pastry dough.  And finally, the blueberries are pressed into the rolled out dough, and then the final dough is rolled up like a cinnamon roll, flattenened to a rectangle, and cut into the characteristic scone wedges. 


    Here is the video from Cook's Illustrated that does a wonderful job demonstrating the techniques.
    These are a huge favorite in our house, and I can't wait to experiment with more fruits - raspberries, blackberries, and strawberries all sound fabulous!


    Blueberry scones
    adapted from America's Test Kitchen
    makes 8 scones
    • 8 Tablespoons cold butter, plus more for brushing
    • 2 cups all-purpose flour
    • 1/2 cup granulated sugar, plus more for sprinkling
    • 2 teaspoons baking powder
    • 1/4 teaspoon baking soda
    • 1 teaspoon kosher salt
    • 1 teaspoon lemon zest
    • 1/2 cup sour cream
    • 1/2 cup whole milk
    • 1 1/2 cups fresh blueberries, frozen
    Grate the butter on the large holes of a box grater, and freeze.

    Preheat oven to 425, and combine the dry ingredients.  Stir in frozen butter.  Whisk together the sour cream and whole milk, and stir into the dry ingredients with a wooden spoon until just combined.  The dough will be crumbly, but that's okay.

    Turn out onto a well-floured surface, and knead a few times.  Roll out into a 12x12 inch square.  Using a bench scraper, fold the dough into thirds, then fold into thirds again in the opposite direction to form a square.  Roll the dough out into a 12x12 inch square again, and refold.  Place on a well-floured plate, and freeze for 5 minutes.

    Roll out to a 12x12 inch square for a final time, and press the blueberries into the dough in a single layer.  Carefully roll up, as you would cinnamon rolls.  Press the roll into a 4-inch wide rectangle.  Using the bench scraper, cut into 4 rectangles.  Then cut each rectangle diagonally to make 2 triangles.

    Place on a baking sheet lined with parchment paper.  At this point the scones can be baked or refrigerated overnight.  Brush with melted butter, then sprinkle with sugar.  Bake 18-25 minutes, or until golden-brown.


    Friday, August 28, 2009

    Bacon and Cheddar Scones


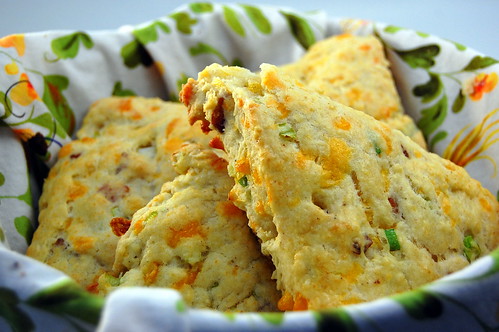
    Yet another recipe from The Pastry Queen, these are perfect to make on the weekend, then grab and go throughout the week (which is exactly what Joey did). I made these scones last Sunday for breakfast, and we enjoyed them out on the patio with some fresh fruit and coffee.

    I love savory scones; it doesn't feel like I'm having dessert for breakfast, so they must be healthy.... despite the bacon, butter, buttermilk, and cheddar cheese...

    These are nice and light, but still filling without feeling too heavy. The base for the scone is slightly different than that of previous scones I'd made, but still very light and buttery.

    Bacon and Cheddar Scones
    adapted from The Pastry Queen
    • 3 cups all-purpose flour
    • 1 Tablespoon baking powder
    • 1 teaspoon salt
    • 2 teaspoons freshly ground black pepper
    • 1/2 cup (1 stick)chilled, unsalted butter, cut into small cubes
    • 1 1/2 cups grated cheddar cheese
    • 4 green onions, thinly sliced
    • 10 slices of bacon, diced and cooked; then drained of fat
    • 3/4- 1 1/2 cups buttermilk
    • 1 large egg
    • 2 Tablespoons water
    Preheat the oven to 400. Sift the flour, baking powder, salt, and pepper into the bowl of a mixer fitted with a paddle attachment. Combine on low speed. Gradually add the butter cubes as the mixer is still running, until the mixture is crumbly and studded with butter-flour bits (about the size of small peas). Add the grated cheese and mix until just blended.

    Add the bacon, green onions, and 3/4 cup of the butter milk. Mix by hand until all the ingredients are incorporated. If the dough will not hold together and is too dry, add buttermilk 1 Tablespoon at a time, stirring lightly with each addition. Do this until the dough is pliable and can be formed into a ball. Do not overwork the dough, or the scones will not be light and tender.

    Place the dough on a lightly floured surface. Pat into a ball, and roll into an 8-inch circle that is about 1/2 inch thick. Cut into 8 wedges for more substantial scones, or 10 wedges for smaller scones.

    Combine the egg and water in a small bowl.

    Place scones on an ungreased baking sheet, and brush each scone with the egg wash. Bake 18-20 minutes, or until golden brown and no longer sticky in the middle.


    Thursday, June 18, 2009

    BB BRC: Cranberry Orange Scones


    I joined a great blogging group called Barefoot Bloggers. Twice a month we cook up an Ina Garten recipe. This week's was a Bonus Recipe, which was chosen by Em of The Repressed Pastry Chef. I have been cooking and baking out of my Barefoot Contessa cookbooks for years, so I was very excited that my first recipe was one I hadn't tried yet. I am starting to gain more confidence in baking, as for so long I was mostly into cooking. The exactness and the techniques really made me nervous. Especially pastry for some reason.

    These scones were flaky and buttery and delicious. I don't know if you've ever had a bad scone, but my first scone experience was awful - dry and hard. I was actually turned off scones for years. I couldn't understand why anyone would actually want to eat that!

    Overall I'm really happy with how these turned out. My only complaint was that they seemed to spread as they baked, but i'm sure that's something I did wrong. I also think I glazed them too early, becaus the glaze pretty much melted into the scone. Also, given some of the comments on the Barefoot Bloggers site, I decided to add extra orange zest to give a stronger orange flavor, and less cranberries to compete with the orange. I've reflected those changes below. I'd love to try these as orange and dark chocolate or blueberry or raspberry with lemon.


    Cranberry Orange Scones


    • 4 cups plus 1/4 cup all-purpose flour
    • 1/4 cup granulated sugar, plus more for sprinkling
    • 2 Tbsp baking powder
    • 2 teaspoons kosher salt
    • 2 Tbsp orange zest
    • 3/4 pound (3 sticks) cold, unsalted butter, diced
    • 4 large eggs, lightly beaten
    • 1 cup cold heavy cream
    • 1/2 cup dried cranberries
    • 1 egg beaten with 2 Tablespoons water, for egg wash
    • 1/2 cup plus 2 Tbsp confectioners sugar
    • 4 tsp freshly squeezed orange juice
    Preheat oven to 400 degrees line baking sheets with parchement paper.

    In the bowl of an electrice stand mixer fitted with the paddle attachment, mix 4 cups of flour, 1/3 cup sugar, the baking powder, salt, and orange zest. Add the cold butter and mix at the lowest speed until the butter is the size of peas. Combine the eggs and heavy cream and, with the mixer on low speed, slowly add to the four and butter mixture. Mix until just blended. The dough will look lumpy!

    Combine the dried cranberries and 1/4 cup of flour, add to the dough, and mix on low speed until blended.

    Dump the dough onto a well-floured board and knead it into a ball. Flour your hands and a rolling pin and roll the dough just under 1-inch thick. You should see small bits of butter in the dough. Keep moving the dough onthe floured board so it doesn't stick. Flour a 3-inch round cutter and cut circles of dough. Place the scones on the prepared baking sheet. Collect the scraps neatly, roll them out, and cut more circles.

    Brush the tops with the egg wash, sprinkle with granulated sugar, and bake for 20-25 minutes, until the tops are browned and the insides are fully baked. The scones will be firm to the touch.

    Allow the scones to cool for 15 minutes and then whisk together the confectioners' sugar and orange juice and drizzle over the scones.


    BLOG DESIGN BY: SHERBET BLOSSOM DESIGNS