Showing posts with label breakfast. Show all posts

Sunday, July 31, 2016

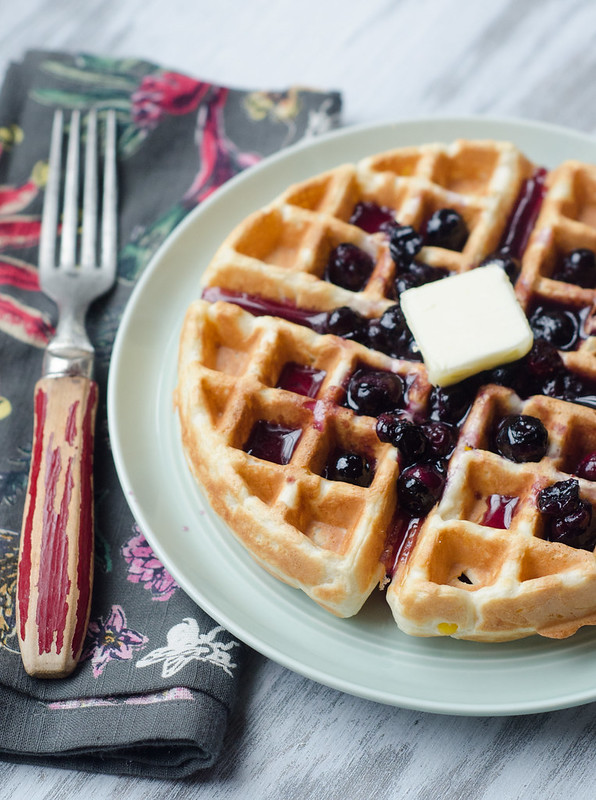
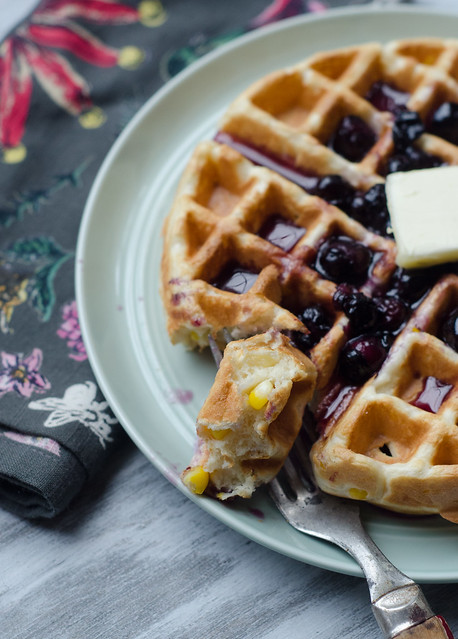
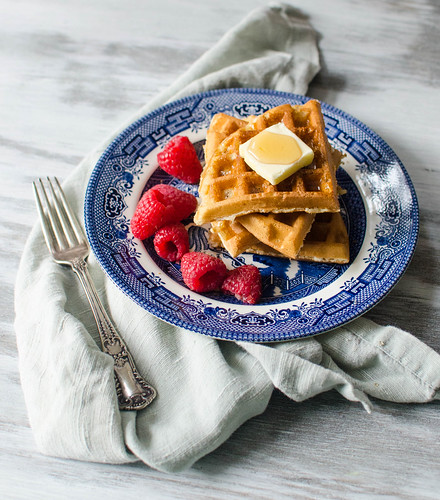
Sweet Corn Waffles with Blueberry-Maple Syrup


If there's one motto for our family, it might just be "waffles are always a good idea."  They are our lunch of choice on Sundays after church, and we have them fairly often for dinner as well.  Ironically, we rarely eat them for breakfast, but that's neither here nor there.  Anyway, if we are having waffles for dinner, I like to mix up the flavors, and experiment with different combinations.  One favorite of the summer has been zucchini waffles (recipe coming soon!), and these corn waffles with blueberry syrup were a hit as well.

My only issue with having waffles or pancakes for dinner is that oftentimes you're basically just having dessert for dinner… which, I mean, I'd be lying if I said I didn't like that.  But every now and then I do try and behave like a responsible parent and feed my children nutritious meals.  These waffles are definitely a little healthier since they have very little added sugar, and you're getting a serving of corn and blueberries in each waffle as well.

Until a few years ago, I probably would have turned up my nose at the combo of blueberries and corn, but now I embrace the motto of "if it grows together, it goes together," and I'm basically just like "gimme all the corn and blueberries now."  This chicken salad is amazing, blueberry cornbread is my favorite, and these waffles are the bomb.   I like serving these with a simple fruit salad on the side, along with either bacon or chicken sausage to round it all out.   We have Meatless Mondays, Taco Tuesdays, and Thirsty Thursdays… so shall we start a trend with Waffle Wednesdays?  Make it happen!


Sweet Corn Waffles with Blueberry-Maple Syrup
adapted from How to Cook Everything Fast, by Mark Bittman
serves 4-6, depending on the size of your waffle iron

  • 2 cups all-purpose flour (or 1 cup all-purpose flour + 1 cup whole wheat flour)
  • 1 Tbs baking powder 
  • 1/4 tsp kosher salt
  • 1 Tbs sugar
  • 2 eggs
  • 3 Tbs melted butter
  • 1 cup buttermilk
  • 1 cup fresh corn kernels
  • 1/2 cup fresh blueberries
  • 3/4 cup maple syrup
Preheat the oven to 200 degrees.

In a large bowl, whisk together the flour, baking powder, salt, and sugar.

In another bowl, combine the eggs, 2 tablespoons of butter, and buttermilk, whisking until well-mixed

Gently stir the wet ingredients into the dry ingredients using a wooden spoon, stirring until just combined.  The batter will still be thick and lumpy.  Fold in the corn kernels.

Follow the directions on your waffle iron to cook the waffles.  As they are finished, place them in the preheated oven to keep warm as you cook the rest.

Meanwhile, melt the remaining tablespoon of butter in a skillet set over medium heat.  Add the blueberries and cook, stirring often, until they begin to soften and give up their juice.  Add the maple syrup and cook until heated through.  Remove from heat and cover to keep warm.

Serve the waffles warm, with the blueberry syrup and more butter, if desired.


Sunday, November 30, 2014

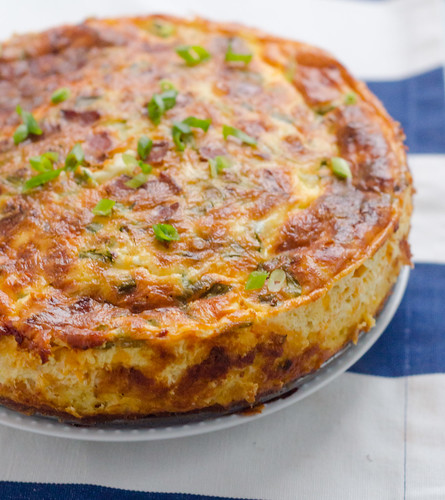
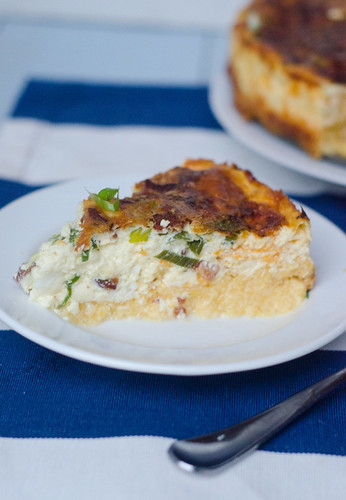
Bacon-Cheddar Quiche with a Grits Crust

Bacon-Cheddar Quiche with a Grits Crust 

Is it just me, or did November absolutely fly by?  Guys, I made it!  I posted every single day for the whole month!  This exercise was really good for me.  It forced me to go a little outside my comfort zone, and kind of reignited my passion for blogging.  And while I don't plan on posting every day in December, I do plan to keep the momentum going and post at least 3-5 days per week.  I kind of loved doing the weekend posts.  Putting together themed menus and party ideas is so much fun, and I also liked giving you a snapshot into our life… and I'll be honest, I always love sharing pictures of my cute kids :)

So now we move on to the holidays.  A time for family, celebration, decadence, and extravagance.  And this quiche kind of embodies all of those things.  This recipe makes a big deep dish quiche, which is big enough to serve several people.  It's decadent, rich, and definitely worthy of a celebration!  The grits crust is the stuff dreams are made of.  I mean, really.  And the quiche filling is custardy, rich, creamy, and absolutely delicious.  

this is definitely not a light and healthy dish.  It's the opposite, actually.  There's bacon, tons of cheese, heavy cream, half-and-half… yeah.  But it's a great dish for a celebration, and a great dish to share.  I actually think it would be pretty perfect for Christmas morning.  It can be prepped and assembled the night before, then just pop it in the oven to bake while you open presents in the morning.

I hope you're ready for some holiday cheer around here… because I have a lot to share with you in the next few weeks.  Get ready!

Bacon-Cheddar Quiche with a Grits Crust 

Bacon-Cheddar Quiche with a Grits Crust
adapted from Southern Living, December 2014
serves 10
  • 6 thick-cut bacon slices, chopped
  • 2 1/4 cups milk
  • 2 Tbs butter
  • 1/2 cup uncooked stone-ground grits
  • 2 tsp kosher salt, divided
  • 1 tsp black pepper, divided
  • 2 1/2 cups shredded extra sharp cheddar cheese
  • 6 large eggs
  • 2 1/2 cups half-and-half
  • 1 cup heavy cream
  • 1/3 cup thinly sliced scallions
  • 1/4 tsp red pepper flakes
Preheat the oven to 350 degrees F.  Lightly grease a 9-inch springform pan and place it on a foil-lined rimmed baking sheet.

Cook the bacon in a large skillet over medium heat until crispy.  Remove to a paper towel-lined plate using a slotted spoon.  

Transfer 1 tablespoon of the drippings to a medium saucepan.  Add the milk and butter and bring to a boil over medium heat.  Slowly whisk in the grits, 1 teaspoon of salt, and 1/2 teaspoon of pepper.  Cook, whisking constantly, for about 15 minutes (or until the grits are very thick).  Remove from heat and let stand for 10 minutes.  Stir in 1 cup of the cheese and 1 egg.  Spread the grits in an even layer in the prepared springform pan and bake for 25 minutes, or until they are lightly browned.  Remove from the oven and sprinkle the remaining cheese over the grits, spreading it to the edges.  Allow to cool for 15 minutes.*

Reduce the oven temperature to 325 degrees.  In a large bowl, combine the half-and-half, remaining eggs, cream, scallions, 1 tsp salt, 1/2 tsp pepper, and the red pepper flakes.  

Pour the mixture over the grits and sprinkle the bacon over the top.  

Bake for 1 hour and 15 minutes, or until the quiche is lightly browned and just set (barely jiggles when lightly agitated).  Let stand for 20 minutes before serving.

To serve, run a sharp knife around the edges of the quiche, remove the sides of the pan, and serve.

*At this point the grits crust and the egg mixture can be stored separately overnight in the refrigerator.  To serve, assemble and bake as directed.


Thursday, November 20, 2014

Sausage and Cheese Biscuits

Sausage and Cheese Biscuits

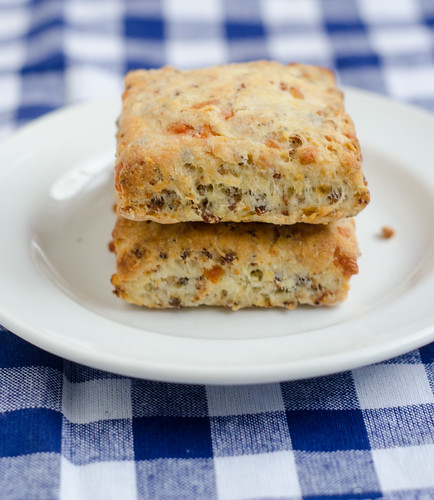
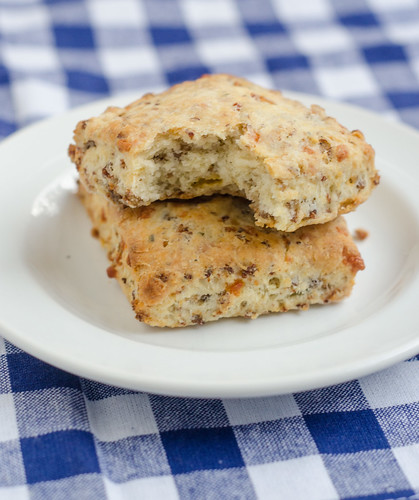
This is one of those recipes that I've been holding out on you guys.  My pal Elly posted these biscuits almost two years ago, and I've made them at least dozen times since.  I make them when we have house guests.  I make them and freeze for quick and easy breakfasts.  They have become my go-to breakfast item when attending a pot luck breakfast or brunch.  I take a batch to new moms or friends who need some TLC.  And I make them when I go out of town for the weekend, leaving Joey in charge of all the kids for four days (ahem, like right now).  They are pretty much his favorite breakfast, so it's an easy sell.  All that is to say that these biscuits, without a doubt, belong on my very favorite recipes Pinterest board.

So what makes them so great?  Well, they're biscuits, for starters.  And they are stuffed with sausage and cheese.  And they are flaky, and tender, and buttery.  I'm sure you're familiar with the ubiquitous sausage, egg, and cheese biscuits from a certain fast food chain, and these biscuits without a doubt put them to shame.  Psst.  They are also pretty fabulous topped with a fried egg.

I know many of you will have house guests in the next week, so I'd highly recommend baking up a batch of these biscuits.  I actually prefer to make them the night before, freeze, then bake in the morning.  It helps them rise and get even taller, fluffier, and flakier.  Plus, this makes them an even easier sell in the morning.  You can stumble downstairs, tired and bleary-eyed, and just pop them in the oven.  And um, not that I would know, but I venture to guess that they'd be pretty great with a mimosa as well.  Hey, it's the weekend, and it's almost a holiday!

DSC_9751
Sausage and Cheese Biscuits
adapted from King Arthur Flour, via Elly Says Opa!

  • 3 cups unbleached all purpose flour
  • 1 Tbs baking powder
  • 1/2 tsp baking soda
  • 1 tsp salt
  • 1/2 tsp garlic powder
  • 1/2 tsp dried oregano
  • 1/2 cup very cold butter, cut into pats
  • 1 cup buttermilk, plus more as needed
  • 12 oz breakfast sausage, crumbled, cooked, drained of excess fat, and cooled to room temperature
  • 1 cup freshly grated cheddar cheese (about 4 oz)

In the bowl of a food processor, combine the flour, baking powder, baking soda, salt,  garlic powder, and oregano. Pulse a few times.  Add the butter and pulse 8 to 10 times, until the mixture is crumbly and resembles coarse sand.  
Dump into a large mixing bowl and stir in the buttermilk, sausage, and cheeses, mixing evenly to distribute (but not overworking the dough). If dough seems very dry or crumbly, add another tablespoon or two of buttermilk.
Transfer the dough to a piece of parchment paper or a lightly floured work surface, and knead a few times to form a cohesive dough. Pat and roll the dough into a rectangle about 3/4″ thick. Cut the dough into 20 squares  using a sharp knife, or use a biscuit cutter to cut out the pieces. 
Place the biscuits on a parchment-lined baking sheet, spaced at least 1 inch apart.  At this point, the biscuits can be frozen or chilled in the refrigerator.
When ready to cook, bake at 425 degrees Fahrenheit for 13-15 minutes or until medium to deep golden brown.  


Tuesday, November 4, 2014

Jalapeño-Cheddar Cornbread Biscuits

Jalapeño-Cheddar Cornbread Biscuits


Biscuits are my love language. And being a good southern girl, I know biscuits.  They must be tall.  They must be flaky.  They must be buttery.  These are my all-time favorite biscuits.  And when I'm in a hurry or feeling particularly lazy, these drop biscuits will do.

Over the weekend however, I had a conundrum.  You see, I had a big pot of tequila-lime turkey chili simmering away, and normally, I serve cornbread with my chili.  No brainer, no substitutes.  But on this particular Saturday, I also had a craving for biscuits.  So what's a girl to do?  Put your hands together my friends.  Put your hands together.

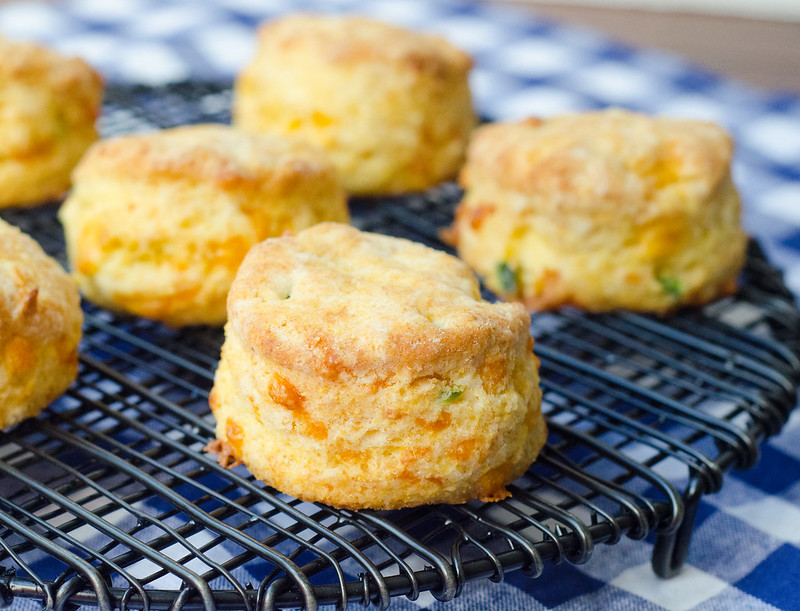
Enter cornbread biscuits.  See those layers?  See how tall they are?  See the pockets of melted cheese, and flecks of jalapeño?  Yeah, they're good.  The cornmeal adds a nice texture and the subtle flavor of cornbread.  These biscuits are the best of both worlds.

Unsurprisingly, my dueling cravings were both quenched.

So when you make these (when, not if), do yourself a favor with the leftover biscuits.  Split them open, toast them, then top them with chili, shredded cheese, and scallions.  You can thank me later.  They also make a killer egg sandwich.  And they taste pretty fantastic with honey-butter.  Basically what I'm saying is:  these biscuits are awesome.  Make them ASAP.

Jalapeno-Cheddar Cornbread Biscuits
adapted from The Complete Cook's Country TV Show Cookbook
makes 12-15 biscuits
  • 1 cup cornmeal
  • 1 1/4 cups well-shaken buttermilk
  • 1 Tbs honey
  • 2 cups all-purpose flour (preferably Lily White), plus more for dusting
  • 1 Tbs baking powder
  • 1/2 tsp baking soda
  • 1 tsp kosher salt
  • 12 Tbs very cold unsalted butter, cut into 1/2-inch pieces
  • 1 jalapeño chile, seededed, ribbed, and finely chopped
  • 1 cup shredded extra sharp cheddar cheese
  • 1 Tbs melted butter
Preheat the oven to 450 degrees, and line a rimmed baking sheet with parchment paper.

In a large bowl, whisk together the cornmeal, buttermilk, and honey.  Allow to sit for 10 minutes.

Meanwhile, pulse the flour, baking powder, baking soda, and salt in a food processor until well-combined, about 3-5 pulses.  Scatter the butter evenly over the top and continue to pulse until the mixture resembles coarse meal, about 15 more pulses.

Add the flour-butter mixture to the cornmeal mixture, along with the diced jalapeño and cheddar cheese.  Stir with a wooden spoon until a cohesive dough forms.

Turn the dough out onto a lightly floured surface and knead 8 to 10 times.  Pat the dough into a 9-inch circle, about 1-inch thick.  Dip a 2-3 inch biscuit cutter into flour and cut out rounds.  Transfer to the prepared baking sheet.  Pat the remaining rounds into another 1-inch thick circle, and repeat.

Brush the tops of the biscuits with the melted butter, and bake 5 minutes.  Reduce the heat to 400 degrees and bake until golden-brown, 8 to 12 minutes.  Cool the biscuits for 5 minutes before serving.


Thursday, August 28, 2014

Hatch Chile Huevos Rancheros

Hatch Chile Huevos Rancheros


I have a pretty epic story involving huevos rancheros, my sister, and an ill-timed 5K, but it's not what I'd call "blog appropriate."  Maybe I'll share it the day after never. ;)

Instead, I want to talk about college football!  So if you don't live in the south, you may like college football.  You might even think you love it.  But until you go to a college football game in the south, you definitely haven't lived it.  There's something magical about the first game of the season, and it's accompanying tailgate.  The very first subtle smells of fall in the air.  But it's still gloriously sunny and warm.  The energy and spirit from all the tailgates.  The seersucker.  The frat boys in bow ties.  The girls in cute sundresses.  Little kids with their faces painted.  The smell of the grill.  The judgment-free flow of mimosas and drinks before noon.  And the food.  The food at a tailgate is vital to the success of the tailgate.

When we were young and responsibility free, our Saturdays in the fall were spent on campus at Georgia Tech.  We had a pretty amazing tailgate group.  Every week was themed, and there was even a spreadsheet.  We took our tailgates seriously, like good southern kids.

So what does all this have to do with huevos rancheros?  Well, I loved having breakfast at our tailgates - it gave me an excuse to drink a mimosa ;).  And I think this would be a pretty fabulous dish to take to a tailgate.  Or if you can't go to a tailgate, then it's definitely a pretty fabulous dish to enjoy at home.

If huevos rancheros is on a brunch menu, there's a really good chance I'm ordering it.  But I've yet to master a homemade version.  Until now, that is.  This version has it all, and it even has a make-ahead option.

The method is a bit unorthodox, and it does take a while, but almost all of it is inactive.  And the extra time is definitely worth it because the flavors of the vegetables are so beautiful and intense, and balance so well with the spiciness from the peppers.  The cheese and runny eggs just put it over the top, and a big plate of these served with fresh corn tortillas is pretty much my idea of perfection.  Especially when I can wash it down with a mimosa.

Hatch Chile Huevos Rancheros

Hatch Chile Huevos Rancheros
adapted from Cook's Country, August/September 2014
serves 4-6

Hatch chiles are in season right now, so I used them in place of poblanos here.  If you can't find them, using a poblano is more than okay.  I also procured some Hatch chile cheddar, which was really great here.  

  • 1 (28-oz) can diced tomatoes, preferably fire roasted
  • 1 Tbs packed brown sugar
  • juice of 1/2 lime
  • 1 sweet yellow onion, diced
  • 1/4 cup extra virgin olive oil
  • 3 Tbs chile powder
  • 4 cloves garlic, thinly sliced
  • 2-3 Hatch chiles, roasted, peeled, seeded, and diced (or 1 poblano pepper)
  • 1 cup shredded Hatch chile cheddar (or Pepperjack cheese)
  • 8 large eggs
  • 1/3 cup minced fresh cilantro
  • 6 (6-inch) corn tortillas, warmed


Preheat the oven to 475 degrees.  Line a rimmed baking sheet with parchment paper and set aside.

Set a fine-mesh strainer over a bowl and drain the tomatoes, pressing with a rubber spatula to extract as much liquid as possible.  Transfer the liquid to a 2-cup liquid measuring cup and reserve 1 3/4 cups of the tomato juice, discarding the rest.  Whisk in the sugar and lime juice and set aside.

In a medium bowl combine the tomatoes, onion, olive oil, chile powder, garlic, and 1/2 teaspoon of salt.  Spread the mixture into an even layer on the prepared baking sheet.  Roast 35 to 40 minutes, stirring halfway through.  

Remove from the oven and reduce heat to 400 degrees.

Transfer the roasted tomato mixture to a 9x13 inch baking dish, and stir in the tomato juice mixture and hatch chiles.  Season with salt and pepper to taste.  Sprinkle with cheese, then use the back of a ladle to form 8 small "wells"in the tomato mixture.*

Carefully crack an egg into each well, then sprinkle the eggs with salt and pepper.

Bake until the whites are just beginning to set but still have some movement, 13 to 15 minutes.  

Remove from the oven, transfer to a wire rack, and cover with foil.  Let the eggs sit for 5 minutes.  Sprinkle cilantro over the top, and serve.

*If you are making this ahead, at this point cover the baking dish and refrigerate until you're ready to cook and serve.  If you're traveling with this to a tailgate, I would prepare it up to this step in a grill-safe aluminum foil pan, then cook the eggs on the grill as you would in the oven.  


Tuesday, July 1, 2014

Big Blueberry Pancake

Big Blueberry Pancake 

What are your plans for the Fourth of July?  Cooking out?  Spending the day at the pool?  Enjoying a lazy morning with your family?  Running in the largest 10K in the world in the wee morning hours?  That's what I'll be doing!  After a 3 year break for pregnancies and baby-raising, I'm back at it, and I'll be running in my 13th Peachtree Road Race.  I'm nervous and excited, and I'm really looking forward to it.  I always identified myself as a runner, and since having kids, it's kind of fallen by the wayside.  I'm so happy to have picked it back up, and I'm really looking forward to the race on Friday.

However, if you're NOT a nut who's getting up way too early to run 6 miles with 55,000 other sweaty people, then might I suggest enjoying a big blueberry pancake?  My kids LOVE pancakes, but to be honest, I find making them to be a bit tedious.  Standing over the hot griddle, pouring the batter just so, flipping, repeat.  By the time I finish making them all, everyone's done eating and are ready to move on to the next activity.

But this big blueberry pancake is as easy and low-maintenance as you can get.  You mix up a typical pancake batter, pour it into a hot skillet, sprinkle on some blueberries, then let it bake up in the oven.  To serve, just slice it into wedges and dole them out.  Easy peasy!

This has quickly become a family favorite - I've made it for breakfast and lunch, and it's gobbled up in no time by my little ones.  Definitely worthy of a holiday meal.  Or an any-day meal!

Big Blueberry Pancake 

Big Blueberry Oven Pancake
adapted from Martha Stewart Living, May 2014
serves 4 to 6

  • 2/3 cup all-purpose flour
  • 1/4 cup whole wheat flour
  • 3 Tbs plus 1 tsp granulated sugar
  • 1 1/2 tsp baking powder
  • 1/2 tsp kosher salt
  • 1 tsp lemon zest
  • 3/4 cup buttermilk
  • 1 large egg
  • 1 tsp vanilla extract
  • 3 Tbs unsalted butter, divided (2 Tbs melted + 1 Tbs solid)
  • 1 cup fresh blueberries
  • confectioner's sugar, for dusting
  • maple syrup, for serving
Preheat the oven to 375 degrees, and place a 10-12 inch cast-iron skillet on a rack placed in the upper-third.  

Whisk together the flour, 3 tablespoons of sugar, baking powder, salt, and lemon zest.

In a liquid measuring up, whisk together the buttermilk, vanilla, egg, and 2 tablespoons of melted butter.

Whisk the wet ingredients into the dry ingredients, stirring until just combined.

Remove the skillet from the oven and add the remaining 1 tablespoon of butter, swirling to coat the bottom and sides of the pan.  Pour in the batter and smooth the top with a spatula.  Sprinkle the blueberries evenly over the batter, then sprinkle the top with the remaining teaspoon of sugar.

Bake until golden-brown and cooked through, about 20-25 minutes.  Allow to cool 5 minutes, then dust the top with confectioner's sugar, slice into wedges, and serve with maple syrup.


Sunday, December 8, 2013

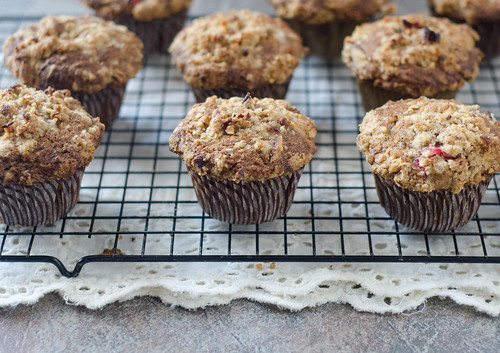
Cranberry-Pecan Muffins


Smith is two years old, and I have to admit that so far it has simultaneously been the most fun and the most frustrating age.  He oscillates between being inSANELY adorable and sweet, and ridiculously wild, crazy, and unreasonable.  One minute he is splitting his cracker in half and feeding it to his baby brothers, and the next minute he is chasing Caroline around and pulling her hair, knocking the twins over, and throwing a tantrum because I won't let him eat cornstarch.  It's hard to stay mad at him though.  I mean, look at that face!


Recently, our QT time has been spent almost exclusively in the kitchen.  He seems to have inherited my love for cooking, and anytime I so much as set foot in the kitchen, he's dragging the step stool over and asking to help.  And I love having him in there.  It's been especially fun to make recipes that require several steps, or call for using different appliances.  His favorite kitchen appliance of the moment is the food processor.  I let him press the button, and it absolutely makes his day.

These muffins were such a fun project for us to do together one afternoon.  Not only did we get to use the food processor THREE TIMES, but we got to eat muffins at the end!

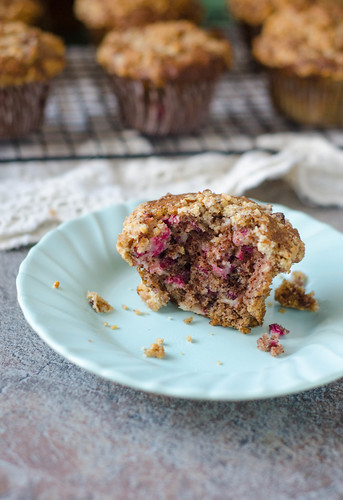
And these muffins are awesome.  There are a few key points that set these muffins above the rest.  First is the preparation of the cranberries.  Using fresh cranberries definitely feels more festive and seasonal, but biting into a whole cranberry can be pretty jarring.  Here, the cranberries are coarsely chopped in the food processor, along with some sugar and a tiny bit of salt.  The salt helps tame the bitterness of the cranberries, while the sugar of course sweetens them a bit.  Chopping the cranberries also helps them to be more evenly distributed throughout the muffin, giving you cranberry in every bite.

Secondly, instead of just mixing in chopped pecans, you make a pecan flour in the food processor by simply grinding them in the food processor with some sugar.  This appeases those who don't like the texture of having nuts added, but it gives the muffins plenty of nutty and delicious flavor.  So as to provide extra texture, a streusel topping finishes them off.

These muffins were a huge hit with both Caroline and Smith, and I loved them as well.  With their crunchy streusel topping, big domed tops, and awesome sweet-tart flavor, they reminded me a lot of a big bakery muffin.  These made a great breakfast for a few days, and Smith and I would split one for a snack sometimes as well.  If you need a fun and festive muffin for a holiday party, or are looking to bake something for Christmas morning, give these a try!  Having a two year old around to help is recommended, but not required. ;)


Cranberry-Pecan Muffins
barely adapted from The Cook's Illustrated Baking Book
makes 12 muffins

Streusel Topping

  • 3 Tbs all-purpose flour
  • 1 Tbs packed brown sugar
  • 4 tsp granulated sugar
  • 1/2 tsp ground cinnamon
  • 2 Tbs unsalted butter, cut into 1/2-inch pieces, softened
  • pinch salt
  • 1/2 cup pecans
Muffins
  • 1 1/2 cups all-purpose flour
  • 1 1/2 tsp baking powder
  • 1 tsp salt
  • 1 1/4 cups pecans, toasted and cooled*
  • 1 cup + 1 Tbs granulated sugar
  • 2 large eggs
  • 6 Tbs unsalted butter, melted and cooled
  • 1/2 cup milk
  • 8 oz (2 cups) fresh cranberries
  • 1 Tbs confectioners' sugar
Preheat the oven to 425 degrees and adjust the oven rack to the upper-middle position.  Line a 12-cup muffin pan with liners, or spray with cooking spray.  Set aside.

For the topping:  Combine the flour, brown sugar, granulated sugar, cinnamon, butter, and salt in the food processor, and pulse 4 to 5 times, until the mixture resembles coarse sand.  Add the pecan and pulse another 4 to 5 times, until they are coarsely chopped.  Transfer the mixture to a small bowl and set aside.

For the muffins:  Whisk the flour, baking powder, and 3/4 teaspoon of the salt together in a medium bowl and set aside.

Combine the toasted pecans and granulated sugar in the food processor, and process until the mixture resembles coarse sand, 10 to 15 seconds.  Transfer to a large bowl and whisk in the eggs, melted butter, and milk.

Whisk the flour mixture into the egg mixture until it's just combined, with no streaks of flour remaining.  Set aside for 30 minutes to thicken.

Meanwhile, pulse the cranberries, remaining 1/4 teaspoon of salt, and the confectioners' sugar in the food processor until very coarsely chopped, 4 to 6 pulses.  Use a rubber spatula to fold the cranberries into the batter.

Divide the batter evenly among the muffin cups using an ice cream scoop or large spoon, filling each cup completely.  Evenly sprinkle the streusel topping over the batter, gently pressing into the batter to adhere.

Bake 17 to 18 minutes, rotating the pan halfway through baking.  They are done when a toothpick inserted into the center comes out clean.  Cool the muffins in the tin for 10 minutes, then remove them to a wire rack and cool at least 10 more minutes before serving.


Monday, October 28, 2013

Apple-Cheddar Scones


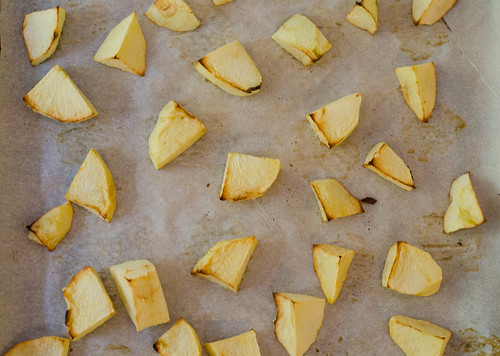
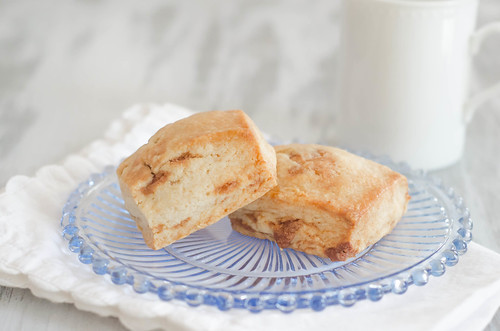
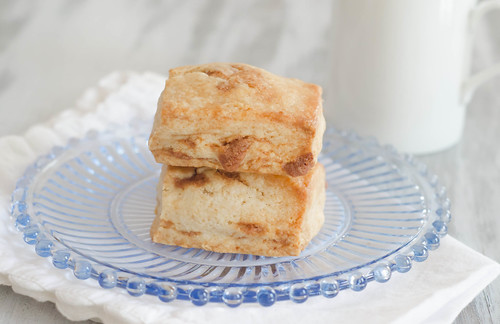
I know it's a super popular regional thing, but for some reason I just can't really get behind apple pie with cheddar cheese.  Don't get me wrong - I love apples and cheddar together - on sandwiches, as a snack, or in a salad.  But I have some sort of a mental block against trying the combo in a pie.  What I don't have a mental block against, however, is the apple-cheddar combo in a scone.  The base of the scone is soft, tender, and buttery, with a subtle cheddar flavor.  What makes these scones truly special, however, are the roasted apples.  You peel and roughly chop apples, then roast them to concentrate to flavor and cook off excess moisture.  They are added to the dough, and you are rewarded with little bursts of sweetness to balance out the more savory scone.


I've taken to only baking up a few scones anytime I make a batch, and freezing the rest to enjoy on a weekday morning.  It's such a special treat to have a freshly baked scone on a random morning!


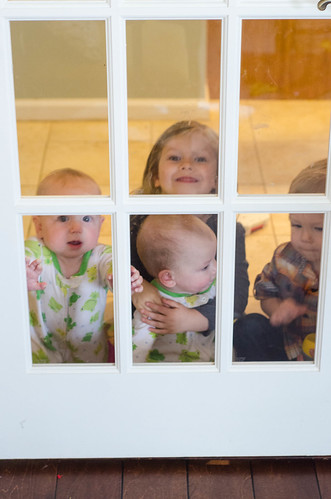
So side note: as I mentioned, I only baked up a few of these right off the bat, then smuggled them into the dining room to photograph before releasing them to my little ones.... I look through the door as I'm snapping some shots, and this is what I see.  :)  Never a dull moment in our house!  For the record:  the scones were devoured in a matter of minutes by my crew.


Apple pie with cheddar:  yay or nay?

Apple-Cheddar Scones
adapted from The Perfect Finish via Smitten Kitchen and Smells Like Home
makes 6 large scones


  • 1 lb firm, tart apples, like Granny Smith (2-4 apples, depending on size)
  • 1 1/2 cups all-purpose flour
  • 1/4 cup sugar
  • 1/2 Tbs baking powder
  • 1/2 tsp kosher salt plus additional for egg wash
  • 6 Tbs unsalted butter, chilled and cut into 1/2-inch cubes 
  • 2 1/2 oz sharp white cheddar, shredded (1/2 cup)
  • 1/4 cup heavy cream
  • 2 large eggs
  • 1 1/2 Tbs coarse sugar, for sprinkling

  • Preheat oven to 375 degrees F, and line a baking sheet with parchment paper.

    Peel, core, and chop each apple into about 16-24 pieces (roughly chopped, really). Toss them onto the baking sheet, spreading them out into one layer.  Bake for 20 minutes until they are slightly browned and look like they are starting to dry out.  Leave the oven on.  


    Let apples cool completely – either at room temperature for about an hour, or if you are in a hurry, pop them in the freezer, baking sheet and all.  

    While the apples roast and cool, whisk the flour, sugar, baking powder, and salt together in a medium bowl; set aside.


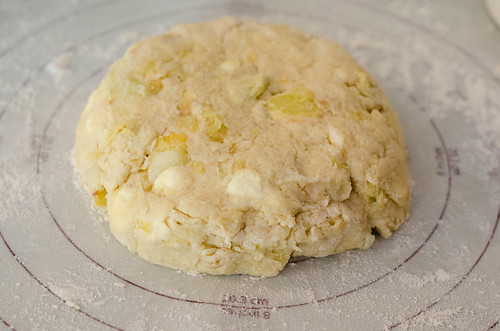
    After the apples cool, add them along with the butter, cheese, heavy cream, and one egg to the bowl of a stand mixer fitted with the paddle attachment.  Sprinkle the flour mixture over the ingredients in the bowl.  With the mixer on low speed, mix the ingredients until they just come together to form a dough – do not overmix.  The butter will still be in large-ish chunks and the dough will be sticky.  If you don’t have a stand mixer, you can do this step by hand using your fingers or a pastry cutter to work the butter into the flour.  This could also be done in a food processor, fitted with the dough-blade.


    Turn the dough out onto a well-floured surface and sprinkle the top of the dough with more flour.  Lightly flour your hands, then work the dough together into a disk then flatten disk to a 6-7 inch circle, about 1 1/4 inches high.  With a floured knife or bench scraper, cut the dough into 6 triangles.  


    Line the now cooled baking sheet with a new piece of parchment paper or grease it with butter.  Transfer the dough triangles to the baking sheet, leaving at least 2 inches between each piece.

    Beat the remaining egg and a pinch of salt together in a small bowl.  Brush the tops of the scones with the beaten egg then sprinkle some sugar on the top of each piece.  Bake for 25-30 minutes, or until the tops are golden brown. 


     Allow the scones to cool at least 10 minutes before serving.  The scones are best served warm and within 1 day of making them.  To freeze, arrange the scones in a single layer on a parchment-lined baking sheet, move to the freezer until they are frozen solid.  Transfer the scones to a freezer bag, and when you're ready to eat them,  just add a few minutes to the baking time.


    Thursday, September 12, 2013

    Brown Butter Waffles


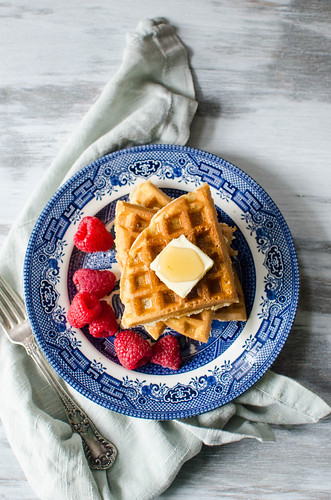
    I know that brown butter has been all the rage for the past few years, and it's probably pretty played out at this point.  But I'd like to think that it's all the rage because it's just so gosh darn tasty!  Add brown butter to pretty much anything and it's an instant winner in my book.  Which is why I wanted to smack myself in the head when I happened across a recipe for brown butter waffles.  How have I never thought of that?!

    These are, of course, delicious.  The brown butter just adds a subtle richness to the waffles, leaving you wondering what it is that makes them taste so good - a little bit of a kicked up version of your favorite Sunday morning breakfast.  Sure, you have to take a few extra minutes to brown the butter, but it's definitely an extra step that's worth taking.  This recipe also calls to separate the eggs, mix the yolks into the batter, and then whip the whites before folding them in.  This helps to create light and fluffy waffles that are beautifully crisp on the outside, and soft and tender on the inside.

    I walked outside this morning, and it just smelled like fall.  Granted, it was 85 degrees at 9 am and didn't feel like fall, but I know it's coming.  And I can think of no other way I'd rather spend a chilly morning than cuddled up with my sweet babies, drinking coffee, and eating a warm and comforting breakfast.  Why not take a few extra minutes to make something special?


    Brown Butter Waffles
    barely adapted from Williams-Sonoma

    • 4 Tbs unsalted butter
    • 2 cups buttermilk
    • 2 large eggs, separated
    • 1 tsp vanilla extract
    • 2 cups all-purpose flour
    • 3 Tbs sugar
    • 4 tsp baking powder
    • 1/4 tsp salt


    Preheat an oven to 200°F. Have ready a rimmed baking sheet. 

    In a small saucepan, melt the butter over medium-low heat and bring to a boil.  Stirring often, cook until the milk solids in the bottom of the pan turn a toasty brown, about 3 minutes.  Immediately transfer to a bowl and let cool slightly. Add the milk, egg yolks and vanilla, and whisk until combined. 

    Preheat the waffle iron according to the manufacturer's instructions.

    In a large bowl, sift together the flour, sugar, baking powder and salt. Add the milk mixture and whisk just until combined (leaving a few small lumps are okay). In another bowl, using a clean whisk or a handheld mixer, whip the egg whites until soft peaks form. Scoop the whites onto the batter and, using the whisk, gently fold them in evenly. 


    If your waffle iron is not nonstick, lightly and evenly oil the grid. According to the manufacturer’s instructions, spoon the batter over the grid, close the lid and cook until the waffle is golden brown, usually about 4 minutes. Transfer to the baking sheet and keep warm in the oven. Repeat with the remaining batter. Serve the waffles piping hot with your desired toppings.


    Tuesday, June 4, 2013

    Asparagus and Prosciutto Scrambled Eggs with Porcini Butter


    Sometimes I feel like I have this whole four-kids-under-five thing under control, and sometimes I feel totally inadequate.  Today was a prime example of both sides of that coin.  Caroline was at camp, and all the boys were napping this morning.  I took advantage of that time to fold some laundry, write a few emails, and unpack a few boxes into the storage closet in the garage (never mind that we moved 8 months ago....).  After feeling awfully smug and proud of myself, I came inside to feed Tucker, and a few minutes later heard a loud crash.  I rushed to the garage, and there was an entire shelving unit... ripped from the wall, with several serving platters, bowls, canning jars, and 2 boxes of wine glasses shattered on the floor.  I was barefoot and holding a baby, so I couldn't properly assess the damage, but rest-assured  it is pretty bad.  Bright side:  at least it wasn't the shelf that hold our china and crystal.

    Fast forward to this afternoon.  I was upstairs getting Smith down for his nap, and I hear both babies crying their little heads off downstairs.  I ask Caroline to go sing to them, because that typically calms them down.  Except she didn't feel like singing, so instead she stood in front of them and cried and yelled at them to stop crying.  And in what I can only assume was a flash of insanity, dumped an entire bag of bath salts over Tucker.  Because she thought "he'd think it was funny."  He didn't, for the record.  After losing my temper and scolding her a bit more than I probably should have (mom of the year), she goes to her room and miraculously falls asleep.  She hasn't taken a nap since she was three years old, so this was huge.  And Smith was asleep.  And then there were two.  The twins fought it for a while, but eventually fell asleep as well.  By this point it was after 4 pm, so I thought it only appropriate to open a beer and relax on the screen porch to celebrate all four kids napping simultaneously.  Fifteen minutes later, the twins woke up, my respite was over, and it was back to the daily grind.  It was fun while it lasted though.  Frustration, happiness, inadequacy, and gratitude are pretty much the emotions that I cycle through every day, every week.

    I vaguely recall the day I first made these eggs as a "frustration" day.  I don't remember the specifics, but I do remember it culminating in Joey pacing with crying, hungry baby in the kitchen while Smith and Caroline were hungry and underfoot, and me rushing to get dinner on the table.  I'm pretty positive that I either wolfed down my food way too fast or reheated it in the microwave after feeding said hungry babies, but I do remember us loving this meal.  It seems so elegant and fancy, but it comes together in less time than it takes to calm a crying baby.

    I have since made this a few times, and it remains a favorite.  You start by making a compound butter using porcini mushrooms, then use that to scramble eggs.  It's also slathered on some toast to serve alongside the eggs, and I can think of several other capacities in which it'd be pretty fabulous.  Asparagus and prosciutto are folded into the scrambled eggs, and there you have it.  A quick and easy meal that would be worthy of a restaurant.  It makes a great dinner, lunch, or weekend brunch - which is my personal preference.  Mimosas are optional.

    Asparagus and Prosciutto Scrambled Eggs with Porcini Butter
    adapted from The America's Test Kitchen Quick Family Cookbook
    serves 4-6

    Season sparingly along the way, as the prosciutto and Parmesan are both quite salty.  Ere on the side of under seasoning, then adjust accordingly once everything is mixed together at the end.

    • 1/4 oz dried porcini mushrooms
    • 1/2 cup water
    • 4 Tbs unsalted butter, softened to room temperature
    • 1/2 shallot, finely minced
    • 1 tsp vegetable oil
    • 1/2 lb asparagus, woody ends snapped off, and sliced into 1-2 inch pieces
    • 10 large eggs
    • 6 Tbs half-and-half or milk
    • 1/2 tsp salt
    • 1/4 tsp pepper
    • 6 (1-inch) slices rustic white bread
    • 1/2 cup grated Parmesan cheese
    • 2 oz thinly sliced prosciutto, coarsely chopped
    Preheat the broiler or toaster oven. 

    Combine the mushrooms and water in a microwave-safe bowl and microwave about 1 minute, or until steaming.  Set aside for about 5 minutes, or until softened.  Use a fork to lift the mushrooms from the water, pat dry with a paper towel, and mince.  Mash the mushrooms into the butter with the shallot, and season with salt and pepper to taste.

    Meanwhile, heat the oil in a 12-inch nonstick skillet over medium heat.  Add the asparagus and cook until lightly browned, 2-4 minutes.  Transfer to a plate and set aside.

    Whisk the eggs, half and half (or milk), salt, and pepper together in a large bowl until thoroughly combined and the color is pure yellow.

    Spread 3 tablespoons of the butter over the bread and toast to your liking.

    Melt the remaining tablespoon in the now-empty skillet over medium heat.  Add the egg mixture and, using a heat-proof rubber spatula, constantly and firmly scrape along the bottom and sides of the skillet until the eggs begin to clump and the spatula leaves a trail along the bottom of the pan, 2-3 minutes.

    Remove from heat and fold in the asparagus, Parmesan, and prosciutto.  Continue to stir the mixture until the eggs cooked through, another 30 seconds or so.  Taste and season with additional salt and pepper as needed.

    Divide the eggs among plates and serve with the buttered toast.


    Wednesday, March 27, 2013

    Strawberries & Cream French Toast Casserole


    Strawberries and cream is such a classic springtime combination.  And unsurprisingly, sometimes simple is best:  one of my favorite ways to enjoy the combo is simply to top some sliced strawberries with whipped cream and dig in.  However, that doesn't translate so well to breakfast (I would be hungry again in approximately 0.034 seconds).  Enter strawberries and cream French toast casserole.  This is a super simple French toast casserole base, with sweet strawberries mixed in.  I typically use milk when I make breakfast casseroles, but this time I replaced half of it with cream.  The result was incredibly rich and decadent, worthy of a special occasion.  Like say, Easter Sunday?  The sweet and bright strawberries were the perfect foil to the custardy filling, and this is going down as one of my favorite breakfasts ever.  I foresee many fruit and cream varieties being made as we head into spring and summer.... blueberries and cream?  Peaches and cream?  Go wild!

    Strawberries and Cream French Toast Casserole
    a Pink Parsley Original
    serves 4

    • 5 cups cubed French bread (day old bread, slightly stale bread is ideal)
    • 4 eggs
    • 1 cup milk
    • 1 cup heavy cream
    • 1/4 cup sugar
    • pinch of cinnamon
    • 2 tsp vanilla extract
    • 1 1/2 cups sliced strawberries, divided
    • 1 Tbs sugar, for sprinkling
    Lightly grease a 9x9 inch square baking dish.

    In a large bowl, whisk together the eggs, milk, heavy cream, sugar, cinnamon, and vanilla.  Mix in the bread and the strawberries.  Pour the mixture into the prepared pan, cover, and refrigerate several hours or overnight.  When ready to bake, preheat the oven to 350 degrees and scatter the remaining 1/2 cup of strawberries over the top.

    Bake 35-45 minutes, or until the custard has set.  During the last 10 minutes of baking time, sprinkle 1 tablespoon of sugar over the top.

    Allow to cool 5-10 minutes before serving.


    Thursday, February 28, 2013

    Honey-Cinnamon Scones


    I know I'm not the only one who does this - but one of my worst habits is failing to read recipes all the way through before I start cooking.  Especially if it's something basic or familiar.  Like these scones, for example.  I figured, "Hey, they're scones!  I'll whip them up before bed, then freeze them overnight, pop them in the oven first thing, and we'll have fresh scones for breakfast tomorrow.  Easy peasy!"  What I failed to realize, however, is that these scones are no ordinary scones.  I should have known better based purely on the fact that they come from Thomas Keller's Bouchon Bakery cookbook.  There are multiple steps and chills, and while none of it is difficult, it is time-consuming.  Lucky for me, I was able to work these in in-between middle of the night feedings, and it wasn't so bad.   And when we woke up Sunday morning, they were ready to be baked and enjoyed!

    Worth it?  Absolutely!  The scones themselves were soft and tender, and rose sky-high during baking. The little pockets of honey-cinnamon butter were little bursts of flavor.  And as they came out of the oven, the scones were brushed with honey butter for some extra sweetness.


    There are a few interesting aspects to the recipe as well.  The scones use part all-purpose flour, and part cake flour.  This helps them achieve a lightness that would be present in a cake or cupcake, but the sturdiness that you expect from a scone.  Typically when I make scones, the butter is cut into the flour, but not fully incorporated, so as to create a light and tender product.  In this recipe, the butter is fully incorporated into the dry ingredients.  Though because of the multiple chills and the cubes of honey-cinnamon butter, the scones are still light and tender.  As for the multiple chills, first the honey-cinnamon butter is frozen, then cut into small cubes.  After being incorporated into the scone dough, the dough is shaped into a large rectangle and chilled again.  And finally, the scones are cut and frozen solid before baking.  All of this results in a uniquely delicious scone.  The spice of the cinnamon plays nicely off the sweetness of the cinnamon.

    These were a nice treat for a Sunday morning.  And since I only baked half and froze the other half, they can be a lovely treat any day of the week!


    Honey Cinnamon Scones
    barely adapted from Bouchon Bakery
    makes 12 large scones

    The ingredients are given in weight and volume below, but I highly suggest using the weight measurements, as they will produce a superior end result.

    Honey-Cinnamon Butter Cubes

    • 30 g (3 Tbs) all-purpose flour
    • 30 g (2 1/2 Tbs) sugar
    • 1 1/2 tsp ground cinnamon
    • 30 g (about 2 Tbs) cold, unsalted butter, cut into 1/4-inch cubes
    • 20 g (1 Tbs) clover honey
    Scone Dough
    • 152 g (1 cup + 1 1/2 Tbs) all-purpose flour
    • 304 g (2 1/4 cup + 2 Tbs) cake flour
    • 12.5 g (2 1/2 tsp) baking powder
    • 2.5 g (1/2 tsp) baking soda
    • 91 g (1/4 cup + 3 1/2 Tbs) granulated sugar
    • 227 g (8 oz) cold, unsalted butter, cut into 1/4-inch pieces
    • 135 g (1/2 cup + 2 Tbs) heavy cream
    • 135 g (1/2 cup + 2 Tbs) creme fraiche, sour cream, yogurt, or buttermilk
    Honey Butter Glaze
    • 4 Tbs melted butter
    • 1 Tbs honey
    For the Cinnamon-Honey Cubes:  Place the flour in a medium bowl.  Sift in the sugar and cinnamon and whisk to comine.  Add the butter cubes, and toss to coat.  Using your (clean) fingers, break up the butter until no large pieces remain.  Mix in the honey using a spatula, mixing until a smooth paste forms.

    Press the paste into a 4-inch square on a sheet of plastic wrap.  Wrap tightly and freeze until solid, at least 2 hours.  this can also be prepared and frozen for up to 1 week.

    When ready to make the scones, cut the butter paste into 1/4-inch cubes and chill until ready to use.

    For the Scones:  Sift the flours, baking powder, baking soda, and sugar into the bowl of a stand mixer fitted with the paddle attachment.  Mix on the lowest setting for about 15-20 seconds to combine.  

    Add the butter and, on the lowest setting, pulse to begin incorporating it into the dry ingredients.  Increase the speed to the low and mix for about 3 minutes, or until no large pieces remain.

    With the mixer running, slowly pour in the cream.  Add the creme fraiche (or substitute) and mix for about 30 seconds, or just until all the dry ingredients are moistened and the dough comes together around the paddle.  Scrape down the sides of the bowl and the paddle, and pulse a few times to combine.

    Using a wooden spoon, stir in the honey-cinnamon butter cubes.  They may begin to break up a bit, but that's okay.  It will give the finished product a marbled look.

    Dump the dough onto a lightly-floured surface, and mound the dough to form a cohesive dough.  Place the dough between 2 pieces of plastic wrap, and using your hands, form it into a 7x10 inch block, smoothing the top and straightening the edges.  Transfer to a cookie sheet and refrigerate for 2 hours or freeze for about 30 minutes, or until the dough is firm.

    Line a baking sheet with a silpat or parchment paper.  Using a sharp knife, cut the block of dough lengthwise into thirds and crosswise into quarters, creating 12 square scones.

    Arrange the scones on the prepared baking sheet, leaving a small space between them.  Cover with plastic wrap, and freeze until frozen solid, at least 2 hours, but preferably overnight (the scones can be frozen for up to 1 month).

    When ready to bake, preheat the oven to 350 degrees for a standard oven, or 325 degrees for a convection oven.  Line a sheet pan with parchment paper, and arrange the scones 1-inch apart.  Bake 28 to 30 minutes (standard) or 20 to 23 minutes (convection), or until the scones are cooked through and lightly golden-brown on top.

    As the scones bake, whisk together the honey and melted butter.  Brush the tops and sides of the scones with the honey butter as soon as you take them out of the oven.  Serve.  

    The scones are best eaten the day they are made, but can be stored in a covered container for 1-2 days.  


    Tuesday, January 29, 2013

    Skillet Strata with Cheddar and Thyme


    I told you I've been going a little egg-crazy since Caroline outgrew her allergy.  And this particular dish has made several appearances on our breakfast, lunch, and dinner table.  It's a super simple recipe that comes together quite quickly.  Onions are quickly sautéed in some butter, then bread cubes are toasted in the skillet as well.  A mixture of eggs, milk, some spices, thyme, and cheese is poured over the bread cubes, then you transfer the pan to the oven and it bakes up into a beautiful and delicious strata.  The sharp cheddar, buttery bread, and fresh thyme combine to create a dish that's definitely greater than the sum of it's parts.  Any dish that can be made with pantry staples and is immediately inhaled by everyone at the table is a true winner in my book!

    Another bonus?  It's infinitely adaptable.  Add some bacon or sausage (or any meat, really).  Amp up the nutritional value by adding veggies - spinach and zucchini would be especially great.  Change up the cheeses.  Play around with the seasonings and spices.... The sky's the limit here.  It's a great recipe to use up random ingredients in your fridge.  And as if you need another reason to make it, the leftovers reheat beautifully, so you can make this over the weekend and then reheat individual portions throughout the week for an easy breakfast.

    Skillet Strata with Cheddar and Thyme
    adapted from America's Test Kitchen Quick Family Cookbook
    serves 4-6

    • 6 large eggs
    • 1 1/2 cups milk
    • 4 oz extra sharp cheddar cheese, shredded (about 1 cup)
    • 4 Tbs unsalted butter
    • 1 medium onion, diced
    • 1 tsp minced fresh thyme (or 1/4 tsp dried)
    • pinch of cayenne
    • 1/4 tsp garlic powder
    • 1/4 tsp mustard powder
    • kosher salt and freshly ground black pepper
    • 5 cups of 1-inch bread cubes (about 5 slices sandwich bread)
    Heat the oven to 425 degrees and adjust the oven rack to the middle position.  Whisk the eggs, milk, and cheddar together in a medium bowl.  


    Melt the butter in a 10-inch ovensafe nonstick or cast iron skillet over medium-high heat.  Swirl the pan to coat, then add the onion, 1/2 teaspoon of salt, and 1/4 tsp pepper.  Cook until softened and beginning to brown, 4-6 minutes.

    Stir in the bread, thyme, cayenne, mustard, and garlic, and toss to coat the bread with the butter.  Cook until the bread cubes are lightly toasted, about 3 minutes.

    Remove the pan from heat and fold in the egg mixture until well-combined with the bread.  Transfer the skillet to the oven and cook 10-12 minutes, or until the edges are browned, the center of the strata is puffed, and the edges are pulling away slightly from the sides of the pan.  Serve.


    Tuesday, January 1, 2013

    Baked Breakfast Taquitos


    We have become quite fond of breakfast foods in our house ever since Caroline outgrew her egg allergy.  We eat breakfast for breakfast, breakfast for lunch, and breakfast for dinner.  I feel like a whole new world has been opened up when it comes to feeding my family.  There have been many evenings in which I haven't felt like cooking or eating dinner, so scrambled eggs, toast, and fruit have become a staple for dinner for the kids and Joey.

    Our love for baked taquitos has also been pretty well-documented here, so I totally felt like Joey Tribiani when I came across these breakfast taquitos - eggs + taquitos.  Put your hands together, my friend.

    The basic premise here is a flour tortilla stuffed with scrambled eggs, salsa, cheese, herbs, and whatever other mix-ins you may prefer.  I used a little crumbled bacon, some cilantro and scallions, and Greek yogurt.  There's also a lime-chipotle dipping sauce that's pretty delicious, but Joey said he actually preferred them dipped in salsa or au naturale.

    And a few more reasons why these are totally awesome:

    1. They can be frozen for an easy grab-and-go breakfast
    2. They are infinitely customizable - play around with the cheeses, use sausage or chorizo - or go vegetarian. 
    3. They are high in protein and relatively healthy.
    4. They are really easy.
    So take my advice:  make a big batch.  Freeze some.  Eat the rest.  And then enjoy a quick and easy breakfast all week.  Happy New Year!

    Baked Breakfast Taquitos
    inspired by Our Best Bites
    • 4 slices bacon, chopped 
    • 12 large eggs
    • 3/4 cup Greek yogurt
    • 1/2 tsp kosher salt
    • 1/4 tsp black pepper
    • 1/2 tsp garlic powder
    • 1/4 tsp ground cumin
    • 1 1/2 cup grated cheese - cheddar, Colby jack, pepperjack, etc
    • 1/2 cup salsa (thick and chunky preferred over a thinner salsa)
    • 1/4 cup minced green onions
    • 1/4 cup chopped cilantro
    • juice of half a lime
    •  hot sauce to taste
    • 16-20 6″ flour tortillas
    • cooking spray or olive oil
    • Dipping Sauce:
    • 1 cup Greek yogurt
    • juice of half a lime
    • 1/4 tsp chipotle chili powder
    • 1/2 tsp kosher salt
    Preheat oven to 425 degrees.   Spray with cooking spray or lightly brush with oil and set aside.
    Chop the bacon into 1/2-inch pieces and cook in a large nonstick skillet over medium heat, stirring often, until browned and crispy.  Use a slotted spoon to remove from the skillet and drain on a paper towel-lined plate.  Discard all but 2-3 teaspoons of the bacon fat.
     Meanwhile, crack eggs into large mixing bowl.  Whisk in the Greek yogurt, salt, pepper, garlic powder, and cumin.  Add egg mixture to pan.  Using a rubber spatula, gently scrape bottom of pan and fold eggs over to scramble.  Remove from heat when slightly undercooked.  Add cheese, salsa, cooked bacon, green onions, cilantro, hot sauce, and lime juice.  Mix to combine, taste, and season with additional salt, pepper, and/or hot sauce as needed.
    Place the tortillas on a plate, cover with a damp paper towel, and microwave 30 seconds.  Working with a few tortillas at a time, place a scant 1/3 C egg mixture into the center of each one and roll up.  Place on a prepared baking sheet, seam-side down, spacing 1-2 inches apart.  Lightly spray tops with cooking spray, or lightly brush with olive oil.  Sprinkle lightly with salt.  Bake for 15 minutes or until edges are golden-brown and crisp.
    While taquitos are baking combine all the ingredients for the dipping sauce.  Stir to combine season to taste.  Remove taquitos from oven , let cool for 5 minutes, and then serve with dipping sauce.


    To Make Ahead: The egg mixture can be made a day ahead of time and stored in the fridge until ready to use.  You can also prepare the taquitos and instead of baking right away, cover tightly in plastic wrap and store in the fridge overnight, or freeze for later use.  To prepare frozen taquitos, place (un-thawed) directly on a baking sheet sprayed with non-stick spray.  Follow original baking instructions, increasing time by 5 minutes or until taquitos are golden brown.


    Tuesday, December 4, 2012

    Back to Basics: Classic French Toast


    A few months ago, we went though quite the ordeal with Caroline, but emerged on the other side with some absolutely fantastic news:  She's outgrown her egg allergy!!  After the skin tests and blood draws showed her to have a borderline allergy, the allergist issued her an "egg challenge."  And yes, I had trouble not saying "Challenge - accepted."  Basically they fed her one scrambled egg over the course of 3 hours and monitored her reaction.  Or in this case, the lack there of.  I know it sounds a little ridiculous, but I definitely shed a few tears of joy at the news.  Especially when  she even got a little teary-eyed as she told me how happy it made her to be able to eat eggs, cookies, cakes, and pie.  To celebrate, I took her to the Whole Foods bakery and let her pick out anything she wanted from the dessert case.  She went with a fruit tart filled with pastry cream, and it was definitely enjoyed.  Along with scrambled eggs the next morning for breakfast.


    I've become so wired to only prepare dinners without eggs, that I feel like a whole new world has been opened up to me.  Not only can I now make things that use eggs as binders, emulsifiers, etc, but breakfast for dinner has quickly become a dinner that we keep in heavy rotation.  Frittatas, scrambled eggs, waffles, pancakes, and French toast are all pretty popular with both kids.  French toast especially. Caroline quickly declared that it's her new favorite food, and Smith loves it as well.  I of course love my French toast drenched in maple syrup, but both of my kids have been eating it sans syrup, and they don't seem to mind at all.  It's plenty flavorful on it's own.

    I know it may seem a little silly to share a recipe for something that is so basic and simple, but this recipe really deserves to be shared.  This is basically the ultimate French toast.  The outside gets a nice crispy, buttery crust, with just the slightest hint of sweetness.  The inside still remains light and fluffy - no soggy, limp French toast here!

    I've made this several times in the past month or so, and I foresee it being made even more as time goes on.  I like to make a few extra pieces, then cut them into "sticks" and reheating them briefly in the oven the next morning.

    Best French Toast
    adapted from The New Best Recipe
    makes 4 to 5 slices

    The flour in the soaking custard is what helps it form such a great crust.  Also, using challah or brioche bread makes it feel that much more indulgent.  I like to add a bit of orange zest to the custard as well, but it's definitely optional - I never make a special trip to the store or anything if I don't have one lying around.  

    • 1 large egg
    • 2 Tbs unsalted butter, melted
    • 3/4 cup milk (any fat percentage is fine)
    • 2 tsp  vanilla extract
    • 2 Tbs brown sugar
    • 1-2 tsp grated orange zest
    • 1/2 tsp ground cinnamon
    • 1/3 cup all-purpose flour
    • 1/4 tsp salt
    • 4-5 slices day-old challah or brioche bread, sliced 1-inch thick
    • unsalted butter, for cooking the French toast
    Heat a large skillet  over medium heat for 5 minutes (preferably cast-iron, but nonstick will work as well).  

    Meanwhile, whisk together the eggs and butter in a shallow dish or pie plate.  Whisk in the milk, vanilla, brown sugar, orange zest, cinnamon, flour, and salt.  Whisk until smooth.

    Soak the bread for about 30-40 seconds per side, being careful not to oversaturate the bread (in other words, no need to dunk it and press it down into the custard).

    Melt 1 tablespoon of butter in the hot skillet, swirling to cover the whole pan.  Transfer the bread 2-3 slices at a time to the skillet.  Cook until golden-brown, about 1-2 minutes on the first side, then 1 minute on the second.  Continue with the remaining bread, adding 1 tablespoon of butter to the skillet for each new batch.  Serve immediately.


    Tuesday, November 27, 2012

    Eggnog Muffins


    I have been incredibly lazy in the kitchen as of late.  It used to be that my "me-time" was spent baking and cooking.  But these days, when I get that elusive quiet time, I have zero energy to be on my feet for an extended amount of time.  These days I spend my me-time laid up on the couch - either watching random tv shows or reading.  I'm 30 weeks pregnant with twins and spend my days chasing around two active toddlers while carrying around 8 pounds of baby - I take the rest when I can get it.

    However, over the weekend, I somehow got a big burst of energy and ran a bunch of errands, did some cleaning and organizing, and got the itch to bake something festive for breakfast.  I had picked up a carton of eggnog a few days prior, so I knew I wanted to bake an eggnog treat.  These muffins totally fit the bill.  They are mixed up an in the oven in less than 10 minutes.  Major score for these tired feet.  And they are tender and moist, with just the right amount of sweetness, a subtle eggnog flavor, and a majorly droll-worthy crumbly streusel topping.  I'm totally a sucker for a crumb topping.

    These are most definitely a great breakfast warm from the oven with a cup of coffee, or if you're an eggnog freak, go ahead and wash down your eggnog muffin with some eggnog. :)  They are also great a few days post-baking - just briefly warm in the microwave for that fresh-baked taste.  You can enjoy a Christmas-y breakfast any day of the week with these muffins!

    Easy Eggnog Muffins
    barely adapted from King Arthur Flour
    makes 12-15 muffins


    • 4 Tbs (1/2 stick) unsalted butter, at room temperature
    • 3/4 cup sugar
    • 2 large eggs
    • 2 tsp baking powder
    • 1 tsp ground nutmeg (preferably freshly ground)
    • 1/2 tsp salt
    • 1 tsp vanilla extract
    • 2 1/2 cups all-purpose flour 
    • 1 1/4 cups eggnog 
    Topping
    • 1/2 cup sugar
    • 1/2 cup all-purpose flour
    • 1/2 tsp nutmeg
    • splash of eggnog
    • 3 Tbs butter, melted
    Preheat the oven to 425 degrees.  Line a muffin pan with liners and spray lightly with nonstick cooking spray.

    In the bowl of a stand mixer, cream the butter and sugar at medium speed until light and fluffy.  Add the eggs, one at a time, scraping down the bowl after each addition.

    Add the baking powder, nutmeg, salt, and vanilla extract to the bowl and mix until just combined.  Beginning and ending with the flour, alternate adding the flour and eggnog to the bowl, mixing at low speed, just until each ingredient is incorporated.

    Scoop the batter evenly into the prepared muffin cups.

    To make the topping, use a fork to combine all of the ingredients just until the mixture is crumbly.  If you mix too much, it will form into a cohesive ball, not a crumbly topping.

    Sprinkle the topping evenly over the batter.  Bake 18-20 minutes, or until the topping is turning golden-brown and the muffins are cooked through.  Allow to cool for a few minutes in the pan, then transfer the muffins to a wire rack to cool before serving.


    Tuesday, August 7, 2012

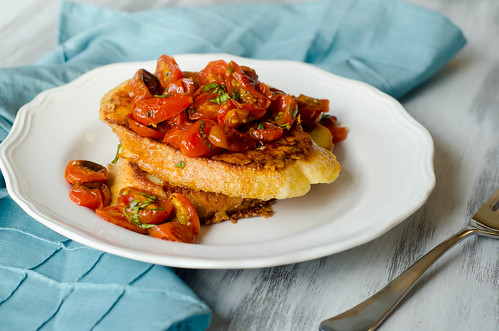
    Savory Parmesan French Toast with Tomato-Basil Topping


    Sometimes I make a recipe not because I know that without a shadow of a doubt that it'll be awesome, but more so that I'm intrigued.  Sometimes it blows up in my face and we have cereal or grilled cheese for dinner, but sometimes it results in a great dinner - like this grilled chicken salad with blueberries and corn, okra tacos, chorizo and sweet potato lettuce wraps, or this blueberry-BBQ salmon.  You win some, you lose some.

    We're all familiar with french toast for breakfast - topped with a pat of butter and fresh fruit, drizzled (umm drenched) with syrup... always a favorite.  But how about making a savory version?  For dinner, even?  This recipe definitely intrigued me, but coat pretty much anything with parmesan cheese and top it with roasted tomatoes, and I'm sure I'll love it.

    And of course, I did.  The toast gets a double dose of the cheese - some is shredded into the egg mixture that you use to soak the sliced bread, then the rest is used to encrust the bread and form a cheesy crust.  The tomatoes are briefly roasted in the oven and come out just garlicky enough, slightly sweetened, and caramelized.  Mixed with a dash of balsamic vinegar and some fresh basil, and you have a super awesome topping for the cheesy toast.  I pretty much always have all the ingredients for this savory french toast on hand, so I foresee it becoming a staple in our house - for a quick and easy weeknight dinner, or a lazy weekend brunch.  Don't be scared - take a leap of faith and try savory French toast!

    Savory Parmesan French Toast with Tomato-Basil Topping
    adapted from America's Test Kitchen, Simple Weeknight Favorites
    serves 4

    • 1 1/2 lbs grape tomatoes, halved
    • 6 garlic cloves, sliced thin
    • 6 Tbs olive oil, divided
    • kosher salt and freshly ground black pepper
    • pinch sugar
    • 2 tsp balsamic vinegar
    • 3 Tbs chopped fresh basil
    • 3 large eggs
    • 2 cups milk
    • 1/4 cup all-purpose flour
    • 1/4 cup finely grated Parmesan cheese + 2 cups shredded on the large wholes of a box grater
    • 8-10 (1-inch) slices Italian or French bread
    Heat oven to 450 degrees and adjust the rack to the middle position.  Toss the tomatoes with garlic, sugar,  and 2 tablespoons of the oil.  Season with salt and pepper and arrange them cut side up on a rimmed baking sheet.  Roast until the skins begin to brown on bottom, about 20 minutes.  Allow to cool slightly, then transfer to a bowl and toss with the basil and balsamic vinegar.  Set aside.

    Meanwhile, whisk the eggs in a shallow dish with milk, flour, finely grated parmesan, 1/4 tsp salt, and 1/4 tsp pepper.  Spread the shredded parmesan in another shallow dish or large plate.

    Working 4 pieces of bread at a time, soak the slices in the milk mixture for 5 minutes, flipping halfway through.  One at a time, remove each slice from the mixture, then transfer to the shredded parmesan, pressing gently on both sides to adhere the cheese to the bread.  Repeat with the remaining bread

    Heat 2 tablespoons of the oil in a 12-inch nonstick skillet over medium heat until shimmering.  Cook 4 slices of bread turning once, until browned and crispy, about 2-3 minutes per side.  Transfer to a large plate and cover loosely with foil.  Repeat with the remaining 2 tablespoons of oil and the remaining 4 slices of bread.

    Serve topped with the roasted tomato mixture.


    BLOG DESIGN BY: SHERBET BLOSSOM DESIGNS