Showing posts with label bread. Show all posts

Wednesday, November 19, 2014

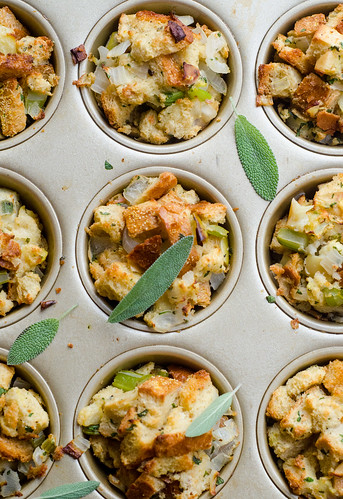
Apple-Sage Stuffing Cups

Apple-Sage Stuffing Cups

T-minus one week until Thanksgiving.  Are you hosting?  Are you ready?  Yesterday I talked about non-negotiables on the Thanksgiving table, and stuffing/dressing certainly qualifies as such.  People are very opinionated on their stuffing, and for good reason.  I am not necessarily a purist when it comes to dressing, but this classic southern style dressing tops my favorites list.  Last year I shared this biscuit, bacon, and oyster dressing.  It's a little off the wall, but amazingly delicious.  And this year I'm dialing it up with a kind-friendly, portable recipe:  apple-sage stuffing cups!

I realize that these are a bit on the precious and cute side, which is not really what I think of when I plan a Thanksgiving meal.  But they make up for the cutsey-ness with the flavor.  I absolutely love apples in my stuffing - both from a flavor and textural standpoint.  They are a nice texture in contrast to the soft bread, and a lovely burst of sweetness as well.  As such, the sage tempers the sweetness nicely, and when cooked in muffin tins, you get all the coveted crispy edges to yourself.  No fighting over with your brother!

As I made these, it occurred to me that these would be a great offering for a kids' classroom Thanksgiving feast.  They are already perfectly portioned, and kids always love things shaped like muffins - I know mine do anyway.  If you're still planning your Thanksgiving menu, or if you're attending a casual Friendsgiving this weekend, these apple-sage stuffing cups are a great option - easy, portable, and obviously delicious!

Apple-Sage Stuffing Cups

Apple-Sage Stuffing Cups
adapted from Cooking Light, November 2014
makes 12 muffins

  • 12 oz of a baguette or rustic white bread, cut into 1-inch cubes
  • 3 Tbs butter
  • 1 1/2 cups peeled and diced apple
  • 1 1/2 cups diced onion
  • 2/3 cup diced celery
  • 1 1/2 Tbs minced fresh sage
  • 1/2 tsp freshly ground black pepper
  • 1/2 tsp kosher salt
  • 1/4 cup minced fresh flat-leaf parsley
  • 1 3/4 cups reduced-sodium chicken broth
  • 2 large eggs, lightly beaten
Preheat the oven to 375 degrees.  Spray a muffin tin with cooking spray and set aside.

Arrange the bread cubes in a single layer on a baking sheet.  Bake 15 minutes, or until the bread is toasted, stirring halfway through.  Transfer the bread to a large bowl and set aside.

Melt the butter in a large skillet over medium heat.  Add the apple, onion, celery, sage, pepper, and salt.  Sauté 5 minutes, or until tender.   Add the apple-onion mixture to the bowl with the bread, and toss to combine.

combine the chicken broth, eggs, and parsley in a small bowl and whisk to combine.  Pour over the bread mixture and use a wooden spoon to gently combine.

Divide the bread mixture evenly among the 12 muffin cups, using a heaping 1/2-cup for each.  Bake 20-25 minutes, or until the tops are browned and crispy.  Use a spatula to gently pop out each muffin, and serve.


Tuesday, November 4, 2014

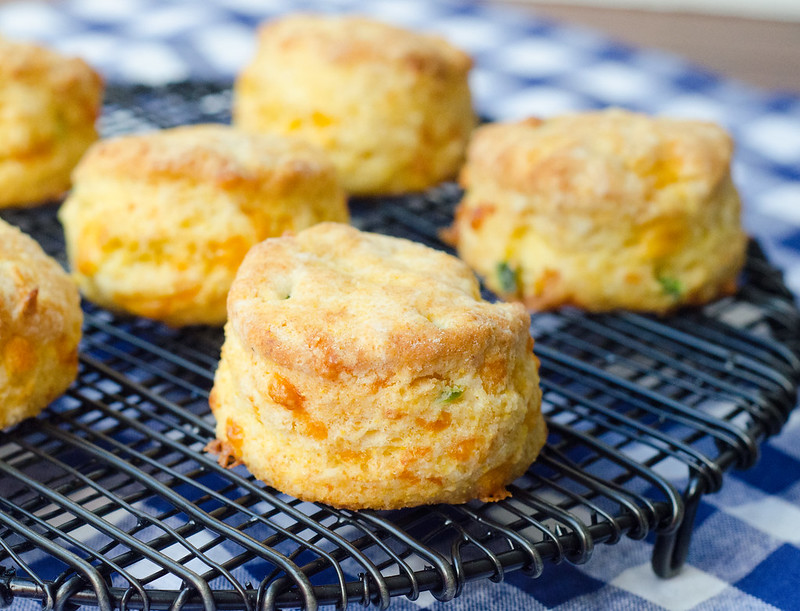
Jalapeño-Cheddar Cornbread Biscuits

Jalapeño-Cheddar Cornbread Biscuits


Biscuits are my love language. And being a good southern girl, I know biscuits.  They must be tall.  They must be flaky.  They must be buttery.  These are my all-time favorite biscuits.  And when I'm in a hurry or feeling particularly lazy, these drop biscuits will do.

Over the weekend however, I had a conundrum.  You see, I had a big pot of tequila-lime turkey chili simmering away, and normally, I serve cornbread with my chili.  No brainer, no substitutes.  But on this particular Saturday, I also had a craving for biscuits.  So what's a girl to do?  Put your hands together my friends.  Put your hands together.

Enter cornbread biscuits.  See those layers?  See how tall they are?  See the pockets of melted cheese, and flecks of jalapeño?  Yeah, they're good.  The cornmeal adds a nice texture and the subtle flavor of cornbread.  These biscuits are the best of both worlds.

Unsurprisingly, my dueling cravings were both quenched.

So when you make these (when, not if), do yourself a favor with the leftover biscuits.  Split them open, toast them, then top them with chili, shredded cheese, and scallions.  You can thank me later.  They also make a killer egg sandwich.  And they taste pretty fantastic with honey-butter.  Basically what I'm saying is:  these biscuits are awesome.  Make them ASAP.

Jalapeno-Cheddar Cornbread Biscuits
adapted from The Complete Cook's Country TV Show Cookbook
makes 12-15 biscuits
  • 1 cup cornmeal
  • 1 1/4 cups well-shaken buttermilk
  • 1 Tbs honey
  • 2 cups all-purpose flour (preferably Lily White), plus more for dusting
  • 1 Tbs baking powder
  • 1/2 tsp baking soda
  • 1 tsp kosher salt
  • 12 Tbs very cold unsalted butter, cut into 1/2-inch pieces
  • 1 jalapeño chile, seededed, ribbed, and finely chopped
  • 1 cup shredded extra sharp cheddar cheese
  • 1 Tbs melted butter
Preheat the oven to 450 degrees, and line a rimmed baking sheet with parchment paper.

In a large bowl, whisk together the cornmeal, buttermilk, and honey.  Allow to sit for 10 minutes.

Meanwhile, pulse the flour, baking powder, baking soda, and salt in a food processor until well-combined, about 3-5 pulses.  Scatter the butter evenly over the top and continue to pulse until the mixture resembles coarse meal, about 15 more pulses.

Add the flour-butter mixture to the cornmeal mixture, along with the diced jalapeño and cheddar cheese.  Stir with a wooden spoon until a cohesive dough forms.

Turn the dough out onto a lightly floured surface and knead 8 to 10 times.  Pat the dough into a 9-inch circle, about 1-inch thick.  Dip a 2-3 inch biscuit cutter into flour and cut out rounds.  Transfer to the prepared baking sheet.  Pat the remaining rounds into another 1-inch thick circle, and repeat.

Brush the tops of the biscuits with the melted butter, and bake 5 minutes.  Reduce the heat to 400 degrees and bake until golden-brown, 8 to 12 minutes.  Cool the biscuits for 5 minutes before serving.


Thursday, January 30, 2014

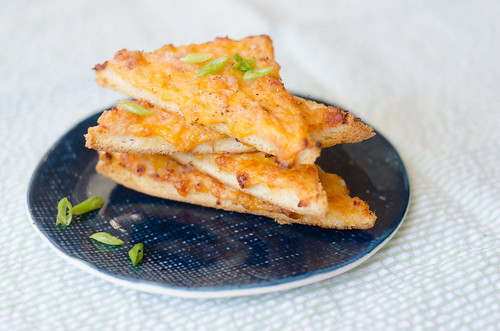
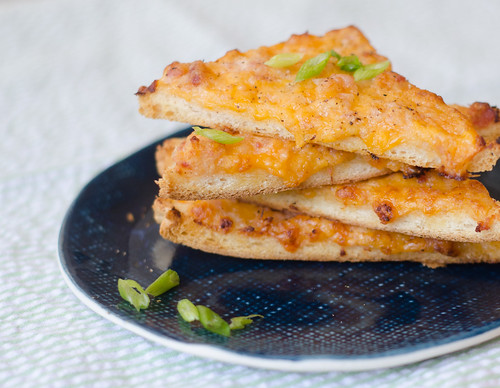
Bacon and Cheddar Toasts


As you have no doubt seen all over the news by now, the past few days in Atlanta have been nothing short of insane.  I wanted to write about it all and share some thoughts, but to be honest, I'm still having trouble processing it and wrapping my head around it all.   I'll just say that our family was extremely fortunate on Tuesday that Joey only spent over two hours in the car before abandoning it and walking three miles home in the snow.  And that we are incredibly lucky that we only live a mile from the school.  After waiting over two hours for her to arrive home on the bus, I set out on foot to the school, when I happened upon the bus just outside our neighborhood.   She got off the bus thinking that she'd just had the greatest adventure of all-time, and I fought back tears of relief.  My mother in law was stuck in traffic near our house, just a few miles from home, but roads were closing and traffic was grid-locked, so she wisely gave up and came to stay with us for the night.

Those are small and petty inconveniences compared to the children who had to spend the night in the school gymnasium because bus service was discontinued and their parents were stranded somewhere in the snow... or worse, the children who had to spend the night on their buses that were stranded on deserted roads.  Or the woman who gave birth to a baby on the interstate.  Or the thousands of people who never made it home that night.  The silver lining was that good samaritans were out in full force, and reading the stories of all the acts of kindness and selflessness brought me to tears.  It's a good reminder of the wonderful human nature that comes out in times of crisis.

So what does all of this have to do with bacon and cheese toast?  Not much, other than as I waited for my family to come home, I engaged in some wicked emotional eating, and downed an embarrassing number of these little babies.  And then I made another batch that night; and Joey, his mother, and I all just stood around the baking pan, drinking wine and eating these toasts as we watched all the reports and news roll in.

These are embarrassingly easy, but amazingly delicious and addictive.  It's a simple mixture of sharp cheddar, bacon, onion, and horseradish, then it's spread on pieces of bread, and baked until the cheese is melted and gooey, the bacon is cooked through, and the bread is nice and crispy.  It's a familiar concept with a kicked-up flavor profile, thanks to the bite from the horseradish and onion.

These are an ideal make-ahead dish and can be flash frozen before baking, or chilled for several hours in the refrigerator.  This makes them perfect for serving at parties.  Like, perhaps a Super Bowl party this weekend?  They also make a nice easy breakfast, snack, or accompaniment to a salad or soup.  With a recipe as easy as this in your arsenal, you'll always have something to make for parties, potlucks, or unexpected visitors during a snowstorm.


Bacon and Cheddar Toasts
adapted from Gourmet Today
makes 28 triangles

While I usually use thick-cut bacon, thin, lean bacon is best here.  Discard the extra fatty parts of the bacon.

Using a food processor is optional, but I think the mixture spreads easier and the flavors meld better with the food processor.

These are utterly irresistible straight out of the oven, but no one will turn them down at room temperature either.

  • 8 oz extra-sharp cheddar, grated (about 2 cups)
  • 8 oz cold lean bacon, finely chopped
  • 2/3 cup coarsely chopped white onion
  • 2 Tbs prepared horseradish
  • 1/2 tsp salt
  • 1/4 tsp freshly ground black pepper
  • 14 thin slices of white sandwich bread (recommended:  Pepperidge farm)
  • sliced scallions or chives for garnish
In the bowl of a food processor, combine the cheese, bacon, onion, horseradish, salt, and pepper.  Pulse a few times to combine well.

Spread a heaping tablespoon of the cheese mixture onto each of the bread slices, spreading it all the way to the edges.  Arrange in a single layer on a baking sheet, cover the bread with wax paper or parchment paper, and place in the freezer for 15 minutes.  Alternatively, store in the refrigerator for at least 2 hours, or overnight.

When ready to bake, preheat the oven to 375 degrees.  

Trim the crusts off the bread, then slice each piece in half diagonally.  Arrange on a greased baking sheet  15 minutes, or until the cheese is melted and the edges are beginning to brown.  Sprinkle with scallions or chives and serve.


Monday, November 25, 2013

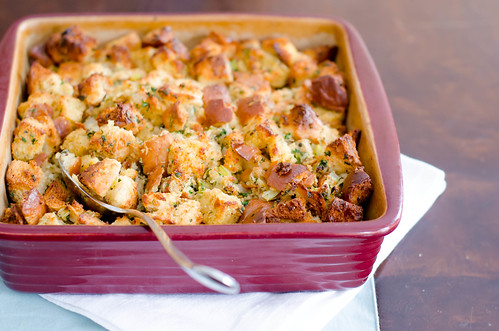
Biscuit, Bacon, and Oyster Stuffing


I know oyster stuffing can seem.... weird.  But it's a thing.  It's a quite popular thing in certain regions of the US, in fact.  I myself could never bring myself to make it or try it ... the thought of biting into an oyster hiding in my dressing kind of icked me out.  It's a textural issue for me.  But I had the idea to chop the oysters prior to mixing them into the dressing, so you get all the wonderful, briny flavor, but none of the unappetizing slimy texture.  Win and win!

I've previously sung the praises of this southern-style cornbread dressing, and really had zero interest in trying another dressing recipe... ever.  But when this biscuit and bacon dressing was recommended to me, I couldn't resist.  I mean, a stuffing recipe made totally out of biscuits?  With bacon?  Sold.

The oysters were a great addition - the briny flavor was a great counterpart to the salty bacon and rich biscuits.  This dressing is absolutely amazing, and I beg you not to be scared off by the addition of the oysters.  In fact, when I made this, I made no mention of the oysters, and Joey immediately proclaimed it to be the best stuffing he's ever had.  Oysters in your dressing.  Do it.


Biscuit, Bacon, and Oyster Dressing
adapted from Williams-Sonoma and Cook Like a Champion

  • 12 cream biscuits (1.5  times this recipe)
  • 1 lb bacon, diced
  • 1 large onion, minced
  • 5 celery stalks, diced; and their leaves minced
  • 1/4 cup minced fresh parsley
  • 2 Tbs minced fresh sage
  • 2 Tbs minced fresh thyme
  • 10-12 fresh oysters, shucked*
  • 3 1/2 cups chicken broth
  • kosher salt and freshly ground black pepper
  • 2 Tbs unsalted butter, cut into 1/2-inch pieces
Preheat the oven to 350 degrees.  Crumble the biscuits into 1-inch pieces, and spread evenly on a baking sheet.  Toast 20-25 minutes, or until the biscuits are lightly browned.  Remove from oven, set aside to cool, and increase the temperature to 375 degrees.

Meanwhile, in a large skillet, cook the bacon until browned and crispy, stirring often.  Use a slotted spoon to remove the bacon to a paper towel-lined plate.  Pour all but 3 tablespoons of the fat.

Add the onions to the skillet and cook until they begin to soften, 5 to 6 minutes.  Add the celery, celery leaves, parsley, sage, and thyme, and cook, stirring often, until the vegetables are softened and beginning to brown, another 5 to 7 minutes.  

Meanwhile, add the oysters to the food processor and pulse a few times to finely mince.  Set aside.

In a large mixing bowl, gently stir to combine the biscuit pieces, sautéed vegetables, and oysters.  Pour the chicken broth over the mixture and mix well.  Pour the mixture into a greased 9x13 inch baking dish.  Sprinkle the butter pieces over the top and cover the dish with foil.

Bake 30 minutes, then remove the foil and bake an additional 20-25 minutes, or until the top is golden-brown and crispy.  Allow to cool 10 minutes before serving.  

*If you don't want to shuck your own oysters, oysters can be purchased already shucked, in pint containers.  They are packed in their own liqueur, so just drain the liquid off before chopping.


Tuesday, December 4, 2012

Back to Basics: Classic French Toast


A few months ago, we went though quite the ordeal with Caroline, but emerged on the other side with some absolutely fantastic news:  She's outgrown her egg allergy!!  After the skin tests and blood draws showed her to have a borderline allergy, the allergist issued her an "egg challenge."  And yes, I had trouble not saying "Challenge - accepted."  Basically they fed her one scrambled egg over the course of 3 hours and monitored her reaction.  Or in this case, the lack there of.  I know it sounds a little ridiculous, but I definitely shed a few tears of joy at the news.  Especially when  she even got a little teary-eyed as she told me how happy it made her to be able to eat eggs, cookies, cakes, and pie.  To celebrate, I took her to the Whole Foods bakery and let her pick out anything she wanted from the dessert case.  She went with a fruit tart filled with pastry cream, and it was definitely enjoyed.  Along with scrambled eggs the next morning for breakfast.


I've become so wired to only prepare dinners without eggs, that I feel like a whole new world has been opened up to me.  Not only can I now make things that use eggs as binders, emulsifiers, etc, but breakfast for dinner has quickly become a dinner that we keep in heavy rotation.  Frittatas, scrambled eggs, waffles, pancakes, and French toast are all pretty popular with both kids.  French toast especially. Caroline quickly declared that it's her new favorite food, and Smith loves it as well.  I of course love my French toast drenched in maple syrup, but both of my kids have been eating it sans syrup, and they don't seem to mind at all.  It's plenty flavorful on it's own.

I know it may seem a little silly to share a recipe for something that is so basic and simple, but this recipe really deserves to be shared.  This is basically the ultimate French toast.  The outside gets a nice crispy, buttery crust, with just the slightest hint of sweetness.  The inside still remains light and fluffy - no soggy, limp French toast here!

I've made this several times in the past month or so, and I foresee it being made even more as time goes on.  I like to make a few extra pieces, then cut them into "sticks" and reheating them briefly in the oven the next morning.

Best French Toast
adapted from The New Best Recipe
makes 4 to 5 slices

The flour in the soaking custard is what helps it form such a great crust.  Also, using challah or brioche bread makes it feel that much more indulgent.  I like to add a bit of orange zest to the custard as well, but it's definitely optional - I never make a special trip to the store or anything if I don't have one lying around.  

  • 1 large egg
  • 2 Tbs unsalted butter, melted
  • 3/4 cup milk (any fat percentage is fine)
  • 2 tsp  vanilla extract
  • 2 Tbs brown sugar
  • 1-2 tsp grated orange zest
  • 1/2 tsp ground cinnamon
  • 1/3 cup all-purpose flour
  • 1/4 tsp salt
  • 4-5 slices day-old challah or brioche bread, sliced 1-inch thick
  • unsalted butter, for cooking the French toast
Heat a large skillet  over medium heat for 5 minutes (preferably cast-iron, but nonstick will work as well).  

Meanwhile, whisk together the eggs and butter in a shallow dish or pie plate.  Whisk in the milk, vanilla, brown sugar, orange zest, cinnamon, flour, and salt.  Whisk until smooth.

Soak the bread for about 30-40 seconds per side, being careful not to oversaturate the bread (in other words, no need to dunk it and press it down into the custard).

Melt 1 tablespoon of butter in the hot skillet, swirling to cover the whole pan.  Transfer the bread 2-3 slices at a time to the skillet.  Cook until golden-brown, about 1-2 minutes on the first side, then 1 minute on the second.  Continue with the remaining bread, adding 1 tablespoon of butter to the skillet for each new batch.  Serve immediately.


Thursday, November 15, 2012

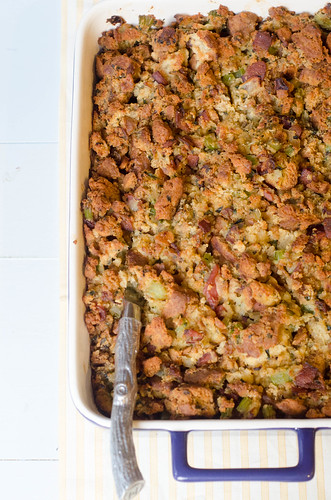
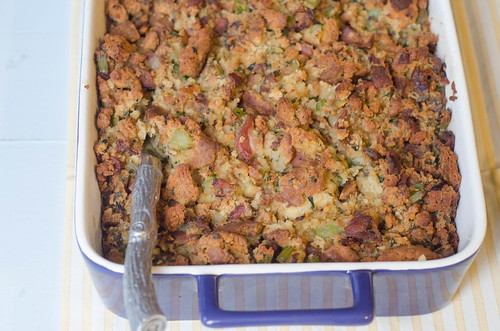
Southern-Style Cornbread Dressing


So do you call the ubiquitous Thanksgiving side stuffing or dressing?  If you call it stuffing, and you don't cook it inside your turkey... well, you're wrong.  Dressing is served alongside your turkey - which is how most of us eat it these days, what with the risks and worries about salmonella and all.  Anyway, it seems like most people from the south call it dressing, and northerners call it stuffing - why the discrepancy, I don't know... but whatever you call it, here's my very favorite version.

A few years ago, I hosted my first Thanksgiving dinner.  As usual, I had a hard time keeping with tradition, and I thought my family might revolt against me.  I served pumpkin soup.  And topped my sweet potatoes with sautéed apples.  And served roasted brussels sprouts and butternut squash.  And in what was perhaps my biggest error, I made dressing out of sourdough bread.  With bacon and apples.  I'll admit it - I liked it.  The dressing was really good.  But it wasn't traditional dressing that my family was used to.  Here in the south, we make dressing with cornbread and biscuits.  Making dressing out of sourdough bread, with fruit in it?  It was practically blasphemous.

Last year when my mom asked me if I wanted to make the dressing for Thanksgiving, I was admittedly a little scared.  So I decided to try and K.I.S.S. (Office, anyone?) and go with a traditional southern version.  But since I can't resist testing the boundaries a little bit, I chose this recipe.  It's traditional in that it's cornbread, onions, celery, and herbs, but it mixes things up a bit by also using brioche bread in combination with the cornbread.  The result is absolutely heavenly.  The traditional taste is there thanks to the cornbread, but you also have these perfect little pillows of bread from the brioche.  With just enough chicken stock to hold it together - but not so much that it's mushy and soggy.  The celery and onions provide just the right amount of sweetness and texture, the herbs give it tons and tons of flavor, and the butter... well that just makes it perfect.  This dressing really is just about as good as it gets.


Southern-Style Cornbread Dressing
adapted from Sara Foster's Southern Kitchen

  • 1/2 lb (2 sticks) unsalted butter
  • 1 large onion, chopped
  • 6 celery stalks, chopped, with 1/4 cup leaves chopped and reserved
  • 1 loaf of challah, brioche, or other soft eggy bread, cut into 1-inch cubes (about 12 cups)
  • about 8 cups cubed cornbread (preferably day-old cornbread)
  • 2 Tbs minced fresh sage
  • 3 Tbs minced fresh parsley
  • 1 1/2 tsp sea salt
  • 1/2 tsp freshly ground black pepper
  • 2-2 1/2 cups low-sodium chicken broth
  • 4 large eggs, lightly beaten
Preheat the oven to 350 degrees and lightly grease a 9x13 inch baking dish.

Melt the butter in a large skillet over medium heat.  Add the onion and celery and cook, stirring occasionally, until the onion is soft and golden (about 5-6 minutes).

In a large bowl, toss the bread cubes (both brioche and cornbread) with the cooked celery and onion, reserved celery leaves, sage, parsley, salt, and pepper.

Pour the chicken broth and eggs over the mixture and mix well to combine and moisten the bread.  If the mixture seems really dry, add more broth as needed.

Transfer to the prepared baking dish and cook 45 minutes to 1 hour, or until the top is golden brown and the dressing is heated throughout.  If the top begins to brown too quickly, cover with foil and continue to bake.  Serve warm.

Note:  The dressing can be assembled and refrigerated overnight before baking.  Just add a little extra chicken broth.


Tuesday, September 4, 2012

Make Ahead Meals: Stromboli


It's pretty much official. While summer isn't over according to the calendar, in most other ways, it's done. Carefree days and nights are gone, school is back in session, and after school activities have started up. I know how easy it is to fall into the "take-out trap" now. You're tired after a long day, and won't be home until it's practically dinnertime. You're just busy.


This is why it is so important to plan, plan, plan, so you can get home, throw something in the oven, and relax for a few quiet minutes while dinner cooks itself, all without the dread of cooking hanging over your head all day.

That's where this stromboli comes in. You can prep this "inside out pizza" the night before or in the morning, then just bake it when you get home. As it bakes, warm up some tomato sauce and throw together a side salad (or roast some vegetables alongside the stromboli for even less work, which is what I do.) Dinner will be markedly better than take-out or fast food, with barely any extra work.

You can customize the fillings as you see fit. I kept it simple here with cheese, pepperoni, and mushrooms. Recently I made an especially delicious version with provolone, mozzarella and parmesan, plus sun-dried tomato chicken sausage and vidalia onions. I'll definitely be enjoying that again soon. Really, anything you'd normally put on a pizza would be great here - any combination of veggies, a simple cheese, sausage and pepper or vegetable combination, barbecued chicken, or even spinocolli!
I took this to a friend who had recently had a baby, and it was a great meal for them as well. Make two, share one!

More Make-Ahead Meal Ideas:
Classic Macaroni & Cheese
Shrimp & Feta Quinoa
Cheesy Chicken & Basil Stuffed Potatoes
Baked BBQ Pork Taquitos
Foil-Baked Fish (Greek-style and Mexican-style)
Crockpot Tequila-Lime Turkey Chili
Crockpot Korean Beef Tacos
Spicy Chicken & Rice Casserole
Vegetable Enchiladas


Make-Ahead Stromboli
adapted from Cook's Illustrated.

Note:  While any combination of toppings can be used here, be careful not to over-fill the stromboli. The entire rectangle doesn't need to be covered. If the toppings are scattered evenly over the cheese, it will be fine. Adding too many toppings will make the stromboli harder to roll, and it could tear. No one wants a leaky stromboli!
  • 1 lb. pizza dough
  • flour, for the surface
  • 1 1/2 cups shredded mozzarella cheese
  • 1/2 cup shredded Parmesan cheese, plus more for sprinkling
  • 4 oz. pepperoni
  • 4 oz. sliced mushrooms
  • oil, for brushing
  • pizza sauce, for serving
Preheat the oven to 400 degrees. Line a baking sheet with parchment paper and brush lightly with oil.

On a well-floured surface, roll the pizza dough into a 10x12 inch rectangle, with the long-side facing you. If you are having trouble getting it to stretch without springing back, let it rest for about 10 minutes, then try again.

Sprinkle the dough with the cheeses, leaving about 1/4-1/2 inch border around the edges. Top with pepperoni and mushrooms, scattering them evenly over the cheese.

Brush the border with water. Starting with the side closest to you, begin rolling the pizza dough tightly into a long cylinder. Carefully transfer to the prepared baking sheet, and brush liberally with oil and sprinkle with the reserved Paremsan cheese.

Cover with foil that has been sprayed with non-stick cooking spray, then bake 20 minutes. Remove the foil and bake an additional 20-25 minutes, until the outside is golden brown. Allow to cool about 10 minutes before slicing and serving. Serve with pizza sauce, for dipping.

Make Ahead Instructions: Prepare the stromboli as directed. After it's assembled (but not baked), it can be refrigerated for up to 24 hours. When ready to bake it, add 5 minutes to the covered baking time (so bake 25 minutes covered with foil, remove foil, and bake 20-25 minutes).


Tuesday, August 7, 2012

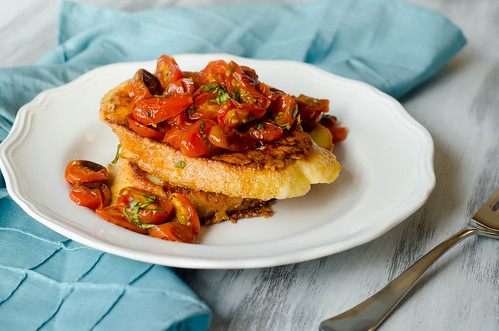
Savory Parmesan French Toast with Tomato-Basil Topping


Sometimes I make a recipe not because I know that without a shadow of a doubt that it'll be awesome, but more so that I'm intrigued.  Sometimes it blows up in my face and we have cereal or grilled cheese for dinner, but sometimes it results in a great dinner - like this grilled chicken salad with blueberries and corn, okra tacos, chorizo and sweet potato lettuce wraps, or this blueberry-BBQ salmon.  You win some, you lose some.

We're all familiar with french toast for breakfast - topped with a pat of butter and fresh fruit, drizzled (umm drenched) with syrup... always a favorite.  But how about making a savory version?  For dinner, even?  This recipe definitely intrigued me, but coat pretty much anything with parmesan cheese and top it with roasted tomatoes, and I'm sure I'll love it.

And of course, I did.  The toast gets a double dose of the cheese - some is shredded into the egg mixture that you use to soak the sliced bread, then the rest is used to encrust the bread and form a cheesy crust.  The tomatoes are briefly roasted in the oven and come out just garlicky enough, slightly sweetened, and caramelized.  Mixed with a dash of balsamic vinegar and some fresh basil, and you have a super awesome topping for the cheesy toast.  I pretty much always have all the ingredients for this savory french toast on hand, so I foresee it becoming a staple in our house - for a quick and easy weeknight dinner, or a lazy weekend brunch.  Don't be scared - take a leap of faith and try savory French toast!

Savory Parmesan French Toast with Tomato-Basil Topping
adapted from America's Test Kitchen, Simple Weeknight Favorites
serves 4

  • 1 1/2 lbs grape tomatoes, halved
  • 6 garlic cloves, sliced thin
  • 6 Tbs olive oil, divided
  • kosher salt and freshly ground black pepper
  • pinch sugar
  • 2 tsp balsamic vinegar
  • 3 Tbs chopped fresh basil
  • 3 large eggs
  • 2 cups milk
  • 1/4 cup all-purpose flour
  • 1/4 cup finely grated Parmesan cheese + 2 cups shredded on the large wholes of a box grater
  • 8-10 (1-inch) slices Italian or French bread
Heat oven to 450 degrees and adjust the rack to the middle position.  Toss the tomatoes with garlic, sugar,  and 2 tablespoons of the oil.  Season with salt and pepper and arrange them cut side up on a rimmed baking sheet.  Roast until the skins begin to brown on bottom, about 20 minutes.  Allow to cool slightly, then transfer to a bowl and toss with the basil and balsamic vinegar.  Set aside.

Meanwhile, whisk the eggs in a shallow dish with milk, flour, finely grated parmesan, 1/4 tsp salt, and 1/4 tsp pepper.  Spread the shredded parmesan in another shallow dish or large plate.

Working 4 pieces of bread at a time, soak the slices in the milk mixture for 5 minutes, flipping halfway through.  One at a time, remove each slice from the mixture, then transfer to the shredded parmesan, pressing gently on both sides to adhere the cheese to the bread.  Repeat with the remaining bread

Heat 2 tablespoons of the oil in a 12-inch nonstick skillet over medium heat until shimmering.  Cook 4 slices of bread turning once, until browned and crispy, about 2-3 minutes per side.  Transfer to a large plate and cover loosely with foil.  Repeat with the remaining 2 tablespoons of oil and the remaining 4 slices of bread.

Serve topped with the roasted tomato mixture.


Wednesday, June 27, 2012

Cherry & Goat Cheese Crostini


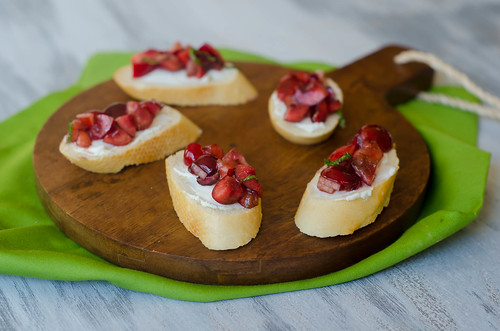
I look forward to cherry season all year long.  Like any good food blogger, I save countless recipes that I can't wait to try.  And without fail, the first few pounds of cherries that we buy go straight from the bag into our mouths.  Once I get that out of my system, I start churning out recipes.  Like this crostini.

When we had our best friends over for dinner a few weeks ago, for some reason I was really struggling with what to serve for an appetizer.  I wanted to do some sort of bruschetta or crostini, but nothing was coming to mind, so I just started browsing my favorite food blogs.  Of course Annie had the answer - cherry and goat cheese crostini!

Since I was throwing this together at the last minute, I didn't have time to go to the store.  So I just improvised and hoped for the best.  I assembled what I thought to be way more than we'd eat, but they were all gone pretty quickly.  This crostini is super fast and easy, and I'll definitely be enjoying it all summer long.

Fresh Cherry and Goat Cheese Crostini
inspired by Fine Cooking, via Annie's Eats

  • 1 cup pitted and chopped fresh cherries
  • 1 shallot, finely diced
  • 2 Tbs chopped fresh mint
  • 1 Tbs chopped fresh basil
  • splash of balsamic vinegar
  • splash of olive oil
  • salt to taste
  • 4 oz. fresh goat cheese, at room temperature
  • about 18 1/2-inch thick baguette slices, lightly toasted
In a medium bowl, mix together the cherries, shallot, mint, basil, balsamic vinegar, and olive oil.  Taste and season with salt as needed.

Spread a thin layer of goat cheese on each piece of bread, then top with the cherry mixture.  Serve immediately.


Friday, April 13, 2012

Balsamic Strawberry & Goat Cheese Flatbread


I've been pretty obsessed with strawberries this spring, but I've been even more obsessed with the strawberry-balsamic combo.  It all started with this strawberry-caprese salad, and it's continued into this flatbread and even a dessert (recipe coming soon!).  So given this recent love, I was absolutely ecstatic to find a strawberry-balsamic vinegar at a local oil & vinegar store (yes, a whole store that sells all sorts of oils and vinegars.  Yes, I'm in love).

One Saturday afternoon, we decided to have a casual snacky dinner - we had some cheeses leftover from various gatherings and recipes, some hummus, and some other little things that needed to be used up.  So we just made that dinner.  However, I was kind of in the mood to cook, and was itching to use my new vinegar, so I also whipped up this flatbread.  We called some neighbors, and before we knew it, we were all outside watching the kids play, drinking a glass of wine, and stuffing our faces.

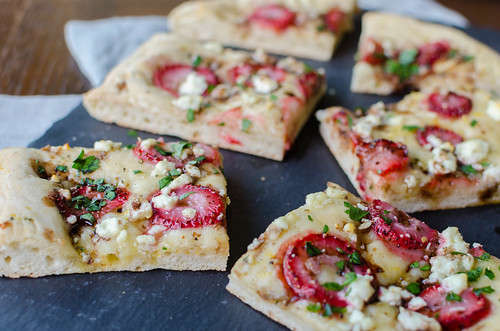
It's a basic pizza dough with a little lemon zest kneaded in, then drizzled with olive oil, some lemon juice, thinly sliced strawberries, crumbles of goat cheese, baked, and then finished with a sprinkling of basil and a drizzle of balsamic vinegar.  Heaven.  The strawberries get so flavorful when roasted in the oven, and then the addition of lemon zest brightens up the flavors.

This flatbread was a great addition to our little buffet, but I also think it would make a great appetizer for a dinner party, served as lunch with a side salad, or as part of a brunch.  It's a little bit sweet, a little bit savory, and completely delicious.  Strawberries = love.


Balsamic Strawberry & Goat Cheese Flatbread
inspired by Joy the Baker

  • 1 lb of pizza dough
  • zest and juice of 1 lemon
  • olive oil, for drizzling
  • 1 cup thinly sliced strawberries
  • about 1/2 cup crumbled goat cheese
  • good balsamic vinegar
  • 1-2 basil leaves, minced
Preheat the oven to 375 degrees.

On a well-floured surface, sprinkle about half the lemon zest over the pizza dough.  Knead it into the dough until well-incorporated, and then press the dough into a rectangle that measures about 12x9 inches (it doesn't have to be exact).  Drizzle with olive oil and about 1 tablespoon of the lemon juice.

Sprinkle the strawberries over the dough, followed by the goat cheese, and then drizzle lightly with the vinegar.

Bake 25-30 minutes, or until the dough is cooked through and just turning golden.  Drizzle with a little more balsamic vinegar and sprinkle with basil.  Cut into squares and serve warm or at room temperature.


Thursday, March 8, 2012

Everything Sandwich Bread


I really really really love bagels.  And while I've made them once, it was kind of a cheater recipe, and I've been dying to try them for real.  A few weeks ago I got a major craving for everything bagels, and thought maybe I'd try them over the weekend.  Well, we ended up having a lot to do and I didn't really have time for it, but the craving never went away - and why I didn't just go to the bagel place for one, I don't know.  I like to make things complicated.  So anyway, I thought of a way that I could satisfy my craving and save on time - make sandwich bread flavored with the everything spices!

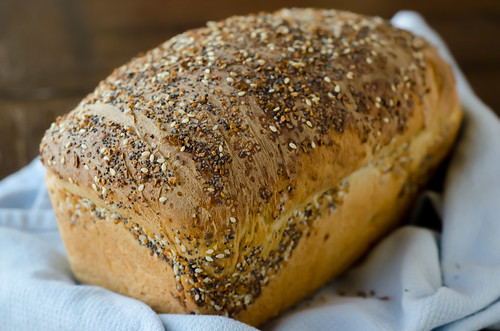
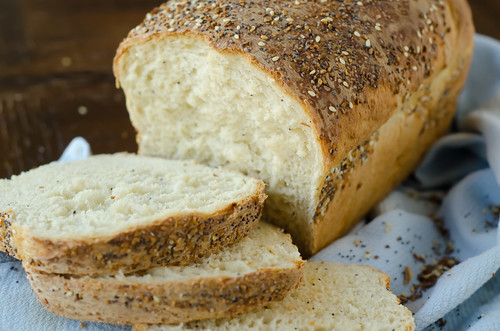
I took my favorite basic sandwich bread dough and mixed some of the spice blend right into the dough.  I then sprinkled more of the spice blend over the top.  The result?  Everything perfection!  This bread really does have the flavor of an everything bagel.  And it makes an incredible breakfast sandwich - melty cheese, a fried egg, and bacon.  Amazing.  Also great?  A sandwich at lunch - I loved it with cucumbers, tomato, avocado, and lettuce.  And it makes a pretty great BLT as well.  And a great turkey sandwich.  And great cheese toast.  Really it's great with just about.... everything (see what I did there?).


Everything Sandwich Bread
adapted from Baking Illustrated's American Sandwich Bread

*the onions and garlic on the top may get a little too brown during the cooking time.   Check on them about half-way through, and if they are getting too dark too quickly, tent the loaf with foil.
  • 3 3/4 cups (18 3/4 oz) all-purpose flour
  • 2 tsp kosher salt
  • 1 cup cold buttermilk
  • 1/3 cup boiling water
  • 2 Tbs unsalted butter, melted
  • 3 Tbs honey
  • 1 envelope (about 2 1/4 tsp) instant yeast
Everything Mix
adapted from Annie's Eats
  • 2 tsp poppy seeds
  • 2 tsp sesame seeds
  • 2 tsp dried minced garlic
  • 2 tsp dried minced onion
  • 3/4 tsp kosher salt
Adjust one oven rack to the lowest position, and another to the middle position.  Heat the oven to 200 degrees.  When it is preheated, maintain the temperature for 10 minutes, then turn off the oven.

Bring the water to a boil in a small saucepan.  Remove from heat and add the cold buttermilk and stir to combine.

Mix 3 1/2 cups of the flour and the salt in the bowl of a stand mixer fitted with a dough hook.  Add the buttermilk/water mixture, butter, honey, and yeast to a liquid measuring cup.  Turn the mixer on low, and add the liquid in a slow stream, increasing the speed of the mixer as you go to medium.  Continue mixing until the dough is smooth and satiny, stopping to scrape the dough from the hook as needed. Sprinkle in 1 tablespoon of the everything spice mix.  Knead about 10 minutes, adding flour 1 Tablespoon at a time, as necessary to keep the dough from sticking to the sides of the bowl.

Turn the dough out onto a lightly floured surface and knead to form a smooth ball, about 15 seconds.

Place the dough in a lightly oiled bowl, rubbing the dough around the bowl to coat with the oil.  Cover tightly with plastic wrap and place the bowl in the oven until the dough doubles in size, 50-60 minutes.

Turn out onto the floured surface and gently press the dough into a rectangle that is 1 inch thick and 9 inches long.  With the long side facing you, roll the dough firmly into a cylinder, pressing with your fingers as you roll to make sure the dough sticks to itself.  Turn the dough seam-side up and pinch it closed.

Place the dough seam-side down in a greased 9x5 inch loaf pan, and press it gently to make sure it touches all four sides of the pan.  Sprinkle with the everything spice mix (you don't have to use all of it - I think I used a few more teaspoons of it), lightly pressing with your hands to adhere the spices to the dough.  Cover with a clean kitchen towel and allow to rise in a warm spot until the dough almost doubles in size, 20-30 minutes.

Preheat the oven to 350 degrees.  Place an empty baking pan on the lowest rack of the oven.  Bring 2 cups of water to a boil and pour  into the empty pan.  Set the loaf onto the middle rack, and bake until an instant-read thermometer inserted into the center of the loaf reads 195 degrees, about 40-50 minutes.

Remove the bread from the pan and cool to room temperature on a wire rack.  Slice and serve.


Sunday, January 22, 2012

Kale & Bacon Omelet Baked in a Bread Boule


There are certain words that just make my skin crawl.  I won't bore you with the (longish) list, but one of the biggest offenders is "brinner."  I don't know why I hate it so much, but it just annoys me to no end when people say it.  Just say "breakfast for dinner."  It's really not that many more syllables.  And saying "brinner" doesn't really specify what you're eating:  it could be eggs and bacon, waffles or pancakes, omelets, oatmeal, cereatl, etc.  It's like saying that you're having dinner for dinner.  Or lunch for dinner.  I just don't get it.  However, I'm certainly not against the concept.  One of my favorite dinners growing up was eggs, grits, and biscuits.  And I'm up for pancakes and waffles any time of the day.

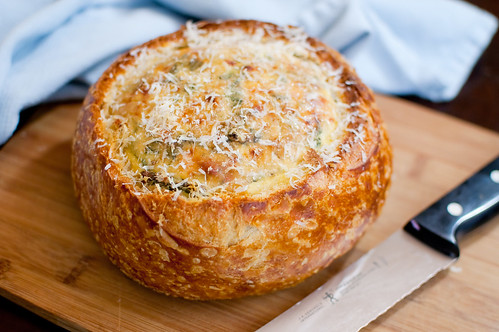
This is one of those ideas that I was annoyed that I didn't come up with on my own.  Bake an omelet in a bread boule.  Seriously, how ingenious is that?!  This particular omelet was really wonderful - lots of kale, Parmesan, ricotta, and just a little bacon.  But you could certainly mix up the add-ins with infinite possibilities.  Anything you like in an omelet or quiche would be wonderful here.  I am pretty partial to this combination though, partly because it is one of the only times Joey has actually enjoyed kale.  And not only did he like it, but he ate all the leftovers for breakfast for the rest of the week.  Tha'ts definitely a success, considering that he rarely eats breakfast at all.

This was such a unique presentation of an omelet.  I can't wait to play around with different variations.  And I think it would be so adorable to bake individual servings in sourdough dinner rolls (or really any roll that is hard and crusty).  The possibilities are endless!


Kale & Bacon Omelet Baked in a Sourdough Bread Boule
barely adapted from Virginia Willis, Basic to Brilliant, Y'all!
  • 2-3 thick-cut slices of bacon, cut into 1-inch pieces
  • 1 onion, chopped
  • 5 cups kale cleaned, stems removed, and chopped
  • kosher salt and freshly ground black pepper
  • 2 Tbs water or broth
  • 6 large eggs, lightly beaten
  • 1/2 cup freshly grated Parmigiano-Reggiano cheese, plus more for serving
  • 1/4 tsp red pepper flakes
  • 1 tsp Dijon mustard
  • 3/4 cup ricotta cheese (part-skim is fine)
  • 1 8-inch round sourdough bread boule
Preheat the oven to 350 degrees and line a baking sheet with parchment paper.

In a large skillet, cook the bacon until crisp and brown, 5 to 7 minutes.  Use a slotted spoon to transfer to a paper towel to dry.  Pour off all but 2 teaspoons of the fat.  Alternatively, if you want to make a vegetarian version, skip the bacon and heat 2 teaspoons of canola oil over medium heat until shimmering.

Add the onion and cook until softened and golden, stirring often, about 4 to 6 minutes.  Decrease the heat to medium-low, add half the greens, and toss until they begin to wilt, about 1 minute.  Add the remaining greens and season well with salt and pepper.  Add the water, decrease the heat to low, and cover.  Cook, stirring occasionally, until the greens are wilted and tender, about 15 minutes.  Use a slotted spoon to transfer the greens to a large bowl, leaving any excess water in the skillet.

Meanwhile, prepare the bread boule.  Slice off the very top of the bread and then remove the inside bread in chunks, leaving a shell.  Reserve the bread for another use (croutons, bread crumbs, etc).  Place the bread boule on the prepared baking sheet.

To the greens, add the eggs, 1/4 cup of the grated cheese, the reserved bacon, the red pepper flakes, and the Dijon mustard.  Fold in the ricotta and season with salt and pepper.

Pour the filling into the bread boule and sprinkle the top with the remaining 1/4 cup cheese.  Bake 45 to 50 minutes, or until the eggs are set.  Allow to cool at least 10 minutes, and sprinkle with reserved cheese. Slice into wedges using a serrated knife, and serve.


Thursday, November 17, 2011

Maple-Bacon Biscuit Bake


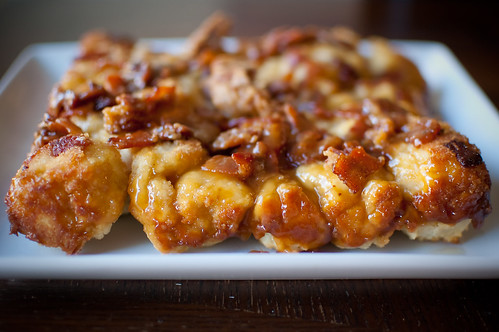
I feel like I should simultaneously apologize and say "You're welcome" for posting this recipe.  It is so bad but so good at the same time.  Bad/good that it is prepped and ready in under an hour.  Bad/good that it is sinful and decadent.  Bad/good that it makes a lot of biscuts.  So you can hoard it all for yourself or share the wealth with several people.

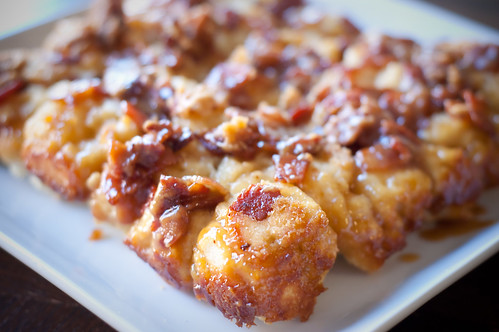
It's sort of a cross between an upside down cake and monkey bread.  The maple-bacon mixture is poured into the bottom of a pan, and then biscuit dough is dropped over it.  After a quick bake in the oven, it is inverted onto a platter and then served monkey bread-style.  Just grab a biscuit and chow down.  Some of the bacon-maple mixture did stick to the pan, but I just scraped it off onto the biscuits.  I do think it would have been better to have lined the pan with parchment though.  I've added that step in my version below.


I think this would be a great treat to make if you are hosting guests in the coming week.  I would say you should make it Thanksgiving morning, but I personally try to eat light and healthy for breakfast - I want to save my calories for the big meal!  But if you are one of those crazies (like me) who gets up early to shop on Black Friday, this would certainly be a welcome thing to come home to after a morning/night of fighting the crowds. 


It's hard to say whether this is best served hot from the oven or at room temperature.  Obviously it's hard to beat it when it's fresh from the oven, but once it cools for a bit, the bacon-maple mixture hardens into sort of a candy.  Honestly, I'm not one of those people who thinks bacon is great in desserts, but this is really wonderful.  So who knows, maybe I'm a convert and you'll be seeing some bacon cupcakes on here soon ;-)


Maple-Bacon Biscuit Bake
adpated from King Arthur Flour


Maple-Bacon Syrup
  • 8 oz bacon, cut into 1/2-inch pieces
  • 1/3 cup brown sugar
  • 1/4 cup all-purpose flour
  • 1/4 cup maple syrup
  • 2 Tbs reserved bacon fat
Biscuits
  • 2 cups all-purpose flour
  • 2 tsp baking powder
  • 1/2 tsp salt
  • 4 Tbs cold butter
  • 1 cup cold buttermilk
Preheat the oven to 475 degrees.  Line a 9-inch round pan or 8-inch square pan with parchment paper, and spray with cooking spray.

Cook the bacon in a skillet until browned and crispy.  Use a slotted spoon to transfer to a paper towel, and reserve 2 tablespoons of the rendered fat.

In a medium bowl, whisk together the syrup, flour, brown sugar, and rendered fat.  Spread over the bottom of the baking pan, and sprinkle the bacon evenly over the top.

For the biscuits, whisk the dry ingredients together in a mixing bowl.  Drop the butter into the mixture, and using your fingers, a pastry blender, or 2 knives, work it into the dry ingredients until the mixture is crumbly and has pea-sized pieces of butter.  Add the buttermilk, and stir to make a sticky dough.

Drop the dough over the maple-bacon mixture using a cookie scoop or large spoon.

Bake for 10 minutes, turn off the oven, and leave the pan in the oven for an additional 5 to 10 minutes, until the biscuits are golden brown.

Remove from the oven and immediately invert onto a serving plate.  Lift off the pan and the parchment paper, and serve.


Thursday, October 20, 2011

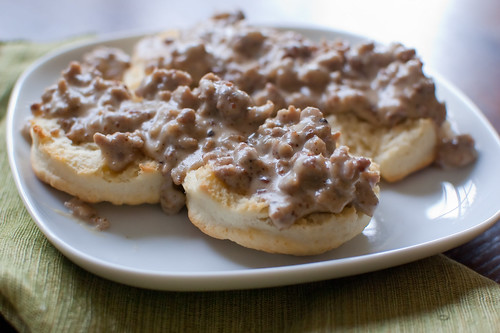
Biscuits and Gravy


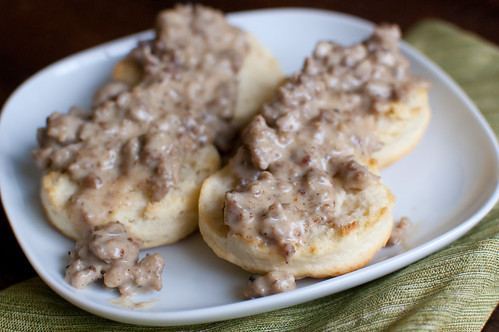
"It smells like my grandmother's house in here" is possibly one of the greatest compliments you could hear from your husband.  That's what Joey said as I cooked this breakfast - biscuits baking in the oven, sausage browning in the cast iron skillet on the stove...  it's definitely homey and comforting.  Biscuits and gravy is one of my favorite breakfasts, but I hadn't indulged in it in probably 7 years.  However, when I saw my friend Courtney post this, I suddenly NEEDED to make them.  Immediately.

I have two biscuit recipes that I toggle between, these fluffy buttermilk biscuits and easy drop biscuits.  But I decided to make the ones Courtney posted because I was intrigued by cream biscuits.  They use heavy cream as the fat source instead of butter, but they were somehow still light, flaky, and buttery.  And they came together very quickly, which is always a plus.  The sausage gravy is really easy too - just brown the sausage, then use the rendered fat as the base for the gravy.  I started browning the sausage as the biscuits were cooking in the oven, and it was all done around the same time.

I love comfort foods as the weather cools down, and this is a great breakfast for lazy weekend mornings.


Cream Biscuits
adapted from The New Best Recipe, via Cook Like a Champion
makes 8 biscuits
  • 2 cups all-purpose flour, plus extra for dusting your work surface
  • 2 tsp sugar
  • 2 tsp baking powder
  •   3/4tsp kosher salt
  • 1 1/2 cups heavy cream

Place oven rack in the upper-middle position and preheat oven to 425º. Line a baking sheet with parchment paper.

In a medium bowl, whisk together flour, sugar, baking powder and salt. Stir in 1 1/4 cups of cream with a wooden spoon until a dough forms, about 30 seconds. Turn the dough out onto a lightly floured surface, leaving behind any flour left in the bottom of the bowl. Use the remaining 1/4 cup of cream to moisten any flour left in the bowl and add to the dough. Gather into a ball and knead for about 30 seconds or until smooth.

Use your hands to shape the dough into a 3/4-inch thick circle. Using a 2 1/2-inch floured cutter, cut the biscuits into rounds and place on prepared baking sheet. Reshape the dough once to cut additional biscuits.To make ahead of time, wrap the baking sheet in plastic and refrigerate for up to 2 hours before baking. Bake biscuits until golden brown, about 15 minutes, rotating the pan halfway through baking.

Sausage Gravy
adapted from Food Network, via Cook Like a Champion
  • 12 ounces bulk pork sausage
  • 2 Tbs all-purpose flour
  • 2 cups milk (low-fat is fine)
  • Salt and freshly ground black pepper, to taste

Heat a medium skillet (preferably cast iron) over medium-high heat. Add the sausage and cook until well-browned, about 7 minutes, breaking it up with a wooden spoon. Using a slotted spoon, transfer to a plate and set aside, keeping the rendered fat in the pan.


Sprinkle the flour into the skillet and whisk for about 1 minute. Continue whisking while slowly adding the milk. Bring to a boil, then reduce heat and simmer for about 2 minutes. Add a generous pinch of salt and pepper to taste. Stir in sausage and serve immediately over split biscuits.


Thursday, October 6, 2011

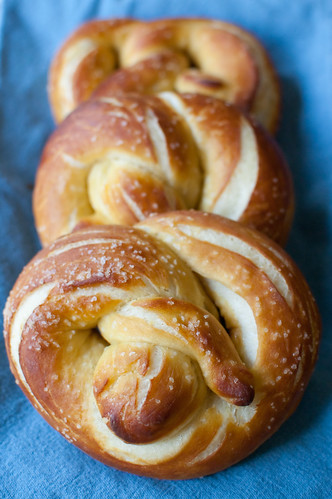
Buttery Soft Pretzels


It's funny how our lives and priorities change over the course of just a few years.  Five years ago, it took a wedding or a funeral to cause us to miss a Georgia Tech home football game.  And it had to be a close friend or family member at that (kidding, kind of).  This year, we've only gone to one game.  We spend our Saturday mornings at Caroline's soccer games and now cuddling with our new baby.  And while I do miss seeing our friends and tailgating, I love our family time even more.

Now we watch the games at home in the comfort of our living room, during Caroline's naptime.  And I like to make some sort of fun snack to munch on while we watch.  While I made ham and cheese stuffed pretzel bites a few years ago, I had not yet tackled classic soft pretzels.  They were actually pretty easy and low maintenance.  The only "tricky" part was shaping and boiling, but even those steps were pretty easy once you got the hang of it. 

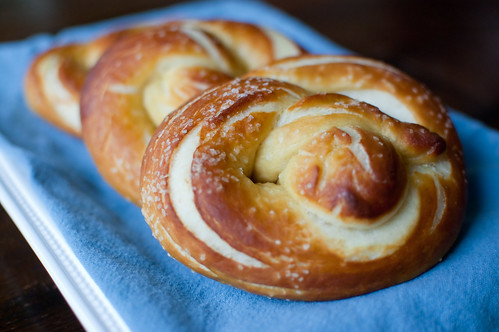
These are pretty big pretzels, but I think you could easily make them smaller.  Which I will probably do when I make these for a tailgate or party.  While huge mall food court pretzels are great, when you have other food in your spread it makes more sense to serve smaller portions.

I followed the recipe as written, but instead of brushing the pretzels with egg wash, I brushed them with butter - both before and after baking.  Partly because of Caroline's egg allergy, but mostly because I love the buttery pretzels at the mall.  Annie of Annie's Eats has great step-by-step pictures of the shaping process, and she also did some testing on making these ahead and freezing.  So if you are interested in that, check out her post.


Soft Pretzels
adapted from Alton Brown, via Annie's Eats
makes 8 large pretzels

For the dough:

  • 1½ cups warm water (110-115° F)
  • 1 Tbs sugar
  • 2 tsp kosher salt
  • 2¼ tsp instant yeast
  • 22 oz all-purpose flour (about 4½ cups)
  • 4 Tbs unsalted butter, melted
  • Vegetable oil
For finishing:
  • cooking spray
  • 10 cups water
  • 2/3 cup baking soda
  • 4 Tbs unsalted butter, melted
  • kosher (or pretzel) salt

To make the dough, combine the water, sugar, salt and yeast in the bowl of a stand mixer fitted with the paddle attachment.  Mix on low speed until the yeast is dissolved.  Add the flour and melted butter and mix until the dough just comes together.  Switch to the dough hook and knead on medium speed until the dough is smooth and clears the sides of the bowl, about 5 minutes.  Transfer the dough to a bowl lightly greased with vegetable oil, turning once to coat.  Cover with plastic wrap and let rise in a warm place, about 50-55 minutes or until doubled in bulk.

Preheat the oven to 450 degrees.  Line two baking sheets with parchment paper and spray lightly with cooking spray.  Bring the water and baking soda to a boil in a large saucepan or stockpot.

Meanwhile, divide the dough into 8 equal pieces (a kitchen scale makes this very easy).  Working one piece at a time, roll the dough into a 24-inch long rope.  Make a U-shape with the dough, and holding the ends of the rope, cross them over each other and onto the bottom of the U-shape to form a pretzel.  Transfer the pretzel to the baking sheet and repeat with the remaining dough.

Working 1-2 pretzels at a time, place into the boiling water and boil for 30 seconds, flipping once.  Use a slotted spoon or skimmer to remove the pretzels from the water and transfer back to the baking sheet.  Repeat with all the pretzels.

Using 2 tablespoons of the melted butter, brush the pretzels with the butter.  Sprinkle each pretzel with salt, and bake until they are a dark golden-brown, about 12-14 minutes. Brush with the remaining butter, transfer to a cooling rack for at least 5 minutes, and serve.


Thursday, September 8, 2011

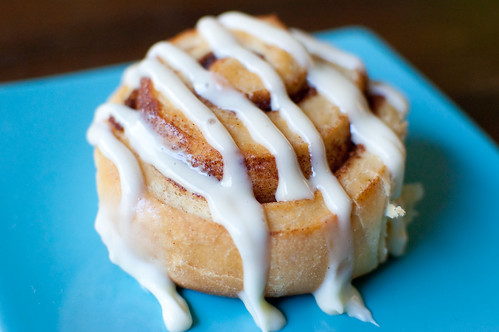
Overnight Cinnamon Rolls


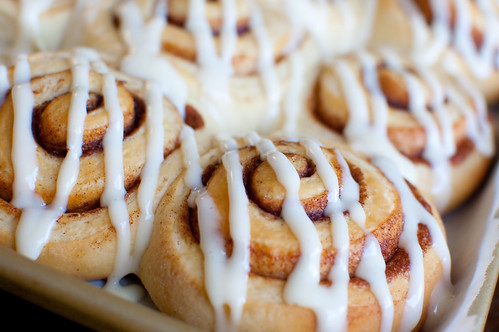
A few weeks ago I woke up one morning and just had to have a cinnamon roll.  It was bad.  And while I sadly didn't get one that day, I decided that I'd make them for the following morning.  I've made and shared a few cinnamon roll-ish things before, but I'd never made classic, straight up cinnamon rolls.  In my opinion, Peter Reinhardt is the authority on all things bread, so I turned to him for what I knew would be a fool-proof recipe.

And it was!  While this is a time-consuming recipe if you look at the total time, the vast majority is inactive time - refrigerate overnight, allowing the dough to rest, proofing the shaped rolls... I would say there is less than 30 minutes of active prep time involved.

This is the second time I have used a Reinhardt recipe (the first was when I made Cheese Danish), and it is probably my favorite dough.  It is so soft, silky, and smooth.  And it rolls out so easily and beautifully.  You have the option to add raisins and/or nuts to the filling, but I opted to K.I.S.S. (The Office, anyone?) and just go with a classic cinnamon-sugar filling.

Since I've never made cinnamon rolls before, I can't compare these to other popular recipes (Alton Brown, Pioneer Woman, Cook's Illustrated...) but I can say that they were pretty darn delicious.  Soft and sweet, with just the right amount of spice from the cinnamon and nutmeg, and the cream cheese frosting definitely  added the perfect touch.  Now that I have a great base recipe, I can't wait to try countless variations for add-ins and flavorings.

This recipe makes 24 rolls, and while I briefly considered halving or even quartering the recipe, I ended up making the whole thing and freezing about half.  Now I can have an (almost) fresh cinnamon anytime the craving strikes!


Overnight Cinnamon Rolls
barely adapted from Peter Reinhardt's Artisan Breads Every Day
makes 24 cinnamon rolls

Dough
  • 6 1/4 cups (28 oz) all-purpose flour
  • 1 Tbs kosher salt
  • 6 Tbs granulated sugar
  • 5 tsp instant yeast
  • 2 cups + 2 Tbs lukewarm milk
  • 1/2 cup melted butter (unsalted)
  • zest of 1/2 lemon
Filling
  • 3 Tbs ground cinnamon
  • 3/4 cup sugar
  • 1/4 tsp ground nutmeg
  • up to 4 Tbs melted butter, for brushing
Cream Cheese Frosting
  • 4 oz cream cheese, softened
  • 1/4 cup melted unsalted butter
  • 1 cup confectioners' sugar, sifted
  • 1 tsp vanilla extract
  • 2-3 Tbs heavy cream (more or less depending on how thick you want your icing)
  • pinch of salt
To make the dough, combine the flour, salt, and sugar in the bowl of stand mixer.  Whisk the yeast into the milk until dissolved, then pour the mixture into the dry ingredients, along with the butter and lemon zest.  Use the paddle attachment to mix the ingredients on the lowest speed for about 1 minutes, or until the dough starts to form a soft, shaggy ball.

Switch to the dough hook and mix on medium-low speed for about 4 minutes, adding more flour or milk as needed to create a smooth, soft, slightly sticky ball of dough.

Increase the speed to medium and mix for an additional 2 minutes, or until the dough is very soft, supple, and tacky, but not sticky.

Transfer the dough to a lightly floured surface and knead for about 1 minute, then form it into a ball.  Place the dough in a large, lightly oiled bowl, cover tightly with plastic wrap, and refrigerate overnight or up to 4 days.

On baking day, remove the dough from the refrigerator about 3 hours before you plan to bake.  Divide the dough in half and form each half into a ball.  Cover with plastic wrap or a lint-free kitchen towel, and allow to rest for about 20 minutes.

On a well-floured work surface, foll each ball of dough into a 12x15 inch rectangle.  To form a rectangle, roll from the center to the corners, then out to the sides.  If the dough starts to resist or is shrinking back, let it rest for 1 minute then continue rolling.  The dough should be between 1/4 and 1/2-inch thick.

Make the cinnamon-sugar mixture by whisking the cinnamon and nutmeg into the sugar.  Brush the surface of the dough with the melted butter over the dough, and sprinkle the cinnamon-sugar over the surface, leaving a 1/4-inch border.

Roll up the dough like a rug, rolling from the long-side of the rectangle to form a tight log.  Use your hands to compress/shape the log into a 12-inch long log, and use a sharp knife or (unflavored) dental floss to cut into 1-inch slices.  Place the rolls on a parchment-lined baking sheet (or in 2 round cake pans), spacing them about 1 1/2 inches apart.

Repeat the rolling, topping, and shaping with the other ball of dough.

Mist the tops with spray oil and cover loosely with plastic wrap.  Let rise at room temperature for 90 minutes to 2 hours, or until the dough swells noticeably and the buns begin to expand into each other.

About 15 minutes before baking, preheat the oven to 350 degrees.

Bake for 10 minutes, then rotate the pan and bake for an additional 5 to 15 minutes, or until the buns are golden-brown.

Meanwhile, make the topping.  Combine the cream cheese, butter, and sugar in a mixing bowl.  Stir vigorously for 2-4 minutes, or until all the ingredients are evenly incorporated and smooth.  Add the vanilla, salt, and 1 tablespoon of the heavy cream and mix to incorporate.  Add additional heavy cream, about 1 teaspoon at a time, until you reach your desired consistency.  I wanted to pipe the frosting vs spreading it, so I wanted mine a bit thinner, so I added more heavy cream.

Allow the buns to cool for 5 minutes, then top with the glaze. 


Friday, August 26, 2011

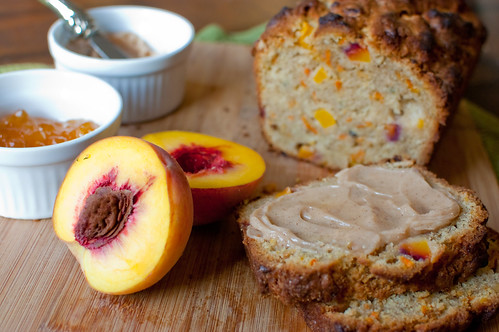
Spiced Peach Carrot Bread


I'm writing a guest post today for Jen over at Beantown Baker, and I'm sharing a recipe for Spiced Peach Carrot Bread.  Go visit her site for the recipe!  Happy Friday!


Monday, July 18, 2011

Cheese & Herb Pull-Apart Bread


A pretty standard meal around here is pasta, bread, and salad.  And not that I get bored, but I do like to mix things up a bit - either by trying new pasta dishes, different salads, or variations on bread.  Admittedly, that is probably what I do the least of though - it's just so easy to just grab a baguette from the bakery at the grocery store and heat it up.  I have a few recipes that I make when I want to get fancy - like these herbed dinner rolls or Garlic and Herb Ciabatta Bread, but for the most part I go with the old standby.

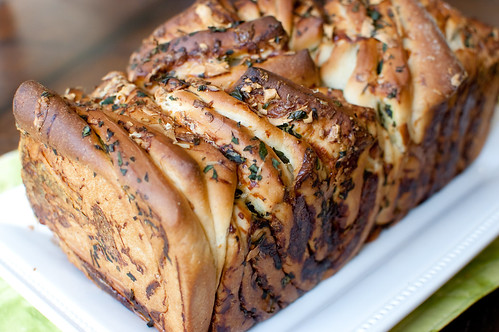
This cinnamon-sugar pull-apart bread has been popping up all over the place, and while I can't wait to try that as well, I was extra excited to try this savory variation.  It is layers of soft bread, filled with garlic, herbs, cheese, and then drizzled with melted butter.  The combinations of herbs and cheeses are pretty much infinite, so just use what you have on hand.  I think for the herbs I used basil, chives, parsley, oregano, and thyme.  And for the cheese I used cheddar, gouda, and Parmesan. 

This method seems imrpressive, but it is actually really easy.  It's a pretty standard yeasted dough, but when it comes time to shape it, it is rolled out into a large rectangle, sprinkled with the filling, then cut into squares and stacked into the loaf pan.  You can be as anal or free form as you want, but I preferred measuring my squares to have them be as close in size as possible (I'm a scientist by training - I really can't help the compulsions). 

My favorite part of this bread was the crunchy outer pieces mixed with the soft and doughy inside.  And of course you can't go wrong with gobs of melted cheese.  This was such a fun bread to make, and it would be especially well-suited to serve to company.  Served with pasta, grilled steaks, a roasted chicken - it's so versatile and would be a great addition to pretty much any meal.


Cheese & Herb Pull-Apart Bread


Bread
  • 2 cups bread flour
  • 1 cup all-purpose flour
  • 1 cup warm water
  • 1 packet instant yeast (2 1/4 tsp)
  • 3 Tbs sugar
  • 3/4 tsp salt
  • 2 Tbs butter, melted
Filling
  • 3-4 cloves garlic, minced
  • 3/4 cup fresh herbs (any combination that suits you)
  • 1 cup cheese (I used cheddar, gouda, and Parmesan)
  • 4 Tbs butter, melted
  • kosher salt and freshly ground black pepper
In the bowl of a stand mixer fitted with the paddle attachment, combine the water, sugar, and yeast.  Add the first 2 cups of flour, and mix until combined.  Switch to the dough hook, and with the mixer on low speed, add the third cup of flour, a few tablespoons at a time, until the dough forms.  Knead 6-9 minutes, until soft and pliable, and it no longer sticks to the sides of the bowl. 

Turn the dough out onto a lightly floured surface and knead to form a smooth ball.  Transfer to a lightly oiled bowl and allow to rise 1-2 hours, until doubled in size. 
Punch down the dough and turn out onto a lightly floured surface.  Allow to rest for 5 minutes.  Meanwhile, chop the herbs and garlic, melt the butter, and grate the cheese.
Roll the dough out into a 12x20 inch rectangle.  Brush with 2 tablespoons of the melted butter, then sprinkle the dough with the garlic, herbs, and cheese.  Sprinkle with salt and pepper to taste.

Cut the dough into 6 equally sized strips using a pizza cutter or knife.  Stack the strips on top of each other and cut into 6 equally-sized squares. 

Grease a 9x5 inch loaf pan, and stack the squares on top of each other in the pan.  I found the best way to do this was to hold the pan on its side and stack them that way.  If you lose some of the filling as you stack, just sprinkle it on top once the dough has been stacked.  Drizzle the remaining 2 tablespoons of melted butter over the top.

Cover with a clean kitchen towel and allow to rise 40 minutes. 

Preheat the oven to 350 degrees.  Bake the bread 35-45 minutes, or until the top is golden-brown and the inside is cooked through.  If the top browns too quickly, cover the bread with foil.

Remove from oven and allow to cool for at least 20 minutes.  Run a knife around the edges and invert onto a serving platter to serve.


source:  adapted from Petite Kitchenesse and Joy the Baker


Sunday, June 26, 2011

Cherry Crumb Muffins


Joey really spoiled me this year for Mother's Day, and he bought me a Kindle.  Even though I love reading, I wasn't sure if I wanted an e-reader.  I just love books, and I didn't want to give them up.  But I am officially a convert.  It is so much fun, and it's definitely easier to pack than the 10 books I take on vacation.  Anyway, as he was showing me some of the features, he showed me how you can preview a book before you buy it.  Apparently one of my suggested items was The Clinton Street Baking Company.  As I scrolled through the pages, I somehow managed to buy it by accident.  And then even though I had the option to cancel my order, I was so used to my iPhone that I tried to cancel by touch screen - which clearly doesn't work.  So I was "stuck" with another cookbook...

It turned out to have been a great mistake though, because this is a really fun cookbook - lots of recipes for breakfast treats, desserts, and even a few sandwiches and savory items.  I mentally flagged several recipes, but with cherries coming into season now, I couldn't pass up these muffins.  They don't have much added sugar, but they are plenty sweet thanks to the cherries and the crumb topping.  I think you could even make them a little healthier by using Greek yogurt in place of the sour cream, subbing part of the flour for whole wheat flour, and leaving off the crumb topping.  But made as listed here, they are really delicious, and they still tasted fresh for several days after baking.

Even though I love my Kindle, I don't plan to buy cookbooks for it - I love being able to write in the margins, and not worry about splatters and spills so much.  But it was definitely worth it for these muffins!


Cherry Crumb Muffins
adapted from Clinton Street Baking Company
makes 10 muffins
  • 4 Tbs unsalted butter, at room temperature
  • 1/2 cup sugar
  • 1/2 tsp almond extract
  • 1 cup all-purpose flour
  • 1/2 tsp baking powder
  • 1/4 tsp baking soda
  • 1/4 tsp salt
  • 1 large egg
  • 1/2 cup sour cream
  • 1 cup fresh cherries, pitted and quartered
  • 10 cherries, pitted and left whole
Crumb Topping
  • 1/4 cup all-purpose flour
  • 1/4 cup sugar
  • 1/8 tsp cinnamon
  • 2 Tbs unsalted butter, cubed
Preheat the oven to 350 degrees.  Line a muffin tin with liners or grease well.

Cream the butter, sugar, and almond extract together in an electric mixer fitted with the paddle attachment on medium-high speed. 

Sift the remaining dry ingredients together into a medium bowl.

Add the egg to the butter mixture and blend until combined.

Add 1/4 cup of the sour cream to the mixer, followed by half the dry ingredients, mixing and repating with remaining sour cream and flour mixture.  Mix until the batter is just combined.

Turn off the mixer and fold in the cherries with a spatula.

To make the crumb topping, combine all the ingredients into a small bowl, and using a fork or your fingers, blend together.

Divide the batter evenly among 10 muffin cups.  Top each muffin with 1 Tablespoon of the crumb topping and 1 cherry. 

Bake 25 to 30 minutes, until a toothpick inserted in the center comes out clean.  Cool for 10 minutes in the pans, then remove to serve or cool completely.


Thursday, June 16, 2011

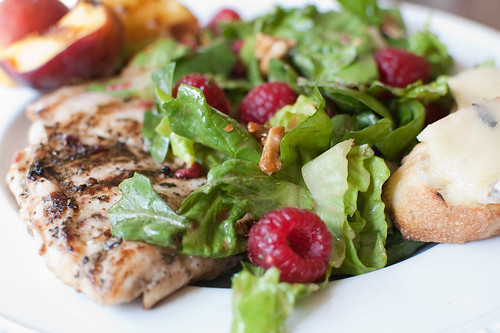
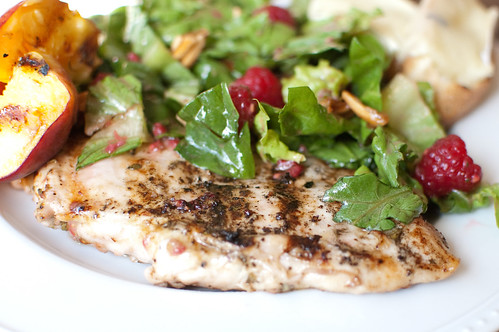
Raspberry Chicken Salad with Grilled Peaches & Brie Croutons


I know that is a ridiculously long title, but it wouldn't have been possible for me to leave any of it out.  I mean seriously - Peaches?  Chicken?  Raspberry?  Brie?  No way.  Does this not sound like an awesome summer salad?  And I haven't even told you about the candied almonds.

This recipe was actually the reason I bought the Cuisine Grilling magazine last summer, but somehow I'm just now getting around to making it.  And as usual, I'm kicking myself for waiting so long.  I love salads that have fresh fruit in them - pears and apples in the fall and winter, berries, peaches, and apricots in the summer, strawberries in the spring...it's all good.

This salad has a double-dose of fresh raspberries - some are used in the vinaigrette/marinade, and the rest are tossed with the salad greens and served fresh in the salad.  It is definitely a fun dressing to make - the raspberries are mashed up with the vinegar and other dressing ingredients.  The chicken is then briefly marinated in some of the vinaigrette, while the rest is used to dress the salad.  Fresh peaches are halved, pitted, and grilled along with the chicken, and the whole salad is served with grilled brie croutons (mmmm melted brie.....).  My favorite component however, could possibly be the candied almonds.  They give the whole salad a nice crunch and dose of richness in an otherwise fairly light meal.  From start to finish this was on the table in under an hour, and it has been one of my favorite meals in several weeks.

Raspberry Chicken Salad with Grilled Peaches and Brie Croutons
adapted from Cuisine Grilling, 2010
  • 1/2 cup slivered almonds
  • 3 Tbs sugar
  • 1 Tbs unsalted butter
  • kosher salt
  • 1/3 cup red wine vinegar
  • 1 1/3 cups fresh raspberries, divided
  • 1 tsp Dijon mustard
  • 3 Tbs honey, divided
  • 3 Tbs minced fresh basil
  • 3 Tbs minced fresh mint
  • 1 Tbs minced shallots
  • 1/4 cup olive oil
  • 4 slices French bread, 1-inch thick
  • 4 slices brie (4 oz)
  • 4 boneless, skinless chicken breast halves (about 6 oz each)
  • 2 Tbs olive oil
  • 4 peaches, halved and pitted
  • 4-6 oz salad greens (I used a mix of spinach and romaine)
Toast the almonds in a nonstick skillet until golden and fragrant, stirring often.  Add the sugar, butter, and salt, and stir until the sugar dissolves and coats the almonds.  Transfer to a plate to cool, then break up into pieces.

Whisk together the vinegar, 1/3 cup raspberries, 1 tablespoon of the honey, mustard, 1 tablespoon each of the basil and mint, and the shallots.  Using the whisk, mash the raspberries to incorporate into the other ingredients.  Drizzle in the oil, whisking constantly.  Set aside 1/2 cup for the chicken marinade, and reserve the remaining dressing for the salad.

Preheat the grill to medium-high.  Pound the chicken breasts between 2 pieces of plastic wrap to 1/2-inch thickness.  Marinate the chicken in the reserved marinade for 15 minutes, turning every few minutes to evenly coat.

Meanwhile, combine the remaining honey with 2 tablespoons  of oil.  Brush onto the cut-side of the peaches, and both sides of the bread slices.

Season both sides of the chicken with salt and pepper, and grill, covered, until cooked through, about 4 minutes per side (the internal temperature should be 165 degrees).  Grill the peaches until lightly marked, about 2-3 minutes per side.  Grill the bread 1-2 minutes, until toasted.  Flip over and divide the cheese evenly among slices.  Continue grilling, uncovered, until the cheese melts, 2-3 more minutes.

Toss the salad greens and the remaining basil and mint with the reserved vinaigrette.  Gently fold in the raspberries and almonds, and serve the salad atop the chicken.  Serve with the grilled peaches and brie croutons.


BLOG DESIGN BY: SHERBET BLOSSOM DESIGNS