Monday, October 20, 2014

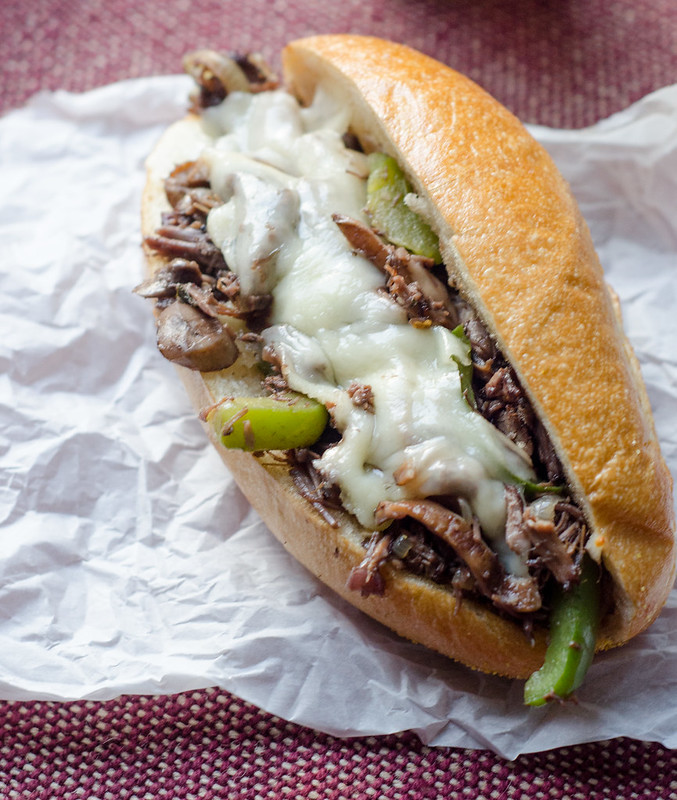
Short Rib and Wild Mushroom Cheesesteaks

Short Rib and Wild Mushroom Cheesesteaks

I know, I know.  You cheesesteak purists are probably rolling your eyes at me.  A true cheesesteak is an art form.  And it doesn't include braised short ribs, wild mushrooms, or fancy cheese.  But you know… it's hard to argue with short ribs, wild mushrooms, and fancy cheese, right?  Right.

This recipe was born from a big bowl of cabernet-braised short ribs sitting in my fridge.  I made a big batch for a shower I threw over the weekend, and I wanted to do something noteworthy with the leftovers.  I thought about pasta, pot pie, mac and cheese… and then inspiration hit:  cheesesteak sandwiches.  But not just any cheesesteaks.  They needed to be elevated to a level worthy of using these precious short ribs.  So I added wild mushrooms.  And Gruyere cheese.  And then I took a bite and swooned.  And then Joey swooned.  And then Caroline swooned.  And then Smith threw his on the floor.  And Joey picked it up and ate it.  No wasting short rib sandwiches!  #truth.  #notashamed

I served these sandwiches with Parmesan-Truffle Oven Fries and some fresh fruit, and we felt like we were eating dinner at a trendy gastropub.

Like I said, I used leftover short ribs for these sandwiches, and it made for a super quick and easy weeknight meal.  But if you don't happen to have a bunch of short ribs hanging out in your fridge (who are you?), then you can definitely braise some up on a Saturday or Sunday then have them ready to go for some quick meals throughout the week.  Or next time you make short ribs, throw a few extra in there, then shred them and freeze them.  I cannot think of any situation in which having short ribs on hand would be a bad thing.

Short Rib and Wild Mushroom Cheesesteaks 

Short Rib and Wild Mushroom Cheesesteaks
  • 1 Tbs butter
  • 1 medium yellow onion, halved and thinly sliced
  • 1 small green bell pepper, seeded and thinly sliced
  • kosher salt and freshly ground black pepper
  • 5 oz wild mushrooms (shiitakes, chanterelles, oyster, etc.  or a mixture), thinly sliced
  • 2 cloves garlic, minced
  • 3 cups shredded braised short ribs
  • 1/4 cup dry red wine (or beef broth, or a dark beer)
  • 4 sandwich rolls, halved and buttered
  • 4 slices Gruyere or sharp provolone cheese
Preheat the oven to 375 degrees.

In a large skillet, melt the butter over medium heat.  Add the onions and bell pepper, and cook, stirring often, until they begin to soften, about 5 minutes.  Add the mushrooms and 1/2 teaspoon of salt.  Saute, stirring often, until the mushrooms are softened and cooked through, about 6 to 8 minutes.

Stir in the garlic and stirring constantly, cook an additional 30 seconds.

Gently fold in the short ribs, and cook until they are heated through, 2 to 3 minutes.  Stir in the wine, scraping up any browned bits from the bottom of the pan.  Taste the mixture and season with salt and pepper to taste.

Divide the filling evenly among the sandwich rolls, then top each with a slice of cheese.  

Close the sandwich and bake 5 to 6 minutes, or until the roll is hot and the cheese is melted.  Serve immediately.


Thursday, October 16, 2014

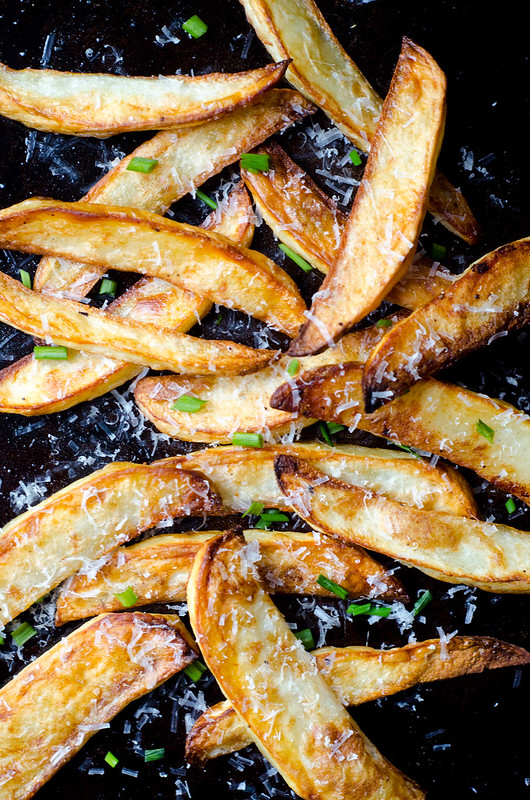
Parmesan-Truffle Oven Fries

Parmesan-Truffle Oven Fries

When it comes to eating French fries, I am admittedly kind of a snob.  I like them to be hand-cut, nice and crispy, and really salty… almost bordering on too salty.  When I come across fries that meet my trifecta, I am pretty much powerless against them.  Can't.  Stop. I don't order fries that often in restaurants, but I always make sure to test a few of Joey's.  Much to his annoyance.  Joey doesn't share food! (can't ever help myself from making a Friend's reference).

And this might put me in the "weirdo" category, but I don't like ketchup on my perfectly cooked and salty fries.  The ketchup dilutes the perfection of the fries and is totally unnecessary.  Sorry ketchup-fiends.  And don't even try putting a cup of mayo down for dipping.  Gag.

However, I will partake in fries that are alternatively seasoned.  Such as say… a parmesan-truffle fry, perhaps?  Yes and yes.

Parmesan-truffle fries have been popping up on the menus of trendy pubs and restaurants for the past several years, and I'm pretty much always going to order them if they're available.  I throw out my "fry trifecta" rule for these fries because…. parmesan.  and truffles.  They are decadent, earthy, salty, and cheesy.  Love at first bite.  Or whiff.  Because is there a smell that's more enticing than that of truffles?

So naturally I set out to make parmesan-truffle fries at home.  I prefer to make oven fries when I'm cooking at home, and to be able to make them slightly healthier was definitely a bonus.

The fries are cooked in a mixture of vegetable oil and truffle oil; so the truffles aren't overwhelming, just a nice background flavor.  A healthy sprinkle of parmesan cheese after cooking finishes them off, and there you have it.  Gourmet fries at home.

I made these alongside what is probably the most amazing Philly Cheesesteak sandwich ever (it had short ribs, omg.  Will be sharing soon).  And Joey asked me to marry him all over again.  Good thing too.  Because I need to keep stealing his French fries.

Parmesan-Truffle Oven Fries
adapted from Cook's Illustrated's Oven Fries

This method is how I always cook oven fries.  So whether you want the Parm-truffle variety (which you should) or you're going basic, this preparation is by far the best one I've ever come across.

  • 3 russet potoates (about 8-12 oz each)
  • 3 Tbs truffle oil*
  • 2 Tbs vegetable oil
  • kosher salt and freshly ground black pepper
  • freshly grated parmesan cheese, for serving
  • freshly snipped chives, for serving
Preheat the oven to 475 degrees and adjust the oven rack to the lowest position.

Peel the potatoes, halve them lengthwise, then cut each half into 4-6 even wedges.

Place the potato wedges in a large bowl filled with hot tap water.  Soak for 10 minutes, then drain and dry on a lint-free kitchen towel (or a double layer of paper towels).  Pat thoroughly with another towel to dry completely.  Toss with 1 tablespoon of the truffle oil.

Meanwhile, coat a large rimmed baking sheet with 2 tablespoons of truffle oil and 2 tablespoons of vegetable oil, using a pastry brush to cover the entire pan with the oil.  Sprinkle evenly with 3/4 teaspoon of salt and 1/4 teaspoon of pepper.

Arrange the potato wedges in a single layer on the baking sheet.  Sprinkle lightly with salt.  Cover tightly with foil and bake 5 minutes.

Remove the foil and continue to bake until the bottoms of the poatoes are spotty golden brown, an additional 15 to 20 minutes.

Using a spatula and a pair of tongs, flip the potatoes, keeping them in a single layer.  Return to the oven and bake until the fries are golden-brown and crisp, 5 to 15 minutes longer, rotating the pan as needed if the fries are browning unevenly.

Transfer the fries to another sheet of paper towels or a kitchen towel to drain the excess oil.  Sprinkle with more salt to taste and toss to combine.  Before serving, sprinkle generously with freshly grated parmesan cheese and freshly-snipped chives.

*In my experience, the intensity of truffle oils vary by brand, and by age.  So if your bottle of truffle oil isn't very strongly scented, I'd recommend using 4 Tablespoons of truffle oil and 1 Tablespoon of vegetable oil.  If your oil is very fresh and fragrant, stick to 3 tablespoons.


Monday, October 13, 2014

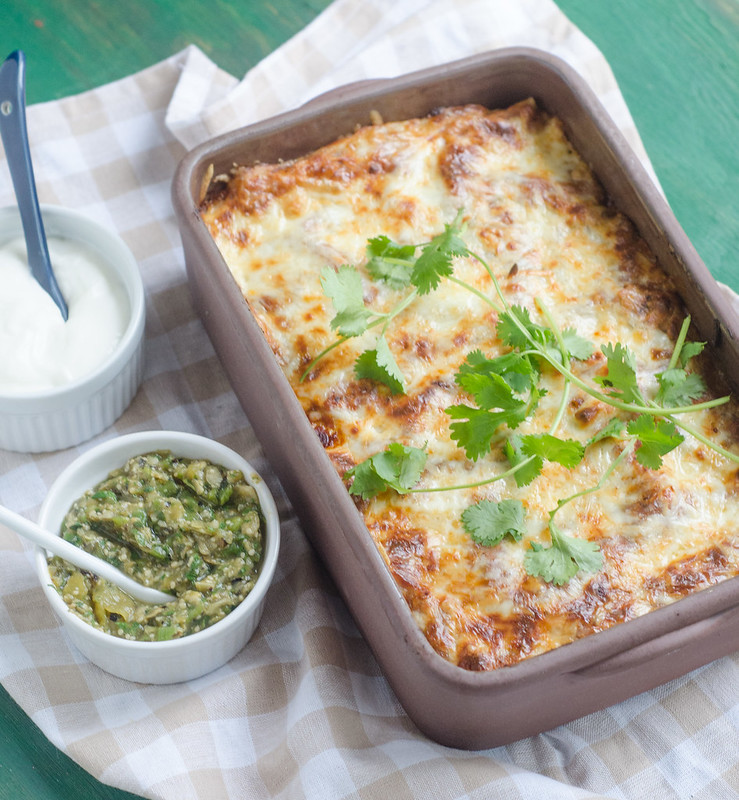
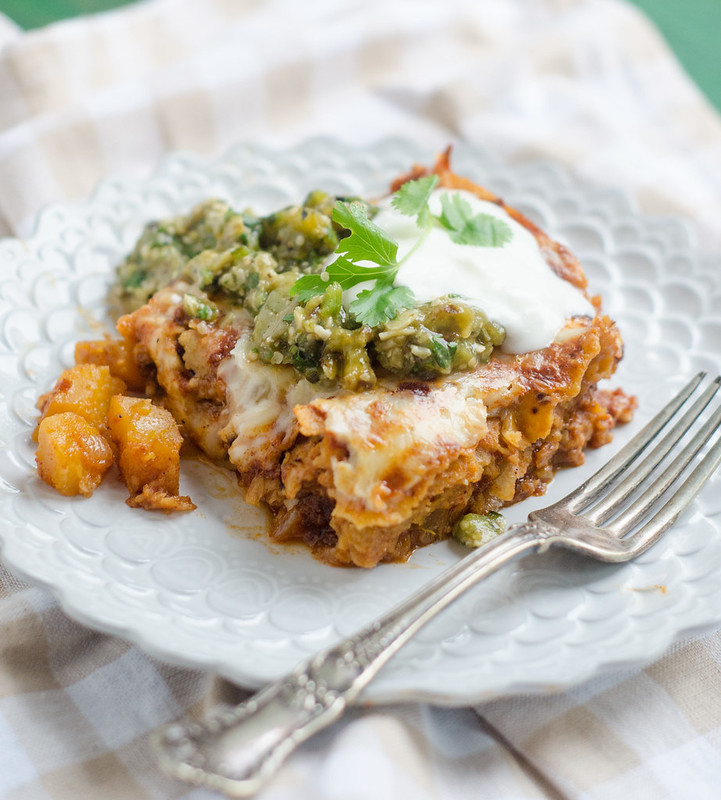
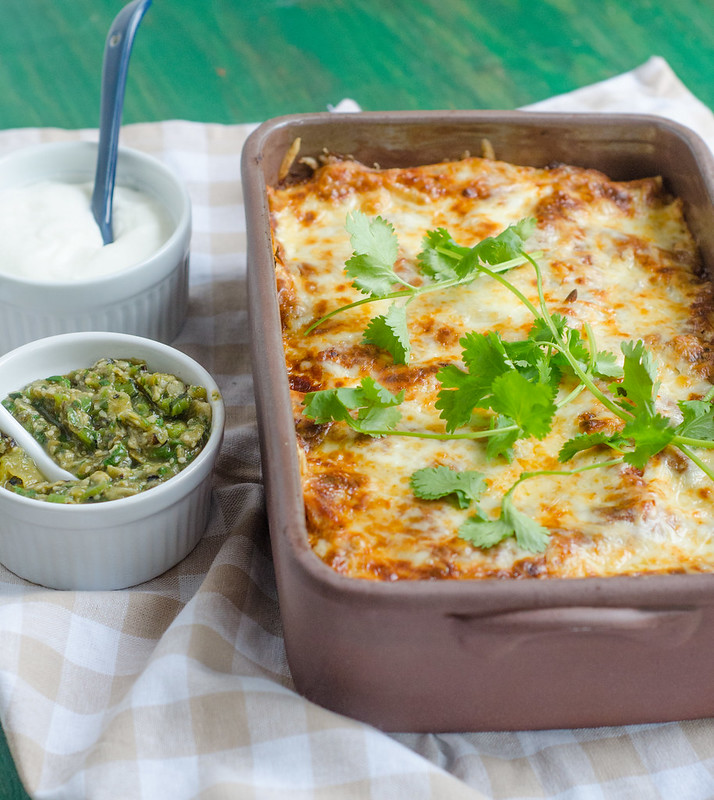
Pumpkin Enchilada Casserole with Poblano-Pepita Salsa


Pumpkin Enchilada Casserole with Poblano-Pepita Salsa

Something about the transition from summer to fall causes me to feel pulled to the kitchen.  As we say goodbye to playing outside until dusk, catching lightning bugs, and evenings at the pool, we welcome cozy evenings in front of the fireplace, sipping hot cocoa, comfort food, and trips to the pumpkin patch.   I love spending a lazy afternoon cooking and baking while the boys nap.  I gravitate towards simple and quick recipes in the summer, but the fall has me slowing down, taking my time, and enjoying the process as much as the final result.  

And this dinner is indeed a process.  There's homemade enchilada sauce, a fresh pumpkin filling, and a roasted tomatillo-poblano-pepita salsa.  And yes, it is pretty much perfection.  While it is a bit time-consuming, nothing is difficult, and should you be pressed for time, any of the components can be made ahead.  And heck, you could assemble the whole thing ahead and then just cook it when you're ready!

Pumpkin Enchilada Casserole with Poblano-Pepita Salsa 


This is an impressive main dish for a fall dinner party, and since I love putting together menus, here's what else I'd serve with it (and actually, most of this is what I did serve with it).

Apple Habanero Margaritas
Chips and Guacamole
Orange-Avocado Salad
Baked Cinnamon-Sugar Donuts with Vanilla Ice Cream (this is my take on churros).

After all my whining about the end of summer, with dinners like this, I guess I can now say that I'm ready to embrace fall.  Let's do this.

Pumpkin Enchilada Casserole with Poblano-Pepita Salsa


Pumpkin Enchilada Casserole with Poblano-Pepita Salsa
adapted from Fine Cooking
enchilada sauce adapted from America's Test Kitchen

Enchilada Sauce
  • 1 medium onion, chopped fine
  • 2 jalapenos, seeded and chopped fine
  • 1 teaspoon canola oil
  • 3 medim cloves garlic, minced
  • 3 Tablespoons chili powder
  • 2 teaspoons ground cumin
  • 2  teaspoons sugar
  • 1 15-oz can tomato sauce
  • 1 cup water
Filling
  • 2 Tbs canola oil
  • 1 large yellow onion, diced
  • 1 jalapeño, seeded and chopped fine
  • 4 cloves garlic, minced
  • 1 Tbs ground cumin
  • pinch of sugar
  • 3 cups of 1/2-inch diced pumpkin or other winter squash (peel, seed, then chop the pumpkin)
  • 1/2 cup chicken or vegetable broth
  • 3 Tbs fresh minced cilantro
  • kosher salt
For Assembly
  • vegetable oil
  • 10 6-inch corn tortillas
  • 2 cups Monterey Jack cheese
  • 1 cup sharp cheddar cheese
  • Poblano Pepita Salsa (recipe follows)
  • Mexican crema or sour cream, for serving

Combine the onion, jalapeno, 1/2 teaspoon salt, and oil in a large saucepan. cover and cook over medium-low heat, stirring often, until the onions and peppers have softened, 8-10 minutes. Stir in the garlic, chili powder, cumin, and sugar, and cook until fragrant, less than 30 seconds. Stir in the tomato sauce, water, and chopped tomato. Bring to a simmer, and cook until slightly thickened, 5 minutes.  Remove from heat and strain through a fine-mesh sieve into a medium bowl.  Set aside.

Meanwhile, make the filling.  Heat the olive oil in a 12-inch skillet set over medium-high heat.  Add the onion and jalapeño, and cook until lightly browned and softened, 10 minutes.  Add the garlic, cumin, 3/4 teaspoon of salt, and sugar and cook one minute, or until it's fragrant.  Stir in the pumpkin.  Lower the heat to medium, add the broth, cover, and simmer until the pumpkin is just tender, about 10 minutes.  Taste and season with additional salt if needed.  Stir in the cilantro.

To assemble the casserole, preheat the oven to 350 degrees and brush a 9x13 inch baking dish with oil.  

Heat a small nonstick or cast-iron skillet to medium-high.  Working one tortilla at a time, heat them in the skillet until softened and beginning to brown in spots, about 1 minute per side.   

Spread 3/4 cup of the sauce evenly over the bottom of the dish.

Arrange 5 of the tortillas over the sauce, cutting them to fit if necessary.

Spread 1/2 cup of the sauce over the tortillas.  Spoon all of the filling evenly over the sauce, then sprinkle with 1 cup of the monterey jack cheese.

Pour 1/2 cup of sauce over the cheese and arrange the remaining 5 tortillas over the sauce (again, cutting the tortillas as needed to fit).  

Spread the remaining sauce over the tortillas then top with the remaining cheese.

Cover with foil and bake 20 minutes.  Remove the foil and bake an additional 10 to 15 minutes, or until the cheese is browning and bubbly.  

Allow to cool 10 minutes before serving with the salsa and crema.

Poblano-Pepita Salsa
  • 2 medium poblano chiles
  • 1 lb tomatillos, husked and rinsed
  • 1/2 cup unsalted, roasted, and hulled pepitas
  • 1/4 cup packed chopped fresh cilantro
  • kosher salt
  • juice of 1/2 lime
Halve the tomatillos and arrange in a single layer on a rimmed baking sheet with the poblanos.

Char under a broiler until the tomatillos are dark and browned in spots and the chiles are blackened on all sides, flipping as needed.  Transfer the chiles to a bowl and cover with plastic wrap.  Cool 10 minutes.  Peel, stem, and coarsely chop the chiles.

Coarsely chop the pepitas in a food processor by pulsing 5 to 6 times.  Transfer to a medium bowl.  Add the tomatillos, chiles, cilantro, and salt to the now-empty bowl, and pulse several times to get a chunky salsa.  Add to the bowl with the pepitas and stir to combine.  Stir in the lime juice.  Taste and season with salt as needed.


Monday, October 6, 2014

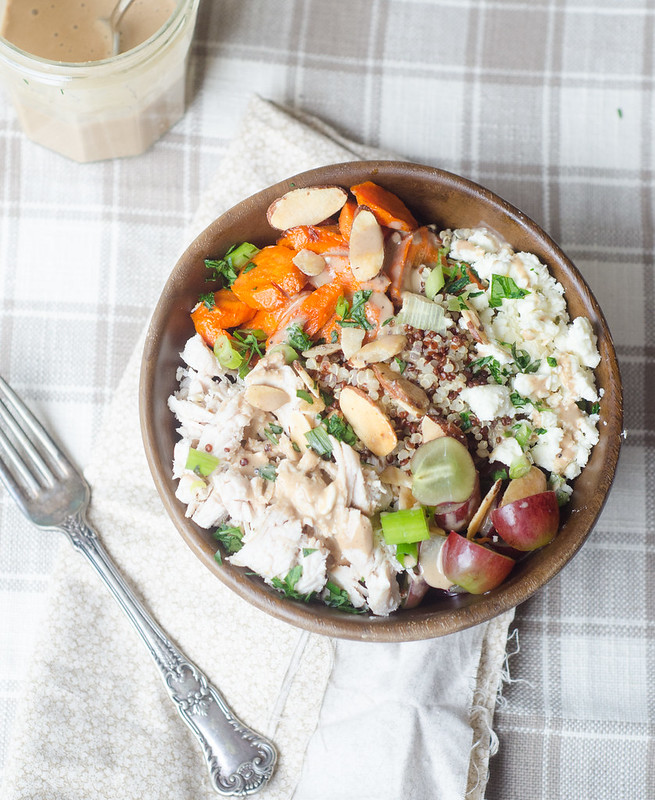
Harvest Quinoa Bowls with Grapes and Goat Cheese

Harvest Quinoa Bowls with Grapes and Goat Cheese

Quinoa bowls are my lunch of choice.  I usually throw them together based on what we have in the refrigerator, and what flavors I'm in the mood for.  No recipe usually, it's just more of a "use what I've got" thing.  But when I came across this combination in Cooking Light, I was immediately in love.

Carrots were an easy and low-maintenance option for the roasted veggie, but I think butternut squash, parsnips, or beets would also work really well with the rest of the flavors.  So many fall comfort foods are heavy and calorie-laden, but this is so fresh, light, and healthy.

These quinoa bowls make a pretty easy and healthy dinner, and the leftovers make for a fabulous lunch.  This was also a great meal for the kids as well.  I kept their portions "deconstructed," if you will:  carrots, grapes, and chicken, plus a side of quinoa, and a little bowl of the dressing for dipping.

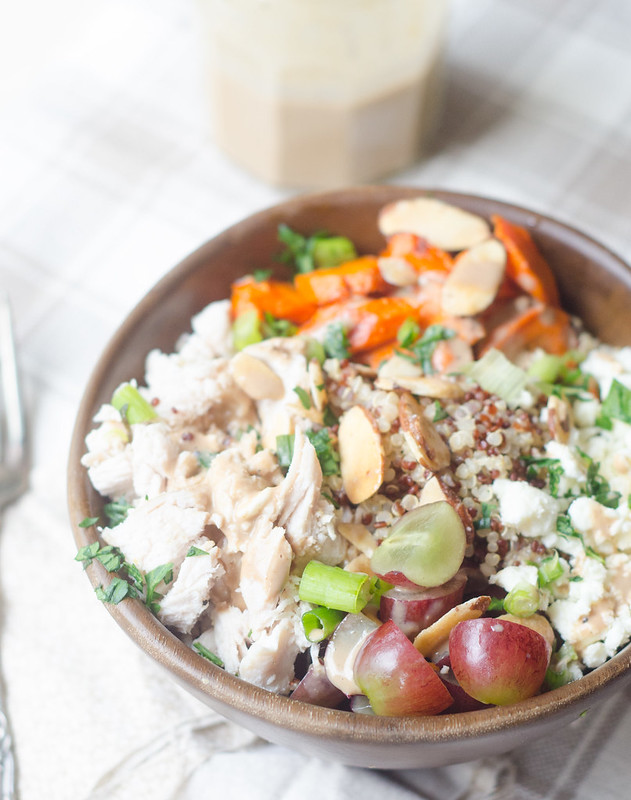
The combination of roasted carrots and grapes intrigued me, and I couldn't stop myself from adding some crumbled goat cheese to the bowl as well.  With a sweet and smoky balsamic dressing, these quinoa bowls became an instant favorite.  I pretty much love everything about these bowls:  lots of protein from the chicken, quinoa, yogurt dressing, and goat cheese.  Little bursts of sweetness from the grapes and carrots.  Tangy, creamy, goat cheese.  Crunchy almonds.  Fresh and crisp lettuce.  Perfection all around,  I tell you.

Harvest Quinoa Bowls with Grapes and Goat Cheese

Harvest Quinoa Bowls with Grapes and Goat Cheese
adapted from Cooking Light, September 2014
serves 4

  • 2 cups (3/4-inch) diagonally cut carrot
  • 2 tsp olive oil
  • 1/2 tsp kosher salt, divided
  • 5 Tbs Greek yogurt
  • 2 Tbs balsamic vinegar
  • 1 Tbs honey
  • 1 Tbs water
  • 1/2 tsp ground cumin
  • 1/2 tsp ground black pepper
  • 1 1/2 cups cooked quinoa
  • 1 1/2 cups shredded (cooked) chicken breasts
  • 1 1/2 cups seeless red grapes, halved (quartered if large)
  • 1/2 cup thinly sliced scallions
  • 1/2 cup fresh parsley, chopped
  • 1/2 cup toasted sliced almonds
  • 1/3 cup crumbled goat cheese
  • 6 cups mixed salad greens, roughly chopped
Preheat the oven to 450 degrees Fahrenheit.  Toss the carrots with the oil and 1/4 teaspoon of the salt.  Arrange in a single layer on a rimmed baking sheet.  Bake for 15 minutes, or until they are browned and tender.

Meanwhile, combine the remaining 1/4 teaspoon of salt, yogurt, vinegar, honey, water, cumin, and black pepper in a small jar.  Cover and shake to combine.

In a large bowl, combine the carrots, chicken, quinoa, grapes, scallions, parsley, almonds, goat cheese, and mixed greens.  Toss gently with the dressing to combine.

Divide among bowls and serve.


BLOG DESIGN BY: SHERBET BLOSSOM DESIGNS