Showing posts with label beef. Show all posts

Tuesday, August 25, 2015

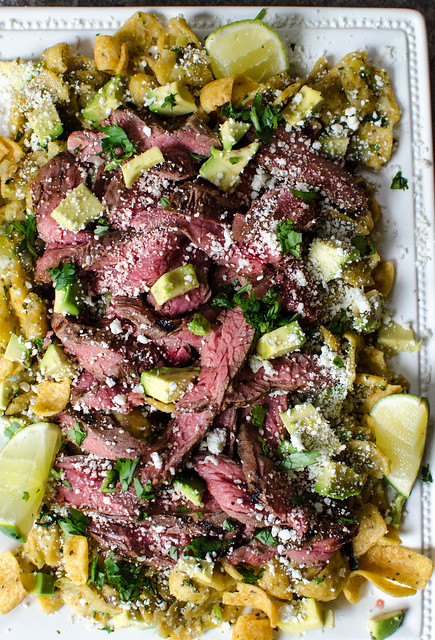
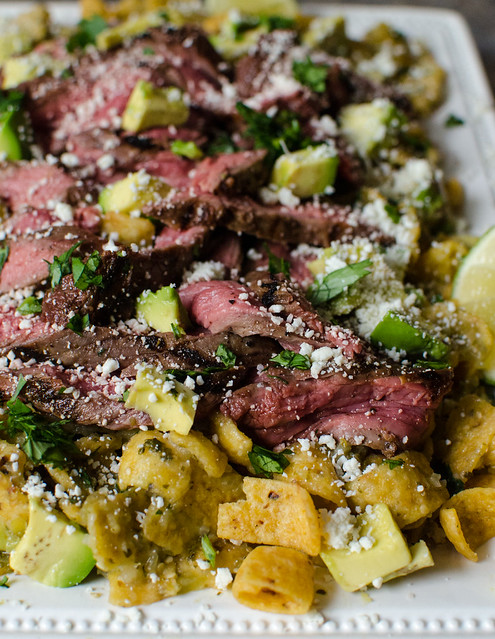
Cola-Grilled Flank Steak with Fritos Chilaquiles

Coke-Marinated Flank Steak over Fritos Chilaquiles

Do you need a minute here?  A minute to process this?  It's crazy, I know.  When I told Joey what I was making for dinner, he asked if it was a "gas station food challenge." It was not. But what it was, was an irresistible recipe that I couldn't stop thinking and daydreaming about from the moment I saw it.  I have a not-so-secret love of Fritos, so Fritos, cooked in salsa?  Uh, yeah.  Sounds right up my alley.

This was a really fun dinner, and one that I would actually love to serve to company.  How kitschy  and cute is this?  A big platter of Fritos cooked in salsa, topped with a sweet and spicy grilled steak?  It's a little out there, but in the best way possible.  What a conversation starter this dinner is!

Because this is from Food and Wine, they give a wine pairing recommendation, but I'm hard pressed to serve this with anything other than a jack and coke or a forty of beer. ;)

Coke-Marinated Flank Steak over Fritos Chilaquiles 

Cola-Grilled Flank Steak with Fritos Chilaquiles
adapted from Food and Wine
serves 4 to 6

  • 4 cups of coca-cola, preferably made with cane sugar (instead of HFCS)
  • 1 Tbs This green curry paste
  • 1 jalapeño chiles, thinly sliced
  • 1 1/2 lbs flank steak, trimmed and cut lengthwise and crosswise to make 4 steaks
  • 1 Tbs canola oil, plus more for brushing
  • kosher salt and freshly ground black pepper
  • 2 cups salsa verde
  • 8 oz Fritos, divided
  • 1/2 cup chopped fresh cilantro
  • 2 avocados, diced
  • 3 Tbs Cotija or queso fresco cheese
  • lime wedges
In a 9x13 inch baking dish, whisk the coke with the green curry paste and jalapeños.  Add the flank steaks and turn them several times to thoroughly coat them with the marinade. Allow to stand at room temperature for 30 minutes.  

Meanwhile, light and prepare the grill.  

Remove the steaks from the marinade and brush with oil and season generously with salt and pepper.  Grill, turning once, until medium-rarre, about 6 to 8 minutes total.  Transfer to a cutting board, tent loosely with foil, and allow rest for 10 minutues.

As the steaks rest, prepare the chilaquiles.  

Heat 1 tablespoon of the oil in a large skillet over medium heat.  Add the salsa verde and bring to a simmer.  Cook until slightly reduced and thickened, about 4 minutes.  Add half of the fritos and cook, stirring constantly about 2 minutes.  Remove from heat, stir in the remaining fritos, along with 1/4 cup of the cilantro and half of the avocado and cheese.   Transfer the chilaquiles to a platter.

Sice the steak thinly across the grain, and arrange it over the chilaquiles, along with any accumulated juices.  Scatter the remaining avocado, cilantro, and cheese over top, and serve with lime wedges.


Tuesday, January 6, 2015

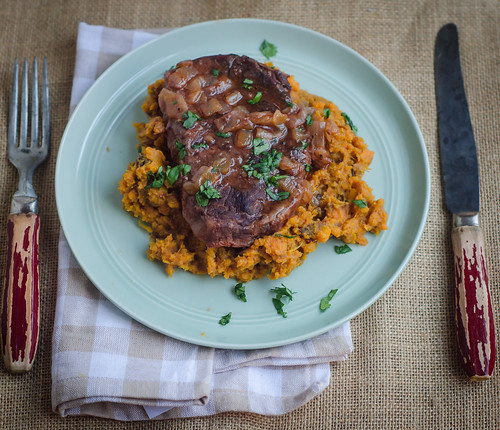
Bourbon-Braised Steaks with Chipotle Sweet Potatoes (Crock Pot Meal)

Bourbon-Braised Steaks with Chipotle Sweet Potatoes (crock pot) 

Let's go ahead and get it out of the way by saying that this dinner will never win a beauty pageant.  It's just not pretty food.  But it's definitely tasty food.  Say this with me.  "Bourbon-Braised Steaks with Chipotle Sweet Potatoes."  And then say this with me.  "Crockpot."  Meaning, you throw a bunch of stuff together in the morning, then come home to an amazing and delicious dinner waiting for you.  Oh and also:  this is under 500 calories per serving, so you can still keep your New Year's healthy eating resolutions.

You use a very inexpensive cut of meat, blade steak.  It is pretty tough, but when cooked low and slow, it becomes fork-tender.  Seriously, I wish I'd taken a picture of it "cut" to show you.  It basically turns into your own little individual pot roast.  But a pot roast that's served with a bourbon sauce.  And over sweet-spicy chipotle sweet potatoes.

You guys know I'm a major fan of the America's Test Kitchen Slow Cooker Revolution cookbooks, and they just released a new one, which focuses on healthy dinners.  One of the major issues I have with a lot of crock pot recipes is that you end up trading healthy for convenience.  This cookbook is full of lightened up crockpot recipes - from lightened up versions of some favorite comfort foods to lean proteins, to vegetables, healthy soups and stews… it's really awesome.  I can't wait to make more from it, and if this recipe is any indication, it may very well become my favorite cookbook!


Bourbon-Braised Steaks with Chipotle Sweet Potatoes (crock pot) 

Bourbon-Braised Steaks with Chipotle Sweet Potatoes
adapted from ATK's Healthy Slow Cooker Revolution
serves 4

  • 1 medium yellow onion, chopped
  • 1 Tbs tomato paste
  • 1 tsp canola oil
  • 1/2 tsp ground coriander
  • 1 clove garlic, minced
  • 1/2 cup reduced-sodium beef broth
  • 1/4 cup bourbon or whiskey
  • 1 Tbs worcestershire sauce
  • 2 tsp instant tapioca
  • 4 (6-8 oz) beef blade steaks, trimmed of all visible fat
  • kosher salt and freshly ground black pepper
  • 2 lbs sweet potatoes, peeled and cut into 1-inch pieces
  • 1 chipotle chile in adobo sauce, finely chopped
  • 1 tsp grated lime zest
  • 1 Tbs lime juice
  • 1/4 cup milk
  • minced fresh cilantro
In a microwave-safe bowl, stir together the onion, tomato paste, oil, coriander, and garlic.  Cook 5 minutes, stirring occasionally, until the onion is softened.  Transfer to the slow cooker.

Stir in the broth, bourbon, Worcestershire sauce, and tapioca.  Generously season both sides of the steaks with salt and pepper, and nestle them into the slow cooker as well.

Loosely tie the sweet potatoes in a cheesecloth bundle;  Gently lay the bundle on top of the steaks.

Cover and cook until the steaks are fork-tender and the potatoes are cooked through and tender as well, 8 to 9 hours on low or 5 to 6 hours on high.

Carefully transfer the potatoes to a large bowl.  Mash with a potato masher until they are mostly smooth, then stir in the chipotle, lime zest and juice, and milk.  Season with salt and pepper to taste.  

Transfer the steaks to a serving platter and cover loosely with foil.  Rest for 5 minutes.  Meanwhile, use a spoon to skim off any visible fat from the top of the sauce, then transfer the sauce to a small bowl.

Serve the steaks over the potatoes, and spoon the sauce over the top.  Garnish with cilantro.


Sunday, December 14, 2014

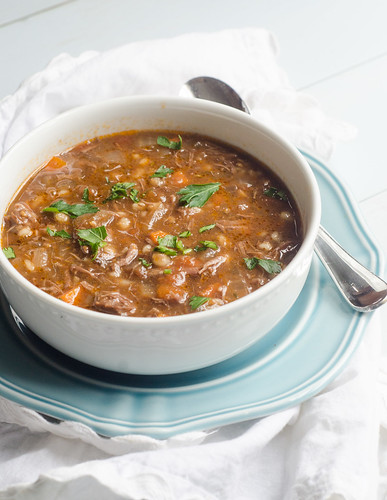
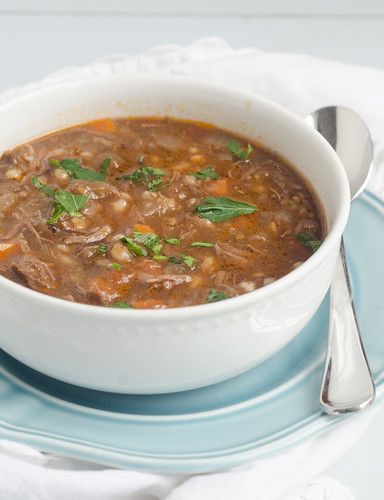
Crockpot Beef and Barley Soup

Crockpot Beef and Barley Soup

Oh boy.  The past week in our house has been pretty miserable.  Tuesday morning, Tucker was sent home from school with a fever.  Wednesday, he was diagnosed with the flu.  Thursday morning, Henry was sent home with a fever, and the flu followed.  Saturday afternoon, Joey and I both succumbed to the flu.  Not fun.  Knocking on wood, but so far Caroline and Smith are healthy.  And we hope to keep them that way.

Have you and/or your family gotten sick yet this year?  It's a doozy!  So I have a recommendation for you.  Make a big pot of this beef and barley soup.  Eat some, then freeze some.  So if/when you get sick, you have something nourishing and comforting to eat without any work.

My sweet friend Katy dropped off some chicken and orzo soup to us this afternoon, and it was so very much appreciated by my whole family.  We've been subsisting on take-out, crackers, and applesauce; thus, a filling and healthy meal was a treat.  So I have another suggestion.  Make a big pot of this soup.  Split it in half, and then take half to a friend who's sick.  I know you have a sick friend who could use this, no?  Tis the season for giving, and all.

Oh, and about this soup?  It's really very good.  Tender beef, a rich broth, and filling barley.  This soup far exceeded our expectations.  It takes only minutes to prepare, and the payoff is huge. This immediately became one of our favorites soups, and I'm already planning to make it again very soon… to share with friends, of course.

Crockpot Beef and Barley Soup

Crockpot Beef and Barley Soup
adapted from The Make-Ahead Cook
serves 6 to 8

  • 2 medium white or yellow onions, chopped fine
  • 2 Tbs tomato paste
  • 2 Tbs olive oil
  • 1 Tbs minced fresh thyme
  • 2 cloves garlic, minced
  • 1 (28-oz) can crushed tomatoes
  • 2 cups beef broth
  • 1 1/2 cups chicken broth
  • 3 medium carrots, peeled and chopped
  • 1/3 cup low-sodium soy sauce
  • 1/4 cup dry red wine
  • 1/3 cup pearl barley
  • 1 dried bay leaf
  • 2-3 lbs beef blade roast, trimmed of excess fat and cut into 4 chunks
  • kosher salt and freshly ground pepper
  • 1/4 cup minced fresh parsley, for serving
In a large microwave-safe bowl, combine the onions, tomato paste, oil, thyme, garlic, and 1 teaspoon of salt.  Stir well to combine and microwave for 5 minutes, or until the onions are softened.  Transfer to the slow cooker.

Stir in the tomatoes, beef broth, chicken broth, carrots, soy sauce, wine, and barley.  Generously season the beef with salt and pepper and nestle it into the slow cooker.

Cover and cook until the beef is tender, 9 to 10 hours on low, or 6 to 7 hours on high.

Carefully transfer the beef to a cutting board.  When it's cool enough to handle, shred into bite-sized pieces with 2 forks, discarding any fat.  

Use a large spoon to skim any fat from the surface of the soup.  Stir in the shredded beef and season with salt and pepper to taste.  Stir in the parsley and serve.


Monday, October 20, 2014

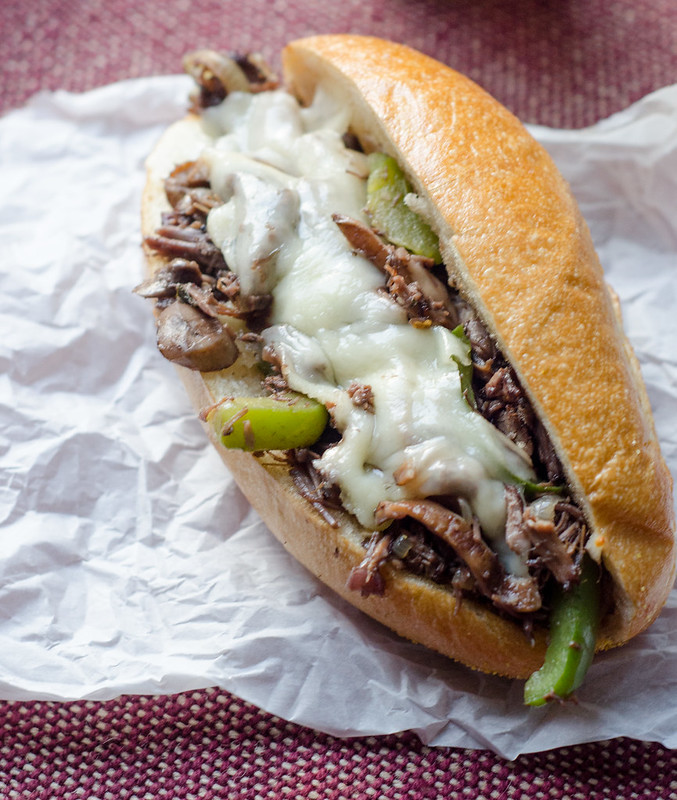
Short Rib and Wild Mushroom Cheesesteaks

Short Rib and Wild Mushroom Cheesesteaks

I know, I know.  You cheesesteak purists are probably rolling your eyes at me.  A true cheesesteak is an art form.  And it doesn't include braised short ribs, wild mushrooms, or fancy cheese.  But you know… it's hard to argue with short ribs, wild mushrooms, and fancy cheese, right?  Right.

This recipe was born from a big bowl of cabernet-braised short ribs sitting in my fridge.  I made a big batch for a shower I threw over the weekend, and I wanted to do something noteworthy with the leftovers.  I thought about pasta, pot pie, mac and cheese… and then inspiration hit:  cheesesteak sandwiches.  But not just any cheesesteaks.  They needed to be elevated to a level worthy of using these precious short ribs.  So I added wild mushrooms.  And Gruyere cheese.  And then I took a bite and swooned.  And then Joey swooned.  And then Caroline swooned.  And then Smith threw his on the floor.  And Joey picked it up and ate it.  No wasting short rib sandwiches!  #truth.  #notashamed

I served these sandwiches with Parmesan-Truffle Oven Fries and some fresh fruit, and we felt like we were eating dinner at a trendy gastropub.

Like I said, I used leftover short ribs for these sandwiches, and it made for a super quick and easy weeknight meal.  But if you don't happen to have a bunch of short ribs hanging out in your fridge (who are you?), then you can definitely braise some up on a Saturday or Sunday then have them ready to go for some quick meals throughout the week.  Or next time you make short ribs, throw a few extra in there, then shred them and freeze them.  I cannot think of any situation in which having short ribs on hand would be a bad thing.

Short Rib and Wild Mushroom Cheesesteaks 

Short Rib and Wild Mushroom Cheesesteaks
  • 1 Tbs butter
  • 1 medium yellow onion, halved and thinly sliced
  • 1 small green bell pepper, seeded and thinly sliced
  • kosher salt and freshly ground black pepper
  • 5 oz wild mushrooms (shiitakes, chanterelles, oyster, etc.  or a mixture), thinly sliced
  • 2 cloves garlic, minced
  • 3 cups shredded braised short ribs
  • 1/4 cup dry red wine (or beef broth, or a dark beer)
  • 4 sandwich rolls, halved and buttered
  • 4 slices Gruyere or sharp provolone cheese
Preheat the oven to 375 degrees.

In a large skillet, melt the butter over medium heat.  Add the onions and bell pepper, and cook, stirring often, until they begin to soften, about 5 minutes.  Add the mushrooms and 1/2 teaspoon of salt.  Saute, stirring often, until the mushrooms are softened and cooked through, about 6 to 8 minutes.

Stir in the garlic and stirring constantly, cook an additional 30 seconds.

Gently fold in the short ribs, and cook until they are heated through, 2 to 3 minutes.  Stir in the wine, scraping up any browned bits from the bottom of the pan.  Taste the mixture and season with salt and pepper to taste.

Divide the filling evenly among the sandwich rolls, then top each with a slice of cheese.  

Close the sandwich and bake 5 to 6 minutes, or until the roll is hot and the cheese is melted.  Serve immediately.


Monday, July 28, 2014

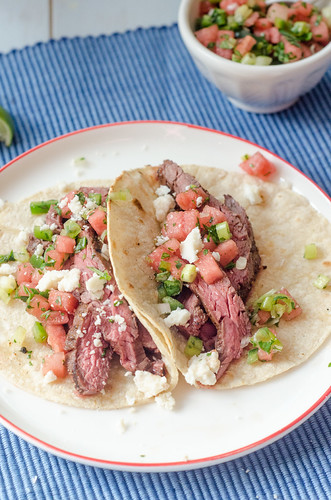
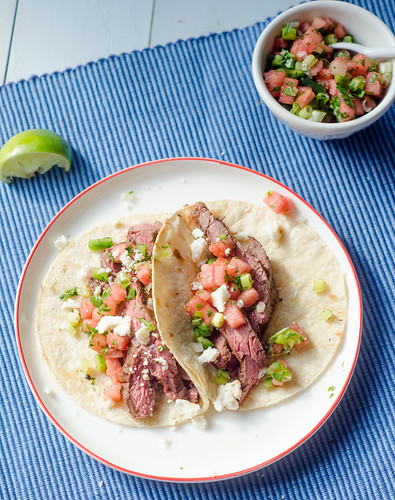
Spicy Steak Tacos with Watermelon Salsa

Spicy Steak Tacos with Watermelon Salsa


It's Taco Tuesday, and everything is awesome!  Who else is watching the Lego movie on repeat?  I don't mind so much, especially when it inspires meals such as this.  This, along with my grilled summer veggie salad, have become my favorite dinners of the summer.  Two more big reasons to love it?   It's incredibly quick and easy, and healthy to boot.

The steak is rubbed with a spicy mixture of cayenne, black pepper, salt, and paprika, and then thrown on the grill.  Meanwhile, you simply mix up a quick watermelon salsa, warm your tortillas, and you're ready to eat.  The smokiness and spice from the steak pair wonderfully with the sweet and spicy watermelon salsa, and the cotija cheese gives the tacos a subtly creamy and salty finish.  I loved these tacos so much, and we all "mmm'ed" our way through dinner.  I served  these tacos with grilled Mexican-style street corn and more watermelon, and it was pretty much the perfect summer dinner.

So today's Tuesday… who wants tacos?

Spicy Steak Tacos with Watermelon Salsa 

Spicy Steak Tacs with Watermelon Salsa
adapted from Cooking Light, August 2014
serves 4

  • 3/4 tsp kosher salt, divided
  • 1/2 tsp freshly ground black pepper
  • 1/4 tsp smoked paprika
  • 1/4 tsp ground cayenne pepper
  • 1/2 tsp vegetable oil
  • 1 pound flank or skirt steak, trimmed 
  • Cooking spray
  • green onions, roots trimmed, finely minced
  • 2 cups finely chopped fresh watermelon
  • 2 tablespoons chopped fresh cilantro
  • juice of 1/2 lime

  • 1/2 jalapeño chile, seeded and chopped
  • (6-inch) corn tortillas
  • 2 ounces cotija cheese, crumbled (about 1/2 cup)
  1. Preheat grill to medium-high heat.
  2.  Combine 1/2 teaspoon salt, black pepper, paprika, oil, and red pepper in a small bowl. Rub both sides of the steak with the pepper and oil mixture.
  3.  Arrange steak on a grill rack coated with cooking spray; grill 3-4 minutes on each side or until desired degree of doneness. Let stand 5 minutes; cut steak across the grain into thin slices.
  4. 4. Combine watermelon, cilantro, green onions, lime juice, chile, and remaining 1/4 teaspoon salt in a medium bowl.
  5. 5. Place tortillas on grill rack coated with cooking spray; grill 1 minute on each side or until lightly charred.  Divide steak, salsa, and cheese evenly among tortillas.


Monday, July 14, 2014

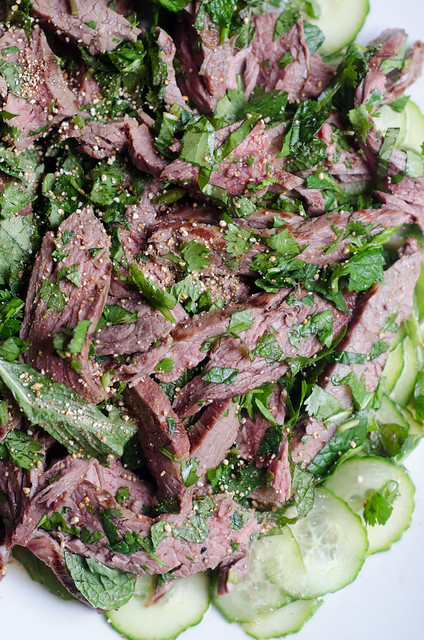
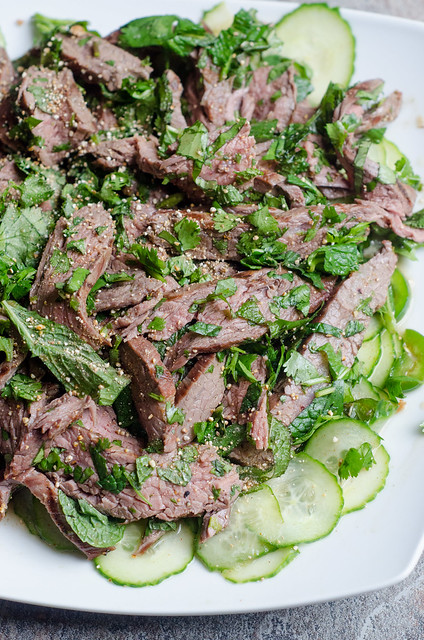
Thai Grilled Steak Salad

Thai Grilled Steak Salad 

This has been the Summer of Salads.  We've been eating salads for dinner at least once a week, and oftentimes more than that.  Now, before you roll your eyes at me for getting excited about salad, let me clarify that we've been eating ridiculously amazing salads.  Like this chopped grilled summer vegetable salad.  And it's chicken fajita counterpart.  And a balsamic steak and tomato salad with bacon and blue cheese.  And a Georgia-style caprese salad.  And a shrimp and okra po' boy salad.  And last but not least, this Thai Grilled Steak Salad.

When I was young and hip and lived in the city, there was a gourmet grocery store/take out place called Eatzy's.  They had a glorious selection of all sorts of snacks, cheeses and meats, prepared salads and dinners, and an amazing deli.  It was right across the street from my gym, so I used to treat myself once a week to their Thai steak salad.  I'm quite certain it wasn't authentic, but I just loved it so much.

This salad is reminiscent of that one, and dare I say even better?  Being that this is a recipe from Cook's Illustrated, there are of course a few offbeat methods and steps.  Their goal for this salad was to be able to make it completely from ingredients found in the grocery store.  Therefore, a few creative substitutions and steps were taken to avoid a trip to an Asian grocer.  So while making your own toasted rice powder may seem a little strange, and toasting spices may seem like too much work, trust me on this.  Those little things just take a few minutes; they really elevate the salad to the next level, and are well-worth your time.

The dressing hits the usual Thai flavor points of hot-sour-salty-sweet-bitter, and the savory steak and crisp and refreshing cucumbers and herbs play so nicely off of it.  This was a really great dinner served simply with some fresh fruit and grilled corn, and the leftovers were stellar as well.

The Summer of Salads.  It's a thing.  What's your favorite salad?

Thai Grilled Steak Salad 

Thai Grilled Steak Salad
adapted from Cook's Illustrated

  • 1/2 tsp paprika
  • 1/2 tsp cayenne pepper
  • 1 Tbs long-grain white rice
  • 3 Tbs lime juice (about 1 lime)
  • 2 Tbs fish sauce
  • 2 Tbs water
  • 1/'2 tsp granulated sugar
  • 1 1/2 lbs flank steak, trimmed
  • kosher salt and freshly ground black pepper
  • 1 cup fresh mint leaves, coarsely chopped
  • 1/2 cup fresh basil leaves, coarsely chopped (Thai basil, if you can find it)
  • 1 cup fresh cilantro, coarsely chopped
  • 3 shallots, sliced into thin rings
  • 1 serrano chile, seeded and sliced into thin rings
  • 1 seedless English cucumber, sliced as thinly as possible (use a vegetable peeler or mandolin)
Prepare grill.

In a small skillet, heat the paprika and cayenne over medium heat.  Cook, shaking the pan often, until fragrant, about 1 minute.  Transfer to a small bowl.  Be very careful and run the fan over your stove if you have one as you toast the spices, because the toasted cayenne will burn your eyes and throat if you're not careful!

Return the now-empty skillet to medium-high heat, add the rice, and toast, stirring frequently, until it's a deep golden brown, about 5 minutes.  Transfer to a small food processor or spice grinder, and allow to cool 5 minutes before grinding the rice to a fine meal.  You should have about 1 tablespoon of powder.

In a large bowl, whisk together the lime juice, fish sauce, water, granulated sugar, and 1/4 teaspoon of the toasted spice mixture.  Set aside.

Season the steak liberally on both sides with salt and pepper.  Place the steak on the grill and cook until it's just beginning to char, and beads of moisture appear on the outer edges, 5 to 6 minutes.  Flip the steak and continue to cook until the steak reaches 125 degrees (for medium-rare), about 4 to 5 minutes longer.  Transfer to a plate and allow to cool 5 to 10 minutes.  Slice 1/4-inch thick on the bias, against the grain.

Toss the cucumber slices, shallots, and serrano rings in the bowl with the dressing, then use a slotted spoon to remove them and arrange on a serving platter.  Toss the steak and herbs in the bowl with the dressing, then place on top of the cucumber slices.  Sprinkle the toasted rice powder over the top, and pass the toasted spice mixture at the table for those who want more heat.  Serve warm or at room temperature.


Sunday, April 20, 2014

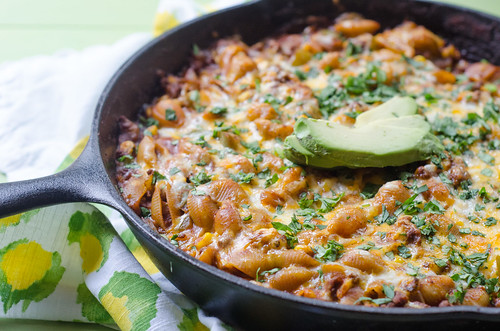
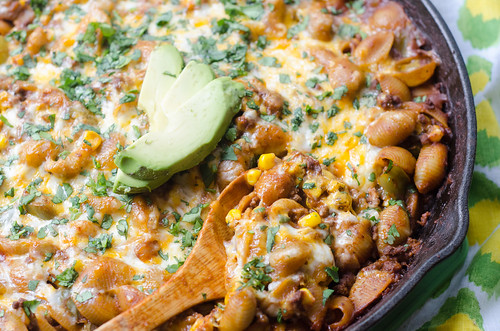
Skillet-Baked Tex-Mex Macaroni


Do you want to know how you can tell that something was REALLY good?  If you look at a picture of it two weeks later, when you are super full from a huge Easter lunch, and your mouth waters and your stomach growls.... you know it's good.

This skillet tex-mex macaroni is not only amazingly delicious, but it's cooked in under 30 minutes, and only dirties one pot.  It makes a perfect weeknight dinner, and it has all your bases covered:  Mexican food, pasta, spice, cheesiness, and it's reasonably healthy.


This skillet meal reminded me a bit of hamburger helper, but obviously it's better.  Joey and I really really loved this, and my mom asked for the recipe when she ate the leftovers for lunch during a visit.  

I really just cannot say enough good things about this dish, so I'll leave you with this:  rearrange your weekly meal plan and squeeze this in.  And then come back and tell me "thank you."  


Skillet-Baked Tex-Mex Macaroni
adapted from Pasta Revolution
serves 4
  • 1 Tbs canola oil
  • 1 cup finely chopped onion
  • 1 green bell pepper, stemmed, seeded, and chopped into small pieces
  • 1 jalapeño, seeds and ribs removed, minced
  • 3 cloves garlic, minced
  • 2 Tbs chili powder
  • pinch of cayenne pepper (optional)
  • 2 tsp cumin
  • 1/2 tsp paprika
  • kosher salt and freshly ground black pepper
  • 1 lb 90% lean ground beef
  • 2 cups water
  • 1 (15-oz) can tomato sauce (preferably from fire-roasted tomatoes, if you can find it)
  • 8 oz (about 2 cups) elbow macaroni or shells
  • 1 cup frozen corn
  • 1 (4.5 oz) can chopped green chiles, drained
  • 3 Tbs chopped fresh cilantro
  • 1 cup shredded cheddar cheese
  • 1 cup shredded Monterey Jack or Pepperjack cheese
  • avocado, sour cream, and/or hot sauce for serving
Preheat the oven to 475 degrees.

Heat the oil in a 12-inch nonstick skillet over medium heat.  Add the onion, bell pepper, and jalapeño and sauté until softened, 5 to 7 minutes.  

Stir in the garlic, chili powder, cumin, cayenne, paprika, and 1/2 teaspoon of salt.  Cook until fragrant, about 30 seconds.  

Add the beef, using a wooden spoon to break up any big pieces, and cook until it's no longer pink, 2 to 3 minutes.

Stir in the water, tomato sauce, and pasta.  Increase heat, cover, and bring to a vigorous simmer.  Stirring frequently, cook until the pasta is tender, 10 to 12 minutes.

Remove the skillet from heat and stir in the corn, green chiles, 2 tablespoons of the cilantro, and 1/2 cup of each of the cheeses.  Taste and season with salt and pepper as needed.  Sprinkle the remaining cheese over the top of the para, and bake until the cheese is melted, browned, and bubbly, 10 to 15 minutes.  

Cool 10 minutes, sprinkle with the remaining tablespoon of cilantro, and serve.


Sunday, January 12, 2014

Tequila-Braised Short Rib Enchiladas


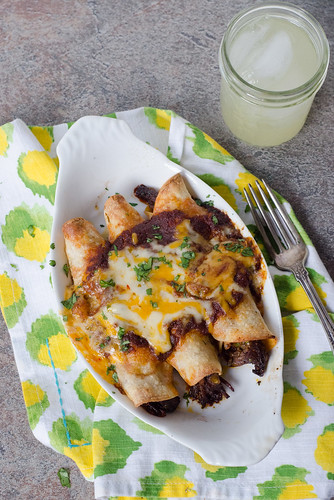
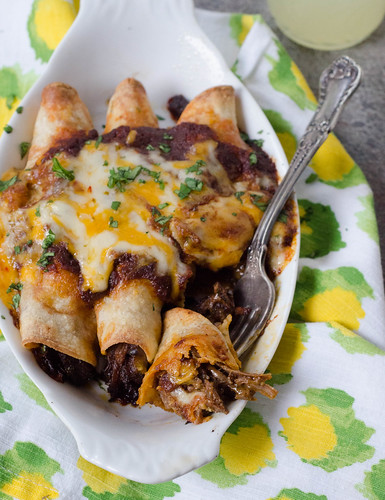
So you guys.  These enchiladas.  Oh my.  They are something special.  These chicken enchiladas are by far the most popular recipe on my site.  And I'm not trying to be sensationalist or be "the girl who cried enchiladas," but dare I say the short rib version is even better?  We loooooved them, and the twins both absolutely devoured the short rib meat we gave them (spoiled little foodie babies).

As Joey and I were discussing our plans for New Year's Eve, I gave him a few ideas for dinner - various appetizers, braised short ribs, or enchiladas.  As we so often do, we decided on Mexican food, but I couldn't get short ribs out of my head.  So I did what any Mexican food-obsessed person would do, and combined the two ideas.


I turned to my usual chicken enchilada recipe, and adapted it to short ribs.  After a quick sear on the stove top, I braised them in a mixture of tequila and tomato sauce, all seasoned with my favorite enchilada sauce ingredients - plenty of chile powder, cumin, jalapeños, etc.  After a few hours in the oven, I not only had perfectly tender short ribs, but an intensely flavored and perfect enchilada sauce - once I spiked it with a little more tequila, that is.

Assembly was quick and painless, and the result was totally fantastic.  These enchiladas obviously require a lot of time, but much of it is hands off, and it's the perfect project for a cold and rainy day at home.  Cook for a while, go play or relax for a while.  And you'll be handsomely rewarded with these awesome enchiladas.  The meat is fall-apart tender, there's just enough tequila and spice to keep them interested, and the bits of meat that are right inside each enchilada get kind of crispy - almost like carnitas.  But better.  Because it's short ribs.  And there's tequila.

We ended up having a low-key evening at home, snacking on black bean and corn dip, drinking margaritas, eating enchiladas, and coloring Sesame Street characters with Smith and Caroline.  It was the perfect end to a pretty wild and wonderful year, and I wouldn't have had it any other way.


Tequila-Braised Short Rib Enchiladas
inspired by these Chicken Enchiladas

Take care to skim off as much fat from the sauce as you can, as it will cause the enchiladas to be pretty greasy otherwise.

  • 1 Tbs vegetable oil
  • 2 1/2 - 3 lbs beef short ribs (bone-in)
  • kosher salt and freshly ground black pepper
  • 1 large onions, finely diced
  • 2-3 jalapeños, seeds and ribs removed, chopped
  • 3 cloves garlic, minced
  • 1/4 cup chile powder
  • 1 Tbs ground cumin
  • 1 tsp sugar
  • 1 cup tequila, divided
  • 1 (15-oz) can tomato sauce
  • 1/3 cup minced fresh cilantro
  • 1 cup sharp cheddar cheese, divided
  • 1 cup Pepperjack cheese, divided
  • 12-15 corn tortillas
  • 1/2 cup water (optional)
  • chopped cilantro and/or scallions, for serving
Preheat the oven to 325 degrees.  

Heat the oil over medium-high heat in a large pot or Dutch oven.  Season both sides of the short ribs liberally with salt and pepper.  Working in batches (only sear as many as can fit in a single layer in the pot at a time), cook the short ribs 2-3 minutes on each side, or until they are browned.  Remove to a clean plate and repeat with the remaining short ribs.

Pour off all but about 2 tablespoons of the oil, reduce the heat to medium-low, and add the onions and jalapeños with 1/4 teaspoon of salt to the pot, stirring well.  Cover and cook until they are softened but not browned, 5-8 minutes.  Add the garlic, chile powder, cumin, and sugar, and cook about 1 minute, or until the mixture is fragrant.

Pour in 2/3 cup of the tequila, and scrape the bottom of the pot with a wooden spoon to scrape up any browned bits.  Stir in the tomato sauce, then nestle the short ribs (and any juices that are on the plate) into the sauce.  Remove from heat, cover, and transfer to the oven.

Cook the short ribs 2 1/2 - 3 hours, or until they are very tender and falling off the bone.  Remove the meat from the sauce, and transfer them to a plate too cool.  

As the meat cools, pour the sauce through a fine-mesh strainer into a medium bowl.  Press down on any solids to extract as much liquid as possible.  Allow to cool slightly, then use a large spoon to skim as much fat off the top as possible.  Stir in the remaining 1/3 cup of tequila, and if the sauce seems too thick (if it's the same consistence as spaghetti sauce, it's just a little too thick), thin it with up to 1/2 cup of water.

Shred the meat into bite-sized pieces using 2 forks (or clean hands), discarding the bones and visible fat.

Increase the oven temperature to 425 degrees, and lightly grease a 9x13 inch baking dish.  

In a large bowl, toss the meat with the cilantro, 1/2 cup of the cheddar, 1/2 cup of the pepperjack, and 1/2 cup of the sauce.  Toss well to combine and season with additional salt and pepper to taste.

Stack the tortillas on a microwave-safe plate and cover with a damp paper towel.  Microwave about 1 minute, or until the tortillas are soft and pliable.  

To assemble the enchiladas, add a scant 1/3 cup of the filling onto each tortilla, and roll tightly.  Arrange the enchiladas in a single layer in the prepared baking dish, seam side-down.  Repeat with the remaining tortillas and filling.  

Lightly brush the tops of the enchiladas with vegetable oil, and bake 7 minutes, or until the tortillas begin to brown.  Remove from the oven, reduce the heat to 400 degrees, and pour the remaining enchilada sauce over the top.  Sprinkle with the remaining cheese, cover the dish with foil, and return to the oven.

Bake 20 minutes, remove the foil, and bake a final 5 minutes.  Sprinkle with cilantro and/or chopped scallions before serving.


Wednesday, November 13, 2013

(Crockpot) Texas-Style Chili


A few weeks ago, we had Henry and Tucker baptized.  It was a wonderful service, and we were lucky to be able to share the special occasion with our families and friends.  I have to admit that I was more than a little nervous about how Smith would behave during the baptism - he's a typical two-year old boy, and doesn't like to be still.  Especially when he's in a fun new place that needs to be explored.  There were six adults on the pulpit, and at some point he was chased down by five of us.  And then Henry spit up all over himself and me.  I like to think that these things simply made the day more memorable for us all.


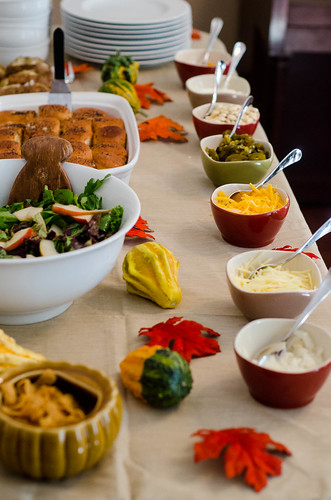
After church, we had our families over for a casual lunch.  I like to keep these kinds of events relaxed and low-key, so I planned a simple and seasonal menu:

Chicken Chili Verde
Texas-Style Chili
Baked Ham & Cheese Sliders
Baked Potatoes
Fall Harvest Pear Salad
Jalapeno-Cheddar Cornbread
Various toppings and garnishes for the chili

I'm especially glad that I kept things pretty simple, because we had some unexpected home issues to deal with most of the day prior to the lunch, which kept me out of the kitchen almost all day.  I had to nix my plans for a mini dessert bar, however, and ended up ordering a cake from a local bakery.  It all worked out in the end, and the day was a big success.

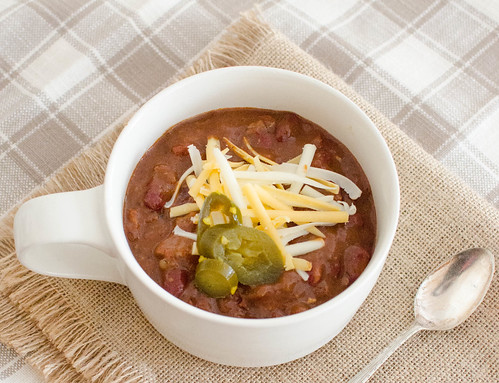
In large part of course, thanks to this chili.  Joey and I searched and browsed through countless cookbooks and websites trying to choose a chili to serve.  In the end, we chose this one, because it's a little different than the standard ground beef chili, but still familiar.

This chili has big chunks of beef, a chile-infused sauce, kidney beans, and just enough spice to keep things interesting.  It was a big hit with our families, and it is now officially our "go-to" chili.  I know that Texas chili purists will point out that Texas-style chili doesn't have beans in it.... but well... I just like beans in my chili, so sorry not sorry. ;-)

Beef chuck is the meat of choice here, and while it is typically kind of tough, after 9 hours in the crock pot, it is melt-in-your-mouth-tender.  It's super easy to prep, and then the longer it cooks, the better it gets.  This was the perfect blend of spicy, smoky, and savory.  Everyone loved it; so much so that I was kind of sad that there were barely any leftovers.  It was 29 degrees this morning, and a big bowl of this would be have been perfect for dinner tonight.  I think that will happen sooner, rather than later.

Crockpot Texas-Style Chili
barely adapted from America's Test Kitchen, Slow Cooker Revolution
serves 8 to 10

  • 3 medium onion, minced
  • 2 jalapeños, seeds and ribs removed, minced
  • 1/4 cup chili powder
  • 1/4 cup tomato paste
  • 3 Tbs vegetable oil
  • 8 cloves garlic, minced
  • 2 Tbs cumin
  • 1 tsp dried oregano
  • 2 (15-oz) cans dark red kidney beans, rinsed and drained (optional)
  • 1 (28-oz) can crushed tomatoes, preferably fire-roasted
  • 2 cups low-sodium chicken broth
  • 1/4 cup Minute tapioca
  • 3 Tbs soy sauce
  • 1 Tbs minced canned chipotle in adobo sauce
  • 2 Tbs brown sugar
  • 2 bay leaves
  • 1 (5-lb) boneless beef chuck roast, trimmed and cut into 1-2 inch chunks
  • salt and pepper
  • 1/2 cup minced fresh cilantro
In a microwave-safe glass bowl, combine the onions, jalapeño, chili powder, tomato paste, vegetable oil, garlic, cumin, and oregano.  Cook about 5 minutes, stirring every 1-2 minutes.  Transfer to the slow cooker.

Stir the beans, tomatoes, broth, tapioca, soy sauce, chipotles, sugar, and bay leaves into the slow cooker.  Season the beef liberally with salt and pepper, and stir into the bean mixture.  Cover and cook on low until the beef is tender, 9 to 11 hours on low, or 5 to 7 hours on high.

Turn off the heat, uncover, and allow the mixture to settle 5 to 10 minutes.  Remove the fat from the surface using a large spoon, discard the bay leaves, and taste.  Season with additional salt and pepper as needed.  Stir in the cilantro, and serve.


Thursday, August 29, 2013

Rosemary Flank Steak with Fig Salsa


This meal is one that I've been planning for over a year now.  It first showed up in the August 2012 Southern Living, and I immediately added it to my menu for the following week.  None of the figs looked great at the grocery store that day, so it got pushed back.  The following week I forgot to buy another key ingredient, and they got pushed back again.   Then I had trouble finding the proper cut of steak.  And then before I knew it, fig season was over, and this dinner was moved to the "next summer" file in my brain.  I've kept it in the back of my head almost every week while I'm out doing my shopping, just in case I happen to find figs, the proper steaks, and and open spot on the weekly meal plan.

And that serendipitous event occurred at Whole Foods on Sunday.  As soon as I walked in, I was greeted by a huge table of beautiful figs.  There was a perfect steak waiting for me at the meat counter.  I had an unopened package of gorgonzola cheese at home, along with a flourishing rosemary bush.  It was meant to be.

So with all that hype, I thought to myself that this had better be one of the best meals ever.  And big surprise - it was.  Flank steak (or skirt, flatiron, or "fajita") is briefly marinated in a mixture of oil, garlic, and rosemary.  As it marinates, you mix up the fig salsa - fresh figs, shallot, parsley, rosemary, and balsamic vinegar.  Then you cook the steak to your liking, slice it up, and top with the salsa and crumbles of gorgonzola.  And it. is. magical.  The sweet and juicy figs are a great match for the creamy cheese and the tender steak.  The balsamic vinegar helps marry the sweet and savory flavors, and the rosemary gives it a nice herbal note.

I served this over gorgonzola cheese grits, and it was a major hit all around.  There was a bit of salsa left over, and it was really awesome the next day on some toasted bread spread with goat cheese.  And then on a sandwich with prosciutto and goat cheese.  And eaten by the spoonful (Caroline's vehicle of choice).

Fig season is cruelly short, so I highly recommend that you snatch up some figs next time you see them and make this dinner.  This weekend, perhaps?

Rosemary Flank Steak with Fig Salsa
adapted from Southern Living, August 2012
serves 6

  • 2 Tbs chopped fresh rosemary
  • 2 garlic cloves, minced
  • 1 tsp kosher salt
  • 1/2 tsp freshly ground black pepper
  • pinch of crushed red pepper flakes
  • 4 Tbs olive oil, divided
  • 1 1/2 lbs flank steak
Fig Salsa
  • 3 cups chopped fresh figs
  • 1 small shallot, minced
  • 2 Tbs chopped fresh basil
  • 1/2 tsp chopped fresh rosemary
  • 2 Tbs balsamic vinegar
  • salt and pepper to taste
  • 2-3 Tbs crumbled Gorgonzola cheese
In a small bowl, stir together the rosemary, garlic, salt, pepper, and red pepper flakes with 2 tablespoons of olive oil.  Rub onto both sides of the steak, cover, and chill for 30 minutes, or up to 4 hours.

Preheat the grill to 400-450 degrees Farenheit.  

Meanwhile, make the fig salsa by stirring together the figs, shallot, basil, rosemary, vinegar, and remaining 2 tablespoons of oil.  Taste and season with salt and pepper as needed.

Grill the steak, cored with grill lid, 3-5 minutes per side, or to desired degree of doneness.  Cover with foil and let stand 5 minutes.

Cut the steak diagonally across the grain into thin strips, and arrange on a serving plate.  Spoon the fig salsa over the steak, and sprinkle with gorgonzola.  Serve.


Sunday, June 9, 2013

Blue Cheese-Stuffed Hamburgers


I'm blaming my own lack of awareness on both the excessively cool spring we've had and still being in a bit of a baby-induced fog.  But is it just me, or did the summer totally sneak up on us this year?  I didn't even realize it was Memorial Day weekend until the Thursday before when someone asked our plans for the long weekend.  And now we're suddenly almost halfway through June??  Caroline is starting kindergarten in August, and Smith will be starting preschool in September.  Time needs to slow down juuuust a little, because before I know it the twins will be graduating from high school!

But now that I'm firmly in summer-mode, I'm taking full advantage of the warm weather - dinner is cooked on the grill almost every night, and we've been eating on the screen porch nightly as well.  The kids just love being out there - Caroline gets super excited when I start carrying things out to the porch for dinner.

These burgers were one of our first al fresco dinners of the season.  It's a basic burger, but its kicked up a notch by stuffing it with a blue cheese filling.  The filling is a mixture of blue cheese, cream cheese, shallots, garlic, and mustard.  And it's goooood.  The rich and creamy filling pairs just swimmingly with the juicy burgers.  I couldn't get enough.

They come together quite quickly - the filling is mixed up, the burger patties formed, and then they are chilled for a bit before grilling.  This allows the cheese to firm up, thereby keeping the stuffing inside the patties versus oozing out all over the place.  It also provides you with a great make-ahead dinner.  I actually prepped the burgers early in the afternoon, and then when it was time to eat, just threw them on the grill while I cooked the sides (green salad and grilled corn on the cob, by the way).

We all absolutely loved these burgers, and I know they'll make many repeat appearances on our (outside) dinner table this summer.  If you're planning to grill out for Father's Day, these would be a great option - a little fancier than your everyday burger, but well -- it's still a burger.  And who wouldn't love a burger stuffed with cheese?

Blue Cheese-Stuffed Hamburgers
adapted from All Fired Up, by the editors of Southern Living
makes 4 burgers

  • 2 oz. cream cheese, softened
  • 1/4 cup crumbled blue cheese
  • 1 Tbs grated onion or shallot
  • 1 Tbs Dijon mustard
  • 1 garlic clove, minced
  • 1 1/2 lbs ground beef (preferably 80/20 fat content)
  • kosher salt and freshly ground black pepper
Stir together the cream cheese, blue cheese, onion, mustard, garlic, and a pinch of salt and pepper.

In a large bowl, gently combine the ground beef with 1/2 teaspoon of kosher salt and 1/2 teaspoon of pepper.  Shape the mixture into 8 (4-inch) patties and arrange in a single layer on a foil-lined baking sheet.

Spoon 1/4 of the cheese mixture onto each of 4 of the patties.  Top with the remaining 4 patties, pressing and pinching the edges to seal.  Cover with plastic wrap and chill for at least 30 minutes, or up to several hours.

To grill the burgers, prepare the grill to medium-high heat (350 to 400 degrees Farenheit.  Brush the grates with oil and grill the patties 6 to 7 minutes per side, flipping once.  

Serve on toasted buns with your choice of accompaniments.  I loved this simply with arugula - the burgers were juicy, and the stuffing provided plenty of flavor without the need for additional condiments.


Thursday, September 27, 2012

Baked Burritos with Creamy Poblano Sauce


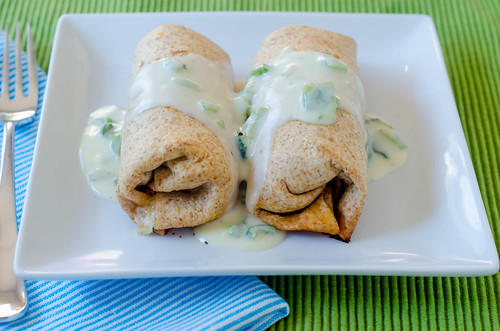
I'm pretty much guaranteed to like any combination of fillings that are wrapped into a tortilla - eat it as is, fry it, bake it, top with sauce, leave it "naked," whatever.  I'll eat it and I'll like it.  And to make it even better - how about if that combination is lean ground beef, black beans, Mexican spices, and plenty of cheese?  And then topped with a creamy poblano sauce?  It's most definitely a winner.

These burritos are basically the perfect combination of spicy, salty, creamy, crispy, savory... the works. I really and truly couldn't get enough.  

When I made them the first time, I used poblanos in the sauce, but I managed to get my hands on some Hatch green chiles for the second batch, and they were obviously wonderful that way as well.  

If you're not into red meat, chicken or turkey could easily be subbed as well... or even do all beans and/or a combination of other veggies make these vegetarian.  However you decided to make them, just make them.  They are quick and easy, relatively healthy, and of course delicious.  

I made these burritos the last week we lived in our old house, and froze half the filling for a future meal.   And then I used that filling to make our first meal in the new house.  Full circle, yes?

Baked Burritos with Sour Cream-Poblano Sauce
barely adapted from Elly Says Opa

  • 1 Tbs canola oil
  • 1 large onion, diced
  • 1 lb ground beef or sirloin
  • 3 cloves garlic, minced
  • 1 Tbs tomato paste
  • 1 can black beans, drained and rinsed
  • 1/4 cup water or chicken broth
  • 1/2 tsp cumin
  • 1/2 tsp oregano
  • 1 1/2 tsp chili powder
  • 1/8 tsp cayenne
  • 1 tsp brown sugar
  • 1/4 cup chopped fresh cilantro
  • 1 cup shredded Monterey Jack, cheddar, or cheese of your preference
  • 4-10 whole wheat tortillas, depending on size (4 for burrito-sized, more for soft taco or fajita sized)
  • cooking spray
Sour Cream-Poblano Sauce
  • 2 poblano peppers
  • 2 Tbs butter
  • 2 Tbs flour
  • 2/3 cup chicken broth (preferably room temperature)
  • 1/2 cup sour cream (light is fine)
  • salt and pepper, to taste

Preheat the oven to 400ºF and spray a rimmed baking sheet with cooking oil.
To make the burritos:  Heat a large skillet over medium heat, and add the oil. Add the onions and cook  3-5 minutes until they begin to soften. Place the ground beef in the pan and cook, stirring occasionally and breaking up any large pieces, until well browned.  (At this point, drain any excess fat if necessary/desired).
Stir in the garlic and tomato paste and cook for 30-60 seconds before adding in the beans. Add the water or broth, cumin, oregano, chili powder, cayenne, brown sugar and salt to taste (about 1 teaspoon). Reduce heat and simmer until most of the liquid has been absorbed
Sprinkle a few tablespoons of the cheese down the center of each tortilla (depending on size) and then spoon some of the beef and bean mixture over the top. Fold the left and right sides of the tortilla in, and then roll the tortilla up, from the end closest to you, to the top. Place seam-side down on a baking sheet, and spray with cooking oil.  Sprinkle the tops lightly with kosher salt.

Bake for about 20 minutes, until tortillas are golden brown and crispy.

Meanwhile, make the sauce.
Place the poblano directly over a gas burner. Using tongs, turn occasionally until skin is blackened on all sides. Place in a bowl and top with plastic wrap or a clean towel, until cook enough to handle.  Alternatively, if you don't have a gas burner, preheat the broiler and place the poblano on a baking sheet.  Broil 6-inches from the heat source, turning occasionally, until blackened and charred. 
Peel the poblano and rinse off any small bits of charred skin, remove the stem and seeds, and dice it.
Heat a small sauce pan over medium heat, and melt the butter. Stir in the flour, cooking for about a  minute. Slowly whisk in the chicken broth and then the diced poblano; continue to simmer, whisking frequently, until thickened.
Add the sour cream and warm through. Season to taste with salt and pepper.  Reduce the heat to low and cover to keep warm until the burritos are done.
Spoon the sauce over the burritos and serve.


Tuesday, September 11, 2012

Steaks with Citrus-Soy Sauce & Edamame Slaw


Aside from the obvious question of "how are you feeling?" I am often asked if I'm having any crazy cravings with this pregnancy.  With Caroline, I craved bbq allllll the time.  With Smith, I developed quite an addiction to (decaf) iced vanilla lattes.  And with this pregnancy, I've been all about red meat.  More specifically, steak.  It's not really like me at all, given that I typically only eat red meat about once a month or so - but the babies want what the babies want, right?

This particular steak really hit the spot, too.  New York Strip steak is cooked on the stovetop to your desired doneness (sadly, I overcooked mine quite a bit.  But since it's not recommended to eat medium-rare meat while pregnant, I guess it was for the best).  A quick slaw is mixed up of shredded broccoli, edamame, onion, and toasted almonds.  And the best part - a simple dressing soy-citrus dressing pulls double duty - part of it becomes the dressing for the slaw, and the rest is reduced on the stovetop to create a flavorful pan sauce for the steak.  From start to finish, this came together in under thirty minutes.  I served it with some rice on the side, and it was a super easy meal that would have been fancy enough for company.  And the leftovers were all cooked together the next day to make a pretty fabulous steak and veggie-fried rice.  Pretty great when 30 minutes of cooking gives you two great meals, isn't it?

Steaks with Citrus-Soy Pan Sauce & Edamame Slaw
adapted from America's Test Kitchen, Simple Weeknight Favorites
serves 4

  • 1 1/2 cups frozen shelled edamame
  • 5 Tbs low-sodium soy sauce
  • 1 Tbs grated orange zest + 1/4 cup juice
  • 2 Tbs rice wine vinegar
  • 1 Tbs freshly grated ginger
  • pinch of crushed red pepper flakes
  • 3 Tbs toasted sesame oil
  • 1 (10-oz) bag broccoli slaw mix
  • 1/2 red onion, thinly sliced
  • 1/2 cup slivered almonds, toasted
  • 3 (10-  to 12-oz) boneless strip steaks, 1-2 inches thick
  • 4 Tbs unsalted butter, cut into 4 pieces and chilled
Place edamame in a bowl, cover, and microwave 4 to 6 minutes, or until tender.  Set aside to cool for 5 minutes.

 Meanwhile, whisk the soy sauce, orange zest and juice, vinegar, ginger, and red pepper flakes together in a small bowl.  Transfer 3 tablespoons of the dressing to a large bowl, then whisk in 2 tablespoons of the sesame oil (to the large bowl).  Add the broccoli slaw mix, edamame, onion, and almonds, and toss to coat.  Season with salt and pepper to taste and set aside.

Pat the steaks dry with paper towels and season liberally with salt and pepper.  Heat the remaining tablespoon of sesame oil in a large skillet over medium-high heat.  Cook steaks until well browned and cooked to your liking, turning once (about 3-5 minutes per side).  Transfer to a cutting board and test loosely with foil.  Let rest while you make the pan sauce.  Reduce the heat to medium-low.

Add the remaining soy sauce mixture to the now-empty skillet and cook until slightly thickened, about 1 minute.  Remove from heat and whisk in the butter, one piece at a time.  

To serve, divide the slaw evenly among 4 plates.  Thinly slice the steaks and distribute among plates, and drizzle with sauce.


Sunday, August 12, 2012

Skillet Lasagna


So I've been holding out on you guys... I have a lot going on right now (all good things!), one of which is that we're moving!  If all goes according to plan, we'll be closing on our new house at the end of this month.  Woot!  As excited as I am to have a big backyard and a bigger kitchen, that comes with a price - cleaning and packing up our current house - and our lives for the last 9 years.  As you might could imagine, this will be no small feat with two small children underfoot.  Caroline loves to "help" me pack, which roughly translates to "ooooh look I found my favorite toy! " (some random ball that she hasn't touched for 2 years) and "Can I play with this book of 2000 stickers that you're trying to pack?  I promise not to make a mess!"

So needless to say, the less I have to pack and take with us, the better.  Which brings us to this lasagna.  I'm trying to pare down my pantry, fridge, and freezer.  The less we have, the less we have to pack or throw away.  I always seem to have several boxes of half-empty pasta, so this made the perfect dinner to use those up.  I actually did have some partially full boxes of lasagna noodles, but really any small or medium pasta would work well here.

The beauty of this dish is that it really does taste like lasagna, but it comes together in right around half an hour and is completely cooked one skillet.  Joey even ventured to say that he likes it better than traditional lasagna.

Peeled tomatoes are pulsed in a food processor to form the tomato sauce - but I think you could use crushed tomatoes and still have great results.  Onion and ground beef are then sautéed, flavored with some garlic, herbs, and spices, and the noodles and tomato sauce are added.  They are simmered on the stovetop, absorbing all the tomato-goodness, leaving you with a super flavorful dish.  And THEN, ricotta, parmesan, and mozzarella are stirred in, MORE cheese is sprinkled over the top, and a quick trip under the broiler leaves you with the melty, gooey top that is a necessity to any lasagna.

I'll most definitely be making this dish in our new house time and time again.  It has quite easily become a family staple.


Skillet Lasagna
adapted from America's Test Kitchen, Pasta Revolution
serves 4 to 6

  • 3 (14.5 oz) cans whole peeled tomatoes (or 1.5 28 oz cans)
  • 1 Tbs olive oil
  • 1 medium onion, diced
  • kosher salt and freshly ground black pepper
  • 3-4 garlic cloves, minced
  • pinch red pepper flakes
  • 3/4 tsp dried Italian seasoning
  • 1 lb ground sirloin
  • 10 (curly-edged) lasagna noodles, broken into 2-inch pieces
  • 3/4 cup shredded mozzarella cheese
  • 1/2 cup grated Parmesan cheese
  • 3/4 cup ricotta cheese (part-skim is fine)
  • 3 Tbs chopped fresh basil
Pulse the tomatoes in a food processor until coarsely ground and no large pieces remain, about 12 pulses.

Heat the oil in a 12-inch nonstick skillet over medium heat.  Add th onion and 1/2 teaspoon of salt and cook, stirring often, until softened, 5 to 7 minutes.  Stir in the garlic, pepper flakes, and Italian seasoning and cook until fragrant, about 30 seconds.

Add the ground beef to the skillet.  Cook, stirring often and using a wooden spoon to break up the meat, about 3 to 5 minutes, or until it's no longer pink.

Scatter the pasta in the skillet, then pour the tomatoes over the top.  Stir, increase the heat to medium-high, and cover.  Cook at a vigorous simmer, stirring often, until the pasta is tender, 20 minutes (if you don't stir it, the pasta will clump together and stick to the bottom and sides of the skillet).

Meanwhile, preheat the broiler.

Remove the skillet from heat, and stir in half the mozzarella and parmesan, and 1/4 cup of the ricotta.  Dot the remaining ricotta over the noodles in tablespoons, then sprinkle with the remaining mozzarella and parmesan.  Transfer to the oven and broil until the cheese melts and is starting to brown.  Remove from oven, sprinkle with basil, and serve.


Thursday, March 22, 2012

Balsamic Steak, Roasted Red Pepper, & Goat Cheese Pizza


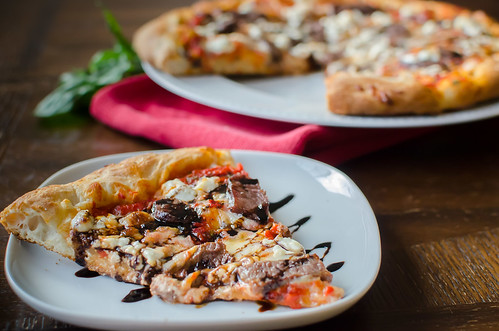
Happy pizza Friday!  When we have leftover meat, my favorite way to use it up is on a pizza.  Chicken. pulled pork, and most recently, steak!  There was a good bit of steak leftover from the Mexican-Style Steak Sandwiches, so one night I chopped it up and made bbq sandwiches, and one night I made this pizza.  And this pizza - oh my goodness - it's one of the best things I've made in quite some time.

I started by making a roasted red pepper sauce - simply pureed some roasted peppers in the food processor with a little garlic and basil.  I topped that with a little mozzarella, the chopped steak, and then some crumbled goat cheese.  After it was cooked, I drizzled the whole thing with balsamic glaze, and it just put the whole pizza over the top.  Balsamic glaze on pizza is, quite simply, life-changing.  I first tried it on a whim last time I made white pizza, and I thought it would go really well with the steak and goat cheese this time.  It's just a little sweet, a little sour, and a lot delicious.  So so good.  To be honest, I'm going to have a hard time eating pizza without it moving forward.

If you don't just happen to have any leftover steak in your fridge, then just cook it to your liking and slice it thinly.  I also think chicken would work well here, or make it vegetarian and leave the meat off altogether.  


Balsamic Steak, Roasted Red Pepper, and Goat Cheese Pizza
Pink Parsley Original
  • pizza dough
  • olive oil
  • 1/2 cup roasted red peppers, patted dry and coarsely chopped
  • salt and pepper
  • 1 clove garlic, minced
  • 2-3 basil leaves torn
  • 3/4 cup shredded mozzarella cheese
  • 1/2 cup thinly sliced steak
  • 1/2 cup crumbled goat cheese
  • 1/2 cup Balsamic vinegar
Preheat the oven and the pizza stone to 500 degrees, for at least 30 minutes.  Lightly sprinkle a large square of parchment paper with cornmeal, and stretch the pizza dough over it into a 12 inch circle.  Brush the outer ring with olive oil.

In the food processor, puree the roasted red peppers, garlic, and basil.  Season to taste with salt and pepper.  

Spread the roasted red pepper puree over the pizza dough, and sprinkle with mozzarella.  Scatter the steak over the cheese, and then top with the goat cheese crumbles.  

Use the parchment to transfer the pizza to the pizza stone and cook for about 10 minutes, or until the crust is browned and the cheese is bubbly. 

Meanwhile, bring the balsamic vinegar to a boil in a small saucepan.  Boil until it's thick and syrupy and reduced to a few tablespoons.

Allow the pizza to cool about 10 minutes, then drizzle with the vinegar (a little goes a long way and you don't have to use all of it).  Slice and serve.


Thursday, March 15, 2012

Mexican-Style Steak Sandwiches


We are typically year-round grillers, so when spring arrives, I do love to fire it up, but it's not quite as exciting to me as it is to say, my sister who lives in Minneapolis.  However, this week the weather has been absolutely gorgeous, so I couldn't resist cooking our dinner on the grill and eating on the deck.

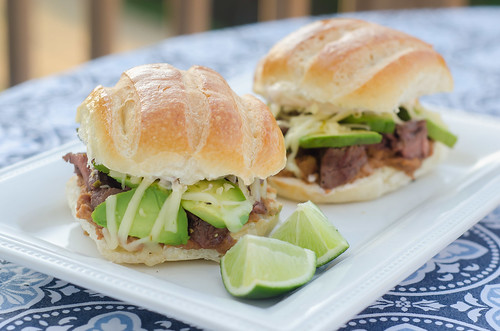
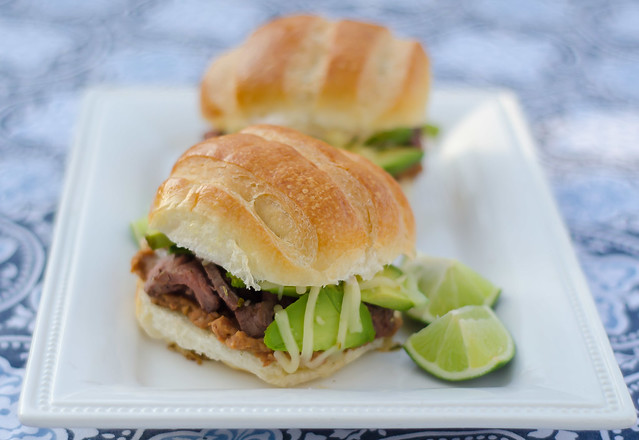
I also can't resist Mexican food, so these sandwiches were a no-brainer for me.  You have thinly sliced steak on top of refried beans, topped with sliced avocado, Pepperjack cheese, and a creamy chipotle-lime sauce.  They are also very easy.  First, the steak is quickly cooked on the grill.  While it is grilling, you prep the other fillings - shred the cheese, slice the avocado and the buns, mix up the sauce, etc.  After assembling the sandwiches, they are popped back on the grill just long enough to melt the cheese and warm the whole thing through.  They are that perfect combination of spicy, salty, and creamy.  I knew that Joey would love these, but I'm pretty sure I loved them just as much. I served these with sweet potato fries, and they were also pretty delicious dipped into the leftover sauce.  In the summer, I also think a watermelon salad would be lovely as a side dish.

These sandwiches are quick, easy, and low-maintenance.  Which is perfect for this time of year - we finished dinner, loaded Smith in the Baby Bjorn, and went for a nice, leisurely walk after dinner.  I love spring so so much!


Mexican-Style Steak Sandwiches
adapted from America's Test Kitchen's 30 Minute Suppers, Summer 2011
  • 1 lb steak (preferably flank, flatiron, or skirt steak)
  • salt and pepper
  • 1/2 cup Greek yogurt or mayonnaise (lowfat is fine)
  • 1 Tbs minced chipotle chiles
  • 1-2 Tbs lime juice
  • 1/2 cup refried beans
  • 1 avocado, pitted and sliced
  • 1/2 cup shredded Pepper Jack cheese
  • 4 sandwich or burger buns, halved
Prepare grill to cook over medium-high heat.  Season both sides of the steak with salt and pepper.  Grease the grates well, then cook the steak until charred on both sides and cooked to your liking (about 4-7 minutes per side for medium).  Transfer the steak to a cutting board and tent with foil.  Allow to rest 5 minutes.

Meanwhile, in a small bowl whisk together the yogurt, chipotles, and lime juice.  Taste and season with salt as desired.

 Slice the steak as thinly as possible, then chop into bite-sized pieces.  On the bottom half of each roll, spread about 2 tablespoons of refried beans.  Top with the chopped steak, avocado, and then sprinkle about 2 tablespoons of cheese over the top.  On the top half of the bun, spread about 1 tablespoon of the chipotle sauce.  Place the top of the bun over the cheese, and lightly press down.

Arrange the sandwiches on a baking sheet and place the sheet directly on the grill.  Close the cover and cook until heated through and the cheese has melted, about 2 minutes.  Serve.


Sunday, March 4, 2012

Four-Cheese Cheese Burgers


We don't really eat a lot of red meat at home, but a few weeks ago I got an undeniable craving for a cheeseburger.  I called Joey at work and asked if burgers were okay for dinner that night (ummm yes they were, of course), and then asked if he had any preferences on toppings - I do like to get fancy after all.  I read him a few ideas that I'd saved from various cookbooks, blogs, and magazines, and when I got to Four-Cheese Burgers he stopped me.  Done and done.

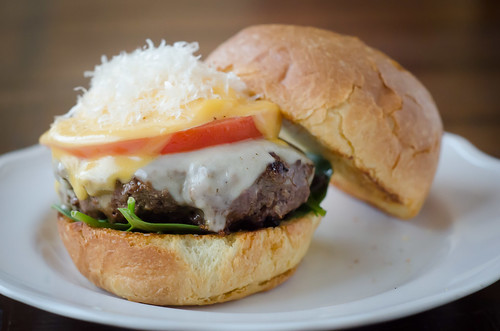
This is a basic burger patty, and the real business is the cheese.  You could really use any combination of cheeses you'd like, but I loved the combo of Swiss, American, Goat, and Parmesan.  Though I love goat's cheese more than life itself, don't be tempted to add extra - it's a very strong flavor and will easily overpower the rest of the cheeses.

This was just really really good - I obviously knew we would like it - I mean, what's not to like here - but we all LOVED it.  So much in fact, that we had the exact same dinner the very next night.  Definitely not something that happens often around here!


Pin It

Four-Cheese Cheese Burgers
adapted from Bobby Flay's Burgers, Fries, and Shakes
makes 4 burgers
  • 1 1/2 lbs ground beef (preferably 85%)
  • kosher salt and freshly ground black pepper
  • 1 Tbs Worcestershire sauce
  • pinch cayenne
  • 2 tsp Dijon mustard
  • 1 Tbs canola oil
  • 4 slices Swiss cheese
  • 4 slices American cheese
  • 1/4 cup crumbled goat cheese
  • 1/4 cup freshly grated Parmesan cheese
  • 4 slices Beefsteak tomatoes, sliced 1-inch thick
  • 4 hamburger buns, split and toasted
  • handful of spinach or arugula leaves
In a large bowl, gently combine the beef with salt and pepper, Worcestershire sauce, mustard, and cayenne.  Form into 4 equal-sized patties, each about 3/4-1 inch thick.  Make a deep depression in the center of each patty with your thumb.  Season with additional salt and pepper.

Heat the oil over medium-high heat in a large skillet, preferably cast-iron.  Cook the burgers 3-4 minutes, then carefully flip using a spatula.  Cook an addtional 3-6 minutes, until the burger reaches your desired degree of doneness.  Top each burger with a slice of Swiss, followed by the tomato slice, goat cheese, and the American cheese.  Cover the skillet and cook an additonal mitue or so, until the cheese has melted.  Remove from heat and sprinkle with the Parmesan.  Serve on the toasted buns with the spinach.


Wednesday, January 18, 2012

Short Rib and Porcini Lasagne


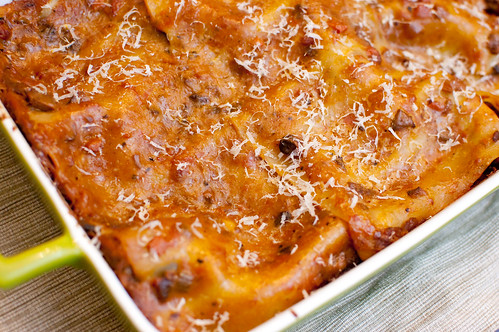
Sometimes you just need comfort food.  Like when it's cold outside.  Or you've had a bad day.  Or your toddler has had a fever for five straight days and it peaked at 106 degrees.  Or your three month old baby rolls off an ottoman and hits his head. You know, those kinds of days.  This lasagne certainly fits the bill.  It's homey, it's rustic, and it's utterly delicious. 

If you love short ribs, you'll love this lasagne.  If you love porcini mushrooms, then you'll love this lasagne.  If you love lasagne, then you'll love this lasagne.  It's rich and filling, but a little goes a long way, so you don't have to eat a giant slice to be satisfied.  Though you may eat a giant slice (or two) because it's so darn good.

Admittedly, it is a bit of an undertaking from a time standpoint.  But it's great for when you want to zone out and forget all your worries and just cook. Nothing is terribly difficult or time-consuming, but from start to finish it will take a few hours - but don't let that scare you away.  A majority of the prep-time is cooking the short ribs, so that is inactive.  And you can actually make them a few days ahead of time, so that will save you a lot of time the day you plan to serve this.  If you are feeling particularly ambitious, you can make your own pasta, but I took the easy way out this time and used no-boil noodles.  Which surprisingly taste almost as good as fresh pasta once the whole thing has been assembled and cooked.

Once assembled, this lasagne is pretty awesome.  The tender pasta, the short ribs (it's hard to go wrong with short ribs), the earthy mushrooms, rich and hearty tomato sauce, and the creamy bechamel all work so wonderfully together.  Yes, it takes a long time to make, but what a perfect project for a cold and dreary weekend.  While you're at it, invite some friends over to eat.  They will most definitely thank you.


Short Rib and Porcini Lasagne 
adapted from Fine Cooking, Dec 2011/Jan 2012
  • 3/4 oz (1 cup) dried porcini mushrooms
  • 2 lbs beef short ribs
  • kosher salt and freshly ground black pepper
  • 1 Tbs extra-virgin olive oil
  • 1 small yellow onion, finely chopped
  • 1 small carrot, finely chopped
  • 1 celery stalk, finely chopped
  • 2 cloves garlic, minced
  • 1 Tbs tomato paste
  • 1 bay leaf, fresh or dried
  • 1/2 cup dry red wine
  • 1 1/2 cups canned crushed tomatoes
  • 3 Tbs unsalted butter
  • 3 Tbs all-purpose flour
  • 2 cups milk (low-fat is fine)
  • 1 clove garlic, smashed
  • 1 1/2 cups finely grated Parmesan cheese
  • 1 box no-boil lasagne noodles
In a small bowl, soak the porcini in 1 1/2 cups of hot water for about 10 minutes.  Drain, and reserve the soaking liquid.  Coarsely chop the mushrooms and set aside.

Season the short ribs with salt and pepper.  In a large Dutch oven, heat 1 Tbs of the oil over medium-high heat until shimmering.  Add the short ribs, in batches if necessary, and brown on all sides, 2 to 3 minutes per side.  Transfer to a plate and pour off all but 1 tablespoon of fat.

Reduce the heat to medium and add the onion, carrot, and celery.  Cook until the vegetables are tender, 4 to 5 minutes.  Add the garlic and cook until fragrant 30 seconds to 1 minute.  Add the tomato paste and cook until it darkens 1 to 2 minutes.  Pour in the wine and add the bay leaf.  Simmer, stirring and scraping up any browned bits as you go, until almost all the wine has evaporated, 2 to 3 minutes.

Add the reserved mushroom liquid and the tomatoes, and bring to a simmer.  Return the short ribs to the pot, along with any accumulated juices and the chopped porcini.  Cover and reduce the heat to maintain a gentle simmer.  Cook, turning the ribs every 30 to 40 minutes, until the meat is fall-off-the-bone tender, 2 1/2 to 3 hours total.

Use tongs to remove the ribs from the pot and move them to a plate to cool.  Pour the sauce into a heatproof bowl and discard the bay leaf.  Allow to sit for a few minutes, until the fat rises to the surface.  Be sure to get as much fat off as you can, or the tomato sauce will be greasy.  Skim it off with a large spoon and discard.  When the meat is cool enough to handle, remove and discard the bones and any fat or cartilage.  Shred the meat and set aside in a medium bowl.

Make the bechamel sauce.  Melt the butter in a 3-4 quart saucepan set over medium heat.  Stir in the flour with a wooden spoon and cook until golden, stirring constantly, about 2 minutes.  Gradually whisk in the milk and add the garlic clove.  Cook at a gentle simmer, stirring often, until the mixture thickens, about 10 minutes.  Fish out the garlic clove and season with 1 teaspoon of salt.  Mix the bechamel sauce into the tomato sauce.

Add the lasagne noodles to a large heatproof bowl or casserole dish.  Pour enough boiling water over them to cover completely, and allow them to soak about 5 to 10 minutes, or until they are soft and pliable.  Drain the water, and when cool enough to handle, line them in a single layer on a lint-free kitchen towel.  Pat dry with another kitchen towel.

Assemble and bake the lasagne.  Heat the oven to 350 degrees and lightly grease a 9x13 inch baking dish.

Spread 3/4 cup of the sauce on the bottom of the dish and cover the sauce with a slightly overlapping layer of the noodles.  Spread 3/4 cup of sauce over the noodles, and add 1/2 cup of the shredded meat over the sauce.  Sprinkle with 1/4 cup of the shredded Parmesan cheese.

Add another layer of noodles, then repeat the layers as instructed above, to make a total of 4 layers of sauce and meat and 5 layers of noodles.  At this point you should have used all the meat, but still have some sauce and cheese left over.  Spread 3/4 cup of the sauce over the top and sprinkle with the remaining cheese.

Cover the baking dish with foil and bake for 40 minutes.  Remove the foil and bake until the top is browned and bubbly, 15 to 20 minutes.  Cool for at least 10 minutes before serving.  Sprinkle with additional cheese as desired when you serve.


BLOG DESIGN BY: SHERBET BLOSSOM DESIGNS