Showing posts with label casserole. Show all posts

Tuesday, February 24, 2015

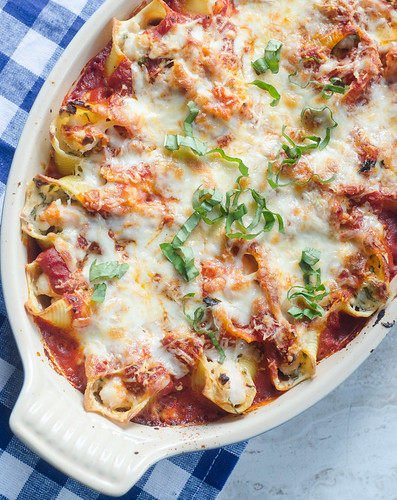
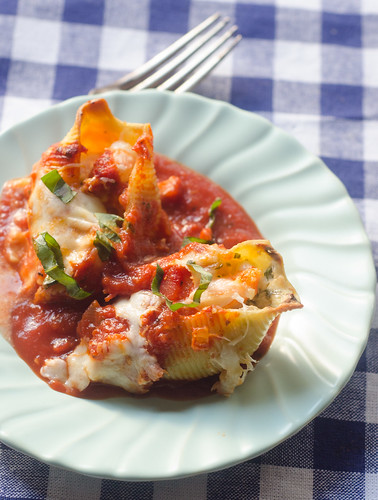
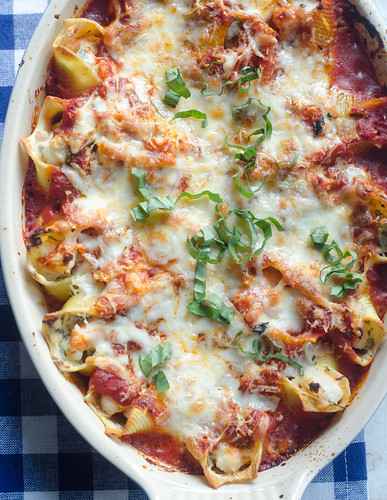
Shrimp-Stuffed Shells

Shrimp-Stuffed Shells

Stuffed shells have long-been one of my favorite dinners, but I typically keep it pretty traditional, with a standard sausage-ricottoa-spinach filling.  However, I absolutely love seafood pastas, so the minute I saw this shrimp-stuffed shells recipe, I knew it would be a winner.  What I didn't expect though, was how MUCH of a winner it would be.  Caroline ate an obscene number of these, and Smith had almost as many.  Henry and Tucker have entered "the picky era" of their lives, and they even ate these shells with reckless abandon.  Which, as I'm sure you can imagine, means, sauce and shrimp flying all over the place and making a giant mess, as only two year olds know how.

Shrimp-Stuffed Shells 

The idea of shrimp in a baked pasta dish may seem kind of .. odd.. but the shrimp cook right in the shells, and there's no overcooked, rubbery seafood to be found.  The filling is cheesy and creamy, and the rich tomato sauce is a great contrast to that.  Of course, no baked pasta dish is complete without a blanket of mozzarella and parmesan, so of course we've got you covered there too.

As we hunker down for another winter storm, I am all about comfort food, and baked pasta definitely fits the bill.  And as a bonus, this is actually pretty light.  Four shells, which I found to be a very generous serving, is just under 500 calories, making this a really great healthy meal.

Shrimp-Stuffed Shells 

Shrimp-Stuffed Shells
adapted from Cooking Light, January 2012
serves 5 to 6

  • 20 uncooked jumbo pasta shells
  • 1  Tbs olive oil
  • 1/2 cup diced shallots
  • 2 Tbs minced garlic
  • 1/2 cup (4 oz) reduced fat cream cheese, softened to room temperature
  • 1/4 cup milk
  • pinch of red pepper flakes
  • 1/3 cup chopped fresh basil
  • 1 pound medium shrimp; peeled, deveined, and cut into thirds
  • 2 tsp cornstarch
  • cooking spray
  • 2-3 cups marinara sauce
  • 1/3 cup shredded mozzarella cheese
  • 2 Tbs freshly grated Parmesan cheese

Preheat oven to 400° F.  Lightly spray a 9x13 inch baking dish with cooking spray.

Bring a large pot of water to a boil and add 2 teaspoons  of kosher salt.  Cook pasta 7 to 9 minutes or until just al dente.  Drain and set aside.

Heat a medium skillet over medium heat. Add oil to pan; swirl to coat. Add shallots and cook 3 to 4 minutes, stirring occasionally. Add garlic and red pepper flakes; cook 1 minute, stirring constantly. Whisk in the cream cheese and milk and cook until cheese melts, stirring until smooth. Remove from heat. Stir in basil. Place shrimp in a bowl. Sprinkle with the corn starch and toss well to coat. Add cream cheese mixture to shrimp.  Mix well to combine.

Divide shrimp mixture evenly among pasta shells.  Spread 1 cup marinara over bottom of dish. Arrange the shells in a single layer in the prepared dish; top with remaining 1-2 cups marinara. Sprinkle shells evenly with the mozzarella and parmesan cheese. Cover  Bake at 400° for 20 minutes.  Remove the foil and bake an additional 5 to 10 minutes, or until the cheese is melted and the shrimp are cooked through.  Serve.


Sunday, January 25, 2015

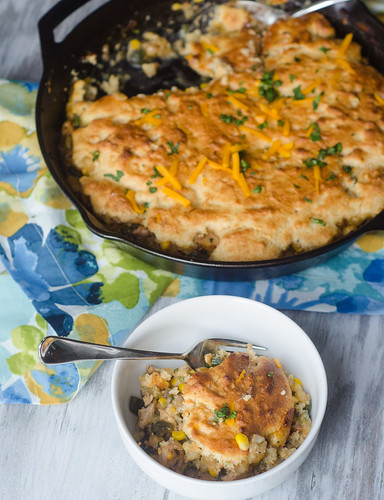
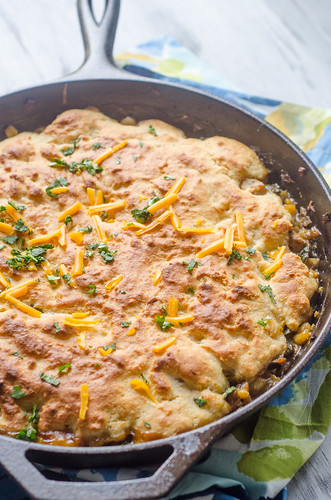
Skillet Chicken Tamale Pie

Skillet Chicken Tamale Pie

When I was growing up, one of my favorite dinners was tamale pie.  My mom made a vegetarian version, which still remains in my top 5 meals (sorry, I've been holding out -- I'll share it soon!).  In case you're unfamiliar with the concept of tamale pie, it's a baked casserole, the filling consisting of various vegetables, perhaps meat, Mexican spices, and topped with cornbread.  Yeah.  It's good.

This version is pretty much a 180 from the tamale pie I had growing up, but I love it just as much.  The filling is chicken, poblano peppers, corn, hominy, and cheddar.  Topped with cornbread batter and baked, it is so comforting -- basically this is a Mexican-inspired chicken pot pie with cornbread instead of a pie crust on top.  As Ina would say, "How bad can that be?"

It's also a pretty light dinner, especially for something so filling and comforting.  It comes in at under 400 calories per serving, which makes this calorie-counting woman very happy.  Paired with a green salad, this made for a really wonderful dinner, and a few days worth of awesome lunches as well!

So I noticed that this is the third skillet dinner in a row that I've posted… hope you guys love them as much as we do!  Long live the skillet!


Skillet Chicken Tamale Pie 

Skillet Chicken Tamale Pie
adapted from America's Test Kitchen's Healthy Family Cookbook
serves 6

  • 1 lb boneless, skinless chicken thighs, trimmed of excess fat
  • kosher salt and freshly ground black pepper
  • 2 tsp canola oil
  • 1 onion, minced
  • 2 poblano peppers, stemmed, seeded, and chopped
  • 1 jalapeño, stemmed, seeded, and chopped (optional)
  • 3 cloves garlic, minced
  • 1 Tbs all purpose flour
  • 1 1/2 cups low-sodium chicken broth
  • 1 (15-oz) can hominy, drained and rinsed
  • 1 (7-oz) can mild chopped green chiles, drained
  • 1 cup frozen corn
  • 3/4 cup shredded extra sharp cheddar cheese
  • 1/4 cup minced fresh cilantro
Topping
  • 3/4 cup all-purpose flour
  • 3/4 cup cornmeal
  • 3 Tbs sugar
  • 3/4 tsp baking powder
  • 1/4 tsp baking soda
  • 1/2 tsp kosher salt
  • 3/4 cup buttermilk
  • 1 large egg
  • 1 Tbs unsalted butter, melted
  • 1/4 cup extra sharp cheddar cheese
Preheat the oven to 450 degrees.  

Pat the chicken dry and season liberally with salt and pepper.  Heat the oil in a 12-inch oven-safe skillet over medium-high heat.  Add the chicken and cook 6 to 8 minutes, flipping once, until it is golden-brown on both sides.  Transfer the chicken to a plate and leave the fat in the pan.

Add the onion, poblano, 1/2 teaspoon of salt, and 1/2 teaspoon of pepper to the pan and cook until it's softened and lightly browned, 5 to 7 minutes.  Stir in the garlic and flour and cook an additional minute.

Stir in the broth, hominy, chiles, and corn, and bring to as mimer.  Nestle the chicken in tot he mixture, cover, and reduce heat to medium-low.  Cook until the chicken is cooked through, about 10 minutes.

Remove the chicken from the skillet, and once it's cool enough to handle, shred it into bite-sized pieces.  Return the chicken to the skillet and stir to combine.  Stir in the cheddar and cilantro, taste, and season with additional salt and pepper if needed.  Remove from heat and cover to keep warm while you make the cornbread topping.

In a large bowl, whisk together the flour, cornmeal, sugar, baking powder, baking soda, and salt.  In a separate, smaller bowl, whisk together the buttermilk and egg.  Stir the buttermilk mixture into the flour mixture, just until no streaks of flour can be seen, then stir in the melted butter and cheddar cheese.  

Drop spoonfuls of the batter over the chicken filling, then smooth the top into an even layer, covering the filling completely.

Transfer the skillet to the oven and bake 15 to 20 minutes, or until the topping is golden and set.  Cool for 10 minutes before scooping into bowls and serving.


Tuesday, December 9, 2014

Skillet Chicken Shepherd's Pie

Skillet Chicken Shepherd's Pie

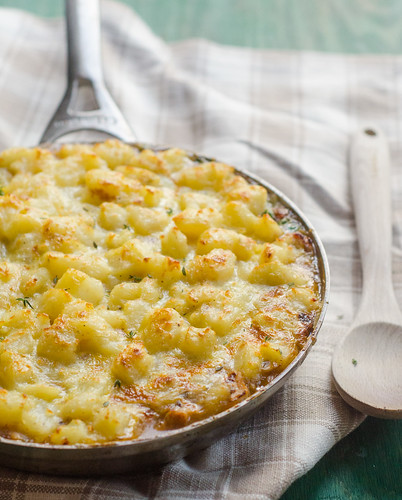
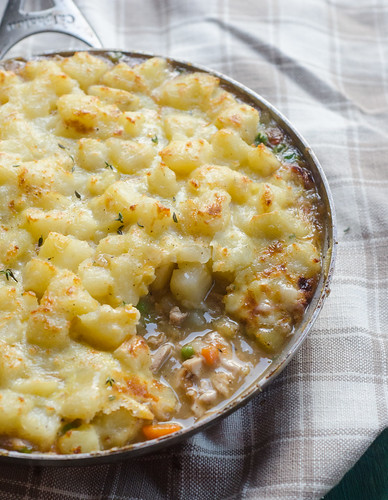
I've never been a big fan of shepherd's pie.  I don't have a good reason other than it's… just not my thing I guess.  But when I saw this version of shepherd's pie in the new Cook's Country Magazine, I couldn't resist.  I mean, look at those potatoes!  Look at that filling!  It's basically a chicken pot pie topped with buttery potatoes, then baked.  Nothing wrong with that, eh?

This shepherd's pie varies from the classic version in that it uses chicken instead of lamb (duh), but also in the potatoes.  Typically, a shepherd's pie is topped with mashed potatoes.  But in my experience, they often get dried out in the oven.  This version simply tosses cooked potatoes in butter, salt, and pepper, then spoons them over the filling.  An egg wash gives them a nice crispy top and pretty golden color, and I promise you this is world's better than dried out gummy mashed potatoes.

This was a huge hit with my whole family, and it's definitely becoming a new favorite in my house.  As we hunker down for what is sure to be a long, cold winter, I'm happy to have this comforting, delicious recipe in my repertoire.

Skillet Chicken Shepherd's Pie

Chicken Shepherd's Pie
barely adapted from Cook's Country, December/January 2015

  • 2 lbs bone-in, skin-on chicken thighs, trimmed of excess fat
  • kosher salt and freshly ground black pepper
  • 6 Tbs unsalted butter, divided
  • 1 onion, chopped
  • 3 medium carrots, peeled, halved lengthwise, and cut into 1/2-inch thick slices
  • 2 large cloves of garlic, minced
  • 2 tsp minced fresh thyme
  • 1/4 cup dry sherry or dry white wine
  • 1 1/2 cups chicken broth
  • 2 lbs russet potatoes, peeled and cut into 1-inch chunks
  • 2 Tbs cornstarch
  • 1 cup frozen peas, thawed
  • 1 Tbs lemon juice
  • 1 large egg, lightly beaten with 1 Tbs water
Adjust the oven rack to the upper-middle position and heat to 375 degrees F.  

Pat the chicken dry and season both sides generously with salt and pepper.  Melt 1 tablespoon of the butter in an oven safe 10-inch skillet over medium-high heat.  Cook the chicken in 2-3 batches, about 5 minutes per side, or until the chicken is well-borwned.  Transfer to a plate and pour off all but about 2 tablespoons of the fat from the skillet.

Return the skillet to heat and add the onions, carrots, and a large pinch of salt and pepper.  Cook, stirring often, until they are just softening, about 5 minutes.  Add the garlic and thyme and cook an additional 30 seconds.  Stir in the sherry and cook until most of the liquid has evaporated, about 1-2 minutes, scraping up any browned bits from the bottom of the pan with a wooden spoon.  Stir in the broth.

Return the chicken and any accumulated juices to the skillet, skin-side up.  Bring to a boil, reduce heat to medium-low, and cover.  Cook until the chicken registers 175 degrees on an instant-read thermometer, about 12 to 14 minutes.  

Remove the skillet from heat and use tongs to transfer the chicken to a clean plate.  Once he chicken is cool enough to handle, shred it into bite-sized pieces, discarding the skin and bones.

Meanwhile, place the potatoes in a medium saucepan and cover with about 1 inch of water.  Stir in 1 tablespoon of salt, and bring to a boil over high heat.  Reduce the heat to medium and cook at a strong simmer until the potatoes are fork-tender, about 10-12 minutes.  

Drain the potatoes and return to the pot.  Return the pot to the stove and cook over low heat, stirring gently, until all of the water has evaporated.  This will only take about 1 minute or so.  Remove from heat and gently stir in remaining 5 tablespoons of butter, 1/4 teaspoon of salt, and 1/2 teaspoon of pepper.  Taste and season with additional salt and pepper as needed.  Cover and set aside to keep warm.

Whisk the cornstarch together with 3 tablespoons of water.  Return the skillet with the broth and vegetables to the stovetop and bring to a boil.  Slowly whisk in the cornstarch  mixture, and cook until the thickened, 1 to 2 minutes.  Remove from heat, stir in the peas, lemon juice, and shredded chicken, and season to taste with salt and pepper.

Spoon the potatoes over the entire surface of the filling.  Brush the potatoes with the egg.  

Bake in the oven until the pie is bubbling, about 15 minutes.  Turn the oven to broil and cook until the potatoes are golden-brown, 3 to 5 minutes.  Cool for 15 minutes before serving.


Monday, October 13, 2014

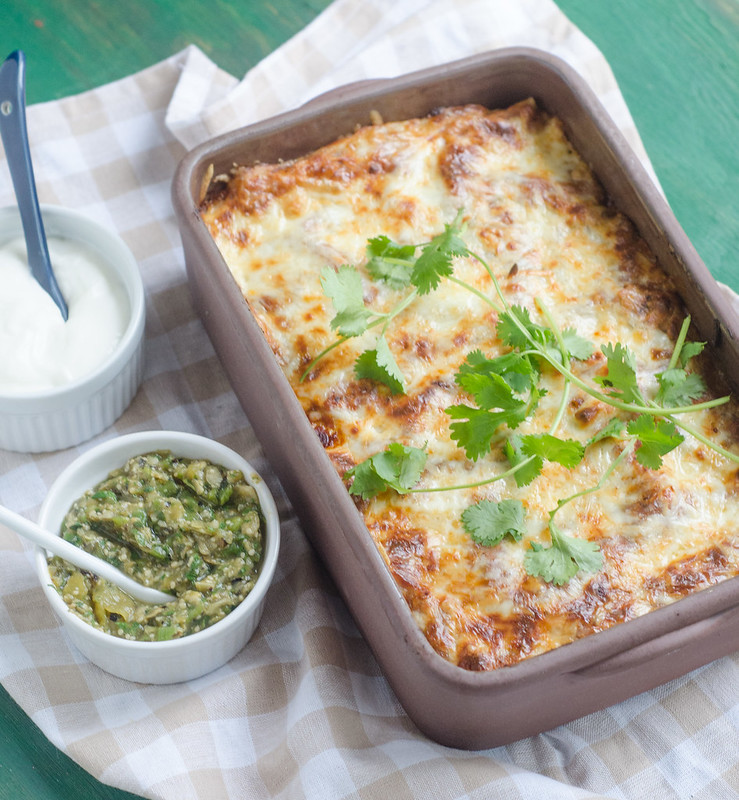
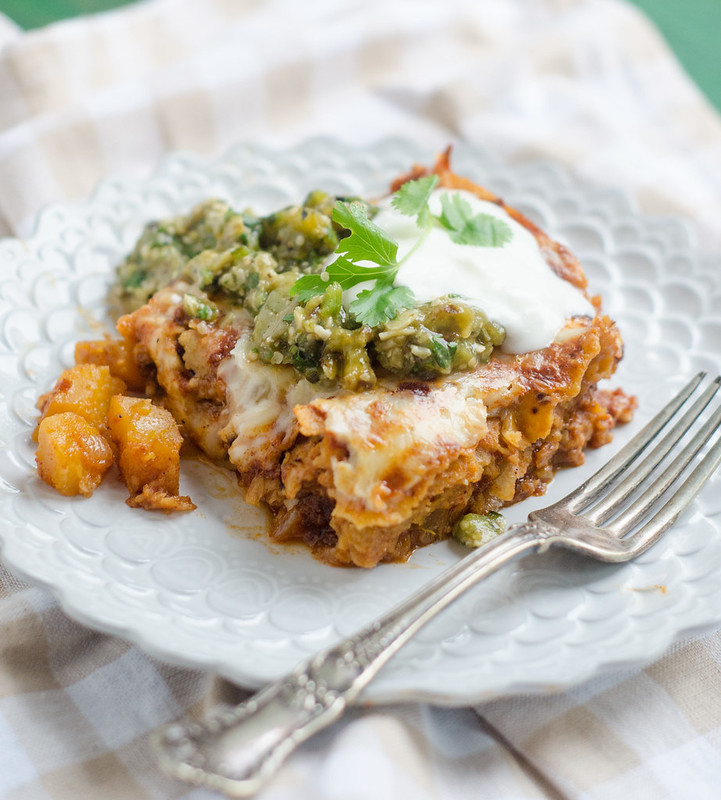
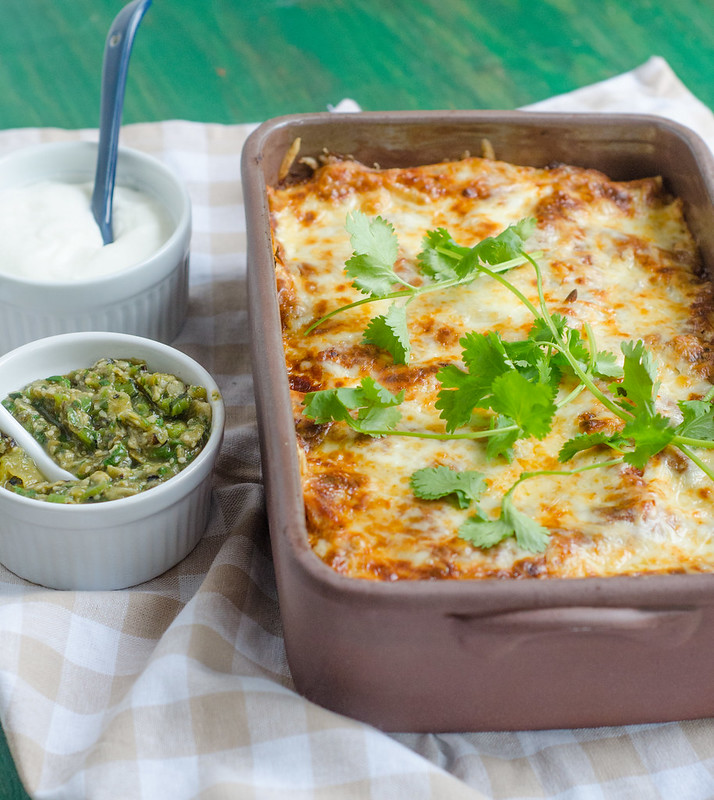
Pumpkin Enchilada Casserole with Poblano-Pepita Salsa


Pumpkin Enchilada Casserole with Poblano-Pepita Salsa

Something about the transition from summer to fall causes me to feel pulled to the kitchen.  As we say goodbye to playing outside until dusk, catching lightning bugs, and evenings at the pool, we welcome cozy evenings in front of the fireplace, sipping hot cocoa, comfort food, and trips to the pumpkin patch.   I love spending a lazy afternoon cooking and baking while the boys nap.  I gravitate towards simple and quick recipes in the summer, but the fall has me slowing down, taking my time, and enjoying the process as much as the final result.  

And this dinner is indeed a process.  There's homemade enchilada sauce, a fresh pumpkin filling, and a roasted tomatillo-poblano-pepita salsa.  And yes, it is pretty much perfection.  While it is a bit time-consuming, nothing is difficult, and should you be pressed for time, any of the components can be made ahead.  And heck, you could assemble the whole thing ahead and then just cook it when you're ready!

Pumpkin Enchilada Casserole with Poblano-Pepita Salsa 


This is an impressive main dish for a fall dinner party, and since I love putting together menus, here's what else I'd serve with it (and actually, most of this is what I did serve with it).

Apple Habanero Margaritas
Chips and Guacamole
Orange-Avocado Salad
Baked Cinnamon-Sugar Donuts with Vanilla Ice Cream (this is my take on churros).

After all my whining about the end of summer, with dinners like this, I guess I can now say that I'm ready to embrace fall.  Let's do this.

Pumpkin Enchilada Casserole with Poblano-Pepita Salsa


Pumpkin Enchilada Casserole with Poblano-Pepita Salsa
adapted from Fine Cooking
enchilada sauce adapted from America's Test Kitchen

Enchilada Sauce
  • 1 medium onion, chopped fine
  • 2 jalapenos, seeded and chopped fine
  • 1 teaspoon canola oil
  • 3 medim cloves garlic, minced
  • 3 Tablespoons chili powder
  • 2 teaspoons ground cumin
  • 2  teaspoons sugar
  • 1 15-oz can tomato sauce
  • 1 cup water
Filling
  • 2 Tbs canola oil
  • 1 large yellow onion, diced
  • 1 jalapeño, seeded and chopped fine
  • 4 cloves garlic, minced
  • 1 Tbs ground cumin
  • pinch of sugar
  • 3 cups of 1/2-inch diced pumpkin or other winter squash (peel, seed, then chop the pumpkin)
  • 1/2 cup chicken or vegetable broth
  • 3 Tbs fresh minced cilantro
  • kosher salt
For Assembly
  • vegetable oil
  • 10 6-inch corn tortillas
  • 2 cups Monterey Jack cheese
  • 1 cup sharp cheddar cheese
  • Poblano Pepita Salsa (recipe follows)
  • Mexican crema or sour cream, for serving

Combine the onion, jalapeno, 1/2 teaspoon salt, and oil in a large saucepan. cover and cook over medium-low heat, stirring often, until the onions and peppers have softened, 8-10 minutes. Stir in the garlic, chili powder, cumin, and sugar, and cook until fragrant, less than 30 seconds. Stir in the tomato sauce, water, and chopped tomato. Bring to a simmer, and cook until slightly thickened, 5 minutes.  Remove from heat and strain through a fine-mesh sieve into a medium bowl.  Set aside.

Meanwhile, make the filling.  Heat the olive oil in a 12-inch skillet set over medium-high heat.  Add the onion and jalapeño, and cook until lightly browned and softened, 10 minutes.  Add the garlic, cumin, 3/4 teaspoon of salt, and sugar and cook one minute, or until it's fragrant.  Stir in the pumpkin.  Lower the heat to medium, add the broth, cover, and simmer until the pumpkin is just tender, about 10 minutes.  Taste and season with additional salt if needed.  Stir in the cilantro.

To assemble the casserole, preheat the oven to 350 degrees and brush a 9x13 inch baking dish with oil.  

Heat a small nonstick or cast-iron skillet to medium-high.  Working one tortilla at a time, heat them in the skillet until softened and beginning to brown in spots, about 1 minute per side.   

Spread 3/4 cup of the sauce evenly over the bottom of the dish.

Arrange 5 of the tortillas over the sauce, cutting them to fit if necessary.

Spread 1/2 cup of the sauce over the tortillas.  Spoon all of the filling evenly over the sauce, then sprinkle with 1 cup of the monterey jack cheese.

Pour 1/2 cup of sauce over the cheese and arrange the remaining 5 tortillas over the sauce (again, cutting the tortillas as needed to fit).  

Spread the remaining sauce over the tortillas then top with the remaining cheese.

Cover with foil and bake 20 minutes.  Remove the foil and bake an additional 10 to 15 minutes, or until the cheese is browning and bubbly.  

Allow to cool 10 minutes before serving with the salsa and crema.

Poblano-Pepita Salsa
  • 2 medium poblano chiles
  • 1 lb tomatillos, husked and rinsed
  • 1/2 cup unsalted, roasted, and hulled pepitas
  • 1/4 cup packed chopped fresh cilantro
  • kosher salt
  • juice of 1/2 lime
Halve the tomatillos and arrange in a single layer on a rimmed baking sheet with the poblanos.

Char under a broiler until the tomatillos are dark and browned in spots and the chiles are blackened on all sides, flipping as needed.  Transfer the chiles to a bowl and cover with plastic wrap.  Cool 10 minutes.  Peel, stem, and coarsely chop the chiles.

Coarsely chop the pepitas in a food processor by pulsing 5 to 6 times.  Transfer to a medium bowl.  Add the tomatillos, chiles, cilantro, and salt to the now-empty bowl, and pulse several times to get a chunky salsa.  Add to the bowl with the pepitas and stir to combine.  Stir in the lime juice.  Taste and season with salt as needed.


Sunday, September 28, 2014

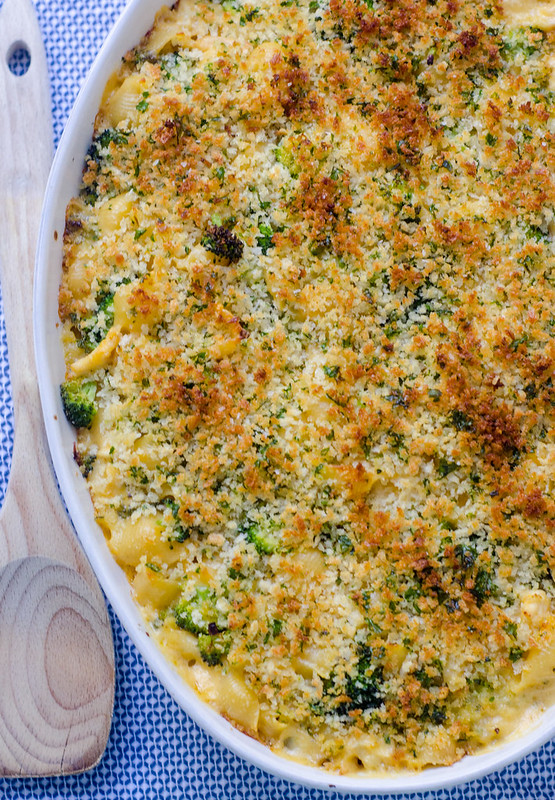
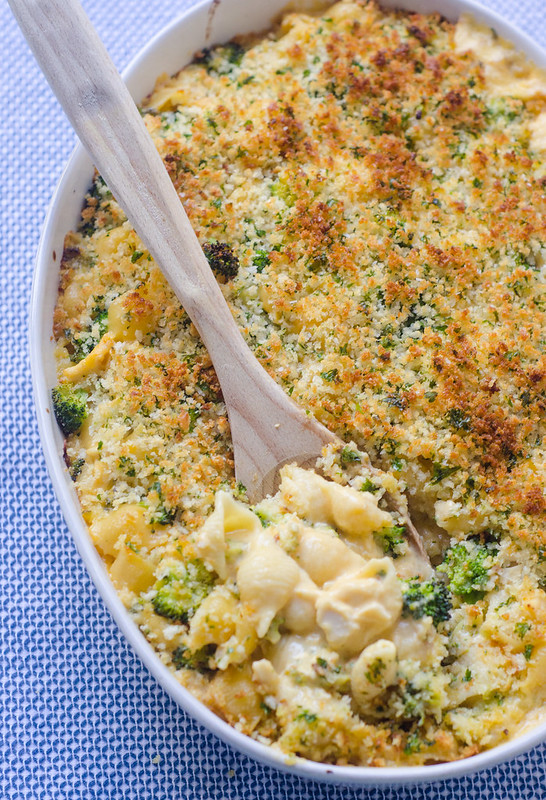
Cheesy Baked Shells with Broccoli and Chicken

Cheesy Baked Shells with Broccoli and Chicken 


Remember this absolutely amazing incredible mac and cheese recipe?  If you haven't made it yet, you really are missing out.  Because it really and truly is the best mac and cheese of all time.  I realize that's a lofty claim, but I have eaten a LOT of mac and cheese in my day, so I feel pretty confident in my assertion.

So anyway, I took that macaroni and cheese, and I added some broccoli and chicken to it.  To make it a full meal, of course.  Look, I can make an entire meal out of a big bowl of mac and cheese, but in the name of adult responsibility, I felt like a vegetable and a protein were needed.  So cheesy baked shells with broccoli and chicken were born!

It's become a standing tradition to for me to make a big dinner for the kids' birthdays.  Smith turned three last week (obvious comment about time moving too quickly), and I'm going to be brutally honest here for a minute.  That kid has challenged me more than I thought possible.  At fifteen months, the poor guy was only a baby himself when Henry and Tucker came along and rocked our world, and he definitely didn't know exactly how to handle the upheaval.  We went though many tough phases with him:  sitting on the babies, pushing them over, throwing toys at them, stealing their milk and food, you name it.  Not to mention the normal day-to-day toddler meltdowns and challenges.

DSC_8965 

But in the past six months or so, there's been a shift.  He's gone from pushing the babies down, to helping them back up when they fall.  He no longer steals their milk, but is waiting at the bottom of the stairs with it every morning when they wake up.  He teaches them all the animal and dinosaur sounds.  He's there to give them hugs and kisses when they have their own epic tantrums.  And he's the referee between their toddler skirmishes now.  This guy was just meant to be a big brother.

So we celebrated my big boy's birthday with this cheesy baked pasta dish.  It's the best dinner I could think of for my little guy, and it was a hit with the whole family.  We're looking forward to another fun-filled year with this sweet boy!
DSC_8972

Cheesy Baked Shells with Broccoli and Chicken
adapted from this macaroni and cheese (which is from Cook's Illustrated)
serves 8 to 10
  • 1 recipe Panko Topping (follows)
  • salt
  • 4 cups chopped broccoli florets
  • 1 pound medium pasta shapes, such as shells
  • 6 Tbs unsalted butter
  • 2 medium garlic cloves, minced
  • 1 tsp dry mustard
  • 1/4 tsp cayenne pepper
  • 6 Tbs all-purpose flour
  • 2 1/4 cups low-sodium chicken or vegetable broth
  • 3 1/2 cups milk (low-fat is fine)
  • 1 pound colby jack cheese, shredded (about 4 cups)
  • 8 oz extra-sharp cheddar, shredded (about 2 cups)
  • 2 cups diced cooked chicken
  • ground black pepper
Preheat the oven to 400 degrees.

In a large microwave-safe bowl, toss the broccoli with a splash of water.  Cover with plastic wrap.  Cook 3-4 minutes, stirring after every minute, until the broccoli is bright green, and just tender.  Set aside.

Bring water to a boil in a large dutch oven set over high heat.  Add 1 tablespoon of salt and the pasta, and cook, stirring occasionally, until the pasta is just beginning to soften, about 5 minutes.  Drain the pasta and leave in the colander.

Wipe the pot dry, and add the butter, and set it over medium heat until melted.  Stir in the garlic, mustard, and cayenne, and cook until fragrant, about 30 seconds.  Stir in the flour, and cook, stirring constantly, until golden, about 1 minute.  Slowly whisk in the chicken broth and milk, and bring to a simmer.  Whisking often, cook until large bubbles form on the surface and the sauce is slightly thickened, about 15 minutes.  Remove from heat and stir in the cheeses until completely melted.  Season with salt and pepper to taste.

Stir the drained pasta, broccoli, and diced chicken into the cheese sauce, breaking up any clumps, until well combined.  Pour into a lightly greased 9x13 inch baking dish and sprinkle with crumb topping.

Bake uncovered, until the sauce is bubbling and the crumbs are crisp, 25-35 minutes. 


To store and serve later:  Wrap the dish tightly with foil, and refrigerate for up to 2 days.  To serve, bake in a 400 degree oven until the filling is hot throughout, about 40-45 minutes.  Remove the foil and continue to cook until the crumbs are crisp, 15-20 minutes.


Panko Topping

  • 1 cup panko bread crumbs
  • 2 Tbs unsalted butter, melted
  • 2 Tbs minced fresh parsley
  • salt and pepper
In a small bowl, combine the panko with the melted butter and parsley.  Season to taste with salt and pepper.


Wednesday, July 23, 2014

Spinach & Zucchini-Stuffed Lasagna Rolls

Spinach and Zucchini-Stuffed Lasagna Rolls


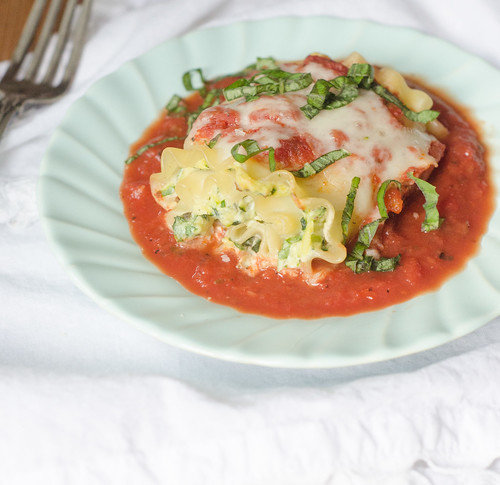
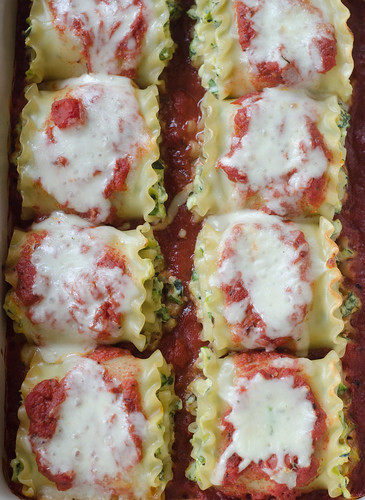
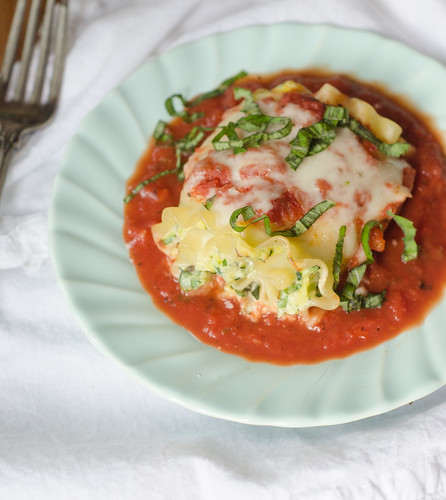
What do you get when you combine one of my favorite comfort foods with fresh summer produce?  Spinach and Zucchini Lasagna Rolls!  These tender pasta rolls are stuffed to the gills with a mixture of ricotta, parmesan, zucchini, onions, and spinach.  Then they're smothered in marinara sauce and cheese, baked, and devoured.  And my gosh, they are good!  And as far as eating a baked pasta dish with three cheeses, they are actually pretty light.  A modest amount of cheese goes a long way in lightening these up, and the addition of zucchini and spinach bulks up each serving.

Spinach and Zucchini-Stuffed Lasagna Rolls

I've been making a conscious effort to eat healthier this summer, and it's so refreshing to be able to enjoy a meal like this with no guilt.   It still has that satisfying comfort food feel, but thanks to a few steps to lighten it up, it's actually fairly healthy.  Definitely the best of both worlds.


Spinach and Zucchini-Stuffed Lasagna Rolls


Spinach and Zucchini-Stuffed Lasagna Rolls
adapted from Skinny Taste
makes 8 rolls
  • 8 lasagna noodles, cooked, drained, and patted dry
  • 2 tsp olive oil
  • 1/2 medium white onion, diced
  • 3 cloves garlic, minced
  • 16 oz zucchini (about 2 medium), grated and squeezed dry
  • 1 cup  part skim ricotta cheese 
  • 1/2 cup grated Parmesan cheese
  • 1 cup baby spinach, chopped
  • 2 Tbs chopped fresh basil, plus more for garnish
  • 1 large egg, lightly beaten
  • 3/4 tsp kosher salt
  • freshly cracked pepper
  • pinch of red pepper flakes
  • 1/2 tsp dried oregano
  • 2 cups Marinara sauce
  • 1/2 cup part skim mozzarella cheese, shredded
  • fresh basil for garnish (optional)

Directions: 

Preheat the oven to 350°F. Ladle about 1 cup sauce on the bottom of a 9 x 13-inch baking dish.

Heat the oil in a large skillet over medium heat.  Add the onion, and cook until just softened, about 3 minutes.  Add the zucchini and sauté until it is softened and beginning to brown, 4 to 5 minutes.  Stir in the garlic, 1/4 teaspoon of salt, and 1/4 teaspoon of pepper, and cook until fragrant about one minute.

In a medium bowl, combine the zucchini, spinach, ricotta cheese, Parmesan cheese, egg, red pepper flakes, oregano, 1/2 teaspoon of salt and pepper in a medium bowl.  


Lay out the lasagna noodles on a clean work surface. Make sure noodles are dry. Take a scant 1/3 cup of ricotta mixture and spread evenly over the noodle. Carefully roll the noodle and transfer it seam-side down to the prepared baking dish.  Repeat with the remaining noodles and filling.

Ladle the remaining sauce over the lasagna rolls and top each one with 1 tablespoon of mozzarella cheese. Cover the baking dish with foil, and bake for 30 minutes, then remove the foil and cook an additional 10 minutes.  Allow to cool slightly, sprinkle basil over the top, and serve.


Tuesday, March 25, 2014

Creamy Poblano-Tortilla Casserole


Creamy Poblano-Tortilla Casserole.  Pretty much any of those words on their own send me running to the kitchen, but combined?  Oh man, it's dangerous.  This casserole is made up of layers of crispy baked tortilla chips, a creamy, cheesy sauce, a tangy and spicy filling, and lots and lots of poblano peppers.  It's creamy, cheesy, crunchy, spicy, and well... just really freaking good.

I couldn't decide if this reminded me more of mac & cheese or an enchilada casserole... then I realized that I didn't care.  It was so awesome that there's no need to label it or compare it to anything else (though of course then I really wanted to make this green chile mac & cheese as a result, ha!).

Like I tend to do most days, I prepped this baby during nap time, then just popped it in the oven when Joey was on his way home.  I also put together a quick citrus and avocado salad to balance out the spice and richness of the casserole.  This was the perfect meal for the end of winter - comforting and homey, but with plenty of brightness and spice from the poblanos.  A winner all-around.


Creamy Poblano-Tortilla Casserole
adapted from Gourmet Today
serves 4

While this is a vegetarian dish, I see no reason why you couldn't stir some shredded chicken, pork, or ground beef or turkey into the filling.  


Filling
  • 9 (6- to 7-inch) corn tortillas
  • 3/4  pound poblano chiles, roasted and peeled (about 3 large poblano peppers)
  • 2  Tbs vegetable oil
  • 2  cups chopped white onions
  • 1 jalapeño pepper, seeds and ribs removed, minced
  • 2 cloves garlic, minced
  • 1  teaspoon salt
  • 1  (14- to 15-ounce) can diced tomatoes
  • 1/4 cup fresh cilantro, chopped
Sauce and topping
  • 2  Tbs unsalted butter
  • 2  Tbs all-purpose flour
  • 1 1/2  cups milk
  • 1 1/2 cups freshly grated cheddar cheese
  • 1 1/2 cups freshly grated  Monterey Jack cheese 
  • 1/2  tsp salt
  • 1/4  tsp pepper
Toast the tortilla wedges: Put racks in upper and lower thirds of oven and preheat to 400 degrees F. Stack tortillas and cut into 8 wedges. Spread tortilla triangles in one layer on two large baking sheets and bake, stirring occasionally and switching position of pans halfway through baking, until crisp and pale golden, 10 to 15 minutes. Cool tortillas, and leave the oven on.

Prepare the chiles: Open chiles and spread flat; discard seeds and stems and cut out ribs. Cut chiles lengthwise into 1/4-inch-wide strips. Reserve about 1/4 cup for garnish, and roughly chop those strips into small pieces.

Make the filling: Heat oil in a 10-inch heavy skillet over medium-low heat until hot but not smoking. Add onions, jalapeño, and garlic and cook, stirring occasionally, until softened, about 5 minutes. Stir in salt, tomatoes with juice, and remaining poblano strips and simmer for 2 minutes. Remove from heat and stir in the chopped cilantro.

Make the sauce: Melt butter in a medium saucepan over  medium-low heat. Add flour and cook, whisking constantly, for 2 minutes. Add milk in a steady stream, whisking, and continue to cook and cook, whisking occasionally, until the sauce is slightly thickened, 3-4 minutes. Remove from heat and gradually add 2 cups of the cheese, stirring until cheese is melted, then add salt and pepper.

Assemble and bake: Arrange half of the tortillas in a greased 2-quart baking dish. Spoon filling evenly over top. Cover with remaining tortillas. Pour sauce over tortillas (tips of tortillas will stick up) and sprinkle with the remaining cup of cheese and reserved poblanos.  Bake, uncovered, in the upper third of oven until gratin is bubbling and top is golden, about 30 minutes.

Allow to cool 5-10 minutes before serving.


Monday, September 16, 2013

Chicken Enchilada Quinoa Bake


I've gotten out of the habit of meal-planning lately, and it's definitely been a stressor for me.  If I don't have a dinner planned out, I feel like I spend the majority of the day staring blankly into my fridge, pantry, and freezer, basically just willing something to magically appear or give me inspiration.  Or going through my Pinterest boards and saved recipes hoping that I miraculously have all the ingredients I need for a particular recipe that catches my eye.  I try to minimize my trips to the grocery store throughout the week, both for budgetary and logistical reasons (Three kids under 2.  No further explanation necessary).

On this particular day, I remembered that I had some shredded chicken and some extra enchilada sauce in the freezer - score!  Earlier that day I laid down the gauntlet for myself and decided we were having quinoa in some fashion, and cooked a few cups during nap time.  I'm pretty much always craving Mexican food; thus divine inspiration hit, and this casserole was born.

Chicken Enchiladas are one of my favorite foods of all times, so it should come as no surprise that I like to reincarnate them into as many different dishes as I can.  So far, pizza, dip, pasta, and zucchini boats have all been pretty well-received at our house.  So a cheesy, baked casserole seemed like a surefire win.  And obviously, it was.

I've gotten into the habit of using quinoa instead of rice 90% of the time, so I continued on with that trend here.  It adds a lot of protein to the dish, so combined with the chicken and black beans, this dinner packs a major protein punch.  I also mixed in some corn, enchilada sauce, a modest amount of cheese, and a few extra spices and seasonings before baking it in the oven.

As expected, we all loved this dish - and what's not to love?  It's comforting, cheesy, spicy, reasonably healthy, and reminiscent of my all-time favorite meal!


Chicken Enchilada Quinoa Bake

I already had chicken, enchilada sauce, and quinoa prepped, so this came together quite quickly.  Even if you are making everything at once, it can all be done pretty easily as well - as the chicken cooks, make the enchilada sauce and cook the quinoa, then it's just assemble and bake.  As a matter of fact, this would make a great make-ahead meal, so you could prep and assemble the night before or morning of, then just throw it in the oven when you get home.

  • 1 cup uncooked quinoa, rinsed
  • 2 cups water
  • 1 Tbs oil
  • 1 medium onion, diced
  • 1 jalapeño, seeds and ribs removed, and diced
  • 1 can black beans, drained and rinsed
  • 1 cup corn kernels (fresh or frozen)
  • 1 (15-oz) can fire-roasted diced tomatoes
  • 2 cups cooked and shredded chicken
  • 1 tsp cumin
  • 1 Tbs chile powder
  • 3/4 tsp salt
  • 1 cup enchilada sauce (recipe follows)
  • 2/3 cup cheddar cheese
  • 2/3 cup Monterey Jack cheese
  • sliced scallions and minced cilantro, for garnish
Preheat the oven to 350 degrees.  Lightly grease a medium baking dish.

Combine the quinoa and water in a medium saucepan and bring to a boil.  Cover, reduce heat, and simmer until most of the water is absorbed and the quinoa is cooked through, about 15 minutes.  Remove from heat and set aside.

In a medium saute pan, heat the oil over medium heat.  Add the onion and jalapeño, and sauté until softened, about 5-6 minutes.  Remove from heat and set aside.

In a large mixing bowl, combine the quinoa, black beans, corn, tomatoes, chicken, cumin, chile powder, salt, enchilada sauce, and 1/ 3 cup of each cheese.  Season with additional sat and pepper to  taste.  Mix well and pour into the prepared baking dish.  Sprinkle with the remaining cheese, and cover the dish with aluminum foil.

Bake 15-20 minutes, then remove foil.  Bake an additional 10-15 minutes, or until the cheese is melted and browning.  Rremove from the oven and allow to cool 10 minutes.  Sprinkle with chopped scallions and cilantro, and serve.

Red Enchilada Sauce
The America's Test Kitchen Healthy Family Cookbook

Note: This will make more than you need for this recipe, so I'd suggest just freezing the leftovers. You never know when you'll have an enchilada sauce emergency!
  • 1 tsp canola oil
  • 1 onion, minced
  • 3 garlic cloves, minced
  • 3 Tbs chile powder
  • 2 tsp ground cumin
  • 2 tsp sugar
  • 1 (15-oz) can tomato sauce
  • 1/2 cup water
  • salt and pepper
Heat the oil in a medium saucepan over medium-high heat.  Add the onion and cook until softened, 5 minutes.  Stir in the garlic, chile powder, cumin, and sugar, and cook, stirring constantly until fragrant, about 30 seconds.  Stir in the tomato sauce and water, and bring to a simmer.  Cook until slightly thickened, about 5 minutes.  Season with salt and pepper to taste.


Monday, August 19, 2013

Chicken & Summer Vegetable Rice Casserole


Is there anything more comforting than a creamy, cheesy, casserole?  I typically reserve that type of meal for cold or gloomy weather, but this casserole is best served in the middle of summer.  It's  actually on the lighter side, thanks to cottage cheese, tons and tons of veggies, brown rice, and a modest amount of Parmesan - but it tastes just as cheesy, comforting, and homey as anything you've had at a church potluck or your grandmother's house.  I first started making this last summer, when I was in the throes of morning sickness.  It was one of the only things that ever sounded edible, which was a bonus - it was also the only way I could stomach vegetables.

I mix it up a little each time I make this, using whatever veggies I have on hand, or just using what sounds good at that moment.  I typically add shredded chicken to make it a complete meal, but you could leave the chicken out and serve this as a side dish or a vegetarian dinner as well.  My go-to combination has been tomatoes, zucchini, corn, onions, and bell peppers.

Another bonus?  No precooking of the vegetables is required.  Just throw it all together, bake, and serve.  This is also a great make-ahead meal.  I've assembled it the night before, then just baked the next day.  And I've taken it to a few friends who just had babies as well.  It's hearty, delicious, filling, and full of the summer's best produce.  Definitely a winner in my book!

Chicken & Summer Vegetable Rice Casserole
adapted from eat love drink, via Sunny Side Up in San Diego


  • 2 eggs
  • 1 tsp kosher salt
  • 1 tsp fresh black pepper
  • 2 tsp Dijon mustard
  • 2 cloves of garlic, minced
  • 1 cup cottage cheese (low fat is fine)
  • 1/2 cup grated Parmesan cheese
  • 2 cup cooked brown rice 
  • 1/2 cup finely diced onion
  • 1 1/2 cups seeded and chopped tomatoes
  • 1 medium zucchini, shredded on the large holes of a cheese grater
  • 1 large ear of corn, kernels cut from the cob 
  • 1/2 medium bell pepper, finely diced
  • 2 cups cooked and shredded chicken
  • 1/4 cup chopped fresh basil

Preheat oven to 350 degrees. Spray a square casserole dish or pie pan with nonstick spray and set aside.
In a large bowl, whisk together the eggs, salt, pepper, mustard, garlic, and cottage cheese. Add the rice, onion, tomatoes, zucchini, corn, bell pepper, chicken, and half the basil.  Stir well to combine.
Pour the mixture into the prepared dish, and use a spatula to smooth the top.  Sprinkle with the Parmesan cheese. Cover tightly with foil and bake for 30-40 minutes. Remove the foil and bake another 15-20 minutes, or until the cheese turns golden-brown.
Allow to cool for 15 minutes, garnish with the remaining basil, and serve.


Sunday, September 11, 2011

PPQ: King Ranch Chicken


The past week has been unseasonably cool here in Atlanta.  I am not normally one to be wishing away summer, but the break in heat was actually pretty nice - especially being 9 months pregnant.  We were still feeling the effects a tropical storm, so the weather was drizzly and cool, and comfort food was in order.  So this was actually a really great choice for this week's Project Pastry Queen recipe.

I'd heard of King Ranch Chicken before, but never really had the desire to make it myself - until I saw Rebecca Rather's completely-from-scratch version.  She even goes so far as to make her own chicken stock for it!  I didn't go that far, since I had just made 32 cups of chicken stock a few weeks ago.  So I took the easy way out and used that and just bought a rotisserie chicken.

King Ranch Chicken Casserole is essentially a chicken tortilla casserole - it is creamy, spicy, and cheesy.  How bad could that be?  You build a cream sauce from scratch instead of opening a can of cream of whatever soup.  It starts with a stick (!) of butter, then peppers, onions, and mushrooms are sauteed.  You add flour to thicken the sauce, then whisk in chicken stock and some cream (or milk, or half-and-half) and let it simmer to thicken a bit.  The sauce is then layered with corn tortillas, cheese, and chopped chicken.  After baking, you are left with a completely comforting casserole.

The recipe makes a 9x13 inch casserole, but I split it up and froze half for an easy meal for when the baby comes.  I'd also like to note that it calls for New Mexican Hatch Chiles, and while normally I would just use a poblano instead,  they are in season right now and The Fresh Market is awesome, so I was able to get my hands on some.  We loved the tangy-spicy flavor they contributed, and I plan to go buy more to roast and freeze so I can enjoy them year-round.

Jody of Savory to Sweet has the full recipe posted if you're interested in making this.  And you should be, because it is pretty awesome!


Tuesday, September 6, 2011

Spicy Chicken & Rice Casserole


I'm getting pretty close to my due date (less than 3 weeks go to!), and over the past month or so I've been stocking my freezer for when we bring the baby home.  I have a few casseroles and baked pasta dishes, but for the most part I've been stocking it with things to make mealtimes easier and faster - pizza dough, smoothie kits, shredded chicken and pork, chicken stock, beans...

In general, we don't eat a lot of casseroles, but I think they certainly have their place - they can be frozen, feed you for several meals, reheat well, and they are usually cheesy and comforting.  This particular casserole is full of some of my favorite flavors and ingredients - cheese, chipotles, black beans, corn... and then it's topped with a buttery, crunchy, tortilla chip topping.  I made the full recipe, but I split it into two 8x8 inch baking dishes.  I baked one for dinner that night (and then subsequently enjoyed the leftovers for several days following), and froze the second one.

This is a bit more work than what you may be used to for a simple casserole, and it's a fairly lengthy ingredient list, but I didn't mind spending the time to make it when I took into account the number of times it would feed us.  And when I pull the second one out of the freezer, it will be a meal that requires zero effort on my part.  A definite plus when I have a newborn at home!


Chicken and Rice Casserole with Chiles, Corn, and Black Beans
adapted from Cook's Illustrated, The Best Make-Ahead Recipes
  • 4 Tbs unsalted butter
  • 2 medium red bell peppers, stemmed, seeded, and chopped medium
  • 1 medium onion, diced
  • 2 jalapeno chiles, seeds and ribs removed
  • kosher salt
  • 3 garlic cloves, minced
  • 1-2 chipotle chiles en adobo, minced
  • 1 tsp ground cumin
  • 1 tsp chile powder
  • 1/4 cup flour
  • 6 cups low-sodium chicken broth
  • 1 cup heavy cream or half-and-half
  • 2 lbs boneless, skinless chicken breasts (4-5 breast halves), trimmed of excess fat
  • 1 1/2 cups white rice
  • 4 oz Pepperjack cheese, shredded (about 1 cup)
  • 4 oz cheddar cheese, shredded (about 1 cup)
  • 1 (15.5 oz) can black beans, rinsed and drained
  • 1 1/2 cups frozen corn
  • juice of 2 limes
  • ground black pepper
  • 1/4 cup minced scallions
  • 1/2 cup chopped fresh cilantro, divided
Corn Chip Crumb Topping
  • 6 oz corn tortilla chips
  • 2 Tbs unsalted butter, melted
  • 2 Tbs minced fresh cilantro
  • salt and black pepper
Melt the butter in a Dutch oven over medium heat.  Add the bell peppers, onion, jalapenos, and 1 teaspoon of salt.  Cook until softened, 8 to 10 minutes.  Stir in the garlic, chipotles, cumin, and chile powder and cook until fragrant, about 30 seconds.  Stir in the flour and cook, stirring constantly, until golden, about 1 minute.  Slowly whisk in the broth and cream.

Add the chicken and bring to a simmer.  Reduce the heat to low, cover, and cook until the chicken is cooked all the way through, reading 160 degrees on an instant-read thermometer, 10-15 minutes.

Remove the chicken and set aside to cool.

Stir the rice into the pot, cover, and continue to cook on low heat, stirring often, until the rice has absorbed a good bit of the liquid and is just tender, 20 to 25 minutes (mine was still pretty soupy, but the rice was cooked all the way through - it will absorb and thicken more as it bakes in the oven).

As the rice cooks, shred the chicken into bite-sized pieces, and make the crumb topping:  pulse the corn chips with the butter in a food processor to coarse crumbs, about 10 pulses.  Toss with cilantro and season with salt and pepper.

Remove the pot from heat and stir in the chicken, black beans, corn, cheese, and lime juice and season with salt and pepper to taste.  Stir in the scallions and half the cilantro.

Pour the mixture into a 9x13 inch baking dish and sprinkle with the crumb topping.


To bake immediately:  Bake the casserole in a 400 degree oven, uncovered, until the sauce is bubbling and the crumbs are crisp, 25 to 35 minutes.  Sprinkle with the remaining cilantro before serving.


To store:  Wrap the dish tightly with foil and then plastic wrap, and refrigerate for up to 2 days or freeze up to 1 month (If frozen, thaw the casserole completely in the refrigerator before baking).  Bake at 400 degrees, covered with foil, about 1 hour.  Remove the foil and bake an additional 15 to 20 minutes longer.


Wednesday, November 17, 2010

Potato Gratin with Mushrooms and Gruyere


All summer long, I dread the fall.  No more tomatoes or corn, no more daylight until 9pm, cold weather is around the corner, and the produce is much more scarce.  However, when I make things like this potato gratin, I am reminded why I love cooking seasonally:  all the seasons have their own special veggies that are open to so many dishes and variations.  I love mushrooms and potatoes in the fall and winter, and let's face it:  melted cheese is good any time of the year. 

I have always loved potato gratin, and I'm pretty sure my mouth started watering as soon as I read the title of this recipe.  Potatoes = good.  Mushrooms = good.  Gruyere = good.  Its hard to mess up.  Especially when heavy cream is involved (though to be honest, I subbed at least half of the cream for half and half, and the dish was still incredible).  I made a fall harvest meal the night I served these potatoes:  grilled maple-cider glazed pork tenderloin and sauteed Brussels spouts accompanied the gratin, and it was truly a delicious dinner.

I personally think potatoes should be in mashed potato form for Thanksgiving, but if you are looking for something a little different, that is elegant and upscale, this would be a lovely addition.


Potato Gratin with Mushrooms & Gruyere
adapted from Cook's Illustarted, The Best Make Ahead Recipes
serves 8 to 10
  • 4 Tbs unsalted butter
  • 2 medium onions, minced
  • 1 pound cremini or shiitake mushrooms, sliced 
  • 4 garlic cloves, minced
  • 1 Tbs minced fresh thyme leaves
  • 2 1/2 tsp kosher salt
  • 1/2 tsp ground black pepper
  • 1/2 cup dry white wine
  • 1 1/2 cups reduced-sodium chicken broth
  • 1 1/2 cups heavy cream or half and half
  • 3 bay leaves
  • 5 pounds russet potatoes (about 9 medium), peeled and sliced 1/8-inch thick
  • 10 ounces Gruyere cheese, shredded (about 2 1/2 cups)
Preheat the oven to 400 degrees.

Melt the butter in a large Dutch oven over medium-high heat.  Add the onions and mushrooms, and cook, stirring often, until the onions are softened and lightly browned, and the mushrooms have released moisture and it has evaporated, about 15 minutes.  Add the garlic, thyme, salt, and pepper, and cook until fragrant, about 30 seconds.

Add the wine, and scrape up any browned bits on the bottom of the pan with a wooden spoon.  Cook until most of the wine has evaporated, 3-5 minutes.

Add the chicken broth, cream, and bay leaves.  Stir in the potatoes, one handful at a time, stirring after each addition.  Cover, reduce heat, and bring to a simmer.  Stir often, and cook until the potatoes are mostly tender, about 15-20 minutes.  To test, pierce a potato with a paring knife.  It should be able to slip in and out of the potato with little resistance.  Stir in half of the Guyere cheese.

Discard the bay leaves, and pour the potato mixture into a 9x13 inch baking dish.  Press gently into an even layer.  Sprinkle the remaining cheese over the potatoes, and cover with aluminum foil.  Bake until the mixture is just warm, 30-40 minutes.  Remove the foil and cook until the cheese is golden brown, and the sauce is bubbling, 10-15 minutes longer.  Remove from oven and allow to cool 10 minutes before serving.


Thursday, September 24, 2009

Chicken Tortilla Casserole


While normally I would say that I'm not a huge fan of casseroles, this one wins a thumbs up from me. Cans of cream of whatever soup, overcooked meat, mushy noodles, tons of cheese (ok well that part does sound good to me)... just not my thing.

I actually made this for my brother-in-law and mom when I was visiting my sister when she had surgery earlier in the month. I made it again for Joey this week, and he was a huge fan as well. Supposedly it serves 2, but I really think it makes enough for 3, even 4, especially if you also serve a salad or some rice and beans.

I love that it uses tortilla chips, and cooks them in batches. The first half goes in with some chicken broth and chicken while it cooks; the remainder is then mixed in and remains nice and crispy. I like to use the multigrain chips because I think they have more flavor and texture. Another hit from Cook's Illustrated, and another use for my new favorite, chipotle peppers.

Tortilla Casserole
adapted from Cook's Illustrated
  • 2 boneless, skinless chicken breasts, trimmed
  • 2 Tablespoons vegetable oil
  • 1 shallot, minced (about 3 Tablespoons)
  • 2 garlic cloves, minced
  • 1-2 tablespoons minced chipotle peppers in adobo sauce (I use 1 pepper)
  • 1 3/4 cups chicken broth
  • 5 cups tortilla chips, broken into pieces
  • 1 tomato, cored, seeded, and chopped
  • 4 ounces sharp cheddar, shredded (1 cup)
  • 2 Tablespoons chopped fresh cilantro
Heat the broiler and adjust rack to about 6 inches from heating source.

Pat the chicken dry and season with salt and pepper. Heat 1 Tablespoon of oil in a 10-inch oven safe skillet over medium-high heat until smoking. Add the chicken and cook on both sides until golden-brown, 5-7 minutes total. Transfer to a plate and set aside.

Add the remaining oil, shallot, garlic, chipotle, and 1/4 teaspoon of salt, and cook until fragrant, about 30 seconds. Add broth and scrape of browned bits, and bring to a simmer.

Stir in half the tortilla chips. Nestle the chicken into the broth and cook over medium low heat until cooked through (reading 160 on a thermometer), about 10-15 minutes. Transfer to a cutting board, and when cool enough to handle, shred into bite-sized pieces.

Return the shredded chicken to the skillet with the tomato, 1/2 cup cheese, and 1 Tablespoon of the cilantro. Stir in the other half of the tortilla chips until they are incorporated and moistened.

Sprinkle the remaining cheese on top and broil until the cheese is melted and browning, 2-3 minutes. Top with remaining cilantro and serve, allowing casserole to cool 5 minutes.


BLOG DESIGN BY: SHERBET BLOSSOM DESIGNS