Showing posts with label seafood. Show all posts

Tuesday, July 21, 2015

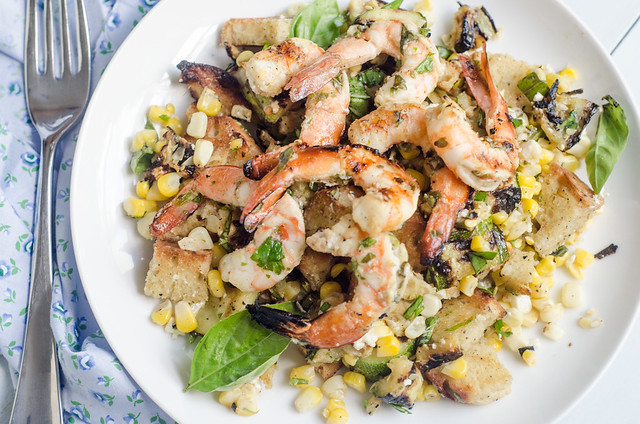
Grilled Shrimp and Summer Vegetable Panzanella

Grilled Shrimp and Summer Veggie Panzanella 

This summer has brought about a new family tradition.  On Friday evenings, we meet a few other neighborhood families at the pool, grill our dinner, and engage in general merriment with the kids.  It's something that I very much look forward to all week long.  Because I am who I am, I spend most of the week thinking about what we'll grill and eat, what cocktail I'll mix up, and what we'll eat for dessert.  Sometimes we go simple - burgers or hotdogs, chips, and watermelon.  Sometimes we go REALLY simple and order pizza.  And sometimes I get inspired and end up creating one of my favorite dinners of the summer.

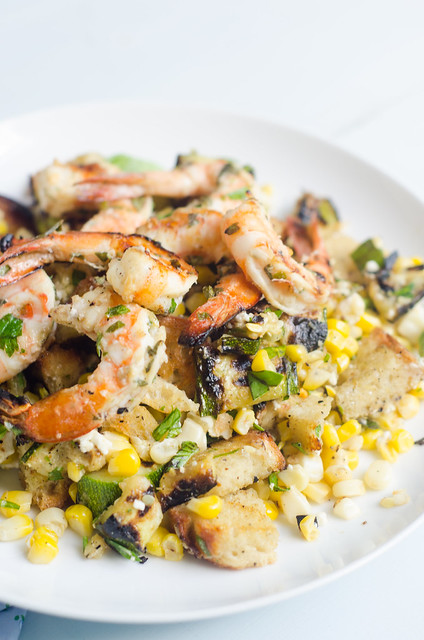
Obviously I'm talking about this salad.  I planned to use my favorite recipe for grilled shrimp, and serve it alongside a simplified zucchini and corn salad, along with some grilled garlic bread.  In a moment of inspiration, I turned it into a grilled shrimp and bread salad.  I was so excited and enamored with the final dish that I made it again a few days later.

This was not only a big hit with Joey and me, but it was a huge hit with the kids as well .  They were especially obsessed with the grilled shrimp and bread, and couldn't get enough.

I have revamped and remixed my chopped summer veggie salad in several ways, spanning numerous cuisines and seasons, but this may be my favorite yet.  When I've made this, I just keep it to the veggies, shrimp, and bread, and leave out the grilled romaine.  I certainly think it would be a great addition though!  If you're looking for a side for this salad, I'd recommend that you keep it simple - a plate of sliced tomato with salt and pepper is perfection here!

Here's to summer grilling and dinner at the pool!

DSC_1430

Grilled Shrimp and Summer Veggie Panzanella

Herb-Grilled Shrimp
adapted from Ina Garten
  • 1 1/2 lbs large shrimp, peeled and deveined, but tails left on
  • 3 cloves garlic, minced
  • 1 medium yellow onion, minced
  • 1/4 cup minced fresh parsley
  • 1/4 cup minced fresh basil
  • 1 teaspoon dry mustard
  • 2 teaspoons Dijon mustard
  • 1 1/2 teaspoons kosher salt
  • 1/2 teaspoon fresh black pepper
  • pinch of red pepper flakes
  • 1/4 cup olive oil
  • 1 lemon, juiced
Combine all the ingredients and toss to coat the shrimp.  Allow to marinate at room temperature for 1 hour, or in the refrigerator for up to 24 hours.
Summer Vegetable and Grilled Bread Salad
  • 1/3 cup extra virgin olive oil, plus more for dressing
  • 3 cloves garlic, minced
  • kosher salt and freshly ground black pepper
  • 1/4 tsp red pepper flakes
  • zest of half a lemon
  • 2 ears corn, husk and silks removed
  • 3 medium zucchini, sliced lengthwise into 1/2-inch-thick planks
  • 6-8 slices baguette or other crusty bread (I used a roasted garlic loaf and it was really really good!)
  • 2 Tbs chopped fresh basil
  • 1/2 cup crumbled feta cheese (about 2 oz)
Prepare the grill to cook at medium-high heat.  Allow to preheat at least 15 to 20 minutes.

Meanwhile, whisk together the oil, garlic, 1/2 teaspoon of salt, 1/2 teaspoon of pepper, lemon zest, and red pepper flakes.

Brush the zucchini, bread slices, and corn with the oil mixture. Reserve the remaining oil mixture to use for the dressing.

Clean the cooking grate, then place the zucchini, corn, and bread slices on the grill.  

For the corn, grill, turning every 2 to 3 minutes, until the kernels are lightly charred all over, about 10 minutes total.

For the zucchini, grill it until it is well-browned and tender (but not mushy), about 4 to 5 minutes per side.

For the bread, grill it 1 to 2 minutes per side, or until it is lightly charred.

Meanwhile, prepare the dressing.  Add enough oil to the remaining oil-garlic-pepper mixture to reach a volume of 1/4 cup, then whisk in the lemon juice.  Taste and season with salt and pepper as needed.

Prepare grill. 

 Thread the shrimp on skewers.

Grill the shrimp for about 2 minutes, then flip skewers and grill until cooked through, an additional 1-2 minutes.  Remove from the grill and cover lightly with foil as you prepare the rest of the salad.

Once everything is off the grill, begin building the salad.    Cut the kernels off the corn and add them to a large bowl.  Cut the zucchini crosswise into 1/2 inch-thick slices, and add those as well.  Slice or tear the bread into bite-sized pieces.  Crumble the feta into the bowl, and top with the chopped basil.  Drizzle the dressing over the top, then toss well to combine.  

Divide among plates, then lightly sprinkle each serving with salt and freshly ground pepper.  Top each serving with several shrimp, and serve.


Wednesday, April 15, 2015

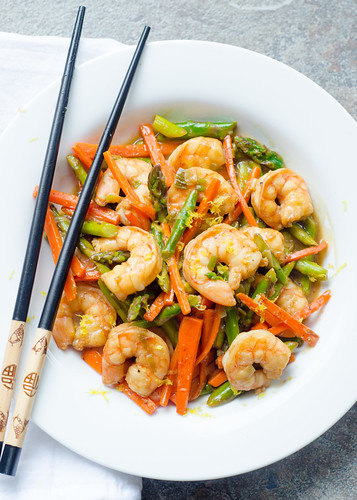
Shrimp and Asparagus Stir-Fry in Lemon Sauce

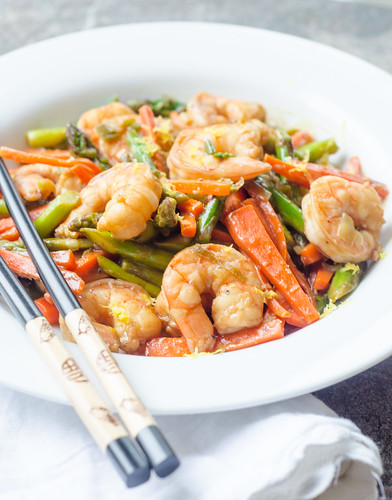
Shrimp and Asparagus Stir Fry in Lemon Sauce

I've had two obsessions this spring (well, three if you count tequila, but that's a year round thing).  My NEW spring obsessions are shrimp and asparagus.  We've been eating them both at least once a week for the past month, and I recently decided to combine their forces for a really awesome dinner.

I'm not generally a fan of Chinese takeout, but I do like the flavors of Chinese food.  Is that weird to say?  Oftentimes takeout leaves me feeling heavy and tired, and honestly a little sick to my stomach.  But take-out fake-out?  I'm always game.   Having control over the ingredients and sodium level makes all the difference for me.

This particular stir-fry is an ode to spring produce and flavors, and it couldn't be any further from the greasy, heavy Chinese food you're used to.  The asparagus, carrots, lemon, and shrimp pair wonderfully together.  As is the case with most stir fries, this does take a bit of prep work, what with the chopping, mixing, etc.  But it can all be done well in advance, and the dinner itself is cooked really quickly.  However, even if you do it all at once, you're still looking at dinner on the table in about half an hour; which in my book qualifies as a pretty solid weeknight meal.

Shrimp and Asparagus Stir Fry in Lemon Sauce 

Shrimp and Asparagus Stir Fry in Lemon Sauce
serves 4
  • 1 lb large shrimp, peeled, deveined, and tails removed
  • freshly ground black pepper
  • 2 tsp low-sodium soy sauce
  • 2 tsp dry Sherry or dry white wine
  • 3 scallions, minced
  • 3 cloves garlic, minced
  • 1 Tbs grated fresh ginger
  • 5 tsp canola oil, divided
  • 1 lb asparagus, woody ends trimmed, sliced on the bias into 2-inch pieces
  • 2 medium carrots, peeled and cut into matchsticks
  • Lemon Sauce (recipe follows)
  • zest of 1/2 a lemon
In a large bowl, toss the shrimp with the pepper, soy sauce, and sherry.  Cover with plastic wrap and refrigerate for at least 10 minutes, or up to 1 hour.

As the shrimp marinates, prepare the lemon sauce (recipe below).  This is also a good time to trim and slice the asparagus, and peel and chop the carrots.

In a small bowl, combine the garlic, ginger, and 1 teaspoon of the oil.

Heat 2 teaspoons of the oil in a 12-inch nonstick skillet over high heat.  Add the shrimp, arranging them into a single layer as best you can.  Cook about 1 minute, stirring halfway through.  They should be lightly browned but not fully cooked.  Remove to a medium bowl and set aside.

Return the skillet to high heat, and add the remaining 2 teaspoons of the oil.  Add the asparagus and carrots and cook 3 to 4 minutes, or until they are just barely tender, stirring constantly.

Stir in the garlic-scallion mixture and cook until fragrant, 30 seconds to 1 minute.

Return the shrimp, along with any accumulated juices, to the skillet.  Shake the sauce to recombine, then pour it over the mixture.  Simmer, tossing and stirring constantly, until the shrimp re cooked through and the sauce has thickened, about 1 minute.  Remove from heat and stir in the lemon zest.  Serve immediately .

Lemon Sauce
  • 6 Tbs low-sodium chicken broth
  • 1/4 cup freshly squeezed lemon juice (from about 2 lemons)
  • 2 Tbs mirin
  • 2 Tbs dry sherry
  • 2 Tbs low-sodium soy sauce
  • 2 tsp sugar
  • 2 tsp cornstarch
  • 1/4 tsp pepper
Combine all the ingredients into a pint-sized jar, and shake to combine.  Use as directed above.


Tuesday, February 24, 2015

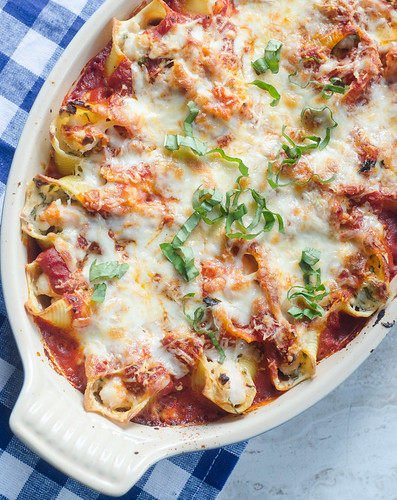
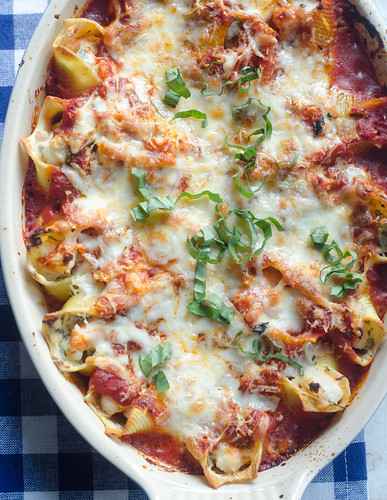
Shrimp-Stuffed Shells

Shrimp-Stuffed Shells

Stuffed shells have long-been one of my favorite dinners, but I typically keep it pretty traditional, with a standard sausage-ricottoa-spinach filling.  However, I absolutely love seafood pastas, so the minute I saw this shrimp-stuffed shells recipe, I knew it would be a winner.  What I didn't expect though, was how MUCH of a winner it would be.  Caroline ate an obscene number of these, and Smith had almost as many.  Henry and Tucker have entered "the picky era" of their lives, and they even ate these shells with reckless abandon.  Which, as I'm sure you can imagine, means, sauce and shrimp flying all over the place and making a giant mess, as only two year olds know how.

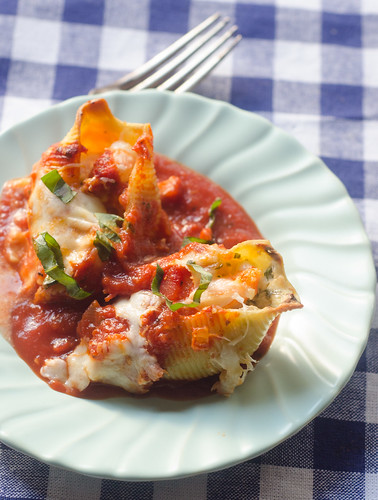
Shrimp-Stuffed Shells 

The idea of shrimp in a baked pasta dish may seem kind of .. odd.. but the shrimp cook right in the shells, and there's no overcooked, rubbery seafood to be found.  The filling is cheesy and creamy, and the rich tomato sauce is a great contrast to that.  Of course, no baked pasta dish is complete without a blanket of mozzarella and parmesan, so of course we've got you covered there too.

As we hunker down for another winter storm, I am all about comfort food, and baked pasta definitely fits the bill.  And as a bonus, this is actually pretty light.  Four shells, which I found to be a very generous serving, is just under 500 calories, making this a really great healthy meal.

Shrimp-Stuffed Shells 

Shrimp-Stuffed Shells
adapted from Cooking Light, January 2012
serves 5 to 6

  • 20 uncooked jumbo pasta shells
  • 1  Tbs olive oil
  • 1/2 cup diced shallots
  • 2 Tbs minced garlic
  • 1/2 cup (4 oz) reduced fat cream cheese, softened to room temperature
  • 1/4 cup milk
  • pinch of red pepper flakes
  • 1/3 cup chopped fresh basil
  • 1 pound medium shrimp; peeled, deveined, and cut into thirds
  • 2 tsp cornstarch
  • cooking spray
  • 2-3 cups marinara sauce
  • 1/3 cup shredded mozzarella cheese
  • 2 Tbs freshly grated Parmesan cheese

Preheat oven to 400° F.  Lightly spray a 9x13 inch baking dish with cooking spray.

Bring a large pot of water to a boil and add 2 teaspoons  of kosher salt.  Cook pasta 7 to 9 minutes or until just al dente.  Drain and set aside.

Heat a medium skillet over medium heat. Add oil to pan; swirl to coat. Add shallots and cook 3 to 4 minutes, stirring occasionally. Add garlic and red pepper flakes; cook 1 minute, stirring constantly. Whisk in the cream cheese and milk and cook until cheese melts, stirring until smooth. Remove from heat. Stir in basil. Place shrimp in a bowl. Sprinkle with the corn starch and toss well to coat. Add cream cheese mixture to shrimp.  Mix well to combine.

Divide shrimp mixture evenly among pasta shells.  Spread 1 cup marinara over bottom of dish. Arrange the shells in a single layer in the prepared dish; top with remaining 1-2 cups marinara. Sprinkle shells evenly with the mozzarella and parmesan cheese. Cover  Bake at 400° for 20 minutes.  Remove the foil and bake an additional 5 to 10 minutes, or until the cheese is melted and the shrimp are cooked through.  Serve.


Tuesday, January 20, 2015

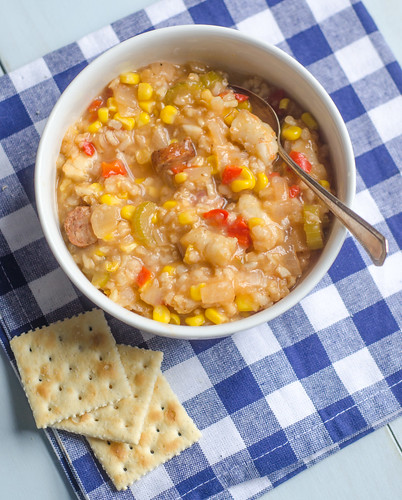
Crock Pot Southern-Style Shrimp, Sausage, and Corn Stew

Crock Pot Southern-Style Sausage, Shrimp, and Corn Stew
Now that we are squarely into the new year, I've kind of established our routines for this semester.  New schedules, new after school activities, doctor appointments, fleeting daylight hours… there's a lot to contend with when planning our days and nights.  Caroline takes gymnastics on Monday evenings, so needless to say, getting a healthy dinner on the table at a decent hour has been a bit tricky.  Enter the crockpot.  Mondays have become our crockpot days.  And lucky for us, I have three pretty fabulous crockpot cookbooks, not to mention the dozens of recipes I've saved over the years.  So I don't think we'll be getting bored anytime soon!

This recipe was one of the first that caught my eye in the new Healthy Slow Cooker Revolution Cookbook.  Obviously I was drawn to the southern-style recipes, and this stew is loaded with corn, smoked sausage, and shrimp.  Not to mention plenty of other veggies to give it a nice nutritional boost. This stew is really healthy, coming in at 350 calories per bowl.  And it's obviously delicious.  What's not to love?  smoky sausage, sweet corn and shrimp, hearty brown rice, and just enough spice to give it a nice kick.

Do you have a designated crock pot night, or am I just a weirdo?

Crockpot Southern-Style Shrimp, Sausage, and Corn Stew
barely adapted from ATK's Healthy Slow Cooker Revolution
serves 6

  • 8 oz smoked sausage (or andouille for more heat), halved lengthwise and sliced 1/2 inch thick
  • 2 medium onions, chopped fine
  • 3 celery ribs, sliced 1/4-inch thick
  • 2 red bell peppers, stemmed, seeded, and chopped fine
  • 2 Tbs tomato paste
  • 4 cloves garlic, minced
  • 1 tsp Old Bay seasoning
  • 2 cups water
  • 2 cups chicken broth, plus more as needed
  • 1/2 cup brown rice
  • 2 Tbs instant tapioca
  • kosher salt and freshly ground black pepper
  • 12 oz shrimp, peeled, deveined, and chopped into 1-inch pieces
  • 4 cups frozen corn, thawed
  • 1-2 tsp hot sauce
In a microwave-safe bowl, combine the sausage, onions, celery, bell peppers, tomato paste, garlic, and old bay seasoning.  Stir well and cook in the microwave 8 to 10 minutes, stirring every 2 minutes.  

Transfer to the slow cooker and stir in the water, broth, rice, tapioca, and 1/2 teaspoon of salt.  Cover and cook on low for 3 to 5 hours (or 2 to 4 hours on high).

Stir the shrimp and corn into the stew, cover, and increase the heat to high.  Cook 15 to 20 minutes, or until the shrimp are cooked through.  If the stew is too thick, stir in some extra broth or water.  Stir in the hot sauce, and season to taste with salt and pepper.

Serve, passing the hot sauce around the table.


Wednesday, September 10, 2014

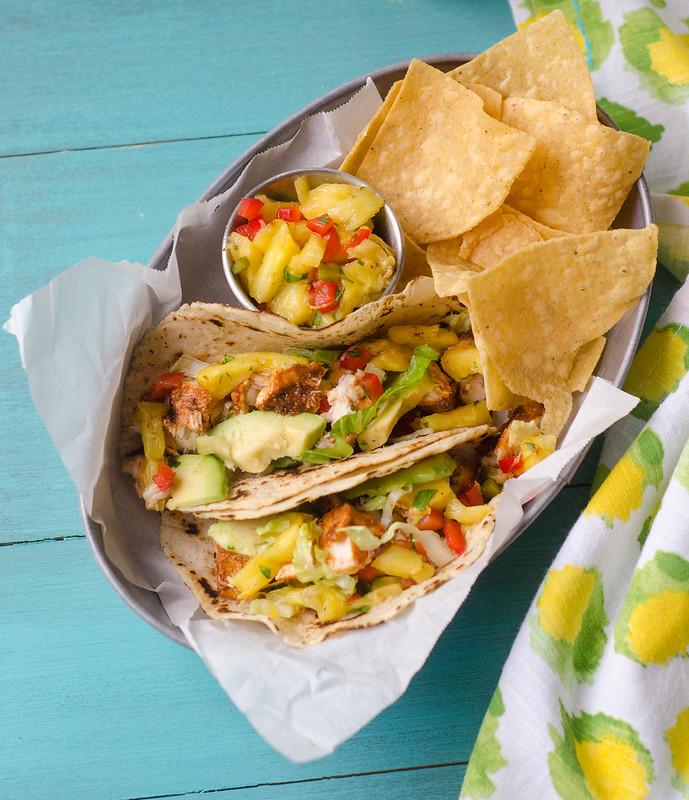
Grilled Fish Tacos with Grilled Pineapple Salsa

Grilled Fish Tacos with Grilled Pineapple Salsa

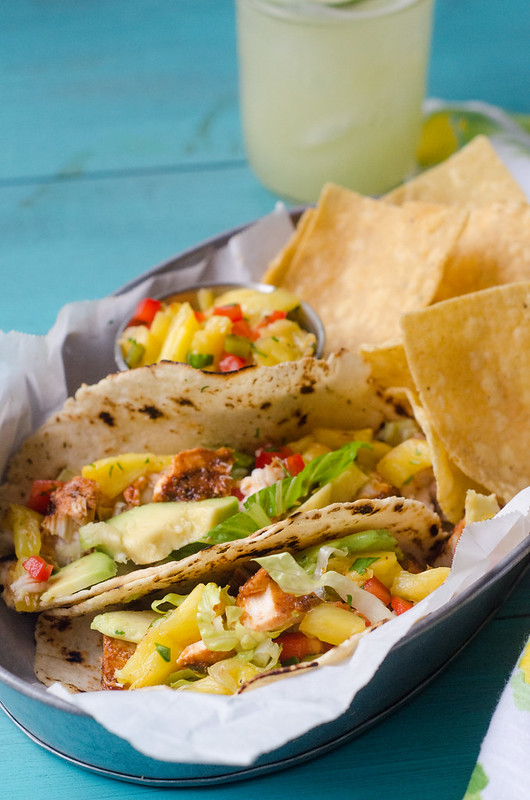
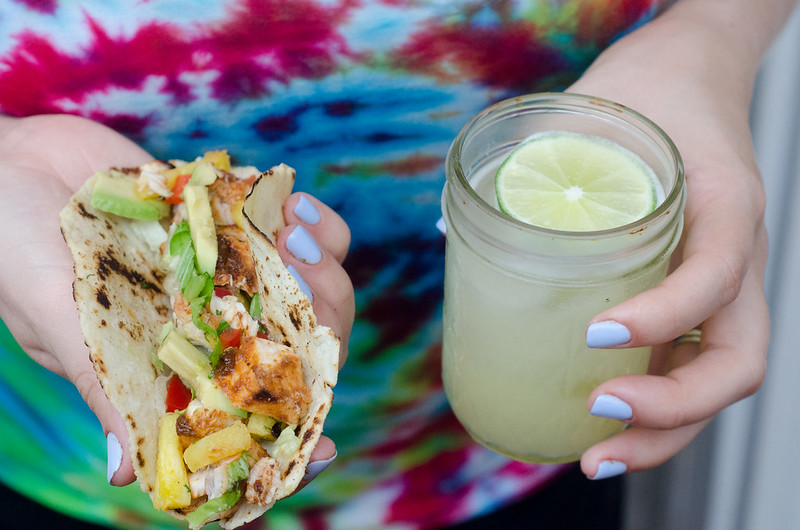
Grilled fish tacos have long-been one of my favorite Mexican dishes, but I've yet to make any at home that blew me away.  Until now, that is.  Cook's Illustrated touts these as "Really Good Fish Tacos," and I counter with "The Best Fish Tacos You'll Ever Make."  I don't make such claims often, so trust me on this.  They've got just the right amount of spice, a touch of sweetness from the pineapple, which is grilled, thus also giving you a touch of smokiness.  And then they are wrapped in a warm tortilla (which I highly recommend you make from scratch), topped with some fresh and crisp lettuce and creamy avocado.  This is good stuff here.

Grilled Fish Tacos with Grilled Pineapple Salsa 

The fish of choice is swordfish, but I think any firm white fish would be fine.  The spice paste is what makes the fish tacos really stand out in my opinion, so don't skip that step!

I'm also a big fan of fruit salsas, and now I'm an even bigger fan of grilled fruit salsa.  Perfection.

I know that for some, grilling season is winding down, but I beg of you.  Make these fish tacos this weekend.  Make a big pitcher of margaritas.  Have yourself a fish taco fiesta.

Grilled Fish Tacos with Grilled Pineapple Salsa 

Grilled Fish Tacos with Grilled Pineapple Salsa
barely adapted from Cook's Illustrated, Sept/Oct 2014
serves 6
  • 3 Tbs canola oil
  • 1 Tbs chile powder
  • 1 1/2 tsp chipotle chile powder (or 1 tsp chile powder + 1/2 tsp cayenne pepper)
  • 1 tsp dried oregano
  • 1 tsp dried coriander
  • 2 cloves garlic, minced
  • kosher salt
  • 2 Tbs tomato paste
  • 1/2 cup orange juice
  • 6 Tbs fresh lime juice (from about 2-3 limes)
  • 2 lbs skinless swordfish steaks, cut lengthwise into 1-inch-wide strips
  • 1 pineapple, peeled, quartered lengthwise, and cored
  • 1 jalapeño chile
  • 18 (6-inch) corn tortillas
  • 1 red bell pepper, stemmed, seeded, and cut into 1/4-inch pieces
  • 3 Tbs minced fresh cilantro, plus more for serving
  • 1/2 head iceberg or romaine lettuce, cored and thinly sliced
  • 1 avocado, halved, pitted, and thinly sliced
  • lime wedges
Heat 2 tablespoons of the oil over medium heat in an 8-inch skillet.  Add the chile powders and, cook, stirring constantly, until fragrant and some bubbles form, 2 to 3 minutes.  Stir in the oregano, coriander, garlic, and 1 teaspoon of salt, and continue to cook an additional 30 seconds.  Add the tomato paste, and use a spatula to mash it with the spice mixture until it's well-combined.  Stir in the orange juice and 2 tablespoons of the lime juice.  Cook, stirring constantly, until thoroughly mixed and slightly reduced, about 2 minutes.  Transfer the spice mixture to a large bowl and allow to cool for at least 15 minutes.

Add the swordfish to the bowl and stir gently with a rubber spatula to coat the fish with the spice mixture,  Cover and refrigerate for at least 30 minutes, or up to 2 hours.

Prepare grill by heating over high heat until hot, about 15 minutes.  Lower the heat to medium-high.

Brush the cooking grate with a well-oiled paper towel, then brush the pineapple and jalapeño with the remaining tablespoon of oil.

Place fish and the pineapple on the grill.  Grill everything for 3 to 5 minutes, or until it all begins to brown.  Use a thin spatula to flip it all over. Cook an additional 3 to 5 minutes, until the jalapeño and pineapple are well browned, and the fish registers 140 degrees.  Transfer the fish to a large platter and cover loosely with foil.  Add the corn tortillas to the grill and cook 30 to 45 seconds per side.  Transfer to a plate and cover loosely with a dish towel or foil.

Use a fork to flake the fish into bite-sized pieces.

Transfer the pineapple and jalapeño to a large cutting board.  Peel the jalapeño, remove the seeds and ribs, and finely chop.  Finely chop the jalapeño.  In a medium bowl, combine the pineapple, jalapeño, bell pepper, cilantro, and remaining 4 tablespoons of lime juice.  Season to taste with salt.  

To serve, top tortillas with fish, salsa, lettuce, avocado, and cilantro.  Serve.


Monday, July 21, 2014

Oven-Fried Shrimp & Okra Po' Boys (and a po' boy salad)

Oven-Fried Shrimp & Okra Po' Boys

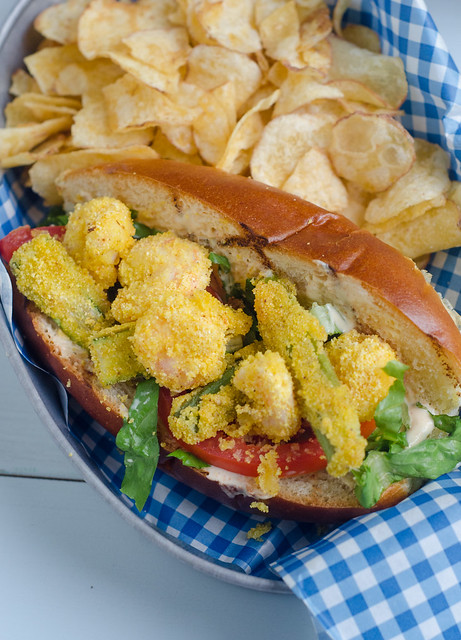
Oyster po' boys are one of my favorite foods ever.  Love the bread, love the fried oysters, love the remoulade sauce… it's all good.  But… not good for you.  Like, at all.  So it's relegated to a "once a year, only order it on vacation" food. That doesn't mean I don't crave it though.  And when I do - there's this sandwich.  No, it's not the same as the real oyster deal.  But it's pretty darn good.  And oh, about 1,000 calories less.  So it's a winner all-around.

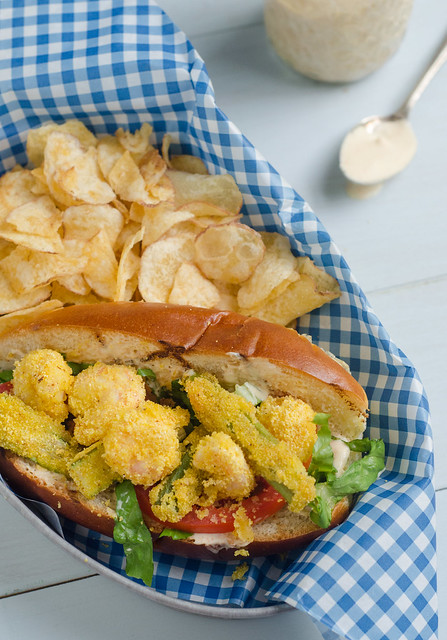
When I first saw these in Cooking Light, I got so excited because HOW have I never thought of an okra po' boy before??  Genius!  Instead of being deep-fried, the shrimp and okra are tossed in buttermilk, then coated with spicy Cajun-spiked cornmeal.  They are baked in the oven, and come out perfectly crispy and delicious.

Another way that these cut calories is portion control.  Instead of being served on a big honking baguette, they are served in hot dog buns - like a lobster roll.  Definitely splurge and buy fresh hot dog buns from the bakery for these; or better yet, make your own!  A spicy and creamy remoulade sauce rounds them out, and I'd recommend serving simply with some chips, or go all-out summer and add some corn on the cob and watermelon.

Oven-Fried Shrimp & Okra Po' Boys

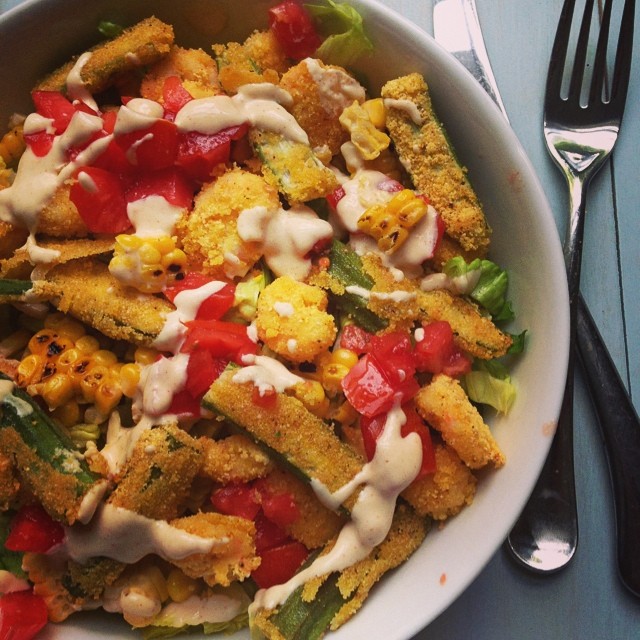
As for me?  I had a hankering for a salad that night (I told you, I'm obsessed with salads this summer).  So I turned my sandwich into a big salad with romaine, tomatoes, grilled corn, then okra and shrimp, and thinned out the remoulade with a little buttermilk to make a kick-ass dressing.  Winner winner, po' boy dinner.

Turned my shrimp and okra po' boy into a salad.  #greatdecision #clblogger #clkickingdishes #pinkparsley #summertime

Oven-Fried Shrimp & Okra Po' Boys
 Cooking Light, June 2014

The sandwiches were a little messy for the kids to eat, so I ended just giving them the okra and shrimp with some remoulade for dipping.  They loved this, and I think it would be a fun appetizer served this way too!

  • 15 small okra pods, trimmed and halved lengthwise
  • 1/2 low-fat buttermilk, divided
  • 1/2 tsp kosher salt, plus more as needed
  • 10 oz medium shrimp, deveined, peeled, and tails removed (preferably gulf shrimp)
  • 1 Tbs all-purpose flour
  • 2/3 cup yellow cornmeal
  • 1 1/2 tsp Cajun or Creole seasoning
  • 3 Tbs canola oil
  • 4 top-split, hot dog buns, toasted
  • 1/2 cup thinly sliced romaine or iceberg lettuce
  • 1 medium tomato, halved lengthwise and sliced
  • Remoulade sauce (recipe below)
Place a baking sheet in the oven and preheat  to 450 degrees.


  1. Combine the okra and 2 tablespoons buttermilk and 1/4 teaspoon of the salt in a medium bowl; gently stir to coat.
  2. Place shrimp in a medium bowl. Sprinkle with flour; toss well to coat. Drizzle with remaining 6 tablespoons buttermilk, and sprinkle with remaining 1/4 teaspoon salt; toss to coat. Drain okra and shrimp through a sieve; discard liquid.

  3. Combine cornmeal and Cajun seasoning in a large zip-top plastic bag. Add okra and shrimp; seal bag, and shake well to coat.

  4. Carefully remove pan from oven; drizzle with oil, then use a brush to coat the entire bottom of the pan with the oil.. Remove shrimp and okra from cornmeal, shaking off excess, and arrange in a single layer on the pan. Bake for 5 minutes.  Carefully flip the okra and corn, then bake an additional 4 to 5 minutes, or until the shrimp and okra are cooked through.
  5. Spread about 1 tablespoon of the rémoulade on one side of hot dog buns; divide lettuce and tomato evenly among buns.  top with the shimp and okra and serve.
Remoulade Sauce
adapted from Annie's Eats

  • 1/4 cup plus 2 tbsp. light mayonnaise
  • 1/4 cup Greek yogurt
  • 2 Tbs dijon mustard
  • 1 clove garlic, minced
  • 1½ Tbs pickle juice
  • ½ tsp prepared horseradish
  • ¼ tsp cayenne pepper
  • ¼ tsp smoked paprika
  • Dash of hot sauce
Combine all the ingredients in a small bowl and whisk to combine.  Cover and refrigerate until ready to use.


Tuesday, June 17, 2014

Low Country Grill


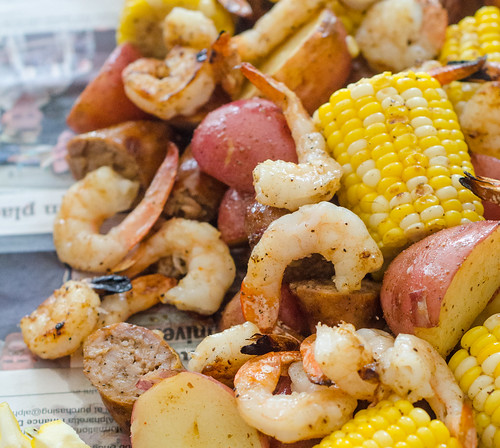
Part of what I love the most about this fine country of ours are all the different regional cuisines and specialties.  I'm sure you're all familiar with seafood boils in the summer, but depending on where you live, it may be called something else, and the seafood will definitely vary.  Here in the coastal south, we call it a "low country boil."  Louisiana and Texas have crawfish boils.  The northeast does clambakes.  And some just call it a shrimp boil.

So everyone does it differently, but here's the way I like it.  Shrimp (only gulf shrimp will do), potatoes, corn, and spicy sausage.  Lots of old bay seasoning.  Butter.  And from the grill.  Low country boil purists will definitely call blasphemy on this, but in my opinion, serving this grilled blows the boil right out of the water (pun intended).  Oftentimes the boil can be bland, and the timing can be tricky as well. Sometimes the potatoes are undercooked.  Sometimes the shrimp is overcooked and rubbery.  But when you make it on the grill, you have total control over each component.


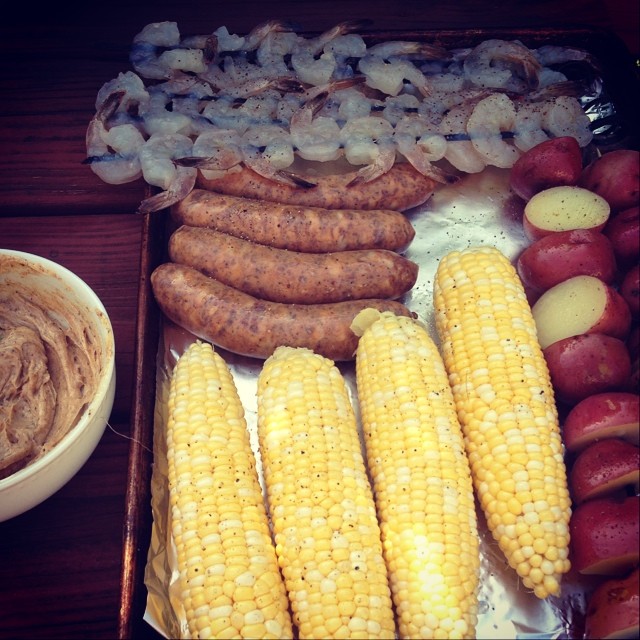
I've been making this for a few years now, and it's my favorite summer dinner.  We make this every year at the beach for our group of 20+, when we're entertaining at our house, when we want a fun weekend dinner… it's just a great summer meal.  I like to prep everything ahead of time, then just throw it on the grill when we're ready to eat.  As it all grills, I brush it with Old Bay butter, then toss it all with more of that delicious compound butter once it comes off the grill.  Dump it on a pile of newspaper, and dig in caveman-style.  The kids think it's hilarious to eat dinner without plates.

The side dishes for this are non-negotiable:  cheddar-garlic biscuits and fresh watermelon.  And cold beer for the adults, of course.

This is the ultimate summer meal, and one that I look forward to every year.  Grill your low-country boil.  You won't be sorry.


Low Country Grill
inspired by Everyday Food, June 2011
serves 4 to 6, and can easily be scaled up or down

  • 1 lb red new potatoes, halved or quartered, depending on size
  • 4 ears corn, husks and silks removed
  • 1 lb smoked sausage or Andouille sausage
  • 1 lb shrimp, peeled and deveined
  • canola oil
  • kosher salt and freshly ground black pepper
  • 8 Tbs unsalted butter, at room temperature
  • 1 Tbs Old Bay seasoning
  • 1 tsp hot sauce (or more, if you prefer more spice)
  • 1 tsp honey
  • lemon wedges, for serving
  • hot sauce, for serving
Prepare grill to medium-high heat.

Add the potatoes to a medium saucepan, cover with water, and season with a big pinch of salt.  Bring to a boil and cook until the potatoes are easily pierced with a fork, 8 to 12 minutes.  Drain and rinse, then when cool enough to handle, thread onto skewers.

Thread the shrimp onto skewers.  

Brush everything with canola oil, and season lightly with salt and pepper.

In a medium bowl, combine the butter, old bay, hot sauce, honey, and a pinch of salt.

Place everything on the grill, then cook 8 to 12 minutes, turning every few minutes and brushing with the butter.  The shrimp will take the least amount of time - cook them just until they are pink and opaque, 8 minutes at the very most, but likely closer to 5 to 6 minutes, depending on how tightly they are threaded onto the skewers and how big they are.  Reserve the remaining butter.

Remove from heat and cut each ear of corn into thirds.  Slice the sausage into bite-sized pieces.  Combine the sausage, corn, potatoes, and shrimp in a large bowl and toss with the remaining butter.  

To serve, dump everything onto a platter or newspaper.  Dig in.


Thursday, April 24, 2014

Grilled Mojito Halibut with Mango-Avocado Salsa


Guys, WHAT is the deal with the lime prices these days?  I've read several articles about the shortage, and while it makes me want to write an article about the global and environmental impact of factory farming (I have SO much to say about this) and crazy weather patterns, more than anything, talking about limes just makes me want a margarita.  Or a mojito.  And it definitely makes me want to hoard my limes.  No more squeezes of lime juice in my water.  I used to just automatically buy lemons and limes at the grocery store, but not when limes are 2 for $3.  I covet the limes that I buy, and save them for extra-special recipes.

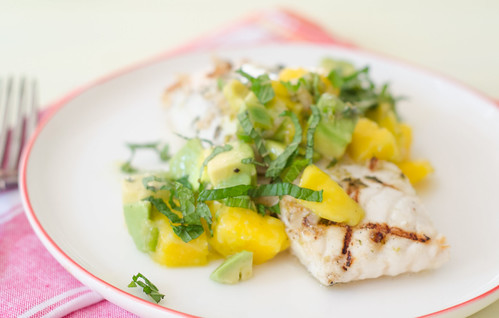
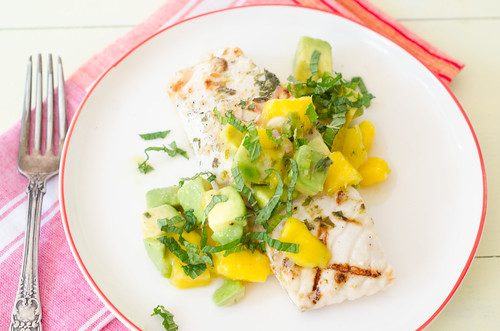
This mojito-marinated fish is definitely worthy of a coveted lime.  I really love mojitos, so making a seafood dish around them was a pretty awesome adaptation.  The mango-avocado salsa is equally awesome, and despite the sweetness from the mango and honey, it is not overly sweet.  The avocado, mint, jalapeño, and shallot do a great job of balancing the sweetness, and the lime and rum give it a nice little kick.

This dish is super healthy, bright and summery, and a great excuse to serve a cocktail with dinner!  Serve this with cilantro-lime rice or some chips and salsa, and call it a day.  Or wrap the fish and salsa up in a warm tortilla and call it a fish taco.  However you serve it, I hope you enjoy.  Three cheers for mojitos!


Grilled Mojito Halibut with Mango-Avocado Salsa
adapted from Ellie Krieger's Weeknight Wonders
serves 4

  • zest of 2 limes
  • juice of 4 limes
  • 1/2 cup lightly packed fresh mint leaves, chopped
  • 1 medium shallot, minced
  • 3 Tbs light rum
  • 2 Tbs canola oil
  • 1 Tbs honey
  • 1/4 tsp kosher salt, plus more as needed
  • 1/4 tsp freshly ground black pepper
  • 4 skinless halibut fillets (4-6 oz each)
  • 1 medium-ripe avocado
  • 1 medium-ripe mango
  • 1/2 seeded jalapeño, finely minced

Combine the lime zest and juice in a medium bowl.  Add 2 tablespoons of the mint, and set the rest aside for garnish.

Add the minced shallot, rum, canola oil, honey, salt, and pepper, and whisk to combine.

Place the halibut in an 8x8 inch square baking dish, and pour 1/2 cup of the marinade over it.  Refrigerate and marinate for 10 minutes, and save the remaining dressing for the salsa.

Meanwhile, chop the mango and avocado into 1-inch pieces, and toss with the jalapeño and remaining marinade.  Taste and season with additional salt and pepper as needed.

Oil the grates of the grill, and place the marinated fish onto the grill.  Cook 3 to 4 minutes per side, or until the fish is just cooked through.

To serve, top the fish with the salsa, then sprinkle with the remaining mint.


Monday, February 10, 2014

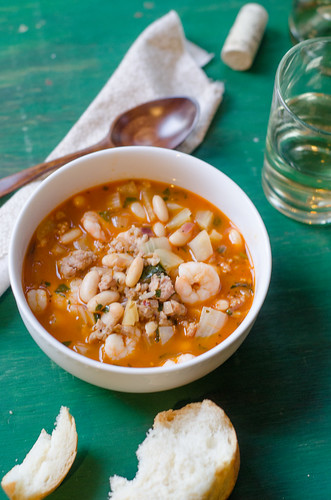
Shrimp and Sausage Cioppino


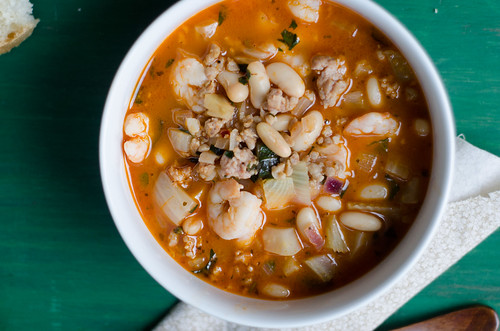
I realize that this version of cioppino may be considered blasphemous, but if adding sausage to a seafood soup is wrong, I don't want to be right.  Traditionally, cioppino can be any combination of mussels, shrimp, clams, squid, crab... really any mixture of seafood.  Here, it is simply shrimp and sausage - consider this to be surf and turf soup, if you want.

It's hearty and filling, a relatively quick meal, and is oh so comforting and delicious.  As we settled in for dinner, I couldn't stop talking about how much I loved the broth.  Typically the broth is an afterthought to me - I'm all about the meat and veggies in a soup.  But this broth was simultaneously light and fragrant and comforting and hearty.  It's a white wine-tomato broth, infused with the flavor of onions, garlic, fennel, and lots of fresh herbs.  With sweet and tender shrimp, spicy sausage, and creamy white beans, this soup was definitely a thing of beauty.  Served with a glass of white wine and a big piece of warm crusty bread, it was a comforting yet elegant weeknight dinner.  


Shrimp and Sausage Cioppino
adapted from Weeknights with Giada
  • 1 lb spicy Italian sausage, casings removed (substitute part of all for mild sausage if you prefer less spice)
  • 1 large fennel bulb, cored, trimmed and chopped into 1/2-inch pieces
  • olive oil
  • 4 garlic cloves, minced
  • 2 large shallots, chopped
  • kosher salt and freshly ground black pepper
  • 1/4 cup tomato paste
  • 1 Tbs chopped fresh thyme
  • 2 cups dry white wine, such as Pinot Grigio 
  • 3 cups low-sodium chicken broth
  • 1 dried bay leaf
  • 1 lb peeled and deveined large shrimp, chopped into bite-sized pieces
  • 1 (15-oz) can cannelloni beans, rinsed and drained
  • 1 cup fresh basil leaves, chopped
  • 2 Tbs chopped fresh parsley
Preheat a Dutch oven or large saucepan to medium-high heat.  Crumble the sausage into the pan, breaking it up into bite-sized pieces with a wooden spoon.  Cook, stirring often, until it's browned and cooked through, about 5 minutes.  Use a slotted spoon to remove the sausage to a bowl and set aside, leaving as much of the rendered fat as you can in the pot.

Add enough olive oil to the pan to have 2 tablespoons of fat.  Reduce the heat to medium and add the fennel, shallots, and garlic, and cook, stirring often, until the vegetables are softened and translucent, about 4-5 minutes.  

Stir in the tomato paste, thyme, 1/2 teaspoon of salt, and 1/4 teaspoon of pepper, and cook until fragrant, about 1 minute.  Stir in the wine, and use the wooden spoon to scrape up the browned bits from the bottom of the pot.  Add the chicken broth and bay leaf and bring to a boil.  Reduce the heat, cover,  and simmer 10 minutes.

Uncover the pan and add the shrimp, beans, basil, and parsley.  Simmer, uncovered, until the shrimp is pink and cooked through, 3-4 minutes.

Remove the bay leaf and discard.  Taste and season with additional salt and pepper if necessary.  Ladle the soup into bowls and serve with crusty bread.


Sunday, February 2, 2014

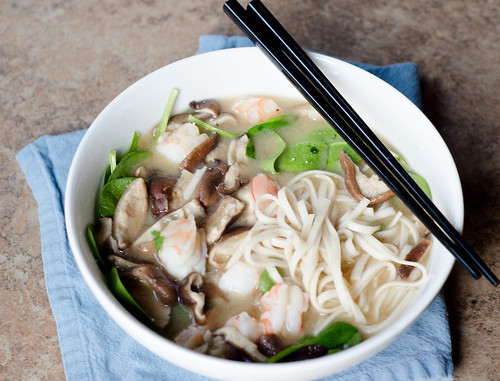
Mushroom-Miso Soup with Shrimp and Udon Noodles


I didn't really make New Year's resolutions for 2014, but I did sit down and make a little list of a few goals I'd like to focus on throughout the year.

....Ok, so when I put it that way, I guess I did make resolutions.

One of my non-resolution resolutions is to cook more foods outside my typical cuisines of Southern, Mexican, and Italian food.  I actually really love Asian food, and every time I make something that's Chinese or Japanese-inspired, I kick myself for not venturing to the far east more often.

Speaking of the far east, did you know that I almost moved to Japan when I graduated college?  It's a long story, but one that definitely worked out for the best in the end.  ANYWAY, I visited there over Christmas break of my senior year, after taking Japanese lessons for almost a year.  I was so excited to immerse myself in the culture, see some famous sites, and of course, eat the food.

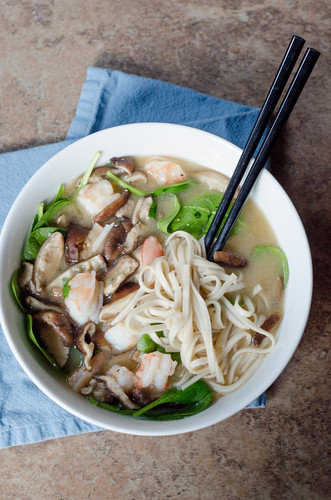
Almost every meal began with miso soup, and I came to look forward to that small bowl of fragrant broth.  This soup is a heartier and more filling take on that soup.  In addition to the miso broth, there are tender udon noodles - which just so happened to be my favorite noodle in Japan!  There are also earthy mushrooms, tender and sweet shrimp, and bites of leafy green spinach.  It's a wonderful combination, and the first few bites transported me back all those years to Japan.  Caroline absolutely loved this soup - she slurped up all the noodles, ate the shrimp, spinach, and mushrooms out with a fork, and then drank the remaining broth.

With meals as delicious as this one, it will definitely be easy to keep my non-resolution this year, and I can't wait to share more of my adventures with you along the way.


Mushroom-Miso Soup with Shrimp and Udon
barely adapted from The Six-Ingredient Solution
serves 4 generously

  • 12 oz udon noodles
  • 4 oz (4 cups) baby spinach, roughly chopped
  • 10 oz shiitake mushrooms
  • 3 cups vegetable broth
  • 12 oz extra-large shrimp, peeled and deveined
  • 1/2 cup white miso
  • kosher salt and freshly ground black pepper
Bring 4 quarts of water to a boil in a large pot.  Add the noodles and cook until al dente, about 4 to 5 minutes.  Drain and rinse with warm water to remove any excess starch.  Drain well, then portion the noodles into four individual serving bowls.  In each bowl, top the noodles with one cup of the baby spinach.  Set the bowls aside while you finish the soup.

Stem and thinly slice the mushrooms.  Bring the broth, 2 cups of water, and the mushrooms to a boil in a large saucepan over medium-high heat.

Reduce the heat to medium-low and simmer gently until the flavors meld and the mushrooms are tender, about 10 minutes.

Meanwhile, remove the tails from the shrimp and cut each shrimp into 3 equal pieces, and season lightly with salt and pepper.

In a small bowl, whisk together the miso and 1/2 cup of water until it's a smooth mixture.

Remove the soup from heat and stir in the shrimp and miso mixture.  Cover and let sit until the shrimp are just pink, about 1 to 2 minutes.  Taste and season with salt and pepper as needed.  Ladle the soup into the prepared bowls and serve.


Sunday, July 28, 2013

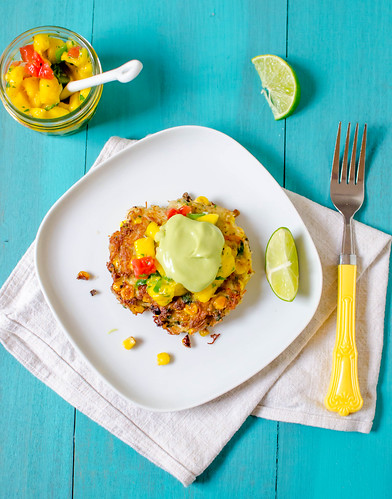
Crab & Corn Cakes with Mango Salsa and Avocado Cream


Typically, I'm pretty good about sticking with my weekly menu plan.  Sure, things may get pushed back to the following week, or we may skip a planned dinner here or there for leftovers or take-out, but as a general rule, I make what I plan.  So there I was, doing my weekly grocery shopping, and I happened to see crab legs on sale for a ridiculous price.  I immediately threw some in my cart, and there went my planned dinner for that night.  I honestly had no idea what I wanted to do with them:  steam and dip into melted butter, make some sort of taco or pizza?  salad?  risotto?  pasta?  Eventually, I decided to stay pretty classic, and make crab cakes.  But of course, not just any crab cakes.  Summery crab cakes.  Filled with fresh sweet corn.  And topped with mango salsa.  Oooh and avocado cream!  It was a great decision, and it resulted in a pretty killer dinner.

As is my M.O. these days, I prepped this dinner while the boys napped.  I picked the crab, mixed and formed the crab cakes, threw together the salsa, and then just pan-fried the cakes and made the avocado cream when it was dinner time.  I actually think chilling the crab cakes helps them stay together better - I've yet to make a crab cake that didn't require using the utmost care when flipping them.

Seafood goes really well with mangos, and avocados (Exhibit A.  Exhibit B.).  And while these may seem like they have a lot/too much going on, the crab really does shine.  The slight sweetness of the corn plays really well off the crab, and the little kernels provided a great textural contrast in the crab cake.  I also really loved how the kernels on the outside of the crab cake got nice and crispy in the pan.  The sweet and spicy mango salsa is a great complement to the crab cake, and the avocado cream gives the whole thing a creamy, rich finish.

Crab & Corn Cakes with Mango Salsa & Avocado Cream
a Pink Parsley Original
makes 4 crab cakes, with enough salsa and cream leftover for chips and dip.

  • 8-10 oz crab meat, picked over for errant shells and cartilage
  • 1 egg
  • kernels from 1 ear of corn
  • 2-3 Tbs minced fresh cilantro
  • 1/2 jalapeño, seeds and ribs removed, minced
  • 1/4 cup dried bread crumbs
  • 2 Tbs mayonnaise
  • 1 green onion, minced
  • kosher salt and freshly ground black pepper
  • 3 Tbs vegetable oil
Combine all the ingredients in a medium bowl, and gently mix with a spatula.  With wet hands, divide the mixture into 4 parts, then form into patties that are about 2-3 inches across.  Arrange in a single layer on a parchment-lined baking sheet, cover with plastic wrap, and refrigerate for at least 1 hour.

When you're ready to cook the crab cakes, heat the oil in a large nonstick skillet over medium-high heat.  Very carefully transfer the cakes to the skillet, and cook 3-4 minutes per side, flipping very carefully with a metal spatula.  Serve immediately.

Mango Salsa
  • 2 mangos, peeled and diced into 1/2-inch cubes
  • 1/4 cup chopped red or green bell pepper
  • 1/2 jalapeno, ribs and seeds removed, diced
  • 2 T diced red onion
  • juice of 1 lime
  • 1/8 tsp chili powder
  • 2 Tbs minced fresh cilantro
  • salt and pepper to taste

To prepare the mango salsa, combine all the ingredients in a medium bowl.  Taste and season with more salt, lime, or hot sauce if necessary.


Avocado Crema
  • 1 avocado, pitted 
  • 1-2 Tbs plain yogurt
  • 1 Tbs sour cream
  • juice of 1/2 lime
  • hot sauce to taste
  • salt and pepper to taste


For the avocado crema, use a fork to mash the avocado in a medium bowl.  Add the yogurt, sour cream, hot sauce, and lime, and continue mashing to form a smooth sauce.  Add more yogurt or sour cream to achieve your desired consistency, and season with salt and hot sauce.


Thursday, June 27, 2013

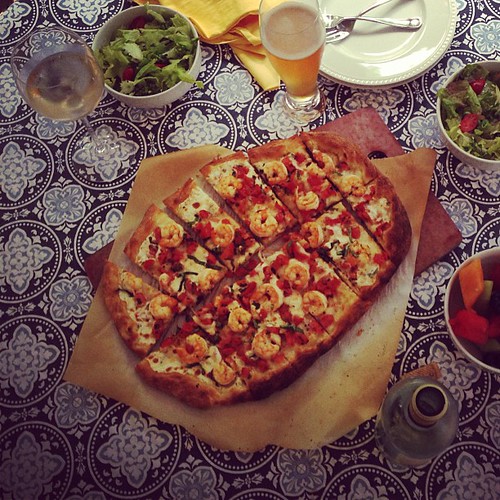
Shrimp Caprese Pizza


Pizza night is one of my very favorite nights.  Not only because I love pizza, but because Caroline and Smith love helping me make it.  Caroline helps me from start to finish - shaping the dough, spreading the sauce, scattering on the toppings - the whole shebang.  Smith helps by dumping handfuls of cheese and other toppings onto the dough, then eating any toppings he can get his little hands on.  But I remember when that was the extent of Caroline's contribution, and now she can practically make a pizza all by herself!  Having the kids help me in the kitchen is most definitely one of my favorite past times, and I think it's safe to say that they love it even more.  Before I can even finish the sentence "Caroline, do you want to help me make dinner?" she's dragging the step stool up to the counter.

This pizza was one such joint effort.  It's a simple premise - chopped tomatoes, mozzarella, basil, and shrimp.  But it's so delicious in it's simplicity.  I guess it's effectively just a margherita pizza with shrimp, but call it whatever you want - it's delicious either way.  Simple dinners like this are one of the best things about summer - enjoy this pizza as a main dish with a green salad and a glass of wine, or set it out as a hearty appetizer or first course.  It's light, fresh, and perfect for a relaxed dinner on the porch.


Shrimp Caprese Pizza
  • 1 lb. pizza dough
  • cornmeal, for sprinkling
  • olive oil
  • kosher salt and freshly ground black pepper
  • 2 cups shrimp (deveined, peeled, and tails removed) - halved if they are jumbo shrimp or exceptionally large
  • 1 large clove garlic, minced
  • 1 heaping cup of chopped tomatoes (seeds and pulp removed from the tomatoes)
  • 1 heaping cup torn or diced mozzarella cheese
  • 1/4 cup shredded fresh basil, divided
Place a pizza stone or baking sheet in the oven and preheat to 500 degrees Fahrenheit for at least 30 minutes.
Sprinkle a large square of parchment paper (about 14-16 inches) with cornmeal, and pull and stretch the pizza dough into a large circle or rectangle.  Brush the entire thing with olive oil, and sprinkle with salt, pepper, and the garlic.  

Pat the shrimp dry with paper towels and season liberally with salt and pepper.  Preheat 2 teaspoons of olive oil in a large nonstick skillet over medium-high heat, and cook the shrimp 1 minute per side.  Remove from the pan and set aside.

Scatter the tomatoes, mozzarella, and 3 tablespoons of the basil over the dough.  Arrange the shrimp in an even layer over the toppings - you may not use all the shrimp, so feel free to snack on the leftovers - cook's treat!

Cook 10 minutes, or until the crust is golden-brown and the cheese is melted and bubbly.  If the mozzarella and/or shrimp have released any water, just use a paper towel to carefully blot it up.

Allow to cool about 5 minutes, then sprinkle with the remaining basil, cut into slices, and serve.


Tuesday, May 28, 2013

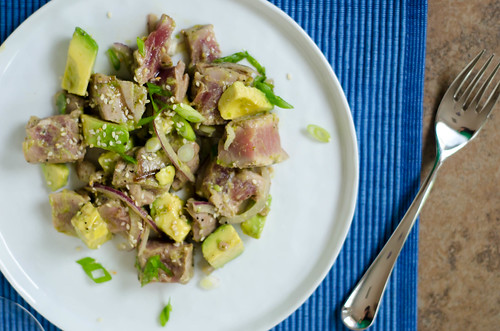
Grilled Tuna and Avocado Salad


Many moons ago, Joey and I went on our honeymoon to a wonderful resort in St. Lucia.  There was a library there, and I borrowed the book Julie and Julia to read while we relaxed on the beach every day.  Never having heard of food blogs before, I thought they were a pretty revolutionary idea, and the wheels started turning in my head.  Having received The Barefoot Contessa at Home as a wedding gift, I thought it would be a fun idea to cook my way through it a la Julie Powell.  However, as soon as we got home and I looked into it, I saw that I was about two years too late.  There were already tons of food blogs out there.  I pushed starting a blog to the back burner, but I started cooking my way through The Barefoot Contessa at Home at a voracious pace anyway.  That summer I probably made half the recipes in her cookbook, and we loved them all.

This grilled tuna salad was first up, and I made it one Saturday night when we had some friends over for dinner.  It was the beginning of summer, and this grilled salad was a really nice light dinner - paired with a green salad, some good bread, and crisp white wine, it was perfect for entertaining friends on the deck.  I've made it a few times since then, and I'm so happy to share it with you now.

This salad is the reason I fell in love with Ina Garten's recipes.  Seemingly simple ingredients combined in a way to create a truly special meal.  Avocado, onion, and scallions don't seem like anything special, but mixed with seared tuna and a wasabi-lime vinaigrette, this salad is elevated to a meal worthy of a special occasion.  It's also very quick and easy - as the grill is preheating, mix up the vinaigrette, chop the veggies, and toast the sesame seeds.  Quickly grill the tuna (with a glass of wine in hand, of course), then chop the avocado and fish, toss it all together, and serve.  As Ina would say, "How easy is that?"

Grille Tuna and Avocado Salad
barely adapted from The Barefoot Contessa at Home
serves 4 to 6
I only grilled enough tuna for Joey and myself, but for the kids, I used grilled shrimp and chopped mango.  It was a great alternative for the grilled tuna, and a combination I'll definitely be using in the future.

If you don't have a grill, the tuna can also be seared on the stovetop.  In a dry sauté pan over high heat,  cook the tuna 2-3 minutes per side, turning once.

  • 2 lbs very fresh tuna steaks, about 1-inch thick
  • olive oil
  • kosher salt and freshly ground black pepper
  • 1-2 Tbs sesame seeds
  • grated zest of 2 limes
  • juice of 3 limes
  • 1 tsp wasabi powder
  • 2 tsp low-sodium soy sauce
  • 1 tsp honey
  • 10-15 dashes of hot sauce (adjust to your spice preference)
  • 2 firm, ripe avocados
  • 1/2 medium red onion, thinly sliced
  • 2 scallions, minced (white and light green parts only)
Heat the grill to medium-high heat.

Meanwhile, brush both sides of the tuna steaks with olive oil, and season liberally with salt and pepper.

To toast the sesame seeds, place them in a dry sauté pan, and cook over medium-low heat, tossing often, until they are golden-brown, 5-10 minutes.  Remove them from the pan as soon as they are done, or they will burn.

Mix the vinaigrette:  In a small bowl, whisk together 1/4 cup of olive oil, lime zest, lime juice, wasabi powder, soy sauce, honey, hot sauce, 1 tsp kosher salt, and 1/2 teaspoon of pepper.  Taste and adjust seasonings as needed.

For the tuna, brush the grates of the grill with oil.  Place the tuna on the grill and cook 2-3 minutes per side.  Remove to a plate.  The tuna should be seared on the outside and raw in the center.  Allow to cool slightly, and chop into 1-inch cubes.

Meanwhile, chop the avocado into large bite-sized pieces and toss with the tuna, onion, scallions, and most of the wasabi-lime dressing.  Divide among individual serving plates and drizzle with additional dressing and sprinkle with sesame seeds.  Serve at room temperature.


Wednesday, April 24, 2013

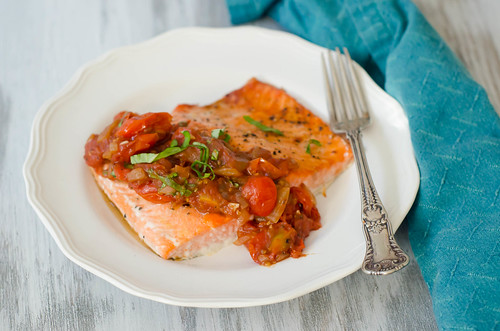
Salmon & Melting Cherry Tomatoes


Tomatoes... so close, yet so far away.  I daresay it's the produce I look forward to the most throughout the year.  There really and truly is nothing like a peak-seaon, homegrown tomato.  What would life be without homegrown tomatoes?  (side note:  Does anyone else know that song by John Denver?)

So while we still have a few months before tomatoes are plentiful and flavorful, cherry and grape tomatoes are starting to come into season now.  With a quick sauté of garlic, onions, balsamic vinegar, and fresh basil, they create a luscious and flavorful sauce.  And use that sauce to top salmon?  You have a pretty amazing meal.  We've been eating a lot of salmon lately, and this was definitely a great preparation for it.  The rich, buttery flavor of the salmon plays really well off of the deep, slightly sweet flavor of the sauce.  It reminded me a bit of this chicken with tomato-herb pan sauce, which is also a favorite dinner around here.

I broiled the salmon, but you could certainly cook it on the stovetop or grill as well.  I served this with a side of roasted asparagus, and called it a day.  So while I'm still yearning for summer and tomatoes, this dinner will hold me off until the time comes.

Salmon & Melting Cherry Tomatoes
adapted from The Barefoot Contessa:  Foolproof
serves 4

  • 2 lbs salmon, cut into 4 portions
  • olive oil
  • kosher salt and freshly ground black pepper
  • 1 cup chopped sweet onion
  • 2 cloves minced fresh garlic
  • 2 cups (1 pint) cherry or grape tomatoes, halved through the stem
  • 2 Tbs balsamic vinegar
  • 2 Tbs julienned fresh basil leaves
Preheat the broiler.  Line a baking sheet with foil, and arrange the salmon fillets in a single layer.  Lightly brush each fillet with olive oil, then generously sprinkle with salt and pepper.

Broil the salmon for 8-10 minutes, or until it is lightly browned on top but still translucent in the center (you can use a butter knife or fork to test).  Remove from oven, cover with foil, and allow to rest until it's ready to serve.

Meanwhile, make the sauce.  Heat 3 tablespoons of the oil in a medium sauté pan set over medium-low heat.  Add the onions and cook, stirring occasionally, until very tender but not browned, about 5 minutes.  Add the garlic and cook 1 more minute.

Stir in the tomatoes, 1/2 teaspoon of salt, and 1/2 teaspoon of pepper.  Cook over medium-low heat 10 to 15 minutes, stirring occasionally, until the liquid evaporates and the sauce is thickened.  Remove from heat and stir in the balsamic vinegar and basil, being sure to scrape the browned bits off the bottom of the pan.  Taste and season with additional salt if needed.  

Spoon the tomato sauce over the salmon and serve.

Friday, March 8, 2013

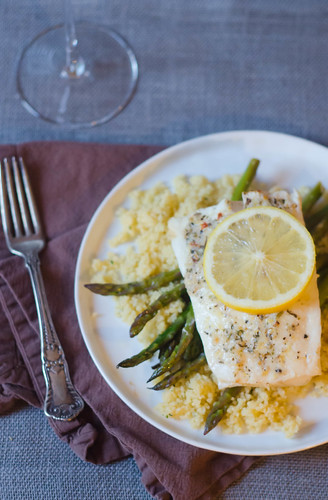
Foil-Baked Lemon-Garlic Fish and Asparagus


Lately I have been dealing with a lot of mom-guilt over the twins.  They take up SO much of my time, and it leaves me with little to no time to spend with Caroline and Smith.  So when I am just running out for some mundane errands (which sadly is the highlight of my week), I try and take Caroline along with me for some quality mother-daughter time.

Last week we were at Whole Foods, and Caroline asked if we could buy some fish for dinner.  She didn't have to ask me twice - I love the fish counter there, and the idea for this recipe had been rattling around in my brain for months.  I went with halibut because I like it so much, and it was on special that day.  But any white fish should work - just adjust the cooking time for the thickness.

As I was cooking dinner, Joey and Caroline had a funny little conversation:

Joey:  Mommy bought some nice fish for dinner tonight, are you excited?
Caroline:  Yes!  I love nice fish - it's delicous.  We don't eat mean fish though, they don't taste yummy.

That girl cracks us up to no end.  She's right though.  This fish was delicious.  I made a simple compound butter with lemon, garlic, and herbs, and slathered it on each piece of fish.  I then wrapped each portion in a foil-packet, along with some asparagus and lemon slices.  After a very brief stint in the oven, you have a super flavorful, healthy fish dinner.  The lemon butter melts over the fish and asparagus, and you have a tasty sauce to pour over the fish.  I served it over couscous, but it would be great over any number of grains - rice, quinoa, orzo, etc.

Foil-Baked Lemon-Garlic Fish and Asparagus
loosely inspired by this foil-baked fish
serves 4
  • 4 (6-8 oz) skinless white fish filets, about 1-inch thick
  • 4 Tbs unsalted butter, at room temperature
  • zest and juice of 1/2 lemon
  • 1/2 tsp dried herbes de provence
  • 2-3 garlic cloves, finely minced
  • pinch of red pepper flakes
  • kosher salt and freshly ground black pepper
  • 1 lb. asparagus, woody ends snapped off
  • 4 lemon slices, plus more for serving.
  • 4 Tbs dry white wine
Preheat the oven to 450 degrees.  Cut 4 pieces of foil, each measuring about 10x14 inches.  Divide the asparagus evenly between the foil sprinkle lightly with salt and pepper, top with a lemon slice, and set aside.  Pat the fish dry with paper towels, and season with salt and pepper.

Using a fork, combine the butter, lemon zest and juice, herbs, garlic, pepper flakes, and salt and pepper to taste.  Spread 1 tablespoon of the butter on each piece of fish.  Carefully transfer each piece of fish to the foil, and pour 1 tablespoon of wine over each piece.  Wrap and seal the packets, and transfer to a baking sheet.

Bake until the fish is just cooked through and the asparagus is crisp-tender, 15-20 minutes.  Open very carefully, as the steam will burn!  Serve the fish and asparagus with the accumulated juices in the packet and extra lemon.


Sunday, October 7, 2012

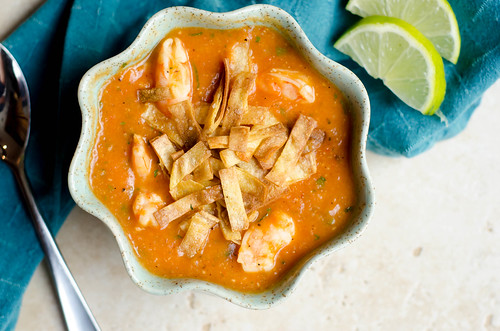
Shrimp Tortilla Soup


Chicken tortilla soup is one of my favorite soups of all time.  As a matter of fact, sometimes I'll order it when we go out for Mexican because I love it so much.  And though it's been a while since I've made it, this is my all-time favorite recipe.  However, when I saw a recipe for shrimp tortilla soup, it stopped me in my tracks.  How smart!  I think shrimp and tomatoes go well together already, and the smoky, spicy soup that's finished with a good dose of lime juice just works.  It somehow feels a little lighter than chicken tortilla soup, even topped with the crispy and crunchy tortilla strips.

The base is made up of onions, chipotle chiles, tomatoes, and hominy.  After simmering a bit, it's pureed and returned to the stovetop.  There, the lime, cilantro, and shrimp are added.  The shrimp cooks really quickly in the broth, and before you know it you're enjoying a big bowl of comfort.

We've all been battling what feels like a never-ending cold, and this spicy soup was both comforting and restorative.  I kept it simple and served it with cheese quesadillas - which coincidentally were great dipped into the broth.  This soup is homey, it's comforting, it's healthy... pretty much the perfect combination.  If you're into making soups ahead of time and freezing, I would just make the tomato-base, freeze, then add the shrimp to cook as you reheat the soup.

Shrimp Tortilla Soup
adapted from America's Test Kitchen, Simple Weeknight Favorites
serves 6-8

  • 4-5 (6-inch) corn tortillas, halved and sliced into 1/4-inch thick strips
  • 2 Tbs vegetable oil
  • salt and pepper
  • 1 large onion, chopped
  • 4 garlic cloves, minced
  • 1 tsp cumin
  • 1 tsp chile powder
  • 2 Tbs minced canned chipotles in adobo sauce (remove the seeds if you're sensitive to heat)
  • 5 cups low-sodium chicken broth
  • 2 (15-oz) can hominy, drained and rinsed
  • 1 (14.5 oz) can diced tomatoes (preferably fire-roasted)
  • 1 1/2 lbs shrimp, peeled, deveined, and tails removed, halved crosswise if large
  • 1/4 cup chopped fresh cilantro
  • 2 Tbs fresh lime juice, plus lime wedges for serving
Heat the oven to 435 degrees.  Toss the tortilla strips with 1 tablespoon of oil and salt.  Arrange in a single layer on a baking sheet and cook until deep-golden brown and crispy, 10-12 minutes, tossing halfway through.  Season with additional salt and pepper to taste and transfer to a paper towel-lined plate.

Meanwhile, heat the remaining tablespoon of oil in a large pot or dutch oven over medium-high heat.  Add the onion and cook until softened, about 4 minutes.  Add the garlic, cumin, chile powder, and chipotles.  Stirring constantly, cook until fragrant, about 30 seconds.  Add the broth, hominy, and tomatoes.  Bring to a simmer, reduce heat to low, cover, and cook about 15 minutes to allow the flavors to meld.

Working in batches, puree the soup in a blender or food processor until smooth.  Return the soup to the pot and bring to a simmer.  Add the shrimp and cook, stirring occasionally, until they are just cooked through and opaque, about 2-3 minutes.  Remove from heat and stir in the cilantro and lime juice.

Ladle into bowls and top with tortilla soups.  Serve with lime wedges.


Sunday, August 26, 2012

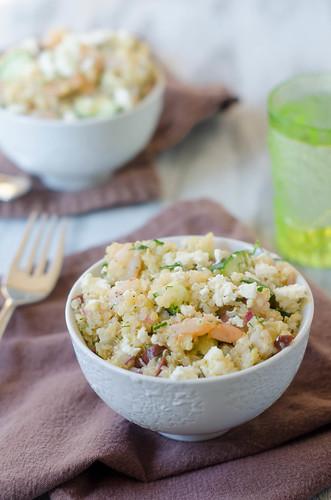
Shrimp & Feta Quinoa


Some flavor combinations just work so so well together.  One of my favorites is feta, shrimp, cucumber, and fresh herbs.  I've made a mac and cheese using these flavors, and it's still one of my favorites of all time... but it's decidedly unhealthy, not to mention it's not the quickest dinner ever.

This is a great alternative.  You get all the wonderful fresh flavors, but you get them in under thirty minutes, and it's a very healthy dish to boot. As the quinoa cooks, chop the rest of the components and cook the shrimp.  Then you just mix it all together.  I'm terrible about reading directions before I start cooking (I know I'm not the only one), so while the original recipe called for the salad to be chilled for a few hours before serving, we ate it warm, and it was great.  I ate the leftovers for lunch the next day, and it was great chilled as well.  So just do whatever floats your boat.

I also didn't have the right amounts of herbs called for, so I just kind of mixed and matched what I had - I used a combo of basil, parsley, oregano, dill, and chives.  I really wish I'd had mint though.

This made a nice light dinner, but I could see mixing up a batch of this on Sunday night and having lunch ready for the week - pack your lunch with some toasted pita and fresh fruit, and you have a protein-packed, healthy and - most importantly - delicious lunch.

Shrimp + feta = love.

Shrimp & Feta Quinoa 
adapted from Food Network Magazine, via Perry's Plate
makes 5-6 servings

  • 1 1/2 cups uncooked quinoa, rinsed
  • 3 cups broth (any kind)
  • 1 pound large shrimp, peeled & deveined
  • 1 1/2 Tablespoon olive oil
  • 1 clove garlic, minced
  • Sea salt and freshly ground pepper
  • Grated zest of 2 small (or 1 large) lemon, plus 1/3 cup fresh lemon juice
  • 1/3 cup finely chopped red onion
  • 1/2 cup chopped fresh dill
  • 2 Tbs chopped fresh mint
  • 2 Tbs chopped fresh parsley
  • 1 1/2 cup diced English cucumber (about half of one)
  • 6 ounces crumbled feta cheese
  • 3 Tablespoons chopped kalamata olives (optional)
  • 1/3 cup extra-virgin olive oil
Preheat the broiler.
Bring broth to a boil and add quinoa. Boil for a minute or so, then reduce heat to medium-low, cover, and cook for 12-15 minutes, or until the liquid is completely absorbed and quinoa is fluffy. Set aside.
Meanwhile, toss shrimp on a baking sheet with 1 1/2 tablespoons of oil, garlic, and salt and pepper to taste. Arrange evenly on the baking sheet. Broil the shrimp, stirring once, until opaque and just cooked through, 2-3 minutes.
In a large salad bowl, combine shrimp, lemon zest and juice, onions, herbs, cucumber, feta, olives, and olive oil. Toss to coat evenly. Serve immediately or cover and refrigerate for a few hours.


Tuesday, August 21, 2012

California Roll Burgers


The minute I saw these burgers on Use Real Butter, I'm pretty sure I immediately started drooling.  Start out with a pretty basic burger - use the highest quality beef you can, add a little fish sauce (just trust me), and grill them.  Mix up a quick crab salad and wasabi mayo, then pile it all on a toasted bun with the obligatory lettuce and tomato, plus some chopped nori, avocado slices, and pickled ginger.  It is one intense burger.  I was pretty full after eating only half of it, but it was so good that I couldn't bear to let any go to waste.  Don't you hate that?

As soon as I made these, I started envisioning a spicy tuna roll burger... and then I got pregnant.  I later saw that Jen was ahead of me, and had recently posted one.  You'd better believe that I'll be enjoying one pretty quickly after these babies are born!  Without a doubt, sushi is the hardest thing to give up when pregnant.  For some reason I crave it all. the. time now.

I know summer is winding down, but even if you only plan to use your grill one more time, I beg of you - make these burgers.  You most definitely won't be sorry!

California Roll Burgers
adapted from Use Real Butter

feel free to customize these to your tastes.  Leave off any of the components you don't care for, or add anything else you do like.  The original recipe called for roe as one of the toppings, but I don't care of the texture so much, so I left it off.  I topped mine with a little extra siracha sauce for a spicier burger.  I also followed Jen's lead and served it with the Terra root chips.  

Prepare all the toppings and refrigerate them before you grill the burgers, so you can assemble and eat as soon as they come off the grill.  The combo of hot burger with cold toppings is really great.

  • 1 lb ground beef
  • 1 tsp fish sauce
  • kosher salt and freshly ground black pepper
  • 6-8 oz crab meat, picked through for shells
  • 1 Tbs mayonnaise
  • dash of soy sauce
  • 1/4 cup mayonnaise
  • 1 tsp wasabi powder (more or less to taste)
  • pickled ginger
  • nori (seaweed sheets) cut or torn into thin strips
  • avocado slices
  • lettuce or spinach, washed and torn
  • tomato slices
  • challah or brioche buns, halved
  • Siracha, for serving
Combine the ground beef with the fish sauce, and season with salt and pepper.  Using a light hand, loosely form the beef into 4 patties.  Season the outside with additional salt and pepper.

For the crab salad:  Combine the crab meat with 1 tablespoon of mayonnaise and soy sauce, taste, and season with salt and pepper.  Cover and chill until ready to use.

To make the wasabi mayonnaise, stir the wasabi powder into 1/4 cup of mayonnaise.  Taste and add additional wasabi or mayonnaise to adjust to your liking.  Cover and chill until ready to use.

Prepare the grill to medium-high heat.  Oil the grates, then grill the burgers to desired doneness, flipping once.  Brush the cut side of the buns with oil or butter and grill them as well.

To assemble:  Starting with the bottom bun, layer the lettuce, tomato, burger patty, crab salad, avocado, nori, and pickled ginger.  Spread the top bun with some of the wasabi mayonnaise, drizzle siracha on top if desired, and serve immediately.


Tuesday, June 19, 2012

Crispy Parmesan Tilapia with Roasted Tomato Caprese Salsa


Chicken Parmesan is one of my all-time favorite dinners.  What's not to love?  Crispy chicken, tomato sauce, melted cheese... all good things.  However, what with being in the beginning stages of summer, I'm more apt to crave lighter dinners.  This dinner definitely fits the bill.  I feel like fish - especially something like tilapia - is typically lighter in taste than chicken.  Plus, it cooks in no time flat.  Definitely a plus.  Rather than smothering the meat in a heavy tomato sauce and a blanket of melted cheese, I topped it with a salsa of sorts - roasted cherry tomatoes, cubes of mozzarella, and lots of fresh basil.  You could certainly serve this over some pasta, but I opted to go with a bed of baby spinach.

Any spin on chicken parmesan is fine by me, but I especially like this lighter and summery take on it.  Bring on the summer!

Crispy Parmesan Tilapia with Roasted Tomato Caprese Salsa
Pink Parsley Original


Roasted Tomato Caprese Salsa
  • 1 pint cherry or grape tomatoes
  • 1/2 Tbs olive oil
  • kosher salt
  • pinch of sugar
  • 1/2 cup cubed mozzarella
  • 1/4 cup chopped fresh basil
  • splash of balsamic vinegar
  • freshly ground black pepper
Parmesan Tilapia
  • 1/2 cup flour
  • 2 eggs
  • splash of water or milk
  • 1/2 cup panko bread crumbs
  • 1/2 cup shredded Parmesan cheese
  • salt and pepper
  • 1/4 tsp garlic powder
  • 4 tilapia filets, patted dry
  • 4 Tbs olive oil, divided
For the roasted tomatoes, preheat the oven to 400 degrees.  Toss the tomatoes with the oil, salt, and sugar.  Spread in a single layer and cook about 20 minutes, tossing once.  Remove from the oven and allow to cool slightly.  Using tongs, transfer to a medium bowl, squeezing some of the tomatoes to break them (it lets the juices permeate the whole salsa).  Toss with the mozzarella, basil, and balsamic vinegar.  Season to taste with salt and pepper and add more oil if necessary as well.  Set aside.

Meanwhile, prepare the tilapia:  Set up an assembly line with three shallow bowls (pie plates work really well too!).  In the first bowl, add the flour and a pinch of salt.  In the second, beat the eggs with the milk/water.  In the third, mix the panko, Parmesan, salt and pepper, and garlic powder.

Preheat 2 tablespoons of the oil in a large nonstick skillet over medium heat.  Season the tilapia filets with salt and pepper.

One at a time, dredge the tilapia in the flour, then dip in the egg, allowing excess to drip off.  Finally coat with the panko/parmesan mixture, pressing lightly to adhere the crumbs to the fish.  Repeat with the remaining pieces.

Working 2 pieces at a time, cook the tilapia in the oil about 2-3 minutes per side, or until it flakes easily with a fork.  Remove to a paper towel-lined plate and repeat with the remaining fish.  

Divide evenly among serving plates and top with the roasted tomato salsa.  Serve immediately.


BLOG DESIGN BY: SHERBET BLOSSOM DESIGNS