Showing posts with label recipe remix. Show all posts

Tuesday, July 21, 2015

Grilled Shrimp and Summer Vegetable Panzanella

Grilled Shrimp and Summer Veggie Panzanella 

This summer has brought about a new family tradition.  On Friday evenings, we meet a few other neighborhood families at the pool, grill our dinner, and engage in general merriment with the kids.  It's something that I very much look forward to all week long.  Because I am who I am, I spend most of the week thinking about what we'll grill and eat, what cocktail I'll mix up, and what we'll eat for dessert.  Sometimes we go simple - burgers or hotdogs, chips, and watermelon.  Sometimes we go REALLY simple and order pizza.  And sometimes I get inspired and end up creating one of my favorite dinners of the summer.

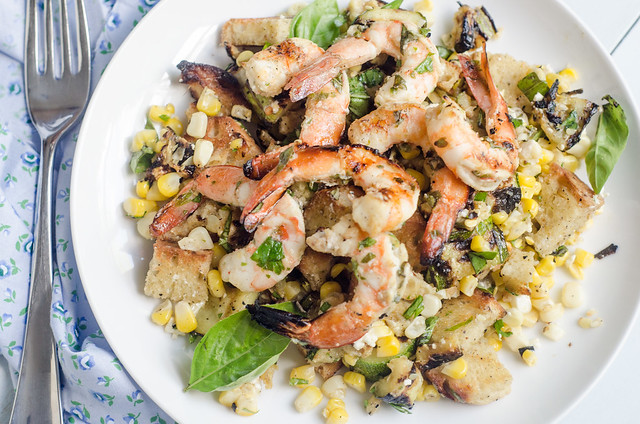
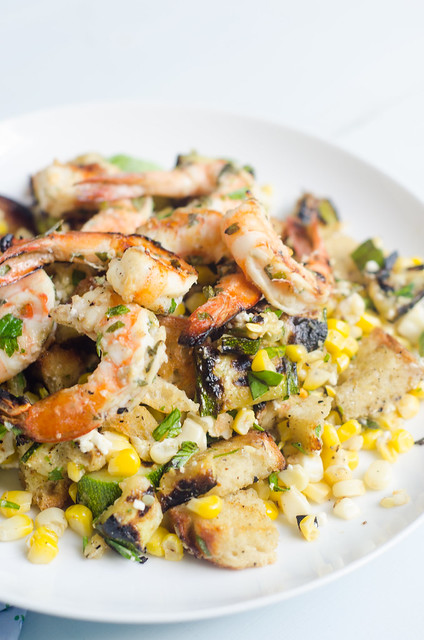
Obviously I'm talking about this salad.  I planned to use my favorite recipe for grilled shrimp, and serve it alongside a simplified zucchini and corn salad, along with some grilled garlic bread.  In a moment of inspiration, I turned it into a grilled shrimp and bread salad.  I was so excited and enamored with the final dish that I made it again a few days later.

This was not only a big hit with Joey and me, but it was a huge hit with the kids as well .  They were especially obsessed with the grilled shrimp and bread, and couldn't get enough.

I have revamped and remixed my chopped summer veggie salad in several ways, spanning numerous cuisines and seasons, but this may be my favorite yet.  When I've made this, I just keep it to the veggies, shrimp, and bread, and leave out the grilled romaine.  I certainly think it would be a great addition though!  If you're looking for a side for this salad, I'd recommend that you keep it simple - a plate of sliced tomato with salt and pepper is perfection here!

Here's to summer grilling and dinner at the pool!

DSC_1430

Grilled Shrimp and Summer Veggie Panzanella

Herb-Grilled Shrimp
adapted from Ina Garten
  • 1 1/2 lbs large shrimp, peeled and deveined, but tails left on
  • 3 cloves garlic, minced
  • 1 medium yellow onion, minced
  • 1/4 cup minced fresh parsley
  • 1/4 cup minced fresh basil
  • 1 teaspoon dry mustard
  • 2 teaspoons Dijon mustard
  • 1 1/2 teaspoons kosher salt
  • 1/2 teaspoon fresh black pepper
  • pinch of red pepper flakes
  • 1/4 cup olive oil
  • 1 lemon, juiced
Combine all the ingredients and toss to coat the shrimp.  Allow to marinate at room temperature for 1 hour, or in the refrigerator for up to 24 hours.
Summer Vegetable and Grilled Bread Salad
  • 1/3 cup extra virgin olive oil, plus more for dressing
  • 3 cloves garlic, minced
  • kosher salt and freshly ground black pepper
  • 1/4 tsp red pepper flakes
  • zest of half a lemon
  • 2 ears corn, husk and silks removed
  • 3 medium zucchini, sliced lengthwise into 1/2-inch-thick planks
  • 6-8 slices baguette or other crusty bread (I used a roasted garlic loaf and it was really really good!)
  • 2 Tbs chopped fresh basil
  • 1/2 cup crumbled feta cheese (about 2 oz)
Prepare the grill to cook at medium-high heat.  Allow to preheat at least 15 to 20 minutes.

Meanwhile, whisk together the oil, garlic, 1/2 teaspoon of salt, 1/2 teaspoon of pepper, lemon zest, and red pepper flakes.

Brush the zucchini, bread slices, and corn with the oil mixture. Reserve the remaining oil mixture to use for the dressing.

Clean the cooking grate, then place the zucchini, corn, and bread slices on the grill.  

For the corn, grill, turning every 2 to 3 minutes, until the kernels are lightly charred all over, about 10 minutes total.

For the zucchini, grill it until it is well-browned and tender (but not mushy), about 4 to 5 minutes per side.

For the bread, grill it 1 to 2 minutes per side, or until it is lightly charred.

Meanwhile, prepare the dressing.  Add enough oil to the remaining oil-garlic-pepper mixture to reach a volume of 1/4 cup, then whisk in the lemon juice.  Taste and season with salt and pepper as needed.

Prepare grill. 

 Thread the shrimp on skewers.

Grill the shrimp for about 2 minutes, then flip skewers and grill until cooked through, an additional 1-2 minutes.  Remove from the grill and cover lightly with foil as you prepare the rest of the salad.

Once everything is off the grill, begin building the salad.    Cut the kernels off the corn and add them to a large bowl.  Cut the zucchini crosswise into 1/2 inch-thick slices, and add those as well.  Slice or tear the bread into bite-sized pieces.  Crumble the feta into the bowl, and top with the chopped basil.  Drizzle the dressing over the top, then toss well to combine.  

Divide among plates, then lightly sprinkle each serving with salt and freshly ground pepper.  Top each serving with several shrimp, and serve.


Thursday, May 9, 2013

Strawberry-Rhubarb Pie Bars


A few weeks ago, we made the trek to my hometown of McDonough, Georgia to visit my family.  While we were down there, we met my dad and his wife at Southern Belle Farm for some strawberry picking!  Caroline and Smith were both really excited to pick the berries this year: Caroline proclaimed every berry she picked to be "the most perfect strawberry ever," and Smith was very involved in the quality control testing.  We left with two gallons of strawberries and bellies full of homemade strawberry ice cream.


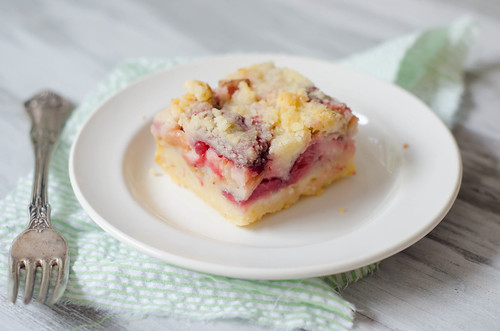
I of course already had more recipe ideas than I did strawberries, and sadly, I barely made a dent in my list.  However, I used the last of the berries to make these strawberry-rhubarb pie bars, and they were definitely a great use of those beautiful strawberries!

I used the base of these blackberry pie bars and adapted the filling to suit the new flavors.  The result was a fantastic dessert:  a buttery crust that transforms into a sweet, custardy filling, with the slightest sour notes from rhubarb, and finally topped with more buttery, crumbly crust.  The crust kind of fades into the filling, creating an ombre of flavor and texture.  Absolutely delicious!

My dad's favorite dessert is strawberry-rhubarb pie, so I feel like I should have waiting to post these before Father's Day, but I guarantee these will be a hit with any moms in your life as well.  Or anyone in your life for that matter!

Strawberry-Rhubarb Pie Bars
adapted from The Pastry Queen's Blackberry Pie Bars
makes one 9x13 inch pan.

Crust and Topping

  • 3 cups all-purpose flour
  • 1 1/2 cups sugar
  • 1/4 tsp salt
  • 1 1/2 cups (3 sticks) unsalted butter, chilled
Fruit Filling

  • 4 large eggs
  • 1 1/2 cups sugar
  • 3/4 cup buttermilk
  • 3/4 cup flour
  • pinch salt
  • zest of 1/2 lemon
  • 1 tsp vanilla extract
  • 8 oz. strawberries, hulled and halved (quartered if they are large berries)
  • 8 oz. fresh or frozen rhubarb, cut into 1/2-inch slices
To make the crust and topping, preheat the oven to 350 degrees.  Grease a 9x13 inch baking pan. 

Combine the flour, sugar, and salt in the bowl of a food processor.  Pulse a few times to mix.  Cut the butter into 1/2-inch cubes, and add to the flour mixture.  Process until the butter is evenly distributed but the mixture is still crumbly, 30-60 seconds.

Reserve 2 cups of the mixture to use as the topping.  Press the remaining mixture into the bottom of the pan, and bake 12-15 minutes.  Cool for at least 10 minutes.

To make the filling, whisk the eggs in a large bowl, then add the sugar, buttermilk, flour, salt, lemon zest, and vanilla extract.  Gently fold in the berries and rhubarb and spoon the mixture over the crust.  Sprinkle the remaining flour mixture evenly over the filling, and bake 55 to 65 minutes.

Cool at least 1 hour before cutting into bars, or scoop out of the pan to serve cobbler-style.


Friday, March 8, 2013

Foil-Baked Lemon-Garlic Fish and Asparagus


Lately I have been dealing with a lot of mom-guilt over the twins.  They take up SO much of my time, and it leaves me with little to no time to spend with Caroline and Smith.  So when I am just running out for some mundane errands (which sadly is the highlight of my week), I try and take Caroline along with me for some quality mother-daughter time.

Last week we were at Whole Foods, and Caroline asked if we could buy some fish for dinner.  She didn't have to ask me twice - I love the fish counter there, and the idea for this recipe had been rattling around in my brain for months.  I went with halibut because I like it so much, and it was on special that day.  But any white fish should work - just adjust the cooking time for the thickness.

As I was cooking dinner, Joey and Caroline had a funny little conversation:

Joey:  Mommy bought some nice fish for dinner tonight, are you excited?
Caroline:  Yes!  I love nice fish - it's delicous.  We don't eat mean fish though, they don't taste yummy.

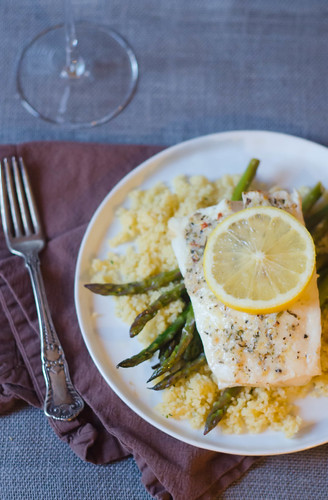
That girl cracks us up to no end.  She's right though.  This fish was delicious.  I made a simple compound butter with lemon, garlic, and herbs, and slathered it on each piece of fish.  I then wrapped each portion in a foil-packet, along with some asparagus and lemon slices.  After a very brief stint in the oven, you have a super flavorful, healthy fish dinner.  The lemon butter melts over the fish and asparagus, and you have a tasty sauce to pour over the fish.  I served it over couscous, but it would be great over any number of grains - rice, quinoa, orzo, etc.

Foil-Baked Lemon-Garlic Fish and Asparagus
loosely inspired by this foil-baked fish
serves 4
  • 4 (6-8 oz) skinless white fish filets, about 1-inch thick
  • 4 Tbs unsalted butter, at room temperature
  • zest and juice of 1/2 lemon
  • 1/2 tsp dried herbes de provence
  • 2-3 garlic cloves, finely minced
  • pinch of red pepper flakes
  • kosher salt and freshly ground black pepper
  • 1 lb. asparagus, woody ends snapped off
  • 4 lemon slices, plus more for serving.
  • 4 Tbs dry white wine
Preheat the oven to 450 degrees.  Cut 4 pieces of foil, each measuring about 10x14 inches.  Divide the asparagus evenly between the foil sprinkle lightly with salt and pepper, top with a lemon slice, and set aside.  Pat the fish dry with paper towels, and season with salt and pepper.

Using a fork, combine the butter, lemon zest and juice, herbs, garlic, pepper flakes, and salt and pepper to taste.  Spread 1 tablespoon of the butter on each piece of fish.  Carefully transfer each piece of fish to the foil, and pour 1 tablespoon of wine over each piece.  Wrap and seal the packets, and transfer to a baking sheet.

Bake until the fish is just cooked through and the asparagus is crisp-tender, 15-20 minutes.  Open very carefully, as the steam will burn!  Serve the fish and asparagus with the accumulated juices in the packet and extra lemon.


Thursday, May 10, 2012

Baked BBQ Pork Taquitos


Ever since last winter, these baked chicken taquitos have been a perennial favorite in our house.  I always have a few in the freezer to cook up for a last minute lunch, and Joey gets really excited whenever they're on the menu (which, according to him, is not often enough).  Every time I make them, I start thinking up other variations.

It just so happens that we have several pounds of pulled pork in the freezer at any given time, so it only seemed natural to marry the two.  Kind of like that friends episode where Joey has to choose between a big tub of jam and the hot girl at the Xerox place:  put your hands together, my friend.  Put your hands together.  Joey said he liked these even better than the original chicken taquitos, and dare I say I agreed?

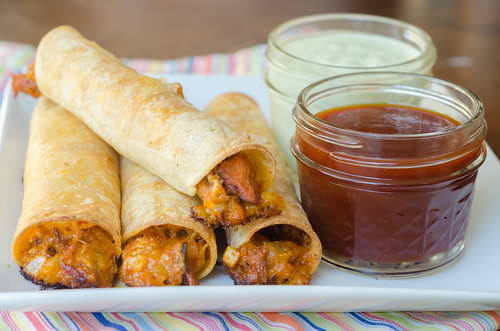
So here's the rundown on what I did:  I used pulled pork instead of chicken, but I think chicken would work just as well here.  I know I'm always looking for ways to use leftover meat, and this is a great solution.  I used cream cheese as the binder, just as in the original recipe, but I would love to try ranch dressing next time.  then I used bbq sauce instead of salsa, and seasoned the mixture with spices that I would use for pulled pork:  paprika, brown sugar, mustard, etc.  Baked up until they are perfectly crispy, then dipped in a  combo of ranch dressing and bbq sauce, these were pretty much perfection.

I still have a few more taquito variations of my sleeve, but it's going to be hard to stray from these and the chicken ones from here on out.... I suppose that somehow I'll manage ;-)

Baked BBQ Pork Taquitos
inspired by these Baked Chicken Taquitos (which are from Our Best Bites)

  • 3 oz. cream cheese, softened to room temperature (reduced-fat is fine)
  • 1/3 cup bbq sauce
  • 1/2 tsp paprika
  • 1/2 tsp chile powder
  • 1/2 tsp garlic powder (or 1 garlic clove, minced)
  • 1/2 tsp mustard powder
  • 1/2 tsp brown sugar
  • 1/2 tsp liquid smoke
  • pinch red pepper flakes
  • kosher salt and pepper to taste
  • 1/4 cup diced onion
  • 3 scallions, thinly sliced
  • 2 Tbs minced fresh cilantro or parsley
  • hot sauce (optional)
  • 2 cups shredded or chopped cooked pork or chicken
  • 1 cup sharp cheddar cheese
  • 8-10 (6-inch) corn or flour tortillas
  • cooking spray
  • Ranch Dressing and/or BBQ Sauce, for serving
Preheat the oven to 425 degrees and spray a baking sheet with cooking spray. 

In a large bowl, combine the cream cheese with the bbq sauce, paprika, garlic powder, mustard, brown sugar, liquid smoke, chile powder, red pepper flakes, cilantro, scallions, onion, and 1/4 tsp kosher salt.  Fold in the pork and cheese.  Taste and season with additional salt and pepper if necessary.  Add hot sauce if you like things spicy!

Working 3-4 tortillas at a time, stack them on a microwave-safe plate and cover with a damp paper towel.  Cook 30 seconds, or until tortillas are soft and pliable. 

Spoon 2-3 tablespoons of filling onto the lower third of each tortilla, and roll tightly.  Place seam side-down on the prepared baking sheet.  Repeat with remaining tortillas and filling.

Spray the taquitos lightly with cooking spray, sprinkle with salt.  Bake 15-20 minutes, or until the tortillas are crisp and golden-brown.  Serve with bbq sauce and ranch dressing for dipping.


Tuesday, April 17, 2012

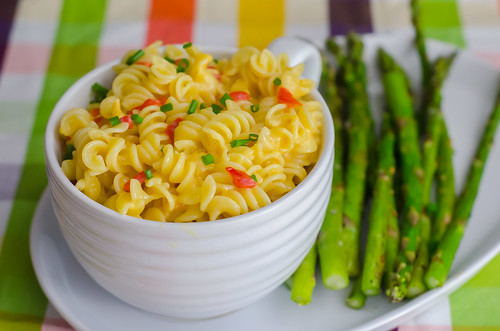
Recipe Remix: Pimento Cheese Macaroni and Cheese


I've made my obsession with pimento cheese abundantly clear on here, so no need to rehash that.  Therefore, I'll just get right to the point and share yet another dish that's a variation of pimento cheese.

One night for whatever reason, my planned dinner wasn't happening, so I was scrounging.  It's times like this when I fall back on pantry staple meals so we don't succumb to take-out or delivery pizza.  When I think of pantry staple meals, pasta is always a safe bet for me.  We always have dried pasta of some sort and several random cheeses in the fridge, so some variation of macaroni and cheese is usually the fallback.  Especially considering that it is Caroline's absolute favorite food in the whole world (her words).  You can never have too many versions, right?

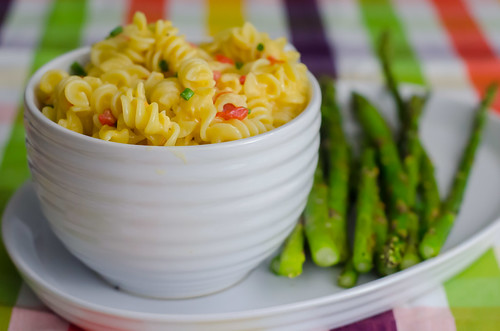
I used this creamy stovetop macaroni and cheese as the base recipe, adjusting the ingredients to the flavor profile I was going for.  The final product was just what I wanted:  supremely creamy and cheesy with just a little kick.  And it was ready and on the table in under half an hour.  You can't beat that!


Pimento Cheese Macaroni and Cheese
adapted from Italian Style Stovetop Macaroni and Cheese, originally from Macaroni and Cheese

  • 12 oz. dried pasta shapes (smaller shapes work best)
  • 1 clove garlic, minced
  • large pinch of red pepper flakes
  • dash of worcestershire sauce
  • 8 oz shredded extra sharp cheddar cheese
  • 4 slices American cheese, torn into small pieces
  • 1/4 cup milk, half-and-half, or cream
  • 4 oz. Greek yogurt (low fat or nonfat is fine)
  • 2 Tbs unsalted butter, at room temperature
  • 4 oz. jar of diced pimentos, drained and rinsed
  • salt and pepper to taste
  • snipped fresh chives, for garnish
Bring a large pot of salted water to boil and cook the pasta to al dente, according to the directions on the package.

Drain the pasta, reserving 1 cup of the pasta water (I used to always forget to save the water, so now I put a measuring cup in the strainer while the pasta is cooking, so I don't forget).

Return the pasta to the pot and stir in the garlic, worcestershire sauce, and red pepper flakes.  Add the cheese a handful at a time, stirring well between each addition.  Stir in the Greek yogurt, butter, and milk, and stir until all the cheese has melted and the sauce is creamy and smooth.  Stir in the pimentos, season to taste with salt and pepper and garnish with chives before serving.


Thursday, February 9, 2012

Heart-Shaped Cherry-Nutella Pop Tarts

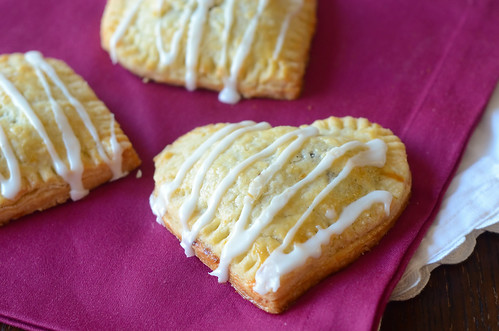
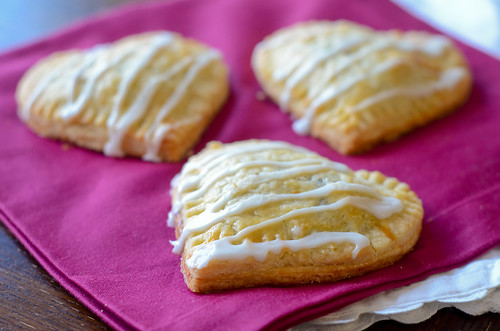
 Last fall, when I made the Pumpkin Pie Pop Tarts, I started thinking of possibilities for other flavors.  I've got quite the list going, but this time I chose to go festive for Valentine's Day with cherry pie filling.  And in a fly by the seat of my pants decision, I decided to do half of them with a cherry pie-nutella filling.  Which turned out to be a very wise decision indeed.  While I really loved the cherry filling, the cherry-nutella filling was just over-the-top good. And cutting them into hearts just makes them so romantic, doesn't it?
I used the exact same recipe and method as the pumpkin pop tarts, but instead of cutting the dough into rectangles, I used a heart-shaped cookie cutter.  I re-rolled the scraps to get a few more Pop Tarts out of the batch, and I couldn't tell a difference in the quality of the pastry at all.

Since cherries aren't in season right now, I used frozen cherries for the filling.  I kept it super simple with a little sugar, lemon juice, and a splash of bourbon, then thickened the mixture with some cornstarch.

This was a really fun project, and I think kids would really get a kick out of making these for Valentine's Day. 


Cherry-Nutella Pop Tarts
pastry from these Pumpkin Pie Pop Tarts, which are from Joy the Baker


For the Pastry:

  • 2 cups all-purpose flour
  • 1 1/2 Tbs granulated sugar
  • 3/4 tsp salt
  • 1 cup (2 sticks) unsalted butter, cold, cut into cubes
  • 1 large egg
  • 2 Tbs milk
  • 1 large egg (for brushing the dough)
For the Filling:
  • 12-oz frozen cherries, thawed and drained
  • 2 Tbs sugar
  • juice of half a lemon
  • splash of Bourbon (optional)
  • 1 Tbs cornstarch mixed with 1 Tbs water
  • Nutella (optional)
For the Glaze:
  • 1 cup powdered sugar
  • 2-4 Tbs milk
  • 1/2 tsp vanilla extract

In the bowl of a food processor, pulse together flour, sugar and salt.  Add the cold butter and pulse in 1-second increments until the butter is the size of peas.  The mixture should also hold together when squeezed into a ball.

In a small bowl, beat the egg with the milk.  Add the mixture all at once to the dry ingredients and process to make sure that moisture is introduced to all of the flour mixture.  On a lightly floured surface, knead the dough  for a few turns until it really starts to come together.  Divide the dough in two, wrap in plastic wrap and refrigerate for about 30 minutes

While the dough is chilling, prepare the filling:

In a medium saucepan, combine the cherries, sugar, lemon juice, and bourbon.  Bring to a boil over medium heat, and mix in the cornstarch mixture.  Cook until thickened, stirring often, 5-10 minutes.  Use a fork to mash the cherries.  Set aside until ready to use.

On a well floured work surface, press dough into a 3×5-inch rectangle, roll the dough out to about 1/8-inch thickness.  The dough should be slightly larger than 9×12-inches.  Trim dough with a pizza cutter, creating a perfect rectangle that is 9-inches tall and 12-inches long.  Using the pizza cutter, cut each side into thirds, creating 9 squares.  Place dough squares in the fridge while you roll out the second piece of dough in the same way. Alternatively, use a heart-shaped cookie cutter to cut out the pastry.

Brush one set of 9 squares with beaten egg.  This will act as the glue for the top layer of dough.  Spoon about one to two teaspoons of nutella into the center of each piece of dough, and then top that with one tablespoon of pie filling.  If you aren't using the Nutella, just top the pastry with the one tablespoon of cherry filling.  Top with a second piece of dough and use a floured fork to crimp the sides closed.  Use the tines of the fork to create vent holes in each tart.

Position a rack in the upper third of the oven and preheat to 350 degrees F.  Let tarts rest in the fridge for at least 30 minutes while the oven preheats.

Remove tarts from the fridge and brush the tops with the egg wash.  Bake for 25 to 30 minutes, or until light golden brown on top.

While the tarts bake, whisk together ingredients for the glaze and set aside.

Let baked tarts rest on a cooling rack to cool completely, and then use a spoon to drizzle the glaze over the Pop Tarts.  Best served within 2 days.


Thursday, December 15, 2011

Recipe Remix: Peppermint Oreo Cheesecake Cupcakes


My first thought when I made the Oreo Cheesecake Cupcakes last year was "these would be really good with mint cookies!"  And of course, they are.  Though if I'm being technical, I didn't use Oreos for these.  I used candy cane Joe-Joes.  Which in my humble opinion are so much better.  They aren't just regular cookies flavored with mint - they have pieces of crushed up candy canes in the filling!  If you have a Trader Joe's nearby, I highly recommend that you go buy a few boxes.  You can thank me/curse me later.

I followed the exact same recipe as with the classic cheesecakes, but just replaced them with mint-flavored ones.  If I had had any on hand, I probably would have used peppermint extract in place of the vanilla extract as well.  So that is also a good adaptation to keep in mind.  To serve, I topped each cupcake with a bit of whipped cream and a peppermint.

Peppermint Cookies and Cream Cheesecakes
Martha Stewart's Cupcakes
makes 30 cupcakes

  • 42 mint-flavored cookies and cream sandwich cookies - 30 left whole, and 12 chopped
  • 2 lbs cream cheese, room temperature (reduced fat is fine)
  • 1 cup sugar
  • 1 tsp vanilla extract or peppermint extract (or half and half!)
  • 4 large eggs, lightly beaten
  • 1 cup sour cream or Greek yogurt (low fat is fine)
  • pinch of salt
Preheat the oven to 275 degrees.  Line muffin tins with paper liners, and place 1 cookie in the bottom of each cup.

With an electric mixer on medium-high speed, beat the cream cheese until smooth, scraping down the sides of the bowl as needed.  Gradually add the sugar, and beat until smooth.  Beat in the vanilla or peppermint extract, then drizzle in the eggs.  When well combined, mix in the sour cream and salt.  Stir in the chopped cookies by hand.

Divide the batter evenly among the muffin tins, filling each one almost to the top.  Bake, rotating tins halfway through, until the filling is just set, about 22 minutes.

Transfer the tins to wire racks to cool completely, then refrigerate (in tins) at least 4 hours.  Remove from tins just before serving.


Tuesday, August 9, 2011

Recipe Remix: Peach Pie Bars


My sweet baby sister lives in Georgia Peach country, and when she came to visit last weekend, I requested that she bring some peaches.  She asked how many, and I said the sky's the limit!  I figured I'd cook, bake, and snack on as many as I could handle, then turn the rest into jam or preserves. 

I made blackberry pie bars for Project Pastry Queen back in May, and I loved them so much that I couldn't wait to try them out using different fruits.  Since peaches are my favorite fruit, I knew I wanted to make that variation first.  These are maybe a little more involved than the blackberry version, simply because the peaches need to be peeled and chopped before adding them to the mix.  But that can be done while the crust is baking, so they're still very easy and low-maintenance.

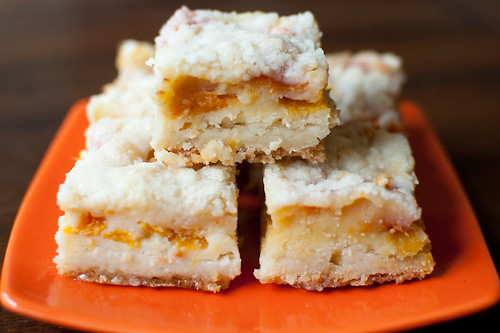
These are everything you'd think they'd be - sweet, buttery, and delicious.  The peach-sour cream filling seeps into the crust and topping a bit, giving you the best of both worlds - a crispy crust and topping with a soft and sweet filling.  I personally don't think pies are that much work or terribly difficult once you get the pie crust technique down, but these bars are a great alternative.  Plus, they are portable and can be eaten without a plate or utensils.  I couldn't possibly choose a favorite between pie and these bars, so I'll just say they both have their place in the world!   And on a related note, I'll be sharing a recipe for peach pie on Friday!


More Peach Goodness:
Peach-Tilapia Packets
Pork Tenderloin with Peach-o de Gallo (Confections of a Foodie Bride) 
Peach Vanilla Bean Jam (Annie's Eats)
Fresh Peach Ice Cream
Triple Vanilla Bean-Scented All-Peach Pie (Ezra Pound Cake)
Peach-Cream Cheese Tart
Peach Wine Coolers
Peach Lemonade Coolers (Cook Au Vin)
Grilled Chicken with Peach BBQ Sauce (Tracey's Culinary Adventures)
Peach Salsa


Peach Pie Bars
adapted from Rebecca Rather, The Pastry Queen

Crust and Topping

  • 3 cups all-purpose flour
  • 1 1/2 cups sugar
  • 1/4 tsp salt
  • 1 1/2 cups (3 sticks) unsalted butter, chilled
Fruit Filling
  • 4 large eggs
  • 1 1/2 cups sugar
  • 1 cup sour cream
  • 3/4 cup flour
  • pinch salt
  • 1/4 tsp cinnamon
  • 1 tsp vanilla extract
  • 2 1/2 lbs peaches, peeled, pitted, and chopped
To make the crust and topping, preheat the oven to 350 degrees.  Grease a 9x13 inch baking pan.

Combine the flour, sugar, and salt in the bowl of a food processor.  Pulse a few times to mix.  Cut the butter into 1/2-inch cubes, and add to the flour mixture.  Process until the butter is evenly distributed but the mixture is still crumbly, 30-60 seconds.

Reserve 1 1/2 cups of the mixture to use as the topping.  Press the remaining mixture into the bottom of the pan, and bake 12-15 minutes.  Cool for at least 10 minutes.

To make the filling, whisk the eggs in a large bowl, then add the sugar, sour cream, flour, salt, cinnamon, and vanilla extract.  Gently fold in the peaches and spoon the mixture over the crust.  Sprinkle the remaining flour mixture evenly over the filling, and bake 45 to 55 minutes.

Cool at least 1 hour before cutting into bars, or scoop out of the pan to serve cobbler-style.


Friday, September 3, 2010

Recipe Remix: Spinach & Gruyere Souffle


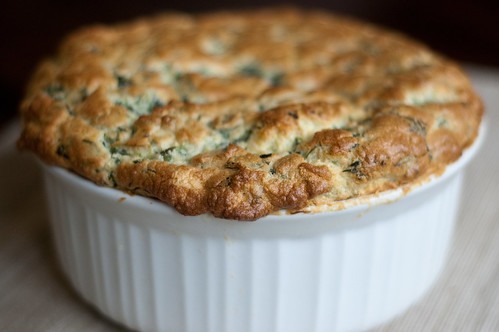
Last fall, the Barefoot Bloggers made Ina Garten's Blue Cheese Souffle.  I remember commenting that it would be great with different types of cheese, but the idea of this particular souffle was born out of an impulse to add spinach.  I thought it would be a great way to add more veggies, and then I remembered that I had some Gruyere to use up.  And in what case is adding Gruyere a bad idea?

I know my souffle isn't tall in the pic, but it had already fallen by the time I carried it to the table.  Oh well, it certainly didn't affect the taste, and this was even delicious as leftovers.  I made this when my wonderful friend Annie came over for dinner, and I served it along with grilled vegetables and herbed dinner rolls, with the mocha-almond-meringue tarts for dessert.  I for one thought it was a great dinner, and I hope she did too!


Spinach and Gruyere Souffle
adapted from Ina Garten's Blue Cheese Souffle, Barefoot in Paris
  • 3 Tbs unsalted butter, plus more for greasing the dish
  • 1/4 cup grated Parmesan cheese, plus more for sprinkling in the dish
  • 3 Tbs all-purpose flour
  • 1 cup hot milk
  • kosher salt and freshly ground black pepper
  • pinch nutmeg
  • pinch cayenne
  • 4 large egg yolks, at room temperature
  • 1 cup shredded Gruyere cheese
  • 10 oz frozen spinach, thawed, drained well, and chopped (fresh spinach is fine too - just wilt, drain, and chop)
  • 5 large egg whites, at room temperature
  • 1/8 tsp cream of tartar
Preheat the oven to 400 degrees.  Butter the inside of a souffle dish (about 7 inches in diameter and 3-4 inches deep).  Sprinkle the butter with Parmesan.


Melt the butter in a small saucepan over low heat. With a wooden spoon, stir in the flour and cook, stirring constantly, for 2 minutes, until golden. Off the heat, whisk in the hot milk, 1/2 teaspoon salt, 1/4 teaspoon black pepper, the cayenne, and nutmeg. Cook over low heat, whisking constantly, for 1 minute, until smooth and thickened.

Remove from heat and one at a time, whisk in the egg yolks.  Stir in the gruyere, spinach, and parmesan, and transfer to a large bowl.

In the bowl of a stand mixer fitted with the whisk attachment, combine the egg whites, cream of tartar, and a pinch of salt.  Beat over low speed for 1 minute, medium heat for 1 minute, then increase to high and beat until they form firm, glossy peaks.

Whisk in about 1/4 of the egg whites to lighten the yolks, then carefully fold in the rest.  Pour into the prepared souffle dish, and use a spatula to smooth the top.  Draw a circle on top with a knife or spatula to help the souffle rise evenly, then place in the middle of the oven.  Decrease the heat to 375, and bake 30-35 minutes, without peeking (!), until the top is golden brown.  Serve immediately.


Thursday, July 29, 2010

Recipe Remix: Blueberry-Lavender Shortcake Cookies

 
I have been slightly obsessed with lavender recently, especially when paired with fruit.  So one night as I was brainstorming and researching recipes, I had the idea to turn my strawberry shortcake cookies into lavender cookies.  I wasn't really sure how they would turn out - there is a delicate balance between not being able to even detect the lavender in a dish and the whole thing tasting like soap.  Personally, I think I struck a great balance here, with 3/4 teaspoon of lavender in the dough, and 1/4 of a teaspoon sprinkled over the cookies before they're baked. 

My only issue with this recipe was that blueberries don't give off as much moisture as strawberries, but that was easily remedied by adding a little more cream to the dough.

These cookies were light and sweet, with just the perfect amount of lavender in the background.  After the first cookie, I decided I needed to taste another...just to form an opinion of course... and the next thing I knew, I had eaten four!


Blueberry-Lavender Shortcake Cookies
adapted from Strawberry Shortcake Cookies, originally from Martha Stewart 
makes about 3 dozen cookies
  • 12 ounces blueberries (about 2 cups)
  • 1-2 teaspoons freshly squeezed lemon juice
  • 1/2 teaspoon lemon zest
  • 1/2 cup plus 2 Tablespoons granulated sugar
  • 2 cups all-purpose flour
  • 2 teaspoons baking powder
  • 1/2 teaspoon kosher salt
  • 1 teaspoon dried lavender, divided
  • 3 ounces (6 Tablespoons) cold, unsalted butter, cut into small pieces
  • 2/3 cup heavy cream, plus more as needed
  • coarse sugar, for sprinkling
Preheat the oven to 375.  Line 2 baking sheets with parchment paper.

Combine the blueberries, lemon juice, and 2 Tablespoons of granulated sugar in a medium bowl.  Set aside.

Whisk together the flour, remaining sugar, baking powder, 3/4 teaspoon of the lavender and salt in a large bowl.  Using a pastry cutter, cut in the butter to the flour mixture until coarse crumbs are formed.  You can also use your fingers.  Stir in the heavy cream until the dough starts to come together, then gently fold in strawberries.  Add more heavy cream if the dough is still crumbly and doesn't come together, 1 Tablespoon at a time.

Using a 1-1/2 inch cookie scoop, drop dough onto cookie sheets, evenly spaced apart.  Sprinkle with coarse sugar and the remaining lavender.  Bake for 22-27 minutes, or until cookies are golden brown.  Transfer to a wire rack to cool completely.  The cookies are best eaten the same day. 


Friday, July 2, 2010

Recipe Remix: Peach Wine Coolers


So often in my write-up for a recipe, I comment that it is open to many adaptations.  I thought it would be a fun feature if I actually started sharing those adaptations with you.  Oftentimes I will make the recipe again and use it in a completely different way, or change the flavors, or find a creative use for leftovers.  I never thought to post about it, but now I will!  For example, I sometimes save a little filling from enchiladas, mix it with a little sauce, then top with cheese and bake it.  It makes a really delicious dip!  I've also recently come up with a new way to serve the filling from the Swiss Chard Manicotti that I'll share soon.

But today's recipe remix is for the strawberry wine coolers I posted several weeks ago.  I believe I even commented at the time that I couldn't wait to try them with peaches.  So when my sister brought me some peaches (she lives in the middle of Georgia peach country), I knew exactly what I would do first.

Just like the strawberry counterpart, peach wine coolers are a little bit sweet, a little bit dry, and a lot delicious.  I followed the same method as the strawberry, but I didn't strain out the pulp.  I think its optional if you use peaches.  The mixture was a little thicker, but I didn't mind.  Just more peach flavor!  I also used peach schnapps instead of vodka in the mixture.  Again, more peachy flavor.

I've made these a few times since, and I have to say, I think I like the peach variation even better than the strawberry.


One Year Ago:  A Duo of Goat Cheese Bruschetta


Peach Wine Coolers
inspired by  The Lee Bros. Simple Fresh Southern
serves 6
  • 1 pound fresh peaches, peeled and chopped
  • 2 ounces peach schnapps
  • generous pinch of kosher salt
  • 2 750-mL bottles dry Reisling, Pinot Grigio, or Sauvignon Blanc
  • ice, for serving
Combine the peaches, peach schnapps, salt, and 2 scant cups of the wine a blender.  Puree until smooth and frothy, about 1 minute.

Either strain through a fine-mesh sieve, or transfer directly to a pitcher or bowl.  Refrigerate at least 2 hours.

To serve, fill a large wine goblet with ice, then fill about halfway with the peach mixture.  Top off with reserved wine, and garnish with mint.


BLOG DESIGN BY: SHERBET BLOSSOM DESIGNS