Showing posts with label pork. Show all posts

Tuesday, June 2, 2015

Sweet Sriracha-Glazed Pork Skewers

Sweet Sriracha-Glazed Pork Skewers

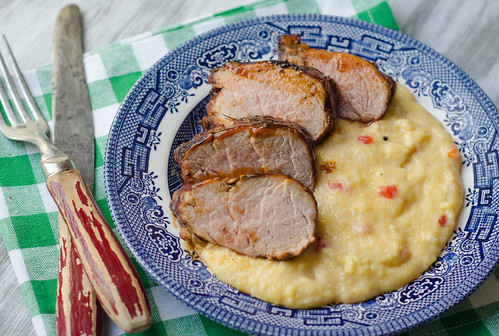
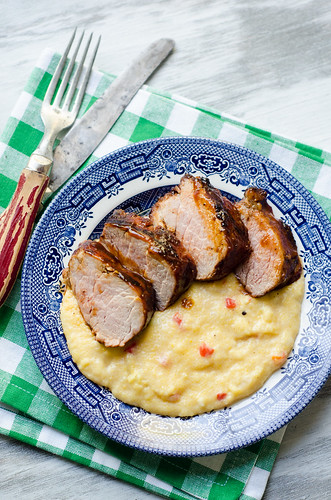
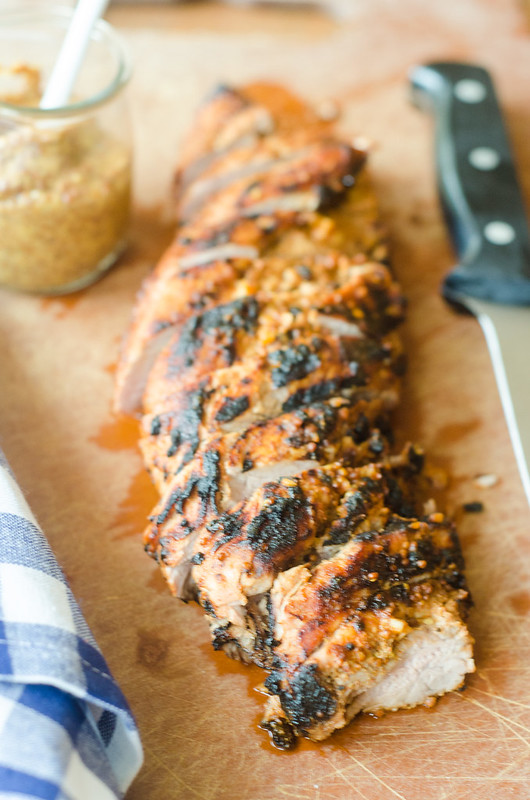
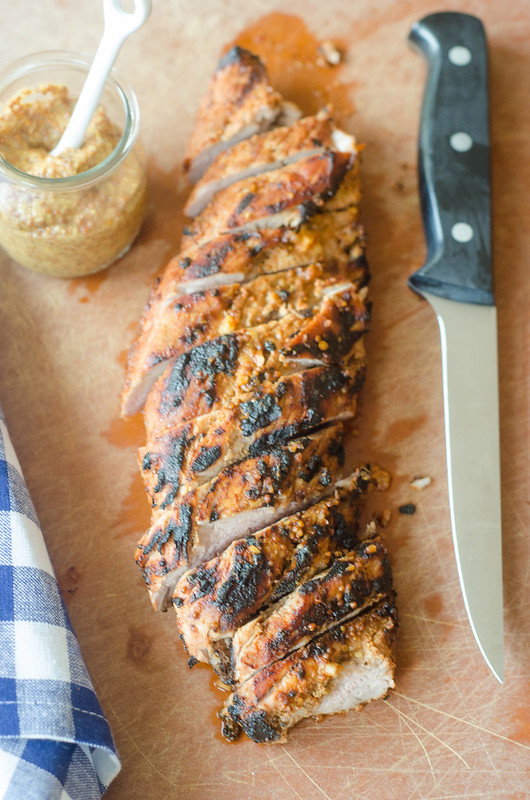
"Sweet Sriracha Glaze" won me over with this one.  Once I read those words in the latest Cook's Illustrated, I was powerless; and I added them to my menu immediately.  But if you aren't one to be wooed by just a few words, I'll give you a few more reasons why you should add these skewers to your summer grilling repertoire.  They are super easy and low-maintenance, which minimizes indoor kitchen prep time, and maximizes outdoor fun time.  The recipe also calls for pork tenderloin, which is a healthy and relatively inexpensive cut of meat.  And finally, isn't it just more fun to eat food off a stick?

The combination of brown sugar and Sriracha chile sauce give the pork that super addictive and crave-worthy sweet heat.  The glaze is pretty fantastic, and I'm already envisioning many other ways to use it:  grilled shrimp, steak, chicken, or even brussels sprouts all sound pretty fantastic to me!

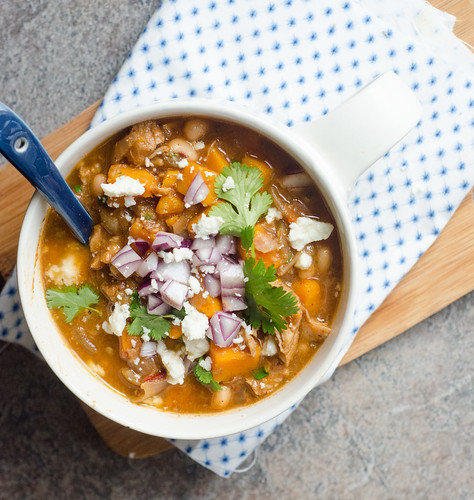
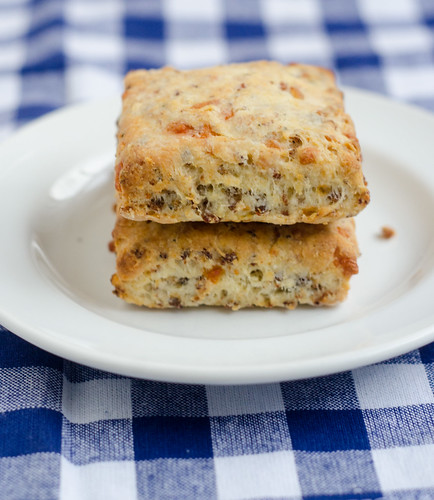
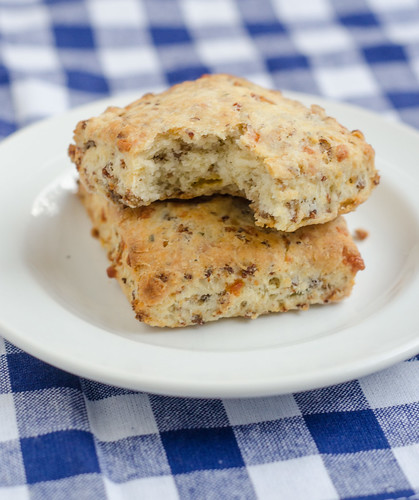
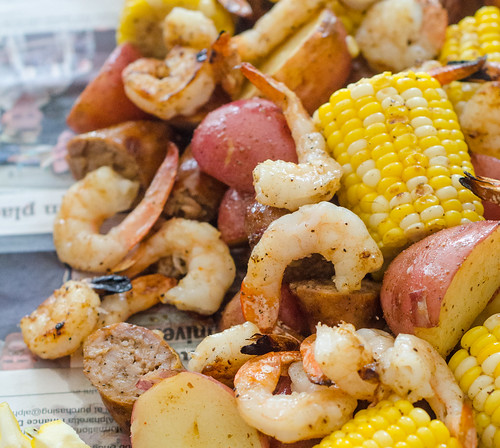
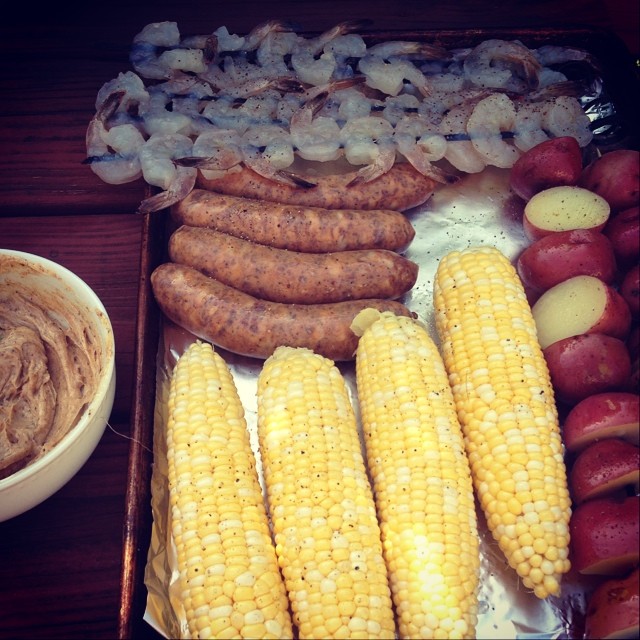
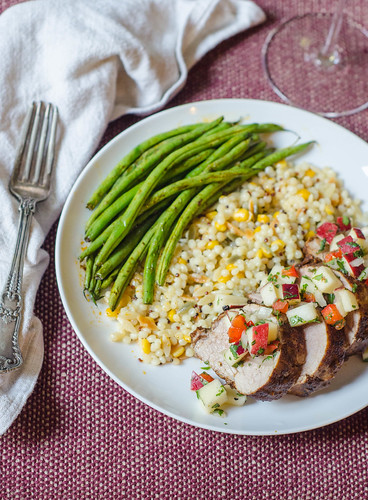
We grilled these for Memorial Day, and I also served them with grilled corn on the cob, these amazing broccoli rabe cheese toasts, and of course fresh watermelon.  As usual, I'm totally grill-obsessed, so be on the lookout for more grilled favorites soon!  Maybe I should change my blog name to Grilled Parsley?

Sweet Sriracha-Glazed Pork Skewers
adapted from Cook's Illustrated, May/June 2015
serves 4

  • 2 pork tenderloins, trimmed and cut into 1-inch chunks
  • 1 tsp kosher salt
  • 3 Tbs packed brown sugar
  • 2 Tbs Sriracha sauce
  • 1 tsp cornstarch
  • cooking spray
Toss the pork and salt together in a large mixing bowl and let sit at room temperature for 20 minutes.

Meanwhile, whisk together the brown sugar, Sriracha sauce, and cornstarch.

Prepare grill.

Set aside 2 tablespoons of the glaze, and add the rest to the pork, mixing well with a rubber spatula.

Thread the pork onto 4 to 5 12-inch metal skewers.  Spray both sides of the meat with the cooking spray.

Place the skewers on the grill and cook until well charred, about 3 to 4 minutes.  Use tongs to flip the skewers and brush with half the reserved glaze.  Grill an additional 2 minutes, flip the pork back to the original side, brush with the remaining glaze, and grill one more minute.

Transfer the skewers to a serving platter, tent loosely with aluminum foil, and let rest for 5 minutes before serving.


Sunday, April 12, 2015

BBQ Glazed Pork Tenderloin over Pimento Cheese Grits

BBQ Glazed Pork Tenderloin over Pimento Cheese Grits 

Any southern lady worth her salt has a good recipe for pimento cheese in her back pocket.  Traditionalists hold strong to the idea that pimento cheese should be used only for dipping crackers and spreading on white bread.  I myself am a bit liberal when it comes to my pimento cheese consumption, and firmly believe that the sky's the limit!  I mean, I made pimento cheese macarons last year.   Clearly I'm no traditionalist.  So while pimento cheese grits aren't that out there, they are a fun spin on both grits and pimiento cheese -- two of my favorite southern delicacies.  And to top it with grilled and glazed pork tenderloin?  Pure southern perfection.

I'm imagining serving this at a dinner party.  Start with fried green tomatoes.  Serve grilled or cornmeal-crusted okra on the side.  And finish with an Arnold Palmer Layer Cake or Peach Cobbler.  To drink?  If you can find it, La Peche Mode, a peach saison by Three Taverns Brewery here in Atlanta.  This beer pairs perfectly with the spicy pork and creamy grits.

I realize that some parts of the country are still blanketed in snow, but please.  The minute you can, dust off your grill and make this dinner.  You'll be so happy, and I'll grant you all southerner cards for the day!

BBQ Glazed Pork Tenderloin over Pimento Cheese Grits 

BBQ Glazed Pork Tenderloin over Pimento Cheese Grits

  • 1 lb pork tenderloin, trimmed of excess fat
  • 3 Tbs BBQ Spice Rub (recipe below)
  • 1 Tbs canola oil
  • 1/2 cup BBQ sauce
  • 2 Tbs butter
  • 1/2 cup chopped onion
  • 2 cloves garlic
  • 1/4 tsp dry mustard powder
  • 1/8 tsp cayenne pepper
  • kosher salt and freshly ground black pepper
  • 1 cup stone-ground grits
  • 2 cups water
  • 2 cups milk
  • 1 1/2 cups extra sharp cheddar cheese
  • 4 oz diced pimentos, drained (or 1/2 roasted red pepper, diced)
  • 2 Tbs heavy cream or half and half
Prepare the grill to cook over medium-high heat.  Brush the grates with cooking oil.

In a small bowl, combine the BBQ spice rub and the canola oil to form a paste.  Rub over the pork tenderloin.

Place on the grill and cook, turning every 4-5 minutes, until the meat registers 140 degrees in the center.  For the last 5-6 minutes, brush with the bbq sauce.  Remove the tenderloin from the grill, cover with foil, and allow to rest for 5 to 10 minutes.  Brush once more with bbq sauce, and slice.

As the pork is cooking, make the grits.  Melt the butter in a medium saucepan over medium heat.  Add the onions.  Cook, stirring often, until they are softened and translucent, 5 to 6 minutes.  Add the garlic, mustard powder, cayenne pepper, 3/4 teaspoon of kosher salt, and 1/2 teaspoon of pepper.  Cook for an additional minute, then slowly whisk in the water and milk.  

Bring to a boil and whisk in the grits.  Reduce the heat to medium-low, and cook until the grits are creamy, about 20 to 25 minutes.  Whisk often to keep lumps from forming and to keep the grits from sticking to the bottom of the pan.

Remove the saucepan from heat and stir in the cheese, pimentos, and cream.  Taste and season with additional salt and pepper as needed.

To serve, spoon the grits onto a plate and arrange a few slices of pork over the top.  


BBQ Spice Rub
America's Test Kitchen, Healthy Family Cookbook

  • 3 Tbs brown sugar
  • 3 Tbs smoked paprika
  • 2 Tbs dry mustard powder
  • 2 Tbs pepper
  • 1 Tbs onion powder
  • 1 Tbs garlic powder
  • 1 Tbs ground cumin
  • 2 tsp kosher salt
  • 1/2 tsp cayenne pepper
Combine all the spices in a small bowl and stir to combine well.  This can be stored at room temperature in an airtight container for about a month.


Tuesday, April 7, 2015

Chicken with Chorizo Salsa

Chicken with Chorizo Salsa 

Is there an ingredient that will without fail, cause you to make a recipe?  For me, it's chorizo.  Include that spicy, smoky sausage in basically any dish, and I'm powerless against it.  Lately I've been adding it to scrambled eggs in the morning, along with shredded zucchini and fresh cilantro.  It's quickly become my favorite breakfast, and my mouth is watering just thinking about it.

BUT I'm not here to talk about that breakfast today, I'm here to tell you about this chicken with chorizo salsa.  Yes, chorizo salsa.  This stuff is a revelation, and I pretty much want to eat it every day with every meal from now to eternity.  Sound good?

This is also a super easy and quick weeknight dinner.  You make the chorizo salsa, then cook the chicken in the drippings, giving you even more chorizo flavor.  I served this chicken over a bed of Mexican-style zucchini, and it made for such a wonderful, satisfying, and healthy meal.  Mexican food tends to be heavy and calorie-laden (at least the things I love are!), so having a nice and light Mexican dinner was a nice change of pace.  I enjoyed the leftovers all chopped up and stuffed into lettuce wraps for lunch the next day, so I highly recommend that you save some for that!

Chorizo = love.

Chicken with Chorizo Salsa
adapted from Cooking Light, Jan/Feb 2015
serves 4

  • 2 oz (1 link) Mexican pork chorizo
  • 4 (6-oz) boneless, skinless chicken breast halves, pounded to even thickness
  • kosher salt and freshly ground black pepper
  • 1/4 tsp ground cumin
  • 1 1/2 tsp canola oil
  • 1 cup seeded and chopped tomato (1 large)
  • 1/4 cup chopped fresh cilantro
  • 2 Tbs finely chopped red onion
  • juice of 1/2 lime
  • 1/4 cup crumbled queso fresco
Heat a large skillet over medium-high heat.  Remove the chorizo from its casing and crumble into the pan.  Cook, stirring constantly, for about 4 minutes.  Transfer the chorizo to a small bowl.

In a small bowl, combine 1/4 tsp of salt, 1/4 tsp of pepper, and the ground cumin.  Sprinkle the mixture over the chicken breasts.

Return the skillet to the stovetop and add the oil to the drip pins in the pan, swirling to coat.  Add the chicken to the pan and cook 5 minutes per side, or until it's cooked through (reaching 165 degrees as the internal temperature).  Remove the chicken from the pan, and cover with foil.

Once again, return the pan to the stovetop.  Add the tomato, cilantro, and onion, and cook, stirring constantly 1 to 2 minutes.  Add the chorizo, then stir in the lime juice.  Season to taste with salt and pepper and transfer the salsa to a small bowl.

To serve, place 1 chicken breast on each plate and top with about 2 tablespoons of the salsa and 1 tablespoon of cheese.  


Monday, March 9, 2015

Smoky Pork, Sweet Potato, and Black Eyed Pea Chili (Crockpot)

Smoky Pork, Sweet Potato, and Black-Eyed Pea Chili (Crokpot)

Chili recipes are like margarita recipes:  you can never have too many variations.  This particular combination is a little different than a standard chili, but I am totally smitten with it.  Lean pork loin country-style ribs are the meat of choice, and the chili is bulked up by the addition of sweet potatoes and black eyed peas.  I absolutely love black eyed peas, so I knew this would be a big hit -- kind of a southern-style chili almost.  Fragrant spices like chili powder, cumin, and just a pinch of cinnamon give it a nice smoky background, and there's just enough heat to keep things interesting from chipotle chiles.

This chili is also super filling, and pretty healthy.  I know that we're moving into spring and warm weather, but there's always one surprise and unwelcome cold snap before we get there for good.  For that day:  make this chili!

Smoky Pork, Sweet Potato, and Black-Eyed Pea Chili (Crokpot) 

Smoky Pork, Sweet Potato, and Black Eyed Pea Chili
adapted from The Healthy Slow Cooker Revolution
serves 6 to 8

  • 2 onions, chopped fine
  • 6 cloves garlic, minced
  • 2 Tbs chili powder
  • 2 tsp ground cumin
  • 1/4 tsp ground cinnamon
  • 2 tsp canola oil
  • 1 chipotle chile in adobo sauce, minced (seeds optional)
  • 3 (15-oz) cans black eyed peas, rinsed and drained (divided)
  • 3 cups chicken broth
  • salt and pepper
  • 1 1/2 lbs boneless country-style ribs, trimmed of visible fat
  • 1 1/2 lbs sweet potatoes, peeled and cut into 1-inch pieces
  • 2 Tbs minced fresh cilantro
To serve:  diced red onions, cilantro, jalapeƱos, queso fresco cheese, avocado, etc

In a large microwave-safe bowl, stir together the onions, garlic, chili powder, cumin, cinnamon, tomato paste, oil, and chipotle.  Microwave for 5 minutes, stirring occasionally, until the onions are softened.  Scrape into the slow cooker.

In a food processor or blender, puree one can of the black eyed peas with 1 cup of the broth until smooth.  Transfer to the slow cooker.  Stir in the remaining 2 cups of broth and 1/2 teaspoon of salt.  Season the pork with salt and pepper and nestle it into the mixture.

Make a foil packet for the sweet potatoes:  Place the sweet potatoes on one side of a large piece of aluminum foil and sprinkle with salt and pepper.  Fold the other half of the foil over the vegetables and crimp the 3 open edges to seal.  

Carefully place the packet on top of the stew.

Cover and cook until the pork is tender and can easily be shredded with a fork, 6 to 8 hours on low or 4 to 6 hours on high.  

Transfer the foil packet to a plate and carefully open it, watching for steam.  Use tongs to remove the ribs from the slow cooker and shred them using 2 forks.  Stir the potatoes, shredded pork, cilantro, and the remaining 2 cans of black beans into the slow cooker.  Taste and season with salt and pepper.  

Serve with any toppings or garnishes you'd like!


Tuesday, February 10, 2015

Blood Orange-Rosemary Pork Tenderloin

Blood Orange-Rosemary Pork Tenderloin

Ahhh blood oranges.  The beautiful bright spot in an otherwise bleak winter.  I buy out every grocery store in my area that carries them throughout the months of January to March.  Most of the oranges are reserved for margaritas and martinis, but I always squirrel some away for snacking and recipes as well.  Like this gorgeous pork tenderloin.

The pork is marinated in a  mixture of blood orange juice, rosemary, balsamic vinegar, and Dijon mustard, then seared and roasted.  Meanwhile, you make a super simple blood orange sauce for the finished pork.  The result is a perfectly roasted, flavorful, and healthy dinner.  The sweet-tart blood orange juice is a great contrast to the earthy rosemary and sweet, tender pork.

I don't know what your plans are for Valentine's Day, but this pork tenderloin would be a wonderful option if you're cooking at home.  It's super easy, is prepped ahead, and is elegant and beautiful.  Serve this with a side of roasted asparagus and some goat cheese grits, and you have a lovely dinner.  And it's low-maintenace enough that it leaves you with plenty of time for smooching your sweetie!

Blood Orange-Rosemary Pork Tenderloin

Blood Orange-Rosemary Pork Tenderloin
adapted from Grill It!  by Bobby Flay

2 1/2 cups fresh blood orange juice (squeezed from 8 to 10 blood oranges)
1/2 cup + 1 Tbs olive oil
2 Tbs balsamic vinegar
2 Tbs chopped fresh rosemary leaves
1 Tbs Dijon mustard
1 1-lb pork tenderloin, trimmed
1 Tbs honey
kosher salt and freshly ground black pepper

Whisk together 1/2 cup of the blood orange juice, 1/4 cup of oil, 1 Tbs of the balsamic vinegar, and the Dijon mustard.  Combine this mixture with the pork tenderloin a gallon-sized ziploc bag.  Seal and agitate the bag to coat the pork, then transfer to the refrigerator.  Allow to marinate for at least 1 hour, and up to 4 hours.

Meanwhile, pour the remaining 2 cups of blood orange juice into a medium saucepan.  Cook over medium-high heat until it's reduced to 3 tablespoons, watching it carefully so it doesn't boil over.

Transfer the reduced juice to a  blender or small food processor, and and add the remaining tablespoon of vinegar and the honey.  Blend until smooth.  Add the remaining 1/1/4 cup of oil, and blend until it's smooth and emulsified.  Transfer to a small bowl.  The sauce can be refrigerated for up to 4 hours before serving as well.

When you're ready to cook the pork, preheat the oven to 425 degrees.

Heat 1 tablespoon of the oil in a 12-inch oven-safe skillet over medium-high heat.  Remove the pork from the marinade and season generously on all sides.  Cook in the skillet for 7 to 9 minutes, turning every 2 minutes or so, or until it is well-browned on all sides.

Transfer the skillet + pork to the oven and cook until the pork registers 140 degrees in the thickest portion, 13 to 18 minutes.  Remove from oven, cover loosely with aluminum foil, and allow to rest for 5 to 10 minutes.

Slice the pork and serve with the blood orange sauce.


Thursday, November 20, 2014

Sausage and Cheese Biscuits

Sausage and Cheese Biscuits

This is one of those recipes that I've been holding out on you guys.  My pal Elly posted these biscuits almost two years ago, and I've made them at least dozen times since.  I make them when we have house guests.  I make them and freeze for quick and easy breakfasts.  They have become my go-to breakfast item when attending a pot luck breakfast or brunch.  I take a batch to new moms or friends who need some TLC.  And I make them when I go out of town for the weekend, leaving Joey in charge of all the kids for four days (ahem, like right now).  They are pretty much his favorite breakfast, so it's an easy sell.  All that is to say that these biscuits, without a doubt, belong on my very favorite recipes Pinterest board.

So what makes them so great?  Well, they're biscuits, for starters.  And they are stuffed with sausage and cheese.  And they are flaky, and tender, and buttery.  I'm sure you're familiar with the ubiquitous sausage, egg, and cheese biscuits from a certain fast food chain, and these biscuits without a doubt put them to shame.  Psst.  They are also pretty fabulous topped with a fried egg.

I know many of you will have house guests in the next week, so I'd highly recommend baking up a batch of these biscuits.  I actually prefer to make them the night before, freeze, then bake in the morning.  It helps them rise and get even taller, fluffier, and flakier.  Plus, this makes them an even easier sell in the morning.  You can stumble downstairs, tired and bleary-eyed, and just pop them in the oven.  And um, not that I would know, but I venture to guess that they'd be pretty great with a mimosa as well.  Hey, it's the weekend, and it's almost a holiday!

DSC_9751
Sausage and Cheese Biscuits
adapted from King Arthur Flour, via Elly Says Opa!

  • 3 cups unbleached all purpose flour
  • 1 Tbs baking powder
  • 1/2 tsp baking soda
  • 1 tsp salt
  • 1/2 tsp garlic powder
  • 1/2 tsp dried oregano
  • 1/2 cup very cold butter, cut into pats
  • 1 cup buttermilk, plus more as needed
  • 12 oz breakfast sausage, crumbled, cooked, drained of excess fat, and cooled to room temperature
  • 1 cup freshly grated cheddar cheese (about 4 oz)

In the bowl of a food processor, combine the flour, baking powder, baking soda, salt,  garlic powder, and oregano. Pulse a few times.  Add the butter and pulse 8 to 10 times, until the mixture is crumbly and resembles coarse sand.  
Dump into a large mixing bowl and stir in the buttermilk, sausage, and cheeses, mixing evenly to distribute (but not overworking the dough). If dough seems very dry or crumbly, add another tablespoon or two of buttermilk.
Transfer the dough to a piece of parchment paper or a lightly floured work surface, and knead a few times to form a cohesive dough. Pat and roll the dough into a rectangle about 3/4″ thick. Cut the dough into 20 squares  using a sharp knife, or use a biscuit cutter to cut out the pieces. 
Place the biscuits on a parchment-lined baking sheet, spaced at least 1 inch apart.  At this point, the biscuits can be frozen or chilled in the refrigerator.
When ready to cook, bake at 425 degrees Fahrenheit for 13-15 minutes or until medium to deep golden brown.  


Tuesday, September 23, 2014

Garlic & Mustard-Grilled Pork Tenderloin

Garlic and Mustard-Grilled Pork Tnderloin 


I've though long and hard about this, because clearly it's a life-or-death decision.  And I've come to the conclusion that pork tenderloin is my favorite cut of meat to grill.  It's lean, easy to prep, quick to cook, healthy, and has so much flavor.  You can pretty much go any direction or cuisine you want, making it incredibly versatile.

This version is marinated in a mustard and garlic mixture, then grilled and glazed with more of that delicious mixture.  Joey immediately proclaimed it to be the best pork tenderloin I've made to date, and I immediately added it to next week's menu.

Seriously, this is the easiest prep ever, and it's an absolutely amazing dinner.  You can pretty much serve it with any side you want - I went with a salad and stuffed zucchini (recipe coming soon!).  But any grilled or roasted veggies would be awesome, as well as grits, polenta, rice, etc.

I know that as we move into fall, many of you stow away your grills.  But I beg of you:  keep them out!  enjoy them until the first snow falls!  And make this pork tenderloin!

DSC_8890 

Garlic and Mustard-Grilled Pork Tenderloin
adapted from Bobby Flay:  Grilling for Life
serves 6

  • 1/4 cup whole-grain mustard
  • 2 Tbs Dijon mustard
  • 5 cloves garlic, minced
  • 2 Tbs white wine vinegar
  • 1 Tbs low-sodium soy sauce
  • 1 Tbs honey
  • 1 Tbs chopped fresh thyme leaves
  • 2 tsp smoked paprika
  • pinch of red pepper flakes
  • 1/4 tsp kosher salt
  • 1/4 tsp freshly ground black pepper
  • 2 pork tenderloins, trimmed 
Whisk together all the ingredients (mustard through black pepper).  Reserve 1/4 cup of the marinade, then pour the remaining marinade into a gallon-sized ziploc bag.  Transfer the pork tenderloins to the bag, seal, and press to coat the meat with the marinade.

Refrigerate for at least 30 minutes, and up to 4 hours.

Prepare the grill over medium-high heat.

Grill the meat, turning every 5 minutes, and brushing with the reserving marinade every time you turn it.  Cook until it reaches an internal temperature of 135-140 degrees.  

Remove from heat and cover loosely with foil.  Allow to sit for 10 minutes.  Slice and serve.


Friday, June 27, 2014

BLT Pizza

BLT Pizza


On Monday, I wrote an ode to baked brie, and today I'm here with an ode to the BLT.  Is there a summer meal more perfect than a BLT?  A juicy homegrown tomato, perfectly crispy and salty bacon and fresh crisp lettuce.  I think I may need a moment.  I have been pretty vocal about my distaste for mayonnaise, but this is one capacity in which I think it is crucial.  I typically like to mix it with some fresh herbs and/or garlic before spreading it on the bread for my BLT, which not only adds another layer of flavor to your sandwich, but it helps mask the "mayo" taste. ;)  I could eat a BLT for lunch and dinner every day in the summer and never get tired of it.

But this isn't about a sandwich, this is about a pizza.  And this pizza is definitely worth writing about.  I've been wanting to make a BLT pizza for years now, but could never quite conceptualize it.  Leave it to Cooking Light to not only make a really freaking delicious pizza, but one that's actually relatively healthy and light.  Imagine that!

So remember how I said I hate mayo, but I use it on my BLT's mixed with herbs and garlic?  Well that's exactly what you'll use as the sauce here.  I know it sounds kind of icky to use mayo on a pizza, but it's just a small amount, and it almost "melts" into the dough, and it gives the pizza a rich and creamy taste.  I also added my beloved roasted tomatoes to the pizza, sprinkled some bacon over those, and then topped it with a modest amount of cheese.  After it bakes, comes the "L."  Simply scatter some fresh leaves of your choice over the pizza before serving.  The original recipe called for arugula, but it's not my favorite green, so I used mache instead.

I've yet to even have my first BLT sandwich of the summer, but I'm pretty sure that the BLT pizza is going to become a regular occurrence around here as well.  BLT sandwich for lunch, BLT pizza for dinner?  Overkill?

BLT Pizza

BLT Pizza with White Sauce
adapted from Cooking Light, July 2014
serves 4

  • 1 lb cherry or grape tomatoes, halved or quartered if large
  • 1 tsp dried oregano
  • 1/2 tsp freshly cracked black pepper
  • kosher salt
  • 3 slices bacon
  • 1/4 cup canola or reduced-fat mayonnaise
  • 1 Tbs extra virgin olive oil, plus more for brushing the dough
  • 1 Tbs minced fresh scallions
  • 1 Tbs minced fresh parsley
  • 2 cloves garlic, minced or grated
  • 1 lb fresh pizza dough
  • 1 Tbs cornmeal
  • 2 oz part-skim mozzarella cheese, shredded (about 1/2 cup)
  • 1 cup greens of your choice (recommend mache, spinach, or arugula)
Preheat the oven to 400 degrees.  Arrange the tomatoes in a single layer on a foil-lined baking sheet, and sprinkle with the oregano and pepper.  Scoot the tomatoes towards the center of the baking sheet and fit the bacon around the edges.  Bake for 20 minutes, stirring the tomatoes halfway through.  Drain the bacon on a paper towel-lined plate then break into bite-sized pieces.

Place a pizza stone in the oven and increase the temperature to 500 degrees.

Meanwhile, whisk together the mayonnaise, oil, scallions, parsley, and garlic in a small bowl.  

Sprinkle the cornmeal over a large square of parchment paper, then roll and stretch the pizza dough into a 12-inch circle.  Spread the mayo mixture over the dough, leaving a 1-inch border, then brush the border lightly with olive oil.

Scatter the tomatoes and bacon over the sauce, then sprinkle with the cheese.  Transfer to the pizza stone in the oven, and bake 10 minutes, or until the crust is browned and the cheese is melted and bubbly.

Allow to cool 10 minutes.  Top with greens, cut into 8 slices, and serve.


Tuesday, June 17, 2014

Low Country Grill


Part of what I love the most about this fine country of ours are all the different regional cuisines and specialties.  I'm sure you're all familiar with seafood boils in the summer, but depending on where you live, it may be called something else, and the seafood will definitely vary.  Here in the coastal south, we call it a "low country boil."  Louisiana and Texas have crawfish boils.  The northeast does clambakes.  And some just call it a shrimp boil.

So everyone does it differently, but here's the way I like it.  Shrimp (only gulf shrimp will do), potatoes, corn, and spicy sausage.  Lots of old bay seasoning.  Butter.  And from the grill.  Low country boil purists will definitely call blasphemy on this, but in my opinion, serving this grilled blows the boil right out of the water (pun intended).  Oftentimes the boil can be bland, and the timing can be tricky as well. Sometimes the potatoes are undercooked.  Sometimes the shrimp is overcooked and rubbery.  But when you make it on the grill, you have total control over each component.


I've been making this for a few years now, and it's my favorite summer dinner.  We make this every year at the beach for our group of 20+, when we're entertaining at our house, when we want a fun weekend dinner… it's just a great summer meal.  I like to prep everything ahead of time, then just throw it on the grill when we're ready to eat.  As it all grills, I brush it with Old Bay butter, then toss it all with more of that delicious compound butter once it comes off the grill.  Dump it on a pile of newspaper, and dig in caveman-style.  The kids think it's hilarious to eat dinner without plates.

The side dishes for this are non-negotiable:  cheddar-garlic biscuits and fresh watermelon.  And cold beer for the adults, of course.

This is the ultimate summer meal, and one that I look forward to every year.  Grill your low-country boil.  You won't be sorry.


Low Country Grill
inspired by Everyday Food, June 2011
serves 4 to 6, and can easily be scaled up or down

  • 1 lb red new potatoes, halved or quartered, depending on size
  • 4 ears corn, husks and silks removed
  • 1 lb smoked sausage or Andouille sausage
  • 1 lb shrimp, peeled and deveined
  • canola oil
  • kosher salt and freshly ground black pepper
  • 8 Tbs unsalted butter, at room temperature
  • 1 Tbs Old Bay seasoning
  • 1 tsp hot sauce (or more, if you prefer more spice)
  • 1 tsp honey
  • lemon wedges, for serving
  • hot sauce, for serving
Prepare grill to medium-high heat.

Add the potatoes to a medium saucepan, cover with water, and season with a big pinch of salt.  Bring to a boil and cook until the potatoes are easily pierced with a fork, 8 to 12 minutes.  Drain and rinse, then when cool enough to handle, thread onto skewers.

Thread the shrimp onto skewers.  

Brush everything with canola oil, and season lightly with salt and pepper.

In a medium bowl, combine the butter, old bay, hot sauce, honey, and a pinch of salt.

Place everything on the grill, then cook 8 to 12 minutes, turning every few minutes and brushing with the butter.  The shrimp will take the least amount of time - cook them just until they are pink and opaque, 8 minutes at the very most, but likely closer to 5 to 6 minutes, depending on how tightly they are threaded onto the skewers and how big they are.  Reserve the remaining butter.

Remove from heat and cut each ear of corn into thirds.  Slice the sausage into bite-sized pieces.  Combine the sausage, corn, potatoes, and shrimp in a large bowl and toss with the remaining butter.  

To serve, dump everything onto a platter or newspaper.  Dig in.


Thursday, May 1, 2014

Tequila-Infused Chorizo Queso Fundido


I'm going on the record as saying that it is impossible to eat at a Mexican restaurant and NOT order a bowl of cheese dip.  Fact.  It's also a fact that no matter how big the bowl is, or how many of you there are at the table, the dip will be absolutely demolished.  You'll be scraping the bowl for any little vestige of melted cheese you can get on your chip.  I know I'm not the only one.

So now that it's out there what a big fan of queso dip I am, let me tell you another fact.  This tequila-infused chorizo queso?  Blows all other cheese dips out of the water.  Like, majorly.  It's the stuff Mexican food dreams are made of.  What, you don't have dreams about Mexican food?

In case you can't tell, I really really love this dip.  Melted cheese is pretty fantastic on it's own, but adding tequila?  And chorizo?  That turns it into perfection.

I don't care what your plans are for this weekend, or for Cinco de Mayo.  But please promise me that you'll make this dip?  I'm contemplating making it Friday, Saturday, and Sunday night.  Overkill?

Tequila-Infused Chorizo Queso Fundido
adapted from Fiesta at Rick's
serves 4ish

  • 6 oz fresh chorizo, casings removed
  • canola oil
  • 1 large tomato, cored, seeded, and cut into 1/4-inch pieces
  • 1 cup chopped white onion
  • 1 jalapeƱo pepper, stemmed, seeded, and chopped (optional - the chorizo may be enough spice for you on it's own.  Just use your judgment based on your spice preferences)
  • salt
  • 3 Tbs silver tequila
  • 8 oz Mexican melting cheese, such as chihuahua or quesadilla, or Monterey Jack
  • 1/3 cup loosely packed chopped cilantro, divided
Heat an 8 to 10-inch skillet over medium-high heat, and crumble the chorizo into the pan.  Cook, stirring often to break up the chunks, until the chorizo is cooked through, about 5 minutes.  Use a slotted spoon to remove the chorizo to a paper towel-lined plate.

Add enough canola oil to have a total of 1 tablespoon of fat in the skillet, and add the onion, tomatoes, and chile peppers.  Season lightly with salt.  Cook, stirring often, until the onion begins to soften and brown, about 5 to 7 minutes.  

Add the tequila and cook, stirring occasionally, until the tequila has reduced to a thick glaze, about a minute or two.  Stir in half the cilantro.

Reduce the heat to medium-low and add the cheese, a handful at a time, stirring well to melt the cheese.  As soon as the cheese is melted, remove the skillet from heat, sprinkle the chorizo and remaining cilantro over the top, and serve with tortilla chips and/or warm flour tortillas.


Thursday, March 27, 2014

Prosciutto-Wrapped Asparagus Bundles


This is one of those embarrassingly easy recipes that I make dozens of times a year.  As soon as spring rolls around and asparagus comes into season, this becomes my go-to appetizer and pot luck contribution.  It's great straight out of the oven, at room temperature, and even chilled; so you really can't go wrong.

I love to drizzle these with a balsamic glaze, but it's certainly not necessary.  Just an extra little touch that makes them even more special.

Same deal with the Dijon mustard.  I brush each piece of prosciutto lightly with the mustard, and I think it imparts a nice little bit of spiciness, and it helps cut the rich saltiness of the prosciutto.  So while you could just simply wrap some asparagus with prosciutto and call it a day, the mustard and prosciutto are what elevate this dish to truly wonderful.

I hope everyone has a wonderful weekend - perhaps one that involves these little babies and a few glasses of wine?


Prosciutto-Wrapped Asparagus Bundles

  • 1 lb asparagus, woody ends trimmed
  • 4 oz thinly sliced prosciutto, halved horizontally
  • 1-2 Tbs Dijon mustard
  • extra virgin olive oil
  • kosher salt and freshly ground black pepper
  • balsamic glaze, for serving*
Preheat the oven to 400 degrees and lightly grease a rimmed baking sheet.

Brush each slice of prosciutto lightly with the Dijon mustard, and wrap tightly around 3-4 spears of asparagus.  Lay each bundle seam side-down on the baking sheet.

Drizzle lightly with oil, then sprinkle the asparagus VERY lightly with salt.  Season with freshly ground black pepper.

Bake 10-15 minutes, or until the asparagus is tender and cooked-through, and the asparagus is slightly browned and crispy.

Before serving, drizzle with balsamic glaze.

*To make a balsamic glaze, heat 1 cup of balsamic vinegar in a small saucepan over medium-high heat.  Bring to a boil and cook until it is thickened and reduced by half, 15-20 minutes.  Remove from heat and cool.


Sunday, March 23, 2014

Vietnamese-Style Pork and Rice Noodle Salad


Sometimes I just do not feel like making dinner.  Like on a day when I oversleep, and then I'm "that mom" at toddler sports class, with all three boys crying for no reason.  And then a certain 2 year-old pushes down his brother and almost breaks his nose.  And then everyone refuses to nap.  And it's raining.  Again.  You know, hypothetically, you may not want to make dinner after a day like that.


Or maybe you do.  Because after lunch, the sun comes out, and it's a glorious day outside.  And your sweet husband brings home your favorite wine.  Then that sweet husband takes all the kids outside to play; you have a quiet house, a glass of wine, and all the time in the world to unwind and relax as you make said dinner.  Those are hypothetically the kinds of things that might turn your day around.

And then when that dinner ends up being one of the best things you've made all year?  Day = made.

This was pretty far outside my comfort zone, which was another reason that I was so tempted to order take-out on this hypothetical day.  And it does require quite a bit of chopping and mixing, so I understand that can be a deterrent (I'm really selling this salad, aren't I?).


However, maybe I'm crazy, but when I'm not rushed to put dinner on the table or trying to multitask while I cook, I find chopping, slicing, and mixing to be quite therapeutic.  Crank up my favorite pandora station pour myself a glass of wine, and I find my happy place.

And then I found my happy place again when we sat down to eat.  This salad.  Oh my, it's good.  Chewy rice noodles, crisp veggies, crunchy peanuts, bright and fresh herbs, perfectly cooked pork tenderloin, and a sweet-salty-spicy dressing.  It's good stuff.  Like I said, this was a bit outside my comfort zone, but when all was said and done, I'm so glad I took the chance on it.

I wasn't so sure how this would be received by the kids, but they all really loved it - especially the pork.  I kept it simple and just sliced up some mango and pineapple to serve on the side, and it was a really wonderful and light meal.  Definitely the kind of meal to turn your day around.  Hypothetically.


Vietnamese-Style Pork and Rice Noodle Salad
adapted from America's Test Kitchen's Pasta Revolution
serves 6

Pork

  • 3 Tbs fish sauce
  • 3 Tbs brown sugar
  • 1 Tbs + 1 tsp vegetable oil
  • 1 1/2 lbs pork tenderloin, trimmed and sliced crosswise into 1/4-inch medallions
Dressing
  • 2/3 cup fish sauce
  • 1/2 cup warm water
  • 1/3 cup lime juice (about 3-4 limes)
  • 1/4 cup granulated sugar
  • 2 Thai, serrano, or jalapeƱo chiles, ribs and seeds removed, finely minced
  • 2 cloves garlic, minced
Salad
  • 4 medium carrots, peeled and shredded on the large holes of a cheese grater
  • 1 large cucumber, peeled, seeded, halved crosswise, and thinly sliced into half moons
  • 1/3 cup chopped unsalted roasted peanuts
  • 1 Thai, serrano, or jalapeƱo chile, ribs and seeds removed, thinly sliced
  • 6 oz dried rice noodles (rice vermicelli), broken into 6-inch pieces
  • 4-5 cups romaine lettuce, chopped
  • 1/2 cup fresh basil, chopped
  • 1/4 cup fresh cilantro, chopped
  • 1/4 cup fresh mint, chopped
For the pork:  Combine the fish sauce, brown sugar, and oil together in a gallon-sized freezer bag, and agitate to dissolve the sugar.  Add the pork, shake to combine, refrigerate for at least 30 minutes, or up to 24 hours.

For the dressing:  Combine all the ingredients in a mason jar or small bowl, then shake or whisk to combine.  Set aside.

For the salad:  In a small bowl, toss the carrots, cucumbers, peanuts, and chile together with 1/4 cup of the dressing.  Set aside and allow to marinate while you prepare the rest of the salad.

Bring a large pot of water to boil.  Remove from heat, add the noodles, and stirring occasionally, let them sit about 10 minutes.  Drain the noodles and transfer to a large bowl.  Layer the carrot-cucumber mixture, lettuce, basil, cilantro, and mint on top of the noodles, but do not toss.  Set aside.

Meanwhile, adjust the oven rack 6 inches from the broiler and heat the broiler.  Line a sheet pan with aluminum foil and spray with cooking spray.  Arrange the slices of pork in a single layer on the baking sheet.

Broil until the pork is golden on both sides with crispy, browned edges, about 10 minutes, flipping halfway through.

Pour half the dressing over the noodle-veggie mixture and toss to combine.  Divide among serving bowls and top each portion with a few pieces of the pork.  Drizzle the remaining dressing over the individual servings and serve immediately.


Monday, February 10, 2014

Shrimp and Sausage Cioppino


I realize that this version of cioppino may be considered blasphemous, but if adding sausage to a seafood soup is wrong, I don't want to be right.  Traditionally, cioppino can be any combination of mussels, shrimp, clams, squid, crab... really any mixture of seafood.  Here, it is simply shrimp and sausage - consider this to be surf and turf soup, if you want.

It's hearty and filling, a relatively quick meal, and is oh so comforting and delicious.  As we settled in for dinner, I couldn't stop talking about how much I loved the broth.  Typically the broth is an afterthought to me - I'm all about the meat and veggies in a soup.  But this broth was simultaneously light and fragrant and comforting and hearty.  It's a white wine-tomato broth, infused with the flavor of onions, garlic, fennel, and lots of fresh herbs.  With sweet and tender shrimp, spicy sausage, and creamy white beans, this soup was definitely a thing of beauty.  Served with a glass of white wine and a big piece of warm crusty bread, it was a comforting yet elegant weeknight dinner.  


Shrimp and Sausage Cioppino
adapted from Weeknights with Giada
  • 1 lb spicy Italian sausage, casings removed (substitute part of all for mild sausage if you prefer less spice)
  • 1 large fennel bulb, cored, trimmed and chopped into 1/2-inch pieces
  • olive oil
  • 4 garlic cloves, minced
  • 2 large shallots, chopped
  • kosher salt and freshly ground black pepper
  • 1/4 cup tomato paste
  • 1 Tbs chopped fresh thyme
  • 2 cups dry white wine, such as Pinot Grigio 
  • 3 cups low-sodium chicken broth
  • 1 dried bay leaf
  • 1 lb peeled and deveined large shrimp, chopped into bite-sized pieces
  • 1 (15-oz) can cannelloni beans, rinsed and drained
  • 1 cup fresh basil leaves, chopped
  • 2 Tbs chopped fresh parsley
Preheat a Dutch oven or large saucepan to medium-high heat.  Crumble the sausage into the pan, breaking it up into bite-sized pieces with a wooden spoon.  Cook, stirring often, until it's browned and cooked through, about 5 minutes.  Use a slotted spoon to remove the sausage to a bowl and set aside, leaving as much of the rendered fat as you can in the pot.

Add enough olive oil to the pan to have 2 tablespoons of fat.  Reduce the heat to medium and add the fennel, shallots, and garlic, and cook, stirring often, until the vegetables are softened and translucent, about 4-5 minutes.  

Stir in the tomato paste, thyme, 1/2 teaspoon of salt, and 1/4 teaspoon of pepper, and cook until fragrant, about 1 minute.  Stir in the wine, and use the wooden spoon to scrape up the browned bits from the bottom of the pot.  Add the chicken broth and bay leaf and bring to a boil.  Reduce the heat, cover,  and simmer 10 minutes.

Uncover the pan and add the shrimp, beans, basil, and parsley.  Simmer, uncovered, until the shrimp is pink and cooked through, 3-4 minutes.

Remove the bay leaf and discard.  Taste and season with additional salt and pepper if necessary.  Ladle the soup into bowls and serve with crusty bread.


Thursday, February 6, 2014

Antipasto Pizza


Friday nights in our house mean one of two things:

  1. The kids eat random leftovers or quesadillas and we get take-out once they go to bed, or
  2. Family pizza night!
  Making dinner with my two big kids is a great way for us to all unwind from the week, eat some cheese off the cutting board, and turn what is typically the most stressful and harried part of the day into a fun and relaxing activity for the kids to enjoy.  I feel like every time I post a new pizza recipe, I end up talking this, but I just can't help myself - it's probably the reason we eat pizza as much as we do, after all.  

This particular pizza night was especially memorable, because I got to introduce Caroline and Smith to some new ingredients and food.  They had never had salami before, and it's pretty much Caroline's favorite food now.  She was also introduced to roasted red peppers, and they were a hit too - I think I blew her mind when I wrapped a pice of salami around a roasted red pepper strip and gave it to her, ha!  Kalamata olives, however, were not a hit with Smith.  You win some, you lose some.

What's nice about this pizza is that since "antipasto" is such a broad term, it's pretty much an anything-goes situation.  I basically just took the things I like to see on an antipasto tray and threw them on a pizza.  I included salami, roasted red peppers, and olives, and used a combo of provolone and mozzarella cheeses.  I also threw on some green bell peppers and plenty of fresh basil for some brightness and freshness to balance the rich, salty flavors of the other toppings.  Definitely play around with the toppings though - prosciutto or soprasetta would be really great, fresh slices of tomato would be lovely in the summer, some hot cherry peppers... go nuts.

It's Friday.  Relax, unwind, and eat a pizza!


Antipasto Pizza
  • 1 lb pizza dough
  • cornmeal, for sprinkling
  • 1 Tbs olive oil, plus more for brushing
  • pinch of red pepper flakes
  • 2 cloves garlic, minced
  • 1/2 green bell pepper, seeded and thinly sliced
  • 1 red bell pepper, roasted and cut into thin strips
  • 2 oz salami, sliced into strips
  • 1/4 cup roughly chopped kalamata olives
  • 1 cup shredded provolone cheese
  • 1 cup shredded mozzarella cheese
  • 1/4 cup fresh basil, torn or thinly sliced
Place a pizza stone in the oven and preheat to 500 degrees for at least 30 minutes.  

Meanwhile, in a small skillet, sautĆ© the garlic and red pepper flakes in 1 tablespoon of olive oil over medium-low heat.  Stirring often, cook until the garlic is beginning to turn golden-brown, about 5-6 minutes, then remove from heat.  Set aside.

Sprinkle a large sheet of parchment paper with cornmeal, then pull and stretch the dough into a 12-14 inch circle.  Brush the outer perimeter with olive oil, then brush the center with the garlic-infused oil.  

Sprinkle the dough with 2/3 cup of the provolone cheese and 2/3 cup of the mozzarella cheese, then scatter the salami, green and red bell peppers, and olives over the cheeses.  Top with remaining cheese, then carefully transfer the pizza to the preheated oven.

Bake 10-12 minutes, or until the crust is golden-brown and the cheese is melted and bubbly.

Remove from the oven and allow to cool 10 minutes.  Sprinkle with the fresh basil, slice, and serve.


Wednesday, January 22, 2014

Pork & Mango Stir-Fry


Oftentimes when I buy a new cookbook, I feel overwhelmed by all of the recipes, and I have a really hard time deciding what to make first.  With every page that I turn, I decide that "No, THIS is what I want to make first."  Whenever this happens, I give the cookbook to Joey and let him decide.  Such was the case with Ellie Krieger's So Easy.  I pretty much wanted to make every single recipe I came across, so in the interest of saving myself the agony of making such a monumental decision, I let Joey be the judge.

We all really love mango, so I wasn't too surprised when Joey chose the Pork and Mango Stir-Fry.  We also love meat with fruit, so this was kind of a no-brainer.  The sweet mango pairs so nicely with the tender pork and the other veggies in the stir fry, and it's all pulled together with a sweet-spicy-salty Asian sauce.  This is colorful, healthy, and it was a big hit with the whole family.  Caroline and Smith loved to tell us which colors they were eating, and which was their favorite (for the record, Smith just parrots everything Caroline says).

Even though chopping and prepping the veggies and pork takes a bit of time, the dinner comes together quite quickly once you get started - so definitely measure out the ingredients for the sauce and have everything else ready to go once you start.

Dinners like this make it easy to stick to your New Year's resolutions - quick and easy, healthy, and a pretty darn good substitute for Chinese take-out!

Psst - I'm including the nutritional info because it's provided in the book.  Since I've been counting calories, I've been calculating the nutritional info for most of my recipes - is that something you would be interested in seeing for future posts?

Pork & Mango Stir-Fry
adapted from Ellie Krieger's So Easy
serves 4

  • 3/4 cup low-sodium chicken broth
  • 2 tsp cornstarch
  • 4 tsp canola oil
  • 1 lb pork tenderloin, trimmed of any visible fat, cut into 5-6 pieces
  • 1 medium red onion, halved and thinly sliced
  • 1 red bell pepper, seeded and thinly sliced
  • 2 Tbs minced fresh ginger
  • 3 cloves garlic, minced
  • 3/4 lb snow peas
  • 1/4  cup dry sherry (or Chinese cooking wine)
  • 3 Tbs low-sodium soy sauce
  • 1 tsp Chinese five-spice powder
  • 1/4-1/2 tsp crushed red pepper flakes
  • 1 large firm but ripe mango, peeled, pitted, and cut into chunks
  • kosher salt and freshly ground black pepper
  • 3 cups cooked brown rice
Whisk together the chicken broth and cornstarch in a small bowl to dissolve the cornstarch.  Set aside.

Using a food processor with the slicing attachment,  pass the pieces of pork tenderloin through to thinly slice.  Alternatively, use a knife to slice the pork as thinly as possible.

Heat 2 teaspoons of the oil in a wok or large nonstick skillet over medium-high heat.  Add the pork, season lightly with salt and pepper, and cook, stirring occasionally, until just cooked through, about 4 minutes.  Transfer the meat to a plate and set aside.

Meanwhile, in a small bowl, whisk together the sherry, soy sauce, Chinese five-spice powder, and red pepper flakes.  Set aside.

Heat the remaining 2 teaspoons of oil in the now-empty skillet.  Add the onions, peppers, ginger, and garlic, and cook about 3 minutes, stirring constantly.  Add the snow peas, the cornstarch-broth mixture, and the sherry mixture, and toss to combine.

Cook until the peas are crisp-tender and the sauce is slightly thickened, about 3 minutes.  

Return the pork to the wok, and stir in the mango.  Cook an additional 2 minutes, or until the pork and mango are heated through.

Taste and season with additional salt, pepper, and red pepper flakes as needed.  Serve over brown rice.

Serving Size:  2 cups stir-fry plus 3/4 cup cooked brown rice
Per serving:
460 calories
9 g fat (1.5 g sat fat + 4.5 h mono fat + 2.5 g poly fat)
32 g protein
58 g carbohydrates
7 g fiber
75 mg cholesterol
470 mg sodium


Sunday, December 1, 2013

Baked Pumpkin & Chorizo Taquitos


Hello, December.  According to Caroline, it's now acceptable to decorate for Christmas, listen to holiday music, and read books about Christmas and baby Jesus.  And we did all three of those things today.  The only thing we missed was sitting in front of the fireplace drinking hot chocolate.  Luckily, we still have 23 days to get that done before Christmas.  But that doesn't mean that she wasn't upset that it didn't happen tonight.  Five year olds are not known for their patience.

So now that the holidays are in full swing, does that mean that the pumpkin-everything craze is over?  I sure hope not!  I much prefer pumpkin spice lattes over the holiday drinks.. and pumpkin-cream cheese muffins still make me pretty happy.  And these pumpkin taquitos.  My oh my, are they delicious.    The original recipe was for pumpkin taquitos, but I added chorizo.  I thought the spicy meat and added texture would work really well with the creamy, sweet pumpkin... big shock:  it was a great addition.  I mean, to be honest, adding chorizo to pretty much anything will make me happy, but these taquitos were one of my favorite recent dinners.

Joey tends to be lukewarm to most pumpkin offerings, but he really loved these (see above comment re:  chorizo).  They are spicy, but not too spicy, with just a hint of sweetness from the pumpkin.  And the crispy, crunchy shell is a great foil to the creamy, cheesy filling.  We dipped these in my roasted tomatillo salsa, and everyone loved this meal.

So whether you are still pumpkin-obsessed, or firmly in the "No pumpkin past Thanksgiving" camp, think you'll love these.  They are quick and easy, can be made ahead of time, and your whole family will love them.


Baked Pumpkin & Chorizo Taquitos
significantly adapted from The New Southwest by Meagan Micozzi

  • 8 oz fresh chorizo, casings removed
  • 3/4 cup diced yellow or white onion (about half a medium onion)
  • 2 cloves garlic, minced
  • 1 1/2 cups pumpkin puree
  • 1/2 tsp kosher salt
  • 1 tsp ground cumin
  • 1 tsp chili powder
  • 2 Tbs minced fresh cilantro
  • 2 Tbs Greek yogurt or sour cream
  • juice of 1/2 lime
  • 1 1/2 cups shredded Monterey Jack or Pepperjack cheese
  • 14-15 small flour or corn tortillas
  • 1 Tbs canola oil
  • roasted tomatillo salsa, for serving
Preheat the oven to 425 degrees Fahrenheit.  Line a baking sheet with foil and spray lightly with cooking spray, or brush with oil.

Heat a large skillet over medium heat.  Add the chorizo, and cook, breaking up the large clumps, until it is starting to brown and the fat is beginning to render off, 3-4 minutes.  Add the onion and cook an additional 10 minutes, or until the chorizo is cooked through and the onions are soft.  Stir in the garlic and cook 1-2 minutes, then remove the pan from heat.  Set aside.

Meanwhile, in a large bowl, stir together the pumpkin, salt, cumin, chili powder, Greek yogurt, shredded cheese, cilantro, and lime juice.  Fold in the chorizo-onion mixture and stir until incorporated.

Stack the tortillas on a plate, cover with a damp paper towel, and microwave for 30 second intervals, until they are warm and pliable.  Top each tortilla with 3 tablespoons of the filling, roll tightly, and place seam side-down on the prepared baking sheet.  Brush each taquito with oil, and sprinkle lightly with salt.

Bake 15 to 20 minutes, or until the taquitos are golden-brown and crispy.  Cool slightly, then serve with roasted tomatillo salsa.


Monday, October 21, 2013

Brats with Beer & Mustard Sauce over Egg Noodles


The majority of the time, I try and cook meals that are at least somewhat nutritionally sound.  Or at least have some small amount of nutritional value.  So let me be clear: this meal has basically zero nutritional value, and is not healthy.  At all.  But oh man.  It is good.  And how could it not be?  It's full of some of my favorite things:  sausage, beer, mustard, caramelized onions, and pasta.  I actually did use wheat egg noodles, out of nutrition-guilt, and I roasted a pan of brussels sprouts, apples, and carrots to serve on the side.  So I don't feel tooooo guilty.  And you shouldn't either.  Especially when you taste this outstanding dinner.  I definitely believe in splurges, and this is one you should definitely make.

When we used to tailgate every weekend, beer brats were always a popular dish.  This pasta is a play on that.  The brats are first browned in a skillet.  You then caramelize onions, make a super simple sauce of beer and mustard, then finish cooking the brats in the sauce, infusing them with the beer and tangy mustard.  Served over egg noodles, this is major comfort food.  And even better:  it's one of the easiest and fastest meals ever.  Super comfort food.  Ready in under 30 minutes.  Beer.  Done and done.


Brats with Beer and Mustard Sauce over Egg Noodles
America's Test Kitchen's Pasta Revolution
serves 4 to 6

  • 2 Tbs canola oil
  • 1 lb bratwurst
  • 2 medium onions, halved and sliced thin
  • salt and pepper
  • 1 (12-oz) bottle of a lager or other mild beer
  • 1/3 cup Dijon mustard
  • 12 oz egg noodles
Heat 1 tablespoon of the oil in a 12-inch skillet over medium hat.  Add the sausage and cook until well-browned, about 5 minutes total, turning every minute or so.  Transfer to a plate and set aside.

Add the remaining tablespoon of oil, the onions, and 1/4 teaspoon of salt to the now-empty skillet.  Cook, stirring frequently, until the onions are softened and lightly browned, about 12-15 minutes.  

Whisk the beer and mustard into the skillet with the onions until smooth.

Nestle the sausages into the sauce, along with any accumulated juices from the plate.  Bring to a simmer and cook until the sausages are cooked through, about 10 to 12 minutes.

Transfer the sausages to a cutting board, and once they are cool enough to handle, slice them on the bias about 1/2-inch thick.  Return the sausage to the skillet and season the sauce to taste with salt and pepper.

Meanwhile, bring a large pot of salted water to a boil, and cook the egg noodles until al dente, stirring often, about 10 minutes.  Reserve 1/2 cup of the cooking water, drain the noodles, and return them to the pot.  

Add the sausage + onions and beer sauce to the pot with the noodles, and toss well to combine.  Add the reserved pasta water, a few tablespoons at a time, until you reach your desired consistency.  Taste and season with salt and pepper as needed.  Serve.


Sunday, October 6, 2013

Spice-Rubbed Pork Tenderloin with Apple Salsa


Last weekend, we made the trek to the North Georgia mountains for some apple picking.  It was a pretty ambitious outing for us, now that we're outnumbered by out kids 2:1.  But we forged ahead, and lived to tell the tale, so we're considering it to be a success!  And even better yet, we came home with TONS of apples, so double win.  Smith, Caroline, and I have each been enjoying an apple a day, and I've been an apple-cooking fool for the past week.  So far, I've made a huge batch of my very berry applesauce, baked a pan of cinnamon baked apples for the twins to gnaw on, baked an apple-cinnamon German pancake, and made this pork tenderloin.  And I still have over 50 apples left!  So definitely expect to see apples take over the blog for a while!

It's easy to relegate apples to sweet applications, but I for one think they are pretty awesome in savory dishes as well.  I've always been a fan of fruit salsas, so this was of course an instant hit with me. The pork tenderloin is rubbed with a smoky-spicy-sweet blend of cinnamon, chili powder, and just a pinch of cayenne.  After a brief sear on the stovetop, it's finished in the oven, and then served with the apple salsa.  The warmth and spice from the pork go really well with the crisp freshness and sweet-tartness of the apple salsa.

Pork and apples have long-been a great pairing, and this dish is just a new take on that classic combination.  It's super easy, healthy (less than 500 calories per serving!), and is a hit with the whole family.  I made this a low-maintenace meal by throwing some green beans into the pan with the pork as it roasted.  I also quickly cooked a pot of grains, and it was a really well-balanced, delicious, and healthy meal.

What's more, it's perfectly suited for leftovers.  Let me take just a moment to tell you about the awesome sliders that I used to reinvent the leftovers.  I bought some Hawaiian sweet rolls, and layered on thinly sliced pork, a spoonful of the salsa, and a slice of extra sharp cheddar.  Then I baked them until the cheese was melted, the tops of the buns were just barely crispy, and the pork was heated through.  And oh. my. goodness, were they good.  Like eat them for dinner two nights in a row good.  I'd imagine the same combo would make killer quesadillas as well.

So between the awesome dinner and the amazing leftovers, this is the dinner that keeps on giving.  And as we move into comfort food season, it's a great dish to have in your back pocket - fall flavors, but with a lighter and modern twist.


Spice-Rubbed Pork Tenderloin with Apple Salsa
adapted from Mel's Kitchen Cafe and Multiply Delicious

    For the Pork:
  • 3 Tbs olive oil, divided
  • 4 garlic cloves, minced
  • 2 Tbs chile powder
  • 1 Tbs ground cinnamon
  • 1/8 tsp cayenne pepper
  • pinch of nutmeg
  • pinch of ground cloves
  • 2 tsp salt
  • 2 pork tenderloins, trimmed

  • For the Apple Salsa:
    2 cups fresh apples, cored and diced (about 2 medium apples, or 1 large)
  • 1/2 cup red bell pepper, diced
  • 1/3 cup fresh lime juice (from about 2 limes)
  • 1/4 cup red onion, diced
  • 1/2 jalapeƱo, seeds and ribs removed, diced
  • 1/4 cup chopped fresh cilantro (use less if you're not a cilantro-lover!)
  • 1 Tbs honey
  • 1/4 teaspoon salt, plus more as needed
  • 1/4 teaspoon freshly ground black pepper, plus more as needed
Preheat the oven to 400 degrees.  

In small bowl, whisk together 2 tablespoons of the olive oil, the cinnamon, chile powder, cayenne, nutmeg, cloves, salt, and pepper.  Pour over the pork tenderloins, and massage the spice rub into the meat, turning each piece to fully coat it.

Heat a 12-inch oven-safe skillet (preferably cast-iron) and the remaining tablespoon of oil over medium heat.  Add the pork tenderloins, and cook 2-3 minutes per side.

Transfer the skillet + pork to the oven, and cook until the meat registers 140 degrees at the thickest part of the pork, about 15-18 minutes.  Remove from heat, cover loosely with foil, and allow to rest at least 10 minutes before slicing.

Meanwhile, combine all the ingredients for the apple salsa in a medium bowl, tossing well to combine. Taste and season with additional salt and pepper as needed.

Slice the pork and serve with the apple salsa.


BLOG DESIGN BY: SHERBET BLOSSOM DESIGNS