Showing posts with label apples. Show all posts

Tuesday, December 2, 2014

Sparkly Cranberry-Apple Jellies

Sparkly Cranberry-Apple Jellies 

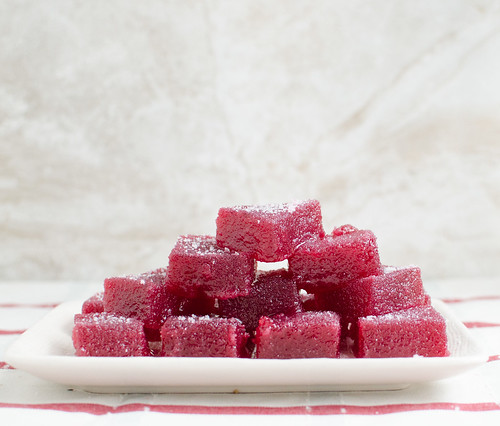
You know how you finish a big meal, and are super stuffed and full, but you just want something small and sweet?  Just me?  Well, these sparkly little jellies are the perfect small treat.  Just sweet enough to be satisfying, but tart enough to be a nice little palate cleanser.  The perfect ending to a big meal.  Or the perfect little snack to give your guests as they leave.

I really love making candy -- it makes me feel like I'm back in the chemistry lab (nerd alert!).  But I realize that a lot of you are intimidated by it.  Don't be.  Just buy a candy thermometer; they're really inexpensive, and invaluable when it comes to confections.

These jellies are really simple and straightforward, and look how pretty!  They taste like a fancy fruit snack, and I mean that in the best way possible!  If I were a fancy-party-throwing type of person, I'd totally make these to pass out to guests as they left.

Tis the season for sweets and treats, and here's to having a fun and sophisticated recipe in your back pocket!

Sparkly Cranberry-Apple Jellies
slightly adapted from Bon Appetit, November 2014

The jellies can be made and chilled a few days ahead of time, but roll in sugar just before serving.  They quickly absorb the sugar, and while they still taste great, they don't have the pretty sparkly appearance.  And we all know that's the most important part!

  • 1 large granny smith apple, peeled, cored, and roughly chopped
  • 1 lb fresh cranberries
  • 2 cups sugar, divided; plus more for coating
  • 2 tsp pectin
  • 1 Tbs fresh lemon juice
Line an 8x8 inch baking dish with 2 pieces of parchment paper, leaving overhangs on all sides.

Puree the apples, cranberries, 1 1/2 cups sugar, and 1 cup of water in a blender until very smooth.  Pour it into a large heavy pot.  Cook over medium heat, whisking occasionally, until the mixture is thick and bubbly.

Combine the pectin and remaining 1/2 cup of sugar in a small bowl.  Slowly whisk it into the cranberry mixture, then reduce heat to medium-low.  Continue to cook, stirring often, until the thermometer registers 200 degrees F, 8 to 15 minutes.  

Remove from heat and whisk in the lemon juice.  Scrape the mixture into the prepared pan and smooth the top with a spatula.  Cool at room temperature until it's firm and set, about 4 hours.

Just before serving, mold the jelly onto a cutting board and cut into 1-inch squares.  Gently toss jellies in a bowl of sugar to coat, and serve immediately.


Wednesday, November 19, 2014

Apple-Sage Stuffing Cups

Apple-Sage Stuffing Cups

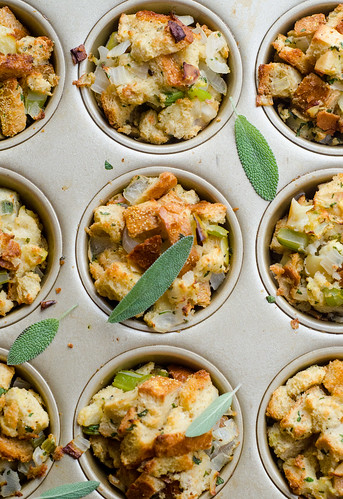
T-minus one week until Thanksgiving.  Are you hosting?  Are you ready?  Yesterday I talked about non-negotiables on the Thanksgiving table, and stuffing/dressing certainly qualifies as such.  People are very opinionated on their stuffing, and for good reason.  I am not necessarily a purist when it comes to dressing, but this classic southern style dressing tops my favorites list.  Last year I shared this biscuit, bacon, and oyster dressing.  It's a little off the wall, but amazingly delicious.  And this year I'm dialing it up with a kind-friendly, portable recipe:  apple-sage stuffing cups!

I realize that these are a bit on the precious and cute side, which is not really what I think of when I plan a Thanksgiving meal.  But they make up for the cutsey-ness with the flavor.  I absolutely love apples in my stuffing - both from a flavor and textural standpoint.  They are a nice texture in contrast to the soft bread, and a lovely burst of sweetness as well.  As such, the sage tempers the sweetness nicely, and when cooked in muffin tins, you get all the coveted crispy edges to yourself.  No fighting over with your brother!

As I made these, it occurred to me that these would be a great offering for a kids' classroom Thanksgiving feast.  They are already perfectly portioned, and kids always love things shaped like muffins - I know mine do anyway.  If you're still planning your Thanksgiving menu, or if you're attending a casual Friendsgiving this weekend, these apple-sage stuffing cups are a great option - easy, portable, and obviously delicious!

Apple-Sage Stuffing Cups

Apple-Sage Stuffing Cups
adapted from Cooking Light, November 2014
makes 12 muffins

  • 12 oz of a baguette or rustic white bread, cut into 1-inch cubes
  • 3 Tbs butter
  • 1 1/2 cups peeled and diced apple
  • 1 1/2 cups diced onion
  • 2/3 cup diced celery
  • 1 1/2 Tbs minced fresh sage
  • 1/2 tsp freshly ground black pepper
  • 1/2 tsp kosher salt
  • 1/4 cup minced fresh flat-leaf parsley
  • 1 3/4 cups reduced-sodium chicken broth
  • 2 large eggs, lightly beaten
Preheat the oven to 375 degrees.  Spray a muffin tin with cooking spray and set aside.

Arrange the bread cubes in a single layer on a baking sheet.  Bake 15 minutes, or until the bread is toasted, stirring halfway through.  Transfer the bread to a large bowl and set aside.

Melt the butter in a large skillet over medium heat.  Add the apple, onion, celery, sage, pepper, and salt.  Sauté 5 minutes, or until tender.   Add the apple-onion mixture to the bowl with the bread, and toss to combine.

combine the chicken broth, eggs, and parsley in a small bowl and whisk to combine.  Pour over the bread mixture and use a wooden spoon to gently combine.

Divide the bread mixture evenly among the 12 muffin cups, using a heaping 1/2-cup for each.  Bake 20-25 minutes, or until the tops are browned and crispy.  Use a spatula to gently pop out each muffin, and serve.


Tuesday, November 18, 2014

Bourbon Sweet Potato and Apple Casserole with a Pecan Crust

Bourbon Sweet Potato and Apple Casserole with a Pecan Crust
On my Thanksgiving table there are non-negotiables.  Turkey, duh.  Gravy, cranberry sauce, a legit green vegetable, mashed potatoes, and sweet potatoes.  I will forever and ever have a soft spot for sweet potatoes topped with marshmallows.

And while I'll never turn down those ubiquitous marshmallow sweet potatoes, I can't help but cringe a bit as well.  I mean, have you ever made a classic sweet potato casserole?  Do you know how much sugar is in there?  Cups.  CUPS of sugar, in a "vegetable" side dish.  No wonder they're so good!  You might as well just move that pyrex to the dessert table.

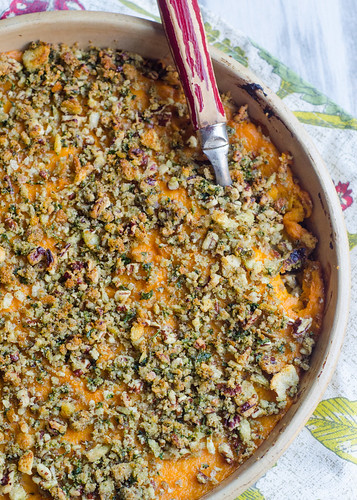
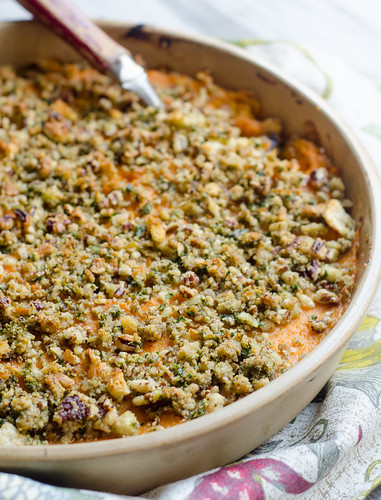
So for the past few years I've been making sweet potatoes that highlight the actual sweet potatoes, and qualify as a reasonable side dish, not a dessert disguised as a vegetable.  And this year, I finally found the ultimate sweet potato dish.  Mashed sweet potatoes.  Apples.  Bourbon.  And an herbed pecan crust.  Yeah, this is good stuff.

In lieu of actual spices to this dish, whole spices are simmered with cream and then strained out, leaving behind a whisper of scent and subtle flavors.  The bourbon lends a gentle smoky, sweet flavor.  And the apples contrast to the sweet potatoes both in texture and sweetness.  The tartness of the granny smiths works really well with the lightly spiced sweet potatoes.  The crispy bread crumb and pecan topping gives the dish much-needed texture and crunch, rounding out the whole thing perfectly.  This recipe highlights the actual sweet potatoes, rather than disguising them in mounds of sugar and marshmallows.  I think it's safe to say that I've finally found the perfect sweet potato dish.  No question.

Bourbon Sweet Potato and Apple Casserole with a Pecan Crust 

Bourbon Sweet Potato and Apple Casserole with a Pecan Crust
barely adapted from Fine Cooking, Holiday Dishes 2014
serves 8

  • 3 lbs sweet potatoes (about 3 large)
  • 4 Tbs unsalted butter
  • kosher salt and freshly ground black pepper
  • 4 oz toasted pecans
  • 4-5 slices rustic white bread (such as sourdough or country bread), torn into pieces
  • 2 Tbs fresh parsley leaves
  • 1 cup heavy cream
  • 1 inch fresh ginger, sliced as thinly as possible
  • 2 whole star anise
  • 1 cinnamon stick
  • 3 Tbs bourbon
  • 1 1/2 tsp vanilla extract
  • 3 large Granny Smith apples, peeled, cored, and thinly sliced
Preheat the oven to 400 degrees.  Prick the sweet potatoes all over with a fork and arrange on a baking sheet.  Bake for 55 to 60 minutes, or until they are completely tender when pierced with a fork.  Let them rest until they are cool enough to handle.*   Reduce the temperature to 375 degrees.

Discard the skins and put the flesh in a mixing bowl.  Use a fork or potato masher to mash the potatoes (they don't have to be perfectly smooth!).  Set the bowl aside.

To make the crumb topping, combine the pecans, bread, and parsley in a food processor.  Pulse until the nuts and bread are coarsely chopping.  Transfer to a small mixing bowl.  Melt 2 tablespoons of the butter and mix into the bowl, along with a generous pinch of kosher salt.  Set aside.

To infuse the cream, combine the heavy cream, ginger, star anise, and cinnamon stick in small saucepan.  Bring to a boil, watching carefully so it doesn't boil over.  Remove from heat immediately, cover, and let steep for 15 to 20 minutes.  Strain through a fine-mesh strainer into a liquid measuring cup, pressing down on the solids to extract as much liquid as possible.  Stir in 2 tablespoons of the bourbon, the vanilla extract, and 1/4 teaspoon of salt.  

While the cream-spice mixture is steeping, melt the remaining 2 tablespoons of butter in a 12-inch skillet over medium-high heat.  Add the apples, season with 1/4 teaspoon of salt, and toss well.  Increase the heat to high, and cook, stirring frequently, until the apples are softened and lightly browned, 5 to 6 minutes.  

Remove from heat and stir in the remaining tablespoon of bourbon.  Stir until it evaporates, which should only take a few seconds.  Stir in 1/3 cup of the infused cream.  

To assemble the casserole, lightly grease a shallow 3-quart baking dish (such as a 9x13 inch dish).  Stir in the remaining cream to the mashed sweet potatoes, and season generously with salt to taste.  

Arrange the apples across the bottom of the baking dish, then spread the sweet potatoes over the apples in an even layer.**  Sprinkle the pecan-crumb mixture over the sweet potatoes.

Bake at 375 degrees until the crumb topping is dark brown and the casserole is heated through, about 25 minutes.  Serve.

*This is a great thing to do ahead of time.  Bake your sweet potatoes off at least a day in advance, then when you are ready to assemble, you have them ready to go.

**At the point, the casserole and the crumb topping can be stored (seperately) in the refrigerator overnight.  When ready to bake, sprinkle the topping over the sweet potatoes and add a few extra minutes to the cooking time.


Sunday, November 2, 2014

Bourbon-Apple Pot Pies

Bourbon-Apple Pot Pies 


I felt like I was smacked in the head when I saw these bourbon-apple pot pies in Martha Stewart Living.  WHAT.  A dessert pot pie?  With apple pie filling?  And bourbon?  And puff pastry?  I'm pretty sure I gasped aloud, and immediately planned to make them ASAP.

Are you surprised to hear that they lived up to my admittedly high expectations?  Because they definitely did.  When Caroline saw me cooking the filling, she jumped up and down and declared that she "loves hot apples!"

Bourbon-Apple Pot Pies

The lightly spiced apple filling is a great conrast to the sweetness of the bourbon and the tartness of the apples.  I briefly considered swapping out the puff pastry for pie crust, but quickly righted myself and went with the puff pastry.  Whew!  Close call.

These pot pies are so easy to assemble, and they are also a wonderful make-ahead option.  Assemble, then store in the fridge until you're ready to cook them.  Thus, making them an ideal dessert for a dinner party - prep the pot pies early in the day, refrigerate, then just as you sit down for dinner, pop them in the oven.

This decidedly rustic and un-fussy dessert is still plenty impressive.  Not only from the novelty aspect - a sweet pot pie! - but also because they simply just taste amazing.  I definitely recommend that you serve these with either a scoop of ice cream or a big dollop of whipped cream, then let the compliments pour in.  Apples.  Bourbon.  Pot Pie.  Enough said.

Bourbon-Apple Pot Pies 

Bourbon-Apple Pot Pies
adapted from Martha Stewart Living, November 2014
makes 6
  • 4 lbs apples, preferably a mix of Granny Smith and Rome, but any combination will likely work
  • 2 Tbs lemon juice
  • 1/2 cup granulated sugar
  • 1/2 cup brown sugar
  • 3/4 tsp kosher salt
  • 1/4 tsp ground allspice
  • 1 tsp ground cinnamon
  • 6 Tbs unsalted butter
  • 1/3 cup bourbon
  • 2 Tbs all-purpose flour
  • 1 lb thawed puff pastry
  • 1 large egg, beaten with 1 Tbs water
  • coarse sugar, for sprinkling
Preheat the oven o 375 degrees.  

Peel and core the apples, then cut into eighths.  In a large bowl, combine the apples, sugars, lemon juice, salt, allspice, and cinnamon.  

Melt 3 tablespoons of the butter in a 12-inch skillet over high heat.  Add half the apple mixture and cook 5 minutes, stirring often.  Reduce the heat to medium-high and cook until the fruit is softened, about 5 more minutes.  Transfer to a bowl and repeat with the remaining 3 tablespoons of butter and apples.

Return all the apples to the skillet, and stir in the bourbon and flour.  Cook, stirring constantly, about one minute. 

Remove from heat and divide the apple mixture among six 8-oz ramekins, gratin dishes, or oven-safe soup bowls.  Place on a rimmed baking sheet to cool to room temperature.

On a lightly floured surface, roll out each puff pastry sheet to a 12x8-inch rectangle.  Cut into six 4-inch squares, and place one square over the filling in each dish.  Cut x-shaped vents in each top.  Brush the pastry with the beaten egg mixture, then sprinkle with the coarse sugar.  At this point the pot pies can be refrigerated for several hours, or you can bake them immediately.

Bake until he fillings are bubbly and the crusts are golden, 25 to 30 minutes.  Cool 10 minutes before serving with ice cream or whipped cream.


Monday, October 28, 2013

Apple-Cheddar Scones


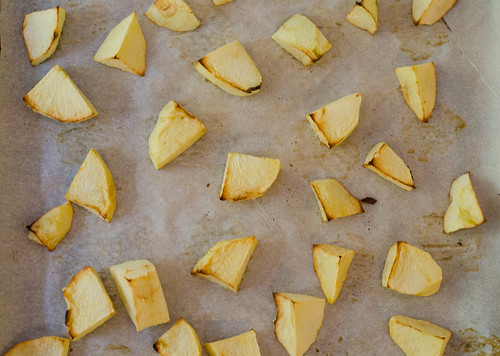
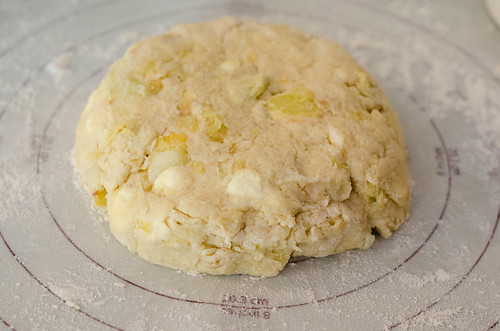
I know it's a super popular regional thing, but for some reason I just can't really get behind apple pie with cheddar cheese.  Don't get me wrong - I love apples and cheddar together - on sandwiches, as a snack, or in a salad.  But I have some sort of a mental block against trying the combo in a pie.  What I don't have a mental block against, however, is the apple-cheddar combo in a scone.  The base of the scone is soft, tender, and buttery, with a subtle cheddar flavor.  What makes these scones truly special, however, are the roasted apples.  You peel and roughly chop apples, then roast them to concentrate to flavor and cook off excess moisture.  They are added to the dough, and you are rewarded with little bursts of sweetness to balance out the more savory scone.


I've taken to only baking up a few scones anytime I make a batch, and freezing the rest to enjoy on a weekday morning.  It's such a special treat to have a freshly baked scone on a random morning!


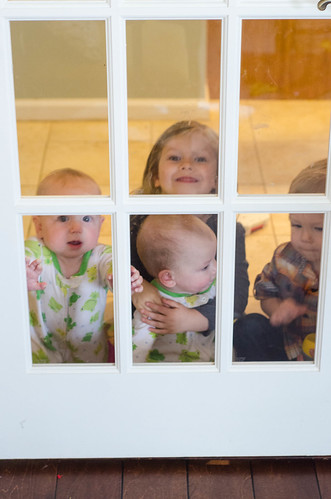
So side note: as I mentioned, I only baked up a few of these right off the bat, then smuggled them into the dining room to photograph before releasing them to my little ones.... I look through the door as I'm snapping some shots, and this is what I see.  :)  Never a dull moment in our house!  For the record:  the scones were devoured in a matter of minutes by my crew.


Apple pie with cheddar:  yay or nay?

Apple-Cheddar Scones
adapted from The Perfect Finish via Smitten Kitchen and Smells Like Home
makes 6 large scones


  • 1 lb firm, tart apples, like Granny Smith (2-4 apples, depending on size)
  • 1 1/2 cups all-purpose flour
  • 1/4 cup sugar
  • 1/2 Tbs baking powder
  • 1/2 tsp kosher salt plus additional for egg wash
  • 6 Tbs unsalted butter, chilled and cut into 1/2-inch cubes 
  • 2 1/2 oz sharp white cheddar, shredded (1/2 cup)
  • 1/4 cup heavy cream
  • 2 large eggs
  • 1 1/2 Tbs coarse sugar, for sprinkling

  • Preheat oven to 375 degrees F, and line a baking sheet with parchment paper.

    Peel, core, and chop each apple into about 16-24 pieces (roughly chopped, really). Toss them onto the baking sheet, spreading them out into one layer.  Bake for 20 minutes until they are slightly browned and look like they are starting to dry out.  Leave the oven on.  


    Let apples cool completely – either at room temperature for about an hour, or if you are in a hurry, pop them in the freezer, baking sheet and all.  

    While the apples roast and cool, whisk the flour, sugar, baking powder, and salt together in a medium bowl; set aside.


    After the apples cool, add them along with the butter, cheese, heavy cream, and one egg to the bowl of a stand mixer fitted with the paddle attachment.  Sprinkle the flour mixture over the ingredients in the bowl.  With the mixer on low speed, mix the ingredients until they just come together to form a dough – do not overmix.  The butter will still be in large-ish chunks and the dough will be sticky.  If you don’t have a stand mixer, you can do this step by hand using your fingers or a pastry cutter to work the butter into the flour.  This could also be done in a food processor, fitted with the dough-blade.


    Turn the dough out onto a well-floured surface and sprinkle the top of the dough with more flour.  Lightly flour your hands, then work the dough together into a disk then flatten disk to a 6-7 inch circle, about 1 1/4 inches high.  With a floured knife or bench scraper, cut the dough into 6 triangles.  


    Line the now cooled baking sheet with a new piece of parchment paper or grease it with butter.  Transfer the dough triangles to the baking sheet, leaving at least 2 inches between each piece.

    Beat the remaining egg and a pinch of salt together in a small bowl.  Brush the tops of the scones with the beaten egg then sprinkle some sugar on the top of each piece.  Bake for 25-30 minutes, or until the tops are golden brown. 


     Allow the scones to cool at least 10 minutes before serving.  The scones are best served warm and within 1 day of making them.  To freeze, arrange the scones in a single layer on a parchment-lined baking sheet, move to the freezer until they are frozen solid.  Transfer the scones to a freezer bag, and when you're ready to eat them,  just add a few minutes to the baking time.


    Thursday, October 17, 2013

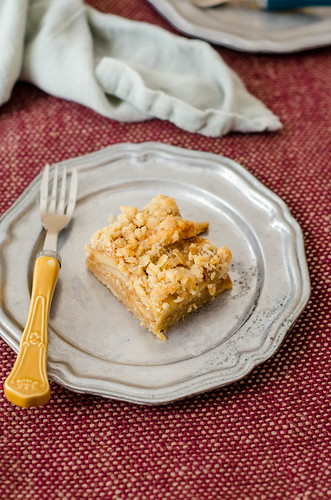
    Salted Caramel Apple Crumble Bars


    When you think of fall desserts, apple pie has got to be the first thing that comes to mind.  And for good reason - it's timeless, classic, and between the soft, spiced apples and the flaky crust, it's hard to beat.  There are a million and one different recipes and versions of apple pie out there, but between you and me, this Southern Comfort Caramel Apple Pie from The Pastry Queen is the best one.

    Anyway, while apple pie is the quintessential fall dessert, there is something about pie bars that just make me so happy.  They are cute, low-maintenance, much easier to make than a whole pie, and the smaller portions are nice when you're watching your calories -- although to be honest, that flies out the window if you eat four in one sitting..... um, no comment there.


    I've had these caramel apple pie bars saved for over a year now, and I figured that between having a big batch of homemade apple cider caramels, and a gajillian apples on hand... it was just meant to be.

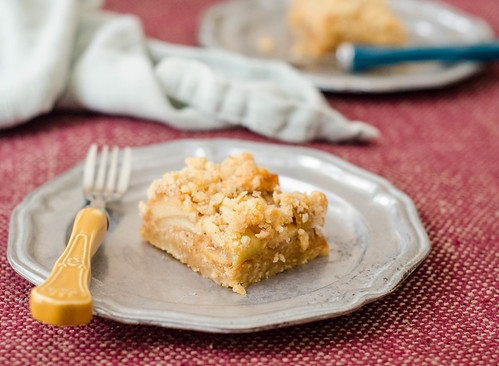
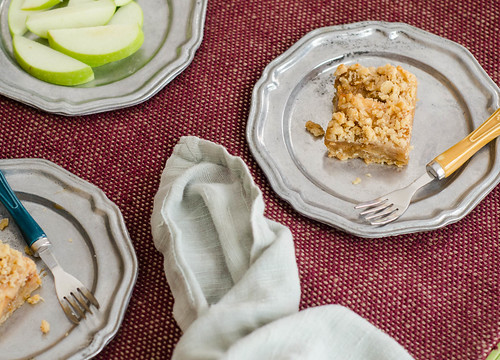
    These bars are not only super easy, but they are now Joey's favorite dessert.  They start with a quick crust of flour, oats, and butter, and it's spiked with just enough cinnamon and brown sugar for a subtle spiced undertone.  The filling is a combo of melted down caramels and buttery, spiced apples.  More of the crust mixture is sprinkled over the top along with just a little bit of sea salt, and the result is truly great.


    I sent most of the batch to a friend who just had a baby, and Joey and I have managed to put away the rest.  I would be sad that they're gone, but I'm making another batch this weekend for the twins' baptism luncheon.

    Dare I say caramel apple pie bars > apple pie?  Is that blasphemous?


    Salted Caramel Apple Pie Bars
    barely adapted from Annie's Eats
    makes 16 bars


    Dough:
    • 1 1/2 cups all-purpose flour
    • 1 cup old-fashioned oats
    • 1/3 cup sugar
    • 1/3 cup lightly packed brown sugar
    • 3/4 tsp baking powder
    • 1/2 tsp salt
    • 1/4 tsp ground cinnamon
    • 12 Tbs cold unsalted butter, cut into small pieces
    • 1 large egg yolk
    • 1 tsp vanilla extract
    • fleur de sel, for sprinkling

    Filling:

    • 2 Tbs unsalted butter
    • 4 large (or 5 medium) apples, peeled, cored, and sliced
    • 3 Tbs sugar
    • 1 tsp cinnamon
    • dash of ground nutmeg
    • pinch of salt
    • 9 oz caramels, unwrapped
    • 2 Tbs heavy cream

    Preheat the oven to 375 degrees.  Line an 8x8 inch square baking dish with foil, leaving an overhand on 2 sides.

    To prepare the dough, add the flour, oat, brown sugar, baking powder, salt, and cinnamon together in a large bowl, and whisk to combine.  Scatter the butter over the top using a pastry blender (or 2 forks), and cut the butter into the dry ingredients until the mixture resembles coarse meal.  Stir in the egg yolk and vanilla and mix or knead until a cohesive dough forms.

    Press about two-thrids of the dough into an even layer in the prepared baking pan.  Bake 12-14 minutes, or until it's light golden-brown.

    Meanwhile, prepare the filling.  Melt the butter in a large skillet over medium heat.  Add the apples, sugar, cinnamon, and nutmeg, and cook the apples, stirring often, until they are softened and caramelized, about 15 minutes.  Remove from heat and set aside.

    For the caramel layer, melt the caramels and heavy cream in a medium saucepan, over medium heat, stirring often, until smooth.  

    To assemble the bars, spread the caramel over the baked crust.  Arrange the apples over the caramel in a single layer.  Finally, crumble the remaining dough mixture over the apples.  Sprinkle lightly with fleur de sel.

    Return the pan to the oven and bake until the caramel is bubbly and the top is golden-brown, 22-25 minutes.  Cool completely before slicing and serving, or scoop it with a large spoon to serve it cobbler-style.


    Sunday, October 13, 2013

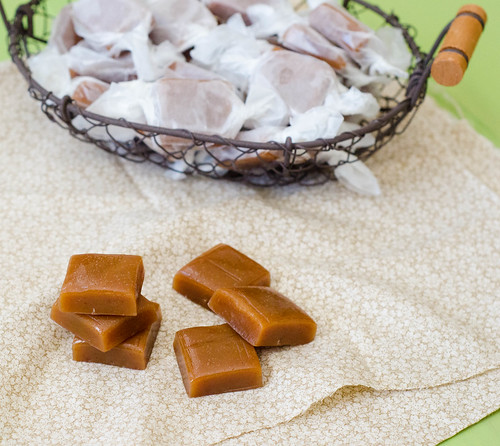
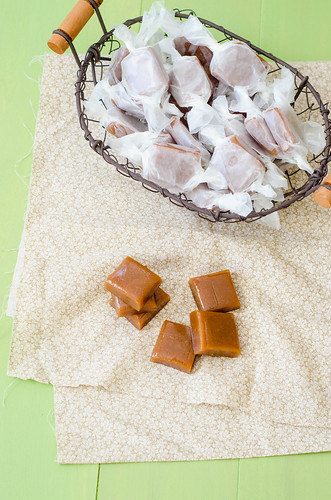
    Apple Cider Caramels


    Raise your hand if you are or ever have been intimidated to make caramel.  It seems like kind of a scary thing to make, doesn't it?  Boiling sugar and butter until juuuuuust before it burns... it can be scary, for sure.  But if you follow a few essential guidelines, you'll be totally fine.  First and foremost, always alway always use a candy thermometer!  Also, don't walk away for even a second.  It can literally go from perfectly golden, delicious caramel to burnt and scorched sugar in the blink of an eye.  But if you abide by these two rules, you will be rewarded.

    And if you make caramels that start with apple cider, you will be very handsomely rewarded.  I've had my eye on these caramels since the moment I laid eyes on them in The Smitten Kitchen Cookbook.  Deb even claims that this is her favorite recipe in the whole book!  In her words, these caramels are "everything I love about New York City in October [...] in one tiny square."  I've been to New York City in the fall, and I have to admit, there is something magical and indescribable about it.  And just as she says, these caramels somehow manage to embody that.

    You start by boiling down the best apple cider you can get your hands on - preferably from an apple orchard or farm.  Once it's reduced to just a fraction of it's original volume, it will be syrupy, rich, and your house will smell absolutely amazing.  Next, you add butter, sugar, and cream, and boil it into a rich, amber caramel sauce.  Mix in cinnamon and sea salt, let the whole thing cool and set, and you will be treated to some pretty awesome caramels.

    They are sweet - but not to sweet.  Salty - but not to salty.  And there's just a whisper of apple-spiced flavor lingering in the background.  These caramels are really something special.

    These make a pretty amazing snack on their own, but if you are interested in a killer dessert and can keep yourself from eating them all in one sitting, then I have a pretty great recipe on deck.  I'll be sharing it later this week, so check back soon!


    Apple Cider Caramels
    barely adapted from The Smitten Kitchen Cookbook
    makes about 64 caramels

    • 4 cups apple cider
    • 1/2 tsp ground cinnamon
    • 1 1/2 - 2 tsp flaky sea salt (fleur de sel)*
    • 8 Tbs unsalted butter, cut into chunks
    • 1 cup (200 grams) granulated sugar
    • 1/2 cup (11 grams) lightly packed light brown sugar
    • 1/3 cup heavy cream
    • neutral oil, for oiling the knife
    Boil the cider in a 3-4 quart saucepan over medim-high heat, until it's reduced to a dark, thick, syrup, between 1/3 and 1/2 cup in volume.  This should take about 30-40 minutes.  Stir or swirl occasionally to prevent scorching.

    Meanwhile, mix together the cinnamon and salt in a small bowl, and set aside; assemble the remaining ingredients as well, since once the caramel starts cooking, you won't have much time.  Line the bottom and sides of an 8-inch square baking dish with 2 long sheets of criss-crossed parchment.  Set aside.

    Once the apple cider is reduced, remove from heat and stir in the butter, sugars, and heavy cream.  Return the pot to medium-high heat, and attach a candy thermometer to the side of the pot.

    Bring to a boil and cook until the thermometer reads 252 degrees Fahrenheit, and immediately remove from heat. This should only take about 5 minutes, so keep a close eye on it.

    Remove the candy thermometer and stir in the cinnamon-salt mixture.  Pour the caramel into the prepared pan, and set aside to cool completely.  This will take about 2 hours at room temperature, and less time in the fridge.  

    Once the caramel is firm, use the parchment paper to transfer it to cutting board.  Lightly oil a sharp knife, and cut the caramel into 1x1 inch squares, oiling the knife after each cut.  

    Wrap the caramels in 4-inch square pieces of wax paper, and store at room temperature.  

    *The original recipe calls for 2 teaspoons of salt, but I found them to be have a slightly salty aftertaste. However, Joey thought they were perfect as-is, so I gave a range.  If you use a finer-grain salt (such as table or sea salt), then definitely use less than 2 teaspoons.   


    Tuesday, October 8, 2013

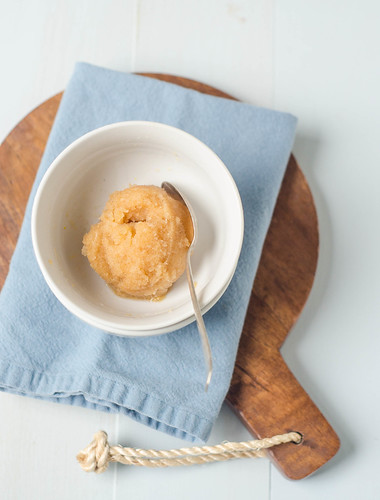
    Baked Apple Sorbet


    My BFF Emilie gives the best presents ever.  For birthdays, Christmas, baby showers, and everything in between, she always manages to give me and the kids the best gifts.  Joey even calls her the gift whisperer.  Take last Christmas, for example.  Among some other fun and awesome things, she gave me a few super cute books:  How to Look Hot in a Minivan (timely, since we'd just purchased one) and Jeni's Splendid Ice Creams at Home.  Which I'd had my eye on for months and months.

    I'm sadly only now getting around to reading them, and no matter how much I read about it,  I just don't think I can look hot in a minivan, but I can make some pretty awesome ice cream and sorbet.  This baked apple sorbet is the epitome of fall.  You might think of frozen desserts as being strictly summer desserts, but when full of  apple goodness and warm fall spices, I think they are more than appropriate for October as well.

    This sorbet starts out the way any apple dessert should:  by baking the apples in sugar and cinnamon.  The mixture is then pureed, chilled, and churned, and you are basically left with frozen apple cobbler.  This stuff is really really good.  It's smooth and creamy, with the perfect balance of sweet-tart apples and warm spices.  I served this at my book club a few weeks ago with these snickerdoodles, and it was a really great ending to our meal.  And I probably should have made a double batch and taken some to Emilie.

    Baked Apple Sorbet
    adapted from Jeni's Splendid Ice Creams at Home.

    • 1 1/2 cups unfiltered apple cider
    • 1 1/2 lbs tart apples (like Granny Smith), peeled, cored, and quartered (about 6 medium apples)
    • 1/2 cup sugar
    • 1/4 cup brown sugar
    • 1/2 cup water
    • 1/4 cup light corn syrup
    • 1 tsp ground cinnamon
    • 1 vanilla bean, split, seeds scraped out
    Preheat the oven to 350 degrees.  

    Add all the ingredients in a 9x13 inch baking dish, tossing to combine.  Cover with foil and bake 30-45 minutes, or until the apples are soft and tender.  Remove from oven and cool to room temperature.  Remove and discard the vanilla bean.

    Puree the mixture in a food processor or blender until completely smooth, doing this in two batches if necessary.  Strain the puree through a fine-mesh sieve, then chill until the mixture is cold, a few hours or overnight.*

    Pour the puree into your ice cream maker and churn according to manufacturer's instructions.  Keep in the freezer at least 4 hours, or until it's firm.

    *To chill the base quicker, you can build an ice bath, and stir it frequently until it's cold.  I usually just make my ice cream/sorbet base and night and chill overnight, then churn the next day.


    Sunday, October 6, 2013

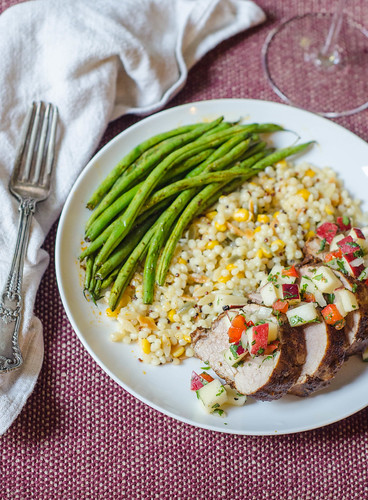
    Spice-Rubbed Pork Tenderloin with Apple Salsa


    Last weekend, we made the trek to the North Georgia mountains for some apple picking.  It was a pretty ambitious outing for us, now that we're outnumbered by out kids 2:1.  But we forged ahead, and lived to tell the tale, so we're considering it to be a success!  And even better yet, we came home with TONS of apples, so double win.  Smith, Caroline, and I have each been enjoying an apple a day, and I've been an apple-cooking fool for the past week.  So far, I've made a huge batch of my very berry applesauce, baked a pan of cinnamon baked apples for the twins to gnaw on, baked an apple-cinnamon German pancake, and made this pork tenderloin.  And I still have over 50 apples left!  So definitely expect to see apples take over the blog for a while!

    It's easy to relegate apples to sweet applications, but I for one think they are pretty awesome in savory dishes as well.  I've always been a fan of fruit salsas, so this was of course an instant hit with me. The pork tenderloin is rubbed with a smoky-spicy-sweet blend of cinnamon, chili powder, and just a pinch of cayenne.  After a brief sear on the stovetop, it's finished in the oven, and then served with the apple salsa.  The warmth and spice from the pork go really well with the crisp freshness and sweet-tartness of the apple salsa.

    Pork and apples have long-been a great pairing, and this dish is just a new take on that classic combination.  It's super easy, healthy (less than 500 calories per serving!), and is a hit with the whole family.  I made this a low-maintenace meal by throwing some green beans into the pan with the pork as it roasted.  I also quickly cooked a pot of grains, and it was a really well-balanced, delicious, and healthy meal.

    What's more, it's perfectly suited for leftovers.  Let me take just a moment to tell you about the awesome sliders that I used to reinvent the leftovers.  I bought some Hawaiian sweet rolls, and layered on thinly sliced pork, a spoonful of the salsa, and a slice of extra sharp cheddar.  Then I baked them until the cheese was melted, the tops of the buns were just barely crispy, and the pork was heated through.  And oh. my. goodness, were they good.  Like eat them for dinner two nights in a row good.  I'd imagine the same combo would make killer quesadillas as well.

    So between the awesome dinner and the amazing leftovers, this is the dinner that keeps on giving.  And as we move into comfort food season, it's a great dish to have in your back pocket - fall flavors, but with a lighter and modern twist.


    Spice-Rubbed Pork Tenderloin with Apple Salsa
    adapted from Mel's Kitchen Cafe and Multiply Delicious

      For the Pork:
    • 3 Tbs olive oil, divided
    • 4 garlic cloves, minced
    • 2 Tbs chile powder
    • 1 Tbs ground cinnamon
    • 1/8 tsp cayenne pepper
    • pinch of nutmeg
    • pinch of ground cloves
    • 2 tsp salt
    • 2 pork tenderloins, trimmed

    • For the Apple Salsa:
      2 cups fresh apples, cored and diced (about 2 medium apples, or 1 large)
    • 1/2 cup red bell pepper, diced
    • 1/3 cup fresh lime juice (from about 2 limes)
    • 1/4 cup red onion, diced
    • 1/2 jalapeño, seeds and ribs removed, diced
    • 1/4 cup chopped fresh cilantro (use less if you're not a cilantro-lover!)
    • 1 Tbs honey
    • 1/4 teaspoon salt, plus more as needed
    • 1/4 teaspoon freshly ground black pepper, plus more as needed
    Preheat the oven to 400 degrees.  

    In small bowl, whisk together 2 tablespoons of the olive oil, the cinnamon, chile powder, cayenne, nutmeg, cloves, salt, and pepper.  Pour over the pork tenderloins, and massage the spice rub into the meat, turning each piece to fully coat it.

    Heat a 12-inch oven-safe skillet (preferably cast-iron) and the remaining tablespoon of oil over medium heat.  Add the pork tenderloins, and cook 2-3 minutes per side.

    Transfer the skillet + pork to the oven, and cook until the meat registers 140 degrees at the thickest part of the pork, about 15-18 minutes.  Remove from heat, cover loosely with foil, and allow to rest at least 10 minutes before slicing.

    Meanwhile, combine all the ingredients for the apple salsa in a medium bowl, tossing well to combine. Taste and season with additional salt and pepper as needed.

    Slice the pork and serve with the apple salsa.


    Wednesday, October 24, 2012

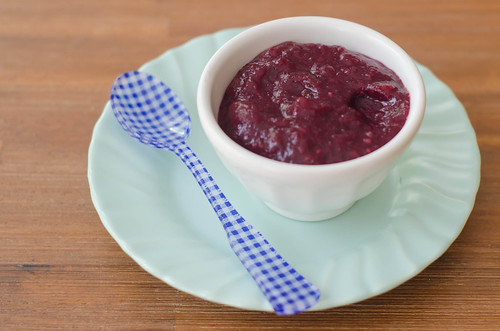
    Very Berry Applesauce


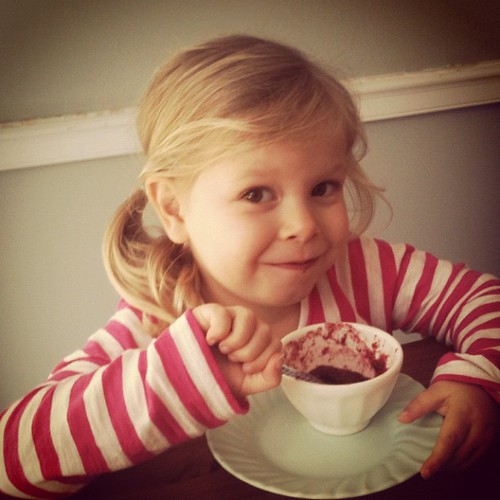
    People often ask me for "kid friendly" dinner and snack ideas.  While I hate to be unhelpful, the truth is, we don't really differentiate between kid meals and adult meals.  For the most part, Caroline and Smith eat what we eat.  I'm glad that so far we've managed to avoid the curse of the picky eater, and hopefully we'll continue to be lucky in that regard with all of our kids.  However, some foods are definitely really big hits with Caroline and Smith.  This berry applesauce was one such snack.  I threw this together on a whim the night I made the roasted veggie-stuffed potatoes, and Caroline and Smith both had seconds of the applesauce.

    Since berries are no longer in season (sad face), I used a bag of frozen mixed berries.  I believe it was raspberries, blueberries, and blackberries.  And since the berries tend to be pretty sweet on their own, I used tart Granny Smith apples for the applesauce.  It was super simple to throw together, and with no added sweeteners, it's a super healthy snack or dessert option for little ones.  I think Caroline, Smith, and I had a bowl of this for our afternoon snacks every single day until it ran out.  Plus, it's super cute when Caroline asks for "Vewy Bewwy Applesauce."


    But the fun doesn't have to stop with berry applesauce.  In the past, I have used a wide variety of fruits and even veggies as add-ins.  Butternut squash, sweet potatoes, carrots, pears, pumpkin puree, and peaches have all been big hits in our house.  Feel free to play around with any of the above fruits, or get crazy and make-up your own combination.  Brussels Sprouts Applesauce, anyone? ;-)

    Very Berry Applesauce
    a Pink Parsley Original

    We like a slightly chunky texture because it makes it easier for caroline to feed herself without drips.  If you prefer or need a thinner texture, then use a food processor or blender, then strain it through a colander.  This would also be a good method if the seeds from the berries bother you.

    • 5-6 medium-large apples, peeled, cored, and roughly chopped (I used Granny Smith)
    • 1 (16-oz) bag frozen mixed berries, thawed, with juices reserved
    • 1 tsp ground cinnamon
    • pinch of salt
    • splash (maybe 1/4 cup) apple cider or water
    Combine all the ingredients in a large saucepan set over medium heat.  Cook, stirring occasionally, until he apples are softened, about 15-20 minutes.  Use an immersion blender to puree the sauce, leaving a few chunks of the apples and berries.

    If the applesauce seems too thin, bring to a boil and allow to cook until it's thickened to your liking.  Allow to cool to room temperature before serving.  Store in an airtight container in the refrigerator, or portion it into freezer bags and freeze.


    Sunday, October 30, 2011

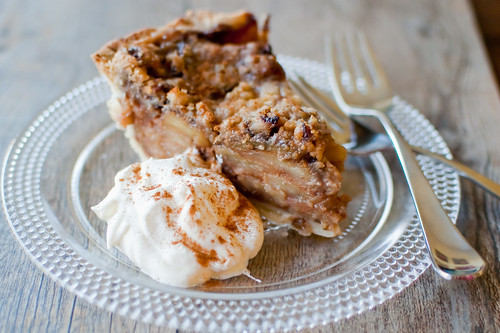
    PPQ: Southern Comfort Caramel Apple Pie


    I am so excited by Caroline's current favorite book.  I loved the Amelia Bedelia series when I was growing up, and I recently bought Caroline Amelia Bedelia's First Apple Pie.  She loves the book, and we pretty much have it memorized because we've read it so many times.  So a few weeks ago when she asked if we could make "Caroline's first apple pie," I was all about it.  I started looking up some recipes, when I remembered that we had this one coming up for Project Pastry Queen. 


    This was a fun activity for us to do together.  She loves helping me in the kitchen, and she was especially excited to make this pie.  And of course we had a great time baking it together, but the best part was obviously eating it together.  O.M.G. this was awesome.  The apples are first sauteed in lots of brown sugar, butter, and cinnamon, and then the juices are mixed with Southern Comfort and heavy cream to make a caramel sauce.  The apples are then mixed with the caramel, poured into a pie shell, covered with a streusel topping of butter, brown sugar, and pecans, and baked.  Obviously your house will smell amazing while this bakes.  And the resulting pie is nothing short of amazing as well. The apples are sweet and spicy, and the caramel sauce has such a wonderful sweetness and warmth thanks to the Southern Comfort.  And the streusel topping is great as well - buttery, sweet, and crunchy.

    I ate this several ways:  straight out of the pie plate, with some whipped cream, and with vanilla ice cream.  All were equally great, so it is up to you how you serve it up.  I think cinnamon ice cream would be an especially great accompaniment as well.  Or if you wanted to get really decadent, top it with ice cream and some caramel.

    Sarah of 20-Something Cupcakes chose this week's recipe, and she has the full version on her blog.  The only changes I made were to add some nutmeg to the filling and topping, and I made my pie crust in my food processor instead of by hand.  Check out the Project Pastry Queen webpage to see how everyone else fared with this pie.  I think it's a safe assumption that it was a hit all-around!


    Wednesday, December 8, 2010

    Blue Cheese Cheesecake with Pear-Onion Jam


    Cheesecake is one of my all-time favorite desserts.  Classic cheesecake, pumpkin cheesecake, chocolate cheesecake, fruity cheesecake, carrot cheesecake, gingerbread cheesecake, red velvet cheesecake... I've made them all and loved them all.  And while I have seen several recipes for savory cheesecakes, they've always seemed a little too "out there" for me.  I feel like having an unappetizing cheesecake is terrible because let's face it - a cheesecake is huge, and that is a lot of food going to waste.  So I've always shied away from them, even though I was intrigued.

    That is, until a few weeks ago.  Some of the women on my street get together every so often for girls' night; we all bring appetizers and drinks, and basically we sit around and gossip and chat until the wee hours of the night.  Our most recent night however, posed a small dilemma.  We were going to be at Georgia Tech all day tailgating and going to a football game, so we weren't expecting to be home in time for me to spend a lot of time making a dish.  Therefore, I wanted to have something that I could make ahead of time.  I searched and searched for something that appealed to me and that would appeal to my friends (who all LOVE food, so I didn't want to do something plain or generic).  Finally I stumbled upon this blue cheese cheesecake.  Jackpot!

    I bought a really nice blue cheese from Whole Foods since it played such a starring role.  As the cake baked, I prepared the pear-onion jam, then I refrigerated both components separately.  The end result was so delicious.  The pungent blue cheese flavor was definitely prominent, but was contrasted nicely by the tangy cream cheese and sweet pear-onion jam.  There are so many adaptations as well.  Use goat cheese instead of blue cheese, replace the asiago with parmesan, use gruyere... and as for the jam, fig-onion jam would be lovely, as would a jam of apples.  I absolutely loved this, and couldn't resist snacking on it all night long. 

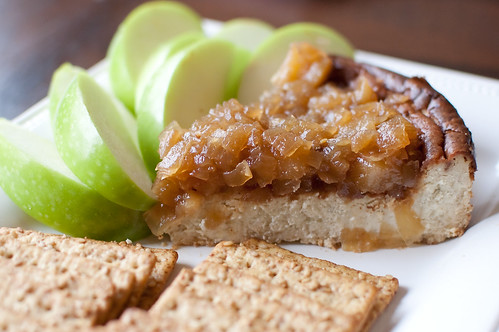
    Luckily, we ended up having so much food that there was enough leftover for me to put out a big wedge as an appetizer for our Fake Thanksgiving dinner the next day.  Served with crackers and apple slices, this makes a great appetizer for nibbling, and I think it would make an absolutely lovely addition to a cheese tray as well. 


    Blue Cheese Cheesecake with Pear-Onion Jam
    adapted from Culinary Concoctions by Peabody
    • 3 (8-ounce) packages cream cheese, softened to room temperature
    • 8 ounces blue cheese, crumbled
    • 6 ounces Asiago cheese, shredded
    • 4 large eggs
    • 1/4 cup heavy cream
    • 1/4 tsp freshly ground black pepper
    Preheat the oven to 350 degrees.  Grease a 9-inch springform pan.

    In the bowl of a stand mixer fitted with the paddle attachment, cream the cream cheese, asiago, and blue cheese until smooth and creamy.  Add the eggs, one at a time, beating well after each addition.  Add the cream and pepper and mix to combine. 

    Pour the mixture into the springform pan and bake uncovered, in a water bath, until browned on top and barely set in the center, 45 to 50 minutes.  Cool completely and refrigerate several hours or overnight before serving.


    Pear-Onion Jam
    • 4 cups onions, diced
    • 2 tsp olive oil
    • 2 cups peeled and chopped pears
    • 2 Tbs raspberry or pear vinegar
    • 1 cup brown sugar, lightly packed
    • 1/4 tsp kosher salt
    • pinch cayenne pepper
    Saute onions in the oil over medium heat until softened and browned. Reduce heat and cook an addtional 10-15 minutes, until they are beginning to caramelize.  Add the pears, vinegar, brown sugar, salt, and cayenne.  Cook until pears are slightly softened but still crisp. 

    Using a slotted spoon, remove the pears and onions from the skillet into a medium bowl, leaving behind as much of the liquid as possible.  Increase heat to medium and cook until the mixture has thickened into a glaze.  Mix into the pears and onions, cover, and refrigerate until ready to serve.

    To serve, pour the pear-onion jam over the cheesecake, then remove the sides of the springform pan.  Serve with crackers, bread, or apple slices.


    Thursday, October 28, 2010

    Vanilla Bean Applesauce

    A few weeks ago, my sister came to visit for the weekend.  I sent Joey off to his parents' house with Caroline, and we had a true girls' weekend.  No boys, no babies, just us sisters.  We ate yummy food, drank wine, had girl talk, and just enjoyed spending time together.  Our big outing of the weekend was driving to the North Georgia mountains and going apple picking (I know, we're wild and crazy).  We made a day of it and had lunch there, took our time browsing the store for gourmet goodies, and picking apples.  We came home with over 70 pounds!  The majority of the apples went towards making a year's worth of applesauce.  Most of it was pretty straightforward - apples, cinnamon, and a pinch of salt.  But you know I have to do something "weird and fancy" as my sister would say.  So I found this recipe from Martha Stewart for applesauce that is full of fun stuff - ginger, apple cider, and a vanilla bean.  One of my favorite things about using vanilla beans is the cute little black specks that they leave behind!  The vanilla flavor isn't overpowering, but it lends a subtle depth of flavor that I just loved.  I also really loved the flavor from the apple cider and subtle spice from the ginger.  All in all, its not any more complicated than plain applesauce, but it is certainly more fun to eat!


    One Year Ago:  Maple-Cider Glazed Chicken


    Vanilla Bean Applesauce
    adapted from Martha Stewart
    makes 1 1/2 quarts
    • about 5 pounds ripe, firm apples (such as Gala or Granny Smith), peeled, cored, and cut into wedges
    • 2 Tbs granulated sugar
    • 1 cup apple cider
    • 1 large cinnamon stick
    • 1 tsp ground cinnamon
    • 1 tsp ground ginger
    • 1/2 tsp ground nutmeg
    • juice of 1/2 lemon
    • 1 vanilla bean, split lengthwise and scraped
    • 1 tsp vanilla extract
    • pinch of kosher salt
    Combine all the ingredients in a large saucepan over medium heat.  Cook, covered, 50-60 minutes, stirring often, until the apple have broken down.  Add more apple cider if necessary to keep the apples from scorching.

    Remove the vanilla bean pod and the cinnamon stick, and mash with a wooden spoon.  Adjust seasonings as necessary.  Allow to cool and store in an airtight container in the refrigerator or freezer.


    Thursday, October 14, 2010

    Apple Spice Cookie Bars


    Caroline is under the assumption that any round fruit is an apple - peaches, oranges, plums, and pears are all apples.  Or as she calls them, "ah-holes."  Quite honestly I'm surprised I didn't get a note from her teacher last week for inappropriate language when they studied apples.  Joey and I laugh because over the past few months we've been commenting that we really need to pay attention to our language.  And here she is inadvertently cussing.  And the more we try to correct her pronunciation, the more adamently she repeats "Ah-hole!  Ah-hole!"  Anyway, I just thought I'd share our current situation, but I"ll also take the opportunity to share a picture of her on her first day of preschool - wearing her apple dress no less!


    So I made these apple spice cookie bars a few weeks ago, and they were really delicious - somewhat of a cross between a cookie and a blondie, with lots of great apple-cinnamon flavor.  They are a cinch to throw together, travel well, and keep for several days.  An ideal treat for fall, and an great use for apples. 

    One Year Ago:  Orange-Chipotle Pork Tenderloin and Tex-Mex Twice Baked Potatoes


    Apple Spice Cookie Bars
    • 2 cups plus 2 Tbs all-purpose flour
    • 2 tsp baking powder
    • 1/4 tsp kosher salt
    • 2 tsp ground cinnamon
    • 1/8 tsp ground nutmeg
    • 1/8 tsp allspice
    • pinch ground cloves
    • 1/2 cup (1 stick) butter, melted
    • 1 cup packed brown sugar
    • 1 cup granulated sugar
    • 2 eggs
    • 1 Tbs vanilla extrac
    • 2 apples, cored and diced (about 2 cups)
    • 1/4 cup granulated sugar + 1 Tbs ground cinnamon (for sprinkling)
    Preheat oven to 350 degrees, and line a 9x13 inch baking pan with foil.  Spray with cooking spray.

    Sift together the flour, baking powder, salt, cinnamon, nutmeg, allspice, and cloves.  Set aside.

    In the bowl of a stand mixer fitted with a paddle attachment, combine the sugars and butter and beat at medium speed for about 1 minute.  Add the eggs one at a time, beating well after each addition.  Add the vanilla.

    Add the dry ingredients and mix at low speed until just combined.  Fold in the apples, and spread the batter in the prepared dish.  Sprinkle with cinnamon sugar.

    Cook 30 minutes, until the top springs back when lightly pressed.  Allow to cool, then remove from the baking dish, cut into bars, and serve.

    Source:  Good Things Catered


    Friday, October 1, 2010

    Apple-Spice Layer Cake with Caramel Swirl Icing


    Rebecca Rather doesn't mess around.  She takes her desserts very seriously, no joke.  Just look at this cake.  You see the title, and you probably think "Oh, ok, another apple cake."  But wait - this cake is 3 9-inch cakes.  Full of fresh apple flavor, fall spices, and enough butter to make Paula Dean's head spin.  Then, its iced with mascarpone buttercream that's swirled with caramel, topped with even more caramel, and adorned with pecans.  And no joke, I think it weighs 5 pounds.  I'm most certainly not one to shy away from eating rich desserts.  When someone puts down their fork and says they can't finish a dessert because its so rich, I make fun of them in my head.  But well, I was one of those people with this cake.  I'm ashamed (or proud?) to admit that I couldn't even finish a tiny sliver.  Never mind that I had already eaten pumpkin pot pie, rolls, salad, and snacked on cheese and crackers all afternoon.  I always make room for dessert, but I just didn't have it in me to finish this cake.  Its that rich.

    I was really excited and nervous to make this cake, because I haven't had very much practice with layer cakes.  Cupcakes I've got down, but I always feel like my cakes are crooked, or domed, or not iced very well, etc.  The nice things about this cake are that you don't have to worry about slicing perfect layers.  Each layer is a cake.  Also, Most of the icing is covered, either by pecans or caramel.  So a "rustic" icing job will do just fine.  It came together fairly quickly, and while I had to make a little extra icing to finish the detail work, I was pretty generous while filling the layers and icing the top.

    While most people have been obsessed with pumpkin (okay, myself included), I've really enjoyed baking and cooking with apples and pears this fall.  And if you can't get enough - check out the Featured Recipes Page.  I've updated it with some great apple-ly recipes to try this fall.

    One Year Ago:  Vidalia Onion and Gruyere Tart 


    Apple-Spice Layer Cake with Caramel Swirl Icing
    barely adapted from Rebecca Rather, The Pastry Queen Christmas
    • 3 sticks unsalted butter at room temperature
    • 3 cups sugar
    • 2 Tbs molasses
    • 6 large eggs
    • 3 cups cake flour
    • 1 1/4 tsp baking soda
    • 1/4 tsp kosher salt
    • 2 Tbs ground cinnamon
    • 2 tsp ground allspice
    • 1 tsp ground nutmeg
    • 1 tsp ground ginger
    • 1 cup sour cream
    • 3 granny smith apples, peeled and shredded (1 1/2-2 cups)
    • 1 Tbs vanilla extract
    • 1 Tbs fresh minced ginger (optional)
    Icing
    • 1 1/2-2 cups caramel 
    • 3 sticks butter, at room temperature
    • 2 Tbs heavy cream
    • 1 tsp vanilla extract
    • 3 cups powdered sugar
    • 1 cup (8 ounces) mascarpone
    • 2 cups pecan pieces, toasted (optional)
    Place one oven rack in the bottom third of the oven and place a second in the top third.  Preheat the oven to 350.  Grease 3 9-inch cake pans, then line each one with a parchment paper round and grease the rounds.

    In a stand mixer fitted with a paddle attachment, cream the butter and sugar on medium-high until light and fluffy, about 3 minutes.  Beat in the molasses, and scrape down the sides of the mixing bowl.  Add the eggs one at at a time, beating well after each egg.  In a medium bowl, sift together the four, baking soda, salt, and ground spices.  Add the sour cream and flour mixture alternately to the batter, starting and ending with the flour mixture (flour in 3 increments, sour cream in 2 increments).  Stir in the shredded apples, vanilla, and fresh ginger.

    The batter will be thick, so use a spoon to transfer evenly into the three pans (I actually used my kitchen scale to make sure I had even layers - anal much?).  Place 2 of the pans side by side on one rack, and the third on the other rack.  Make sure they are staggered so that no layer is directly under or above another.  Bake 35-40 minutes, rearranging the layers about halfway through, until firm to the touch.  Monitor the layers carefully, as they may be ready at different times.

    Remove from the oven and allow to cool in the pans for 10 minutes.  Run a knife around the edges and carefully unmold the cakes to a cooling rack.  Cool completely before icing.

    To make the icing, cream the butter on medium-high speed for about 3 minutes, until fluffy and pale.  Add the powdered sugar over low speed until combined, then add the cream and vanilla.  Increase speed to medium-high and beat until fluffy, about 3 minutes.  Add the mascarpone and beat over low speed just until combined - it may seperate and curdle if its overbeaten.

    Reserve about 1/4-1/3 cup of the caramel, then stir the remaining caramel into the frosting, using large strokes to create swirls throughout.

    Place 1 cake layer on a serving plate or decorating stand, and spread a layer of icing on top.  Top with the second cake, then repeat with more icing, then the final layer.  Cover the cake with an even layer of frosting.  Pat (or fling) the toasted pecans onto the sides of the cake, then decorate the top as you desire.  Drizzle the remaining caramel over the top.


    Wednesday, September 22, 2010

    Caramel Apple Cheesecake Pie


    Fall is officially here, and regardless of the fact that its going to be 90 degrees today, I guess it's time to embrace the season.  And embrace it I did with this cheesecake/pie/dessert/God-send.  Let's  break down this dessert piece by piece, shall we?  First, you start with a cinnamon-spiced graham cracker crust.  Top that with a thin layer of caramel and toasted pecans, followed by a layer of brown sugar-cinnamon apples.  Next comes a cheesecake layer, then the whole thing is finished off with freshly whipped cream and more caramel.  Reminiscent of a candy-apple on crack, this pie is insane - but in the best possible way.

    Nothing is very challenging, though the whole thing does require a bit of time - the crust needs to cook and cool, apples need to be cooked, cheesecake cooked, then the whole thing needs to chill for several hours before serving.  But don't let any of that deter you from making this.  Just take it step by step, and allow yourself plenty of time.  Its a really fun dessert to make, and even more fun to eat. 

    Though I have a love-hate relationship with fall (love the actual season, but hate that it means winter is around the corner), there's nothing not to love about this pie.

    One Year Ago:  Oatmeal Raisin Cookies


    Caramel-Apple Cheesecake Pie
    adapted from Ezra Pound Cake, originally from Mimi Hodges, as seen on Annie's Eats


    For the crust:
    • 1½ cups graham cracker crumbs
    • 3 tbsp. sugar
    • ½ tsp. cinnamon
    • 5 1/3 tbsp. unsalted butter, melted
    • ½-¾ cup caramel 
    • 1 cup chopped pecans
    For the apple filling:
    • 5 tbsp. unsalted butter
    • ½ cup light brown sugar, tightly packed
    • ¼ tsp. salt
    • 1 tsp. cinnamon
    • 5-6 Granny Smith apples, peeled, cored and thinly sliced
    For the cheesecake:
    • 8 oz. cream cheese
    • ¼ cup sugar
    • 1 tsp. vanilla extract
    • 1 large egg
    • 1 tbsp. freshly squeezed lemon juice
    For the topping:
    • ¾ cup heavy cream
    • 3-4 tbsp. confectioners’ sugar
    • ¼-½ cup caramel

    Preheat the oven to 375° F. 

    Spray a 9-inch round springform pan with cooking spray.  In a medium bowl, combine the graham cracker crumbs, sugar, cinnamon and melted butter.  Toss with a fork the ingredients are combined and the crumbs are moistened.  Transfer the mixture to the prepared pan and press the crumbs in an even layer over the pan bottom and about half to two-thirds of the way up the sides of the pan.

    Bake for 6-8 minutes, until golden in color.  Cool for about 10 minutes.  Pour a layer of caramel into the bottom of the crust and sprinkle evenly with the chopped pecans.  Refrigerate the crust while you prepare the filling.


    For the apple filling, melt the butter in a large skillet over medium heat.  Add the brown sugar, salt, and cinnamon, and cook for 1 minute, or until it begins to bubble.  Add the apples and toss to combine well, then allow to cook 15-20 minutes, or until they are softened and most of the liquid has been absorbed.  Pour into the springform pan and set aside.


    To make the cheesecake layer, decrease the oven temperature to 350.  Cream the sugar and cream cheese in the bowl of a stand mixer fitted with a paddle attachment until smooth, about 1 minute.  Add the egg, vanilla, and lemon, and continue to mix until fully incorporated.  Pour over the apples, and use a spatula to smooth the top.  Bake until just set but not browned, about 30 minutes.  A knife inserted into the center will come out clean with its done.  Allow to cool to room temperature, then chill for at least 4 hours before topping with whipped cream and serving.


    To make the whipped cream, combine the heavy cream and confectioner's sugar into a clean bowl fitted with the whisk attachment.  Beat over medium-high speed just until stiff peaks form.  Be careful not to over-whip.  Carefully spread over the cheesecake layer, then drop caramel by dollops on top.  Use a knife to swirl into the whipped cream.  Serve.


    BLOG DESIGN BY: SHERBET BLOSSOM DESIGNS