Showing posts with label tarts. Show all posts

Friday, February 11, 2011

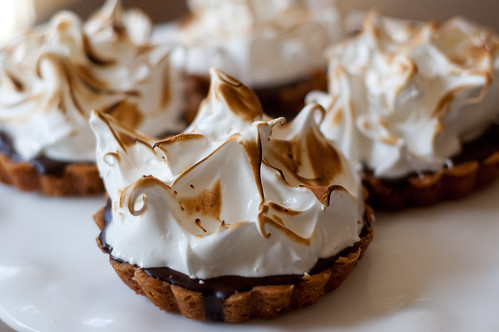
Chocolate Truffle Tarts


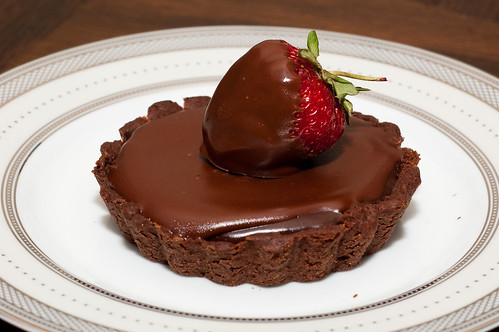
If you've been reading my blog for a while, you may remember the anniversary dinner  that I posted last May.  I have shared most of the recipes by now, but I have been saving this one for Valentine's Day.  Whenever I want to make a special dessert, my mind always goes to chocolate first.  And these tarts are definitely chocolately - a chocolate shortbread crust, filled with chocolate truffle filling, and topped with rich chocolate ganache.  If that doesn't scream Valentine's Day then I don't know what does.

For a dessert with multiple components, these actually come together pretty easily.  The dough is a snap to make in the food processor - the most time consuming step is pressing it into the individual tart pans.  The truffle filling and ganache are also quite simple.  And what makes this an even more ideal dessert is that they are assembled ahead of time and then chilled until ready to serve.  I just took them out about 20 minutes before we ate dessert to take some of the chill off, and they were perfect.

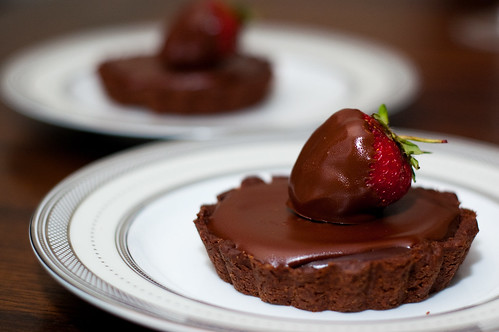
I had quite a bit of leftover ganache, so I used it to make chocolate covered strawberries - which I thought were super cute perched atop each tart.  Just a fun, festive touch.  Happy Valentine's Day!


Chocolate Truffle Tarts
filling and ganache from Tartelette
shortbread crust from Baking:  From My Home to Yours


Chocolate Shorbread Tart Dough
  • 1 1/4 cups all-purpose flour
  • 1/4 cup cocoa powder
  • 1/4 cup confectioners' sugar
  • 1/4 tsp salt
  • 1 stick plus 1 Tbs (9 Tbs) cold, unsalted butter, cut into small pieces
  • 1 egg yolk
Chocolate Truffle Filling
  • 8 oz bittersweet chocolate
  • 12 Tbs unsalted butter, at room temperature
  • 1/4 cup sugar
  • 1/4 cup strong-brewed coffee
  • 4 large eggs
Chocolate Ganache 
  • 4 oz bittersweet chocolate
  • 1/3 cup heavy cream
  • 2 Tbs unsalted butter
Preheat the oven to 375 degrees and lightly grease small tart pans with butter.

Add the flour, cocoa powder, sugar, and salt to the bowl of a food processor a pulse a few times to combine.  Scatter the pieces of butter over the dry ingredients and pulse until the butter is coarsely cut in - some will be the size of oatmeal flakes, while some will be the size of peas.

Add the egg yolk to a small measuring cup with a pourable spout, and stir to break it up.  Add the egg a little at a time, pulsing after each addition.  Once the egg is in,  process in long pulses - about 10 seconds each - until the dough, which will look granular to begin with, forms clumps and curds.  Just before you reach this stage, the sound of the machine will change, so be ready.

Turn the dough out onto a work surface, and very lightly and sparingly knead the dough just to incorporate the dry ingredients.  Press the dough into the tart pans, and chill for 30 minutues to 1 hour before baking.

Bake the dough 10-20 minutes, until the dough is firm and crisp. Remove the tarts from the oven and decrease the temperature to 350 degrees.


For the filling, chop the chocolate into small pieces.  Place in a medium bowl and set aside.  Combine the sugar, coffee, and butter in a small saucepan and bring to a boil.  Pour over the chocolate and leave undisturbed, for 2-3 minutes.  Whisk until smooth, then add the eggs, one a time, stirring well after each addition.  Divide the filling evenly among the tart shells, and bake 10 minutes.  Allow to cool completely.


For the ganache, chop the chocolate and place in a medium bowl.  Heat the cream over medium heat until gently boiling, and pour over chocolate.  Allow to sit undisturbed for 2-3 minutes, then whisk until smooth.  Add the butter and whisk to incorporate.  Divide evenly among the tarts and smooth the tops with an offset spatula.  Refrigerate until ready to serve.


Sunday, January 9, 2011

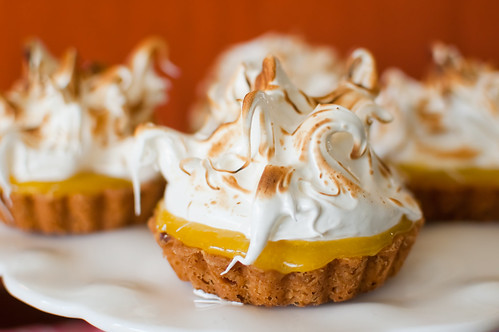
PPQ: Big Hair Lemon-Lime Meringue Tarts


Ever since I bought The Pastry Queen, I have wanted to make these tarts.  Seriously, how fun are they?  Plus, they are Rebecca Rather's signature dessert.  If out of all the decadent and mouth-watering desserts she features in her cookbook, these are what she's known for, then I HAD to make them.  I also had so much fun making the chocolate version over the summer, so I was really looking forward to this week's recipe. 

In all actuality, these are nothing more than a lemon-meringue pie that's been gussied up.  Buttery, shortbread crust that is studded with almonds, tart lemon-lime curd, and heaps of fluffy meringue.  But isn't this so much more fun?

I was a little concerned after I made the citrus curd - it was mouth-pucking it was so tart.  But once it's combined with the rich crust and the sweet meringue, it all balances out.  Obviously styling the meringue is the most fun part of the assembly - Joey really liked helping, and I let him torch it since he's a boy and likes to play with fire.  I think Caroline would have loved helping too, but well, I didn't feel like making a trip to the emergency room for an allergy attack (she is allergic to eggs).

Thanks to Sarah for picking yet another fabulous, over the top dessert.  Check out her blog for the full recipe, and check back next week - it's gonna get wild (card)!


Sunday, December 5, 2010

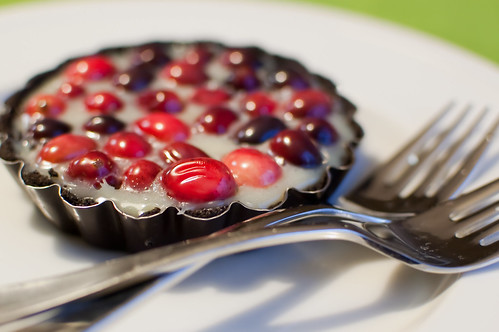
PPQ: Black-and-White Cranberry Tarts


It's my turn again for Project Pastry Queen, and as usual, I struggled immensely with my choice.  We've just had Thanksgiving, so I felt like everyone was over pumpkin.  It's not quite Christmas, so I didn't think a giant cake was appropriate.  Maybe something savory?  Maybe a salad?  But I just couldn't resist these pretty little tarts.  Cranberries are one of my favorite things to bake with, and let's face it.  You can't go wrong with an oreo crust and white chocolate filling.  So the choice was made.

I have to admit that I was a little surprised to see that you don't bake the crusts at all.  However, this presented a problem when it was time to remove the tarts from the pans, and after I broke one tart, I decided to just serve them in the tartlette pans.  No big deal, but I will definitely bake the crusts for 10 minutes or so next time I make them.

The cranberries are just barely cooked - really just heated through enough to absorb some sugar and cut the tartness a bit.  Left whole, it creates quite a striking dessert - especially with the contrasting colors of the black crust, white chocolate ganache filling, and bright red cranberries.  I think these would translate well into a large tart, and I plan to make one for one of the several Christmas functions we'll be attending this year.  Festive, gorgeous, delicious, and most importantly easy. 

Check back next week:  We're making grasshopper pie!


Black-and-White Cranberry Tarts
adapted from The Pastry Queen
makes 8 tarts


Crust
  • 1 (16-ounce) package oreo cookies (about 33 cookies)
  • 1 stick unsalted butter, melted
White Chocolate-Cranberry Filling
  • 16 ounces white chocolate, chopped into small pieces
  • 1 cup heavy cream
  • 1/4 cup (1/2 stick) unsalted butter
  • 2 Tbs light corn syrup
  • 2 cups fresh cranberries, rinsed and picked over
  • 1/4 cup water
  • 1/4 cup sugar
To make the crusts, preheat the oven to 350 degrees.  Process the cookies in a food processor until ground to coarse crumbs.  Pour in the melted butter and pulse until well-combined.  Press the mixture into the bottom of eight tartlet pans. Bake 10 minutes, and set aside.

To make the filling, place the choped white chocolate in a large bowl.  In a medium saucepan, heat the cream, butter, and corn syrup to the boiling point.  Pour over the white chocolate and whisk until smooth.

Combine the cranberries, water, and sugar in a medium saucepan and warm over low heat about 5 minutes.  Do not let the cranberries get hot enough to pop.  Drain the cranberries well, discarding the liquid.  Fold the cranberries into the white chocolate mixture and pour evenly into the tart shells. 

Refrigerate at least 2 hours or overnight.  Remove from tart pans and serve.


Sunday, August 29, 2010

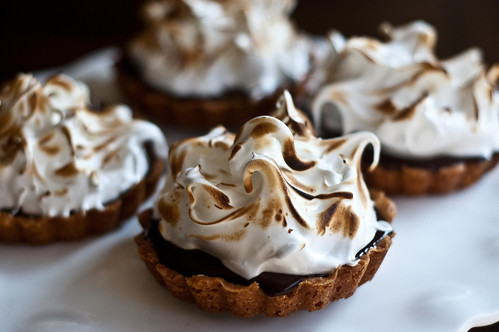
PPQ: Mocha-Almond-Meringue Tarts

This week's Project Pastry Queen recipe was chosen by Joelen of What's Cooking, Chicago?  The actual recipe is Texas Big Hairs Chocolate Hazelnut Meringue Tarts.

I changed things up quite a bit this week, partly out of necessity.  I've been trying to limit my trips to the grocery store, and while I thought I had hazelnuts, it turns out I only had pecans, pistachios, pine nuts, almonds, walnuts, and peanuts.  I then realized I didn't have frangelico either, so I subbed Kahlua.  And thus, mocha-almond tarts were born.  I ran with it at that point, adding instant coffee, almond extract, and more Kahlua to the ganache.  I was very pleased with the final product, and I was also really proud of myself.  Two years ago, there's no way I would have experimented that much with a baking recipe.  Cooking I could do from the hip, but I felt much more rigid while baking.  I guess its the scientist in me, not wanting to mess with the chemistry.  At this point, I know I can add flavors and textures to things like ganache and still get delicious results.  The funny thing was, these tarts look like they should be s'mores tarts, but then you taste coffee.  But it did give me the idea to make a s'mores tart!


I have to admit, my favorite part of this recipe was the meringue.  It was so much fun styling and playing.  I'm certainly not much of a hairdresser (Heaven help me when Caroline's hair is long enough to braid), but I had a lot of fun with these.  I thought I was making them pretty big and pouffy, but then I saw the picture in the cookbook and realized how small mine seemed - I guess everything really is bigger in Texas.

For the original recipe, head over to Joelen's blog.  I'm going to post my ganache recipe below, since it is pretty different from the original.  And check back next week for jailhouse potato cinnamon rolls - they sound like a perfect tailgating treat to kick off football season!


One Year Ago:  Bacon and Cheddar Scones


Mocha Ganache
adapted from The Pastry Queen
  • 1 cup heavy whipping cream
  • 1 tablespoon unsalted butter
  • 1/8 teaspoon salt
  • 1 teaspoon instant coffee
  • 1/4 teaspoon almond extract
  • 1 Tablespoon Kahlua
  • 7 ounces bittersweet chocolate, finely chopped
Place the chocolate in a medium bowl.  Heat the cream, butter, salt, and instant coffee in a small saucepan until gently boiling.  Add the almond extract and Kahlua, and pour over the chocolate.  Allow to sit undisturbed for 5 minutes, then whisk until smooth.


Sunday, August 8, 2010

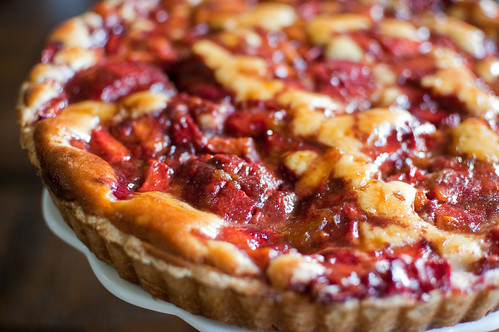
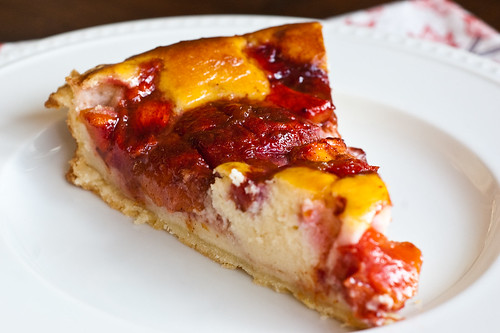
PPQ: Peach Cream Cheese Tart

 I hope you guys aren't getting tired of peach recipes, because I fully intend to bombard you with them until the cruelly short peach season is over.   They are by far my favorite fruit, and I love eating them in savory dishes, sweet, dishes, and over the kitchen sink (with the fuzz peeled off of course - who eats the skin?). 

When I first bought The Pastry Queen last summer, this was one of the first recipes that stuck out to me.  Why I never made it last summer, I don't know.  So when Tara chose it for this week's Project Pastry Queen recipe, I was stoked. 

This isn't a last-minute dessert, as you need time for the dough to chill, mixing up the filling, peeling, pitting, and scoring the peaches, baking the tart, glazing, and finally chilling the tart.  But its all pretty basic, and the result is definitely worth it for me.  This is what I would classify as a "cheesecake tart,"  as it basically tastes like a cheesecake baked in a pastry crust in a tart shell.  And that's most definitely not a bad thing.

The sweet cheesecake filling is cream cheese and mascarpone based, topped with peaches that have been coated in cinnamon-sugar, and then brushed with an apricot-brandy glaze.  The peaches are sweet and caramelized, and the filling is perfectly sweet and tangy.  This is definitely a dessert to impress.

Tara has the full version posted on her blog, Smells Like Home.  Next week, we're cooling down with Watermelon Lemonade!

One Year Ago:  My most popular post ever!  Chicken Enchiladas!


Monday, February 22, 2010

Caesar Salad Tartlets with Roasted Garlic Crusts


This is another recipe from Savory Baking, and it was just as delicious as the Chile-Cheese Bread I posted earlier in the year.  The crust reminds me a little bit of the Basil-Garlic Crust of the Tomato-Mozzarella Tart.... but its better!  Garlic is first roasted, then mixed with butter and Parmesan cheese to flavor the dough, then it is baked in tartlet pans, cooled, and a delicious Caesar salad is piled high inside. 

I made these as the first course for Valentine's dinner, and they were very well received.  I will definitely make these again; they are perfect for a dinner party.  The crusts can be baked in advance, and the vinaigrette can be made 2 days in advance as well.   I am already dreaming up all the fun ideas for using these crusts in other capacities, and I definitely plan on using this vinaigrette for other salads as well.

Such a fun and elegant twist on a traditional Caesar salad!

Caesar Tartlets with Sweet Garlic-Butter Crusts
adapted from Savory Baking, by Mary Cech
makes 8 tartlets

Garlic Tartlets
  • 2 small heads of garlic
  • 2 teaspoons extra-virgin olive oil
  • 1 cup (2 sticks) unsalted butter at room temperature
  • 1/2 cup finely grated Parmesan cheese
  • 1/2 teaspoon salt
  • 2 1/2 cups all-purpose flour
Caesar Vinaigrette and Salad
  • 1 garlic clove, peeled and minced
  • 1 Tablespoon capers, rinsed and chopped
  • 2 teaspoons chopped fresh parsley
  • 1 teaspoon anchovy paste
  • 1/2 teaspoon Worcestershire sauce
  • 1 Tablespoon plus 1 teaspoon red wine vinegar
  • 1/4 teaspoon fresh lemon juice
  • 1/4 teaspoon salt
  • pinch of cayenne pepper
  • 1/4 cup extra-virgin olive oil
  • 1/4 cup finely grated Parmesan cheese
  • Freshly ground black pepper
  • 1 head of romaine lettuce, leaves washed and torn
  • shaved parmesan, for serving
Preheat the oven to 350.

Trim the tops off the heads of garlic and drizzle with olive oil.  Wrap in foil and place on a baking sheet.  Cook until very soft, about 35 minutes.  Let cool, and squeeze each clove from the wrapper.

In the bowl of an electric stand mixer fitted with the paddle attachment, cream the butter with the roasted garlic, cheese, and salt together until smooth.  Add the flour and blend well.  At this point the dough will look crumbl, but that's okay.  Place a generous 1/4 cup of the dough into each tartlet pan.  Press evenly and firmly into the bottom and up the sides of each pan.  Use a fork to poke holes into the bottoms of each tartlet.  Line the pans on a baking sheet, and bake until lightly browned, 18 to 20 minutes.  Cool the baking sheet on a cooling rack and allow to cool completely before removing crusts from each mold.

Meanwhile, prepare the vinaigrette.  Whisk the garlic, capers, parsley, anchovy paste, Worcestershire sauce, vinegar, lemon juice, salt, and cayenne pepper together in a medium bowl.  Slowly drizzle the olive oil while continuously whisking.  Stir in the grated Parmesan and season to taste with salt and pepper.

Put the prepared romaine in a large bowl and drizzle with the vinaigrette.  Toss gently to coat, and add more vinaigrette as necessary.  Place a heaping portion into each shell and finish with shaved Parmesan and a grinding of pepper.


Thursday, October 1, 2009

Vidalia Onion and Gruyere Tart


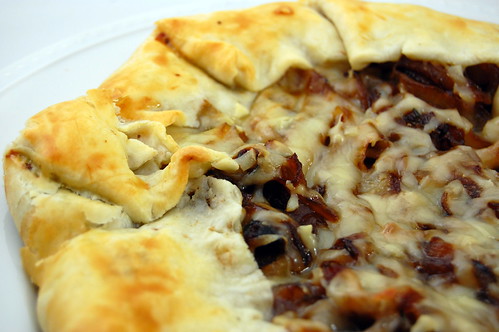
I have had this recipe saved from May's Southern Living all summer, and I am just now getting around to making it. A few week's ago we had Joey's parents over for dinner to thank them for watching Caroline. We started with the zucchini bruschetta, and I served this tart and a pork tenderloin with peach and tomato chutney. Sadly I will not be blogging this, as we didn't take a picture :-( I guess that means I will have to make it again. For dessert I served Arnold Palmers. Overall, it was a great meal.

This tart was a great side dish. Being from Georgia, I of course love Vidalias, and being a human, I of course love pie crust and Gruyere. So you can't go wrong. This was a little messy to serve, but no one seemed to mind. I think it would also be great as the main course for a light lunch, served with a salad.

If you don't have access to Vidalia onions, just use sweet onion and add a little sugar while caramelizing. Also, this seems like a lot of onions, but they will cook down significantly.

Rustic Vidalia Onion Tart
adapted from Southern Living, May 2009
  • 2 Tablespoons butter
  • 4 medium-sized Vidalia onions, halved and thinly sliced (about 6 1/2 cups)
  • 1 1/2 teaspoons chopped fresh rosemary (other herbs can be subbed)
  • 3/4 teaspoon salt
  • 1/2 teaspoon pepper
  • 1/2 recipe pie dough, or 1 refrigerated pie crust
  • 1 egg white, lightly beaten
  • 3/4 cup (3 oz) shredded Gruyere cheese (can sub Swiss cheese)
Preheat oven to 425. Melt butter in a large nonstick skillet over medium-high heat. Add onion, salt, and pepper (and sugar if necessary). Stirring occasionally, cook 8-12 minutes, or until tender. Reduce heat to low and cover; cook an additional 5-10 minutes, or until onions are browned and caramelized. Stir occasionally while cooking.

Shape pie crust on a lightly floured surface by rolling out into a 12-inch circle. Do this on parchment paper to make the transfer to a baking sheet easier.

Brush with egg white, and sprinkle 1/2 cup cheese over dough. Top with onions, leaving a 2 1/2 inch border. Sprinkle remaining cheese, and fold the pie crust over the edge of the onions, pleating as you go. Leave a 4-inch wide opening in the center. Brush crust with egg white.

Bake at 425 on the bottom rack 17-19 minutes, or until crust is golden-brown and cheese has melted. Let stand 5 minutes before serving.


Saturday, September 26, 2009

Arnold Palmers


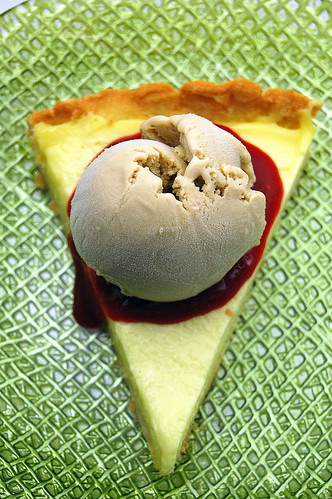
Sweet tea + Lemonade is a classic southern mocktail known as the "Arnold Palmer." Delicious, light, and refreshing, this is a great drink to enjoy sitting on the porch in the summer. Imagine my excitement when I saw this as a dessert when Joey and I were out to dinner one night. This playful dessert was a lemon tart topped with Firefly ice cream. What's Firefly, you ask? It is sweet tea flavored vodka - genius! My favorite way to enjoy it is to mix it with raspberry lemonade over ice. Some friends of mine call firefly with lemonade the John Daly Special, but my best friend calls the raspberry lemonade version a "Southern Belle." And that's much cuter and sweeter, don't you think?

Anyway, on to the dessert. I used Dorie's Most Extraordinary Lemon Tart for the tart. The ice cream was kind of an experiment, but I think it turned out well. I also whipped up a raspberry coulis to serve alongside. This is such a fun dessert, and would be well received at a party.

Bridget has a great write-up on the tart, so I'm just going to link over to her - plus she takes the best pictures!

Firefly Ice Cream
  • 2 cups heavy cream
  • 1 cup whole milk
  • 3/4 cup granulated sugar
  • 1 iced tea tea bag
  • 5 egg yolks
  • 1/2 teaspoon vanilla
  • 1/4 cup sweet tea flavored vodka (Firefly)
  • juice of 1/2 lemon
Combine the milk, 1/2 cup sugar, and 1 cup of cream in a medium saucepan. Heat to dissolve sugar, stirring constantly. Remove from heat, and add tea bag to milk mixture. Cover and allow to steep for 1 hour, stirring occasionaly, and pressing down on bag to extract as much tea as possible.

In a medium bowl, beat the egg yolks and sugar until light and fluffy. Return cream mixture to stove and mix in remaining cup of heavy cream. Heat until lightly simmering, then pour into egg mixture. Stir to combine, and return to heat. Cook over medium-low heat until the custard thickens and coats the back of a spoon, stirring constantly, about 7-12 minutes.

Pour through a fine-mesh seive into a medium bowl, and cover with plastic wrap, pressing down onto the surface of the custard. Mix in vodka, vanilla, and lemon juice. Allow to chill completely.

Follow ice cream maker's instructions to churn ice cream. Freeze overnight for best results. The ice cream will never be completely frozen due to the high volume of alcohol, but mine got to be somewhere between soft serve and traditional ice cream.

Arnold Palmer

To serve, slice tart into wedges, and top with ice cream. Serve with raspberry sauce on the side and fresh berries.


Tuesday, August 11, 2009

Tomato-Mozarella Tart with Basil-Garlic Crust


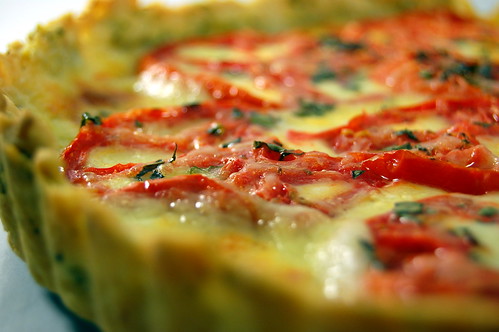
OK let's all just stand back for a moment and take in the awesomeness that is this tart: first and foremost, the crust. Oh, the crust. Made with basil and garlic. buttery, herby, garlicky, YUM. homegrown tomatoes. fresh mozarella. more homegrown basil. all topped with a sprinkle of parmesan cheese. Can you think of much more better than that? Even Joey was basically in complete awe of this, and he didn't even mention the lack of meat. He said it tasted sort of like a pizza - only better. Another recipe to add to my favorites.

I served this with a spinach salad, but it would make a great side dish to grilled chicken or steak as well. It'd also be a great main dish for lunch or brunch.

This was my first foray into tart making. I love the moment when you pull off the shell to reveal the beautifully golden crust. I only wish my crust had been more uniform around the edges. It did shrink a little while cooking, so I'll have to keep that in mind when pressing in my dough next time.

Fresh Tomato Tart with Basil-Garlic Crust adapted from Ezra Pound Cake, orginially from The Complete Italian Vegetarian Cookbook
  • 1 recipe Basil-Garlic Tart Dough (recipe follows)
  • 8 ounces sliced fresh mozzarella
  • 2 large, ripe tomatoes (about 1 pound), cored and cut crosswise into thin slices
  • Salt and freshly ground pepper
  • 1 tablespoon extra-virgin olive oil
  • 1 Tablespoon fresh minced basil
  • 3 Tablespoons freshly grated Parmesan cheese
Preheat oven to 375. Prepare the dough, and press it into a tart pan with removeable bottom.

Line the bottom of the tart pan with the sliced mozzarella. Arrange the tomatoes on top of the cheese. Top with salt, pepper, and parmesan. Drizzle with olive oil, and sprinkle with basil.

Bake 30-35 minutes, or until dough is golden brown and cheese is bubbly and browned in spots. Allow to rest at least 5 minutes before slicing. (The tart may be covered and kept at room temperature for up to 6 hours).

Basil-Garlic Crust
  • 1/3 cup fresh basil leaves
  • 1 medium garlic clove
  • 1 1/4 cups unbleached all-purpose flour
  • 1/2 teaspoon kosher salt
  • 8 tablespoons (1 stick) unsalted butter, chilled and cut into 8 to 10 pieces
  • 4-5 tablespoons ice water

Place the basil and garlic in the work bowl of a food processor. Process, scraping down the sides of the bowl as needed, until finely chopped. Add flour and salt; pulse to combine.

Add butter. Pulse about 10 times, or until the mixture resembles pea-sized crumbs.

Add water, 1 tablespoon at a time, pulsing several times after each addition. After 4 tablespoons water have been added, process the dough for several seconds to see if the mixture forms a ball. If not, add remaining water. Process until dough forms into a ball. Remove dough from processor.

Flatten the dough into a 5-inch disk. Wrap it in plastic, and refrigerate for at least 1 hour. (The dough can be placed in a zipper-lock plastic bag and refrigerated for several days or frozen for 1 month. If frozen, defrost the dough in the refrigerator.)

Roll out the dough on a lightly floured surface into a 12-inch circle. Lay the dough over the tart pan, and press it into the pan. Trim the dough, and proceed with the recipe as directed.


BLOG DESIGN BY: SHERBET BLOSSOM DESIGNS