Showing posts with label gifts from the kitchen. Show all posts

Monday, December 12, 2011

Chocolate Chip Cookie Dough Fudge


Yes, really.  If that doesn't stop you dead in your tracks, then I don't think you're human.  This is serious stuff.  I have a family recipe that I use for standard fudge, but I like making fun and unique variations as well - peanut butter, pumpkin pie, and white chocolate have all been well-received in the past.  But I'm pretty sure this one surpasses them all.

This comes together pretty easily, and honestly the hardest part is waiting for it to set up!  The fudge was smooth and creamy, with the perfect cookie dough flavor.  This was my test batch, and it passed with flying colors - I'll definitely be including this candy in my holiday baskets.  The only change I'll make is to use mini chocolate chips instead of the full-sized ones.  I just think it will look cuter, and be a little bit easier to eat.

So head into your kitchen and make these now.  You definitely won't regret it.


Chocolate Chip Cookie Dough Fudge
barely adapted from Sweet Confections, via Bake at 350
  • 1 3/4 c. sugar
  • 3/4 cup brown sugar
  • 1/2 cup heavy cream 
  • 1/4 c. milk
  • 1 Tbs corn syrup
  • 3/4 tsp  kosher salt
  • 2 Tbs unsalted butter
  • 1 tsp vanilla extract
  • 1/2 cup flour
  • 1/3 cup mini semi-sweet chocolate chips
Spray an 8x8 inch  baking dish with cooking spray and set aside.

In a 3-quart saucepan, combine the sugars, cream, milk, corn syrup and salt.  Cook over medium heat, stirring occasionally, until the mixture reaches 242 degrees (ie the soft-ball stage).  Remove from heat and stir in the butter, vanilla, and flour.

Pour the mixture into a 9x13 inch casserole dish, and allow to cool until it reaches 110 degrees, 10 to 20 minutes.

Use a large spoon to scrape the mixture in the bowl of a stand mixer fitted with the paddle attachment.  Beat at medium speed until the fudge thickens and holds its shape, 3 to 5 minutes.  Transfer the fudge to the prepared 8x8 inch dish and smooth the top with a spatula.  Sprinkle the chocolate chips over the top, pressing them lightly into the fudge.

Allow to set at least 2 hours.  If it's not setting up, cover and refrigerate for a few hours.  Cut into squares and store in an airtight container.


Wednesday, December 22, 2010

Sugared Cranberries


Have you ever had a cranberry completely on its own?  No sugar, no cooking, just straight out of the bag?  I gave one to Caroline recently because I was cooking something and she asked for it.  This girl loves sour - she'll eat a lemon slice - but her face was priceless when I gave her a cranberry.  Then, just so I didn't feel like the worst mother in the world, I ate one.  And then promptly spit it out.  Really, really tart.  And not good at all.  If anything, it made me feel worse that she actually ate the whole thing.  Then again, she's stopped scavenging for ingredients so much while I'm cooking, so there's a plus...

In any case, this is quite literally one of the easiest things I've posted here.  Just make a simple syrup, then soak the cranberries in it overnight (or up to a few days).  Roll the cranberries in some sugar, and let them dry - and you're done!  The simple syrup infuses the cranberries with a subtle sweetness, then the sugar coating gives them a nice crunch and of course sweetens them up even more.

These pretty, sparkly cranberries were originally intended to be a garnish for the black and white cranberry tarts.  However, the tarts were so pretty on their own that I didn't think these were necessary.  Instead, they became a yummy snack!  Crunchy and on the outside, tart on the inside.  They keep really well, so they are an ideal snack to put out for holiday parties or unexpected guests.  I know you can't tell from the picture, but they really do sparkle and glitter - so pretty!  And Caroline went to town once these were finished - at least she's not scarred for life.


One Year Ago:  Creamy Chicken Lasagna


Sugared Cranberries
Cooking Light, December 2003
  • 2 cups granulated sugar
  • 2 cups water
  • 2 cups fresh cranberries
  • 3/4 cup superfine sugar (or granulated sugar processed for 30 seconds in a food processor)
In a medium saucepan, combine the sugar and water and cook over medium-low heat, stirring until the sugar dissolves.   Bring to a simmer, and remove from heat.  Stir in the cranberries, then transfer the mixture to a medium bowl.  Cover and refrigerate at least 8 hours, or overnight.

Drain the syrup from the cranberries (save it to make yummy drinks, or to soak a cake).  Place the superfine sugar in a shallow dish, and add the cranberries.  Stir lightly to coat completely, then transfer the cranberries to a baking sheet.  Allow to dry at least one hour before serving.


Tuesday, December 21, 2010

Raspberry Cream Puffs for a Virtual Holiday Party


One of my favorite things about writing a food blog is "meeting" so many wonderful people.  I've made some great friends through the food blogging community, and it makes me sad that I most likely won't ever meet most of them.  Apparently Annie of Annie's Eats fame had similar feelings recently, because she decided to host a virtual holiday party and she invited me!  Obviously I jumped at the chance to get to "cook for" some of my favorite food bloggers.  If I can't actually go to a blogger holiday party, attending a virtual one is the next best thing.

Tara from Smells Like Home made these cranberry-lime bellinis.  I love bellinis, and this twist looks really delicious.  We typically drink mimosas at my mother's house on Christmas morning, but maybe I'll mix things up this year and serve this variation instead.

Kelsey of Apple a Day went outside the box as well, with Pepper Berry Cocktails.  They sound intriguing and look gorgeous, so I know I'd be a fan.  I love cocktails that have a savory edge.


Elly of Elly Says Opa was kind enough to serve us a Greek specialty, Dolmades.  They are grape leaves stuffed with rice and herbs.  I love Greek food, and while I've never even had a dolmade, I'd love to try some made by a Greek food queen like Elly!


Nikki from Pennies on a Platter really spoke to me by making 
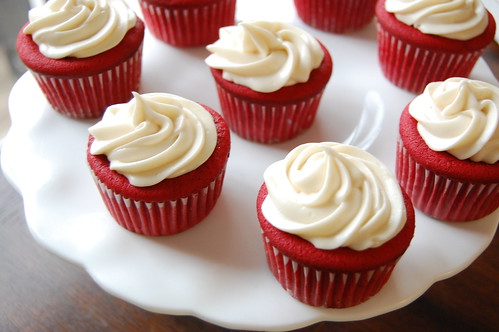
Baked Fontina.  This is probably my favorite appetizer ever, so I would have just planted myself in front of the melted, gooey cheese and not moved all night.


Though if anything could pry me away from melted cheese, it might be French macarons.  Annie of 
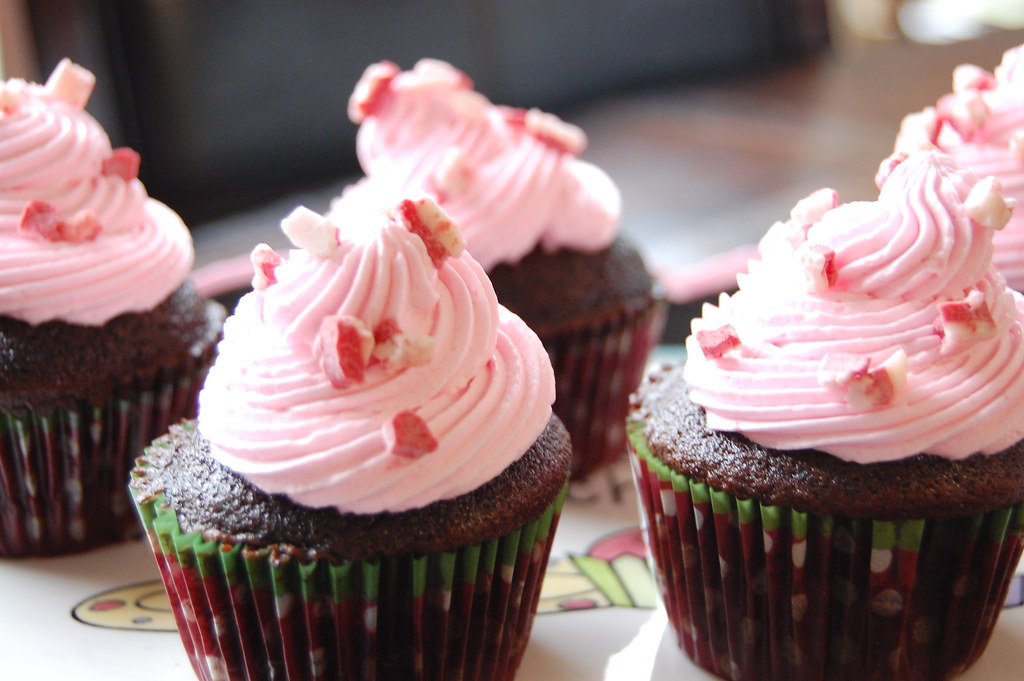
Annie's Eats is a dessert maven, and while I've not yet tried to master the infamous macaron, I certainly can devour them.  Candy cane macarons sound heavenly, and this variation might just force me to try my hand at them by Christmas.


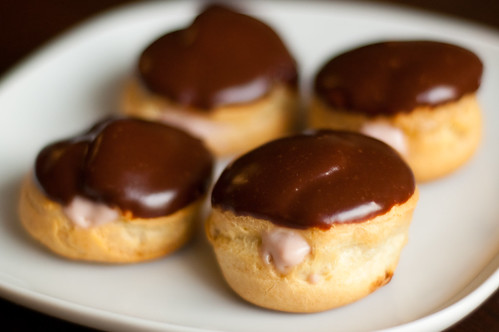
And finally, I contributed these raspberry cream puffs with chocolate glaze.  I look up to and admire all of these ladies, so I wanted to impress them with a great dessert.  I saw the idea for a raspberry filled cream puff in a food magazine this month (though I don't remember which one),but I turned to trusty Baking Illustrated to guide me through the process.

I had never made pate a choux, and I know pastry can be fairly finicky, so I was a little nervous.  Whenever I'm making a complicated recipe I just break it down and go one step at a time.  It really makes it seem less daunting.  So I first made the pastry cream, which I've made many times, then just went step by step for the puffs.  No problems, easy as pie.  I actually just adapted my favorite vanilla pastry cream to be raspberry flavored by adding some raspberry puree and preserves.  It thinned out the pastry cream a little, but it still tasted wonderful.

Thanks so much for hosting us Annie!  I really hope that one day I'll be able to cook with these ladies - seriously, how fun would that be?

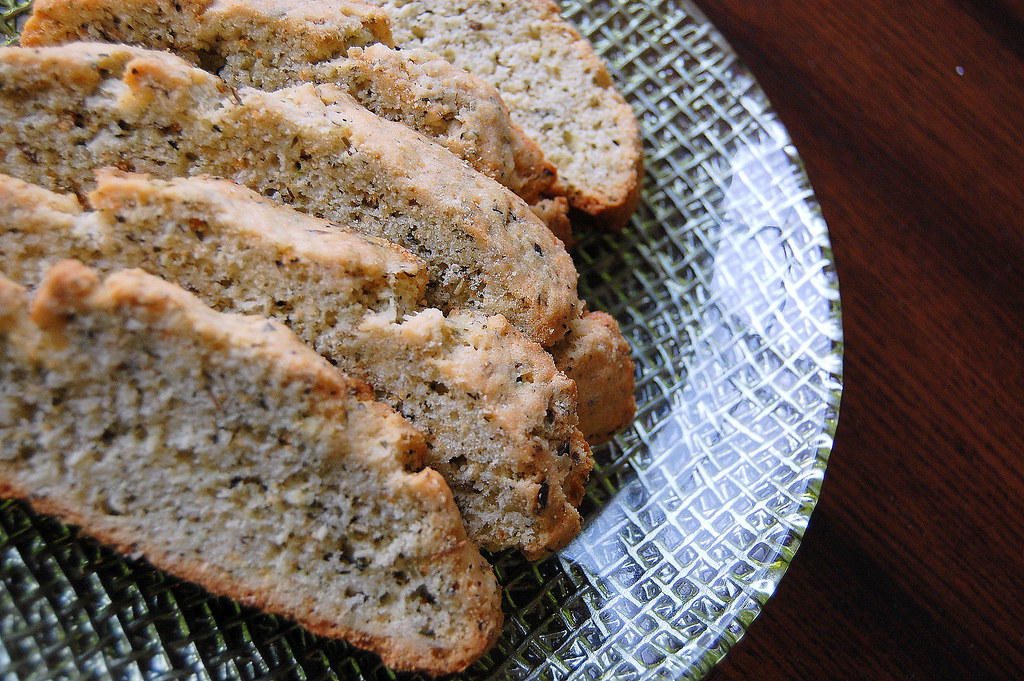
One Year Ago:  Herb and Goat Cheese Biscotti


Raspberry Cream Puffs
Pate a Choux and chocolate glaze from Baking Illustrated
Pastry Cream adapted from Baking Illustrated
makes about 24


Raspberry Pastry Cream
  • 1 1/2 cups half and half
  • 5 Tbs + 1 tsp sugar
  • pinch salt
  • 3 egg yolks
  • 2 Tbs cornstarch
  • 2 Tbs butter
  • 1/2 tsp vanilla extract
  • 4 ounces fresh raspberries
  • 2 Tbs seedless raspberry preserves
In the bowl of a food processor, puree the raspberries until smooth.  Push through a fine-mesh sieve into a small bowl to remove seeds, and whisk in the preserves.


Heat the half and half, 4 tablespoons of sugar, and the salt in a medium heave-bottomed saucepan over medium heat until simmering, sitrring occasionally to dissolve the sugar.


Meanwhile, whisk the egg yolks in a medium bowl until thoroughly combined.  Whisk in the remaining 1 tablespoon plus 1 teaspoon of sugar and whisk until the sugar has begun to dissolve and the mixture is creamy, about 15 seconds.  Whisk in the cornstarch until combined and the mixture is pale yellow and thick, 30 seconds.


When the half-and-half mixture reaches a full simmer, gradually whisk into the egg yolk mixture to temper.  Return the mixture to the saucepan, scraping the bowl with a rubber spatula.  Return to a simmer over medium heat, whisking constantly, until a few bubble burst on the surface and the mixture is thickened and glossy, about 30 seconds.


Off heat, whisk in the butter and vanilla.  Strain the pastry cream through a fine-mesh sieve set over a medium bowl, and whisk in the raspberry puree.  Press a piece of plastic wrap directly on the surface to prevent a skin from forming and refrigerate until cold and set, at least 3 hours or up to 2 days.


Pastry
  • 2 large eggs, plus 1 egg white
  • 5 Tbs unsalted butter, cut into 10 pieces
  • 2 Tbs whole milk
  • 6 Tbs water
  • 1 1/2 tsp sugar
  • 1/4 tsp salt
  • 1/3 cup all-purpose flour, sifted
Preheat the oven to 425 degrees and line a large baking sheet with parchment paper.

Beat the eggs and egg white in a measuring cup with a pourable spout.  You should have 1/2 cup - discard the excess and set aside.

Combine the butter, milk, water, sugar, and salt in a small saucepan and bring to a boil over medium heat, stirring occasionally.  As soon as the mixture reaches a full boil, remove from heat and stir in the flour using a wooden spoon.  Stir until the mixture is well combined and clears the sides of the pan.

Return the pan to low heat and cook, stirring constantly, until the mixture is slightly shiny, looks like wet sand, and tiny beads of fat appear on the bottom of the saucepan, about 3 minutes (the paste should register 175-180 degrees)

Immediately transfer the mixture to a food processor and process with the feed tube open for 10 seconds to allow the mixture to cool slightly.  With the machine running, slowly add the eggs in a steady stream through the feed tube.  Once all the eggs have been added, scrape down the sides of the bowl, then process 30 seconds, until a smooth, thick, sticky paste forms.

Transfer the paste to a pastry bag fitted with a 1/2-inch round tip.  Pipe the paste into 1 1/2 inch mounds on the prepared baking sheet, leaving about 1 inch between them.  You should be able to fit 24 on each sheet.  Dip the back of a spoon into a bowl of cold water and smooth the surface of the mounds.

Bake for 15 minutes without opening the oven door.  Reduce the heat to 375 and bake an additional 8-10 minutes, until the pastries are golden-brown and fairly firm.  Remove the puffs from the oven, and using a paring knife, cu a 3/4-inch slit into the side of each one to release steam.

Turn off the oven, return the pan to the oven, and prop the door open with the handle of a wooden spoon.  Allow to dry until the centers are just moist but not wet, and the puffs are crisp, about 45 minutes.  Transfer the puffs to a wire rack to cool completely.

Chocolate Glaze
  • 3 Tbs half-and-half
  • 2 ounces bittersweet chocolate, finely chopped
  • 1 cup confectioners' sugar, sifted
Place the half-and-half and chocolate in a microwave safe bowl.  Heat 30 seconds at a time, until mixture is steaming.  Whisk well after each heating, and stir well to melt the chocolate.  Add the sugar and whisk until completely smooth.

To assemble the cream puffs, use the tip of a paring knife to cut an "x" into the side of each puff.  Fill a pastry bag fitted with a 1/4-inch round tip with pastry cream and pipe into each X until the cream starts to ooze back out.

Dip the tops of each cream puff into the chocolate glaze, and allow to sit at room temperature until the chocolate is set.  Serve immediately or refrigerate until ready to serve.


Monday, December 20, 2010

Red Velvet Brownies with Cream Cheese Swirl


I kind of hate to admit this, but until recently I wasn't really the biggest fan of red velvet cake.  I didn't think it was anything special - just chocolate cake with way less chocolate than I prefer.  Don't get me wrong - I still ate it - it is cake after all, and I've never been one to turn down cream cheese frosting.  Now, however, I appreciate it much more for what it is - a soft and tender cake with just a hint of chocolate, and a nice tang from the buttermilk (or sour cream).  Paired with cream cheese frosting, it is now one of my favorite cake flavors.

These brownies combine the fudginess of a good brownie with the tang of red velvet cake.  I was really excited when I saw this recipe, but upon closer inspection it just looked like a light chocolate brownie with red food coloring.  To me, the defining characteristic of red velvet cake is buttermilk.  So I added a bit of buttermilk, as well as some vinegar.  I also opted to incorporate a cream cheese swirl rather than using frosting.  The end result was rich and fudgy like a good brownie, but had the flavors of a good red velvet cake - the best of both worlds if you ask me. 


One Year Ago:  Chocolate Peppermint Cupcakes


Red Velvet Brownies with Cream Cheese Swirl
Brownies adapted from Southern Living, December 2010
Cream Cheese Swirl adapted from Cook's Illustrated
  • 4 oz bittersweet chocolate, chopped
  • 3/4 cup (1 1/2 sticks) butter
  • 2 cups sugar
  • 4 large eggs
  • 1 1/2 cups all-purpose flour
  • 1 (1-oz) bottle red food coloring
  • 1 1/2 tsp baking powder
  • 1/8 tsp salt
  • 1 tsp vanilla extract
  • 1/4 cup buttermilk
  • 1 tsp white vinegar
Cream Cheese Swirl
  • 4 oz cream cheese, at room temperature
  • 2 Tbs sugar
  • 2 Tbs sour cream
  • 1/4 tsp vanilla extract
  • 1/2 large egg yolk
Preheat the oven to 350 degrees.  Line a 9x9 inch square baking dish with two pieces of aluminum foil, folding ends over the edges.  Spray with cooking spray.

Combine the chocolate and butter in a large, microwave safe bowl.  Cook 30 seconds at a time until melted, stirring well after each time.  Whisk in the sugar.  One at a time, add the eggs, whisking well between each addition.  Stir in the flour, food coloring, baking powder, salt, buttermilk, vanilla, and vinegar.  Combine well, then pour into the prepared baking dish.

In the bowl of a stand mixer fitted with a paddle attachment, beat the cream cheese, sugar, vanilla, and egg yolk.  Drop spoonfuls over the brownie batter, then use a table knife to swirl into the batter.

Bake 40-50 minutes, or until a toothpick inserted into the center comes out with just a few crumbs attached.  Allow to cool completely before slicing.


Wednesday, December 15, 2010

Gingerbread Whoopie Pies


It seems like every season I develop an obsession with a particular ingredient.  This spring it was asparagus.  The summer had me obsessed with tomatoes, and this fall was the apple.  I'm going to go out on a limb and proclaim this year's holiday obsession to be gingerbread.  Or maybe I shouldn't limit it to gingerbread, and just go with ginger instead.  Regardless, I've been enjoying gingerbread oatmeal in the morning,  cake, gingersnaps as a snack, and now these whoopie pies.

At the end of last year, The New York Times proclaimed whoopie pies to be the new cupcake.  Now, I'm not sure if they can replace cupcakes, but they are a lot of fun.  They have everything going for them that cupcakes do, plus they are portable and neater to eat.

I've actually had the idea to make a gingerbread whoopie pie since this fall, and I figured that I would be able to find a recipe.  King Arthur Flour, one of my favorite sources for baking, has one, but it wasn't quite what I was looking for.  I had no issues adapting it to my taste though.  The classic filling for whoopie pies is marshmallow, but I think cream cheese frosting makes more sense with the spiciness of gingerbread.  However, when I tasted the icing with a cookie scrap, it lacked something.  I added some lemon zest and extract, and the combination of the bright citrus with the spicy gingerbread was spot on.  I was actually a little apprehensive about the combo because I was afraid that ginger + lemon =cough medicine, but it was really really delicious.  So much so that I had to get these out of my house asap.  I took a few to my in-laws, gave some to my sister-in-law, then donated the rest to my friend Michelle and her family.  Only once I got home, I was profoundly sad that I hadn't saved an extra for myself.  Oh well, I guess I will just have to make another batch...


Gingerbread Whoopie Pies with Lemon Cream Cheese Filling
adapted from King Arthur Flour
  • 3 3/4 cups all-purpose flour
  • 1 tsp salt
  • 1 tsp baking soda
  • 1 1/2 tsp ground ginger
  • 1 1/2 tsp ground cinnamon
  • 1/4 tsp ground cloves
  • 1/4 tsp ground nutmeg
  • 3/4 cup unsalted butter, softened (1 1/2 sticks)
  • 3/4 cup lightly packed brown sugar
  • 1 egg
  • 3/4 cup molasses
  • 3/4 cup buttermilk
Lemon Cream Cheese Filling
adapted from Cream Cheese Frosting
  • 12 ounces cream cheese, cold
  • 8 Tbs unsalted butter, softened
  • 1 tsp vanilla extract
  • 1 tsp lemon extract plus more as desired
  • zest of 1 lemon
  • 3 3/4 -4  cups confectioners' sugar, sifted
Preheat the oven to 350 degrees.  Line 2 baking sheets with parchment paper.

In a medium bowl, whisk together the flour, salt, baking soda, and spices.  In the bowl of a stand mixer fitted with a paddle attachment, cream the butter and sugar at medium speed until light and fluffy.  Mix in the egg, beating until incorporated, scraping down the sides of the bowl if needed.

With the mixer on low speed, mix in half the dry ingredients.  Add the molasses, then the remaining dry ingredients.  Finally, add the buttermilk, mixing until just incorporated.

Use a medium cookie scoop or a pastry bag fitted with a round tip to form the cookie shapes on the prepared baking sheet.  Space the cookies a few inches apart, and bake 9-12 minutes, rotating the cookie sheets halfway through, until the cookies are cooked through and spring back when lightly pressed with your finger.

Remove from oven and allow to cool 5 minutes, then transfer to a wire rack to cool completely.  Repeat with remaining dough.

Meanwhile, make the filling.  In the bowl of a stand mixer fitted with the paddle attachment, cream the cream cheese and butter until smooth and creamy.  Add the vanilla, lemon extract, and lemon zest, and mix to combine.  With the mixer on low speed, slowly add the sugar.  Once it is incorporated, increase the speed to medium and beat until light and fluffy.

Match the cookies together by size, and pipe or spread filling over half the cookies.  Form sandwiches with the remaining halves, and serve or store in an airtight container.


Tuesday, October 26, 2010

Halloween Candy Bark

Go ahead and file this little treat under the "why didn't I think of that" category.  It seems so simple, really.  Peppermint bark is so popular around the holidays, so why not make a fall version?  Take leftover candy and basically make a giant candy bar.  The ultimate candy bar, if you will.  Seriously so genius.  Let me break it down for you:  You start by spreading a layer of melted chocolate on a baking sheet, then you top that with broken candy bars, honey roasted peanuts, and Reese's pieces, and finish it off with a drizzle of white chocolate.  Once the chocolate sets, you break it into chunks, and feast!

The recipe calls for Butterfingers, Reese's cups and Heath Bars, but you could certainly mix things up and use pretty much any variety or combination of candy bars.  I think this would also be delicious with marshmallows, pretzels, or oooh maybe Fritos!

If you can wait until after Halloween, this is a great way to use up candy that you have left over from trick-or-treaters, but I wouldn't blame you one bit if you went right out and bought the ingredients to make it tomorrow.  I put a few in a plastic bag, tied it with a ribbon, and gave it to a friend who had us over for dinner.  It made such a cute presentation, that I plan to do the same thing for our neighbors and Caroline's teachers at school.  Anything to get this addictive snack out of my house.


One Year Ago:  Creepcakes


Halloween Peanut Butter and Toffee Candy Bark
Bon Appetit, October 2010
  • 1 pound bittersweet chocolate chips
  • 3 (2.1-ounce) Butterfinger bars, cut into 1-inch chunks
  • 3 (1.4-ounce) Heath bars, cut into 1-inch chunks
  • 8 (0.55-ounce) peanut butter cups, each cut into 8 wedges
  • 1/4 cup honey roasted peanuts
  • Reese's pieces, and/or yellow and orange M&M's
  • 3 ounces white chocolate
Line a baking sheet with foil.  Melt the bittersweet chocolate in a medium saucepan over low heat, stirring constantly.  Remove from heat and pour over the foil-lined baking sheet.  Spread to an even layer that is about 12x10 inches.

Sprinkle the candy and peanuts over the chocolate, pressing lightly to adhere.  Be sure the all the candy is in contact with the chocolate.

Melt the white chocolate over low heat, stirring constantly.  Use a spoon or a fork to drizzle the white chocolate over the candy.

Chill at least 30 minutes, or until firm.  Break into 1-2 inch chunks.


Monday, February 8, 2010

Valentine's Cupcake Ideas


I made some cupcakes for a friend last week.  She wanted Valentine's themed decorations, but since they were mini-cupcakes, I wanted to keep it simple.  I made 75 cupcakes - 25 vanilla, 25 chocolate, and 25 red velvet


I used a different tip to frost each cupcake, then gave each one an adornment.  I left the cream cheese on the red velvet plain, only because of the different candies and sprinkles I tried out, none stood out to me.  I guess sometimes less is more!


They were all super fun to make, and I hope they were enjoyed at the party!


Monday, December 28, 2009

Red Velvet Cupcakes with Cream Cheese Icing


I mentioned in another post that I recently bought The Pastry Queen Christmas.  I seriously cannot say enough good things about it.  It is chock full of delicious treats and indulgences.  I've made no less than 5 recipes out of it in the month that I've had it.

These red velvet cupcakes met my already exceedingly high expectations I have of her recipes.  They are moist and sweet, without being cloyingly so.  The vinegar and sour cream gave them a nice tang, and the chocolate richened the flavor.  I didn't use her suggested marscapone cream cheese icing; rather, I used a pretty standard one from Annie's Eats.  It was so smooth, and piped so beautifully.  I have already made these cupcakes several times, and its not looking to slow down anytime soon!


Red Velvet Cupcakes
Rebecca Rather, The Pastry Queen Christmas
makes 24 cupcakes
  • 1/4 cup (2 ounces) red food coloring
  • 3 1/2 Tablespoons unsweetened cocoa powder
  • 1 cup (2 sticks) unsalted butter, at room temperature
  • 1 3/4 cups sugar
  • 2 large eggs
  • 2 cups cake flour
  • 1 1/2 cups all-purpose flour
  • 1 teaspoon kosher salt
  • 1 teaspoon baking soda
  • 2 teaspoons vanilla extract
  • 1 cup buttermilk
  • 1 cup sour cream
  • 1 Tablespoon distilled white vinegar
Preheat the oven to 350.  Line 2 cupcake pans with liners and spray with cooking spray.

In a small bowl, combine the cocoa powder and food coloring with a fork, mashing and mixing until it forms a paste.  Set aside.

In the bowl of a stand mixer fitted with a paddle attachment, cream the butter and sugar at medium-high speed until it is light and fluffy, about 2 minutes.  One at a time, add the eggs, stopping to scrape down the bowl as needed, and allowing each one to be fully incorporated.  Reduce the speed to low, and add the cocoa paste.  Increase to medium speed and beat the batter for about 4 minutes.

Meanwhile, sift together the cake flour, all-purpose flour, salt, and baking soda.  Stir the vanilla into the buttermilk (this can be done in a measuring cup).

Add the flour and buttermilk in increments, alternating between each addition.  Start and end with the dry ingredients.  Beat on medium speed until just combined.

Add the vinegar and sour cream and beat at low speed until just combined.

Divide batter evenly among the muffin tins, filling each one about 3/4 full.  Bake 17-22 minutes, only until the cupcakes feel firm to the touch  and a toothpick inserted into the center comes out clean.  Be careful not to overbake, as the cupcakes will dry out easily.

Remove from oven and allow to cool in pans for 5 minutes.  Remove the cupcakes from pan and allow to cool completely before frosting.

Cream Cheese Frosting
from Annie's Eats, originally from Confections of a Foodie Bride
  • 12 ounces cream cheese (still cold - not softened)
  • 7 1/2 Tablespoons unsalted butter, softened
  • 1 Tablespoon vanilla extract
  • 3 3/4 cups confectioners sugar, sifted
Cream the butter and cream cheese in the bowl of a stand mixer fitted with the paddle attachment, until creamy and smooth, 2-3 minutes.  Add the vanilla extract.  Gradually add the confectioners sugar over low speed, and when well combined, increase to medium.  Beat until smooth. 


Monday, December 21, 2009

Herb and Goat Cheese Biscotti


It isn't often that I see a recipe and want to try it immediately.  Usually, I will save or star it in my google reader, then come back to it weeks (or even months) later when I'm lacking inspiration.  I saw Giada make this savory biscotti on her show, and in 2 hours I had made it myself.  Pretty much anything with goat cheese or herb de provence will always catch my eye, and in combination with my newfound love for biscotti, I just had to make it right.then.

And it didn't disapoint.  It is crunchy, savory, and so flavorful.  The goat cheese definitely plays a supporting rather than a starrring role.  That belongs to the herbs de provence.  These made a wonderful addition to my holiday gift baskets this year; I figured it might be nice to have something savory to round out all the sweets. 


Savory Biscotti
from Giada de Laurentiis
  • 2 cups all-purpose flour
  • 3 tablespoons herbes de Provence
  • 1 1/2 teaspoons baking powder
  • 3/4 teaspoon kosher salt
  • 1/2 cup (1 stick) unsalted butter, at room temperature
  • 1/4 cup (2 ounces) goat cheese, at room temperature
  • 3 tablespoons sugar
  • 2 eggs, beaten, at room temperature
Preheat the oven to 350, and position the rack in the middle position.  Line a baking sheet with parchment paper.

Whisk together the flour, herbs de Provence, baking powder, and salt in a medium bowl.

In a stand mixer fitted with a paddle attachment, beat the goat cheese and butter until smooth.  Beat in the eggs and sugar, stopping to scrape down the sides if necessary.  In 3 batches, add the flour and herb mixer, mixing until just combined.

Turn out dough onto the baking sheet.  Using damp hands, shape the dough into a 13 x 4 inch log.  Bake until golden brown, about 30 minutes. 

Cool on a baking sheet for 30 minutes.

Using a serrated knife, cut the log on the diagonal into 1/2-1 inch slices.  Transfer slices to the baking sheet, cut side down. 

Bake an additional 15 minutes, then transfer to a cooling rack to cool completely.  Store in an airtight container.


Friday, December 18, 2009

Chocolate Peppermint Cupcakes


A few weeks ago, I agreed to make some cupcakes for a friend's birthday party.  She wanted to do something fun and seasonal for the adults, so I suggested chocolate cake with peppermint buttercream.  I wasn't able to attend the party, but from what I've heard, they were pretty popular.  Since then, I've made them a few more times, and they are always a hit!  I used my favorite choclate cake recipe, then a standard buttercream recipe.  I just used mint extract in place of most of the vanilla, and used a little pink gel coloring to make them look minty and pretty.  Finally, I sprinkled some Andy's mints on top to complete the look.


Peppermint Buttercream
basic buttercream adapted from Cook's Illustrated
  • 2 1/2 sticks unsalted butter, at room temperature
  • 3-4 cups confectioner's sugar, sifted
  • 1/4 teaspoon salt
  • 1/2 teaspoon vanilla extract
  • 2 teaspoons mint extract
  • 2 Tablespoons heavy cream
Cream the  butter over medium speed in the bowl of an electric stand mixer fitted with the whisk attachment.  When pale and fluffy, gradually add the confectioner's sugar in batches, mixing well after each addition.  Add the extracts, salt, and heavy cream, and beat until light and fluffy, about 5 minutes.  If using, add a small amount of pink or red gel paste food coloring and mix well to combine.


Monday, December 7, 2009

Salted Cocoa-Roasted Nuts


If you are looking for a fun and festive addition to your holiday gift baskets, look no further!  If you are looking for something to munch on while you cook, bake, or decorate, look no further!  If you are looking for something to eat for no reason....look no further!  These are insanely addictive.  And seriously yummy.  Its no secret that I'm a big fan of the sweet/salty combo, and these nuts are exactly that.  The coating is egg whites, and it keeps the nuts feeling kind of light and fluffy.  I used a combination of hazelnuts, pecans, and walnuts, but I think next time I'll just use hazelnuts and pecans.  They were my favorite, anyway.  Next time I might add a bit of cinnamon to give them even more flavor!

These babies are getting packaged up as part of my holiday gift baskets.  I'm also going to have several bags ready to go for all the parties we will be attending in the next few weeks.  They'd make great hostess gifts.  Or great to give to last minute visitors that stop by. 


Salted Cocoa-Roasted Nuts
from Joy the Baker, adapted from Essence of Chocolate
  • 3 cups mixed nuts (I suggest hazelnuts and pecans)
  • 8 Tablespoons (1 stick) unsalted butter, cut into chunks
  • 2 large egg whites
  • 1 cup sugar
  • 1 Tablespoon unsweetened cocoa powder
  • 1 teaspoon kosher salt
Preheat oven to 325.  Spread nuts in a single layer on a baking sheet, and bake for 10 minutes, or until slightly browned and fragrant.  Transfer to a large bowl and allow to cool.

Scatter the chunks of butter on the baking sheet, and return to oven to melt the butter.  This will only take a few minutes, so keep a close eye on it.  Remove from oven and tilt the pan to spread the butter all over.

Meanwhile, beat the egg whites in the bowl of a stand mixer over medium-low/medium speed.  When the egg whites are just starting to hold their shape, add the sugar and increase the speed to medium-high for 2 minutes.  They will be shiny and sticky, and a little thinner than meringues. 

Sift the cocoa over the egg whites, and fold in. Mix the egg white mixture into the nuts, and spread onto the baking sheet. 

Bake for 10 minutes, then gently stir.  Return the nuts to the oven and bake another 10 minutes.  Stir again, and sprinkle the salt over the nuts.  Return for another 10 minutes, then remove.  Give the nuts one final stir, breaking up chunks as you go.  When done, the coating should be crisp, and the butter absorbed by the nuts. 

Allow to cool completely.  They can be stored in an airtight container up to 1 week.


BLOG DESIGN BY: SHERBET BLOSSOM DESIGNS