Are you a big Pandora-listener? What's your favorite station? We are definitely dating ourselves, but our Pandora is pretty much always playing Summer Hits of the 90's. It's just the best mix of songs, and they bring back SO many memories! Do yourself a favor and start listening to this station ASAP!
So if I were to put together a "playlist"of my summer hits of 2017, it would include some pretty amazing recipes. Summer is just getting started, so you still have plenty of time to make all of these killer recipes. While you listen to your Summer Hits of the 90's station. And for both the recipes and music… you can thank me me later ;)
My
grilled and chopped summer veggie salad will forever and ever be my favorite summer recipe. It is just so perfect in every way. If I'm entertaining, I like to serve it with fresh tomato bruschetta and
homemade peach wine coolers. It is by far my favorite menu for summer entertaining.
Or rather, I should say that it WAS my favorite menu for summer entertaining. Because the peach wine cooler has been replaced by the
Rosé Slushie. Last spring, my Annie visited ATL for the weekend, and we found ourselves at The Luminary (RIP) at Krog St Market. Once we had one rosé slushie, we parked ourselves on the patio and stayed for waaaaaaay too long enjoying the amazing cocktail. Since then, we found the exact recipe online, and it has become THE drink of summer. Should you not be in the mood for frose´ might I suggest these
rose´ passion fruit spritzes? They make for mighty nice pool sipping. #roséalldayeveryday
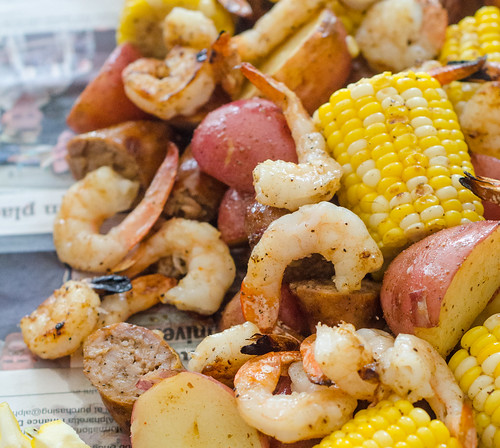
Another favorite dish for entertaining is this
Low Country Grill. I make this a few times every summer, including on vacation when I can get the freshest shrimp imaginable! I also like to grill this up randomly for a weekend lunch while the kids play outside. It feels special somehow to have a fun lunch like this for no reason! However, garlic-cheddar biscuits on the side are non-negotiable.
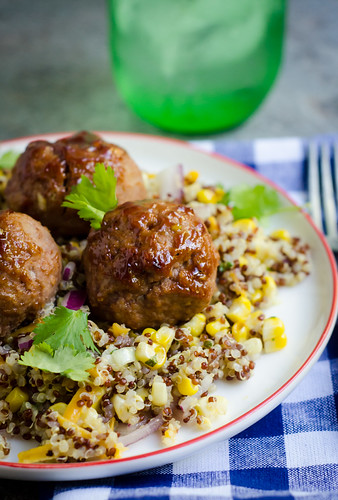
We generally eat pretty healthy at home, so it would be remiss to leave off my favorite healthy dinners. The
BBQ Turkey Meatballs over Cheddar-Corn Quinoa probably top the list, and this reheats beautifully, making it great for lunches the next day -- especially with some fresh chopped spinach mixed in! Other healthy weeknight favorites:
spicy cilantro grilled chicken
grilled tuna and avocado salad
California-style turkey burgers (on lettuce wraps to keep it extra light!)
Grilled Potato BLT Salad with Blue Cheese Dressing
Tomato and Black Eyed Pea Salad (topped with grilled chicken or pork tenderloin)
Strawberry Poppyseed Chicken Salad
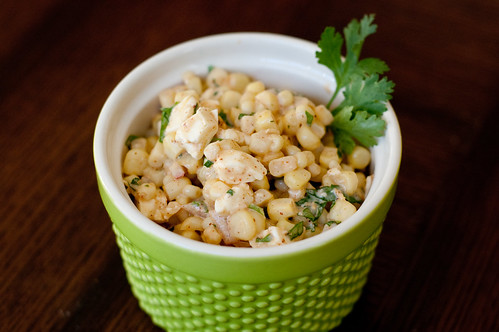
My side dishes are predictable and basic -- almost always including corn in some form, and watermelon in some form. This
Mexican Street Corn Salad is a staple anytime we have Mexican food for dinner...so... weekly? I love it with the aforementioned spicy cilantro chicken, these
BLT tostadas, as a salsa of sorts over grilled steak, and with any sort of grilled tacos, fajitas, etc. Its just so good.
While I highlighted the rose´ earlier, I have a few other cocktails you need to drink this summer.
The Porch Swing is staple because I always have all the ingredients on hand for a cocktail emergency or impromptu gathering. It's also a great pool drink -- light and refreshing and not overly boozy. And the
watermelon margaritas are also a total fave. Love them so much, and they're a standard for entertaining since you can make a giant pitcher. Cheers!
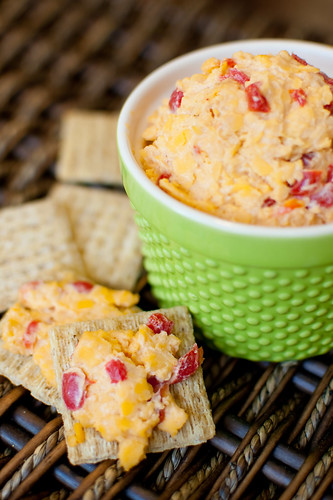
Finally, it would be a travesty to have a roundup of my fave summer recipes and leave off
pimento cheese. I mean, this is a year-round food, but it's especially wonderful in the summer - for snacking at the pool (try it with cucumber slices instead of chips or crackers!), taking to a cookout, slathering on BLTs or grilled burgers, etc. I ask you -- what is not improved upon by the addition of pimento cheese? Pssst. This B
aked Tex-Mex Pimento Cheese Dip is a huuuuuuge favorite as well, and one of my go-to appetizers.
To close out, I'll state the obvious -- I disappeared again! I have no real explanation, its just not really been a priority for me, I'm sorry to say. I'm busy with my kids, my mom went through cancer treatment last fall and winter, and with the current political climate in this country, I just haven't had it in me to post regularly. I cant make any promises, but I'm going to try to pick this dusty blog back up and see where it takes me. There will be little life updates along the way -- I owe you guys some pics of the kids -- along with more great recipes, party ideas, etc. But here's a start, and hopefully I've given you some inspiration for your summer meals! Happy summer!