Thursday, July 14, 2011

Fresh Peach Ice Cream


Growing up, the Fourth of July was one of my favorite holidays.  My sweet grandpa hosted a family reunion every year, and it was pretty much the highlight of my summer.  It was a potluck with lots of yummy food, but for me the highlight was swimming and peach ice cream.  He had an in-ground pool, so all the kids just spent the entire day swimming.  We only got out for 2 things: 
  1. to eat lunch - and then wait 30 minutes before we were allowed back in of course (does anyone still follow that rule?)
  2. To eat ice cream.  A few hours after lunch, Pop would pull out his hand-cranked ice cream maker and churn fresh peach ice cream.  
It was nothing fancy - just vanilla ice cream with peaches mixed in.  But I loooooved it.  Nothing says summer in the south like fresh peach ice cream.  Especially when its still the consistency of soft serve, and the peaches are so ripe that they just melt in your mouth.  I can still remember standing around Pop with my cousins just waiting for him to deem it frozen enough for us to eat ... and then wait another 30 minutes before we were allowed back in the pool.

Lately I've been feeling really nostalgic about my childhood memories, and as a result I've been dying to make peach ice cream.  Plus, it's delicious.  And even though the peach ice cream of my childhood was as basic as it gets, I set out to find a recipe that elevated it.  Of course Cook's Illustrated had what I was looking for.

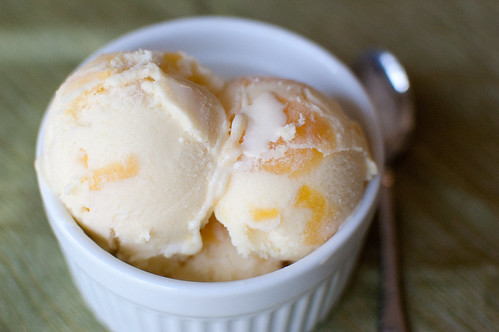
This is a pretty standard custard-style ice cream (meaning it's made with egg yolks), but it is brought to new heights by the peaches.  They are first macerated for a while, then briefly cooked to form a peach syrup + softened peaches for mixing into the ice cream.  Before the ice cream base is churned, the syrup is mixed into it, and then the peaches are added to the mix just as it's finished churning.  You are left with a subtly peachy ice cream base studded with bits of sweet and juicy peaches.

Since Caroline is allergic to eggs, she can't enjoy this particular batch of ice cream, but I definitely plan to make a batch using no eggs later this summer - because even though my Pop is still alive, he no longer hosts the family reunion and his ice cream making days are behind him.  So we'll just create our own peach ice cream memories, and maybe Caroline have some happy memories of the summer right before her world was turned upside down by a baby boy!


Fresh Peach Ice Cream
adapted from Cook's Illustrated
makes about 1 quart
  • 3 medium peaches, peeled, pitted, and cut into 1/2-inch cubes (about 2 cups)
  • 1/2 tsp lemon juice
  • pinch salt
  • 1 cup + 6 Tbs granulated sugar
  • 1 1/4 cups whole milk
  • 1 1/3 cups heavy cream
  • 6 large egg yolks
  • 1 tsp vanilla extract
  • 2 Tbs Peach Schnapps
Combine the peaches, lemon juice, salt, and  1/2 cup sugar in a medium saucepan.  Stir well and allow to sit at room temperature for 1-2 hours.

Heat over medium-high heat until the peaches soften slightly, about 3-4 minutes.  Stir in the Peach Schnapps and refrigerate at least 4 hours, or overnight.

Meanwhile, position a fine-mesh sieve over a large bowl set in an ice bath. 

Whisk the egg yolks with 6 tablespoons of sugar until the mixture is pale yellow.

Combine the milk, cream, and 1/2 cup sugar in a medium saucepan.  Cook over medium heat, stirring occasionally, until steam appears, about 5-6 minutes.  Stream half the mixture into the egg yolks, whisking constantly. 

Return the milk-yolk mixture to the saucepan and set over medium-low heat.  Whisking constantly, cook until the mixture reaches 180 degrees and thickens slightly.  The foam will subside and steam will rise from the custard as it approaches 180 degrees.

Remove from heat and strain mixture into the prepared bowl.  Stir often until the mixture cools to room temperature, then stir in the vanilla extract. 

Cover and refrigerate for at least 2 hours (can also be left overnight).

When ready to churn, strain the syrup from the peaches into the vanilla custard.  Freeze the ice cream according to your manufacturer's instructions, and when it's done, add the peaches and churn just until they are incorporated, about 30 seconds.

Transfer to an airtight container and freeze until firm, at least 2 hours.


Tuesday, July 12, 2011

Oreo Cheesecake Cupcakes


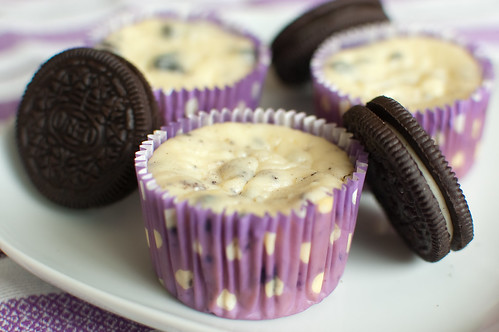
Oreo cheesecake holds a very special place in my heart.  Our groom's cake at our wedding was not just cheesecake, but oreo cheesecake.


And since I love reliving our wedding day, I'll share a picture.  This is the Ramblin' Wreck, which is sort of a second mascot for Georgia Tech, behind Buzz.  It is driven onto the field at the start of every home game.  Not only did we have a replica of the Wreck for the groom's cake, but we also used the real thing as our getaway car from the reception.  Driving through the streets of downtown Atlanta in the Wreck was one of the most fun experiences ever.

Anyway, many of our guests still comment on the cake.  I have to admit that even though our wedding cake was drop-dead gorgeous, this cake definitely upstaged it.  It was not only incredibly detailed and ornate, but come on - it was oreo cheesecake!  And the entire cake was demolished within 10 minutes.  I'm glad I got a bite of it when we cut into it, otherwise I would have been out of luck!

So when I came across these cute little mini cheesecakes in Martha Stewart's Cupcakes, I knew that Joey would love them.  And of course he did - and so has everyone else who tried them!  I've actually made these cupcakes several times, though I'm just now getting around to sharing them on the blog.  They are so so simple.  A whole oreo is used for the crust, so no crushing cookies, pressing crusts, prebaking, etc.  And the filling comes together in less than 5 minutes.  It is super simple, and only a few ingredients - cream cheese, cookies, sour cream (though I used Greek yogurt last time I made these with no problem), eggs, and vanilla.  They do require a bit of preplanning, since they need to chill for a few hours before serving, but I'd say the hard part is actually waiting for them to chill before digging in!

Since (obviously) I look back on our wedding day with fond memories, every time I make these cupcakes I'm reminded of not only of such a wonderful day, but also of our incredibly awesome cake!


Cookies and Cream Cheesecakes
Martha Stewart's Cupcakes
makes 30 cupcakes
  • 42 Oreos - 30 left whole, and 12 coarsely chopped
  • 2 lbs cream cheese, room temperature
  • 1 cup sugar
  • 1 tsp vanilla extract
  • 4 large eggs, lightly beaten
  • 1 cup sour cream or Greek yogurt
  • pinch of salt
Preheat the oven to 275 degrees.  Line muffin tins with paper liners, and place 1 Oreo in the bottom of each cup.

With an electric mixer on medium-high speed, beat the cream cheese until smooth, scraping down the sides of the bowl as needed.  Gradually add the sugar, and beat until smooth.  Beat in the vanilla, then drizzle in the eggs.  When well combined, mix in the sour cream and salt.  Stir in the chopped cookies by hand.

Divide the batter evenly among the muffin tins, filling each one almost to the top.  Bake, rotating tins halfway through, until the filling is just set, about 22 minutes.

Transfer the tins to wire racks to cool completely, then refrigerate (in tins) at least 4 hours.  Remove from tins just before serving.


Monday, July 11, 2011

Grilled Blueberry BBQ Salmon


Four things are well-documented in our house:
  1. Caroline is a blueberry fiend.
  2. I love sweet + savory combos (i.e. fruit with grilled meat)
  3. I've been grilling so much lately that our neighbors joke that my baby will be born a little charred (My belly gets dangerously close to the heat source sometimes).
  4. Pregnancy makes me crave anything with bbq sauce.  
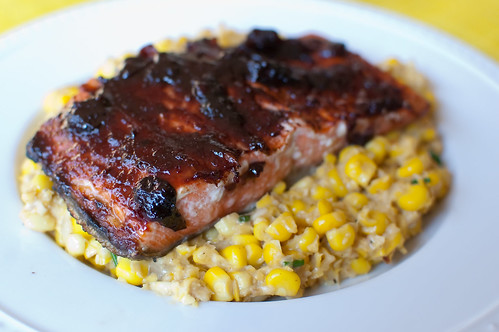
So given all of this, it is obvious that this salmon was a big hit with all of us. I know the combination might sound a little weird, but trust me on this.  The blueberries give the bbq sauce just the right amount of sweetness, without being overpowering.  And the combination of the sweet and savory sauce + the rich and buttery salmon is a match made in heaven. 

Usually I can make an educated guess on Joey's reaction to our dinners.  Sometimes I'll make something knowing that it will be a home run, and sometimes I know that it won't be his favorite (but he always eats it anyway).  I actually didn't expect him to love this as much as he did, but he kept going on and on about how good it was. 

This was definitely a quick and easy dinner, and I served it with homemade creamed corn (pictured here - would you guys want the recipe for that as well?) and some grilled zucchini.  Blueberries, corn, and zucchini - all wonderful summer produce, all things that contributed to our wonderful dinner.


Grilled Blueberry BBQ Salmon
adapted from How Sweet it is, sauce adapted from The Neely's
  •  4 (6-oz) salmon fillets, skin on
  • kosher salt and freshly ground pepper
  • olive oil
  • 1/2 cup fresh blueberries, rinsed and patted dry
  • 1/3 cup ketchup
  • 1 Tbs apple cider vinegar
  • 1 Tbs balsamic vinegar
  • 2 Tbs brown sugar
  • 1/4 tsp garlic powder
  • 2 Tbs grated onion
  • 1 tsp Dijon mustard
  • 1 tsp Worcestershire sauce
  • pinch red pepper flakes
Prepare grill to its highest setting.

Meanwhile, pat the salmon dry and season liberally with salt and pepper.

In a medium saucepan, heat the blueberries over medium-low heat until they begin to soften and burst, about 10 minutes.  Use the back of a wooden spoon to mash them, then add the ketchup, vinegars, brown sugar, garlic, onion, mustard, Worcestershire sauce, and red pepper flakes. 

Whisk well to combine and break up the blueberries, then increase heat to medium.  Stirring often, cook until the mixture begins to bubble, then lower the heat to medium low.  Continue to cook, stirring frequently, until the sauce has thickened, another 10-20 minutes.  The sauce will be thicker and clumpier than traditional bbq sauce.

Use a paper towel and tongs to oil the grates of the grill well, then lay the salmon, flesh-side-down, on the grill.  Cook 5 minutes, then carefully flip.  Brush the salmon with half the bbq sauce, then cook an addtional 3-5 minutes, or until it is mostly cooked through but still pink in the center. 

Remove from grill,  brush with remaining sauce, and serve.


Sunday, July 10, 2011

PPQ: Arnold Palmer Layer Cake


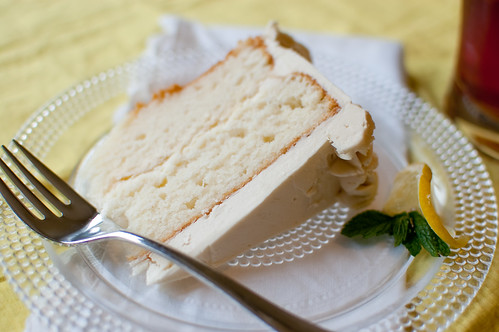
I made this cake for Project Pastry Queen, but it was not the chosen recipe.  Well, the cake itself, buttermilk cake, was.  But it's supposed to have Jack Daniels buttercream.  A silky, Italian meringue buttercream spiked with whiskey.  And while I do love cooking with it, I don't feel comfortable eating it while I'm pregnant.  So using the beverage inspiration, I came up with a pregnant-friendly alternative - Arnold Palmer cake!  For those of you who are unfamiliar with the drink, it is just sweet tea + lemonade. 

I did follow the recipe for the buttermilk cake, and it was a wonderful white cake.  Prior to this, I actually have yet to find a white or yellow cake recipe that I love, so I am excited to have this recipe in my repertoire now.  And going with the beverage-spiked icing, I made a swiss meringue buttercream spiked with sweet tea.  I reduced some tea down to a syrup, added that to my buttercream, then added some more tea to amp up the flavor.  It is still a subtle flavor, but it does intensify the longer it sits.  I reduced 1 cup of tea down to 2 tablespoons of syrup, but I think next time I would start with 2 cups and reduce to 1/4 cup.  And for the lemonade component, I used a lemon cream filling:  whipped cream + lemon curd.

The resulting cake was really fantastic.  A soft and light buttermilk cake, sweet-tart filling, and buttery and sweet frosting.  I absolutely loved this cake, and since the flavors are subtle, it makes for a really light and summery dessert. 

Thanks to Beth of The Powdered Plum for choosing the cake; my apologies for taking so many creative liberties!  I really do want to try the Jack Daniels Buttercream, so I know it will be on my short-list once I have the baby.  I'm thinking it would go really well with a chocolate cake!

Beth has the recipe posted, and check out Project Pastry Queen to see how the other members liked the cake.


Sweet Tea Buttercream
makes about 5 cups
adapted from Martha Stewart's Vanilla Swiss Meringue Buttercream
  • 2 cups sweet tea, plus more as needed
  • 5 egg whites
  • 1 cup + 2 Tbs cups sugar
  • pinch of salt
  • 2 cups (4 sticks) unsalted butter, cut into tablespoons, at room temperature
Bring the tea to a boil in a medium saucepan set over medium heat. Cook until reduced to about 1/4 cup.  Remove from heat and cool to room temperature.

Combine the egg whites, sugar, and salt in the bowl of a stand mixer set over a small pan of simmering water.  Whisk constantly by hand until the sugar has dissolved and reaches 160 degrees. (the mixture should feel completely smooth when rubbed between your fingertips).

Attach the bowl to the stand mixer and fit with the whisk attachment.  Starting on low speed and gradually increasing to medium-high speed, mix until still (but not dry) peaks form.  Continue mixing until until the mixture is light, fluffy, glossy, and completely cool (test by touching the bottom of the mixing bowl), about 10 minutes.

With the mixer on medium-low speed, add the butter 2 tablespoons at a time, mixing well between each addition.  Scrape down the sides of the bowl, increase the speed to medium, and mix until the buttercream comes together (it can take up to several minutes, but it will come together eventually).  Switch to the paddle attachement and beat at medium-low speed to remove air bubbles, about 2 minutes.  Add the syrup, and mix to combine.  Taste and add more sweet tea if desired.


Lemon Cream Filling
  • 2/3 cup cold heavy whipping cream
  • 2 Tbs lemon curd
Whip the cream at high speed until soft peaks form.  Gently fold in the lemon curd.


Thursday, July 7, 2011

Greek Turkey Burgers


It's hard to beat a classic cheeseburger, but I love trying out new and different variations, nonetheless.  I have had this particular recipe saved for about a year now, and I'm so glad I finally got around to trying it.  This is from a Southern Living from last summer, and these fig-glazed burgers with red onion jam were also featured in the spread. 

It is a turkey burger patty that is enhanced by herbs, spices, and most importantly, feta cheese!  Maybe it's my pregnancy, but I can't get enough feta lately.  I could pretty much eat it on anything and be happy.  And I feel the same way about tzatziki sauce as well.  Maybe my lunch tomorrow should be feta + tzatziki, eaten with spoon?  Rather than following the recipe for tzatziki that is listed with the recipe, I used my favorite version from my favorite Greek. :-)

So needless to say, I absolutely loved these burgers.  The salty feta + fresh herbs play wonderfully off of each other, and the bright freshness from the tzatziki is wonderfully light and refreshing next to the burger.  Served on a toasted bun with some fresh cucumber, lettuce, and tomato, I was pretty much in heaven.  I served these burgers with a watermelon, tomato, and feta salad, and it was a truly wonderful summer meal.  And the leftovers made for a killer salad the next day for lunch!


Greek Turkey Burgers
adapted from Southern Living, July 2010
  • 1 1/4 lbs ground turkey breast
  • 4 oz crumbled feta cheese
  • 1/4 cup finely chopped red onion
  • 2 cloves garlic, minced
  • 1 Tbs minced fresh oregano
  • 1 tsp lemon zest
  • 1/2 tsp kosher salt
  • 1 Tbs olive oil
To serve:
  • tzatziki sauce (recipe follows)
  • thinly sliced cucumber (or use a vegetable peeler to peel ribbons)
  • lettuce
  • tomato
  • 4 hamburger buns, split and toasted
Prepare grill.

Mix together all the ingredients for the burgers.  Using a light touch, form into 4 patties.

Grease the grates of the grill and grill the burgers 5-7 minutes per side, until cooked through, turning once.  Serve with tzatziki, tomato, lettuce, and cucmber.


Tzatzi
barely adapted from Elly Says Opa!
  • 1 1/2 cups Greek yogurt (nonfat or lowfat is fine)
  • 1/2 hothouse cucumber, seeds removed
  • 2-3 cloves garlic, finely minced
  • 2 tsp white wine vinegar
  • juice of 1/2 lemon
  • salt and pepper
  • extra virgin olive oil
Shred the cucumber on the large holes of a box grater, and using a few paper towels or a kitchen towel (one that doesn't give off lint), squeeze the cucumber to remove as much water as you can.

Combine all the ingredients through the lemon juice in a medium bowl. Taste and season with salt and pepper.  Top with a drizzle of olive oil, and refrigerate at least 30 minutes, to allow the flavors to meld.


Tuesday, July 5, 2011

Caroline's 3rd Birthday Party

My sweet baby girl turned three years old last week (unbelievable), so we threw her a fun party to celebrate!  As I've mentioned on here before, Caroline loves to help me in the kitchen.  No matter what she's doing, if I ask her if she wants to help mommy, she drops everything and comes running.  So it seemed fitting to throw her a "Little Chef" Party.  Her friends could make their own pizzas, decorate cupcakes, and design their own aprons.  Everyone seemed to have a great time, and the party was a hit!

I was so excited to find these invites from Tiny Prints - they were perfect.  I loved the pink and green color scheme and the little girl holding the cupcake.  I think they set the stage for a fun and festive party.


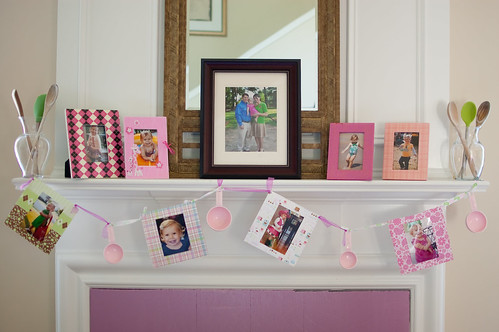
Of course I wanted to highlight some of my favorite pictures of Caroline over the past year, so to tie the banner into the theme I interspersed the photos with pink measuring cups.  I also added some very simple arrangements of spoons and spatulas to the mantle.  And since I have several pink frames, I used them to display a few more pictures.


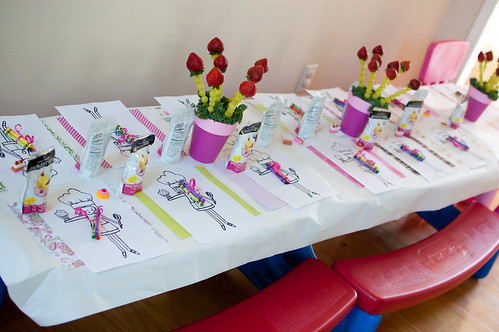
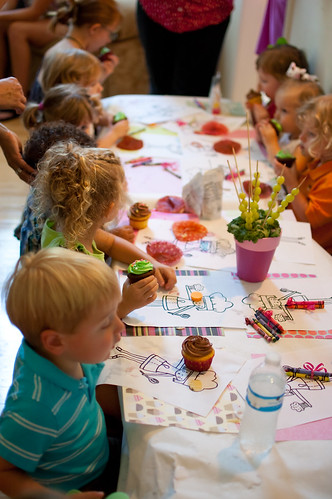
The kids' table was maybe my favorite part of the set-up.  We created an extra-long table by lining up 2 picnic tables and Caroline's play table, and covered them all with butcher paper.  I used pretty scrapbook paper as place mats, then Joey drew a replica of the little girl from the invite to give the kids something to color.  For the crayons, I just bought a big box of crayons and tied 3 together for each place setting with pink ribbon.

I also placed a juice box at each place setting, and scattered some cute dessert themed erasers along the length of the table.

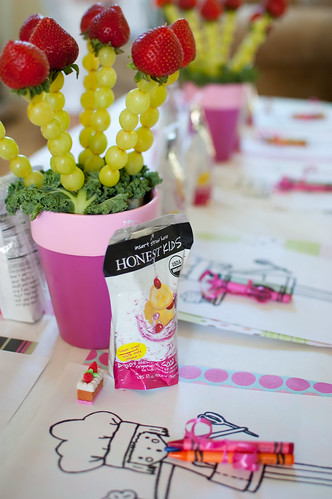
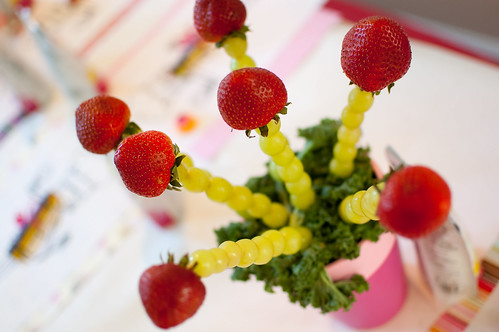
But perhaps the most popular aspect of the table were these edible centerpieces.  I used grapes and strawberries to mimic flowers, and arranged the skewers in painted pots.  I then used kale to cover the Styrofoam blocks that held the skewers.  This gave the kids something to snack on while they waited for their pizzas to cook.  They loved pulling fruit off the skewers!  And just to be safe, I cut off the pointy end from each skewer.


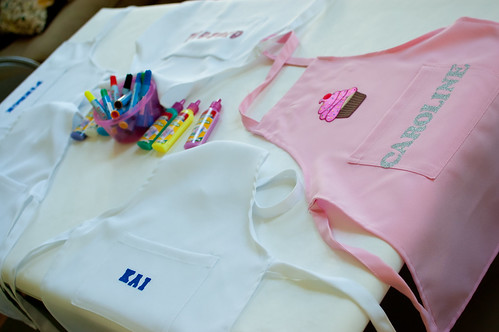
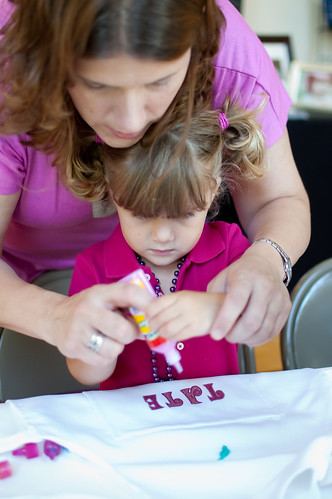
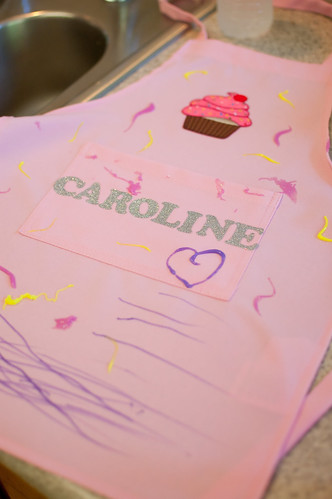
Another popular activity was decorating the aprons.  I ordered small kid-sized aprons from amazon, and ironed-on each name prior to the party.  The girls' letters were pink and glittery, and the boys were blue.  I ordered Caroline a pink one since she was the birthday girl :-).  To decorate, they used fabric paint and fabric markers.  Sadly, the paint took much longer to dry than anticipated, so they didn't get to wear their aprons for the party, but they made a fun activity and favor to take home, nonetheless.


Caroline's masterpiece!


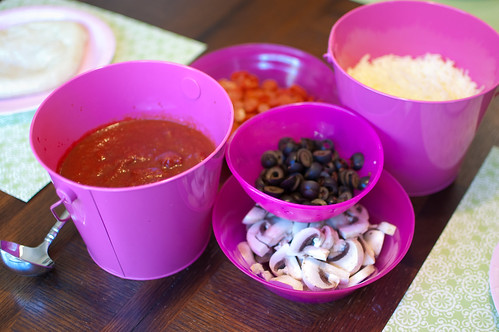
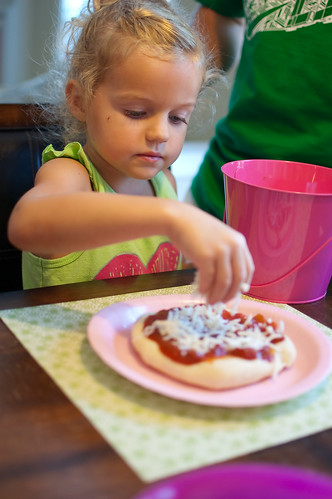
After they decorated their aprons, the kids made their own pizzas.  I prepared and baked dough for personal-sized pizzas ahead of time, so the only cooking required was to heat the toppings and melt the cheese.  I kept the toppings simple, and just offered sauce, cheese, black olives, mushrooms, and pepperoni.

With parental supervision, each child personalized their own pizza.

It was so fun to see what each child wanted on their pizza!  

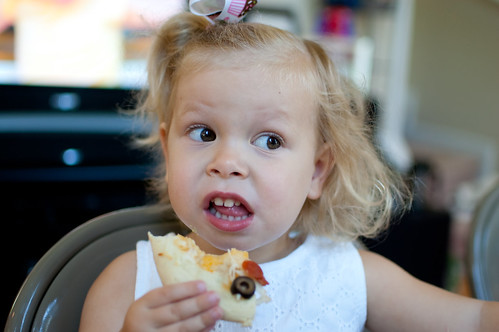
And it was even more fun to watch them enjoy their creations!


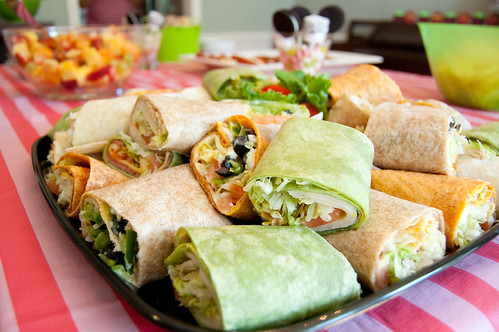
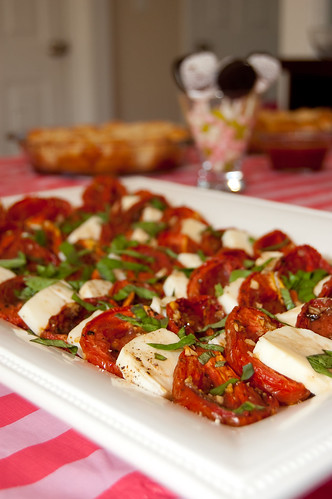
For the food for the adults and parents, I kept things simple.  We ordered a big platter of various wraps from the deli - turkey with provolone, roast beef with cheddar, and veggie wraps with Pepperjack.  I then cooked up a few simple sides to accompany them.


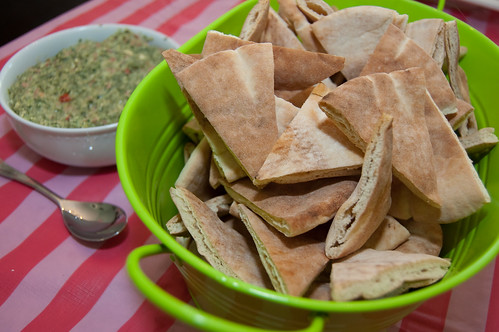
 Spinach Dip with Feta and Roasted Red Peppers


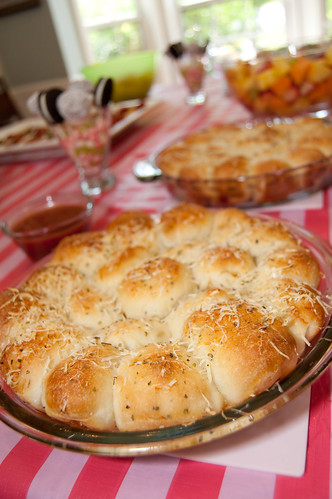
Pizza Bites with Marinara Sauce.

We also served a simple fruit salad and some chips.  The pizza bites were definitely the hit of the party, with the spinach dip coming in a close second.

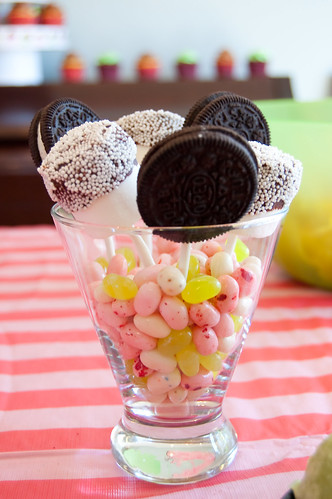
 Instead of traditional flower centerpieces, I opted to go the edible route for the food table as well.  Chocolate-dipped marshmallows and Oreo pops in a glass full of jelly beans.  These were obviously also well-received. :-)
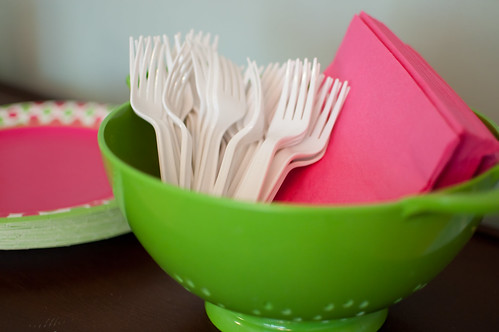
One of the details I was (dorkily) really excited about was the colander.  I used it to hold the napkins and forks, and I thought it looked so cute with the rest of the kitchen-themed decor.


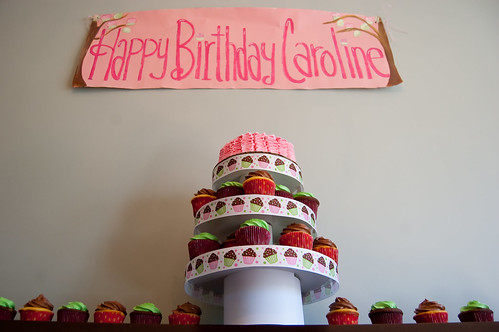
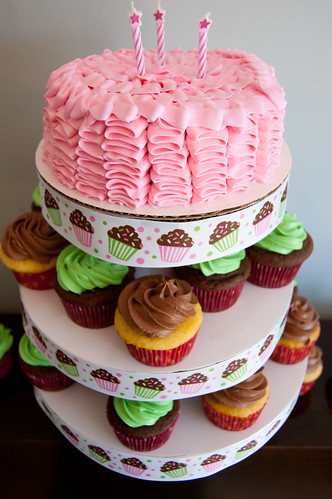
And finally, the center of every birthday party - the cake!  I built a cupcake tower, and topped it with a 6-inch "smash cake" to give her a chance to blow out candles.  Half the cupcakes were chocolate with vanilla buttercream, and the other half  were yellow cake with chocolate frosting.  They were all egg-free since Caroline is allergic, but to be honest I wasn't that thrilled with the taste.  I normally find a vegan recipe to try, but this time I just used egg-replacer, and I felt like the cupcakes were all a bit dry.  Luckily the kids didn't seem to mind though.

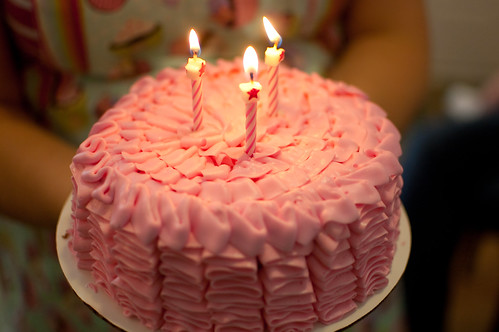
The ruffle cake was a big hit, and it was so easy it's almost funny.  I literally spent less than 5 minutes decorating it, and it turned out so cute!


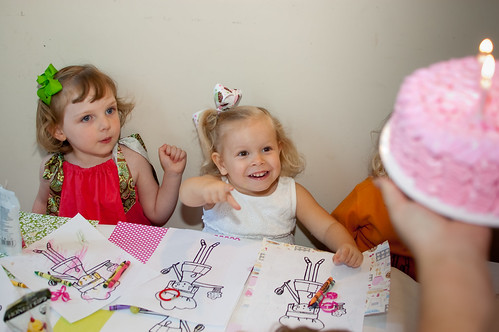
Caroline was really really excited for everyone to sing happy birthday, and she was even MORE excited for cake!


She especially loved blowing out the candles.


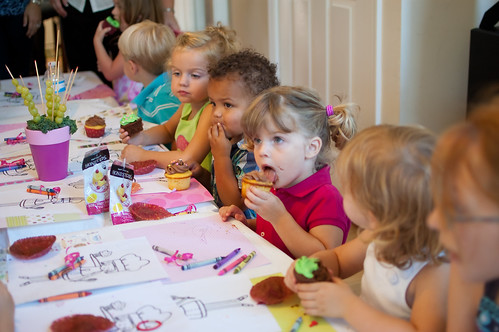
Since most of the kids in attendance were ages 2-4, I opted to keep the cupcake decorating simple and easy.  I piped the frosting ahead of time, and had several different varieties of sprinkles for them to choose from to add to their cupcakes.  


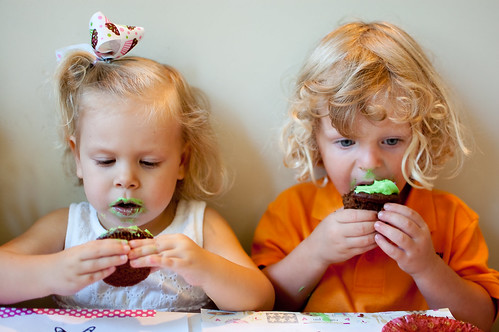
Lots of cupcake-eating going on!
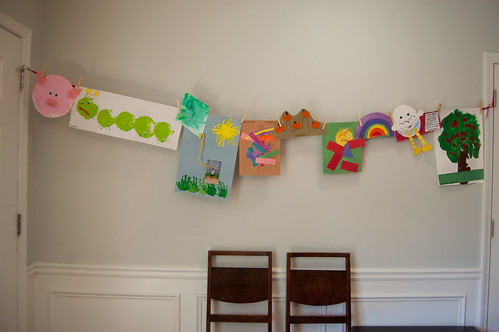
And finally, even though it's not really related to the theme and it's art that only a mother could love, I wanted to display some of Caroline's art projects for the party.  I used a piece of ribbon and clothes pins to hang up some of my favorite pieces of her artwork from throughout the school year.  

And since clearly you haven't seen enough pictures of Caroline, here are a few more that melt my heart. :-)

Overall, the party went very smoothly and everyone seemed to have a good time.  I am still a little bummed that the paint wasn't dry enough for the kids to wear their aprons, but in the grand scheme of things it's not a big deal.  The most important thing is that Caroline had the time of her life - almost 2 weeks later, she is still asking if it's time for another birthday party :-)


Monday, July 4, 2011

Raspberry Cream Cheese Brownies


Brownies are definitely one of the most popular desserts out there, but everyone has their own definition of the "perfect brownie."  For me, I prefer a rich, chocolatey, dense and fudgy brownie over a cake-like one.  And while it's hard to beat a classic chocolate brownie, I still love trying out different flavors and variations.

This particular version is one of my favorite combos - raspberry + cream cheese.  The brownies get a double-dose of raspberry - jam is first mixed into the brownie batter, then more is swirled into the cream cheese layer.  The brownie layer is just the way I like it - rich, dense, and super chocolatey.  And the cream cheese/raspberry layer adds the right amount of sweetness without being cloyingly so.

While these do have a few more steps than a typical brownie, nothing is terribly difficult or time-consuming.  And after test-tasting a few - you know, for quality control purposes - I had to send the rest of the pan to work with Joey.  I can usually handle baked goods in the house, but I was powerless to these brownies.  I'm pretty sure you will be too.


Raspberry Cream Cheese Brownies
Cook's Illustrated, Summer Entertaining


Filling
  • 1 (8-oz) package cream cheese, softened
  • 1/4 cup sugar
  • 1 egg yolk
  • 3/4 tsp vanilla extract
Brownies
  • 2/3 cup all-purpose flour
  • 1/2 tsp baking powder
  • 1/2 tsp salt
  • 8 Tbs unsalted butter, cut into pieces
  • 4 oz. bittersweet chocolate, chopped
  • 1/2 cup raspberry jam
  • 1 1/4 cups sugar
  • 3 large eggs
  • 1 1/2 tsp vanilla extract
Preheat the oven to 350 degrees.  Line an 8-inch square baking pan with foil. leaving the excess hanging over the edges.  Grease foil.

In the bowl of a food processor, combine the cream cheese, sugar, egg yolk, and vanilla.  Set aside.

Combine the flour, baking powder, and salt in a small bowl.  Microwave the chocolate and butter in a large bowl, stirring after every 30 seconds, until melted and smooth.

Whisk in 1/4 cup jam and allow the mixture to cool slightly.  Add sugar, eggs, and vanilla to the chocolate mixture, and stir until combined.  Whisk in flour mixture until just incorporated.

Microwave the remaining 1/4 cup jam until warm, about 30 seconds, and stir until smooth. 

Scrape half the brownie batter into the prepared baking dish.  Dollop the cream cheese by the spoonful over the batter, and spread into an even layer.  Drop spoonfuls of warm jam over the cream cheese, and use the tip of a knife to swirl jam through the filling.  Spread the remaining batter evenly over the filling.

Bake until a toothpick inserted into the center comes out with just a few dry crumbs attached, 50 to 60 minutes.  Cool in the pan on a wire rack for at least 2 hours.  Using the foil overhang, lift the brownies from the pan and cut into squares.

 
BLOG DESIGN BY: SHERBET BLOSSOM DESIGNS