Sunday, March 23, 2014

Vietnamese-Style Pork and Rice Noodle Salad


Sometimes I just do not feel like making dinner.  Like on a day when I oversleep, and then I'm "that mom" at toddler sports class, with all three boys crying for no reason.  And then a certain 2 year-old pushes down his brother and almost breaks his nose.  And then everyone refuses to nap.  And it's raining.  Again.  You know, hypothetically, you may not want to make dinner after a day like that.


Or maybe you do.  Because after lunch, the sun comes out, and it's a glorious day outside.  And your sweet husband brings home your favorite wine.  Then that sweet husband takes all the kids outside to play; you have a quiet house, a glass of wine, and all the time in the world to unwind and relax as you make said dinner.  Those are hypothetically the kinds of things that might turn your day around.

And then when that dinner ends up being one of the best things you've made all year?  Day = made.

This was pretty far outside my comfort zone, which was another reason that I was so tempted to order take-out on this hypothetical day.  And it does require quite a bit of chopping and mixing, so I understand that can be a deterrent (I'm really selling this salad, aren't I?).
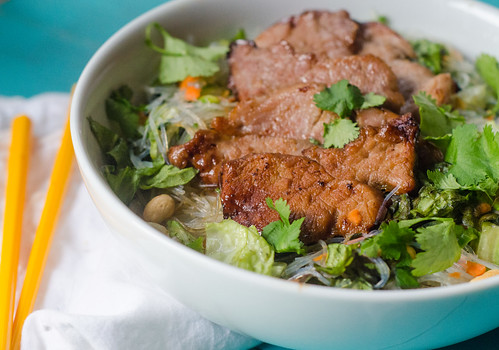

However, maybe I'm crazy, but when I'm not rushed to put dinner on the table or trying to multitask while I cook, I find chopping, slicing, and mixing to be quite therapeutic.  Crank up my favorite pandora station pour myself a glass of wine, and I find my happy place.

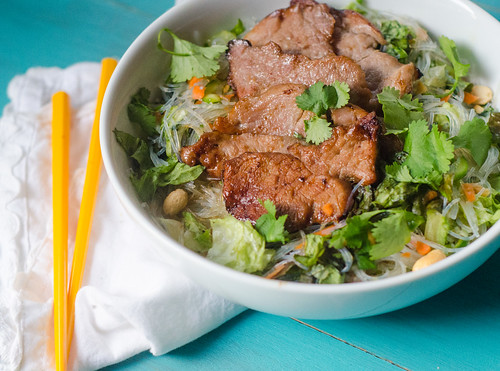
And then I found my happy place again when we sat down to eat.  This salad.  Oh my, it's good.  Chewy rice noodles, crisp veggies, crunchy peanuts, bright and fresh herbs, perfectly cooked pork tenderloin, and a sweet-salty-spicy dressing.  It's good stuff.  Like I said, this was a bit outside my comfort zone, but when all was said and done, I'm so glad I took the chance on it.

I wasn't so sure how this would be received by the kids, but they all really loved it - especially the pork.  I kept it simple and just sliced up some mango and pineapple to serve on the side, and it was a really wonderful and light meal.  Definitely the kind of meal to turn your day around.  Hypothetically.
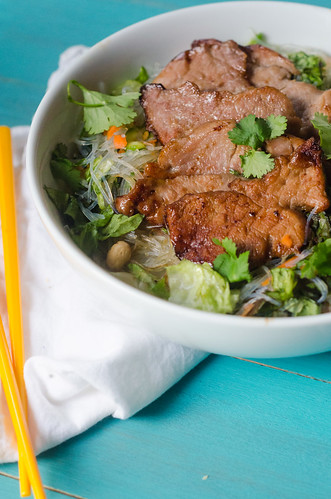

Vietnamese-Style Pork and Rice Noodle Salad
adapted from America's Test Kitchen's Pasta Revolution
serves 6

Pork

  • 3 Tbs fish sauce
  • 3 Tbs brown sugar
  • 1 Tbs + 1 tsp vegetable oil
  • 1 1/2 lbs pork tenderloin, trimmed and sliced crosswise into 1/4-inch medallions
Dressing
  • 2/3 cup fish sauce
  • 1/2 cup warm water
  • 1/3 cup lime juice (about 3-4 limes)
  • 1/4 cup granulated sugar
  • 2 Thai, serrano, or jalapeño chiles, ribs and seeds removed, finely minced
  • 2 cloves garlic, minced
Salad
  • 4 medium carrots, peeled and shredded on the large holes of a cheese grater
  • 1 large cucumber, peeled, seeded, halved crosswise, and thinly sliced into half moons
  • 1/3 cup chopped unsalted roasted peanuts
  • 1 Thai, serrano, or jalapeño chile, ribs and seeds removed, thinly sliced
  • 6 oz dried rice noodles (rice vermicelli), broken into 6-inch pieces
  • 4-5 cups romaine lettuce, chopped
  • 1/2 cup fresh basil, chopped
  • 1/4 cup fresh cilantro, chopped
  • 1/4 cup fresh mint, chopped
For the pork:  Combine the fish sauce, brown sugar, and oil together in a gallon-sized freezer bag, and agitate to dissolve the sugar.  Add the pork, shake to combine, refrigerate for at least 30 minutes, or up to 24 hours.

For the dressing:  Combine all the ingredients in a mason jar or small bowl, then shake or whisk to combine.  Set aside.

For the salad:  In a small bowl, toss the carrots, cucumbers, peanuts, and chile together with 1/4 cup of the dressing.  Set aside and allow to marinate while you prepare the rest of the salad.

Bring a large pot of water to boil.  Remove from heat, add the noodles, and stirring occasionally, let them sit about 10 minutes.  Drain the noodles and transfer to a large bowl.  Layer the carrot-cucumber mixture, lettuce, basil, cilantro, and mint on top of the noodles, but do not toss.  Set aside.

Meanwhile, adjust the oven rack 6 inches from the broiler and heat the broiler.  Line a sheet pan with aluminum foil and spray with cooking spray.  Arrange the slices of pork in a single layer on the baking sheet.

Broil until the pork is golden on both sides with crispy, browned edges, about 10 minutes, flipping halfway through.

Pour half the dressing over the noodle-veggie mixture and toss to combine.  Divide among serving bowls and top each portion with a few pieces of the pork.  Drizzle the remaining dressing over the individual servings and serve immediately.


Tuesday, March 18, 2014

FROZEN: Family Dinner & A Movie Night


In our house, today was the next best thing to Christmas.  The DVD release of Frozen!  Have you seen it??  Don't you love it?!  The soundtrack plays nonstop in my car, and Caroline dresses up as Elsa any chance she gets (she wore her Elsa outfit for 2 straight days when we were snowed in.  No judgement!).  So today was the long-awaited day, and I wanted to plan a fun night around watching Caroline's "most favorite movie in the entire world."  I didn't actually plan to blog about this, but I just loved how it all came together, and Joey pretty much insisted that I share it with you asap!


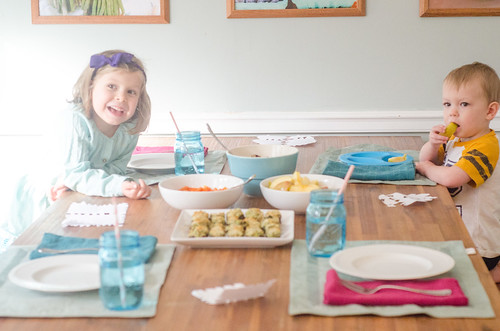
So here's the deal.  I wanted to plan something fun and festive, but I wasn't looking to throw a party, create cutesy printables, or decorate my whole house around the movie.  I wanted a dinner that tied into the movie, but I didn't want anything over the top - still just a healthy, weeknight dinner.  Here's what I came up with:


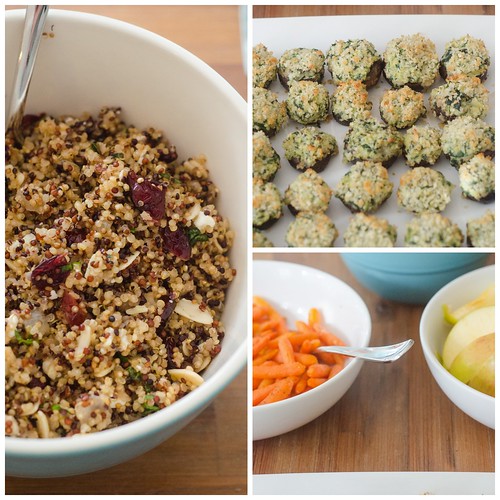
  • Troll Stuffed Mushrooms - spinach-artichoke stuffed mushrooms that resembled the "love expert" trolls.  I adapted this recipe to smaller mushrooms, and they were awesome.
  • Olaf's Pilaf - quinoa pilaf with dried cranberries, feta, and toasted almonds
  • Sven's Snacks - apple slices and roasted carrots 
  • Snowman in the Summer, to drink - water, ha

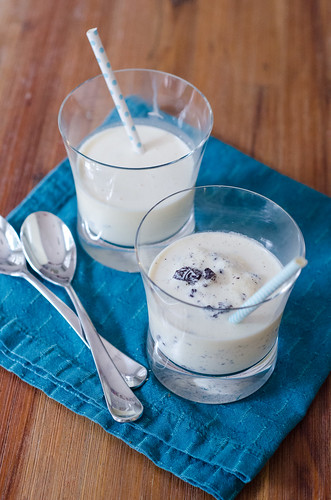
For dessert: homemade Blizzards, in honor of the eternal blizzard that Elsa set off as she fled Arandale (Oreo and vanilla, by request).  

I have way too many napkins and table linens, so I was able to put together placemats and napkins that used the colors from the movie.  I also have way too many paper straws and mason jars, so I worked the colors in there as well.

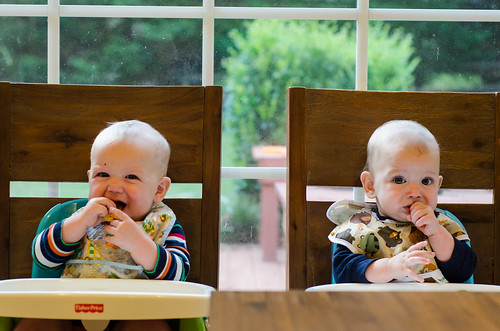
And while I cooked dinner, Caroline cut out some snowflakes.  She loves any and all art projects, so she was super excited to do this.  It got her involved and gave her a sense of responsibility in our big family night.  The twins also enjoyed the celebration.


After dinner, we all cuddled up on the couch for the movie, and it became an instant classic.  Caroline of course loved it, and sang along the whole time; but Smith actually sat still through most of the movie as well - quite a feat!  He only took one short break to put together a puzzle!  He loved the reindeer, Olaf, and all the special effects with the snow and ice.  

After I put together the menu, I thought of several other ideas for a Frozen Family Dinner & a Movie Night, so I'll share them with you in case you want to do something similar:

Elsa's "White Out" White Pizza
"Troll Stone" Meatballs
"Do You Wanna Build a Snowman" Snack Mix (marshmallows, raisins, orange jelly beans or m&m's, pretzel sticks)
Chocolate Fondue (a reference to the coronation ball)
Snow Cones (or snow ice cream, if you have enough snow on the ground!)
Blue Jello
Chili Bar to warm you up during an eternal winter

I had so much fun planning and executing this family movie night, that I think I'm going to make this a monthly tradition.  Since it is logistically pretty difficult for us to go out to eat as a family (Hi, can we have 3 high chairs, please?), I love coming up with new ideas for a dinner that's out of the ordinary and fun.

Last thing - go watch the movie, ASAP!  Even if you don't have kids.  It's really really great!  


Sunday, March 16, 2014

Sweet & Sour Brussels Sprouts with Sriracha Cream Sauce


I never thought I'd say this about a vegetable, much less brussels sprouts, but these are totally crave-worthy.  So much so that I kid you not - I ate these for lunch for almost a week straight.  I don't know whether it's the caramelization of the brussels sprouts themselves, the sweet and sour glaze, or the utterly addictive sweet and spicy Sriracha cream sauce.  My guess is that it's the trifecta.

Because of their inherent bitterness, brussels sprouts lend themselves really well to these bold flavors, but I also gave broccoli this treatment, and it was awesome as well.  You hit on all the major flavors here - sweet, spicy, salty, bitter, and sour.  Therefore totally amazing and totally addictive.


The first time I made this, I served it with ginger-garlic marinated flank steak and brown rice, and ended up just drizzling my entire plate with the sauce.  It was a really great meal, but the brussels sprouts definitely stole the show.  And then I made a giant plate of these again for lunch the next day.  And the next day.  And the next day.  And you get the picture.

We are alllllmost out of brussels sprouts season, so get them while you still can.  And when they're gone, make this with asparagus.  Or broccoli.  Or eggplant.  Actually, I'm pretty sure you could slather a bunch of the glaze and sriracha cream sauce on a leather shoe and it will still taste amazing.  It's that good.


Sweet & Sour Brussels Sprouts with Sriracha Cream Sauce
Sriracha Cream Sauce adapted from Damn Delicious


For the Brussels Sprouts
  • 1 lb brussels sprouts
  • 2 tsp vegetable oil
  • kosher salt and freshly ground black pepper
  • 3 Tbs sweet chili-garlic sauce
  • 2 tsp soy sauce
  • 1 tsp fish sauce
Preheat the oven to 400 degrees. 

Trim the stem-end of the brusels sprouts, then halve.  Toss with the vegetable oil, arrange in a single layer on a rimmed baking sheet, and sprinkle with salt and pepper.  Roast 10-12 minutes.

Meanwhile, whisk together the sweet chili-garlic sauce, soy sauce, and fish sauce.  Pour over the brussels sprouts, then carefully toss to coat.  Return the pan to the oven and cook an additional 5-8 minutes, or until they are charred and browned in spots, and cooked through.

For the Sriracha-Cream Sauce
  • 1/2 cup mayonnaise or Greek yogurt
  • 2+ Tbs Sriracha hot sauce
  • 1 Tbs sweetened condensed milk
Whisk together the 3 ingredients, taste, and add additional Sriracha to reach your desired level of spiciness (for the record I think I added close to 4 Tbs of Sriracha, but I like spicy!)

To serve, divide the brussels sprouts among plates and drizzle with Sriracha sauce.  


Wednesday, March 12, 2014

Feeding My Family: Babies and Toddlers


For many parents, beginning solid foods is one of the most stressful times.  There are worries about allergies, choking, pickiness, and just what the heck to feed that baby!  But instead, look at it as a chance to have fun with food. Exploring different tastes, colors, and textures with your little one, teaching them about nutrition and healthy eating, etc.  Many parents go the jars-of-baby-food-route, many go the homemade-purees route, and some skip over baby food altogether!


In my next installment of Feeding My Family, I'm touching on introducing solid foods to babies and then what to feed them as toddlers.  I am obviously not a doctor or a nutritionist, or really even an expert.  But I do have four kids, and have been through the stages several times, adjusting my philosophy and approach each time.  Therefore, I do (humbly) think I have some experience to share, so here goes.  Get ready, because this is a long one!


Caroline was my first child, and as typical first time parents, we wanted nothing but the best (i.e. the most work possible, of course).  I made all of her baby food from scratch, using organic produce.  Was it doable?  Yes, at the time.  Sometimes I would make several batches of purees over the weekend, but most of the time I just did a batch every other night while I made dinner or after she went to bed.  I didn't buy any fancy equipment or food storage system.  I steamed the veggies and then used my food processor to puree them, portioned them into ice cube trays to freeze, then popped them out into freezer bags for storing.  I never spent more than 10 minutes on any one puree.  Once I had a pretty good stash of different fruits and veggies, I'd mix and match for her meals.  Blueberries + bananas, zucchini + corn, carrots + broccoli, peas + green beans, etc.


There are many many resources for homemade baby food on the web, so instead of rehashing the same info, I'll just share with you some great ones that have guidelines and more ideas:

Wholesome Baby Food
Annie's Eats
Homemade Baby Food Recipes
Weelicious
Top 100 Baby Food Purees - this was my #1 go-to resource, and used it almost everyday.  Highly recommend this book.


With all that said, there is absolutely nothing wrong with buying baby food, but I will say that it is much more expensive.  Buying produce for baby food is much cheaper than buying jars, not to mention more eco-friendly.  I did the calculations for carrots when I first started making my own baby food, and if I recall correctly, a jar of organic carrot puree was around $1, and I could make 24 servings for $3.  The savings are huge, but you are having to put more work into it.  I am a stay at home mom, and I had the time to spend making her food.  Everyone's situation and priorities are different, and we all just do the best we can.  With that said, when we traveled I bought the Plum Organics pouches and used those, and they were great.  I also bought the pouches when we had a babysitter or were going out, and it was always nice to have a few on hand just in case.  I used prepared baby foods quite a bit with Smith when I was pregnant with the twins and in the throes of morning sickness.  So much as looking at a vegetable made me want to puke.  You've gotta do what you've gotta do.


Buy Buy Baby runs sales pretty often, so I use that as an opportunity to stock up.  I actually still like to keep these on hand because Smith can be pretty picky, but he loves pouches.  So when I'm desperate for him to eat some veggies, I turn to those.


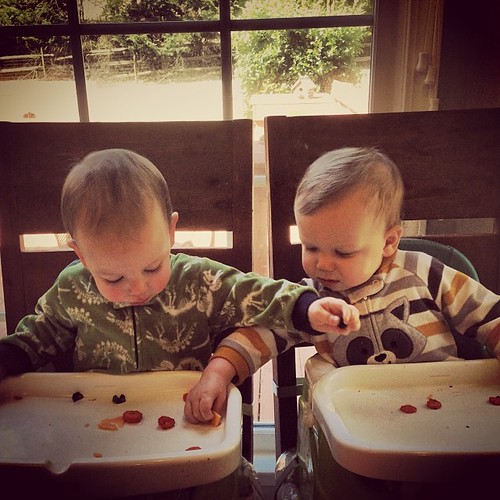
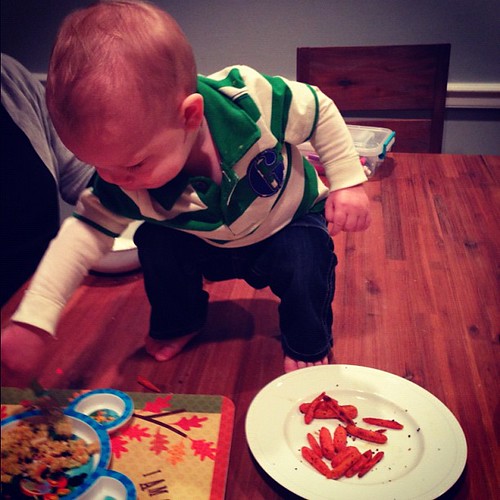
On to baby-led weaning.  This is basically a weird name for "feeding your baby whatever you eat."  I was super paranoid about choking, and didn't attempt this with Caroline or Smith.  We did purees with them until about 9-10 months, and then introduced soft solid foods, gradually working our way up to "real" food by the time they were a year.  For the twins, it got to be too much to feed them purees while keeping Caroline and Smith happy at dinner, not to mention eating dinner ourselves.  So around 8 months, we just quit the purees and starting feeding them from our plates.  We just pinched off tiny pieces and either fed them directly or put it on their trays.  It was definitely a learning process for us all, but it worked out really well in the end.  Another bonus is that feeding themselves and picking up food is wonderful for the development of their fine motor skills!  If you want more info on baby-led weaning, check out these resources:

Simple Bites
Cook Like a Champion
Baby Led Weaning


Now.  Onto what to actually feed them!  As my kids have grown, we've discovered many foods that are perfect for beginning eaters, and even into toddlerhood.  Here is a list of many of the foods that I keep in heavy rotation for Henry, Tucker, and Smith.  I will be doing separate posts for breakfast, lunch, and snacks, and will go into more detail and specifics then.

Fruits and Veggies:
  • frozen peas - perfect for little fingers, and great practice for their fine motor skills
  • cinnamon-baked apples (huge hit with all the kids - toss peeled apples slices with cinnamon and a little butter, then bake at 400 until they are softened).
  • steamed broccoli and cauliflower
  • roasted sweet potato and butternut squash cubes
  • cheerios and/or puffs
  • avocado
  • wedges of watermelon (I always keep a big bowl of watermelon in my fridge during the summer)
  • applesauce pouches
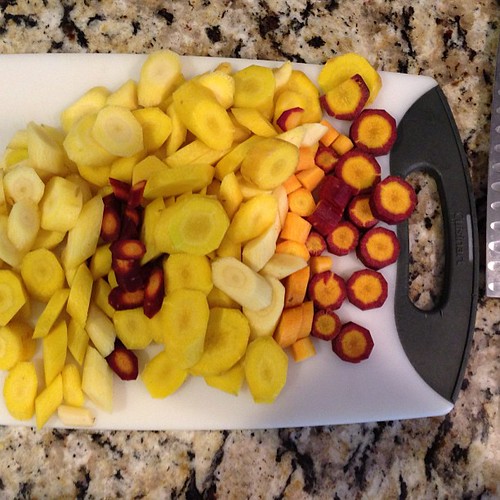
  • roasted or steamed carrots
  • fresh berries
  • clementines
  • lima beans
  • sweet potato fries and/or sweet potato tater tots
  • bananas
  • dried fruit (once they have molars)
  • pan-toasted okra (toast okra rounds in a dry nonstick pan over medium heat, tossing often.  Season with salt and pepper).
  • corn on the cob
  • apple "donuts" (apples sliced into super thin rounds core poked out with a small cookie cutter.  Sometimes served plain, sometimes made into a sandwich with peanut butter).
  • slices of pears (great for teething babies!)
  • cantaloupe
Meats, Protein, and Main Dishes
  • cheese toast
  • gnocchi and pasta 
  • shredded chicken or pork
  • chicken-apple sausage
  • dried mini ravioli from Trader Joe's (tossed with frozen peas, butter, and parmesan, this is one of their favorite meals, and it comes together so quickly.  Perfect for when other plans fall through or you don't have a meal already planned).
  • the meat and veggies from soups - soft, and the perfect texture for early eaters.  Use a fork or small strainer to drain off the liquid before serving.
  • meatballs, chopped into bite-sized pieces
  • hummus pinwheels
  • quesadillas - use any cheese and leftover meat!
  • turkey rolls (roll a slice of deli turkey around a piece of cheese or string cheese)
  • lentil soup
  • risotto
  • frozen veggie burgers (Amy's organics brand is my favorite)
  • halibut and tilapia, flaked into bite-sized pieces.  Some  kids love salmon, but the flavor is a little strong for others.
  • chicken pot pie (fed them the filling with a  spoon, then let them eat the crust on their own).
  • thin-crust pizza (and teething babies loves gnawing on the crust!)
  • hash browns
  • hummus + pita bread
  • fried or hard-boiled eggs, chopped into bite-sized pieces
  • beans (black, pinto, red, black-eyed peas, white/canellini, chickpeas, etc)
Dairy
  • "Yogurt Pops" - tubes of yogurt - frozen, then eaten like a popsicle.
  • smoothies (great way to get some extra veggies into their diet - will touch on this more when I talk about picky eaters)
  • string cheese
  • cheese toast, cut into small pieces, or use a cookie cutter to make fun shapes
If you have any ideas or suggestions, feel free to leave them in the comments - I want this list to be a resource for parents, and would love to get some new ideas myself!  Feedback is always welcome!


Monday, March 10, 2014

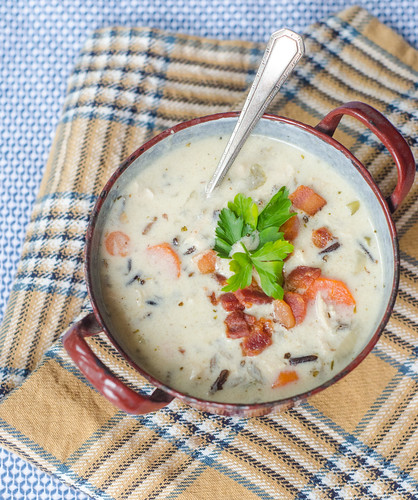
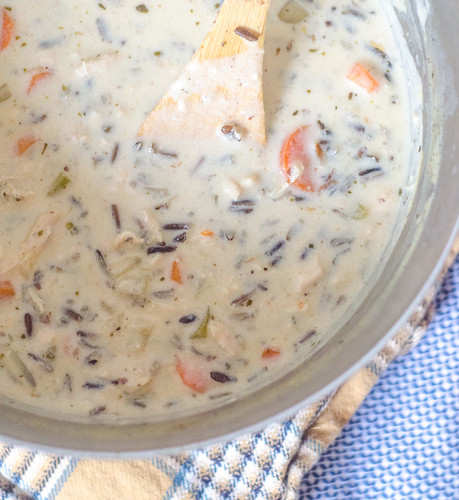
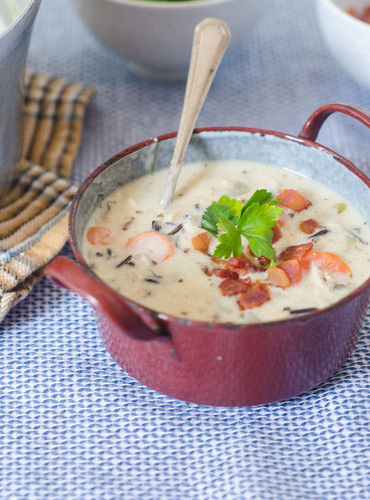
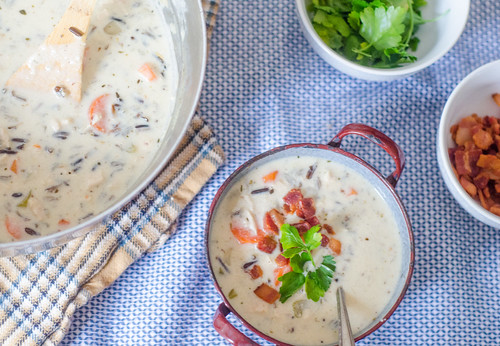
Creamy Chicken and Wild Rice Soup with Bacon


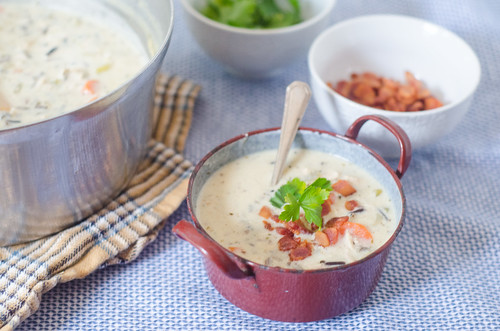
Is it spring yeeeeeeeet???  I'm hopeful that the gorgeous weather is here to stay in my part of the country; but realistically, I know we are in for at least one more cold snap.  And what do you eat when there's a cold snap?  Soup!


This soup is everything you want in a bowl of comfort food.  There's chicken, rice, tender vegetables, bacon, and it all comes together in a rich, creamy broth.  Creamy soups are definitely one of my guilty pleasures, and one that I only indulge on occasion.  But this soup is so so worth the splurge.


I served this with my buttermilk drop biscuits and fall harvest pear salad, and it was a great meal on a cold and rainy night.  And then subsequently, I enjoyed the leftovers for lunch for the next 3 days.  It reheats well, is warm, comforting and delicious, and makes enough to feed an army (or a family of 6, and then some!).  Go ahead and put this on your menu the next time the weather is cold and dreary.  It feeds the body and warms the soul.


Creamy Chicken & Wild Rice Soup
barely adapted from Elly Says Opa!
serves 6

  • 4 strips of bacon, chopped
  • 1 Tbs butter
  • 3 medium carrots, peeled and sliced
  • 3 ribs celery, sliced
  • 1 medium onion, diced
  • 2 cloves garlic
  • kosher salt and freshly ground black pepper
  • 1/2 tsp dried thyme, or 1 Tbs chopped fresh thyme
  • 1 bay leaf
  • 6 cups chicken broth
  • 2/3 cup raw wild rice
  • 2 cups shredded or chopped cooked chicken
  • 1/4 cup flour
  • 1 1/2 cups half and half
  • fresh parsley, for garnish
Heat a large pot or Dutch oven over medium-high heat.  Add the bacon and cook, stirring frequently, until it is crispy and has rendered most of it's fat.  Use a slotted spoon to transfer it to a paper towel-lined plate and set aside.  Drain all but 1 tablespoon of the fat, and return the pot to the stovetop.

Decrease the heat to medium and add the carrots, onions, celery, and garlic.  Cook until the vegetables begin to soften, about 3 to 5 minutes, stirring often.  Stir in the dried thyme, 3/4 teaspoon of salt, 1/2 teaspoon of pepper, and the bay leaf.  

Add the chicken broth and wild rice and bring to a low boil.  Cover, reduce the heat, and simmer 35 to 40 minutes, or until the rice is almost cooked through, but still has a bit of a bite.  

Stir in the chicken and cook an additional 5 to 10 minutes, or until the rice is done.

In a liquid measuring cup, add the flour to 1 cup of the half and half.  Whisk until the flour is mostly incorporated, then whisk in the remaining 1/2 cup of half-and half.  Slowly whisk the mixture into the pot, then stirring continuously, cook until the soup is thickened and heated though, another 5 minutes or so.

Remove from heat and allow to sit another 10 minutes, as it will thicken a bit as it cools.  Taste and season with additional salt and pepper if needed.

Divide among serving bowls, and sprinkle each serving with bacon and fresh parsley.  Serve.


Wednesday, March 5, 2014

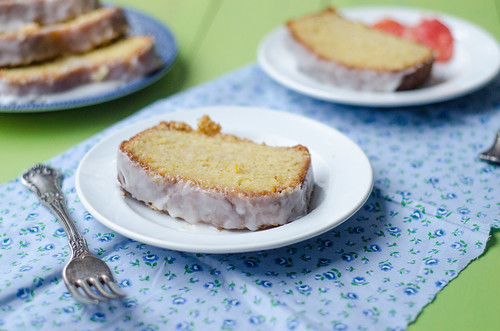
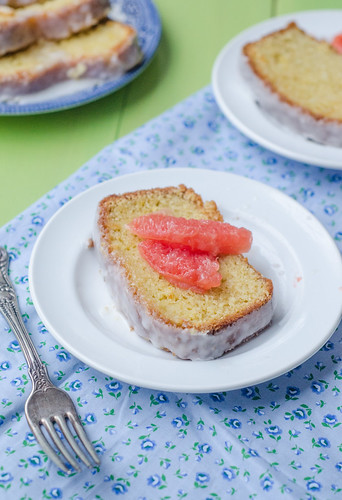
Grapefruit Olive Oil Cake


Like eggplant, I feel like grapefruit is another love it or hate it food.  I happen to love it now, but for many years I was firmly in the "hate it" camp.  Grapefruit margaritas changed it all for me.  Now I eat them several times a week during peak season.  So while I love it now, I'm kind of snob about it.  It has to be a ruby red grapefruit, and it has to be from Texas.

Joey's a grapefruit-hater, but I may have converted him with this cake.  Margaritas are my gateway drug to grapefruit, and cake is his.


I've had olive oil cakes a few times, and the results have been mixed at best.  But this one.  Oh boy.  It's good.  Like gooooood good.

I have to admit that I was kind of excited when I made it.  Since I thought Joey was a hater, I mistakenly thought I'd have this cake all to myself.  But I kept catching Joey sneaking bites.


It's moist and rich, but thanks to the bright and bracing citrus flavor, it still tastes light.  The olive oil is a great contrast to the intensity and bitterness from the grapefruit.  It's tart enough, but too tart.  It's sweet enough, but not too sweet.  And it's just light enough to justify eating it for breakfast.

The grapefruit diet was really popular once upon a time, right?  Maybe we should resurrect that and call it the grapefruit cake diet?  Any takers?


Grapefruit Olive Oil Pound Cake
The Smitten Kitchen Cookbook

Cake

  • butter or oil for the pan
  • 1 1/2 cups all purpose flour, plus more for the pan
  • 2 Tbs freshly grated grapefruit zest (1-2 grapefruits)
  • 1/2 cup granulated sugar
  • 1/2 cup turbadino or raw cane sugar (granulated sugar can be subbed if you can't find this variety)
  • 1/2 cup good fruity olive oil
  • 2 large eggs, at room temperature
  • 1 tsp baking powder
  • 1/4 tsp baking soda
  • 1/2 tsp table salt
  • 2 Tbs freshly squeezed grapefruit juice
  • 1/3 cup buttermilk or yogurt
Syrup
  • 2 Tbs granulated sugar
  • 1/3 cup freshly squeezed grapefruit juice
Glaze
  • 1 cup confectioners' sugar
  • 2 Tbs freshly squeezed grapefruit juice
Preheat the oven to 350 degrees, and butter and flour a 9-by-5-inch loaf pan.

In a large bowl, rub the grapefruit zest into the sugars with your fingertips.  This will help it release as much flavor and essence as possible.  

Whisk in the oil, then the eggs one at a time, and scrape down the bowl.

In a second, smaller bowl, whisk together the flour, baking powder, baking soda, and salt.  

Combine the grapefruit juice and buttermilk in a liquid measuring cup.

Alternating, add the flour and buttermilk mixtures to the sugar-oil mixture, beginning and ending with the flour.

Pour the batter into the prepared pan, and use a spatula to smooth the top.  Tap the pan on the counter a few times to pop any air bubbles.

Bake 45 minutes, or until a toothpick inserted into the center comes out clean.

As the cake is baking, make the syrup.  Combine 2 tablespoons of sugar with 1/3 cup of grapefruit juice in a small saucepan.  Cook over low heat until the sugar dissolves, stirring occasionally.  

When the cake is finished, cool it in the pan for 10 minutes.  Meanwhile, line a baking sheet with parchment paper or foil, and top with a cooling rack.  Carefully invert the cake onto the rack, and use a toothpick or skewer to poke holes all over the top (don't go all the way through though).  Pour the syrup over the cake slowly.  Allow the cake to cool to room temperature.

To make the glaze, whisk together the confectioners' sugar and grapefruit juice until smooth.  Once the cake has cooled, pour the glaze over the cake, allowing it to drizzle down the sides decoratively.  Slice and serve.

Monday, March 3, 2014

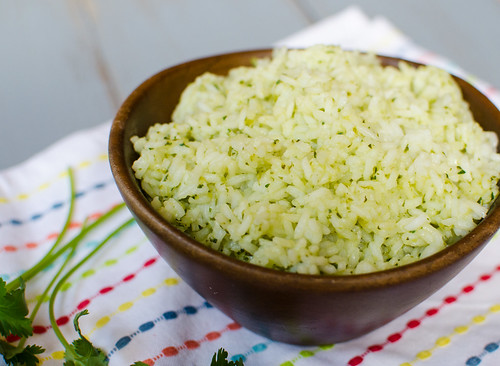
Cilantro-Lime Rice


If I see cilantro-lime in a recipe title, chances are I'm immediately saving it.  It's easily one of my favorite combos, and come on - it's Mexican food.

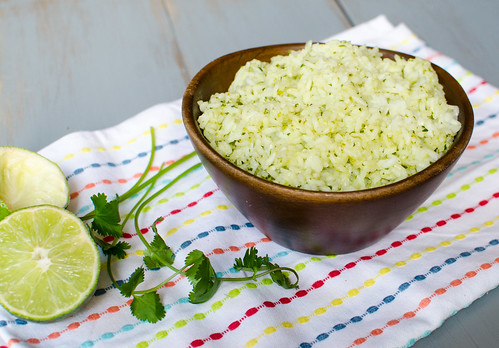
I've been making this cilantro-lime rice for a few years now, and it's one of my favorite side dishes.  For some reason, the traditional red Mexican-style rice feels heavy to me, and this just feels so light and fresh.  Oftentimes I even use quinoa instead of the rice, and I use brown rice sometimes too - it just depends on my mood and the rest of the meal.  Any grain will do here!

Also, if you're a fan of Chipotle, this is a pretty close approximation of the rice they serve! I have used this rice as the base for a burrito bowl many times, in fact.  It really is one of my favorite recipes.

On a semi-related note, I've started a Pinterest board for my very favorite recipes in the whole wide world.  These are recipes that I make over and over again, and are family favorites.  Some are from my blog, but many are from other blogs and sites, and I've just never posted them here.  But I want to share them with you, so if you're interested in what makes me happy, be sure to check it out :)


Cilantro-Lime Rice
adapted from Everyday Food (RIP) via Annie's Eats

  • 1 cup long grain white rice*
  • 2 cups water
  • kosher salt
  • 2/3 cup fresh cilantro, lightly packed
  • 1 tsp lime zest
  • juice of 1/2 lime
  • 1 Tbs canola oil
  • 1/2 jalapeño, seeds and ribs removed, coarsely chopped
  • 1 Tbs water
Combine the rice, water, and 1/2 tsp salt in a medium saucepan and bring to a boil.  Stir, cover, and reduce heat to medium-low.  Cook 15-20 minutes, or until the rice is tender and cooked through.  Remove from heat and set aside.

Meanwhile, in the bowl a food processor or a blender, combine the cilantro, lime zest and juice, canola oil, jalapeño, water, and 1/4 teaspoon of salt.  Puree until smooth.

Stir the cilantro-lime puree into the rice, taste and season with additional salt and pepper if needed, and serve.

*If you use another grain besides rice, be sure to read the package directions for water:grain ratio and cook times.


BLOG DESIGN BY: SHERBET BLOSSOM DESIGNS