Monday, August 31, 2009

Seafood Risotto


I have expressed my love for both risotto and Cook's Illustrated in previous posts, so imagine my excitement when I came across a recipe for risotto from Cook's Illustrated! And it has shrimp! And scallops! And wine! And I can use tomatoes and basil from my garden! The excitement was exhausting.

This was a fairly quick weeknight dinner, and since risotto is basically a one-pot meal, clean up is a breeze as well. In fact, the shrimp and scallops are essentially poached in the risotto; seriously, it doesn't get any easier.

This had a great seafood flavor without being overly fishy. The saffron gave it a nice depth of flavor, and the clam juice reinforced the seafood taste without being overpowering. I used bay scallops instead of cutting up sea scallops. I also used a shallot instead of onion... because it just seemed like the right thing to do. The only other change I would make would be to add a squirt of lemon juice when serving. I felt like it would have benefited from the acid and brightness.

I served this with a nice dry rose' and a crusty baguette, and it was a great summer meal.

Seafood Risotto
adapted from Cook's Illustrated
  • 1 3/4 cups low-sodium chicken broth
  • 1 (8-ounce) bottle clam juice
  • 2 tablespoons unsalted butter
  • 1 shallot, minced (1/3 cup)
  • salt and ground black pepper
  • 2/3 cup Arborio rice
  • pinch of saffron threads
  • 1/2 cup dry white wine
  • 8 jumbo shrimp, peeled, deveined, and tails removed, each cut into 3 pieces
  • 6 ounces bay scallops (about 1 cup scallops)
  • 1 tomato, cored, seeded, and chopped
  • 2 Tablespoons chopped fresh basil
  • lemon wedges, for serving
Combine the chicken broth and clam juice in a medium heat proof bowl. Cover, and microwave until hot, 1 to 3 minutes.

Melt 1 Tablespoon of the butter in a 10-inch skillet over medium heat. Add the shallot and 1/4 teaspoon salt. Cook, stirring occasionally, until shallots have softened, 1-3 minutes. Stir in the rice and saffron and cook until the ends of the rice are transparent, stirring often, about 2 minutes. Stir in the wine and cook until it is completely absorbed, 1-2 minutes.

Add 1 cup of the hot broth mixture and simmer, stirring frequently, until all the liquid has absorbed, and the bottom of the pan is almost dry. This will take close to 10 minutes.

Adding broth 1/2 cup at a time, and stir until almost all the liquid has been absorbed between each addition. Be careful not to let the bottom of the pan dry out. Continue to stir often, and repeat until the rice is al dente, about 10-15 minutes. You may not use all the broth. I just began tasting after about 10 minutes, and kept adding broth and stirring until it was done.

Vigorously stir in the remaining 1 Tablespoon of butter until it has melted. Gently fold in the shrimp, scallops, tomatoes, basil, and 1/3 cup of the broth mixture. Cover the skillet, reduce heat to low, and cook until the seafood is cooked through, 6 to 8 minutes. Stir once halfway through cooking. Season with additional salt and pepper to taste, and serve immediately with lemon wedges.


Friday, August 28, 2009

Bacon and Cheddar Scones


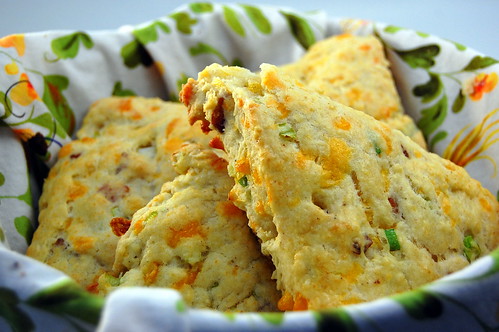
Yet another recipe from The Pastry Queen, these are perfect to make on the weekend, then grab and go throughout the week (which is exactly what Joey did). I made these scones last Sunday for breakfast, and we enjoyed them out on the patio with some fresh fruit and coffee.

I love savory scones; it doesn't feel like I'm having dessert for breakfast, so they must be healthy.... despite the bacon, butter, buttermilk, and cheddar cheese...

These are nice and light, but still filling without feeling too heavy. The base for the scone is slightly different than that of previous scones I'd made, but still very light and buttery.

Bacon and Cheddar Scones
adapted from The Pastry Queen
  • 3 cups all-purpose flour
  • 1 Tablespoon baking powder
  • 1 teaspoon salt
  • 2 teaspoons freshly ground black pepper
  • 1/2 cup (1 stick)chilled, unsalted butter, cut into small cubes
  • 1 1/2 cups grated cheddar cheese
  • 4 green onions, thinly sliced
  • 10 slices of bacon, diced and cooked; then drained of fat
  • 3/4- 1 1/2 cups buttermilk
  • 1 large egg
  • 2 Tablespoons water
Preheat the oven to 400. Sift the flour, baking powder, salt, and pepper into the bowl of a mixer fitted with a paddle attachment. Combine on low speed. Gradually add the butter cubes as the mixer is still running, until the mixture is crumbly and studded with butter-flour bits (about the size of small peas). Add the grated cheese and mix until just blended.

Add the bacon, green onions, and 3/4 cup of the butter milk. Mix by hand until all the ingredients are incorporated. If the dough will not hold together and is too dry, add buttermilk 1 Tablespoon at a time, stirring lightly with each addition. Do this until the dough is pliable and can be formed into a ball. Do not overwork the dough, or the scones will not be light and tender.

Place the dough on a lightly floured surface. Pat into a ball, and roll into an 8-inch circle that is about 1/2 inch thick. Cut into 8 wedges for more substantial scones, or 10 wedges for smaller scones.

Combine the egg and water in a small bowl.

Place scones on an ungreased baking sheet, and brush each scone with the egg wash. Bake 18-20 minutes, or until golden brown and no longer sticky in the middle.


Thursday, August 27, 2009

BB: White Pizzas with Arugula


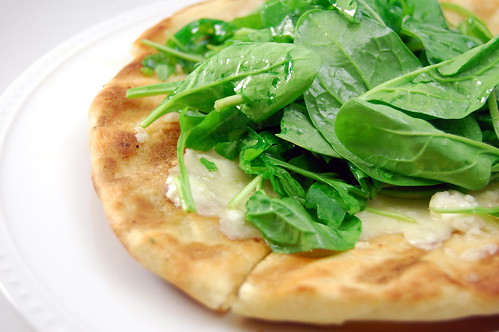
I was so very excited when I saw this month's second selection for Barefoot Bloggers. When I first purchased Back to Basics, this recipe caught my eye, but until this week I had yet to make it. Well it is safe to say that I will definitely be making this again. We had some friends over for dinner, and it was perfect for entertaining. I made the dough, the garlic oil, and shredded the cheese(mmmm mozzarella, goat cheese, and fontina) earlier in the day, so when it came time to make dinner, I just had to roll out the pizzas and throw them on the grill.

Which brings us to my next rave: pizza on the grill. This is really the only way I make pizza anymore. It makes the crust nice and crispy on the outside, but still soft on the inside. The ideal way to make pizza is in a brick oven, but since most of us don't have access to one, in my opinion a grill is the next best thing. If you don't have access to a grill, just bake them at 500 degrees for 10-15 minutes, as Ina instructs.

One final point, I always use Cook's Illustrated's recipe for pizza dough, so I was a little nervous to try something different, but Ina's did not disappoint. I'll probably still stick with CI's in the future, but this one was delicious as well.

White Pizzas with Arugula
adapted from The Barefoot Contessa, Back to Basics

  • 1 1/4 cups warm water (100-114 degrees)
  • 2 packages dry yeast
  • 1 Tablespoon honey
  • extra virgin olive oil
  • 4 cups all purpose flour, plus more for kneading
  • Kosher salt
  • 4 garlic cloves, sliced
  • 2 teaspoons dried thyme
  • 1/4 teaspoon crushed red pepper flakes
  • Freshly ground black pepper
  • 3 cups grated Fontina cheese (8 ounces)
  • 1 1/2 cups grated fresh mozzarella
  • 11 ounces creamy goat cheese, crumbled
  • 1/2 cup olive oil
  • 1/4 cup freshly squeezed lemon juice
  • 4 ounces baby spinach
  • 4 ounces baby arugula
To make the dough, combine the water, honey, yeast, and 3 Tablespoons olive oil in the bowl of an electric mixer fitted with the dough hook. When the yeast is dissolved, add 3 cups of flour and then 2 teaspoons of salt, and mix on medium low speed. Add up to 1 more cup of flour while it mixes, or just enough to make a soft dough that doesn't stick to the bowl. Knead 10 minutes, sprinkling with flour to keep it from sticking to the bowl.

Turn the dough out onto a floured board and knead it by hand 10-12 times. At this point it should be smooth and elastic. Place the dough in a well-oiled bowl, brush the top with oil, and cover with a damp kitchen towel. Allow the dough to rise for 30 minutes at room temperature.

Meanwhile, make the garlic oil. pour 1/2 cup olive oil, the garlic, thyme, and red pepper flakes into a small saucepan, and bring to a simmer over low heat. Cook for 10 minutes, making sure the garlic doesn't burn. Set aside.

Prepare grill.

Dump the dough onto a board and divide it into 6 equal pieces. Place them on a sheet lined with parchment, and cover them with a damp towel. Allow the dough to rest for 10 minutes. Use immediately, or refrigerate for up to 4 hours.

Press and stretch each ball into an 8-inch circle. Brush with the oil, and carefully place on the grill oil-side down. Brush the other side with oil. Repeat with remaining dough (I could fit 3 pizzas on the grill at a time). When the first side is browned and crispy, carefully flip. Working quickly, top with the cheese (I mixed mine all together in a big bowl to make this easier). Drizzle with a little more oil and top with pepper. Continue to cook until the second side is done, and the cheese has melted (about 5 minutes or so).

To make the vinaigrette, whisk together 1/2 cup of the olive oil, the lemon juice, 1 teaspoon salt, and 1/2 teaspoon pepper. When the pizzas are done, place the arugula and spinach in a large bowl and toss with just enough vinaigrette to moisten. Slice the pizza into quarters and top with a large bunch of the greens. Sprinkle with a small amount of salt and serve.


Salmon Pesto Pasta


I have recently discovered another blog that I absolutely love. Bridget of The Way the Cookie Crumbles not only shares my love of Cook's Illustrated, but she is a science nerd as well! Plus, she takes beautiful photographs and bakes up some of the prettiest desserts ever.

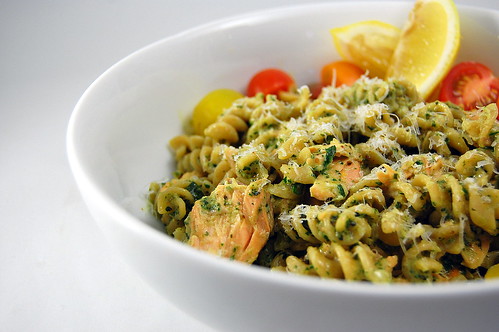
So I was perusing her blog and came across this recipe. It has some of my favorite ingredients in it: pesto, pasta, and salmon. My basil plant has been overflowing, so I knew I needed to make some pesto soon; plus we love salmon in our house. She introduced me to a new way to make pesto: toast the garlic first. It really does take away the sharp bite of raw garlic, and leaves the pesto tasting.... more pesto-y.

I stayed true to her recipe; I just threw some baby heirloom tomatoess on top because I pretty much add tomatoes to everything in the summer.

Salmon Pesto Pasta
from
The Way the Cookie Crumbles
  • 8 oz pasta
  • 12 oz salmon
  • salt and pepper
  • 1 teaspoon grated lemon zest
  • 1 Tablespoon olive oil
  • 1 teaspoon lemon juice
  • 5 oz evaportaed milk
  • 1/2 cup pesto (recipe follows)
  • grated Parmesan, for serving
Bring a large pot of water to a boil. Once water is boiling, add 1 Tablespoon of kosher salt, and stir to dissolve. Add pasta and stir. Allow to cook to al dente, 8-10 minutes.

Meanwhile, adjust oven rack to the upper-middle position. Heat broiler. Line a baking sheet with foil, and place salmon on the foil. Season with salt and pepper, and rub with lemon zest and olive oil. Broil until flesh is firm and salmon is no longer translucent, about 10-12 minutes. Remove from oven and sprinkle with lemon juice. Flake fish into bite size pieces with a fork. Set aside.

When pasta is cooked, drain and discard water. Add the evaporated milk to the empty saucepan and cook until reduced to about 1/4 cup. Return pasta to the pan and stir to combine.

Remove the pot from heat, and add the salmon and pesto. Stir to combine. Serve with additional lemon wedges and Parmesan cheese. Top with tomatoes if desired.

Pesto
  • 2 cups packed fresh basil leaves
  • 1/4 cup pine nuts, toasted
  • 5 medium garlic cloves, unpeeled
  • 2 Tablespoons Italian parsley
  • 1/4 cup extra virgin olive oil
  • salt
  • 1/4 cup grated Pamesan cheese
"Bruise" the basil leaves in a food processor fitted with the dough blade (the one that's not as sharp) for a few pulses. Replace with the steel (sharp) blade.

Toast nuts in a small skillet over medium heat, stirring frequently, until golden brown. Add to teh food processor. Add the garlic cloves to the skillet and toast, tossing frequently, until the skins are toasted and garlic is fragrant. Peel and add to food processor as well.

Process until finely chopped, and add remaining ingredients except cheese. Transfer to a small bowl, add the cheese, and adjust seasonings if necessary.


Tuesday, August 25, 2009

Pimiento Cheese with Bacon


Having grown up in the south, I am no stranger to pimiento cheese. No gathering was complete without little pimiento cheese sandwiches cut into circles with a biscuit cutter. I guess I always took them for granted, because I was thinking not too long ago how much I loved it, and how much I miss having them. I came across this recipe in Southern Living a few months ago, and I had been thinking about it ever since. Pimiento cheese = delicious. With bacon? yes please!

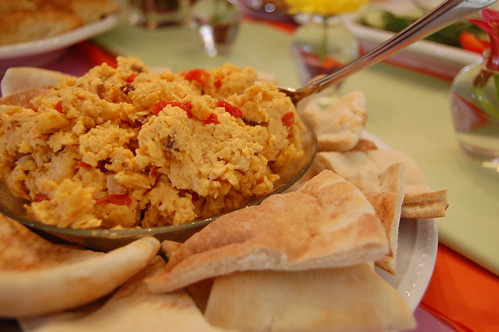
I am actually ashamed to admit that before making this, I had no idea how to even make pimiento cheese. Well, it really can't get any easier than this, y'all. Just shred some cheese, fry up the bacon, and mix in a few other ingredients. I've replaced the cayenne pepper for chili powder. For one thing, I'm a spice wuss, but I also like how the smokiness of the bacon and chili powder complement each other.

I have made this twice, and have served it with toasted pita both times. I've also eaten the leftovers as sandwiches... or straight out of the container with ritz crackers.... one of these days I will make the pimiento cheese burgers that were in the same article.

And lastly, I apologize for the terrible picture... I was trying to quickly snap some pics before the food table was attacked at the shower ;-)

Bacon Pimiento Cheese
adapted from Southern Living, July 2009

  • 4 strips of bacon, diced
  • 16 ounces extra sharp cheddar cheese, grated
  • 1 4-oz jar diced pimientos, rinsed and drained
  • 1/2 cup mayonnaise
  • 2 Tablespoons grated onion
  • 1 Tablespoon Worcestershire sauce
  • 1/4 teaspoon salt
  • 1/8 teaspoon freshly ground pepper
  • 1/4 teaspoon chili powder
Grate cheese and allow to stand at room temperature 15-20 minutes (this allows the cheese to soften, making it easier to mix in with the other ingedients. Then the flavors will meld together better. This is a good thing).

Stack bacon strips on top of each other, and dice (this is made easier if you freeze the bacon for about 15 minutes before you need it). Sautee in a nonstick skillet until done. Allow to drain on a paper towel. Reserve the fat for another use.

Stir together all the ingredients. Check seasonings, and adjust if necessary. Store in an airtight container up to 1 week.


Sunday, August 23, 2009

S'mores Cupcakes


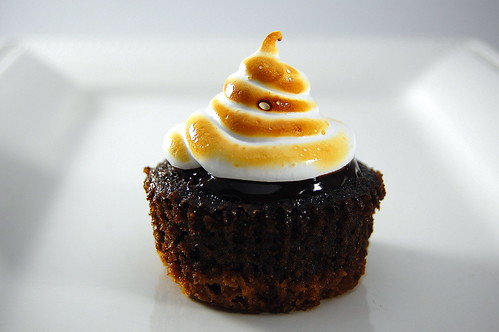
Chocolate and marshmallow rank right up there as one of my favorite flavor combinations. So it should come as no surprise that combined with my love of cupcakes, this would be right up my alley.

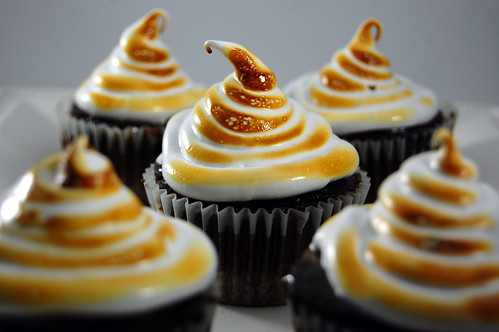
I initially got the recipe from Martha Stewart in her new Cupcakes book, but upon further inspection I wasn't too impressed. I had envisioned a chocolate cupcake with rich ganache and toasted marshmallow frosting, but she did something funny with the cupcake base. She used that as the graham flavor by using graham flour and brown sugar, and I just didn't want to do that at all. Luckily, I had recently seen a similiar cupcake on Proceed with Caution (originally from Domestic Pursuits), and my problems were solved. Graham cracker crust, chocolate cupcake, chocolate ganache, marshmallow frosting. Perfect!

These were pretty painless to make, though they did require several steps. The good news is that you could easily split it up over 2 days, though I did do it all in one afternoon. I took these to a neighborhood party, and we all agreed that they were fun, festive, and delicious!

The only hurdle I encountered was the torch step, which is optional anyway. I bought a creme brulee torch, but failed to buy the butane for it; so I just used one of those long-necked lighters that we use for candles, and it worked beautifully. I let Joey torch some of them, and he had a great time - of course he did, give a man fire to play with and he's entertained for hours, right? ;-)

S'mores Cupcakes

adapted from Martha Stewart, Cupcakes, with inspiration from Proceed with Caution

makes 24 cupcakes


Graham Cracker Crust

  • 10 graham crackers, crushed in a food processor into crumbs
  • 1/2 stick butter, melted
  • 2 Tablespoons sugar
Preheat oven to 350. Line muffin tins with liners, and spray with nonstick cooking spray. Combine the graham cracker crumbs, butter, and sugar. Add 1 Tablespoon of the crumb mixture to each muffin tin, and use a small glass or bottle to press into the bottom. Bake 5-7 minutes, or until edges begin to brown. Remove from oven.

Chocolate Cake

adapted from Hershey's
  • 2 cups sugar
  • 1-3/4 cups all-purpose flour
  • 3/4 cup Cocoa powder
  • 1-1/2 teaspoons baking powder
  • 1-1/2 teaspoons baking soda
  • 1 teaspoon salt
  • 2 eggs
  • 1 cup buttermilk
  • 1/2 cup vegetable oil
  • 2 teaspoons vanilla extract
  • 1 cup hot, strong-brewed, coffee
Sift together the sugar, flour, cocoa powder, baking powder, baking soda, and salt in the bowl of a mixer. Stir to combine. In a seperate bowl, whisk together the eggs, buttermilk, vegetable oil, and vanilla. Add to flour mixture, and mix for 2 minutes on medium speed. Turn off mixture, and pour in the hot coffee. Stir to combine.

Fill each muffin tin 2/3 full of batter. Bake 18-23 minutes, or until a toothpick inserted in the center comes out clean. Cool completely on a wire rack before frosting.

Chocolate Ganache Glaze
Martha Stewart, Cupcakes
  • 6 oz semi-sweet chocolate, finely chopped
  • 2/3 cup heavy cream
  • 1 Tablespoon light corn syrup
Place chocloate in a medium heatproof bowl. Heat the cream and corn syrup to a simmer in a small saucepan; pour over chocolate. Let stand, without stirring, until chocolate starts to melt, 1-3 minutes.

Gently stir the choclate and cream until completely combined. This can be refrigerated for up to 5 days in an airtight container. Just reheat gently before using.

Marshmallow Frosting

Martha Stewart, Cupcakes

  • 1 envelope unflavored gelatin (1 scant tablespoon)
  • 1/3 cup plus 1/4 cup cold water
  • 1 cup sugar
In a mixing bowl, sprinkle the gelatin over 1/3 cup of cold water. Allow gelatin to soften, about 5 minutes.

Meanwhile, heat the remaining 1/4 cup water and the sugar in a saucepan over medium-high heat, stirring until sugar is dissolved. Stop stirring; using a candy thermometer to monitor, boil syrup until it reaches the soft-ball stage (238 degrees F). Use a wet pastry brush to brush down the sides of the pan to keep sugar crystals from forming.

Remove from heat. Add syrup to the softened gelatin. Whisk mixture by hand to cool, 1-2 minutes, then use an electric mixture to whisk on medium-high speed until soft, glossy (but not dry) peaks form, 8-10 minutes. Use immediately (frosting will harden)

To assemble


Spoon 1-2 tablespoons of the ganache onto each cupcake. Using a pastry bag fitted with a large round tip, pipe frosting onto each cupcake, swirling tip and releasing as you pull up to form a peak. Use a small kitchen torch or long-necked lighter to toast the frosting. Serve immediately.


Friday, August 21, 2009

Fontina and Herb Stuffed Chicken


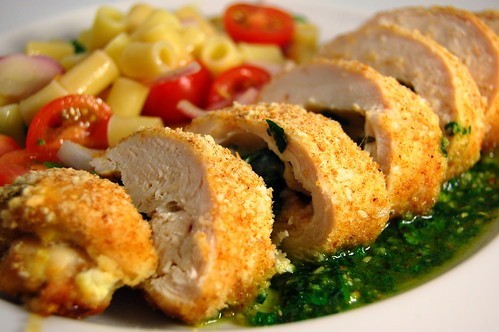
I bought chicken breasts at the grocery store this week, as usual, but wasn't sure what to do with them. Initially I planned to marinate and grill them as usual, but the weather was rainy and I wanted comfort food. So I just kind of threw this together, and they turned out much better than I expected. I really love those kinds of meals, don't you?

This is basically a deconstructed pesto stuffed chicken breast. I just replaced the Parmesan with some melty, gooey, fontina, and added in some spinach and parsley in addition to the basil. I used the leftover herbs and pine nuts to throw together a quick pesto oil for the sauce, but I don't think it was necessary. It certainly didn't hurt though ;-)

Fontina and Herb Stuffed Chicken
  • 3 boneless, skinless chicken breasts, pounded to 1/4 - 1/2 inch thickness
  • 4-oz fontina cheese sliced
  • 3 Tablespons pine nuts, toasted
  • 1/2 cup fresh baby spinach, coarsely chopped
  • 1/4 cup mixed fresh herbs (I used basil and parsley, but could have used pretty much anything)
  • salt and pepper
  • garlic powder
  • 3/4 cup bread crumbs, toasted
  • 1 egg, lightly beaten
Preheat oven to 350. Lightly toast pine nuts and bread crumbs. Pound chicken breasts to 1/4-1/2 inch thickness.

Season chicken with salt, pepper, and garlic. Lay out 2-3 slices of cheese per breast, top with herbs and pinenuts, and roll tightly. Coat with egg and then breadcrumbs, and lay seam-side down on a well-oiled baking sheet.

Repeat with remaining chicken breasts

Bake for 25-35 minutes, or until the meat reaches 170. Allow to rest at least 10 minutes, then slice against the rolls and serve.

If making sauce, use leftover herbs and pine nuts, and combine in a food processor with 1 clove of garlic, salt, pepper, and additional olive oil to reach desired consistency.


BLOG DESIGN BY: SHERBET BLOSSOM DESIGNS