Tuesday, November 26, 2013

Cranberry-Swirl Cheesecake Bars


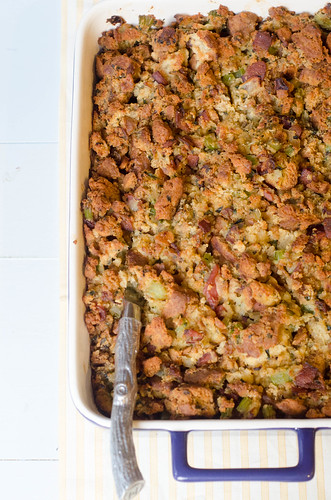
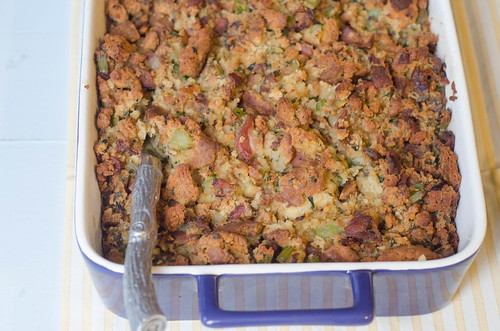
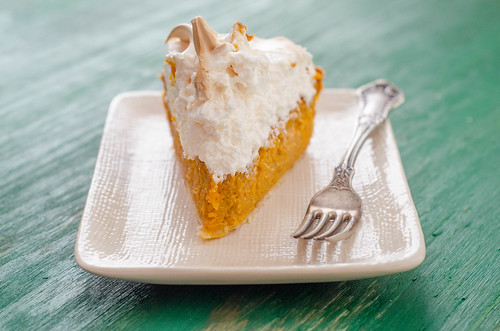
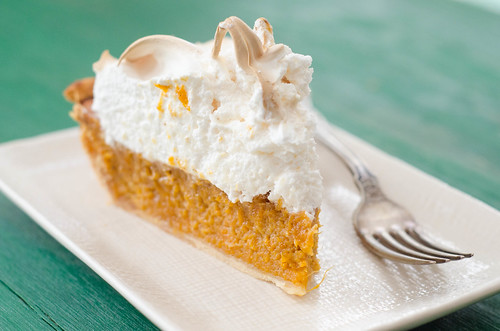
T-minus one day before Thanksgiving.  If you're hosting, I hope you have your menu set.  Actually,  I hope you have a good head start on all of your cooking and prep.  As for me, I'm not hosting, but I'll be contributing the stuffing, gravy, and mashed potatoes to our family's lunchtime feast.  We'll go to my in-laws' house for dinner, and I'm bringing roasted veggies and a pumpkin cheesecake tart with gingersnap crust for Thanksgiving 2.0.

If we're honest with ourselves, one of the best things about Thanksgiving dinner is the entire fridge full of leftovers.  I truly do love turkey day leftovers almost as much as the meal itself.  I enjoy maybe one to two meals of straight up reheated dinner, and then beyond that I will try and reinvent everything as best I can.  These turkey cranchiladas are a perennial favorite around here (we actually had them for dinner Tuesday night!).  And this pulled turkey sandwich with cranberry BBQ sauce is anther standby - especially if you use smoked turkey. But if you are looking to make another dessert - and really, who isn't - use your leftover cranberry sauce to make cheesecake bars.

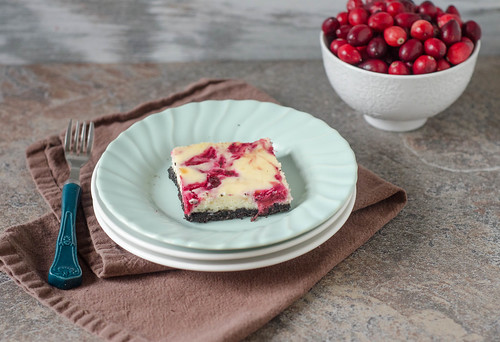
 You might be tired of pumpkin pie by now, and these cheesecake bars are a nice change of pace.  They start with a chocolate cookie crust, topped with a sweet and creamy cheesecake layer, and finally finished with a swirl of cranberry sauce.  They are the perfect blend of sweet-tart, and they are totally irresistible.  I initially planned to use a graham cracker or gingersnap crust, but I think the chocolate is a great and unexpected twist.  With the festive swirl of cranberry sauce, they look quite festive for Christmas as well.  A perfect treat to move us from Thanksgiving into Christmas.

I hope you all have the loveliest of Thanksgivings!

Cranberry-Swirl Cheesecake Bars
adapted from these raspberry-lemon cheesecake bars

  • 20 oreo sandwich cookies
  • 2 Tbs unsalted butter, melted
  • 16 oz cream cheese at room temperature
  • 1/2 cup Greek yogurt or sour cream
  • 3/4 cup granulated sugar
  • 2 eggs
  • 3/4 cup cranberry sauce
  • 1-2 Tbs water
Preheat the oven to 325 degrees, and line a 9x13 inch baking dish with foil, leaving an overhang on the long sides.  Spray lightly with cooking spray.

Add the cookies to the food processor, and process until the cookies become crumbs.  Transfer to a medium bowl with the melted butter.  Stir to combine well. Press the mixture into the prepared pan, using your hands or the bottom of a glass.  Bake 8-10 minutes, then transfer to a wire rack to cool.

Meanwhile, using an electric mixer (hand or stand mixer is fine), beat the cream cheese and sour cream together at medium speed until smooth.  Add the sugar, and mix 2-3 minutes at medium-high speed, scraping down the sides of the bowl as needed.  Add the eggs, one at a time, mixing well between each addition, then mix in vanilla extract.  Pour the mixture over the crust and use a spatula to smooth the top.

In the now-empty food processor, puree the cranberry sauce with water until it is smooth.  Drop spoonfuls of the cranberry sauce over the cheesecake batter, then use a toothpick to create swirls over the top.

Bake 35-40 minutes, or until the cheesecake is just set and no longer jiggles in the middle.  Allow to cool to room temperature, then cover and refrigerate at least 4 hours before serving.  To serve, lift the cheesecake from the pan using the foil overhang, then slice into squares with a clean, sharp knife.


Monday, November 25, 2013

Biscuit, Bacon, and Oyster Stuffing


I know oyster stuffing can seem.... weird.  But it's a thing.  It's a quite popular thing in certain regions of the US, in fact.  I myself could never bring myself to make it or try it ... the thought of biting into an oyster hiding in my dressing kind of icked me out.  It's a textural issue for me.  But I had the idea to chop the oysters prior to mixing them into the dressing, so you get all the wonderful, briny flavor, but none of the unappetizing slimy texture.  Win and win!

I've previously sung the praises of this southern-style cornbread dressing, and really had zero interest in trying another dressing recipe... ever.  But when this biscuit and bacon dressing was recommended to me, I couldn't resist.  I mean, a stuffing recipe made totally out of biscuits?  With bacon?  Sold.

The oysters were a great addition - the briny flavor was a great counterpart to the salty bacon and rich biscuits.  This dressing is absolutely amazing, and I beg you not to be scared off by the addition of the oysters.  In fact, when I made this, I made no mention of the oysters, and Joey immediately proclaimed it to be the best stuffing he's ever had.  Oysters in your dressing.  Do it.


Biscuit, Bacon, and Oyster Dressing
adapted from Williams-Sonoma and Cook Like a Champion

  • 12 cream biscuits (1.5  times this recipe)
  • 1 lb bacon, diced
  • 1 large onion, minced
  • 5 celery stalks, diced; and their leaves minced
  • 1/4 cup minced fresh parsley
  • 2 Tbs minced fresh sage
  • 2 Tbs minced fresh thyme
  • 10-12 fresh oysters, shucked*
  • 3 1/2 cups chicken broth
  • kosher salt and freshly ground black pepper
  • 2 Tbs unsalted butter, cut into 1/2-inch pieces
Preheat the oven to 350 degrees.  Crumble the biscuits into 1-inch pieces, and spread evenly on a baking sheet.  Toast 20-25 minutes, or until the biscuits are lightly browned.  Remove from oven, set aside to cool, and increase the temperature to 375 degrees.

Meanwhile, in a large skillet, cook the bacon until browned and crispy, stirring often.  Use a slotted spoon to remove the bacon to a paper towel-lined plate.  Pour all but 3 tablespoons of the fat.

Add the onions to the skillet and cook until they begin to soften, 5 to 6 minutes.  Add the celery, celery leaves, parsley, sage, and thyme, and cook, stirring often, until the vegetables are softened and beginning to brown, another 5 to 7 minutes.  

Meanwhile, add the oysters to the food processor and pulse a few times to finely mince.  Set aside.

In a large mixing bowl, gently stir to combine the biscuit pieces, sautéed vegetables, and oysters.  Pour the chicken broth over the mixture and mix well.  Pour the mixture into a greased 9x13 inch baking dish.  Sprinkle the butter pieces over the top and cover the dish with foil.

Bake 30 minutes, then remove the foil and bake an additional 20-25 minutes, or until the top is golden-brown and crispy.  Allow to cool 10 minutes before serving.  

*If you don't want to shuck your own oysters, oysters can be purchased already shucked, in pint containers.  They are packed in their own liqueur, so just drain the liquid off before chopping.


Sunday, November 24, 2013

Sweet Potato Pie with Marshmallow-Meringue Topping


In general, I'm not really a bossy person (except to my little sister.  Hi, Hope!).  But I'm about to boss you around.  You must.  MUST.  make this pie for Thanksgiving.  I don't care if you already have five pies on the menu; make it an even six.  This pie is sooooo worth it.  I know sweet potatoes can be kind of divisive, but I served this to two self-proclaimed sweet potato-haters, and they both loved it.

So here's the breakdown:  a standard pie crust, a smooth and creamy spiced sweet-potato filling, and a marshmallow-meringue topping.  The whole thing is quickly browned in the oven just before serving to give you that awesome toasted marshmallow flavor.  The sweet and fluffy marshmallow topping is a perfect contrast to the subtly spiced, smooth, and creamy filling.


It is a multi-step process, but nothing is difficult or tedious.  And you can split it up over two days or so as well - make your pie dough and cook the sweet potatoes the day before, then assemble and bake it the day of.  Or make the pie the night before, then just prep the meringue topping the day of.

I will probably never serve a pumpkin pie again on Thanksgiving, because no one would even touch it with this sweet potato pie on display.  It's a showstoppingly gorgeous pie - look at that pillowy mound of marshmallow meringue!  I know that sweet potatoes are a quintessential Thanksgiving side dish, and it may seem redundant to serve them as dessert too, but I promise that no one will mind.

I have a few Thanksgiving recipes to share this week, but I had to start with this one.  It's officially become a Thanksgiving tradition in our house.


Sweet Potato Pie with Marshmallow-Meringue Topping
adapted from Southern Living, November 2010


Crust
Filling
  • 4 Tbs unsalted butter, melted and cooled slightly
  • 1 cup sugar
  • 1/4 tsp salt
  • 1 tsp ground cinnamon
  • 1/4 tsp ground nutmeg
  • 3 large eggs, lightly beaten
  • 3 cups cooked and mashed sweet potatoes (from about 2 1/2 lbs of sweet potatoes - 2-3 sweet potatoes)*
  • 1 cup half-and-half
Marshmallow Meringue
  • 3 egg whites
  • 1/2 tsp vanilla extract
  • pinch of salt
  • 3 Tbs sugar
  • 1 (7-oz) jar marshmallow creme
Prepare the crust:  Preheat the oven to 425 degrees.  On a lightly floured surface, roll the pie dough into a 12-inch circle; carefully transfer to a 9-inch pie plate.  Fold the edges under and crimp the edges.  Poke the bottom and sides with a fork, then line the pie with parchment paper and fill with pie weights or dried beans.  Bake 9 minutes, then remove and discard the parchment and weights.  In a small bowl, whisk together the egg yolk and cream, then brush over the entire surface of the crust.  Return to the oven and bake an additional 6 to 8 minutes, or until the crust is golden-brown.  Transfer to a wire rack and set aside to cool while you prepare the filling.  Reduce the oven temperature to 350 degrees.

To prepare the filling, whisk together all the ingredients in a large bowl.  Carefully pour the filling into the prepared pie dish.  It will be very full.  

Bake 50 to 55 minutes, or until the center of the pie is set, and a knife inserted into the center comes out clean.  Wrap the crust with aluminum foil if it is browning too much.  Allow to cool at least and hour before topping.  Increase the oven temperature to 400 degrees.

To prepare the topping, beat the egg whites in a stand mixer at high speed until foamy.  Add the sugar 1 tablespoon at a time, until the egg whites form stiff peaks.  Turn off the mixer and add one-fourth of the marshmallow creme.  Resume mixing at medium speed, then add the rest in one-third increments, mixing well between each addition.

Immediately spoon over the pie and spread and "style" the meringue into peaks using the back of a spoon.  Bake 6 to 7 minutes, or until the meringue is lightly browned.  Serve.

* To prep the sweet potatoes, prick a few times with a fork, then bake for about an hour at 400 degrees.  


Sunday, November 17, 2013

Wild Rice Gratin with Kale, Caramelized Onions, and Gruyere


So Thanksgiving can be kind of a tricky holiday.  With some families, there are certain dishes that have to be on the table.  Non-negotiables, if you will.  And these dishes must be made a specific way.  No riffing, substitutions, or changes.  Don't even try to pull a fast one and use fresh green beans instead of frozen or canned in the green bean casserole, for example.  Or put apples, sourdough, and bacon in the dressing (I've made that mistake, and barely lived to tell the tale).  And that's fine.  Thanksgiving is about tradition.

Other families like to use the holiday to mix things up and try new dishes.  Rack of lamb on Thanksgiving?  Why not?  The important thing if that you're spending the day with your loved ones and eating delicious food, so who cares if it's nontraditional?

I like to think I'm somewhere in between.  I do like the standards on Thanksgiving:  turkey and gravy, sweet potatoes, dressing, and cranberry sauce.  But I also like mixing things up - maybe a unique dessert or new side here and there.  Or a twist on a traditional dish.

I'd like to think that this wild rice gratin would appeal to both sets of people.  It's cheesy, comforting, and seasonally appropriate, but it's a little more special than your typical rice casserole.  There are sweet caramelized onions, hearty kale, and wild rice.  Oh yeah, and a cheesy, crunchy, buttery topping.  With bubbly gruyere cheese.  Oh yes, this is good stuff.

However you choose to eat your Thanksgiving dinner, I'd highly suggest that you make this gratin a part of it.  If you have vegetarians to serve, you could even add some quinoa or lentils to make it a complete protein - missing out on the turkey isn't so bad after all!


Wild Rice Gratin with Kale, Caramelized Onions, and Gruyere
adapted from The Smitten Kitchen Cookbook, by Deb Perelman
serves 10 to 12 as a side

  • 1 1/2 cups uncooked wild rice
  • 3 Tbs butter, divided
  • 1 Tbs olive oil
  • 2 large sweet onions, halved and thinly sliced
  • 3/4 tsp kosher salt, plus more to taste
  • freshly ground black pepper
  • pinch of red pepper flakes
  • 4 cups stemmed, ribboned kale leaves
  • 2 cups coarsely grated Gruyere cheese
  • 1 cup chicken or vegetable broth
  • 1 cup panko bread crumbs
Rinse the rice thoroughly, then drain.  Boil 4 1/2 cups of water in a medium saucepan, and stir in the rice.  Cover, return to a boil, then simmer over low heat for 40 minutes, or until the rice is tender.  Remove from heat and set aside.

Meanwhile, prepare the rest of the components to the gratin:  Preheat the oven to 375 degrees.  Use 1 tablespoon of the butter to generously grease a 2-quart baking dish.  

Caramelize the onions:  Heat the olive oil and and 1 tablespoon of the butter in a large skillet over medium-low heat.  Add the onions, sprinkle with the salt and 1/4 teaspoon of pepper, and a pinch of red pepper flakes, and cook until they are tender and golden-brown, about 30 minutes, stirring occasionally.  


Add the kale ribbons, and cook until they wilt, about 5 minutes.  Stir in the wild rice, 1 cup of the grated cheese, and the broth.  Taste and season with additional salt and pepper if needed.

Spread the mixture into the prepared dish, and sprinkle with the remaining cheese.  Toss the breadcrumbs with the last remaining tablespoon of butter, and salt and pepper to taste.  Sprinkle the breadcrumbs over the cheese, and bake the gratin until it is bubbly and beginning to brown, 30 to 35 minutes.  Serve.


Wednesday, November 13, 2013

(Crockpot) Texas-Style Chili


A few weeks ago, we had Henry and Tucker baptized.  It was a wonderful service, and we were lucky to be able to share the special occasion with our families and friends.  I have to admit that I was more than a little nervous about how Smith would behave during the baptism - he's a typical two-year old boy, and doesn't like to be still.  Especially when he's in a fun new place that needs to be explored.  There were six adults on the pulpit, and at some point he was chased down by five of us.  And then Henry spit up all over himself and me.  I like to think that these things simply made the day more memorable for us all.


After church, we had our families over for a casual lunch.  I like to keep these kinds of events relaxed and low-key, so I planned a simple and seasonal menu:

Chicken Chili Verde
Texas-Style Chili
Baked Ham & Cheese Sliders
Baked Potatoes
Fall Harvest Pear Salad
Jalapeno-Cheddar Cornbread
Various toppings and garnishes for the chili

I'm especially glad that I kept things pretty simple, because we had some unexpected home issues to deal with most of the day prior to the lunch, which kept me out of the kitchen almost all day.  I had to nix my plans for a mini dessert bar, however, and ended up ordering a cake from a local bakery.  It all worked out in the end, and the day was a big success.

In large part of course, thanks to this chili.  Joey and I searched and browsed through countless cookbooks and websites trying to choose a chili to serve.  In the end, we chose this one, because it's a little different than the standard ground beef chili, but still familiar.

This chili has big chunks of beef, a chile-infused sauce, kidney beans, and just enough spice to keep things interesting.  It was a big hit with our families, and it is now officially our "go-to" chili.  I know that Texas chili purists will point out that Texas-style chili doesn't have beans in it.... but well... I just like beans in my chili, so sorry not sorry. ;-)

Beef chuck is the meat of choice here, and while it is typically kind of tough, after 9 hours in the crock pot, it is melt-in-your-mouth-tender.  It's super easy to prep, and then the longer it cooks, the better it gets.  This was the perfect blend of spicy, smoky, and savory.  Everyone loved it; so much so that I was kind of sad that there were barely any leftovers.  It was 29 degrees this morning, and a big bowl of this would be have been perfect for dinner tonight.  I think that will happen sooner, rather than later.

Crockpot Texas-Style Chili
barely adapted from America's Test Kitchen, Slow Cooker Revolution
serves 8 to 10

  • 3 medium onion, minced
  • 2 jalapeños, seeds and ribs removed, minced
  • 1/4 cup chili powder
  • 1/4 cup tomato paste
  • 3 Tbs vegetable oil
  • 8 cloves garlic, minced
  • 2 Tbs cumin
  • 1 tsp dried oregano
  • 2 (15-oz) cans dark red kidney beans, rinsed and drained (optional)
  • 1 (28-oz) can crushed tomatoes, preferably fire-roasted
  • 2 cups low-sodium chicken broth
  • 1/4 cup Minute tapioca
  • 3 Tbs soy sauce
  • 1 Tbs minced canned chipotle in adobo sauce
  • 2 Tbs brown sugar
  • 2 bay leaves
  • 1 (5-lb) boneless beef chuck roast, trimmed and cut into 1-2 inch chunks
  • salt and pepper
  • 1/2 cup minced fresh cilantro
In a microwave-safe glass bowl, combine the onions, jalapeño, chili powder, tomato paste, vegetable oil, garlic, cumin, and oregano.  Cook about 5 minutes, stirring every 1-2 minutes.  Transfer to the slow cooker.

Stir the beans, tomatoes, broth, tapioca, soy sauce, chipotles, sugar, and bay leaves into the slow cooker.  Season the beef liberally with salt and pepper, and stir into the bean mixture.  Cover and cook on low until the beef is tender, 9 to 11 hours on low, or 5 to 7 hours on high.

Turn off the heat, uncover, and allow the mixture to settle 5 to 10 minutes.  Remove the fat from the surface using a large spoon, discard the bay leaves, and taste.  Season with additional salt and pepper as needed.  Stir in the cilantro, and serve.


Monday, November 11, 2013

Autumnal Chicken Pot Pie


As much as I mourn the end of summer, fall is pretty great in its own way too (I guess...).  Cooler weather means more time to play outside comfortably.  College football is on every weekend.  Pumpkin patches are fun.  Halloween is awesome.  Jumping in the leaves is a rite of passage.  And comfort food is here for the long haul.  We've been making the most of fall this year, and Caroline and Smith are especially loving all the time outdoors.  Joey got some pretty cute pictures of them over the weekend, so I thought I'd share them with you.


And I've been making the most of fall with all the delicious fall-inspired recipes.  This fall-harvest pear salad has made many appearances on my dinner table this year, and I've been taking advantage of winter squash, apples and pears, cranberries, and greens in my cooking.  

This fall-inpsired chicken pot pie has been a favorite of mine for the past few years, and I'm so excited to finally share it with you.  Chicken pot pie is one of my most beloved dinners, and I'm always on the lookout for new variations and recipes.  This one is especially great.  You start with a basic pot pie filling:  shallots, chicken, a creamy, velvety sauce... and with the addition of cubes of roasted butternut squash, sautéed wild mushrooms,

and fresh sage, you have a wonderfully comforting and seasonal pot pie.  In lieu of a traditional pie crust, this pot pie is enveloped in buttery, flaky, puff pastry.  It's a simple twist, but it really puts this over the top (side note:  I used store-bought puff pastry this time, but I'd love to try this homemade whole wheat puff pastry.  I think the wheat version would be a great addition to the comforting, fall-inspired filling).  


What's more, this is a great make-ahead meal.  I assembled the whole thing in the morning, then kept it chilled in the refrigerator all day.  Dinner time was so easy and stress-free!  And it doesn't dirty every dish in your kitchen.  The pot pie is baked and served in the same skillet you use to make the filling - I love my cast iron pan!  

If you're looking for a fun twist on chicken pot pie, give this a try.  I think it would be a great use for leftover turkey as well.  I'm always looking for ways to reinvent my Thanksgiving leftovers, and this is a great option!


Autumnal Chicken Pot Pie
barely adapted from Sara Foster's Southern Kitchen
serves 6-8
  • 4 cups of peeled, seeded, and chopped butternut squash (from 1 small squash)
  • 1 Tbs olive oil
  • sea salt and freshly ground black pepper
  • 6 Tbs unsalted butter, plus more as needed
  • 8 oz wild mushrooms (any combination of oysters, chanterelles, shiitakes, and/or cremini)
  • 2 shallots, minced
  • 1/4 cup all-purpose flour
  • 3-4 cups low-sodium chicken broth
  • 4 cups cooked shredded chicken
  • 1 Tbs chopped fresh sage (or 1 tsp dried crumbled sage)
  • 1 sheet frozen puff pastry, thawed in the refrigerator
  • 1 large egg, lightly beaten with 2 Tbs milk or water (for egg wash)
Preheat the oven to 400 degrees Fahrenheit.  

On a rimmed baking sheet, toss the squash with 1 tablespoon of olive oil, salt, and pepper.  Arrange in a single layer and bake 25 to 30 minutes, stirring halfway through.  Remove from the oven and set aside.

Over medium-high heat, melt the butter in a 10 to 12-inch cast iron skillet (or another oven-safe skillet).  Add the mushrooms and shallots and cook 5-6 minutes, stirring frequently, until light brown.  Add more butter if needed.  Add the flour and cook, stirring constantly, until light brown, 3 to 4 minutes longer.  Slowly stir in the broth, scraping the browned bits from the bottom of the pan, and bring to a gentle boil.  Stirring often, cook until the sauce is slightly thickened, 5-6 minutes.

Stir in the chicken and the sage, and season with salt and pepper (start with 1 teaspoon of salt and 1/2 teaspoon of pepper, and adjust from there).  Reduce the heat to medium and cook until the mixture is thick and creamy, about 10 minutes, stirring frequently.  Remove from heat, stir in the squash, and allow to cool slightly.  Taste and season with salt and pepper as needed.

Meanwhile, roll out the puff pastry on a lightly floured surface - just enough to to even out the lines.  Cut the pastry to fit the top of the baking dish, leaving enough excess for the pastry to drape over the edge by just 1/2 an inch or so.

Gently place the puff pastry over the filling, and cut a few slits in the crust to allow steam to escape.  Decorate with the extra puff pastry if you'd like, and brush the top with the egg wash.  Place the skillet on a baking sheet and transfer to the refrigerator for at least 1 hour.

When ready to bake, preheat the oven to 375 degrees.  Transfer the skillet + baking sheet to the oven and bake until the filling is bubbling around the edges and the pastry is golden-brown, 45 to 50 minutes. Remove from the oven, allow to cool slightly, and serve.


Tuesday, November 5, 2013

One-Pot Cheesy Gnocchi with Broccoli & Chicken


There have been very few times in my life when I've been a trend-setter.  Typically I'm several years behind the trends, only to finally catch on as everyone else is moving on to the next big thing.  I just bought my first pair of skinny jeans this year, for example.  And most recently, I've become addicted to the now-defunct show, Gossip Girl.  It is mindless, smutty, and totally ridiculous, but it is my new guilty pleasure.  I blew through way too many episodes yesterday, and finally finished the first season...  when I should have been folding the mountain of laundry, cleaning the bathrooms, and/or any of the other million items on my never-ending to-do list.  But Blair and Serena were calling my name, and I couldn't resist.  Did anyone else watch Gossip Girl, or am I alone in this one?

Another thing I'm late to the party on:  gnocchi.  I'd ordered it in restaurants a few times, but never used it in my own cooking.  It is super easy, and while I do plan on making it from scratch soon, the vacuum-sealed packages are great in a pinch.  I love serving it with bolognese sauce, brown-butter sauce with various veggies, and now this one-pot cheesy gnocchi with broccoli and chicken.  It is embarrassingly easy, a hit with our whole family, and actually not too sinful - especially since it's basically glorified mac and cheese.  I almost always have all the ingredients on hand, so this is a perfect last-minute meal, or something to whip up when other dinner plans fall through.  My kids love broccoli, and combined with shredded chicken, tender gnocchi, and creamy mascarpone cheese, this is a killer combination.

One-Pot Cheesy Gnocchi with Broccoli & Chicken
adapted from The Yummy Mummy Kitchen
serves 4

  • 17 oz potato gnocchi
  • 3 cups broccoli florets
  • 3/4 cup milk
  • 2 cloves garlic, minced
  • pinch of cayenne pepper
  • 4 oz mascarpone cheese, or cream cheese
  • 1/2 cup grated Parmesan cheese
  • 1 cup shredded cooked chicken breast
  • kosher salt and freshly ground black pepper
  • 1/4 cup fresh basil, torn
Bring a large pot of salted water to a boil.  Add the gnocchi to the water and cook until they rise to the surface, about 3 minutes.  Add the broccoli and continue to cook an additional 2 minutes.  Remove from heat, drain, and rinse the gnocchi and broccoli with cold water.  Drain well and set aside.

Return the pot to the stovetop, and over medium heat, add the milk, garlic, and cayenne.  Bring to a simmer and stir in the mascarpone and Parmesan until the cheeses are melted.  Reduce the heat to medium-low and cook a few more minutes, or until the milk-cheese mixture is slightly thickened.

Add the chicken, gnocchi, and broccoli and stir well to combine.  Season to taste with salt and pepper.  Remove from heat and allow to sit 10 minutes before serving (this will help thicken the sauce).  Sprinkle with basil and serve.


BLOG DESIGN BY: SHERBET BLOSSOM DESIGNS