Tuesday, February 14, 2012

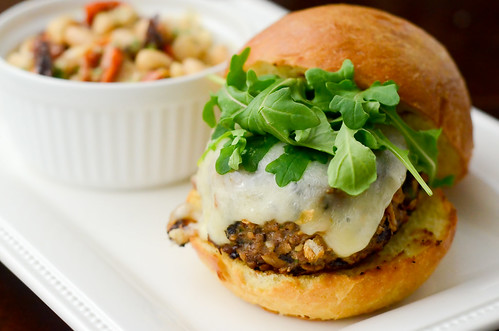
Mushroom-Crusted Turkey Burgers


Last year, Joey took me to one of our favorite restaurants for my birthday.  I had a seared pork loin that was stuffed with cheese and prosciutto and coated in a porcini mushroom crust.  It was insanely delicious, and I vowed to recreate it then and there.  And here we are, almost one year later.... Somehow a mushroom-crusted pork loin morphed into the idea of a mushroom-crusted turkey burger. 

It was definitely a great adaptation.  To coat the burgers, I ground up some dried porcini mushrooms in the food processor (I used my mini-prep for the job), and then coated the burgers with the powder.  I kept the burger itself pretty simple - a few simple herbs and spices and a little bit of the porcini powder.  Seared in a skillet and topped with Havarti and a little arugula, these burgers now top the list as on of our favorite meals.  I love making fun burgers, and Joey said these are probably his favorite that I've made yet.  The mushroom crust gets a little crispy in the skillet, and the earthy mushrooms go really well with the turkey burgers and creamy Havarti.  The arugula gives the whole thing a bit of freshness and bite.  Ready in under 30 minutes, full of mushroom flavor, and relatively healthy - what more could you want?


Mushroom-Crusted Turkey Burgers
a Pink Parsley Original
makes 4 burgers
  • 1 oz dried mushrooms
  • 1/4 tsp kosher salt
  • 1/8 tsp ground black pepper
  • 1 1/4 lbs ground turkey
  • 1 scallion, minced
  • 2 Tbs minced fresh parsley
  • 1 tsp Dijon mustard
  • 1 tsp Worcestershire sauce
  • 2 Tbs oil
  • 4 slices Havarti cheese
  • 4 burger buns, split
  • arugula, for serving
In the bowl of a food processor, grind the dried mushrooms until they are a coarse powder.  Reserve 2 teaspoons of the powder, and transfer the rest to a shallow bowl or pie plate and mix in the salt and pepper.

In a large bowl, combine the turkey, reserved mushroom powder, scallion, parsley, mustard, and worcestershire sauce.  Season with salt and pepper to taste.  Form into 4 equal-sized patties.

Preheat a large skillet over medium heat, and add the oil.

Working one burger at a time, coat the outside with the mushroom powder, pressing lightly to adhere. 

Cook the burgers 4-5 minuts per side, or until the meat is cooked through.  Add the cheese for the last minute or two, and continue cooking until it has melted.

Toast the buns and serve the burgers topped with arugula. 


Sunday, February 12, 2012

White Bean Salad with Oven-Roasted Tomatoes and Goat Cheese


Oven-Roasted tomatoes are pretty much my favorite (healthy) thing ever.  Whenever I make them, it's hard to save them for the recipe, when really I just want to eat the entire pan as a snack.  But it's definitely worth it to save them for this salad.  White beans are one of my favorite types of beans, and they are the base of this salad.  They are mixed with the sweet and tender oven-roasted tomatoes, pine nuts, lemon, and goat cheese.  This is a wonderful side dish, but it makes a great lunch or light entree served over a bed of arugula as well.  

I have had a black bean salad with roasted tomatoes saved for quite some time, but for some reason I thought of turning it into a new salad using white beans, pine nuts, and goat cheese instead of the black beans, feta, and almonds.  It just goes to show that it is incredibly versatile, and you can pretty much adapt it to any flavor profile you'd like.

I've been making more of an effort to prepare interesting and healthy side dishes lately, and this one was a triple success:  easy, healthy, and it made enough for me to enjoy for lunches for the rest of the week!  If you want to add meat and turn it into a heartier main-course salad, then I think chicken sausage, grilled chicken, or shrimp would be great as well.

White Bean Salad with Oven-Roasted Tomatoes and Goat Cheese
inspired by Super Natural Everyday, by Heidi Swanson
  • 1 pint cherry tomatoes (about 2 cups)
  • 1/4 cup extra virgin olive oil, plus more if needed
  • 1 Tbs sugar
  • salt and black pepper
  • 4 cups (2 15-oz cans) cooked Cannellini Beans
  • 1/3 cup toasted pine nuts
  • zest and juice of 1 lemon
  • 1/2 cup crumbled Goat cheese
  • Arugula, for serving (optional)
Preheat the oven to 350 degrees, and position the rack in the top third of the oven.  Halve each tomato and place them cut-side up on a rimmed baking sheet.  In a medium bowl, whisk together the olive oil, sugar, and 1/2 teaspoon of salt.  Pour over the tomatoes and top with cracked black pepper.  Cook 45 to 60 minutes, or until the tomatoes shrink a little bit and start to caramelize around the edges.  Allow to cool to room temperature before using.  The tomatoes can be refrigerated in an airtight container (with their oil) for about 1 week.

To make the salad, combine the beans, most of the tomatoes (with their oil), pine nuts, 1/4 teaspoon of salt, lemon zest, and lemon juice.  Taste and adjust the seasonings.  Gently fold in the goat cheese, and top the salad with the rest of the tomatoes and some fresh black pepper before serving. 


Thursday, February 9, 2012

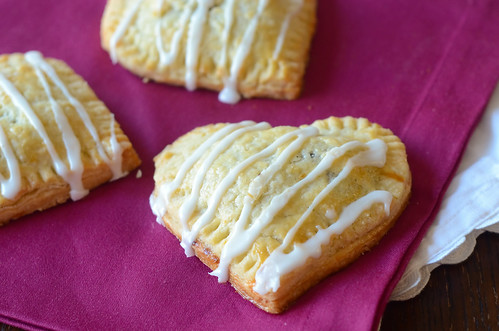
Heart-Shaped Cherry-Nutella Pop Tarts

 Last fall, when I made the Pumpkin Pie Pop Tarts, I started thinking of possibilities for other flavors.  I've got quite the list going, but this time I chose to go festive for Valentine's Day with cherry pie filling.  And in a fly by the seat of my pants decision, I decided to do half of them with a cherry pie-nutella filling.  Which turned out to be a very wise decision indeed.  While I really loved the cherry filling, the cherry-nutella filling was just over-the-top good. And cutting them into hearts just makes them so romantic, doesn't it?
I used the exact same recipe and method as the pumpkin pop tarts, but instead of cutting the dough into rectangles, I used a heart-shaped cookie cutter.  I re-rolled the scraps to get a few more Pop Tarts out of the batch, and I couldn't tell a difference in the quality of the pastry at all.

Since cherries aren't in season right now, I used frozen cherries for the filling.  I kept it super simple with a little sugar, lemon juice, and a splash of bourbon, then thickened the mixture with some cornstarch.

This was a really fun project, and I think kids would really get a kick out of making these for Valentine's Day. 


Cherry-Nutella Pop Tarts
pastry from these Pumpkin Pie Pop Tarts, which are from Joy the Baker


For the Pastry:

  • 2 cups all-purpose flour
  • 1 1/2 Tbs granulated sugar
  • 3/4 tsp salt
  • 1 cup (2 sticks) unsalted butter, cold, cut into cubes
  • 1 large egg
  • 2 Tbs milk
  • 1 large egg (for brushing the dough)
For the Filling:
  • 12-oz frozen cherries, thawed and drained
  • 2 Tbs sugar
  • juice of half a lemon
  • splash of Bourbon (optional)
  • 1 Tbs cornstarch mixed with 1 Tbs water
  • Nutella (optional)
For the Glaze:
  • 1 cup powdered sugar
  • 2-4 Tbs milk
  • 1/2 tsp vanilla extract

In the bowl of a food processor, pulse together flour, sugar and salt.  Add the cold butter and pulse in 1-second increments until the butter is the size of peas.  The mixture should also hold together when squeezed into a ball.

In a small bowl, beat the egg with the milk.  Add the mixture all at once to the dry ingredients and process to make sure that moisture is introduced to all of the flour mixture.  On a lightly floured surface, knead the dough  for a few turns until it really starts to come together.  Divide the dough in two, wrap in plastic wrap and refrigerate for about 30 minutes

While the dough is chilling, prepare the filling:

In a medium saucepan, combine the cherries, sugar, lemon juice, and bourbon.  Bring to a boil over medium heat, and mix in the cornstarch mixture.  Cook until thickened, stirring often, 5-10 minutes.  Use a fork to mash the cherries.  Set aside until ready to use.

On a well floured work surface, press dough into a 3×5-inch rectangle, roll the dough out to about 1/8-inch thickness.  The dough should be slightly larger than 9×12-inches.  Trim dough with a pizza cutter, creating a perfect rectangle that is 9-inches tall and 12-inches long.  Using the pizza cutter, cut each side into thirds, creating 9 squares.  Place dough squares in the fridge while you roll out the second piece of dough in the same way. Alternatively, use a heart-shaped cookie cutter to cut out the pastry.

Brush one set of 9 squares with beaten egg.  This will act as the glue for the top layer of dough.  Spoon about one to two teaspoons of nutella into the center of each piece of dough, and then top that with one tablespoon of pie filling.  If you aren't using the Nutella, just top the pastry with the one tablespoon of cherry filling.  Top with a second piece of dough and use a floured fork to crimp the sides closed.  Use the tines of the fork to create vent holes in each tart.

Position a rack in the upper third of the oven and preheat to 350 degrees F.  Let tarts rest in the fridge for at least 30 minutes while the oven preheats.

Remove tarts from the fridge and brush the tops with the egg wash.  Bake for 25 to 30 minutes, or until light golden brown on top.

While the tarts bake, whisk together ingredients for the glaze and set aside.

Let baked tarts rest on a cooling rack to cool completely, and then use a spoon to drizzle the glaze over the Pop Tarts.  Best served within 2 days.


Tuesday, February 7, 2012

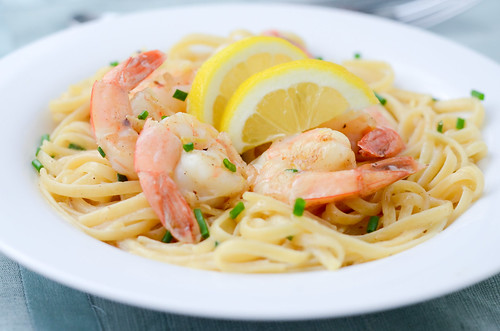
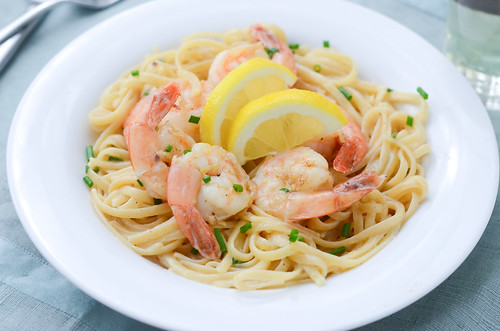
Lemon-Garlic Linguine with Mascarpone and Shrimp


This year, Valentine's Day falls on a Tuesday.  If you plan to stay home and cook, I'd imagine that you're looking for a quick and easy meal, but still something that's a little more special than your typical Tuesday night dinner.  One that allows you to spend some QT with your honey, and one that doesn't take hours of intense preparation.  I've got you covered.  This pasta dish comes together in the amount of time it takes to cook the noodles.  It is quick and easy, uses few ingredients (most of which I bet you already have on hand), yet it seems fancy.  Like something you might order at a cute little bistro.

You start out by quickly sauteing some shallots, garlic, and red pepper flakes in a little butter.  The shrimp is then added, and since it cooks quite quickly, you basically begin building the sauce immediately.  White wine and lemon juice are reduced, then you mix in the mascarpone (yum), a little reserved pasta water, and the pasta itself.  Let it all meld, then give the whole thing a big dose of citrus with some lemon zest.  And then you're done.  Seriously.  Less than 20 minutes.  A creamy, garlicky, citrusy shrimp and pasta dish.  Happy Valentine's Day!


Lemon-Garlic Linguine with Mascarpone and Shrimp
adapted from Fine Cooking
  • kosher salt
  • 8 oz dried linguine
  • 1 1/2 tsp lemon zest
  • juice of 1 lemon
  • 1 lb shrimp, peeled and deveined
  • freshly ground black pepper
  • 2 Tbs butter
  • 3 garlic cloves, thinly sliced
  • 1 small shallot, thinly sliced into rings
  • 1/8 to 1/4 tsp crushed red pepper flakes
  • 1/4 cup dry white wine
  • 1/2 cup mascarpone cheese
  • 2 Tbs minced fresh chives
  • lemon slices, for serving
Bring a large pot of well-salted water to boil.  Add the linguine and cook until just al dente, 7 to 8 minutes.  Drain, reserving 1/2 cup of the pasta water.

Meanwhile, pat the shrimp dry and toss with half the lemon zest, 1/4 teaspoon of salt, and 1/4 teaspoon of pepper.

In a large skillet set over medium-high heat, melt the butter until the foaming subsides.  Add the shallot, garlic, and red pepper flakes and cook, stirring continuously, until the garlic is just turning brown, about 1 minute.  Add the shrimp and cook about 90 seconds on one side.  Turn the shrimp, reduce the heat to medium, and add the white wine and half the lemon juice. 

Bring to a boil and cook about 1 minute.  Add the mascarpone, reserved pasta water, and linguine, and toss to coat.  Cook an addtional 1-2 minutes, or until the pasta is well coated and the sauce has thickened.  Mix in the remaining lemon zest and juice, and the chives.  Season with additional salt and pepper if necessary, and serve immediately with lemon slices.


Monday, February 6, 2012

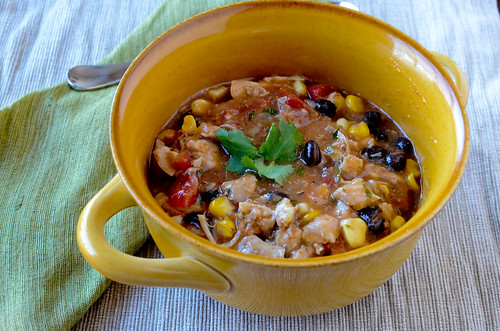
Tex-Mex Chicken Stew (Crock Pot)


I don't consider myself to be a "dog person."  I like dogs fine, but I really have no desire to have one of my own.  Plus, Caroline is allergic, so having a dog is just not in the cards right now.  However, I always had dogs growing up.  We had a Doberman for over 10 years, several stray mutts that we took in, and my dad had a Welsh Corgie, Obi (Wan Kenobi).


Obi was a great dog, and my dad's sole companion for several years, before he married my stepmother.  It was with great sadness that he passed away a few weeks ago.  The loss of a pet is always a hard thing to deal with.  Sure, they aren't people, but they are your friend.  Your companion.  Your playmate.  No one feels this way more than my friend Branny, and she is putting her money where her mouth is and giving back.  For every soup recipe submitted to her "Souper Bowl," she is donating $1 to the ASPCA.  I totally forgot to submit this, but she was kind enough to let me turn it in tardy :-)  I am dedicating this entry to Obi, may he rest in peace.

Now as for the soup, this is a quick and easy crock pot recipe.  Tex-Mex flavors are always a big hit in our house, and this was no different.  It makes a lot of stew, and I had plans to freeze half of it to save for a busy day.  But I ended up eating it for lunch all week, and before I knew it, it was gone.  It's pretty healthy, full of flavor, and the best part:  low maintenance!  Just let it cook all day, and then enjoy that night.  As far as toppings go, you could pretty much go crazy.  Cheese, jalapenos, cilantro, avocado, tomatoes, onions, tortilla chips.... the possibilities are endless.  You could serve this over rice too.  And it would be great with cornbread.  There is nothing better on a cold and rainy day than a big bowl of soup or stew.  That is, unless it's cooked and waiting for you when you get home.


Tex-Mex Chicken Stew
barely adapted from Slow Cooker Revolution
serves 6 to 8

Instead of chopping all the vegetables by hand, I roughly chopped them and then threw them in the food processor.  It dirtied an extra dish, but I was in a really big hurry when I was prepping this, so it was worth it to me.


If you are sensitive to or really love spice, feel free to adjust the amounts of jalapeno, cayenne, and chipotle chiles listed below.  This had a little bit of heat but was not overwhelming to us.


This cooks for 4-6 hours on low, but I honestly think it would be fine if you let it go longer than that. 
  • 1 large yellow onion, minced
  • 1 green bell pepper, seeds and ribs removed, chopped
  • 2 jalapeno chiles, seeds and ribs removed, minced
  • 6 garlic cloves, minced
  • 1 Tbs tomato paste
  • 1 Tbs vegetable oil
  • 1 Tbs chile powder
  • 2 tsp ground cumin
  • 1/8 tsp cayenne pepper
  • 4 cups low-sodium chicken broth (more if you like a brothier consistency)
  • 1 (14.5 oz) can diced tomatoes, drained (use Rotel if you like extra spice)
  • 1/4 cup Minute Tapioca
  • 1 Tbs brown sugar
  • 3 lbs boneless, skinless chicken thighs, trimmed of excess fat
  • salt and pepper
  • 2 cups frozen corn
  • 1 (15-oz) can black beans, drained and rinsed
  • 2 minced chipotle chiles in adobo sauce
  • 1/4 cup minced fresh cilantro
Microwave the onions, peppers, garlic, tomato paste, oil, chili powder, cumin, and cayenne in a large bowl, stirring occasionally, for about 5 minutes, or until the vegetables are softened.  Transfer to the slow cooker.

Stir the broth, tomatoes, tapioca, and sugar into the slow cooker.  Season the chicken with salt and pepper and nestle into the slow cooker.  Cover and cook until the chicken is tender, 4 to 6 hours on low.

Transfer the chicken to a large cutting board, and when it's cool enough to handle, shred into bite-sized pieces.  If any fat has risen to the surface in the slow cooker, skim it off with a large spoon (this was not necessary for me).

Return the chicken the slow cooker, stir in the beans, corn, and chipotle chiles, cover, and cook on high until heated through, about 10 minutes.  Stir in the cilantro, season with additional salt and pepper as needed, and serve.


Sunday, February 5, 2012

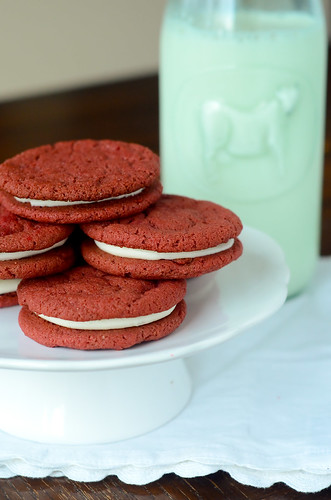
Red Velvet Oreos


Is there a cookie in the world that is more universally loved than the oreo?  I dare you to find one.  So what if you combined the beloved oreo with a classic flavor combination - red velvet?  You will end up with one awesome cookie.

I honestly don't know where I thought of this.  I'd been wanting to make red velvet cookies, but most of the recipes started with a box of cake mix, and I don't really like to bake out of the box.  So I was just driving down the road, thinking about cooking and food (as usual), and the idea hit me like a ton of bricks.  Red.  Velvet.  Oreos.  With cream cheese filling, of course.  To me, red velvet is characterized by a light chocolate taste, a bit of tang/sourness from buttermilk, and of course the red color.  I've had a recipe for homemade oreos saved for months, so I figured I could just adapt it to my liking.  Of course I added some red food coloring and decreased the chocolate, but I was stumped a bit when it came to the buttermilk.  Should I just add vinegar?  Add a few tablespoons of buttermilk and hope it didn't affect the chemistry of the cookie?  And then I had another idea:  buttermilk powder.  Many people keep it on hand so they don't have to worry about buttermilk going bad.  Just like powdered milk, you just add water to the powder.  But since powdered milk is often used in baked goods, I figures why not try buttermilk powder?  And it worked!  These cookies are slightly chocolately with that characteristic buttermilky tang.  Fill them with cream cheese icing and you have one addicting cookie.


Now that the Super Bowl is over and it's time to start thinking about Valentine's Day, you should definitely consider these cookies as a strong possibility for a festive dessert.  They would be so fun to send in with you child to school, or just for dessert or a special snack.  They are literally mixed up in minutes, and before you know it you'll be snacking on your new favorite cookie.


These came out a little bit larger than I'd expected, so I've adjusted the instructions below.  I found buttermilk powder at my local Super Target, but I'm sure it's also available at most well-stocked grocery stores.


Red Velvet Oreos
inspired by Retro Desserts, via Annie's Eats and Smitten Kitchen

For the cookies:
  • 1 1/4cups all-purpose flour
  •  5 Tbs unsweetened Dutch process cocoa powder
  • 3 Tbs buttermilk powder
  • 1 tsp baking soda
  • ¼ tsp baking powder
  • ¼ tsp salt
  • 1 1/4 cups sugar
  • 10 Tbs (1¼ sticks) unsalted butter, at room temperature
  • 1 1/2 - 2 tsp red food coloring
  • 1 large egg
For the filling:

  • 4 tbsp. (¼ cup) unsalted butter, at room temperature
  • 3 oz. cream cheese, chilled
  • 2 cups confectioners’ sugar, sifted
  • pinch of salt


Preheat the oven to 350˚ F.  Line two baking sheets with silicone baking mats or parchment paper.

In a food processor or the bowl of an electric mixer, combine the flour, cocoa powder, buttermilk powder, baking soda, baking powder, salt, and sugar.  Pulse a few times to combine.  Cut the butter into tablespoon size pieces, and add them to the bowl and pulse or mix briefly to incorporate.  In a small bowl, lightly beat the egg and stir in the food coloring. Pour into the mixture and pulse or mix until a cohesive mass forms.

Scoop about 2 teaspoons of batter onto the baking sheet.  Continue scooping, spacing the dough balls a couple of inches apart.  With moistened fingers, gently press down on the dough balls to flatten slightly.  Bake for 9-11 minutes, rotating the pans halfway through baking.  Cool the cookies completely on the baking sheet. 

To make the filling, combine the butter and cream cheese in the bowl of an electric mixer.  Beat on medium-high speed until smooth.  Add the confectioners’ sugar and salt to the bowl and mix on low speed just until incorporated, then increase the speed to medium-high and beat until light and fluffy, about 2-3 minutes.  

To assemble the cookies, match them up by size.  Use a pastry bag fitted with a  round tip to pipe a swirl of filling onto the flat side of one cookie of each pair.  Sandwich together with the remaining cookie and press down so that the filling reaches the edges.


Thursday, February 2, 2012

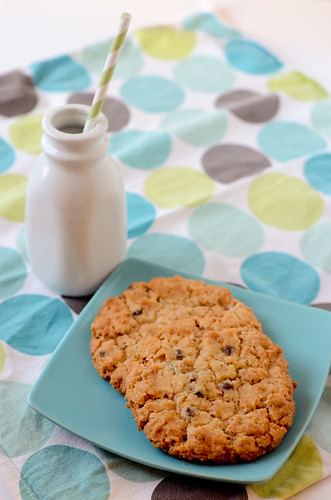
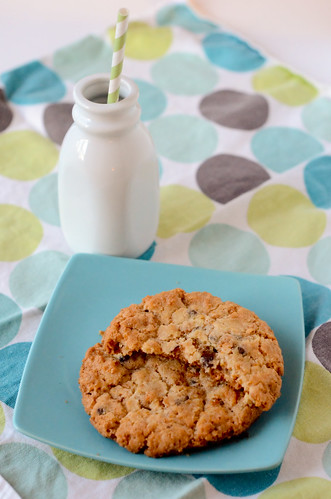
Cornflake-Chocolate Chip-Marshmallow Cookies


I know these sound weird and random, but please don't click away just yet - they are so awesome!  Don't worry, I thought the same thing at first too.  I recently bought Christina Tosi's cookbook, Momofuku Milk Bar, and this is the first recipe I've made from it.  The cookbook is unlike any I've ever read before.  Every recipe is incredibly unique, and while many make me scratch my head a little bit, judging by the popularity of the restaurant, they should all be pretty delicious.  And to someone who enjoys cooking complicated and time-consuming recipes from time-to-time, this book is spot on.  Many of the recipes require you to cook at least one component before you can even make the recipe.  And many call for some obscure ingredients that may be hard to find in regular grocery stores, but can be ordered from Amazon.  So this isn't really a book that you'll cook from on a whim, but that's okay - it gives you something to plan and look forward to.  My birthday is in a month, and I've already chosen my birthday cake from this book.  I am way too excited to make it and am practically counting down the days.  Anything that makes me look forward to turning 30, right?

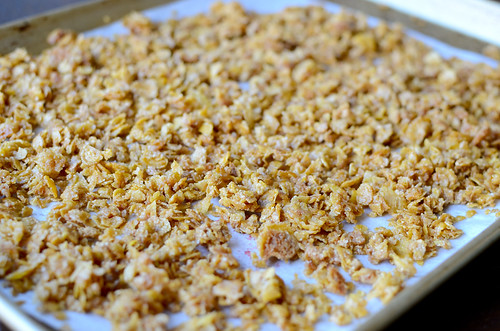
So when I came across these cookies and saw that they are one of the most popular items on the menu, I knew I should give them a shot.  They do require a "pre-recipe," but it is very quick and easy.  Cornflakes are lightly crushed, mixed with a few other ingredients, and toasted.  That in itself is incredibly addictive, but add that to the cookie dough with chocolate chips and marshmallows, and you have sweet-salty perfection.  The marshmallows kind of melt into the cookie, and the cornflakes give them a lovely crunch.  They are giant cookies that should be split between two people... but I ate it all myself anyway.  And then I ate another one.  One of the best parts about this recipe, however is that the dough can be kept in the fridge for up to 1 week.  So I baked a few off earlier, and I'm saving the rest for Super Bowl Sunday.  Who wouldn't want a giant sweet and salty chocolate chip cookie that's on steroids for the big game?


Cornflake-Chocolate-Chip-Marshmallow Cookies
barely adapted from Christina Tosi's Momofuku Milk Bar
makes 15 to 20 cookies
  • 16 Tbs (225 g) butter, at room temperature
  • 1 1/4 cups (250 g) granulated sugar
  • 2/3 cup (150 g) light brown sugar
  • 1 egg
  • 1/2 tsp vanilla extract
  • 1 1/2 cups (240 g) flour
  • 1/2 tsp baking powder
  • 1/4 tsp baking soda
  • 1 tsp kosher salt
  • 3 cups (270 g/ about 3/4 recipe) Cornflake Crunch (recipe follows)
  • 2/3 cup (125 g) mini chocolate chips
  • 1 1/4 cups (65 g) mini marshmallows
Combine the butter and sugars in the bowl of a stand mixer fitted with a paddle attachment.  Cream at medium-high speed for 2-3 minutes.  Scrape down the sides of the bowl, add the egg and vanilla, and beat for 7 to 8 minutes.

Reduce the speed to low and slowly add the flour, baking powder, baking soda, and salt.  Mix until just combined.  

With the mixer on low, add the cornflake crunch and mini chocolate chips.  Mix until just incorporated, and paddle in the marshmallows until just incorporated.

Using an ice cream scoop or 1/3-cup measuring cup, portion out the dough onto a parchment-lined sheet pan.  Lightly press down the domes to form a flat top.  Wrap the pan with plastic wrap and refrigerate for at least 1 hour, or up to 1 week.

When ready to bake, preheat the oven to 375 degrees.  Transfer the dough balls onto another parchment-lined pan and space them at least 4 inches apart.  Bake 15 to 18 minutes, or until the edges are light brown and the cookies are browning lightly towards the center.  As the cookies bake, they will puff, crackle, and spread.

Cool the cookies completely on the sheet pans before transferring to a storage container.  The cookies will keep fresh for 5 days at room temperature and 1 month in the freezer.


Cornflake Crunch
makes about 4 cups
  • 5 cups (170 g) cornflakes
  • 1/2 cup (40 g) milk powder (I used malted milk powder because it's what I had on hand, and it was fine)
  • 3 Tbs (40 g) sugar
  • 1 tsp (4 g) koshe salt
  • 9 Tbs (130 g) unsalted butter, melted
Heat the oven to 275 degrees and line a baking sheet with parchment paper.

Pour the cornflakes into a medium bowl and crush them with your hands to one-quarter of their original size.  Add the milk powder, sugar, and salt and toss to mix.  Stir in the melted butter.  As you mix it in, the mixture will form small clusters.

Spread the mixture onto the prepared baking sheet and bake for 20 mintues, or until they look toasted, smell buttery, and crunch gently.

Cool the cornflake mixture completely before storing or using in a recipe.  It will keep for 1 week at room temperature if stored in an airtight container, or 1 month in the refrigerator or freezer.

 
BLOG DESIGN BY: SHERBET BLOSSOM DESIGNS