Some flavor combinations just work so so well together. One of my favorites is feta, shrimp, cucumber, and fresh herbs. I've made a mac and cheese using these flavors, and it's still one of my favorites of all time... but it's decidedly unhealthy, not to mention it's not the quickest dinner ever.
This is a great alternative. You get all the wonderful fresh flavors, but you get them in under thirty minutes, and it's a very healthy dish to boot. As the quinoa cooks, chop the rest of the components and cook the shrimp. Then you just mix it all together. I'm terrible about reading directions before I start cooking (I know I'm not the only one), so while the original recipe called for the salad to be chilled for a few hours before serving, we ate it warm, and it was great. I ate the leftovers for lunch the next day, and it was great chilled as well. So just do whatever floats your boat.
I also didn't have the right amounts of herbs called for, so I just kind of mixed and matched what I had - I used a combo of basil, parsley, oregano, dill, and chives. I really wish I'd had mint though.
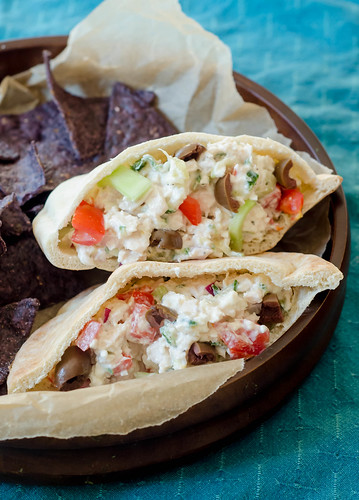
This made a nice light dinner, but I could see mixing up a batch of this on Sunday night and having lunch ready for the week - pack your lunch with some toasted pita and fresh fruit, and you have a protein-packed, healthy and - most importantly - delicious lunch.
Shrimp + feta = love.
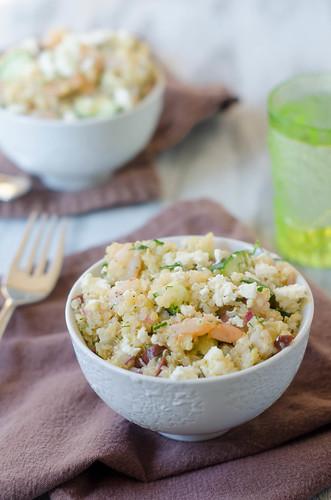
Shrimp & Feta Quinoa
adapted from Food Network Magazine, via Perry's Plate
makes 5-6 servings
- 1 1/2 cups uncooked quinoa, rinsed
- 3 cups broth (any kind)
- 1 pound large shrimp, peeled & deveined
- 1 1/2 Tablespoon olive oil
- 1 clove garlic, minced
- Sea salt and freshly ground pepper
- Grated zest of 2 small (or 1 large) lemon, plus 1/3 cup fresh lemon juice
- 1/3 cup finely chopped red onion
- 1/2 cup chopped fresh dill
- 2 Tbs chopped fresh mint
- 2 Tbs chopped fresh parsley
- 1 1/2 cup diced English cucumber (about half of one)
- 6 ounces crumbled feta cheese
- 3 Tablespoons chopped kalamata olives (optional)
- 1/3 cup extra-virgin olive oil
Preheat the broiler.
Bring broth to a boil and add quinoa. Boil for a minute or so, then reduce heat to medium-low, cover, and cook for 12-15 minutes, or until the liquid is completely absorbed and quinoa is fluffy. Set aside.
Meanwhile, toss shrimp on a baking sheet with 1 1/2 tablespoons of oil, garlic, and salt and pepper to taste. Arrange evenly on the baking sheet. Broil the shrimp, stirring once, until opaque and just cooked through, 2-3 minutes.
In a large salad bowl, combine shrimp, lemon zest and juice, onions, herbs, cucumber, feta, olives, and olive oil. Toss to coat evenly. Serve immediately or cover and refrigerate for a few hours.