Friday, February 5, 2010

Grilled Rosemary Chicken Thighs


Brace yourselves:  I have a new favorite chicken recipe.  My previous favorite was just chicken coated in pesto and grilled... but this one blows it out of the water.  When planning my menus, I always forget about the possibility of using chicken thighs, but no more!  Sure, they have more fat than breasts, but they are still not terribly fattening.

This marinade doesn't seem like much:  some rosemary, olive oil, honey, and mustard.  But when the components meld together, something magical happens.  The resulting chicken is moist, flavorful, smoky, and herbaceous!    Super easy and quick, it doesn't get any easier than throwing some ingredients in and letting it marinate.  Absolutely delicious, and open to many adaptations.  I can't wait to try it on pork tenderloin and chicken breasts. 


Rosemary Grilled Chicken Thighs
adapted from Southern Living, September 2008
  • 2 garlic cloves, minced
  • 1 Tablespoon extra virgin olive oil
  • 2 Tablespoons dijon mustard
  • 2 Tablespoons honey
  • 1 teaspoon red wine vinegar
  • 1 teaspoon salt
  • 1 teaspoon chopped fresh rosemary
  • 1 1/2 pounds boneless, skinless chicken thighs, trimmed of excess fat
  • 1/2 lemon
Combine the garlic, oil, mustard, vinegar, honey, salt, and rosemary in a shallow dish or large ziploc bag.  Add the chicken and turn to coat.  Allow to marinate chilled for at least one hour or, up to 24 hours.

Prepare grill.  Grill chicken thighs 5-7 minutes per side, or until an internal temperature of 165 has been reached.  Remove from grill and cover with aluminum foil.  Allow to rest 10 minutes, then top with the juice of 1/2 a lemon before serving.


Tuesday, February 2, 2010

Herbed Basmati Rice


I love it when I have low expectations for a recipe, and then it blows me away.  I had various types of herbs leftover last week, and I also needed a side dish to go with some baked halibut.  I started thumbing through The Barefoot Contessa at Home, and I came across this recipe.  Like I said before, I didn't really have high expectations - I mean, it's rice.  I figured it would suffice as a a side dish, and we'd move on.  Well, this really is a fantastic recipe.  The basmati is nutty and slightly sweet, you get a little bit of richness from the butter, and then a nice punch of flavor from the herbs.  You could really play around with the varieties of herbs, and I think some toasted nuts would be lovely as well.  This dish is open to many adaptations, and it  was also low maintenance and quick.  You can't beat that!


Herbed Basmati Rice
adapted from Ina Garten, The Barefoot Contessa at Home
serves 3 to 4
  • 1 cup uncooked long-grain basmati rice
  • 1/2 teaspoon kosher salt
  • 1 Tablespoon unsalted butter
  • 2 Tablespoons minced fresh flat-leaf parsley
  • 1 Tablespoon minced fresh dill
  • 1 Tablespoon minced fresh basil
  • 1 Tablespoon minced fresh scallions, white and green parts
  • freshly ground black pepper
Combine the rice, 1 3/4 cups water, salt, and butter in a small saucepan.  Bring to a boil; reduce heat to low, stir once, and simmer, covered tightly, for 15 minutes.  You may need to pull the pot half-way off the burner to keep it from boiling over.

Turn off the heat, and allow the rice to sit covered for 5 minutes.  Mix in the herbs and season with salt and pepper.  Fluff with a fork, and serve warm.


Monday, February 1, 2010

All-Desserts Bridal Shower


This past weekend, I hosted a bridal shower for one of my best friends.  Since it was in the middle of the afternoon, we didn't want anything too heavy.  All desserts seemed perfect - and it was!!  I will be posting the recipes in the next few weeks, but here is the menu and a sneak peak:

 
Chocolate fondue with pretzels, strawberries, pound cake, and homemade marshmallows


Dulce de leche sandwich cookies
 
Lemon Cheesecake Cheeseball with Gingersnaps and Apples


Cinnamon-Cream Cheese Pinwheels


Mini Lemon Tartlettes


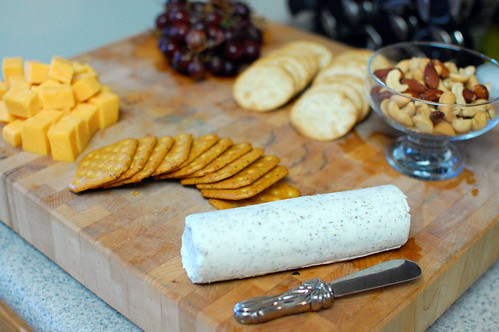
Cheese and Cracker Board


And champagne, or course!!


Monday, January 25, 2010

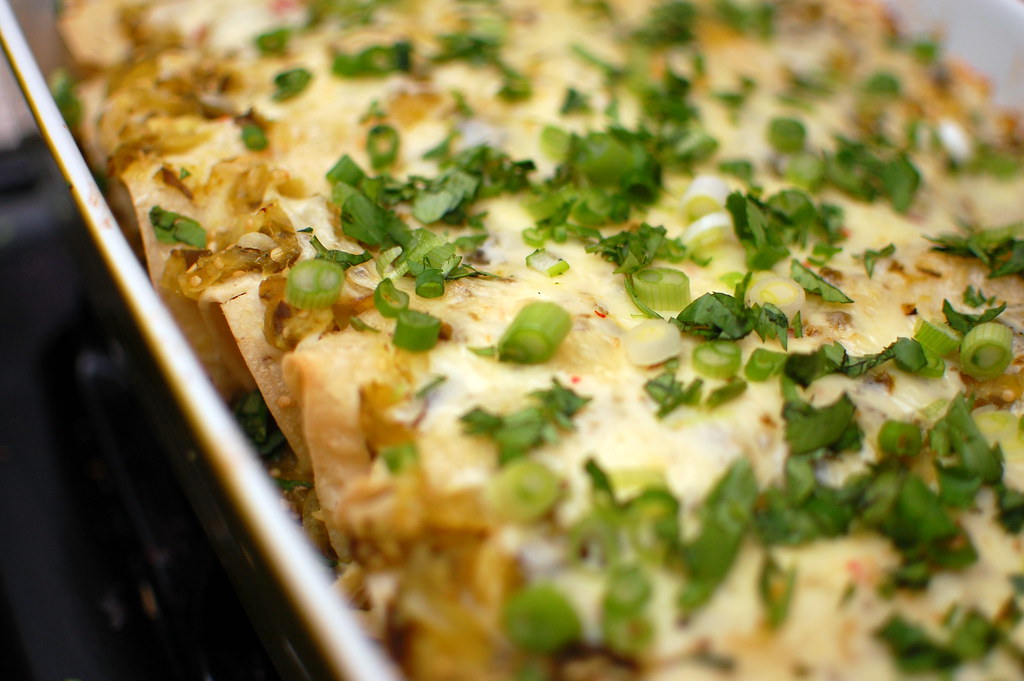
Chicken Enchiladas Verdes


After making traditional enchiladas and loving them as much as we do, I was super excited to see Enchiladas Verdes in one of my issues of Cook's Illustrated.  I absolutely love tomatillo salsa, and I honestly can't believe I haven't blogged it yet! I will have to make a point to do it soon.

These enchiladas are made by a similar method to the red chile ones.  The chicken is poached in a flavorful broth, then mixed with fresh tomatillo sauce, cheese, and cilantro, and wrapped in corn tortillas and topped with more sauce and cheese.  Poblano chiles are used for smoky heat, but if you want a spicier kick, feel free to add some jalapenos as well.  I can't necessarily say that I like these more than the traditional ones, but they are really really delicious.  We both enjoyed these, and can't wait to make them again.


Enchiladas Verdes
adapted from Cook's Illustratedserves 4 to 6
  • 4 teaspoons vegetable oil
  • 1 onion, chopped medium
  • 3 garlic cloves, minced
  • 1/2 teaspoon ground cumin
  • 1 1/2 cups low-sodium chicken broth
  • 1 pound boneless, skinless chicken breasts, trimmed
  • 1 1/2 pounds tomatillos, husks and stems removed, rinsed well and dried
  • 3 poblano chiles, halved lengthwise, stemmed, and seeded
  • 1-2 1/2 teaspoons sugar
  • salt and pepper
  • 1/2 cup chopped fresh cilantro
  • 8 ounces Pepperjack cheese, shredded (about 2 cups)
  • 12 (6-inch) corn tortillas
  • cooking spray
  • 2 scallions, sliced thin
Adjust the oven racks to the middle and highest position, and turn on the broiler.

Heat 2 teaspoons of the oil in a medium saucepan over medium heat.  Add the onion, and cook, stirring frequently until golden, 8-10 minutes.  Add 2 teaspoons of the garlic and the cumin.  Cook until fragrant, about 30 seconds.  Decrease the heat to medium-low, and stir in the broth.  Add the chicken, cover, and cook until an internal temperature of 160-165 has been reached, 15-20 minutes.  Halfway through cooking, flip the chicken in the broth.

Remove from heat, and transfer the chicken to a bowl to cool.  Reserve 1/4 cup of the broth, and strain the liquid, reserving the onions and garlic for the filling.  Discard the cooking liquid.

Meanwhile, toss the tomatillos and chiles with remaining 2 teaspoons of oil; Scatter on a rimmed baking sheet lined with foil, with the peppers skin-side up.  Broil until they blacken and soften, 5-10 minutes, rotating the pan halfway through cooking.

Remove from the oven and allow to cool for 10 minutes, then remove the skin from the chiles.  Transfer the chiles and tomatillos to a food processor, and add 1 teaspoon of sugar, 1 teaspoon of salt, 1 teaspoon of garlic, and the reserved cooking liquid.  Pulse until the sauce is thick and chunky, about 8 pulses.  Season with salt and pepper, and adust the tartness by adding the remaining sugar, 1/2 teaspoon at a time.  Set the sauce aside.

Decrease the oven temperature to 375 degrees.

Shred the chicken into bite-sized pieces, and combine with cilantro, 1 1/2 cups of cheese, the onions and garlic, and 1/3 cup of the tomatillo sauce.  Toss to combine and adjust seasonings if necessary.

Stack the tortillas on a microwave safe plate, and cover tightly with plastic wrap.  Microwave for 30 seconds, or until the tortillas are soft and pliable.

Spread 3/4 cup of the tomatillo sauce into the bottom of a 9x13 inch baking dish.  Fill each tortilla with 1/3 cup of chicken filling, and roll tightly.  Lay the tortillas in the baking dish seam side down.  Pour the remaining sauce over the top, and spread it with a spoon to coat each tortilla.  Sprinkle with the remaining cheese and cover with foil.

Bake the enchiladas on the middle rack until heated through and cheese is melted, 20-25 minutes.  Remove the foil and bake an additional 5 minutes, or until cheese is bubbly and beginning to brown.  Top with scallions and cilantro, and serve immediately.


Friday, January 22, 2010

Brown Sugar Bacon Waffles


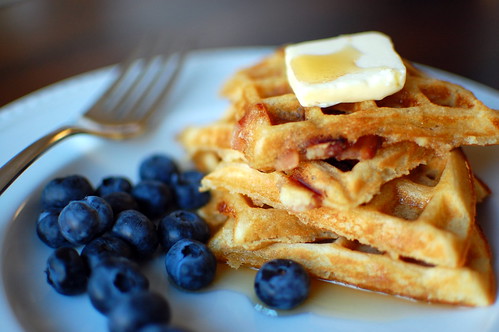
I really don't know what to say about these waffles except... well.... you really should make them this weekend.  They are pretty much the best waffles I've ever had.  You all know I'm a big fan of the sweet and savory combo, so it should come as no surprise that these were such a favorite. 

Thick slices of applewood smoked bacon are cooked with brown sugar, then broken into bite-sized pieces (try not to just gobble the bacon up at this point).  It is then mixed into a waffle batter that is made with brown-sugar instead of granulated, and just a touch of cinnamon.  Drizzle the finished product with some pure maple syrup, and eat with some fresh berries.  You have the perfect breakfast. 


Brown Sugar Bacon Waffles
adapted from Joy the Baker


For the Bacon
  •  10 slices of bacon
  • 1/4 cup brown sugar
Preheat the oven to 375.  Spray a baking sheet with cooking spray, and line with foil.  Spray the foil with cooking spray, and line the bacon in a single layer on the foil.  Sprinkle each slice with brown sugar.  Bake until the bacon is crispy, and the sugar is caramelized, about 10-15 minutes.  Immediately transfer the bacon to a cutting board, and when cooled enough to handle, break into bite-sized pieces. Set aside.


For the Waffles
  • 3 cups all-purpose flour
  • 1 Tablespoon baking powder
  • 1 teaspoon baking soda
  • 1 teaspoon salt
  • 1/4 cup brown sugar
  • 1/4 teaspoon cinnamon
  • 2/3 cups canola oil
  • 4 large eggs
  • 2 teaspoons vanilla extract
  • 2 1/2 cups buttermilk
Set your waffle iron a clean level surface, and set to preheat.

Whisk together the flour, baking powder, baking soda, salt, cinnamon, and brown sugar together in a large bowl.  In a medium bowl, whisk together the oil, eggs, vanilla extract, and buttermilk.  Make a well in the center of the dry ingredients, and fold in the wet ingredients.  Stir until just combined (its okay to still be lumpy).  Gently fold in the bacon, being careful not to overmix.

Cook in the waffle maker according to manufacturer's instructions. 

Serve with maple syrup and fresh berries.


Monday, January 18, 2010

Roasted Mushroom and Chorizo Salad


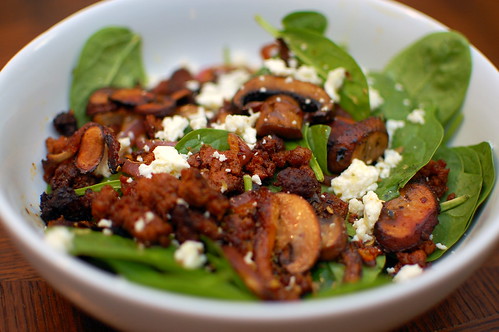
Another hit from Mexican Everyday!  This was a salad that was hearty enough to serve as a main course.  Joey doesn't typically like to eat salad as dinner, but he said he really liked this.  And what's not to like?  Chorizo, mushrooms, caramelized onions, cheese?  All good things.  Plus, it comes together in just 20 minutes.  This is served with a light lime vinaigrette, but I really think it would be fine with just a squeeze of lime juice; the mushrooms and chorizo have so much flavor on their own.  Serve this with a piece of warm crusty bread, and you've got a perfect dinner.


Roasted Mushroom Salad with Spinach and Chorizo
adapted from Rick Bayless, Mexican Everyday
serves 4
  • 8 ounces fresh chorizo, casings removed
  • 4 cups (8 ounces) sliced mushrooms (I used the gourmet mix that my grocery store sells)
  • 1 large red onion, halved and sliced into 1/4 inch slices
  • 8 cups (about 8 ounces) salad spinach, washed, and stems removed
  • 2 Tablespoons olive oil
  • 2 Tablesoons freshly squeezed lime juice
  • 1/2 teaspoon dried oregano
  • salt and pepper
  • 4 ounces queso fresco or feta cheese, crumbled
Heat the oven to 425.

Break the chorizo into clumps and scatter on a baking sheet with the mushrooms and onions.  Toss with 1 teaspoon of olive oil, and season with salt and pepper.

Bake for 10 minutes, then stir to break up the chorizo.  Bake an additional 10 minutes, and remove from the oven.

Mix together the olive oil, lime juice, oregano, 1/2 teaspoon salt, and 2 Tablespoons of water in a microwave safe container.  Microwave on high for 30 seconds and whisk to combine.

Toss the spinach with the dressing, and divide into 4 dishes.  Top with the roasted mushrooms, onions, and chorizo, and sprinkle with cheese.  Serve immediately.


Sunday, January 17, 2010

Meyer Lemon-Glazed Madeleines


Until last week, I had never even tasted a madeleine, much less made them, but I agreed to make some for a baby shower, so I set to work!  Peabody is a great resource for pretty much any delectable baked good, so I looked there first.  I also had in the back of my head that I'd like to use meyer lemons, since I had just bought some from Trader Joe's.  Lo and behold, she has a recipe for Meyer Lemon-Glazed Madeleines! 

They aren't terribly difficult to make, you just have to be careful not to overfill the molds or overmix the batter.  And the glaze is so tasty, I could probably drink it!  In case you've never had a madeleine either, they are little shell-shaped cookies that are actually delicate little cakes.  So pretty!  I loved using meyer lemons - they are sweeter than regular lemons, but still retain a bit of tartness, and not as sweet as oranges. 

These were so fun and pretty, and I can't wait to try out some different variations!


Meyer Lemon-Glazed Madeleines
adapted from Culinary Concoctions by Peabody
makes at least 64 mini Madeleines, or 24 standard sized ones
  • 3 large eggs, at room temperature
  • 2/3 cup sugar
  • 1/8 teaspoon kosher salt
  • 1 1/4 cup all purpose flour
  • 1 teaspoon baking powder
  • zest of 1 Meyer Lemon
  • 9 Tablespoons unsalted butter, melted, then cooled to room temperature
For the glaze:
  • 3/4 cup powdered sugar
  • 1 Tablespoon of juice from a Meyer Lemon
  • 2 Tablespoons water
Brush the Madeleine mold with melted butter, then lightly coat with flour.  Shake off the excess and place the mold in the refrigerator.

Zest the lemon into the melted butter.

Using an electric mixer, beat the eggs, sugar, and salt until thickened and frothy, about 5 minutes.

Combine the flour and baking powder, and sift into the egg mixture, folding as you go with a rubber spatula.  Mix until just combined.

Drizzle the melted butter/lemon zest into the batter, a few spoonfuls at a time, folding gently.  Again, mix until just combined, and be careful not to overmix.

Refrigerate the batter for at least 1 hour, or overnight.  Preheat the oven to 425.  Use a teaspoon to drop the batter into the Madeleine molds, filling each one 3/4 full.  Do not spread, the batter will spread as it bakes.

For mini madeleines, bake 5-7 minutes, for standard madeleines, bake 8-9 minutes, or until the cakes feel just set.

As they bake, whisk the powdered sugar, lemon juice, and water together to make the glaze. 

Gently remove the madeleines from the mold using a spoon, and cool on a cooling rack.  After they have cooled about 3-5 minutes, dip the scalloped side in the glaze, and return to the cooling rack to cool completely and set the glaze.

They are best eaten the day they are made, but can be stored overnight loosely covered.


BLOG DESIGN BY: SHERBET BLOSSOM DESIGNS