Tuesday, April 29, 2014

Rick Bayless's Summer Margarita


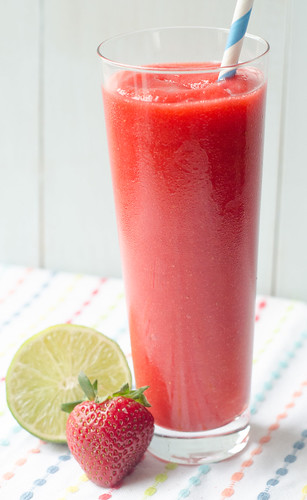
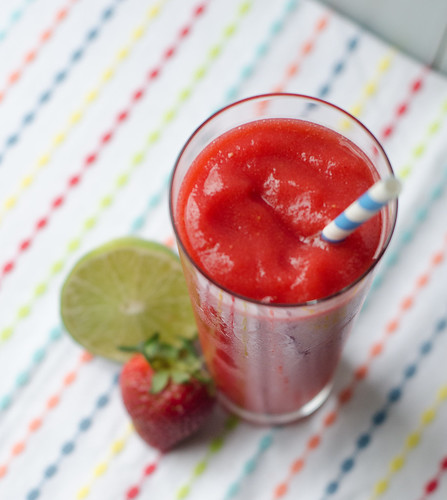
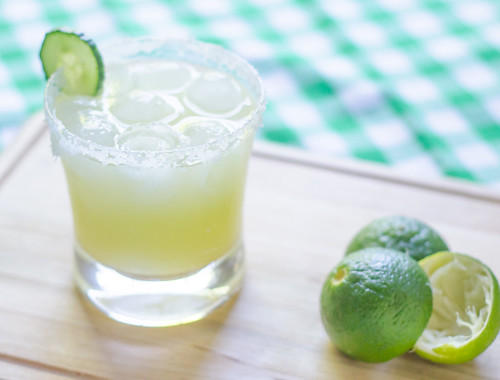
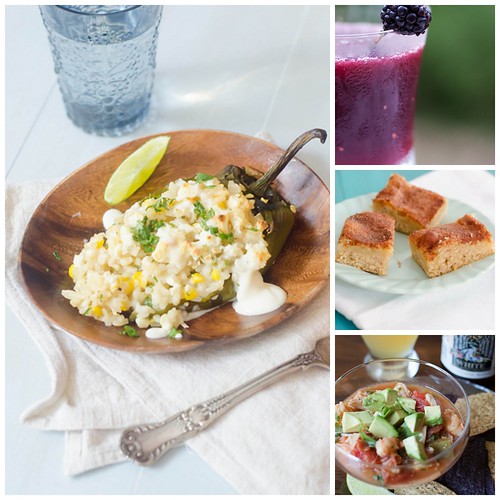
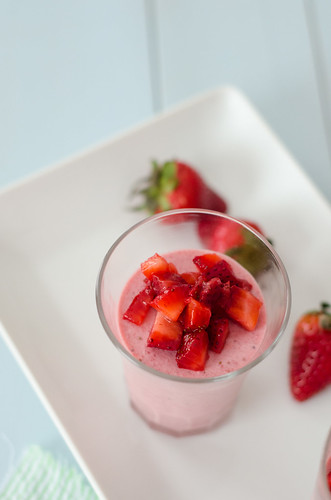
Last fall, my amazing and generous friend Annie invited Joey and I to join them for dinner at Alinea in Chicago.  Lo and behold, my wonderful mother-in-law offered to watch all four kids for a few days, and Joey and I were able to fly to Chicago for a perfect weekend getaway.  We planned our trip around our meals, obviously; and what good would a trip to Chicago be if we don't eat at a Rick Bayless restaurant?  Frontera was our first stop, and we enjoyed a wonderful and leisurely lunch there.  First thing we ordered?  Margaritas and beer, of course!  I went with the summer margarita, which is basically a cucumber-lime margarita.

I know cucumber may sound a little odd, but hear me out.  We've all seen water with cucumber slices before at spas, right?  And to me, cucumbers are more like a melon than a veggie, so it's a pretty natural pairing for a margarita.  It makes sense.

This margarita is amazingly refreshing, just sweet enough without being cloying, and just tart enough without being sour and bitter.  It is crisp and fresh, and it backs a nice boozy punch.  In short, it's a perfect margarita for summer.  And Cinco de Mayo.  Who knows when we'll get back to Chicago, but in the meantime I can enjoy a taste of our trip through this margarita.  I'll take it.


Rick Bayless's Summer Margarita
barely adapted from Fiesta at Rick's
makes nine 6-ounce margaritas

  • 1-2 English (hothouse) cucumbers, peeled, seeded, and thinly sliced (you need 3 cups of cucumber slices)
  • 1 1/2 cups silver tequila
  • 1 1/4 cups fresh lime juice
  • 1 cup simple syrup*
  • a lime half for moistening the glass rim
  • ice cubes
  • coarse (kosher) salt
  • cucumber slices, for garnish
In a blender, combine the cucumber slices, tequila, lime juice, and simple syrup.  Puree until the mixture is smooth.  Strain into a pitcher.  Cover and refrigerate until chilled, about 1 hour.

To serve, moisten the rims of your glasses with the lime half.  Dip the glass into a plate or bowl of salt to coat the rim of the glass.  Fill each glass halfway with ice.

Fill a cocktail shaker 3/4 full with ice, then measure in 1 1/2 cups of the margarita mixture.  Shake vigorously 10 to 20 seconds, then pour the margarita into the prepared glasses.  Garnish each drink with a cucumber slice, and serve.

Repeat as needed for the remaining margaritas, or store, covered, in the refrigerator for the next round!

*For the simple syrup, combine 1 cup of sugar with 1 cup of water in a medium saucepan.  Cook over medium heat, swirling often, until the sugar dissolves.  Remove from heat and cool.  This can be stored indefinitely in the refrigerator.


Sunday, April 27, 2014

The Ultimate Cinco de Mayo Menu Planner

We are one week out from Cinco de Mayo, so you know what that means:  it's time to fiesta!  Aside from southern food, Mexican food is my favorite cuisine, so naturally Cinco de Mayo is one of my favorite holidays.  I'm not typically one to post a round-up for every holiday and occasion.  However, I have so many Mexican-inspired recipes here that I just love so much, and I want to help you plan the ultimate menu for the holiday.  So whether you are throwing a big blowout or just enjoying some Mexican food at home, I've got you covered.

Start with some booze:

Frozen Mango Margaritas
Sangria Slushies
Blackberry-Thyme Margaritas
Classic Margaritas (Confections of a Foodie Bride)


Next, pick your salsa, cheese dip, and/or guacamole:

Rustic Roasted Salsa
Crab & Shrimp Campechana (Mexican crab and shrimp cocktail)
Tomatillo Salsa
Baked Tex-Mex Pimento Cheese Dip - this is my party staple, no matter what the occasion!
Restaurant Style Queso
Bacon-Chipotle Guacamole
Peach Salsa

Now on to the Main Event!

The Best Ever Chicken Enchiladas
Tequila-Braised Short Rib Enchiladas
Corn Risotto-Stuffed Poblano Peppers
Shrimp Quesadillas with Mango Salsa
Baked Burritos with Creamy Poblano Sauce
Classic Ground Beef Tacos
Beer-Battered Fish Tacos
Spicy Cilantro-Grilled Chicken
Chipotle-Grilled Pork Tacos
Chipotle Bean Burritos
Chorizo, Potato, and Mushroom Tacos
Mexican-Style Steak Sandwiches
Foil-Baked Fish with Black Beans and Corn
Bean and Cheese Burritos
Vegetable Enchiladas
Baked Chicken Taquitos


Add a few sides...

Avocado, Strawberry, and Mango Salad
Cheesy Creamed Corn
Guacamole Salad
Cilantro-Lime Rice
Mexican Cherry Tomato Salad
Mexican Corn Salad
Fresh Watermelon Slices
Grilled Corn on the Cob
Refried Beans

And now for dessert:


Strawberry Margarita Cupcakes
Gooey Cinnamon Squares
Texas Pecan Pie Bars
Aztec "Hot" Chocolate Ice Cream

Here are a few sample menus that I put together.  I think would be fabulously festive for the holiday, whether you are planning a big blowout or a quiet dinner at home.  So plan one of these and then invite me over, por favor!

Menu #1.  Bring on the Booze!
Mango Margaritas
Tequila-Infused Queso Fundido (recipe coming tomorrow!)
Tequila-Braised Short Rib Enchiladas
Fresh Watermelon Slices (I won't judge if you soak them in tequila....)
Mexican Grilled Corn Salad
Margarita Popsicles (Confections of a Foodie Bride)


Menu #2.  Taco Extravaganza!
Summer Margaritas (recipe coming soon!)
Rustic Roasted Salsa
Tomatillo Salsa
Restaurant Style Queso Dip
Potato, Mushroom, and Chorizo Tacos
Classic Ground Beef Tacos
Beer-Battered Fish Tacos
Cilantro-Lime Rice
Mexican-Style Cherry Tomato Salad


All Veggies for Vegetarians
Sangria Slushies
Baked Tex-Mex Pimento Cheese Dip
Vegetable Enchiladas
Cheesy Creamed Corn
Fresh Watermelon Slices
Gooey Cinnamon Squares


Classic Mexican Fare
Classic Margaritas
Chicken Enchiladas
Cilantro-Lime Rice
Refried Beans (Elly Says Opa)
Churros (Annie's Eats)

A Light and Healthy Celebration
Roasted Tomatillo Salsa
Spicy Cilantro-Grilled Chicken
Strawberry, Mango, and Avocado Salad
Grilled Corn on the Cob
Fresh Watermelon Slices


Think Outside the Box - Mexican Food with a Twist
Blackberry-Thyme Margaritas
Crab & Shrimp Campechana
Corn Risotto-Stuffed Poblanos
Guacamole Salad
Aztec "Hot" Chocolate Ice Cream


I hope you found this menu planner helpful, and be sure to check back throughout the week - I have a few more Cinco de Mayo recipes to share!


Thursday, April 24, 2014

Grilled Mojito Halibut with Mango-Avocado Salsa


Guys, WHAT is the deal with the lime prices these days?  I've read several articles about the shortage, and while it makes me want to write an article about the global and environmental impact of factory farming (I have SO much to say about this) and crazy weather patterns, more than anything, talking about limes just makes me want a margarita.  Or a mojito.  And it definitely makes me want to hoard my limes.  No more squeezes of lime juice in my water.  I used to just automatically buy lemons and limes at the grocery store, but not when limes are 2 for $3.  I covet the limes that I buy, and save them for extra-special recipes.

This mojito-marinated fish is definitely worthy of a coveted lime.  I really love mojitos, so making a seafood dish around them was a pretty awesome adaptation.  The mango-avocado salsa is equally awesome, and despite the sweetness from the mango and honey, it is not overly sweet.  The avocado, mint, jalapeño, and shallot do a great job of balancing the sweetness, and the lime and rum give it a nice little kick.

This dish is super healthy, bright and summery, and a great excuse to serve a cocktail with dinner!  Serve this with cilantro-lime rice or some chips and salsa, and call it a day.  Or wrap the fish and salsa up in a warm tortilla and call it a fish taco.  However you serve it, I hope you enjoy.  Three cheers for mojitos!


Grilled Mojito Halibut with Mango-Avocado Salsa
adapted from Ellie Krieger's Weeknight Wonders
serves 4

  • zest of 2 limes
  • juice of 4 limes
  • 1/2 cup lightly packed fresh mint leaves, chopped
  • 1 medium shallot, minced
  • 3 Tbs light rum
  • 2 Tbs canola oil
  • 1 Tbs honey
  • 1/4 tsp kosher salt, plus more as needed
  • 1/4 tsp freshly ground black pepper
  • 4 skinless halibut fillets (4-6 oz each)
  • 1 medium-ripe avocado
  • 1 medium-ripe mango
  • 1/2 seeded jalapeño, finely minced

Combine the lime zest and juice in a medium bowl.  Add 2 tablespoons of the mint, and set the rest aside for garnish.

Add the minced shallot, rum, canola oil, honey, salt, and pepper, and whisk to combine.

Place the halibut in an 8x8 inch square baking dish, and pour 1/2 cup of the marinade over it.  Refrigerate and marinate for 10 minutes, and save the remaining dressing for the salsa.

Meanwhile, chop the mango and avocado into 1-inch pieces, and toss with the jalapeño and remaining marinade.  Taste and season with additional salt and pepper as needed.

Oil the grates of the grill, and place the marinated fish onto the grill.  Cook 3 to 4 minutes per side, or until the fish is just cooked through.

To serve, top the fish with the salsa, then sprinkle with the remaining mint.


Sunday, April 20, 2014

Skillet-Baked Tex-Mex Macaroni


Do you want to know how you can tell that something was REALLY good?  If you look at a picture of it two weeks later, when you are super full from a huge Easter lunch, and your mouth waters and your stomach growls.... you know it's good.

This skillet tex-mex macaroni is not only amazingly delicious, but it's cooked in under 30 minutes, and only dirties one pot.  It makes a perfect weeknight dinner, and it has all your bases covered:  Mexican food, pasta, spice, cheesiness, and it's reasonably healthy.


This skillet meal reminded me a bit of hamburger helper, but obviously it's better.  Joey and I really really loved this, and my mom asked for the recipe when she ate the leftovers for lunch during a visit.  

I really just cannot say enough good things about this dish, so I'll leave you with this:  rearrange your weekly meal plan and squeeze this in.  And then come back and tell me "thank you."  


Skillet-Baked Tex-Mex Macaroni
adapted from Pasta Revolution
serves 4
  • 1 Tbs canola oil
  • 1 cup finely chopped onion
  • 1 green bell pepper, stemmed, seeded, and chopped into small pieces
  • 1 jalapeño, seeds and ribs removed, minced
  • 3 cloves garlic, minced
  • 2 Tbs chili powder
  • pinch of cayenne pepper (optional)
  • 2 tsp cumin
  • 1/2 tsp paprika
  • kosher salt and freshly ground black pepper
  • 1 lb 90% lean ground beef
  • 2 cups water
  • 1 (15-oz) can tomato sauce (preferably from fire-roasted tomatoes, if you can find it)
  • 8 oz (about 2 cups) elbow macaroni or shells
  • 1 cup frozen corn
  • 1 (4.5 oz) can chopped green chiles, drained
  • 3 Tbs chopped fresh cilantro
  • 1 cup shredded cheddar cheese
  • 1 cup shredded Monterey Jack or Pepperjack cheese
  • avocado, sour cream, and/or hot sauce for serving
Preheat the oven to 475 degrees.

Heat the oil in a 12-inch nonstick skillet over medium heat.  Add the onion, bell pepper, and jalapeño and sauté until softened, 5 to 7 minutes.  

Stir in the garlic, chili powder, cumin, cayenne, paprika, and 1/2 teaspoon of salt.  Cook until fragrant, about 30 seconds.  

Add the beef, using a wooden spoon to break up any big pieces, and cook until it's no longer pink, 2 to 3 minutes.

Stir in the water, tomato sauce, and pasta.  Increase heat, cover, and bring to a vigorous simmer.  Stirring frequently, cook until the pasta is tender, 10 to 12 minutes.

Remove the skillet from heat and stir in the corn, green chiles, 2 tablespoons of the cilantro, and 1/2 cup of each of the cheeses.  Taste and season with salt and pepper as needed.  Sprinkle the remaining cheese over the top of the para, and bake until the cheese is melted, browned, and bubbly, 10 to 15 minutes.  

Cool 10 minutes, sprinkle with the remaining tablespoon of cilantro, and serve.


Wednesday, April 16, 2014

Spring Vegetable Goat Cheese Dip


I wax poetic about this every year around this time, but gosh, I love spring.  There's a certain feeling of hope and renewal in the air, and a positive, excited energy all around.  The weather is gorgeous, everything blooms and blossoms... it really is the best time of the year.  Along with spring being my favorite season, Easter is probably my favorite holiday.  Both from the religious and cultural points of view, I love all that it stands for and symbolizes.  And from a totally shallow standpoint, I love the clothes. ;)  Seriously, I'm dying over my kids' Easter outfits this year!

There are a million and one things I love about spring, and I won't bore you with the list.  Instead, I'll hone in on the produce.  Don't get me wrong, summer produce is pretty much incomparable, but spring produce is so special in its own right.  It's the first green we've seen in months.  It's bright and fresh and sweet.  And I love it all.


So naturally, in order to elevate the veggie love, what did I do?  I mixed those beautiful green spring vegetables with a bunch of goat cheese and served it with bread.  Naturally.  Adding bread and goat cheese to anything basically makes it a winner in my book.

Let me run down the list of gorgeous ingredients in this dip:  asparagus, peas, artichokes, leeks, a whole mess of herbs, mozzarella, and goat cheese.  I mean, come on.  What's not to love there?  This is basically a spin on spinach-artichoke dip, so you still have that familiar cheesy flavor and texture, but it's just gussied up with some extra veggies and goat cheese.


If you're still finalizing your Easter menu, definitely add this as an appetizer.  Everyone will stand around eating it until its gone, and by then dinner will be ready and on the table!

Spring veggie and goat cheese dip.  Do it.


Spring Vegetable Goat Cheese Dip
adapted from Bon Appetit, April 2012
serves 4-6

  • 1 cup 3/4-inch pieces asparagus, spears reserved (so only the stalks)
  • 2 Tbs unsalted butter
  • 2 medium leeks
  • 2 Tbs all-purpose flour
  • 1 1/4 cups milk
  • 1-2 Tbs dry white wine
  • 1 cup grated mozzarella
  • kosher salt and freshly ground black pepper
  • 1 (14.5 oz) can artichoke hearts, drained and chopped
  • 1/4 cup fresh or frozen peas
  • 2 Tbs chopped fresh chives
  • 2 Tbs chopped fresh parsley
  • 2 Tbs chopped fresh mint
  • 2 Tbs chopped fresh basil
  • 1/2 tsp lemon zest
  • 1 Tbs lemon juice
  • 4 oz crumbled goat cheese, divided
Preheat the oven to 425 degrees and lightly grease a 4 to 5 cup baking dish.  Set aside.

Bring a medium saucepan of salted water to a boil, and add the asparagus pieces (but not the tips).  Boil for 1-2 minutes, drain, and rinse with cold water.  Set aside.

Return the now empty saucepan to the stovetop and melt the butter over medium heat.  Add the leeks and 1/4 teaspoon of salt.  Cook, stirring often, until the leeks are soft, about 10 minutes.  

Whisk in the flour and cook, whisking constantly, 1 to 2 minutes.  Slowly whisk in the milk, and bring to a simmer, continuing to whisk frequently.  Cook until the mixture is slightly thickened, 3 to 4 minutes, and remove from heat.  

Stir in the mozzarella, artichokes, peas, all the herbs, lemon zest and juice, 1/4 teaspoon of pepper, and 2 ounces of the goat cheese.  Taste and season with additional salt and pepper as needed.

Spoon the dip into the prepared baking dish, and arrange the reserved asparagus spears over the top.  Sprinkle with the remaining 2 ounces of goat cheese, transfer to the oven, and cook 15 to 20 minutes, or until the dip is hot and bubbly and the cheese is beginning to brown.  

Allow to cool slightly before serving, and serve with toasted bread slices or crackers.


Tuesday, April 15, 2014

Fresh Strawberry Mousse


Continuing with my Easter and spring recipes this week, I'm sharing with you a beautiful and elegant dessert:  fresh strawberry mousse.  This mousse is a great dessert option for Easter dinner because it's made hours (or even days) in advance, and seriously - how pretty is it??  It's also seasonal and fresh, which I love for entertaining.  One of my strategies for throwing dinner parties is to just look to the seasonal produce for inspiration - this is especially helpful if you're just trying to fill in the gaps for a side dish or dessert.

This mousse is impossibly creamy and luscious, yet still light and airy.  Pure strawberry perfection.  I'm a sucker for any and all strawberry recipes, not to mention the color pink, so needless to say, I'm totally smitten with this dessert.


Since this recipe is from Cook's Illustrated, it of course employs a few interesting and perhaps unorthodox techniques and instructions.  Chocolate mousse is typically made with egg yolks, but the strawberry mousse uses gelatin as a stabilizer.  It also uses a combination of cream cheese + whipped cream to keep a light and fluffy texture.  Finally, in order to coax as much strawberry flavor out of even the most mediocre supermarket berries, a strawberry puree is reduced to a thick syrup, leaving you with the brightest and freshest flavor imaginable.  Like I said, this is pure strawberry perfection.

So as I mentioned earlier, these are a great make-ahead dessert, and they can be made up to 48 hours in advance.  Just let them sit at room temperature for at least 15 minutes before serving - so take them out of the fridge when you sit down to eat, and they'll be ready in time for dessert.  This was a hit with the kids as much as it was with Joey and me, and I have no doubt that it will be a hit at your Easter celebration as well.

Hoorray for strawberry season!  Want more strawberries?  Check out my Strawberry Love Pinterest board!


Fresh Strawberry Mousse
barely adapted from Cook's Illustrated, May/June 2014
serves 4-6
  • 2 lbs fresh strawberries, hulled
  • 1/2 cup + 1 tsp sugar
  • 1 3/4 tsp unflavored gelatin
  • 4 oz cream cheese, at room temperature, cut into 8 pieces
  • 1/2 cup heavy cream, chilled
  • 1 tsp lemon juice
  • pinch of salt
Cut enough of the strawberries into 1/4-inch dice to measure 1 cup, cover, and refrigerate until ready to serve the  mousse.

Puse the remaining strawberries in a food processor until most pieces are 1/4-1/2 inch thick (some larger pieces are fine), 5-8 pulses.  Be careful not to over process them - it's better for them to be a little too big vs pureed.  Transfer the berries to a medium bowl and toss with 1/2 cup of the sugar and a pinch of salt.  Cover the bowl and let stand 45 minutes, stirring occasionally.

Strain the juice from the processed berries through a fine mesh strainer into a liquid measuring cup - you should have at least 2/3 cup of juice.  

Measure out 3 tablespoons of the juice and transfer to a small bowl.  Sprinkle the gelatin over the juice and let sit 5 minutes.

Meanwhile, pour the remaining juice into a small saucepan and bring to a simmer over medium-high heat.  Cook until the juice has reduced to about 3 tablespoons, which should take about 10 minutes.  

Remove the pan from heat, add the softened gelatin mixture, and stir until the gelatin has dissolved.  Add the cream cheese, whisking until it's fully incorporated and smooth.  Transfer the mixture to a large bowl.

As the juice is reducing, return the berries to the now-empty food processor and puree until smooth, about 20 seconds.  

Strain the puree into the juice-gelatin mixture, pressing on any solids to remove the seeds and pulp.  Discard the seeds and pulp and whisk the berry puree and lemon juice into the mixture until smooth.

Using a hand mixer or whisk, whip the cream until soft peaks form.  Add the remaining teaspoon of sugar and whip until stiff peaks form, another 1 to 2 minutes using an electric mixer.  Gently whisk the whipped cream into the strawberry mixture until no white streaks remain.

Portion the mousse into dessert dishes and chill at least 4 hours, or up to 48 hours before serving.  Let sit at room temperature for at least 15 minutes before serving.  Garnish with the reserved berries and serve.


Sunday, April 13, 2014

(Creamless) Creamy Asparagus Soup


When asparagus is in season, I buy a few bundles of it every week - we roast or grill it as a side, use it in various salads, pasta, and rice dishes, and eat an egg over it for breakfast or lunch.  However, I've never used it for soup.  But I've had plenty of other creamy pureed veggie soups, so why not, right?  And if it can be healthy and filling?  Even better!

This asparagus soup really just tastes like .... wait for it... asparagus.  With a silky, creamy, dreamy texture.  In lieu of cream or milk, this soup uses a potato to give it a creamy flavor and consistency.  The potato also adds bulk to the soup, making it surprisingly filling.  I served this with goat cheese biscuits, and it was such a nice spring meal.  I really really loved this soup just the way it is, but Joey suggested sprinkling a little crispy prosciutto over the top, and I think that's a lovely idea.


  With it's bright and vibrant color, I think this would be so cute served in shot glasses for a party or shower - maybe with a steamed asparagus spear sticking out of the top as well?  If you're looking for a first course for Easter dinner, or even just a quick and healthy weeknight, dinner, this asparagus soup is a great option.

Easter is Sunday, and I have a few great recipes that I can't wait to share with you this week.  Happy Monday!

(Creamless) Creamy Asparagus Soup
adapted from Ellie Krieger's Weeknight Wonders
serves 4

  • 2 medium leeks
  • 2 Tbs olive oil
  • 1 medium Russet potato (8 oz), peeled and chopped into 1-inch cubes
  • 1 tsp dried herbs de Provence
  • 3/4 tsp kosher salt
  • 1/4 tsp freshly ground black pepper, plus more for serving
  • 3 cups low-sodium chicken or vegetable broth
  • 2 lbs asparagus, woody ends snapped off
  • juice of 1/2 lemon
Slice off the dark green tops of the leeks and discard.  Slice the leeks in half length-wise and rinse out any sand or dirt with water.  Coarsely chop.

Heat the oil in a large pot over medium heat.  Add the leeks and cook until tender, about 4 minutes.  Stir in the herbs de provence, salt, and pepper and stir to combine. 

Increase the heat to medium-high, add the broth and potato, and bring to a boil.  Cover, reduce the heat to medium-low, and simmer about 5 minutes, or until the potato is tender.

As the soup simmers, cut the asparagus into 1 to 2-inch pieces.  Stir the asparagus pieces into the liquid, and return to a boil over high heat.  Cover, reduce the heat to medium-low again, and cook about 5 minutes.  

Remove the pot from heat and allow to cool slightly, just about 5 minutes or so.  Working in batches if necessary, transfer the soup to a blender and puree until smooth, transferring the soup to another pot or a soup tureen.  Stir in the lemon juice, taste, and season with additional salt and pepper if needed.  Serve immediately.


Thursday, April 10, 2014

Artichoke Pesto Chicken Pizza


It's Pizza Friday!  It's a thing, right?

I've come to the conclusion that it's time to start making two pizzas for my family on pizza night.  One just barely feeds everyone, and that's only if I serve a substantial side dish.  Or maybe I should just stop making pizzas that are so good that we all inhale an entire pizza in less than 10 minutes?  Then maybe Caroline won't cry when she doesn't get seconds because her brothers (and parents) ate the rest of the pizza?

.... We'll go with a second pizza.

This pizza is a riff on a pesto pizza, utilizing one of my favorite spring veggies:  artichokes!  I mixed up an easy artichoke pesto, slathered it on the crust, then topped it with plenty of cheese, shredded chicken, and roasted tomatoes.  Such a simple combo, but such a great pizza.

It was a gorgeous evening, so we carried our dinner outside and ate on the deck.  After the pizza was demolished in mere minutes, the kids all toddled around in the yard, and I sat and relaxed with a nice glass of rose'.  Life is good in the springtime.  Especially with pizza and wine.


Artichoke Pesto-Chicken Pizza

Artichoke Pesto
adapted from Confections of a Foodie Bride

This will make more pesto than you need, but it is wonderful as a sandwich spread, stuffing for chicken or pork, bruschetta topping, pasta mix-in, etc.  Or you could probably freeze it pretty easily and save it for another pizza!

  • 9 oz artichoke hearts (frozen or canned, drained and patted dry)
  • 2 cloves garlic, smashed
  • 1/4 cup basil leaves
  • 2 Tbs fresh parsley leaves
  • 1 cup fresh spinach
  • 1 tsp lemon zest
  • juice of 1/2 lemon
  • 1/2 cup Parmesan cheese
  • pinch of red pepper flakes
  • 4-5 Tbs olive oil
  • salt and pepper to taste
Combine all the ingredients except the olive oil in a food processor, and puree until smooth, stopping to scrape down the bowl as needed.  With the food processor running, slowly pour 4 tablespoons of the olive oil through the feed tube.  Add an extra tablespoon of oil if the pesto still seems thick - you want it to be easy to spread.  Taste and season with salt and pepper as needed.

Pizza
  • 1 1/2 cups halved grape tomatoes
  • olive oil
  • kosher salt and freshly ground black pepper
  • 1 lb pizza dough
  • cornmeal
  • 1/2 cup artichoke pesto
  • 1 1/4 cups shredded mozzarella cheese
  • 1/2 cup shredded Parmesan cheese
  • 1 cup cooked and shredded chicken
  • 2 Tbs chopped fresh basil
On a rimmed baking sheet lined with parchment paper, toss the tomatoes with 1 tablespoon of olive oil, a big pinch of salt, and a pinch of sugar.  Turn on the oven to 500 degrees, place a baking stone on the bottom rack, and roast the tomatoes while the oven preheats.  Stir them every 5-6 minutes, roasting for 10-15 minutes total, or until they are browned, caramelized, and have released a lot of their liquid.  Keep a close eye on them though, because they will burn easily.  Remove the tomatoes from the oven and transfer the baking stone to the top rack.  Keep the oven on as you prepare the rest of the pizza.
Sprinkle a large square of parchment paper with cornmeal, then roll and stretch the pizza dough into a 12-14 inch circle.  Brush the outer edge with olive oil, and spread the artichoke pesto in a thin layer in the center.
Top the pesto with 1 cup of mozzarella, then scatter the chicken and tomatoes over the cheese.  Sprinkle the remaining mozzarella and the parmesan over the top.

Carefully transfer the pizza + parchment to the oven and bake 10-12 minutes, or until the dough is browned and the cheese is melted and bubbly.  Allow to cool 10 minutes, sprinkle the top with basil, slice, and serve. 


Tuesday, April 8, 2014

Fresh Strawberry Daiquiris


My big kids are on spring break this week.  While I wish we could be off enjoying a beach vacation (or any vacation, really), it just isn't in the cards this year.  It's no matter though.  The kids and I have been enjoying the downtime:  Caroline is attending a dance camp at the community center, and it's a Frozen theme.  It's basically the best thing she's ever done.  Smith's been helping me do some yard work and organizing.  And the twins are just being adorable, as usual.  We've all been taking advantage of the gorgeous weather by spending as much time as possible outside, and I have a few fun activities planned for the rest of the week as well.

One thing that helps a grown-up enjoy a spring break stay-cation?  A fun and fruity drink.  I've been wanting to make fresh strawberry daiquiris for over a year now, but haven't been able to keep any strawberries in the house long enough! This week I bought a package specifically earmarked for these pretty drinks, and I'm so glad I finally made them!

When I was a kid, the pinnacle of cool was to order a virgin frozen drink. I mean, it's basically a dessert that you get to enjoy though out the entire meal - what's not to love?  As a seasoned adult, I now know that the frozen daiquiris of my childhood are nothing more than sugar, sugar, sugar, fake strawberry flavor, and red food coloring.

But these.  Oh my, they are good.  Fresh strawberries, freshly squeezed lime juice, and rum.  Theres' a little water, sugar, and ice to round things out, and the drink is just the essence of summer.  I mean, just look at that color - could these drinks be any more vibrant??  These went down waaay to easily, and I foresee them being a dangerous and delicious addition to our summer cocktail list.

When we have friends over for dinner, I always like to serve a "signature cocktail," or something a little fun and unique besides beer and wine.  These are officially in the rotation, and I can't wait to enjoy them all summer long.

Who needs a beach vacation when you can enjoy awesome frozen drinks from the comfort of your own home?


Fresh Strawberry Daiquiris
adapted from Gourmet Today
makes 4 drinks

  • 1 lb strawberries, hulled and quartered*
  • 3/4 cup crushed ice
  • 3/4 cup rum
  • 1/3 cup water
  • 1/3 cup fresh lime juice
  • 1/4 cup superfine sugar**
Line a baking sheet with parchment paper.  Arrange the strawberries in a single layer, and freeze until hard, at least 2 hours (however, the frozen strawberries can be transferred to an airtight container and kept frozen for up to 1 week).

Combine the strawberries with the rest of the ingredients in a blender, and blend until smooth, about 1 minute.  Divide evenly among 4 glasses, and garnish with strawberries and lime slices.

*Frozen strawberries can also be used.  Be sure to buy them with no added sugar though.
**If you don't keep superfine sugar on hand, add granulated sugar to a food processor and pulse several times.  


Sunday, April 6, 2014

Creamy Sausage & Spinach-Stuffed Baked Potatoes


According to my kindergartener, the months of March and April are spent in a tug-of-war between winter and spring.  Winter is holding on tight, trying to force a few more cold days, while spring is trying its hardest to warm things up and get plants and flowers to bloom.  I thought that was a pretty apt description, and I for one am rooting for spring.  Caroline, however, is having a mental tug-of-war, herself.  On the one hand, she loves playing outside and planting flowers.  But on the other hand, "the cold never bothered [her] anyway."  Yes, she really says that; and yes, she is obsessed with Frozen and Queen Elsa.

Today was certainly a tug-of-war between the two seasons.  It wasn't terribly cold, but there was a definite chill in the air, it was overcast all day, and there were intermittent rain showers throughout the day as well.

Days like this mean comfort food for dinner, and these potatoes fit the bill nicely.  Baked potatoes are one of my favorite foods, but what if you stuff them with a creamy and cheesy mixture of sausage, tomatoes, and spinach?  Pretty wonderful.  This is total comfort food, but a little outside the normal comfort food triangle of pasta-casserole-pot roast.  I get burnt out a bit on some of the typical comfort foods, and this was a nice change of pace.

I took advantage of nap time to make dinner - baking the potatoes and mixing up the filling.  But it was pretty quick, and could definitely be done at dinnertime as well.  Or, you could bake the potatoes and cook the filling the night before, then just reheat when it's time to eat, making this a pretty great make-ahead meal.  I served these potatoes with some roasted asparagus, and it was a hit all-around.  It's practically a complete meal on its own, so just serve it with your veggie or salad of choice and call it a day.

Who will win the tug-of-war this week?  I'm still pulling for spring!


Creamy Sausage & Spinach-Stuffed Baked Potatoes
adapted from Weeknights with Giada
serves 4

  • 4 (8 to 10-oz) russet potatoes, scrubbed clean
  • 2 Tbs olive oil, divided
  • 1 cup diced yellow onion (1 small)
  • kosher salt and freshly ground black pepper
  • 3 cloves garlic, minced
  • pinch of red pepper flakes
  • 8 oz sweet or spicy turkey sausage, casings removed (or a combo of the two)
  • 1 1/2 cups marinara sauce
  • 4 cups baby spinach
  • 1/2 cup (4 oz) mascarpone cheese
  • 1/2 cup grated Parmesan cheese, plus more for serving
  • 3 Tbs chopped fresh basil leaves

Preheat the oven to 375 degrees.

Brush the potatoes with 1 tablespoon total of the olive oil, and sprinkle generously with salt and pepper.    Poke several holes in the tops with a fork, then bake in s single layer on a baking sheet for 45 minutes to 1 hour, or until they are tender when pierced with knife.

Meanwhile, heat the remaining oil in a large skillet over medium-high heat.  Add the onion, 1 teaspoon of salt, and 1/2 teaspoon of pepper.  Cook, stirring often, about 3 minutes.  Stir in the garlic and red pepper flakes and cook until fragrant, about 1 minute.  Add the sausage, and use a wooden spoon to break it into bite-sized chunks.  Cook until browned and cooked through, 5 to 7 minutes.

Stir in the marinara sauce and spinach.  Bring the mixture to a low boil and cook until the spinach is wilted.  Remove from heat and stir in the mascarpone, parmesan cheese, and 2 tablespoons of the basil.  Taste and season with additional salt and pepper if needed.

Once they are cool enough to handle, cut a slit in the top of each potato and gently squeeze the ends to form an opening.  Use a fork to break up the insides  bit, then season lightly with salt and pepper.

Spoon the sausage mixture into each potato, garnish with the remaining basil, and serve, passing the extra parmesan at the table.


Wednesday, April 2, 2014

Chipotle Turkey-Stuffed Portobello Mushrooms


Like many food bloggers and enthusiastic home cooks, I have a bit of a cookbook addiction.  Sometimes I buy a cookbook because I just love looking at the pretty pictures and reading the recipes (I know I'm not the only one who reads them like novels).  But some cookbooks I buy because I know I will cook from them until they are tattered, stained, and falling apart at the seams.  Such is the case with Ellie Krieger's Weeknight Wonders.  I've sung the praises of her book So Easy in the past, yet dare I say that I like this one even better?  I pretty much flagged every single recipe as I flipped through this cookbook the first time, and I've loved everything that we've had so far.

Do you also remember when I told you that I can never decide what to make first when I get a new cookbook?  And how I always shove the book in Joey's face and make him decide?  Well, I didn't do that this time.  Because as soon as I saw these stuffed mushrooms, I knew.

I mean, really.  A portobello mushroom stuffed with a spicy, cheesy filling?  Done and done.  I've made many many variations of stuffed mushrooms in the past, but surprisingly, never a Mexican version.  It was only a matter of time though, and these definitely filled the void.

The filling is a mixture of ground turkey chipotle chiles, tomatoes, corn, a taco-like seasoning blend, and a modest amount of cheese.  It's a killer combination, and definitely a nice and healthy alternative to taco night.  Before serving, I topped each mushroom with a big scoop of guacamole, and it was a great addition... though when is guac not a great addition?  I thought so.

While this is not a vegetarian meal, I think you could easily convert it that way by using a can of black beans or pinto beans.  Maybe even add some sautéed veggies and some extra corn?  Or some sautéed mushrooms perhaps?

Since stuffed mushrooms aren't very easy to eat for a toddler, I dumped the filling out and chopped up the mushrooms for the boys.  Then I mixed the chopped mushrooms into the filling and fed it to them by the spoonful.  It was a great way to "sneak" an extra veggie into their dinner.

We actually had quite a bit of filling leftover, and it was great as a dip with some chips, rolled up into a tortilla as a taco, or just eaten by the spoonful.  It's very versatile, and well... just really good.  Healthy Mexican food, for the win!


Chipotle Turkey-Stuffed Portobello Mushrooms
adapted from Ellie Krieger's Weeknight Wonders
serves 6

  • 6 portobello mushroom caps
  • 2 Tbs canola oil
  • 3/4 tsp salt, divided
  • 1/2 tsp freshly ground black pepper
  • 1 cup diced onion
  • 3 cloves garlic, minced
  • 1-2 canned chipotle chiles in adobo sauce, plus 1 tsp sauce
  • 1 lb ground turkey
  • 1 tsp ground cumin
  • 1 tsp dried oregano
  • 1 tsp chile powder
  • 1 (14.5 oz) can fire-roasted diced tomatoes
  • 1 (8-oz) can tomato sauce
  • 2/3 cup corn kernels (fresh or frozen)
  • 1/4 cup fresh cilantro, minced
  • 1/3 cup shredded extra sharp cheddar cheese
  • 1/3 cup shredded Pepperjack cheese
  • guacamole, for serving
Preheat the oven to 450 degrees.

Pop out the stump from the mushroom caps, then use a butter knife to scrape out the gills.  Brush the caps on both sides with 1 tablespoon of the oil (total), then sprinkle them with 1/4 teaspoon each of the salt and pepper.  Lay them cap side-down on a baking sheet, and cook until they are tender and juicy, 8 to 10 minutes.  Remove from the oven.  If they have given off a lot of water, use a paper towel to lightly dab up the excess.  

Meanwhile, heat a large skillet over medium-high heat with the remaining tablespoon of oil.  Add the onions and cook until they begin to soften, about 3 minutes.  Add the ground turkey, and stirring to break up clumps, cook until it's no longer pink, 4 to 5 minutes.  Stir in the garlic, chipotle chile and sauce, cumin, oregano, chile powder, and remaining salt and pepper, and cook an additional minute.  Add the diced tomatoes, tomato sauce, and corn, and bring to a simmer.

Cook until the mixture thickens, stirring occasionally, 5 to 10 minutes.  Remove from heat and stir in the cilantro.  Taste and season with additional salt and pepper if needed.

Preheat the broiler.

Scoop about 1/2 cup of the filling into each mushroom cap, then sprinkle the top with 1 tablespoon each of the cheddar and pepperjack cheeses.  Broil until the cheese is melted and bubbly, 2 to 3 minutes (watch carefully!).

Divide the mushrooms among plates and top each mushroom with a healthy scoop of guacamole.


BLOG DESIGN BY: SHERBET BLOSSOM DESIGNS