Monday, August 29, 2011

Cheesy Zucchini Rice


I feel kind of left out when I hear my friends and other bloggers "complain" about their plethora of zucchini.  I don't have any planted, and we didn't join a CSA this year, so whatever zucchini I have, I've bought.  So in order to fit in with all my blogging friends, I buy 5-6 zucchini a week just so I can lament my overabundance and try to find fun new recipes to make with it. :-)

So far this summer we've had grilled zucchini countless times, sauteed shredded zucchini, baked zucchini fries.... I still really want to make zucchini cupcakes, so maybe those will be my next order of business. I served this rice alongside the Honey-Dijon Chicken Tenders, and now this zucchini rice has now become a summer staple.  It's an incredibly quick and easy side dish.  The rice is cooked (in chicken or vegetable broth for the most flavor!), and zucchini and cheese are shredded.  After the rice cooks, the zucchini is added to the pot and steams for a few minutes.  You mix in the cheese, and voila!  Instant and delicious side dish.  This is also incredibly versatile, and can be served with pretty much any main dish - grilled chicken or pork, fish, steak, shrimp....  Or, mix in some extra veggies and serve it as a vegetarian entree (that's how I enjoyed the leftovers).  Feel free to mix up the cheese - I loved sharp cheddar, but I think pretty much any cheese would be delicious.  However you decide to make it, just make it - before zucchini season is over!

Cheesy Zucchini Rice
adapted from Comfort of Cooking, originally from Real Simple
  • 2 cups chicken or vegetable broth
  • 1 cup long-grain white rice
  • 2 Tbs butter
  • 1 medium zucchini, grated on the large holes of a cheese grater
  • 1 cup shredded sharp cheddar
  • salt and pepper, to taste
Bring the broth to a boil in a medium saucepan.  Stir in the rice, cover, and reduce heat to low.

Cook about 20 minutes, or until most of the liquid has been absorbed.

Remove from heat, add the butter and zucchini, and cover.  Allow to stand 5 minutes, then stir to incorporate.  Stir in the cheese, season with salt and pepper, and serve.


Sunday, August 28, 2011

Baked Honey-Dijon Chicken Tenders


I'm fortunate that as a stay at home mom, I don't really have to worry about having the time to cook dinner.  I can make a time and labor-intensive meal pretty much any night of the week, since I usually have the afternoon to prep (sidenote:  I will be so sad when Caroline gives up naptime).  However, I definitely look for quick and easy meals too - because as much as I enjoy cooking, I don't want to be in the kitchen for 2 hours every single night.  We love to play outside, go to the pool, or watch a movie after dinner, so sometimes I want dinner on the table ASAP.  Plus, with a new baby on the way, I know I will need some fast and easy recipes to fall back on for a few weeks.

Regardless of how much time I have to cook dinner though, I'm not one to fall back on chicken nuggets for dinner.  For one thing, frozen chicken nuggets are full of preservatives and additives, and I try to avoid them.  Also, I can make something far more nutritious in the same amount of time it takes for the oven to preheat, the chicken to cook, etc.  Plus, have you seen that Jamie Oliver where he demonstrates how they are made?!

These chicken tenders are a wonderful alternative.  They are not only incredibly easy and quick, but they are also baked - so there is significantly less fat than their deep-fried counterparts.  They are also 100% chicken - you know exactly what's in them - no mystery meat here!  And who doesn't love chicken tenders?! 

Like I said, these are incredibly easy and quick.  In the time it takes the oven to preheat, the chicken is dipped, breaded, and ready to go.  And in the time they bake, you can prep your sides.  I served these with cheesy zucchini rice (recipe to be shared tomorrow!), and slices of fresh watermelon.   This was a hit with everyone at the table - I for one especially loved the honey-dijon flavor.  Honey mustard is one of my favorite condiments, so I loved that these incorporated it into the chicken.  The chicken is first dipped in a mixture of honey, Dijon mustard, and butter, and thencoated with spiced panko breadcrumbs.  With this being such an easy, delicious, and fast dinner, I know we'll be enjoying it in the months to come. 


Baked Honey-Dijon Chicken Tenders
adapted from The Comfort of Cooking
  • 1 cup panko breadcrumbs
  • 3/4 tsp salt
  • 1/2 tsp pepper
  • 1/2 tsp garlic powder
  • 1/4 tsp paprika
  • pinch cayenne pepper
  • 3 Tbs butter, melted
  • heaping 1/4 cup Dijon mustard
  • 1 Tbs honey
  • 1 1/2 lbs boneless, skinless chicken breasts, cut into vertical strips
Preheat the oven to 400 degrees.  Lay a baking rack over a baking sheet and spray with nonstick cooking spray.

In a pie plate, combine the panko, salt, pepper, garlic powder, paprika, and cayenne.  In another pie plate, or a wide, shallow bowl, whisk together the butter, mustard, and honey.  Working one chicken strip at a time, dip the chicken first into the mustard mixture, then the panko.  Turn and pat the breadcrumbs on all sides to be sure each piece of chicken is fully coated.

Carefully arrange the chicken tenders on the baking sheet, and cook 25-30 minutes, or until they are golden-brown and the chicken is cooked through.  Serve with your preferred dipping sauce (honey mustard, ketchup, BBQ sauce, ranch..).


Friday, August 26, 2011

Spiced Peach Carrot Bread


I'm writing a guest post today for Jen over at Beantown Baker, and I'm sharing a recipe for Spiced Peach Carrot Bread.  Go visit her site for the recipe!  Happy Friday!


Tuesday, August 23, 2011

Fresh Corn & Basil Polenta


When I posted the Chicken with Tomato-Herb Pan Sauce a few weeks ago, I had no idea how many people would ask me for the recipe for the polenta that I served with it.  And since we loved it so much, I had no problem remaking it so I could share the recipe with you!  Apparently this is a very inauthentic dish, since corn is not really eaten much in Europe.  But honestly, if something tastes good and we enjoy it, I don't worry too much about authenticity. 


This is really just a basic recipe for polenta, with some corn and herbs mixed in at the end.  There are two options for incorporating the corn:  stir it in during the last 10 or so minutes of cooking the polenta so that it cooks there, or cook it ahead of time and stir it in at the end.  I have made it both ways, and it's great either way.  I just happened to have the grill on already, so I threw a few ears of corn on and grilled them.  I think it gave the dish a great smoky and charred flavor, but it certainly wasn't necessary.  I don't think I would specifically turn the grill on just for this recipe.

Because we loved the tomato-herb pan sauce so much, I made it again to serve over the polenta last week.  It was really really great with the polenta, but you could certainly serve the polenta on it's own without a sauce.  It's very versatile in that it can be a main dish or a side.  It's pretty rare for me to repeat recipes, especially within a few-week period, so the fact that I've made this twice is a testament to how much we loved it. 


Polenta with Corn and Basil
inspired by The Complete Italian Vegetarian Cookbook, by Jack Bishop
  • 2 cups medium-grind cornmeal, or polenta
  • salt
  • 4.5 cups water
  • 4.5 cups chicken or vegetable broth
  • 4 ears corn
  • 2 Tbs unsalted butter
  •  1/4 cup heavy cream
  • 1/4 cup minced fresh basil leaves
  • 3/4 cup freshly grated Parmesan cheese
  • freshly cracked black pepper
Bring 4 cups of water and 4 cups of chicken broth to a boil in a large saucepan with 1 1/2 teaspoons of salt.  Mix the remaining half cup of each together in a liquid measuring cup and set aside.

In a slow stream, whisk the cornmeal into the boiling water, whisking constantly.  To prevent lumps, continue to whisk constantly as the mixture returns to a boil.  Reduce the heat, cover, and simmer.  Every 10 minutes or so, stir the polenta with a wooden spoon.  If it seems too thick and is getting hard to stir, add a little of the reserved water/broth mixture and stir to incorporate.

Meanwhile, remove the husks and silk from the corn.  Stand each ear in a large shallow bowl and cut the kernels from the cobs. 

When the polenta has been cooking for about 30 minutes, stir in the corn.  Continue to cook an additional 10 minutes or so, until the corn is tender and cooked through.  Alternatively, cook the corn using your preferred method and stir it in at the end of the cooking time.

Stir in the butter, and stir until melted.  Remove the pan from heat and stir in the cream, basil, and cheese.  Taste and adjust seasonings as desired. If the polenta is too thick, stir in more broth.  Serve immediately, garnishing each serving with freshly cracked black pepper.


Sunday, August 21, 2011

PPQ: Cappuccino Cheesecakes


Sometimes I think I'm the best mom ever, and sometimes I'm embarrassed that my 3 year old outsmarts me.  I gave up coffee at the beginning of this pregnancy, but over the past few months I've become quite addicted to decaf iced lattes.  Luckily I can make them at home, but when I go to Target I'll sometimes treat myself to one from Starbucks.  One such time I was wandering around Target, enjoying my drink, when Caroline asked for a sip.  I told her it was mommy's drink, and that she wouldn't like it.  But she just kept asking.  Since it was decaf, I figured I'd let her have a sip and she'd learn her lesson.  Well, she took a sip, her face lit up, she proclaimed it "yummy," and asked for more.  Yeah, that one backfired.  Mom of the Year.

So apparently she seems to have inherited my love for coffee over Joey's dislike for it.  I love love love coffee and anything that is coffee flavored.  So when Sarah of 20 Something Cupcakes chose Cappuccino Cheesecakes for Project Pastry Queen, I was stoked.  I am always drawn to coffee flavored desserts, I love cheesecake, and it's a cute, individualized dessert.  Win win win. 

These cheesecakes start with an oreo crust, are filled with a coffee flavored cheesecake, and then topped with chocolate ganache.  The instructions call for the cheesecakes to be baked in mini tartlette pans, but I have cute mini cheesecake pans that rarely get used, so I went with those instead.  I halved the recipe and ended up with 2 full pans and one that was half-filled.  However, these are actually big enough to share with a date or a friend.

I also added a big splash of Kahlua to the batter to amp up the coffee flavor, and used mocha flavored chocolate for the ganache. I received a bar from Scharffen Berger in my BlogHer Food swag bag, and thought this would be a perfect opportunity to try it.  The resulting cheesecake was rich, chocolatey, and pretty much perfect.  They come together quite easily and quickly, and are made several hours ahead of time, so they would be ideal for entertaining.  So many people like to drink coffee at the end of the meal, so why not combine that with dessert?

Sarah has the full recipe posted on her blog.  And next week we're making a big over-the-top cake again!  With lots of chocolate!


Thursday, August 18, 2011

My Virtual Baby Shower


Today I'm posting about another virtual blogger party - but it's for me this time!!  My good friend Annie of Annie's Eats, and she offered to throw me a virtual baby shower in honor of my baby boy's imminent arrival, so I rounded up some of my favorite food bloggers and friends for the occasion.  All of these ladies not only write fabulous food blogs, but they are also some of the sweetest, most talented, smartest, and all around awesome women I know.  And they all went all-out for this occasion.  There is some seriously amazing food that they whipped up.

Nikki of Pennies on a Platter is one of my favorite food bloggers, and she started us off with a refreshing mocktail - Sparkling Italian Lemonade.  I've become quite addicted to sparkling water over the course of my pregnancy, so I know that I would love this.  And I really love the addition of basil - it seems like such a refreshing and summery drink!


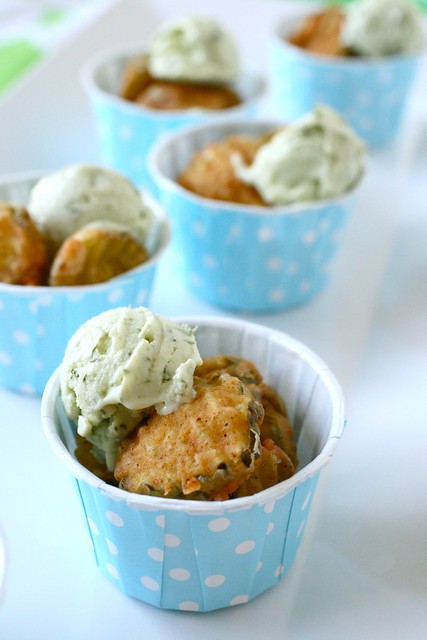
Our gracious hostess Annie, is not only one of my favorite food bloggers, but she is an awesome friend as well.  We always joke that we share a brain because we have such similar tastes and opinions, and I take that as an enormous compliment - she is not only a successful food blogger, but the mom of two incredibly adorable children and a physician as well!  She went all out for the occasion, and made one of my favorite appetizers, Fried Pickles, and served them with ranch ice cream!  I have never heard of such a thing, but I bet it's tasty.  And the possibilities of things to dip into it are pretty much endless.  Neither Joey nor myself really care for pickles, but if you fry them then we both will absolutely devour them.  I especially love Annie's spin on "pickles and ice cream," and I love that she made a southern dish as well!  Annie, you are awesome!


Elly is the voice behind 
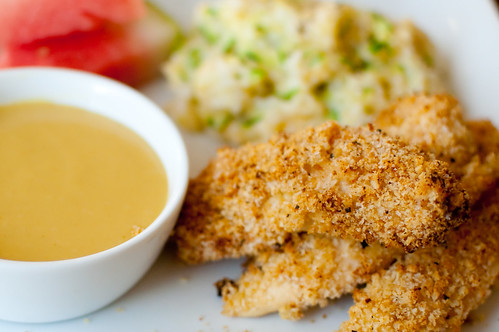
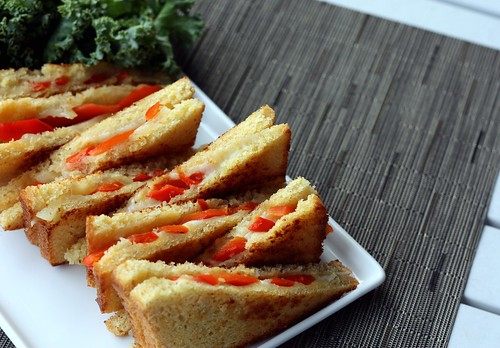
Elly Says Opa! , and she's one of my all-time favorite food bloggers.  We correspond almost daily via email, and she has the best sense of humor.  I routinely laugh out loud at some of the things she says.  Elly made these tasty-looking grilled cheese sandwiches.  They are filled with manchego cheese (yum) and piquillo peppers, and grilled on yeasted cornbread.  I love eating finger sandwiches at showers - I don't feel as guilty as I would eating a whole sandwich - and rest assured, I'm pretty sure I'd eat several of these little babies!
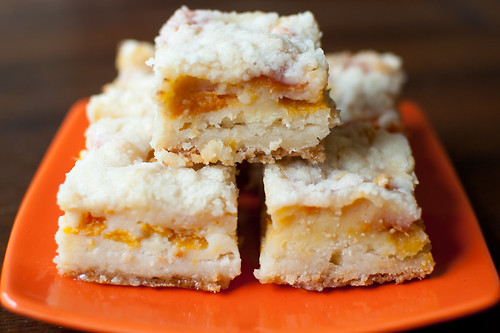

Cate of Cate's World Kitchen is another mom-to-be, and she is pretty much due any day now with a sweet baby girl!  She writes a vegetarian food blog with lots of stories about her running and life.  Her blog always leaves me wanting to give up meat and run marathons.  ;-)  For my virtual shower, she made these delicious  Apricot and Chevre Phyllo Purses.  I have a major obsession with combining goat cheese and fruit, so these look pretty much perfect to me.


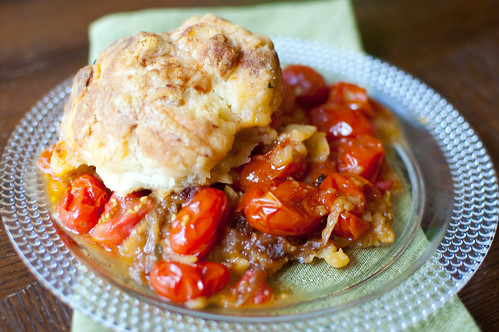
 I had the pleasure of meeting Branny from Branny Boils Over at BlogHer Food a few months ago.  She is  one of the funniest people I've ever met, and I so loved hanging out with her all weekend.  We enjoyed a phenomenal dinner one night at Wisteria here in Atlanta, and ordered Pimiento Cheese Deviled Eggs for the table.  Honestly, I'm not a huge fan of deviled eggs, but adding pimiento cheese to them definitely has me becoming a convert!  I hope she can make another trip to Atlanta so we can hang out again - or maybe I'll go visit her and her horses on her farm!


I was first introduced to Shanon of The Curvy Carrot through Annie, who is friends with her in real life.  Shanon posts some of the most delicious and decadent recipes, and interspersed with healthy fare.  Definitely my style of eating and cooking!  As are these Mini Mac & Cheese Pies.  Bite sized mac & cheese?  I'm pretty sure I could down several of these!


Shawnda of Confections of a Foodie Bride is not only one of my favorite food bloggers, but she is the brains behind 
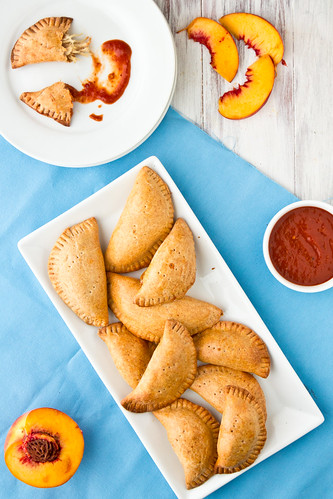
Project Pastry Queen as well.  I pretty much want to jump up and cook everything she posts the minute I read about it, and these empanadas are absolutely no exception.  Stuffed with pulled pork and served with chipotle-peach BBQ sauce, I can't think of a more irresistible combination.  She must be aware of my love for all things chipotle, peaches, and pulled pork, because this sounds like my favorite appetizer ever!


Tara from 
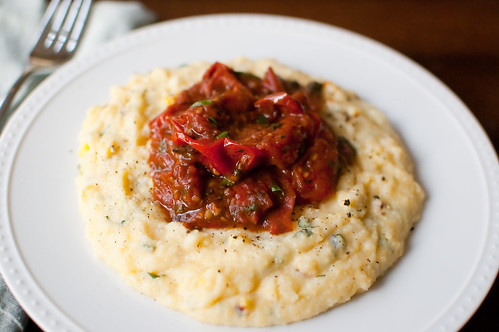
Smells Like Home is another long-time blogging friend, and I had the pleasure of hanging out with her at BlogHer Food as well!  She is so much fun, and I'm glad we keep in touch via email and facebook.  She hails from the northeast (and has a New York accent!), and I was lucky enough to be around for her to try pimiento cheese, okra, and other fun southern delicacies when she was here in Atlanta.  She went southern for the shower and made Fried Pimiento Mac and Cheese.  Ummm I don't really know what to say about this.  It pretty much sounds like the best thing ever!


 Jen of Bakin' and Eggs not only writes her food blog, but she also maintains a great fitness and lifestyle blog, Peanut Butter Runner.  Even though she is a UGA fan, I still love her to death, and I am thrilled with her contribution.  Baked Vidalia Onion Dip is right up my ally - sweet vidalia onions, gooey cheese, and a crunchy breadcrumb topping.  I absolutely love dips, so I'm pretty sure I'd eat more than my fair share of this!


And now moving on to desserts!  Kelsey from Apple a Day is one of the sweetest, most genuine people that I've (never) met, and she really spoke my language with this Sweet Tea Tiramisu.  I saw this recipe in Southern Living a few months ago, and I've been thinking about it ever since.  The lady fingers are soaked in sweet tea in this version - seriously, how genius is that?! 


Courtney from Cook Like a Champion was my roommate at BlogHer Food, and we had the best time together all weekend!  She is so much fun, and pretty much the most adorable person I've ever met.  Even though I had never met her prior to that weekend, I immediately felt like she was just an old friend whom I'd known for years!  She made these Peach Mousse Verrines for my shower, and aren't they just gorgeous?  There are layers of peach puree, peach mouse, and strawberry puree.  They just sound and look so lovely and light, and absolutely perfect for a shower!


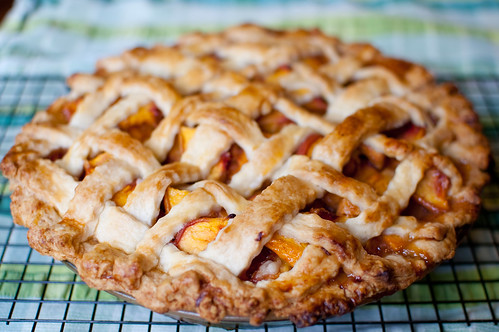
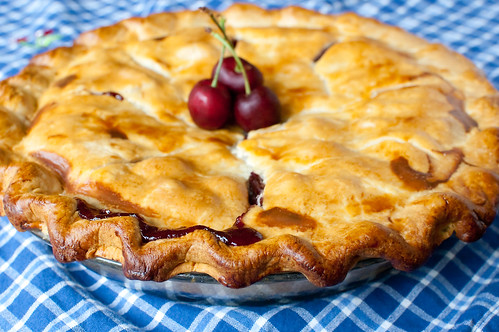
Michelle is a relatively new blogger, and she writes 
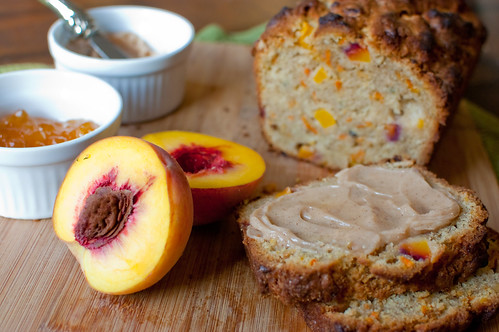
Cook Au Vin.  She is not only a great blog-friend, but she is one of my real-life friends too!  Our daughters are close to the same age, and we love to get them together to play while we talk food.  She is from New York, so even though she doesn't understand or particularly like some of my favorite southern foods and traditions, she went southern for my shower!  These Mini Peach Pies are not only super cute, but they were delicious as well!  One of the perks of inviting a local friend to a virtual shower is that I got to actually eat some of the food :-)  Now if only I could get her to like okra....
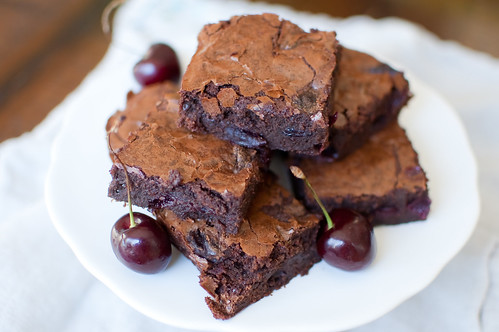

Bridget from 
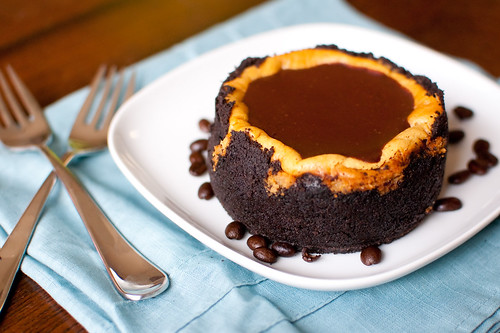
The Crumbly Cookie is a fellow science nerd, so I love her scientific and methodical approach to cooking and baking.  I also love these Chocolate Friands.  Bridget says they are little brownies that are so rich that they're almost like candy.  I can definitely get behind that!  Early on in this pregnancy I couldn't really handle super rich desserts, and I am so glad I got over that when I left morning sickness behind!!


Karin is another one of my real life friends who also blogs.  She is hilarious, awesome, sweet, and all around wonderful.  Karin is not only the lady behind This Wife Bakes, but she is also a ridiculously talented cake baker and decorator as well.  Her cakes are seriously amazing!  She has a son that is a few days older than Caroline, and when they were babies we used to meet to walk (and gossip) at a local park.  I wish she was pregnant again so we could continue that tradition when this baby boy is born!  I love having cupcakes at showers, and she made these Brown Sugar Cupcakes with Raspberry Buttercream - how cute are they?!  And I love the little decorations/adornments as well.  Too fun!

This shower is so amazing, and I am so thankful to have made such wonderful friends in the blogging world.  Be sure to check out the blogs of these lovely ladies to see the full recipes for these awesome treats.  I know I for one really want to make every single thing featured here!  You girls are all so awesome, and I feel so lucky to be able to call each of you my friend.  Everything y'all cooked looks so incredible, and I love that so many of you went southern (it is my favorite style of cooking, after all).  Thank you all, from the bottom of my heart!


Wednesday, August 17, 2011

Roasted Cherry Brownies


I was looking back through my posts from the last few weeks, and I noticed that almost every single one features summer produce.  I hope no one minds though - it's just hard to cook with anything else when there are so many great fruits and veggies available.  I know that almost everyone else hates summer and counts down the days to fall, but for me it's the opposite.  I get sad when I think about losing tomatoes, corn, peaches, and cherries.  Not to mention daylight, warm weather, and flip flops. This may be considered blasphemy in the blogging community, but give me summer produce over pumpkins and winter squash any day of the year. 

Since cherries come in a very close second as my favorite fruit behind peaches, I knew I NEEDED to make these brownies as soon as possible.  Cherry season is sadly drawing to a close, so I wanted to send them out with a bang.  It's hard for me to cook with cherries, since I usually eat an entire bag just as snacks or in a salad or something, but these brownies are certainly worth sacrificing 2 cups of cherries for.

I had seen this basic idea on a few blogs, but when my girl Annie posted the recipe I knew I needed to go with her version.  She uses my favorite basic brownie recipe and mixes in roasted cherries for an incredibly rich dessert.  I made a pan of these one afternoon, and took a few outside to our neighbors while our kids played together.  Even though this was over a week ago, every time I see him now he still talks about these brownies.  I offload treats on them fairly often, but he said this is his favorite thing that I've ever made.

If you like chocolate and you like cherries (and really, who doesn't?), then I highly recommend that you make these as soon as you can - cherries won't be around much longer!  In fact, I think I need to make them once (or twice) more myself....


Roasted Cherry Brownies
barely adapted from Annie's Eats, originally from The Pastry Affair and Baking Illustrated
  • 2 cups fresh cherries, pitted and halved
  • 1¼ cups plus 2 tbsp. sugar, divided
  • 5 oz. semisweet or bittersweet chocolate, chopped
  • 2 oz. unsweetened chocolate, chopped
  • 8 tbsp. unsalted butter, cut into quarters
  • 3 tbsp. cocoa powder
  • 3 large eggs
  • 2 tsp. vanilla extract
  • ½ tsp. salt
  • 1 cup all-purpose flour
Preheat the oven to 450 degrees.  Toss the cherries and 2 tablespoons of the sugar together in a small baking dish.  Cook for 10 minutes, or until the cherries start to release their juices.  Remove from oven and reduce the temperature to 350 degrees.

Line a 9x9 inch baking dish with foil and spray with cooking spray or grease with butter.

In a microwave safe bowl, combine the unsweetened chocolate, bittersweet chocolate, and butter.  Microwave at 50% power for 30 second intervals, stirring well after each time until the chocolate is melted.  Whisk in the cocoa powder and set aside.

In a large bowl, whisk together the eggs, remaining sugar, vanilla, and salt until well combined, about 15 seconds.  Whisk in the warm chocolate mixture until well-incorporated, then use a wooden spoon to stir in the flour until it is just combined.  Gently fold in the cherries and their juices.

Pour the batter into the prepared pan and spread with a spatula to make an even layer.  Cook for about 35 minutes, or until a toothpick inserted in the center comes out with just a few crumbs attached, and the brownies are slightly puffed.

Remove from oven and allow to cool at least 2 hours before slicing.  To serve, use the foil to lift the brownies from the pan and then cut into squares.


Sunday, August 14, 2011

Tomato Cobbler


I'm going to keep the description of this dish short and sweet because sometimes less is more.  Roasted cherry tomatoes + caramelized onions + Guryere biscuits.  I could probably stop right there and say no more, but I'll tell you (unnecessarily) that this is one of the best things I've made all summer.

We had my dad and stepmom over for dinner a few weeks ago, and I planned to make this tomato and corn pie.  However, I saw this cobbler posted on The Bitten Word right before I went to the grocery store, and immediately changed my mind.  This is a bit of a time-consuming recipe, but most of it is inactive.  First, the onions are caramelized, then mixed with the tomatoes.  The biscuits are formed and top the tomato-onion mixture, and then the whole thing is baked for over an hour.  I know a lot of people don't like to turn on the oven in the summer, but I promise you this will be worth it. 

There is definitely something magical about roasted cherry tomatoes, and to mix them with caramelized onions and then top them with biscuits and Gruyere cheese... well I can't think of much that would be better.


Tomato Cobbler
adapted from The Bitten Word, originally from Martha Stewart Living, July 2011
serves 6-8
  • 2 Tbs extra-virgin olive oil
  • 2 Tbs unsalted butter
  • 2 medium onions, thinly sliced
  • 4 garlic cloves, minced
  • 1 tsp minced fresh thyme
  • 3 pounds grape tomatoes
  • 3 tablespoons all-purpose flour
  • 1/4 teaspoon crushed red-pepper flakes
  • Coarse salt and freshly ground pepper
Biscuit Topping

  • 2 cups all-purpose flour
  • 2 teaspoons baking powder
  • Coarse salt
  • 1 stick cold unsalted butter, cut into small pieces
  • 1 cup grated Gruyere cheese (2 1/4 ounces), plus 2 tablespoons, for sprinkling
  • 1 1/2 cups heavy cream

To make the filling,  heat oil and butter in a large skillet over medium heat. Cook onions, stirring occasionally, until caramelized, about 25 minutes. Add garlic and thyme, and cook until fragrant, about 3 minutes. Let cool.

Preheat oven to 375 degrees.  In a large bowl, toss onion mixture, tomatoes, flour, and red-pepper flakes with 1 1/2 teaspoons salt and some pepper.

Make the biscuit topping: Whisk together flour, baking powder, and 1 teaspoon salt in a bowl. Cut in butter with a pastry cutter or rub in with your fingers until small clumps form. Stir in cheese, then add cream, stirring with a fork to combine until dough forms. (Dough will be slightly sticky.)

Transfer tomato mixture to a 2-quart baking dish or 9x13 inch baking dish . Use and ice cream scoop or 1/4 cup measuring cup to drop clumps of biscuit dough (about 1/2 cup each) over top in a circle, leaving center open. Sprinkle the top with remaining 2 tablespoons of cheese. Bake until tomatoes are bubbling in the center and biscuits are golden brown, about 1 hour 10 minutes. Transfer to a wire rack. Let cool for 20 minutes before serving.


Thursday, August 11, 2011

Brown Sugar-Cinnamon Peach Pie


Rivaled only by banana pudding, peach pie is the quintessential southern dessert.  Just like biscuits and pimiento cheese, everyone and their grandma has their own secret family recipe.  I don't know what my family recipe was, but this will be it in the future.  It is a pretty basic peach pie recipe, but it's amped up by the addition of cinnamon and brown sugar.  They give the peaches a nice warmth that balances their sweetness. 

Even though I absolutely love peaches, peeling them can be a bit of a pain.  I actually have a nice and sharp vegetable peeler that I use most of the time, but you can also peel them the same way you peel tomatoes:  use a sharp knife to cut a small "x" in the bottom of the peach, then cook them in boiling water for 30-60 seconds.  Submerge them in a bowl of ice water to stop them from cooking, and when they're cool enough to handle, the skins should slip right off.  I use this method if I have more than just a few peaches to peel.

I had actually never made a lattice crust before, but my friend Annie of Annie's Eats has a great tutorial.  It wasn't difficult at all, and with just a few more steps than usual, you have such a stunning and impressive looking dessert.

My dad isn't a huge fan of cake, so when we hosted him and my stepmother over for his birthday last weekend, I offered to make a pie instead.  This went over very well with both of them, and served warm with a big scoop of vanilla ice cream, it doesn't get much better.


Brown Sugar-Cinnamon Peach Pie
adapted from Southern Living, July 2011
  • 1 recipe double-crusted pie dough
  • 6-8 large fresh, firm, ripe peaches (3-4 lbs)
  • 1/4 cup flour
  • 1/2 cup firmly packed brown sugar
  • 1/3 cup granulated sugar
  • 1 1/2 tsp ground cinnamon
  • 1/8 tsp salt
  • 2 Tbs bourbon or whiskey
  • 2 Tbs butter, cut into small pieces
  • 1 large egg, lightly beaten + 1 tsp water
  • 1 1/2 Tbs granulated sugar + 1/2 tsp cinnamon
Divide the dough into 2 equal pieces and on a lightly floured surface, roll the first piece into a 12-inch circle.  Starting at 1 side of the dough, wrap it around a rolling pin and transfer to a 9-inch pie plate.  Press dough into the plate being careful not to punch through.  Trim the overhang.

Peel the peaches, and cut into 1/2-inch thick slices, and cut the slices in half.  In a large mixing bowl, whisk together the flour, sugars, cinnamon, and salt.  Add the peaches and bourbon, and stir to coat.  Immediately pour the filling into the pie plate, and scatter the butter pieces over the top.  Don't make the filling until you are ready to use it, because the peaches will give off too much of their liquid and the filling will be runny.

Roll the second pie crust into a 10-inch circle, and if making a lattice crust, cut into several strips using a pizza cutter or knife.  Make a lattice design over the peaches.  If you choose to make a standard top, transfer the crust to the pie, pinch the edges together to make a fluted edge or use the tins of a fork to press them closed.  Cut a few slits in the top to release steam.

Brush the top with the egg wash, then sprinkle with the cinnamon-sugar.

Freeze the pie for 15 minutes.  Meanwhile, preheat the oven to 425 degrees, and position the oven rack to the lowest position.  Heat a baking sheet in the oven as it preheats.

Place the pie on the preheated baking sheet.  Bake 15 minutes, then reduce the oven temperature to 375 degrees.  Bake 40 minutes.  If the crust is getting too dark, cover loosely with aluminum foil.  Bake an additional 15-25 minutes, or until the juices are thick and bubbly.  Transfer to a wire rack to cool 2 hours before serving.


Tuesday, August 9, 2011

Recipe Remix: Peach Pie Bars


My sweet baby sister lives in Georgia Peach country, and when she came to visit last weekend, I requested that she bring some peaches.  She asked how many, and I said the sky's the limit!  I figured I'd cook, bake, and snack on as many as I could handle, then turn the rest into jam or preserves. 

I made blackberry pie bars for Project Pastry Queen back in May, and I loved them so much that I couldn't wait to try them out using different fruits.  Since peaches are my favorite fruit, I knew I wanted to make that variation first.  These are maybe a little more involved than the blackberry version, simply because the peaches need to be peeled and chopped before adding them to the mix.  But that can be done while the crust is baking, so they're still very easy and low-maintenance.

These are everything you'd think they'd be - sweet, buttery, and delicious.  The peach-sour cream filling seeps into the crust and topping a bit, giving you the best of both worlds - a crispy crust and topping with a soft and sweet filling.  I personally don't think pies are that much work or terribly difficult once you get the pie crust technique down, but these bars are a great alternative.  Plus, they are portable and can be eaten without a plate or utensils.  I couldn't possibly choose a favorite between pie and these bars, so I'll just say they both have their place in the world!   And on a related note, I'll be sharing a recipe for peach pie on Friday!


More Peach Goodness:
Peach-Tilapia Packets
Pork Tenderloin with Peach-o de Gallo (Confections of a Foodie Bride) 
Peach Vanilla Bean Jam (Annie's Eats)
Fresh Peach Ice Cream
Triple Vanilla Bean-Scented All-Peach Pie (Ezra Pound Cake)
Peach-Cream Cheese Tart
Peach Wine Coolers
Peach Lemonade Coolers (Cook Au Vin)
Grilled Chicken with Peach BBQ Sauce (Tracey's Culinary Adventures)
Peach Salsa


Peach Pie Bars
adapted from Rebecca Rather, The Pastry Queen

Crust and Topping

  • 3 cups all-purpose flour
  • 1 1/2 cups sugar
  • 1/4 tsp salt
  • 1 1/2 cups (3 sticks) unsalted butter, chilled
Fruit Filling
  • 4 large eggs
  • 1 1/2 cups sugar
  • 1 cup sour cream
  • 3/4 cup flour
  • pinch salt
  • 1/4 tsp cinnamon
  • 1 tsp vanilla extract
  • 2 1/2 lbs peaches, peeled, pitted, and chopped
To make the crust and topping, preheat the oven to 350 degrees.  Grease a 9x13 inch baking pan.

Combine the flour, sugar, and salt in the bowl of a food processor.  Pulse a few times to mix.  Cut the butter into 1/2-inch cubes, and add to the flour mixture.  Process until the butter is evenly distributed but the mixture is still crumbly, 30-60 seconds.

Reserve 1 1/2 cups of the mixture to use as the topping.  Press the remaining mixture into the bottom of the pan, and bake 12-15 minutes.  Cool for at least 10 minutes.

To make the filling, whisk the eggs in a large bowl, then add the sugar, sour cream, flour, salt, cinnamon, and vanilla extract.  Gently fold in the peaches and spoon the mixture over the crust.  Sprinkle the remaining flour mixture evenly over the filling, and bake 45 to 55 minutes.

Cool at least 1 hour before cutting into bars, or scoop out of the pan to serve cobbler-style.


Monday, August 8, 2011

Chicken with Tomato-Herb Pan Sauce


I have a backlog of recipes that I want to try that I'm pretty sure could last me for years, but sometimes I'll come across one that I NEED to make - immediately!  Such was the case with this chicken.  I pretty much love any chicken with a pan sauce, but this one was especially appetizing to me - I loved the mixture of herbs, plus the roasted tomatoes.  Something seriously magical happens anytime you roast tomatoes.  They develop such a rich, complex flavor that can't be beaten.  The addition of fresh herbs brightens up the sauce, and butter gives it an indulgent finish. 

This recipe uses kind of an interesting technique as well.  A compound butter is made first, and the chicken is cooked in that to impart extra flavor into the meat.  I've never cooked chicken in compound butter before, but it will definitely be something I do in the future.  I served the chicken over polenta with fresh corn and basil, and it was a wonderfully fresh and summery meal.  I was so taken by the idea of this sauce that I almost decided to forgo the chicken and just serve the pan sauce over the polenta, but since I already had chicken thawed and ready I went ahead and made it.  I'm glad I did because it was so perfect with the pan sauce and polenta.


Chicken with Tomato-Herb Pan Sauce
adapted from Cook Like a Champion, originally from Bon Appetit, July 2011
serves 2

  • 2 tablespoons unsalted butter, at room temperature
  • 1/2 tsp dried oregano
  •  2 garlic cloves, minced
  • 1/2 teaspoon sweet paprika
  • Salt and freshly ground black pepper
  • 2 tablespoons all-purpose flour
  • 2 boneless, skinless chicken breasts
  • 2 teaspoons olive oil
  • 2 cups cherry tomatoes (11-12 ounces)
  • 1 Tbs balsamic vinegar
  • 2 Tbs chopped fresh basil
  • 1 1/2 teaspoons chopped fresh oregano
  • 1 tablespoon chopped fresh parsley

In a small bowl, mix together the butter, garlic, dried oregano and paprika. Season to taste with salt and pepper and set aside.


Preheat oven to 200 degrees, or the lowest possible temperature. Pat dry both sides of the chicken dry with a paper towel, and season with salt and pepper. Measure the flour onto a plate. Working with one breast at a time, press both sides into the flour. Shake gently to remove excess flour and repeat with remaining breast.

Melt 1 tablespoon of the oregano butter with the 2 teaspoons of oil in a large skillet set over high heat. Reduce to medium-high when the butter stops foaming. Add the chicken breasts in the skillet and sauté until browned on one side, about 4 minutes. Flip and continue cooking 3-4 minutes, or until cooked through and reads 165-170 on an instant read thermometer. Transfer to a small pan or oven-safe plate and keep warm while preparing sauce.

Increase heat to high and add tomatoes to the skillet. Cook, stirring occasionally, until they begin to char and burst, about 5 minutes. Add remaining butter and the balsamic vinegar. Crush tomatoes slightly to release their juices and continue stirring until butter has melted. Using a wooden spoon, scrape the bottom of the skillet to loosen the browned bits. Stir in the fresh oregano, basil, and parsley.  Remove chicken from oven and add any juices that may have accumulated. Slice chicken and top with tomato sauce.


Thursday, August 4, 2011

Fresh Cherry Pie


My best friend in college had a big thing for canned cherry pie filling.  Like, she'd just eat it out of the can with a spoon.  Even back then, when I lived off of Ramen noodles and PB&J sandwiches, I thought that was pretty gross.  Since that is what I always associated cherry pie with, it was never really a dessert that appealed to me.  I don't think I had ever had one made with fresh cherries.  I first came across this recipe last summer in Cook's Illustrated, and I was definitely intrigued.  I really love fresh cherries, and of course I trust Cook's Illustrated to elevate pretty much anything to delicious status.

This pie has a few interesting steps, as does any CI recipe.  First, part of the cherries are pureed, while some are left whole.  In addition to the pureed cherries, the filling contains pureed plums as well.  The plums help to cut the sweetness of the cherries a bit.  As with many fruit pies, tapioca is added to the filling as a thickening agent, but the recipe instructs you to pulse it in a food processor first.  I did this the first time I made it, but didn't bother the next time, and I didn't see any ill effects.

I so wanted to do a lattice crust on this pie because really, what is prettier than a cherry pie with a lattice crust?  But the recipe instructs that a full pie crust is better to keep the moisture in - lattice crusts will result in a drier filling.

I was so disappointed when I made this last summer because I never took a picture to blog, but it just meant that I had to make it again.  I baked this pie for our Fourth of July dinner, and served with vanilla ice cream, it was a perfectly patriotic and summery dessert.  Even though cherry season is winding down for the summer and pitting 2 pounds of cherries is a real pain, I am tempted to make it one more time - I'm just not sure that I can go another full year without enjoying it!


Sweet Cherry Pie
barely adapted from Cook's Illustrated, July/August 2010
  • 1 recipe for a double pie crust 
  • 2 red plums, halved and pitted
  • 6 cups (about 2 lbs) fresh cherries, pitted and halved
  • 1/2 cup sugar
  • 1/8 tsp salt
  • juice of 1/2 lemon
  • 2 Tbs bourbon
  • 2 Tbs instant tapioca
  • 1/8 tsp ground cinnamon
  • 2 Tbs unsalted butter, cut into 1/4-inch pieces
  • 1 egg, lightly beaten with water, for egg wash
Roll out half of the dough into a 12-inch circle that is 1/8-inch thick.  Transfer to a 9-inch pie plate, leaving at least 1-inch overhang.  Press the dough into the bottom of the pie plate and chill until firm, about 40 minutes.

For the filling, combine the plums and 1 cup of the cherries in the food processor and puree until smooth, about 1 minute, scraping down the sides of the bowl as needed.  Strain into a large bowl to remove the skins, pressing down to extract as much liquid as possible from the solids.

Stir in the remaining cherries, sugar, salt, lemon juice, tapioca, and cinnamon.  Let stand at room temperature for 15 minutes.

Pour the filling and all its liquid into the prepared pie plate and ssprinkle the butter over the top.  Roll our the second pie crust into an 11-inch circle and carefully transfer to the top of the pie using the rolling pin.  Leave at least a 1/2-inch overhang. 

Flute the edges or press together using the tines of a fork.  Use a sharp knife to make 8 evenly spaced 1-inch slits in the top of the crust, and brush the top and sides with egg wash.  Chill pie for 1 hour, or freeze for 20 minutes.

Meanwhile, preheat the oven to 400.  Adjust the oven rack to the lowest position and place a baking sheet on the oven rack.  Place the pie on the preheated baking sheet and bake 30 minutes.  Reduce the oven temperature to 350 degrees and bake an additional 30 to 40 minutes, or until the juices are bubbling over and the crust is golden-brown.

Transfer to a wire rack and allow to cool at least 2-3 hours before serving.


Tuesday, August 2, 2011

Peach, Prosciutto, and Brie Panini


I am pretty sure that if Joey had to choose, sandwiches would be his favorite dinner.  And I'm certain that his choice would have nothing to do with the fact that it basically generates 3 dishes for him to wash - a pan, a knife, and a cutting board.  I try and plan a sandwich night once every week or two.  More in the summer - there are BLTs to be eaten then!

I'm not sure where I got the idea for this particular sandwich - I'm sure I saw something similar somewhere, but I'm glad I made it - I've made my love for peaches quite clear, just as my love for sweet + savory, so it should come as a shock to no one that this was a big hit in our house.  Peaches - good.  Prosciutto - good.  Brie - goooood.  Seriously, is there anything that is not made better by the addition of brie? 


More Sandwich Love:
Apple-Almond Chicken Salad
Chicken Caesar Clubs
Tomato, Mozzarella, and Pesto Paninis
Goat Cheese and Strawberry Grilled Cheese
Shrimp Rolls 
Ultimate Grilled Cheese 


Peach, Prosciutto, and Brie Panini
a Pink Parsley Original
  • 4 slices good sandwich bread
  • butter
  • Dijon mustard
  • Peach preserves
  • 1 peach, peeled and sliced
  • 4 slices prosciutto
  • 1-2 oz brie
Butter one side of each piece of bread.  Flip over and spread 2 slices with mustard and the other 2 slices with peach preserves.

Preheat a nonstick skillet or panini press.  Layer the prosciutto, peaches, and brie over the prepared bread, and top with the remaining bread to make a sandwich.

Cook 2-3 minutes per side, or until browned and crispy, and the cheese is melted.  Allow to cool 1-2 minutes before serving.


Monday, August 1, 2011

Tomato & Corn Pie


I consider myself to be a true southerner - not only are both of my parents from Atlanta, but so were their parents... and their parents... and their parents... I think both sides of my family have been traced back to the 1700's, and they have been in Georgia ever since.  So even though I consider myself a bit of an expert in southern cooking, prior to last summer I had never heard of tomato pie, much less tried it.  And how I went 28 years without trying it, I'll never know - because this stuff is life-changing.

I was first introduced to this pie by my friend Jenn of Bakin' and Eggs.  I made this toward the end of last summer, and it automatically went on my list of favorite things.  As soon as tomatoes started coming into season this year, I knew I wanted to make this again.  But in the meantime, I came across a similar recipe from Smitten Kitchen, so I decided to combine the two and make my own version.

This is a bit of a time-consuming recipe, but the results are so so worth it.  First you have to peel the tomatoes, slice, drain, then make the crust, cut the corn off the cobs, shred the cheese, and finally assemble.  But we ate this for dinner one night, then I enjoyed it for lunch over the next several days.  So you definitely get to reap the benefits of your hard labor for several days.  And none of the steps are challenging or particularly time-consuming.

You start with a buttery, flaky, biscuit-like crust, and start layering sliced tomatoes (peeled first - no icky skins!), fresh corn, and a garlicky, cheesy, herbaceous filling between the layers.  Top it with more of that awesome crust, bake, and enjoy!  I served this as a vegetarian entree with a cucumber salad and sliced watermelon, but you could certainly have it as a side to some grilled chicken, steak, fish, etc.  I'm already looking forward to making this again in the coming weeks - it's not often that I repeat recipes, but this one is definitely a winner!


Tomato and Corn Pie
makes 1 9-inch pie


For the crust:
  • 2 cups all-purpose flour
  • 1 Tbs baking powder
  • 3/4 tsp salt
  • 6 Tbs cold unsalted butter, cut into 1/2-inch cubes
  • 3/4 cup buttermilk
  • 2 Tbs butter, melted
For the Pie:
  • 1 3/4 lbs tomatoes
  • salt
  • 2/3 cup mayonnaise (light is fine)
  • 2 cups shredded sharp cheddar cheese (8 oz)
  • 1/2 cup shredded Parmesan
  • 2 garlic cloves, minced
  • 1/4 cup chopped fresh basil
  • 2 Tbs snipped fresh chives
  • 2 Tbs fresh lemon juice
  • freshly grated black pepper
  • 1 1/2 cups fresh corn (from 2-3 ears)
To make the crust, whisk together flour, baking powder, and  salt in a bowl, then blend in cold butter with your fingertips or a pastry blender until it resembles coarse meal. Add the buttermilk, stirring until mixture just forms a dough, then gather into a ball.


Divide dough in half and roll out one piece on a well-floured counter  into a 12-inch round. Either fold the round gently in quarters, lift it into a 9-inch pie plate and gently unfold and center it or, roll the dough around the rolling pin and transfer to the pie plate. Pat the dough in with your fingers trim any overhang.  Place the pie plate in the refrigerator to chill while you prepare the filling.  Wrap the second half of the dough in plastic wrap and chill as well.

Bring a large pot of water to a boil.  Cut an "x" in the bottom of each tomato.  Have a large bowl of ice water ready, then add the tomatoes to the boiling water.  Cook for about 10 seconds then transfer to the ice water.  When cool enough to handle, peel the skins from the tomatoes.

Line a baking sheet with a double layer of paper towels or a lint-free kitchen towel.  Cut the tomatoes into 1/4-inch slices and arrange in a single layer over the paper towels.  Sprinkle generously with salt and allow to stand at room temperature for 20-30 minutes.  Blot the tomatoes with more paper towels (or another kitchen towel).

Meanwhile, preheat the oven to 400 degrees.

Mix together the mayonnaise, cheeses, garlic, and lemon juice.  Season with salt and pepper to taste.

Remove the pie crusts from the refrigerator.  Layer half the tomatoes on the bottom of the pie, gently removing extra seeds from some of them (there's a lot of flavor there, so I didn't remove all the excess liquid, maybe just from about half to two-thirds of the tomatoes). Scatter half the corn over the tomatoes, then drop spoonfuls of the cheese-mayo mixture over the top.  Sprinkle with half the basil and chives, then repeat the layers:  tomatoes, corn, cheese, herbs.

Roll out the second pie crust into a 12-inch circle.  Fit over the filling, pinching the edges of the two crusts together to form a fluted edge, or use the tines of a fork to fit together.  Use a small knife to cut 4 slits in the top of the crust, then brush with melted butter.

Bake pie until the crust is golden and the filling is bubbling, 30-35 minutes (place a cookie sheet on the rack below the pie in case any of the filling boils over).

Allow to cool 10-15 minutes before cutting into slices and serving.


Source:  adapted from Bakin and Eggs and Smitten Kitchen, originally from Christ Church Cooks and Gourmet


BLOG DESIGN BY: SHERBET BLOSSOM DESIGNS