Thursday, January 14, 2010

Chile-Cheese Bread


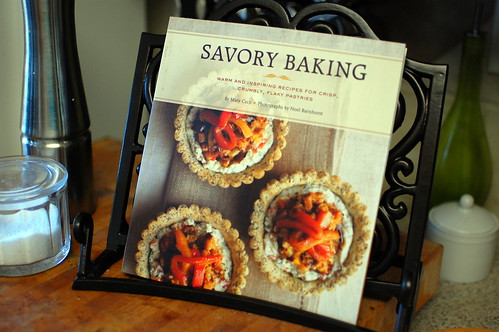
In addition to Rick Bayless's cookbook, Santa also brought me a book called Savory Baking.  NPR named it  one of the top cookbook's of the year, so I couldn't wait to break it in.  It is chock full of intriguing recipes that I'm so excited to try.  Some of the ones I'm especially looking forward to:  smoked-salmon crepe torte, hazelnut waffles, peppered pear and goat cheese scones, baked pomodoro dumplings on olive salad, onion and sherry cream turnovers... seriously I want to make them all.


I actually kept it pretty simple with my first recipe, mostly because I already had everything I needed to make this bread.  It couldn't have been any easier to put together, and the resulting bread was delicious!  The bread actually reminded me a little bit of Ina's Jalapeno Cheddar Cornbread, but a little turned up.  It houses 3 different peppers:  fresh jalapenos, green chiles, and red bell peppers.  Moist, flavorful, and a little spicy, we went through this loaf before I could make the gratin sandwiches that were actually part of the original recipe!  I will say that it makes great cheese toast though!


Chile-Cheese Bread
Savory Baking, by Mary Cech
  • 2 cups all-purpose flour
  • 2 teaspoons granulated sugar
  • 1 Tablespoon baking powder
  • 1 teaspoon freshly ground black pepper
  • 1 teaspoon salt
  • 4 ounces (1 cup) sharp cheddar cheese, shredded
  • 1 cup whole milk
  • 1/3 cup vegetable oil
  • 1 egg
  • 1 4-ounce can chopped green chiles
  • 3 Tablespoons finely chopped jalapeno chile, veined and seeded
  • 1/2 cup finely chopped red bell pepper
Preheat the oven to 375, and  grease or spray an 8x3 inch loaf pan.

Sift together the flour, salt, pepper, sugar, and baking powder in a medium bowl.  Add the cheese and gently toss and stir until it is evenly distributed throughout the mixture.

Whisk the milk, oil, egg, green chiles, jalapeno, and red bell pepper in another bowl.  Make a well in the center of the flour and cheese mixture, and pour the milk mixture in the center.  Briefily blend with a spatula, only until the dry ingredients are just incorporated.

Pour the batter into the prepared pan, and place in the oven.  Bake until the top is golden-brown, and springs back when touched in the center, about 45-50 minutes.  Cool on a rack for 10 minutes, then remove the bread from the pan and cool completely.


Monday, January 11, 2010

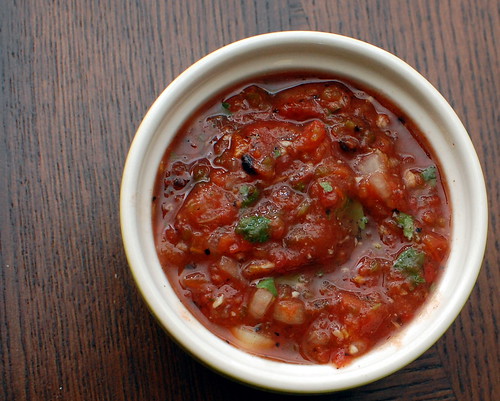
Rustic Roasted Salsa


Santa brought me Rick Bayless's Mexican Everyday this Christmas, and I was so incredibly excited.  This was probably the #1 cookbook on my wishlist, and I couldn't wait to start breaking it in.  So far I have been very impressed.  I love his philosophy of "everyday eating."  Basically he discusses the importance of portion control and a well-balanced diet.  Plenty of vegetables, good carbs, etc.  He also stresses that is important to "feast" every once in a while for special occasions.  Most of the recipes are actually pretty healthy, and so far, they have all been very tasty!

The first recipe I'll be sharing with you is his recipe for Rustic Roasted Salsa.  One of my favorite things about summer is the abundance of tomatoes and fresh produce.  I absolutely love making salsa in the summer, and pretty much have it in my fridge at all times.  So I kind of fall out of the habit as the weather gets colder, and the tomatoes go out of season.  This is a great alternative to fresh salsa, using good quality canned diced tomatoes, then roasting the garlic and jalapenos to add some extra depth of flavor to the salsa.  The result was spicy, smokey, but still fresh.  The key is to use good tomatoes.  I used Muir Glen Organic Fire Roasted, and they really have great flavor. 

This is very simple to throw together, and keeps well when refrigerated.  I snacked on this for a few days, then used the rest to make some black bean chili. 


Rustic Roasted Tomato Salsa
adapted from Rick Bayless, Mexican Everyday
makes about 2 cups
  • 2 fresh jalapeno peppers
  • 4 garlic cloves, unpeeled
  • 1/2 cup finely chopped white onion
  • 1 15-ounce can diced fire-roasted tomatoes in juice
  • 1/3 cup (loosely packed) roughly chopped cilantro
  • juice of 1/2 lime, or 1 teaspoon cider vinegar
  • Salt and Pepper
Heat a small skillet over medium heat, and dry roast the peppers and garlic, until soft and blotchy in spots.  The peppers will take about 10 minutes, and the garlic will take about fifteen.

Meanwhile, rinse the onion in a fine-mesh strainer under cold water.  Shake to dry, and set aside.

Stem and peel the jalapenos, and scrape out the seeds and membranes (or leave them if you want the salsa extra spicy)!  Peel the garlic, and transfer it to a food processor, along with the jalapenos.  Pulse until they are finely chopped, then add the tomatoes (with their juice), and pulse a few more times to make the salsa as smooth or as coarse as you want.  Pour the mixture into a medium bowl, and add the onion, cilantro, and lime juice.  Stir to combine, and add salt to taste.  Cover and refrigerate, or serve immediately.


Thursday, January 7, 2010

Green Bean Bundles


Another hit from The Pastry Queen, these green bean bundles are so fun and delicious!  Who doesn't want their food wrapped in bacon?  They were a festive addition to our New Year's Day spread.  The marinade gives the beans a great flavor, and as the bacon cooks, the beans absorb that delicious salty, smoky flavor.  They are perfect to make ahead and just bake off while you prepare the more labor intensive dishes of your meal.  These would also be great served as an appetizer on a buffet. 

Seriously, The Pastry Queen is quickly moving up the ranks as one of my favorite chefs.  I have yet to make anything that wasn't absolutely delightful, and I'm looking forward to working my way through her cookbooks!


Green Bean Bundles
adapted from The Pastry Queen Christmas, by Rebecca Rather
yields 6-8 servings
  • 1 1/2 lbs green beans, washed and trimmed
  • 1/2 cup (1 stick) unsalted butter
  • 1/2 teaspoon dry mustard
  • 1 teaspoon packed brown sugar
  • 2 cloves garlic, minced
  • 1/4 teaspoon kosher salt
  • 8 ounces of bacon, each piece cut in half width-wise
Bring a large saucepan of water to a boil over high heat, and blanch the beans 3-4 minutes, or until they are bright green in color and pliable but still very crunchy.  Drain and run them under cold water.  Place in a shallow, ovenproof casserole dish and pat dry with a paper towel.

In a small saucepan, melt the butter over medium heat.  Add the garlic, mustard, salt, and brown sugar.  Pour the mixture over the green beans, cover with plastic wrap, and refrigerate for at least 4 hours, or overnight.

Preheat the oven to 375.  Gather 8-9 beans at a time and make bundles.  Wrap with a slice of the (halved) bacon, and lie seam-side down in a greased baking sheet or casserole dish.  Pour remaining marinade over the top.

Bake, uncovered, for 45 minutes, or until the bacon is cooked through and the beans look wrinkled.  Cook under the broiler for an additional 1-2 minutes to crisp the bacon even more, if desired.  Serve warm or at room temperature.


Wednesday, January 6, 2010

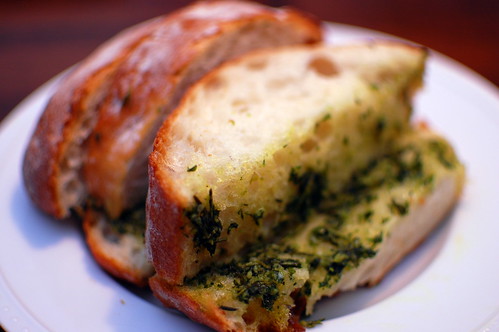
Garlic and Herb Ciabatta Bread


To go along with my kitchen-killing fettuccine alfredo, I made my favorite garlic bread.  Ina's Garlic Ciabatta bread is full of yummy herbs, garlic, oil, and butter.  And the beautiful thing is, you can adapt it however you like.  I used rosemary, thyme, and parsley this time, but I've used oregano and basil the past (though I didn't heat the basil with the oil, just mixed it in afterwards). I think a little Parmesan would be delicious as well.

I love ciabatta bread, and anything I pick up a loaf I make this with half of it, then use the other half for sandwiches.  Or more garlic bread the next night :-).

I pretty much follow her recipe, though sometiems I spread butter and the herb mixture on both halves.  It makes it a little easier to eat.


Garlic Ciabatta Bread
adapted from Ina Garten, Back to Basics
  • 6 galic cloves,roughly chopped
  • 1/4 cup fresh parsley
  • 2-3 Tablespoons fresh herbs (oregano, thyme, rosemary, and/or basil)
  • 3/4 teaspoon kosher salt
  • 1/2 teaspoon freshly ground black pepper
  • 1/2 cup good olive oil
  • 1 large ciabatta loaf
  • 2-4 Tablespoons unsalted butter, at room temperature
Preheat oven to 350.

Place the galric, herbs, salt, and pepper in a food processor fitted with the steel blade.  Process until finely minced.  Meanwhile, heat the olive oil in a small skillet over medium-low heat.  Add the glarlic and herb mixture, and cook until the garlic is softened but not browned, about 2-3 minutes.  Remove from heat and set aside.

Cut the ciabatta in half horizontally, and spread 1-2 Tablespoon of butter over each half.  Spoon the garlic mixture over each half as well, and press the halves together to make a sandwich.

Wrap in aluminum foil and place on a sheet pan.  Bake 5 minutes.  Unwrap from the foil, and bake an additional 5 minutes.  Slice loaf into pieces and serve warm.


Tuesday, January 5, 2010

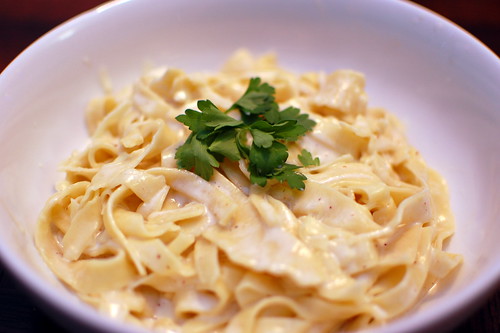
Fettuccine Alfredo


This meal really wreaked havoc on my kitchen.  Like, really. 

Santa was generous enough to bring me the pasta attachment for my KitchenAid, and I couldn't wait to use it.  My sister was visiting, and her favorite is Fettuccine Alfredo.  So I set to work.  I rolled out my sheets, and began cutting into noodles with the fettuccine attachment....and.... smoke..... and ..... grinding.  I turned off the mixer and unplugged, but she never made a full recovery :-(.  I can still make cakes and thin batters, but when it comes to kneading breads or mixing thick batters and doughs, I'm afraid she is done.  But its okay because there is a 6 quart Pro Series in my very near future.

And then I broke my cheese grater shredded the Parmesan (but that's okay too because it was a cheap one, and I replaced it with this beautiful Microplane).  And then, I dropped the lid to my mini-prep food processor and broke off the latch.

So all in all, a stressful time in the kitchen.  As we finally sat down for dinner, Joey made sure I had a big glass of wine to take the edge off.  I was so mad by that point that I didn't even want to eat.  I commented that it'd better be good or I was really going to be upset.  And.... heaven.  We all just mmm-ed all through dinner.    Worth it for all the trouble and broken appliances?  That's a toss up since mixers are expensive.  But so good.  Oh yes.

There are a few things that really made this a standout dish.
  1. Fresh Pasta.  If you can't make it, buy it from the refrigerated section of the grocery store.  The dried stuff just won't do.
  2. Add pasta water to the alfredo sauce towards the end.  If you've ever tried to reheat leftover alfredo sauce from a restaurant, you know that, well, it doesn't.  The delicate sauce is very quick to congeal and become thick.  Unless you eat it in less than a minute or so, this will start happening.  Adding the pasta water helps thin it out just enough to last a little longer.
  3. While cooking the pasta and sauce, fill your serving bowls with hot water.  Serving the pasta in already warmed bowls will help the sauce maintain its texture a little longer as well.
  4. Use the best quality ingredients you can.  No powdery Parmesan or fake butter here.  When a recipe has so few ingredients, its really important to let them shine.
This is not a light dish.  In fact, its widely known to be one of the worst things you can order out at a restaurant.  But every now and then its good to indulge, right?  I did replace some of the heavy cream with half and half with no negative results.  Other than that, I stayed pretty true to the recipe.

 While I did make my pasta from scratch, I'm not going to post the recipe in this post.  Rather, I will link to the recipe I used since I followed it to the letter.  I'm hoping to experiment with more fresh pastas when I get my new mixer, so be on the lookout for those recipes!


Fettuccine Alfredo
slightly adapted from Cook's Illustrated
serves 2-3 as a main course
  • 1 cup heavy cream
  • 1/2 cup half and half
  • 2 Tablespoons unsalted butter
  • kosher salt and freshly ground black pepper
  • 9 ounces fresh fettuccine
  • 1 1/2 ounces Parmesan cheese, grated (about 3/4 cup)
  • 1/8 teaspoon freshly grated nutmeg
Bring 4 1/2 quarts of water to a boil, coved, in a stockpot or dutch oven.  Using a ladle, fill serving bowls with boiling water.  Set bowls aside.

As water is coming to a boil, heat 1 cup of heavy cream and butter in a large saucepan over medium heat.  Bring to a simmer, then reduce heat and gently simmer until the mixture has reduced to about 2/3 cup, 12-15 minutes.  Remove from heat and stir in half and half, 1/2 teaspoon salt, and 1/2 teaspoon pepper.

Add 1 Tablespoon of salt to the boiling water and add pasta.  Cook until just shy of al dente.  Reserve 1/4 cup cooking water and drain pasta. 

Return cream to a simmer over medium-high heat.  Reduce the heat to low again and add the pasta, Parmesan, and nutmeg.  Toss gently with tongs to coat the pasta, and cook an additional 1-2 minutes.  Stir in the reserved pasta water.  At this point the sauce might seem to thin, but it will thicken as it begins to cool and is served. 

Quickly pour out the water from the serving bowls, and divide pasta and sauce among them.  Serve immediately.


Monday, January 4, 2010

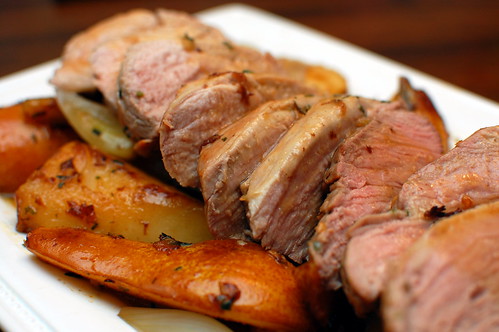
Pork Tenderloin with Pears and Shallots


Other than chicken, pork tenderloin is the cut of meat we eat most often.  I love that it is lean, cooks pretty quickly, and can be adapted to so many tastes and dishes.  I also really love to pair pork with fruit.  I just think the fruit brings out the natural sweetness from the pork, and the sweet and savory combo is one of my favorites.

This particular recipe is great for so many reasons:  it is a quick and easy meal, would be perfect for entertaining, and is fairly healthy.  The sauce is finished with pear nectar, and it makes it seem so luscious and elegant. 


Pork with Pears and Shallots
adapted from Bon Appetit, January 2010
  • 3 Tablespoons olive oil
  • 3 garlic cloves, minced
  • 1 Tablespoon chopped fresh thyme
  • 1 1 1/4 lb pork tenderloin, trimmed
  • 3 large shallots, peeled, stemmed, and quartered
  • 3 unpeeled Bosc pears, cored and quartered
  • 4 teaspoons butter, at room temperature
  • 2 teaspoons all-purpose flour
  • 1/2 cup dry white wine
  • 1 1/2 cups low-sodium chicken broth
  • 3/4 cup pear nectar
  • kosher salt and black pepper
Preheat the oven to 475.  Combine the oil, garlic, 1/2 teaspoon kosher salt, 1/4 teaspoon pepper, and thyme in a small bowl.  Toss half the mixture with the pears and shallots, and rub the other half over the pork.

Heat a large ovenproof skillet over medium-high heat.  Add the pork and shallots.  Brown the pork on all sides, about 7 minutes total, and toss the shallots occasionally.  Transfer the shallots to a platter, and transfer the pork to a baking sheet and place in the oven.  Bake until an instant-read thermometer reads 145, about 8-12 minutes.

Meanwhile, using the same skillet, saute the pears over medium-high heat, turning once or twice, until browned and softened.  Transfer the pears to the platter.

Mash the butter and flour together in a small cup or bowl.  Add the white wine to the skillet, and cook, scraping up the browned bits.  Add the chicken broth, pear nectar, and pear nectar to the same skillet.  Boil until sauce thickens, and season with salt and pepper.

After pork has rested at least 10 minutes, slice and arrange on the platter with pears and shallots.  Drizzle sauce over the platter, and serve with additional sauce if desired.


Saturday, January 2, 2010

BB: Sausage-Stuffed Mushrooms


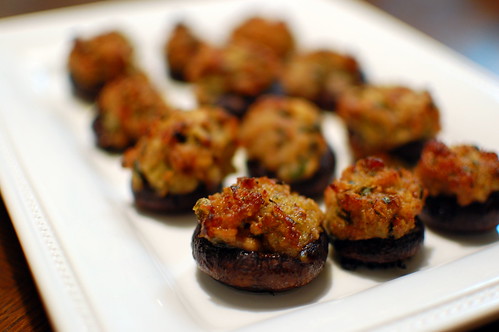
The second December recipe for Barefoot Bloggers was chosen by Michelle of Welcome to the Club.  She chose sausage-stuffed mushrooms, which was a perfect choice for December.  I actually made these 3 times:  for my extended family's Christmas Party, Joey's family gathering, and finally for New Year's Eve.  They were all eaten at all of the parties.

In the past when I make stuffed mushrooms, I've kept it simple:  low fat cream cheese, bulk sausage, Parmesan, and parsley.  These were from Ina, so of course they were slightly more elegant and upscale.  The mushrooms are stemmed and tossed in olive oil and Marsala wine.  Then the stems are chopped and sauteed with Italian sausage, green onion, garlic, panko, and parsley.  Rich Marscapone cheese is then swirled in, and the mushroom caps are filled and baked.  The result is pretty much the perfect stuffed mushroom.  A little salty from the sausage and Parmesan, earthy from the mushrooms, and a little sweet from the Marsala wine and Marscapone cheese. 

They come together quite easily; the only issue I had was that there was still plenty of filling leftover after stuffing the mushrooms.  Therefore, I suggest that you use 16 ounces of mushrooms.  And don't worry about that being too many.  There won't be any leftovers, no matter how many you make.

Sausage-Stuffed Mushrooms


BLOG DESIGN BY: SHERBET BLOSSOM DESIGNS