Monday, January 31, 2011

Fontina, Mushroom and Prosciutto Shells & Cheese


One of my favorite foods in the world is macaroni and cheese.  I mean, come on:  it's pasta baked in a cheesy sauce.  What's not to love?  While I have a classic recipe that I make quite often (and really should share with you guys), I always think it's fun to experiment with different cheeses and flavor profiles.

This particular creation actually started out as a lasagna recipe, but I adapted it to make mac and cheese instead.  I just wasn't feeling lasagna for some reason, so I turned it into a simple baked pasta dish - sauteed mushrooms, garlic, and onions, added herbs and prosciutto, then tossed with a cheesy bechamel sauce and pasta. What's more, it uses one of my favorite cheese ever, fontina!  I love the smooth, nutty flavor, and it really melts beautifully.

Overall, this was a really great twist on macaroni and cheese.  My sister called it "fancy," but I call it comforting and delicious.  And that's really with mac and cheese is all about, right?


More Fontina Goodness:
Baked Fontina

Fontina and Herb Stuffed Chicken
Swiss Chard and Sweet Pea Manicotti
Fontina-Stuffed Meatball Kabobs
Fontina Shells and Cheese
White Pizzas with Arugula


Macaroni and Cheese with Mushrooms, Fontina and Prosciutto
inspired by Williams-Sonoma

Breadcrumb Topping:
  • 1 cup fresh breadcrumbs
  • 2 Tbs butter, melted
  • 2 Tbs shredded parmesan 
  • salt and pepper
  • 2 Tbs olive oil
  • 12 oz mushrooms, sliced
  • 1 leek, halved, white and light green parts sliced
  • 4 oz prosciutto, chopped
  • 1 tsp fresh thyme
  • 1 tsp fresh rosemary
  • 3 Tbs fresh basil
  • 1 Tbs fresh parsley
  • 3 cloves garlic
  • 1 lb pasta shapes
Bechamel:
  • 6 Tbs butter
  • 1/3 cup flour
  • 3/4 cup chicken broth
  • 2 1/2 cups milk (low-fat is fine)
  • 1/3 cup marsala wine
  • 1/4 tsp nutmeg
  • kosher salt and black pepper
  • 1/2 cup shredded Parmesan
  • 2 cups shredded fontina
Preheat the oven to 350 degrees.  Toss the breadcrumbs with the melted butter and spread on a baking sheet.  Bake 5-10 minutes, stirring often, until golden-brown.  Allow to cool, then mix in the Parmesan and season with salt and pepper.

In a large skillet, heat the olive oil over medium heat.  Add the mushrooms and leek, and cook, stirring often, until golden, about 5-8 minutes.  Add the prosciutto, thyme, rosemary, basil, parsley and garlic.  Cook until fragrant, about 1 minute. Season with salt and pepper and set aside.

Meanwhile, bring a large pot of salted water to boil and cook the pasta to al dente, about 8 minutes.  Drain pasta and wipe out saucepan.

Melt the butter in the saucepan.  Add the flour and cook, stirring constantly, about 3 minutes.  Slowly whisk in the broth and milk.  Bring the mixture to a heavy simmer (almost to a boil), whisking often, until thickened, 10-12 minutes.  Stir in the marsala and nutmeg, and season with salt and pepper. 

Remove from heat and stir in the fontina and Parmesan cheeses, stirring until the cheese has melted.  Fold in the mushroom-herb mixture and the pasta.  Spread the mixture into a lightly greased 9x13 inch baking dish, and sprinkle the breadcrumbs over the top.

Bake uncovered for 20-25 minutes, until the cheese is bubbly.  Allow to rest 5-10 minutes before serving.


Thursday, January 27, 2011

Mediterranean Vegetable Salad


Even though I strive to cook as seasonally as possible, sometimes a craving hits and I just can't ignore it.  Last week I was going about my business, and I was hit with a sudden craving for Greek salad.  I couldn't stop thinking about the combination of salty feta, fresh cucumbers, and bright and tangy dressing.  Later that day, I was thumbing through How Easy is That? and this salad jumped out at me.  Most of the ingredients aren't really in season, but I made an exception and adapted it to what I had the best access to.

This salad is full of yummy vegetables:  cucumbers, scallions, chickpeas, and cherry tomatoes.  It also gets a punch of freshness from the mint, basil, lemon, and parsley.  The original recipe actually calls for vine-ripened tomatoes, but I used cherry tomatoes instead.  They are really the only acceptable tomatoes that are available right now.  I also used a trick I learned from Cook's Illustrated.  If you salt and drain the tomatoes and give them a spin in your salad spinner before adding them to the salad, you will rid them of excess moisture, thereby keeping all the flavors from being too diluted.

I served this salad as a side to quinoa burgers, but it was also delicious on it's own for lunch the next day with some toasted pita.  Another Ina hit, and I really can't wait to make this when produce is at it's peak!


Mediterranean Vegetable Salad
adapted from Ina Garten, How Easy is That?
serves 4 to 6 as a main dish, 8 to 10 as a side.
  • 10 scallions, white and green parts, thinly sliced
  • 1 pound cherry tomatoes, quartered
  • 1 hothouse cucumber, halved lengthwise, seeded, and 1/2-inch diced
  • 1 can chickpeas, rinsed and drained
  • 1/3 cup chopped fresh parsley
  • 1/3 cup chopped fresh mint leaves
  • 1/3 cup chopped fresh basil leaves
  • 1/2 cup freshly squeezed lemon juice 
  • 1 Tbs minced garlic
  • kosher salt and freshly ground black pepper
  • 1/3 cup olive oil
  • 8 oz.  feta cheese, 1/2-inch diced
Place the quartered tomatoes in a strainer and toss with 1/2 teaspoon of salt.  Allow to drain 20-30 minutes.

Meanwhile, in a small bowl or measuring cup, whisk together the lemon juice, garlic 1 1/2 teaspoons salt, and 1 teaspoon pepper.  Slowly whisk in the oil to make an emulsion. 

Spin the tomatoes in a salad spinner several times to remove seeds and moisture.  Toss the tomatoes with the scallions, cucumber, chickpeas, parsley, mint, and basil in a large bowl.  Whisk the dressing to recombine, and pour over salad.  Toss gently to coat.  Add the feta, sprinkle with salt and pepper, and toss gently.  Serve.


Wednesday, January 26, 2011

Chicken Parmesan with Pepperoni


If chicken parmesan and pepperoni pizza had a love child, it would be this dish.  It is a pretty standard chicken parmesan, but then it's topped with pepperoni before baking.  I used to really really hate pepperoni, but now I enjoy it in limited capacities.  Like on pizza.  Or now on chicken parmesan.

This was fairly quick, and very easy.  Chicken breasts are coated in panko bread crumbs, then pan-fried.  They are then transferred to a baking dish, topping with tomato sauce, cheese, and pepperoni, and baked. Easy peasy. 

Healthy, this is not.  But it was a great meal for a cold and rainy day.   And if you already love chicken parm, then this is a really fun and delicious twist on an old classic. 


Chicken Parmesan with Pepperoni
adapted from Food and Wine, January 2011
serves 4
  • 2 large eggs
  • 1/4 cup milk
  • 1/2 cup flour
  • 2 cups panko
  • 4 (8-ounce) boneless, skinless chicken breast halves, pounded 3/4-inch thick
  • salt and freshly ground black pepper
  • 1/3 cup canola oil
  • 1 1/2 cups tomato sauce (recipe follows)
  • 1/3 cup freshly grated Parmigiano-Reggiano cheese
  • 1 cup shredded mozzarella
  • 2 ounces sliced pepperoni
Tomato Sauce
  • 1 (15-ounce) can tomato sauce
  • pinch red pepper flakes
  • 3/4 tsp garlic powder
  • 1/4 tsp sugar
  • 1/2 tsp dried oregano
  • kosher salt and freshly ground black pepper
Preheat the oven to 450 degrees.  In a small saucepan, combine the ingredients for the tomato sauce.  Simmer over medium-low heat as you prepare the chicken.

In a pie plate, beat the eggs with the milk.  In 2 more pie plates (or shallow dishes), spread the flour and panko.  Season the panko with salt and pepper.  Pat the chicken dry and season with salt and pepper.  Lightly dredge each chicken breast in the flour, followed by the egg, and finishing with the panko.  Press to help the crumbs adhere.

In a large skillet, heat the oil over medium-high heat until shimmering.  Add the chicken and cook, turning once, until cooked through, about 7 minutes.  Drain the chicken on a paper towel-lined plate, then transfer to a lightly greased baking dish.

Top the chicken with the tomato sauce, cheeses, and pepperoni.  Bake the chicken for about 15 minutes, until the cheese is melted and bubbling.  Transfer the chicken to plates and serve.


Tuesday, January 25, 2011

PPQ: Triple Threat Chocolate Cookies


I was thisclose to choosing this recipe for Project Pastry Queen last time it was my choice.  But I was seduced by cranberries, and thus I missed yet another chance to tackle these cookies.  Thanks to Rebeca of Through the Looking Glass, I had my chance this week! 

The recipe calls for pecans and walnuts, but I omitted both.  I also used half white chocolate chips and half semisweet.  I just love white chocolate chips in chocolate cookies. 

These cookies are rich:  8 ounces of bittersweet chocolate, 3 ounces of unsweetened chocolate, and 1 1/2 cups of chocolate chips.  They only have 1/3 cup of flour, but 3 eggs.  So they are super fudgy, chewy, and kind of a cross between a cookie, a brownie, and fudge.  They are on the small side, which is fine.  A few bites will do ya!  Enjoyed hot from the oven with a glass of milk, they are an awesome afternoon snack (or breakfast, or dessert, or midnight snack).

Rebeca has the full recipe on her blog, and check back next week for Pear-Ginger Bread.


Wednesday, January 19, 2011

Herbed Focaccia


One of my favorite ways to elevate a meal from good to great is by serving it with freshly baked bread.  Focaccia is one of my favorite breads to make for several reasons.  It is very low maintenance, it's open to many adaptations and variations, and most of all, it is absolutely delicious.  I love the slightly crunchy top, studded with herbs and spices, which gives way to the soft and tender bread underneath. 

I have made focaccia several times, and everytime I make it I do at least 2 different toppings.  My favorites are rosemary and lavender-lemon, which are the toppings I used this time.  I really can't pick a favorite, even after stuffing myself silly with both variations.

I served this with the pasta with lemon, garlic, and olive oil, and it was a perfect complement.  As I mentioned before, it is a pretty low-maintenance recipe - just mix, knead, rise, shape, bake.  The dough is actually mixed by hand, and while I really love my stand mixer, sometimes there is something so gratifying about kneading my dough by hand.  It's a great time to zone out and forget the stresses of the day.  Just knead and then go enjoy a glass of wine as it rises. 


One Year Ago:  Roasted Mushroom and Chorizo Salad


Herbed Focaccia
adapted from Williams-Sonoma
  • 1 package (2 1/2 tsp) instant yeast
  • 1/2 cup warm water (110-115 degrees)
  • 1 1/2 cups warm milk
  • 1/4 cup + 2 Tbs olive oil
  • 5 cups all-purpose flour
  • 2 tsp salt
  • 1/2 Tbs minced fresh rosemary
  • 1 tsp dried lavendar
  • zest of 1/2 lemon
  • kosher salt
Add the yeast to the water and stir to combine.  Stir in the milk and 1/4 cup of the olive oil.  In a large bowl, stir together the flour and salt, and add the yeast mixture.  Use a wooden spoon to stir, and mix until a soft dough forms, about 2 minutes.

Turn the dough out onto a lightly floured work surface, and knead until the dough is smooth and elastic, about 10 minutes.  Shape into a ball and transfer to a lightly oiled bowl.  Cover with plastic wrap and let the dough rise in a warm, draft-free place until doubled in bulk, about 1 hour.

Oil a 15x10x1 inch baking pan, and punch down the dough.  Transfer to the pan and press down with your hands to flatten the dough and cover the bottom of the pan.  Cover with a clean, lint-free kitchen towel or plastic wrap, and let rise again until puffy, about 1 hour.

Preheat the oven to 450 degrees.

Using your fingertips, press dimples in the dough about 1-inch apart and 1-inch deep.  Drizzle the remaining olive oil over the top and sprinkle half with rosemary, and the other half with the lavender and lemon zest.  Sprinkle the top generously with kosher salt.

Bake 15-25 minutes, or until the top is golden-brown.  Slide the focaccia onto a wire rack to cool completely, then cut into squares and serve.


Tuesday, January 18, 2011

Red Lentil Soup with Lemon


I first tried lentils last winter with the sausage and lentil soup, and I've been enjoying them ever since - in salads, as one-pot meals with veggies and a protein, and most recently, in vegetarian pot pies!  I've always been intrigued by red lentils because as fickle as it sounds, I think they are so pretty!  However, they cook faster than green or brown lentils, which makes them a poor choice for salads - they get mushy and lose all texture.  This is what makes them ideal for soups, as they kind of "melt" into the broth and thicken the soup.

I was really intrigued by this recipe as I read In the Kitchen with a Good Appetite.  I had never thought to pair lemon with lentils, but it makes perfect sense - lentils are earthy, and the bright acidity of lemon is a perfect match.  After I read this recipe, I couldn't get this soup out of my head, and I NEEDED it as soon as possible.  Which led to me on a wild goose chase to four grocery stores looking for red lentils.  I did eventually find them, and as I drove home, I thought to myself that "this soup had better be good."

And boy, was it!  It is flavored with tomato paste, cumin, chili powder, and garlic, and then finished with cilantro and lemon.  It is comforting and earthy, with a nice freshness from the lemon, and a spicy kick at the finish.  I served this with toasted pita, which was perfect for dipping. 

I'm submitting this post to Branny's Charity Souper Bowl blogging event - she is making a contribution to the ASPCA for every soup entry through February 6th.  Though we don't have any pets, I absolutely support this endeavor and this charity.  Thanks, Branny!

Red Lentil Soup with Lemon
adapted from In the Kitchen with a Good Appetite, by Melissa Clark
serves 6-8
  • 4 Tbs olive oil, plus additional for drizzling
  • 2 large onions, chopped
  • 4 cloves garlic, minced
  • 2 Tbs tomato paste
  • 2 tsp ground cumin
  • 1/2 tsp kosher salt, plus additional to taste
  • 1/2 tsp freshly ground black pepper
  • 1/4 tsp chili powder
  • pinch cayenne pepper
  • 1 1/2 quarts chicken or vegetable broth
  • 2 cups red lentils
  • 2 large carrots, peeled and diced
  • juice of 1 lemon, plus more for serving
  • 1/2 cup chopped fresh cilantro
Heat the oil in a large pot over high heat until shimmering.  Add the onions and saute until golden brown, about 4 minutes.

Stir in the garlic, tomato paste, cumin, chili powder, cayenne, salt, and pepper.  Saute an additional 2 minutes.

Add the broth, 2 cups water, the lentils, and the carrots.  Bring to a simmer, then partially cover the pot and reduce the heat to medium-low.  Simmer until the lentils are soft and breaking down, 30 minutes.  Taste and add more salt if necessary.

Use an immersion blender to puree the soup to acheive a chunky consistency (or transfer half to a blender or food processor, puree, and return to the pot).

Stir in the lemon juice and cilantro.  Serve the soup drizzled with olive oil and additional lemon slices.  Dust lightly with chili powder, if desired.


Sunday, January 16, 2011

PPQ: Kolaches


When we were given the opportunity to go back and cook something that we've missed along the way for Project Pastry Queen, I knew immediately that I wanted to do the kolaches.  This was the very first recipe chosen for the group, and I've been wanting to make these ever since I bought the cookbook almost 2 years ago.  Yes, I know I could have made them any time, but I just never got around to it.

To be honest, I had never even heard of a kolache before this cookbook, but apparently they are popular in Texas.  They are soft and sweet pastry bun, with a sweet or savory filling.  Rebecca gives several variations in the book, and while I am positively dying to make the peach variation, peaches are not in abundance this time of year.  So I worked with what I had and concocted a pear-ginger filling.  I really really liked the combination, but I'm still anxious to make peach kolaches this summer.

These do have a lot of steps, and may seem complicated, but they are actually quite simple to put together.  The dough is made, chilled overnight, then shaped, filled, and baked the next morning.  I would say these have less than an hour of active prep time.  Now just as fair warning, this recipe makes a LOT of kolaches, but I halved it with no problems.  We still had several leftover, but I just sent them to my neighbors.  They really taste best the day they are made anyway.

Thanks to Shawnda, for both choosing this recipe way back in the summer, and for giving us the chance to play catch-up.  Hop over to Project Pastry Queen to see what everyone else made this week!


Kolaches
adapted from The Pastry Queen and Confections of a Foodie Bride
makes 16 to 18 buns


Dough
  • 2 cups milk
  • 1 (1/4-ounce) package instant yeast
  • 1/2 cup lukewarm water (110-115 degrees)
  • 1 stick unsalted butter
  • 2 large eggs
  • 1 1/4 cups sugar
  • 2 tsp salt
  • 8 1/2 cups all-purpose flour
Pear-Ginger Filling
  • 2 cups diced pears
  • 1 cup pear-ginger jam OR 1 cup pear jam + 1 tsp freshly grated ginger
  • 1/2 tsp ground cinnamon
  • pinch of salt
  • 1/4 tsp ground ginger
Streusel Topping
  • 1/2 cup all-purpose flour
  • 1/2 cup sugar
  • 3 Tbs chilled unsalted butter, cut into small pieces
To make the dough, warm the milk and water in the microwave until it reaches 110-115 degrees.  Stir in the yeast.  Melt the butter and set aside to let cool 5 minutes.

In the bowl of a stand mixer fitted with a paddle attachment, combine the eggs, sugar, salt, and melted butter.  Add the milk and yeast mixture, and with the mixer on low speed, gradually add the flour, 2 cups at a time.  Keep adding flour until it is completely incorporated and the dough just begins to hold together.  The dough will be sticky, moist, and light.

Lightly oil a large bowl and transfer the dough to the bowl.  Cover with plastic wrap, and place in a warm, draft-free room to rise.  Rise until it has doubled in size, 1 to 2 hours (a dent will remain when the dough is touched lightly).  Leaving the dough in the bowl, punch once or twice to deflate, recover with the plastic wrap, and refrigerate at least 4 hours, or overnight.

To make the filling, place the jam in a microwave safe bowl and heat 15-30 seconds.  Stir in the pears, cinnamon, salt, and ginger.  Set aside.

Grease a 12x17 inch baking sheet, and with lightly oiled fingertips, shape the dough into 2 1/2-inch diameter balls (about the size of a small lime).  Arrange them evenly on the baking sheet, 3 across and 6 down.

To fill the kolaches, use your thumb or fingertips to make a generous indentation in the middle of each dough ball, being sure not to pierce the bottom of the dough.  Mound about 1-2 tablespoons of the pear filling in each indentation.  Cover the rolls with a clean, lint-free kitchen towel, and let them rise in a warm, draft-free place until puffed and almost doubled in size, about 1 hour.

Preheat the oven to 375 degrees.

To make the streusel topping, mix the flour, sugar, and butter in a medium bowl, using a fork or pastry cutter (or your fingers) to incorporate the butter until the mixture is crumbly.  Scatter the topping over the kolaches just before baking.

Bake until lightly browned on top, 25 to 30 minutes.  Allow to cool 20 minutes before serving.


Friday, January 14, 2011

Orange-Vanilla Bean Cupcakes


I have had a major case of the winter blues pretty much since, oh... the day after Christmas.  I really and truly hate the cold weather.  I love spring and summer, allergies, steaming hot days, and all.  Give me 110 degree temperatures over 20 degrees any day.  And I am even more inclined to feel this way considering the fact that we've been snowed and iced in since Monday.

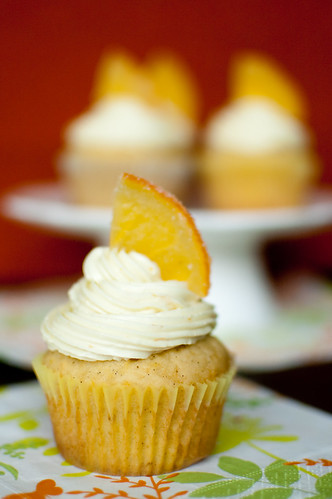
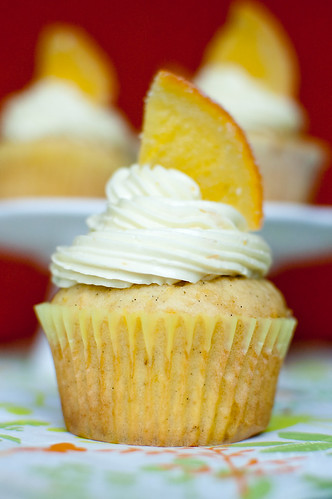
So last week when I had the urge to bake some cupcakes last week, I opted to go with something that felt light and fresh - citrus!  I was intrigued by the orange-vanilla bean combination, and I thought it might be similar to a creamsicle.  The cake itself was much more dense than I expected, but not necessarily in a bad way - it reminded me more of a poundcake than a cupcake.  So if you want a light and fluffy cupcake, maybe try a simple yellow cake recipe and add vanilla beans and orange zest to the batter.  However, the icing was spectacular.  The original recipe is for a simple vanilla Swiss Meringue buttercream, but I added orange zest to give it more citrus flavor.

I also changed up the presentation.  Each cupcake was to be garnished with an entire candied orange slice, but for one thing, I prefer a big swirl of frosting, and I also thought a sticky orange slice would be messy and overkill.  So I quartered each slice and then dipped them in sugar.  The garnish was actually one of the best parts about this cupcake - it reminded me of gummy oranges, but with real orange flavor - none of the fake, artificial flavors you'll find in candy shops.

Finally, I'd like to share a tip about meringue-based buttercream.  I beat the frosting for over 30 minutes, and it was not setting up.  It was a curdled, soupy mess, and I was ready to throw it out and start over.  I have made Swiss Meringue buttercream many times, so I didn't know what was going on - the only change I had made was adding orange zest to the sugar, but I couldn't see how that would mess up the frosting.  So I did a little research, and found the suggestions to refrigerate for 30 minutes, then try again, or to melt a portion of the frosting and add it back to the mixer.  I tried the refrigeration trick with no success, and I had low expectations for the melting trick.  But lo and behold, it worked!  I melted maybe a quarter of the frosting, and when I added it back to the rest, the frosting came together within seconds.  It was seriously like magic!

Joey really liked these cupcakes, and it was fun to make something out of the ordinary.  I for one, could have eaten the entire batch of frosting and been happy, but hey - if you're into cake, it was delicious as well ;-)


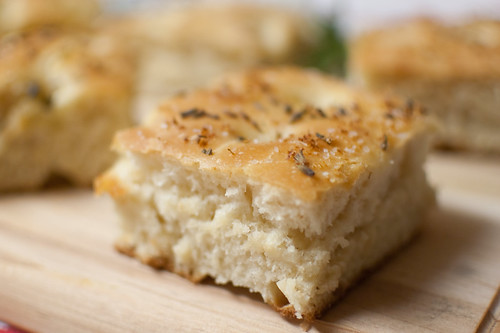
One Year Ago:  Chile-Cheese Bread


Orange-Vanilla Bean Cupcakes
adapted from Martha Stewart's Cupcakes


Candied Orange Slices
  • 1 small navel orange
  • 1 1/2 cups sugar, divided
  • 1 cup water
Wash the oranges trim off the tops and bottoms and cut into 1/8-inch thick slices.  Remove seeds.

Bring 1 cup of the sugar and the water to a boil in a large skillet or saucepan over medium heat.  Boil, stirring, until clear, about 5 minutes.  Add enough orange slices to fit in one layer; simmer, turning oranges occasionally, 20-40 minutes, or until translucent but still orange in color.  Use a slotted spoon of tranfer the slices to a heatproof container.  Repeat with remaining slices and pour the syrup into the container with oranges. Let cool completely.

Spread the remaining 1/2-cup of sugar in a shallow dish.  Using a sharp knife, quarter each orange slice and coat well with the sugar, turning several times.  Lay flat on a cooling rack set over a baking sheet until dry.


Cupcakes
  • 2 cups all-purpose flour
  • 1/4 tsp baking soda
  • 1/4 tsp baking powder
  • 1/4 tsp salt
  • 3/4 cup heavy cream
  • 1 Tbs orange zest
  • 1/4 cup orange juice
  • 1 Tbs vanilla extract
  • 1 stick unsalted butter, at room temperature
  • 1 cup sugar
  • 2 vanilla beans, halved lengthwise, seeds scraped and reserved
  • 2 large eggs
Preheat the oven to 350 degrees, and line muffin tins with paper liners.

Sift together the flour, baing soda, baking powder, and salt.  In another bowl, combine the cream, orange juice, and vanilla extract.

Cream the butter, sugar, vanilla bean seeds, and zest in a stand mixer fitted with a paddle attachment until pale and fluffy.  Add eggs, one at a time, scraping down the bowl as needed.  Reduce speed to low, and alternate adding the flour and cream mixtures, starting and ending with the dry ingredients.  Beat until just combined.

Divide the batter evenly among the muffin cups, filling each one 3/4 full.  Bake, rotating the pan halfway through, until a cake-tester comes out clean, about 25 minutes.  Transfer tins to a wire rack to cool completely.


Orange Swiss-Meringue Buttercream 
  • 3 large egg whites
  • 1/2 cup plus 1 Tbs sugar
  • pinch of salt
  • zest of 1/2 orange
  • 1/2 pound (2 sticks) unsalted butter, cut into tablespoons, at room temperature
  • 1 tsp vanilla extract
Combine the sugar and orange zest in a medium bowl.  Using your fingertips, work the zest into the sugar, rubbing between your fingers, until it is orange-ish in color and very fragrant.

Mix the sugar with the egg whites and salt in the bowl of a stand mixer set over a pan of simmering water.  Whisk constantly by hand until mixture is warm to the touch and the sugar has dissolved (the mixture should feel completely smooth when rubbed between your fingertips).

Attach the bowl to a mixer fitted with the whisk attachment.  Starting on low and gradually increasing to medium-high speed, whisk until stiff (but not dry) peaks form.  Continue mixing until the mixture is light and fluffy, glossy, and completely cool, about 10 minutes (you can test by touching the bottom of the bowl).

With the mixer on medium-low speed, add the butter a few tablespoons at a time, mixing well after each addition.  Once all the butter has been added, whisk in the vanilla.  Increase the speed to medium and beat until frosting forms (this can take several minutes).

Switch to the paddle attachment and beat on low speed until all air bubbles are eliminated, about 2 minutes.  Scrape down the sides of the bowl and beat until the frosting is completely smooth.

Pipe or spread the frosting onto the cupcakes, and garnish with the candied orange slice.  The cupcakes are best the day they are made, but can be stored overnight in an airtight container.


Wednesday, January 12, 2011

Chorizo-Stuffed Adobo Pork Loin


When I bought Pam Anderson's Perfect One-Dish Dinners, I made the salsa verde chicken and dumplings immediately.  However, when making the meal plan for the following week, I let Joey pick out the next recipe.  I was not at all surprised when he chose the roasted chorizo-stuffed adobo pork loin with black beans and rice.  It's pretty much all of his favorite ingredients all combined into one dish.

Be forewarned, this makes a LOT of food.  I actually halved the recipe, and we had tons of leftovers (and that was after sending generous portions to a friend).  Consequently, this is a great recipe for entertaining.  The pork is thrown in the oven and roasted unattended, then the black beans and rice are added to the roasting pan for the last 20 minutes or so.  Serve this with a salad and cornbread or rolls, and you have a great meal.

I couldn't find fully cooked chorizo at my grocery store, so I bought the uncooked version and simply cooked it myself.  It is then added to the food processor and mixed with lots of garlic, cilantro, chipotle chiles, spices, and a little brown sugar.  The pork is split down the middle, stuffed with the chorizo mixture, and tied.  And that's it!  Roast it for a while, add the black beans and rice, then serve. 

Super simple, but the pork is so very flavorful.  I mean, look at what you're working with here, how could it not be? 


Roast Chorizo-Stuffed Adobo Pork Loin with Black Beans and Rice
adapted from Perfect One-Dish Dinners by Pam Anderson
serves 16 (and is easily halved)
  • 1 pound chorizo, casings removed
  • 16 garlic cloves, peeled
  •  up to 6 Tbs olive oil, divided
  • 1 cup fresh whole cilantro leaves, plus 1 cup chopped
  • 1/4 cup chipotle chiles in adobo sauce 
  • 1/4 cup dry bread crumbs
  • 3 Tbs ground cumin, divided
  •  up to 2 Tbs plus 2 tsp kosher salt, divided
  • 1 Tbs plus 1 1/2 tsp freshly ground black pepper, divided
  • 2 Tbs ground paprika
  • 2 Tbs brown sugar
  • 1 whole boneless pork loin (6-8 lbs)
  • 4 (15 oz) cans black beans, drained and rinsed
  • 1 quart chicken broth
  • 2 cups long-grain rice
  • 1 (14.5 oz) can diced tomatoes, undrained
  • 1 bunch scallions, thinly sliced
Cook the chorizo in a small skillet, breaking up large chunks, until fully cooked.  Use a slotted spoon to transfer to a food processor fitted with a steel blade.  Leave the rendered fat in the skillet.

Add enough oil to reach about 3 tablespoons of fat, then add the garlic and cook over medium heat until it starts to sizzle.  Reduce heat to low and continue to cook, stirring a few times, until soft and golden, 5 to 7 minutes.

Meanwhile, to the food processor, add the whole cilantro leaves, chipotles, bread crumbs, and 1 tablespoon of the cumin.  Add the garlic and its oil and process until the ingredients are finely ground.  Set aside.

Combine the remaining 2 tablespoons of cumin with 1 1/2 tablespoons of salt, 1 tablespoon of pepper, paprkia, and sugar in a small bowl.

Adjust the oven rack to the lower-middle position and preheat the oven to 250 degrees.Lay the pork loin on a plastic cutting board, fat side down.  Slit pork loin lengthwise down the center almost - but not quite - all the way through to form a long pocket.  Brush the cavity with 1 tablespoon of the oil and sprinkle with 1 1/2 teaspoons of salt and remaining 1 1/2 teaspons of pepper.

Line the cavity with the sausage mixture.  Tie the roast crosswise with butcher's twine at 1 1/2 inch intervals, alternating between one end and the other so the stuffing remains even.

Brush the roast with remaining 2 tablespoons of oil and sprinkle with the cumin-paprika mixture.

Place the roast on a wire rack set in a large roasting pan and roast until a meat thermometer interseted in the center registers 125-130 degrees, about 1 1/2 hours.  Increase the oven temperature to 400 degrees and remove the rack with the pork from the pan.  Add the rice, beans, tomatoes, and broth, and stir to combine.  Season with remaining salt and pepper if desired.

Return the rack to the pan and return the pan to the oven.  Continue to roast until the meat thermometer reads 155 to 160 degrees, about 20 minutes longer.  Transfer to a cutting board and let rest, uncovered, 15 to 20 minutes.  Meanwhile, stir scallions and remaining 1 cup cilantro into beans and rice, cover, and keep warm. 

To serve, cut twine from pork and slice roast into 1/2-inch slices. 


Tuesday, January 11, 2011

Pasta with Garlic, Olive Oil, and Lemon


I've recently been trying to step back a bit from meal planning.  I have always been pretty rigid with my meal plans, but the problem with cooking 5-6 nights a week is that I'm left with unused ingredients, leftovers, and random food that never gets eaten.  So I've started leaving 1-2 nights a week "free," and just throwing something together, eating a random assortment of leftovers, or creating a whole new dish from leftovers (like this Hawaiian BBQ Pork Pizza).  I like doing this in part because it wastes less food, but it also allows me to get creative in the kitchen and make meals on the fly based on what I feel like eating. 

Enter this pasta dish.  Last Friday, I knew I wanted something comforting.  I also felt like playing in the kitchen and making something fun, but I refused to make a trip to the grocery store.  This pasta is perfect because it requires very few ingredients, and all the ingredients are things I almost always have on hand.

The original recipe calls for linguine, but since I didn't have any on hand (though I do have almost every other shape imaginable), I decided to make fresh pasta.  For one thing, when a dish has so few ingredients, I think its important to use the best quality of each one that you can. Also, I just really like making fresh pasta.  If you are scared or unsure, head over to Annie's Eats.  She just posted a homemade pasta tutorial that is incredibly detailed and helpful.

Anyway, once my pasta was made, this dish comes together in the time it takes to cook the pasta.  And what's more, it is absolutely fantastic.  Lemony and garlicky, with just a hint of spice.  And the fresh pasta just put the whole thing over the top.  As we were eating I just kept saying how much I loved it.  You would never know that this was a last-minute desperation dinner.  But its a great one to have in your arsenal for sure.


Pasta with Garlic, Olive Oil, and Lemon
adapted from The Complete Italian Vegetarian Cookbook
serves 4
  • 6 Tbs extra virgin olive oil
  • 9 medium garlic cloves, minced
  • 2 Tbs fresh lemon juice, divided
  • kosher salt
  • 1/2 tsp dried hot red pepper flakes, or to taste
  • 1 pound linguine, fettuccine, or spaghetti
  • 4 tsp grated Parmesan cheese
Bring 4 quarts water to a boil in a large pot for cooking the pasta.

Meanwhile, heat the oil in a large skillet over medium-low heat.  Add the garlic and cook, stirring often, until golden but not browned, about 4 minutes.  The garlic will become bitter if browned, so it should remain a deep golden color.

Stir in half the lemon juice, 1 teaspoon of salt, and the red pepper flakes.  Cook for 30 seconds to 1 minute, then remove from heat and cover to keep warm.

When the water comes to a boil, add salt to taste and the pasta.  Cook until al dente, then drain.

Add the pasta to the skillet with the oil and garlic and mix well.  Divide among individual serving bowls, and top with remaining lemon juice and the Parmesan.  Serve immediately.


Sunday, January 9, 2011

PPQ: Big Hair Lemon-Lime Meringue Tarts


Ever since I bought The Pastry Queen, I have wanted to make these tarts.  Seriously, how fun are they?  Plus, they are Rebecca Rather's signature dessert.  If out of all the decadent and mouth-watering desserts she features in her cookbook, these are what she's known for, then I HAD to make them.  I also had so much fun making the chocolate version over the summer, so I was really looking forward to this week's recipe. 

In all actuality, these are nothing more than a lemon-meringue pie that's been gussied up.  Buttery, shortbread crust that is studded with almonds, tart lemon-lime curd, and heaps of fluffy meringue.  But isn't this so much more fun?

I was a little concerned after I made the citrus curd - it was mouth-pucking it was so tart.  But once it's combined with the rich crust and the sweet meringue, it all balances out.  Obviously styling the meringue is the most fun part of the assembly - Joey really liked helping, and I let him torch it since he's a boy and likes to play with fire.  I think Caroline would have loved helping too, but well, I didn't feel like making a trip to the emergency room for an allergy attack (she is allergic to eggs).

Thanks to Sarah for picking yet another fabulous, over the top dessert.  Check out her blog for the full recipe, and check back next week - it's gonna get wild (card)!


Friday, January 7, 2011

Vanilla Bean Macarons


Ah, the elusive macaron.  I have longed to make macarons for years now, but could never quite work up the courage.  They are notoriously finicky, and I hate wasting ingredients, not to mention it's a blow to the old self esteem to fail at a recipe.  Over the holidays, I had finally had enough looking at other bloggers' beautiful little cookies, and I set out to make them myself.  I spent a good amount of time reading tutorials and tips from others, then I gathered my ingredients, weighed everything out, and set to work.

And you know what?  They aren't terribly difficult!  I was super careful with each step, working slowly, and being as anal-retentive as I possibly could.  After I finally put them in the oven, I promptly sat myself down on the floor and watched them cook through the oven door.  And when I saw the little feet forming, I may or may not have gotten up and done a little dance (which both Caroline and Joey thought was quite hilarious).

They weren't perfect, and there are a few things I would do differently next time, but I was super excited to share them with my family at our big holiday gathering.  I kept it simple with the filling and went with chocolate ganache, but I'm already dreaming up all the possibilities for future batches.

Here are a few of the resources I used:
DemystifyingMacarons 
Confections of a Foodie Bride
Annie's Eats


One Year Ago:  Green Bean Bundles


Vanilla Bean Macarons
Use Real Butter, originally from Tartelette
  • 110 g blanched almonds
  • 200 g powdered sugar
  • seeds from 1/2 vanilla bean
  • 50 g sugar
  • 100 g egg whites (about 3 egg whites), aged a day at room temperature
Line 2 baking sheets with parchment paper or silicone mats.

Pulse almonds in a food processor until finely ground.  Add the powdered sugar and pulse a few times to combine.

Split the vanilla bean in half lengthwise, and scrape the seeds out using a paring knife.  Add the seeds to the granulated sugar and whisk to combine.

In the bowl of a stand mixer fitted with a whisk attachment, whip the egg whites until foamy, then gradually add the granulated sugar and continue to whip until a shiny, glossy meringue forms (but not dry).

Remove the bowl from the stand mixer, and add the almond mixture.  Using a rubber spatula, briskly and quickly fold the almond meal into the egg whites.  After a few brisk strokes, slow down and then gently incorporate the rest into the batter.You want a batter that flows and "ribbons" for at least 5 seconds.

Pour the batter into a pastry bag fitted with a large round tip.  Pipe the batter into 1 1/2-inch rounds, spacing them about 1-inch apart.

Whack the bakign sheets on the counter a few times, then allow to sit at room temperature 45 minutes-1 hour, or until a hard shell forms.

Meanwhile, preheat the oven to 300 degrees.  Bake the macarons 8-10 minutes, depending on size.  Allow to cool completely on the pan before using a small spatula to remove them.  Match the cookies according to size and pipe filling on half, using the other half to form a sandwich.


Chocolate Ganache Filling
adapted from The Pastry Queen
  • 1 cup heavy whipping cream
  • 1/4 cup sugar
  • 2 Tbs butter
  • 1 cup semisweet chocolate chips
  • 6 oz. bittersweet chocolate, chopped
  • pinch salt
  • 1-2 Tbs Jack Daniel's whiskey (optional)
Heat the cream and sugar in a heavy saucepan over medium heat.  When the sugar is dissolved, add the butter, chocolate chips, and bittersweet chocolate and stir over medium heat until the chocolate is melted and the mixture is smooth.  Stir in the salt.

Remove from heat and stir in the whiskey.  Whisking often, allow to cool to a pipe-able consistency.  Can also be refrigerated overnight to achieve the desired consistency.


Thursday, January 6, 2011

Hawaiian BBQ Pork Pizza


This year for Christmas, I surprised Joey with a smoker.  I have to admit that this was partially a selfish gift, because I think I am just as excited over the possibilities as he is.  To break it in, we decided to smoke a Boston butt on New Year's Eve.  He left the rub and sauce(s) up to me, and he manned the smoker.  We were both fairly nervous, since neither of us really know what we're doing, but it turned out beautifully!  Smoky, flavorful, and tender.


We had my sister and her family staying with us for the holiday, and between 4 adults and 2 children, there wasn't much left over.  Thankfully there was enough for at least one dinner though.  I really prefer to reinvent certain foods into leftovers rather than just reheating, so I was excited to try a fun dish with the leftover pulled pork.

BBQ chicken pizza is fairly common on the menu of any pizzeria these days, so I thought I'd make my own version with pulled pork.  Luckily, we had enough sauce left over to use as the base, and then I just layered the pork, red onion, and pineapple, and finished with a mixture of smoked Gouda and mozzarella.  I thought about using cheddar in place of the Gouda, but I just really love Gouda.  When it was out of the oven, I sprinkled some chopped scallions over the top before serving.

What's funny is that I formulated what to put on this pizza while walking around the grocery store, and then when I got home, I looked up a few pizza menus to see what they include - it turns out this is almost exactly like the BBQ Chicken Pizza at California Pizza Kitchen!  I have had that pizza many times, so I must have subconsciously known what to use as toppings.

We really really loved this pizza.  The crust was nice and crispy, thanks to my new pizza stone, and the flavors of the pork, bbq sauce, pineapple, and cheese just played off of each other wonderfully.  Joey is already talking about smoking pork again this weekend, and I know just what I'll do with the leftovers.


One Year Ago:  Garlic and Herb Ciabatta Bread


Hawaiian BBQ Pork Pizza
Pink Parsley Original, apparently inspired by CPK
makes 1 pizza
  • pizza dough
  • 1/2 cup BBQ Sauce
  • 1 cup pulled pork, finely shredded or chopped
  • 1/2 medium red onion, halved and thinly sliced (about 1/2 cup)
  • 1/2 cup 1-inch pineapple chunks
  • 1/2 cup shredded mozzarella
  • 1 cup shredded smoked Gouda
  • 2 Tbs chopped scallions
Place pizza stone in oven and preheat to 500 degrees for at least 30 minutes.

On a large square of parchment paper, stretch and roll pizza into a 12-14 inch circle.  Brush the outer edge with olive oil.  Spread the BBQ sauce over the dough, then layer the pork, onion, and pineapple.  Sprinkle the cheese evenly over the top. 

Transfer the pizza (on the parchment) to the heated pizza stone, and bake 10-12 minutes, or until the crust is golden-brown and the cheese is melted.  Sprinkle scallions over the top.  Allow to cool 5-10 minutes, slice, and serve.


Wednesday, January 5, 2011

Salsa Verde Chicken and Dumplings


Nothing says comfort food like chicken and dumplings.  And nothing makes me drool quite like Mexican food.  Combine the two?  You have a truly awesome dinner.  After hearing Tara rave over Pam Anderson's Perfect One-Dish Dinners, I "looked inside" on Amazon, and knew I had to have it.  There were several recipes that I knew we would love right off the bat.  I ordered it right then and there - this was the first recipe I made from it, and we went nuts over it.

It has the creamy, comforting essence of chicken and dumplings, but the flavors are kicked up a notch by the addition of salsa verde and lots of fresh herbs.  The dumplings are soft and flavorful:  they are made with a mixture of cornmeal and flour, and they are peppered with cilantro and scallions.  The stew tastes bright and fresh thanks to the salsa verde.  I also added some onions and corn for more veggie power.

And the best part of this recipe?  Its on the table in under an hour.  I probably made things more complicated than they needed to be, first by making my own salsa verde, and then by adding extra veggies, but for a dinner as homey and comforting as this, I don't mind the extra work.


One Year Ago:  Fettuccine Alfredo


Salsa Verde Dumplings with Herbed Cornmeal Dumplings
adapted from Pam Anderson, Perfect One-Dish Dinners
serves 6
  • 1/2 stick (4 Tbs) unsalted butter
  • 1/2 large onion, diced
  • 2 cloves garlic, minced
  • 1/2 cup + 2 Tbs all-purpose flour
  • 1 can (14 ounces) chicken broth
  • 2 cups (16 ounces) salsa verde, homemade or store bought
  • 1 can (5-ounces) evaporated milk
  • 1 cup corn kernels
  • 1 rotisserie chicken, skin removed and meat deboned (about 6 cups)
  • 1/4 cup chopped cilantro
  • 2 scallions, minced
  • kosher salt and black pepper
Dumplings
  • 1 cup milk (low-fat is fine)
  • 3 Tbs unsalted butter
  • 1 1/2 cups all-purpose flour
  • 1/2 cup cornmeal
  • 1 Tbs baking powder
  • 3/4 tsp salt
  • 1/4 cup thinly sliced scallion greens
  • 1/4 cup chopped cilantro
Heat the butter over medium heat in a large ovenproof skillet.  Add the onions and cook until softened, 5-8 minutes.  Add the garlic and cook until fragrant.  Whisk in the flour to make a paste.  Mix the broth, salsa verde, and evaporated milk in a medium bowl and whisk into the skillet all at once.

Whisk, vigorously at first, until the mixture simmers and thickens to a sauce consistency.  Stir in the corn, chicken, and herbs.  Season with salt and pepper to taste.  Heat through, remove from heat, and cover to keep warm.

Meanwhile, heat the oven to 400 degrees.

To make the dumplings, heat the milk and butter in a small saucepan until steaming.  Mix the flour, cornmeal, baking powder, salt, scallions, and cilantro in a medium bowl with a fork.  Stir in the milk mixture to form a smooth, firm dough.

Use a medium cookie scoop, scoop dough from the bowl and drop onto chicken mixture.  Return the skillet to a simmer over medium-high heat.

Cover and transfer the pan to the oven.  Bake until the dumplings are cooked through, 15-20 minutes.  Serve.


Tuesday, January 4, 2011

Fluffy Buttermilk Biscuits


Growing up in the south, biscuits were expected to be at every family gathering.  Whether we were eating breakfast, lunch, or dinner - biscuits were there.  I always thought my mom made the best biscuits until I met Joey.  And hands down, his grandmother makes the best (sorry, Mom!).  They are light, fluffy, and buttery.  I've always been too intimidated to try a proper biscuit.  I've made drop biscuits and cheddar biscuits, but never an honest to goodness, fluffy, flaky, buttermilk biscuit.  However on New Year's morning, I wanted nothing more than a big, fluffy biscuit.  The weather was yucky, and fast food biscuits are too greasy, so I decided to go for it and finally try my hand at them.  Plus, how can I call myself a proper southern lady if I've never made fluffy buttermilk biscuits?

Enter the Lee Brothers.  Anytime I am searching for a classic southern recipe, I turn to them first.  They have yet to disappoint me, these biscuits included.  I knew the important things about biscuit-making:  keep your butter cold and use a light hand with handling the dough.  I know lard is considered to be a must of southern cooking, but I just can't bring myself to use it.  So I just used all butter, and maybe my layers weren't quite as flaky, I will take the trade-off.  I also brushed the tops with a little melted butter - because I just felt like it would be a good addition.

Joey has been totally spoiled all his life by his Nana's biscuits, but he gave these his stamp of approval.  And Caroline probably would have eaten the whole batch if we'd let her. These were perfectly flaky (look at those layers!), nice and fluffy, and soft and tender with a crispy outside.  All things I love in a biscuit, and I have a feeling these will be making another appearance this weekend for breakfast.

One Year Ago:  Pork Tenderloin with Pears and Shallots


Fluffy Buttermilk Biscuits
adapted from The Lee Bros. Southern Cookbook
makes 10-12 biscuits
  • 2 1/4 cups cake flour or 2 cups all-purpose flour, sifted
  • 1 Tbs baking powder
  • 1 Tbs plus 1 tsp sugar
  • 1 tsp salt
  • 6 Tbs cold unsalted butter, cut into several pieces
  • 3/4 cup cold buttermilk
  • 2 Tbs melted butter, for brushing
Preheat the oven to 400 degrees.

In the bowl of a food processor, combine the flour, baking powder, salt, and sugar.  Pulse several times to combine well.  Add the butter and lard and continue to pulse in 2-second increments, until the mixture resembles coarse crumbs with a few pea-sized pieces (about 5 pulses).  This can also be done using a pastry blender or 2 forks if you don't have a food processor.

Transfer the mixture to a medium bowl, pour the buttermilk over it, and use a fork to mix for about 1 minute, or until the dough just comes together.

Turn the dough out onto a floured surface, knead with floured hands, and pat into a rectangle about 6x10 inches and 1-inch thick.

Fold the dough like a business letter (the righmost third over the center third, then the left third on top).  Turn the dough a quarter of a turn, pat it into another 6x10 inch rectangle, and fold it upon itself in thirds again.  Repeat one more time, then pat the dough into a 6x10 inch rectangle a final time.

Using a floured 2-3 inch biscuit cutter, cut the biscuits from the dough and place them about 1 1/2 inches apart on an ungreased baking sheet.  Pat the scraps into a 1-inch thick rectangle and cut more biscuits.

Brush the tops with half the melted butter, and bake 15-20 minutes, or until the tops are just beginning to brown.  Brush the tops again with the remaining butter and serve warm.


Monday, January 3, 2011

Spiced Chipotle Honey Chicken with Sweet Potatoes


I have been reading the most fabulous book.  In the Kitchen with a Good Appetite is by Melissa Clark, author of "A Good Appetite" for The New York Times.  I already loved her column, so I have been lusting after this book for quite some time.  I snuck it into a Christmas presents Amazon order, and haven't put it down since.  It's actually sort of a cross between a memoir and a cookbook - what a blog would be like if you bound and covered it as a matter of fact.  Before each recipe, she shares a story of how the dish came to be.  Along the way you'll learn about her childhood, career as a food writer, marriage, and her 2 year old daughter, Dahlia. 

So the writing is superb, but the recipes are even better.  As I read through, I mentally bookmarked every.  single.  recipe.  I also really  like the clever way she's divided the book into chapters.  Among my favorites are The Farmers' Market and Me, Learning to Like Fish, It Tastes Like Chicken, Things with Cheese (obviously my favorite), and My Mother's Sandwich Theory of Life. 

I started with the Spiced Chipotle Honey Chicken with Sweet Potatoes.  These are some of my favorite ingredients, so obviously I already had everything I needed in the house to make this for dinner.  It is very quick, quite easy, and reasonably healthy.  All good things for a weeknight dinner.  It is simultaneously sweet, spicy, earthy, and savory.  If you are looking for a healthy dinner to get you back on the healthy eating bandwagon, this is a good one.  It's so flavorful you won't miss the butter, cheese, or cream. 

I've already made a few other recipes from this book, and I can't wait to make and share many more!

One Year Ago:  Sausage Stuffed Mushrooms


Spiced Chipotle Honey Chicken Breasts with Sweet Potatoes
adapted from In the Kitchen with a Good Appetite, by Melissa Clark
serves 6
  • 4 sweet potatoes (10 ounces each), peeled and cut into 1-inch pieces
  • 3 Tbs olive oil
  • 4 chipotle chiles in adobo sauce, minced
  • 3 garlic cloves, minced
  • 2 Tbs honey, plus more for drizzling
  • 1 Tbs apple cider vinegar
  • 1 1/4 tsp kosher salt, plus more to taste
  • 1 tsp ground cumin
  • 1/2 tsp ground cinnamon
  • 6 boneless, skinless chicken breasts (about 2 lbs)
  • chopped cilantro, for garnish
Preheat the oven to 400 degrees.  Place the sweet potatoes in a medium bowl.

In a small bowl, mix together 1 tablespoon of the olive oil, chipotles, garlic, honey, vinegar, salt, cumin, and cinnamon.  Mix the remaining 2 tablespoons of olive oil with 2 teaspoons of the paste.  Toss with the sweet potatoes.

Scatter the potatoes on the bottom of a roasting pan, and bake 15 minutes.  Meanwhile, rub the chicken breasts with the remaining paste. 

Stir the potatoes.  Carefully place the chicken on top of the sweet potatoes, and continue to roast until the chicken is just cooked through (registers 165 on an instant read thermometer), about 15-20 minutes longer

Divide the potatoes and chicken evenly among serving plates and drizzle with remaining honey and garnish with cilantro.  Serve.


BLOG DESIGN BY: SHERBET BLOSSOM DESIGNS